
A guide to collaborative sketching
Collaborative sketching workshops are a quick and effective way to get design decisions moving forward as a team. In this post I go through the benefits, provide the materials needed and give a step-by-step guide so that you can run your own session.
Why workshop?
Before I get into the details of the sketching session, it’s worth commenting on the importance of running workshops.
User experience design processes are collaborative in nature. As we strive to run projects that are agile and follow a human-centred design approach, we need to collaborate effectively as multidisciplinary teams. Running workshops enables this collaboration and allows us to optimise communication so that our teams generate ideas together and move forward with a common understanding.
UX Manager Neil Allison’s blog post on why the UX Service values workshops
Collaborative sketching session
A collaborative sketching session is a type of workshop that allows a multidisciplinary team to tackle a design problem and come up with a viable solution. The goal is to produce a variety of ideas and explore potential solutions together.
The session involves:
- sketching
- sharing
- constructive critique
- collaboration
Participants iteratively refine each other’s design ideas and discuss solutions to move forward. It’s pretty fun.
User experience guru Jared Spool promotes these sessions, referring to them as ‘design studios’.
If you’ve yet to participate in your first design studio workshop, you’re in for a treat. It’s an opportunity to bring a team of smart folks together to work through the details of a design challenge or two (or three). It’s a great way to quickly move a design forward, while also getting everyone on the same page for where the design is going and how you’ll get there. – Jared Spool
Design Studio Workshop: Adding Up the Benefits by Jared Spool
But what if I can’t draw?
That doesn’t matter, you don’t need any drawing skills at all. It’s all about ideas and communication. If you prefer, you can use words – as long as you can easily share your concepts with the room.
On the other hand, if you do fancy yourself a bit of an artist, remember that this is not about creating a masterpiece – it’s about rapid idea generation, so keep it simple.
A recent example
I’ll base my guide on an example of a collaborative sketching session that I was involved in recently. The session was part of the work I’m doing to guide the redesign of the University’s authentication service – EASE (the thing you use to log in to University systems). One of the project requirements is for the system to incorporate a two-stage login process. I’ll write more about this in the near future.
I joined the project to conduct the user research:
- mapping user journeys
- prioritising areas to focus on
- conducting cycles of usability tests
For the first round of usability testing I recruited students and staff to undertake tasks on the current system. I then invited the project team to participate in a playback session – another type of collaborative workshop the UX Service runs in which members of the project team are asked to watch videos of the tests, note the issues they come across and to priorities them as a group.
A previous blog post on collaborative usability playback sessions by Neil Allison
The playback session brought numerous issues to the team’s attention and it was my task to create a design to test based on the findings.
However, as I said before, UX design processes are collaborative in nature and to increase the likelihood of creating a prototype to test that the project team would get behind, it was an appropriate time to run a collaborative sketching session.
Preparation
All you need for the session is the following:
- a facilitator
- a team with a variety of backgrounds
- a “problem” to solve
- different coloured pens
- printouts of the templates below
- an hour to an hour and a half
Sketching template 1: 6 screens
Sketching template 2: 1 screen
The facilitator should state a design problem for the group to tackle. For my session, the design problem was to design an EASE login page that uses a two-step login process – users must enter their username and password on separate screens.
I also asked the group to consider:
- appearance – how design elements reflect the University’s reputation
- functionality – what would help the user?
- words – what we say and how we say it has a big impact on what happens next
- the usability problems we had already discovered from phase 1 of testing
- what the current EASE login page looks like – I provided a printout
After the preparation was out of the way we were ready to begin. It is important that the facilitator times the following steps.
Step 1 – sketching on your own
- take a couple of 6 screen templates each
- sketch as many ideas for the new EASE interface as possible
- you only have 5 minutes
Step 2 – share your sketches
- go around the table taking turns to share your ideas with your group
- you only have 1 minute each
Step 3 – sketching with others’ ideas
- refine your sketch ideas
- you must use at least one idea from someone else
- use the 6 screen template
- you have only 5 minutes
Step 4 – share your sketches again
- take turns to share your developed ideas with your group
- you only have 1 minute each
Step 5 – paired sketching
- select a partner
- work with a partner to produce one refined sketch
- you must use at least one idea from someone else again
- use the single screen template
- you only have 5 minutes
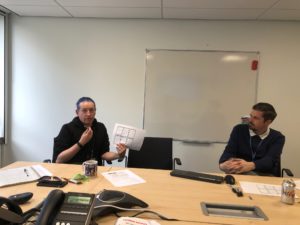
Matt the developer shares his sketches with the group.
Outcomes
By the end of the process, our 5 participants had produced nearly 25 individual sketches and 2 refined sketches from working together.
The session was very insightful. We were all exposed to the differences in how we individually interpreted the design problem. It stimulated discussion and together we collaboratively created the final concepts. Everybody in the room was involved and everybody had valuable opinions to contribute.
The outcome of the session gave me the confidence to create a prototype for the next stage of testing and the stakeholder required to sign-off my prototype was reassured that design decisions were well founded. It was an invaluable exercise.
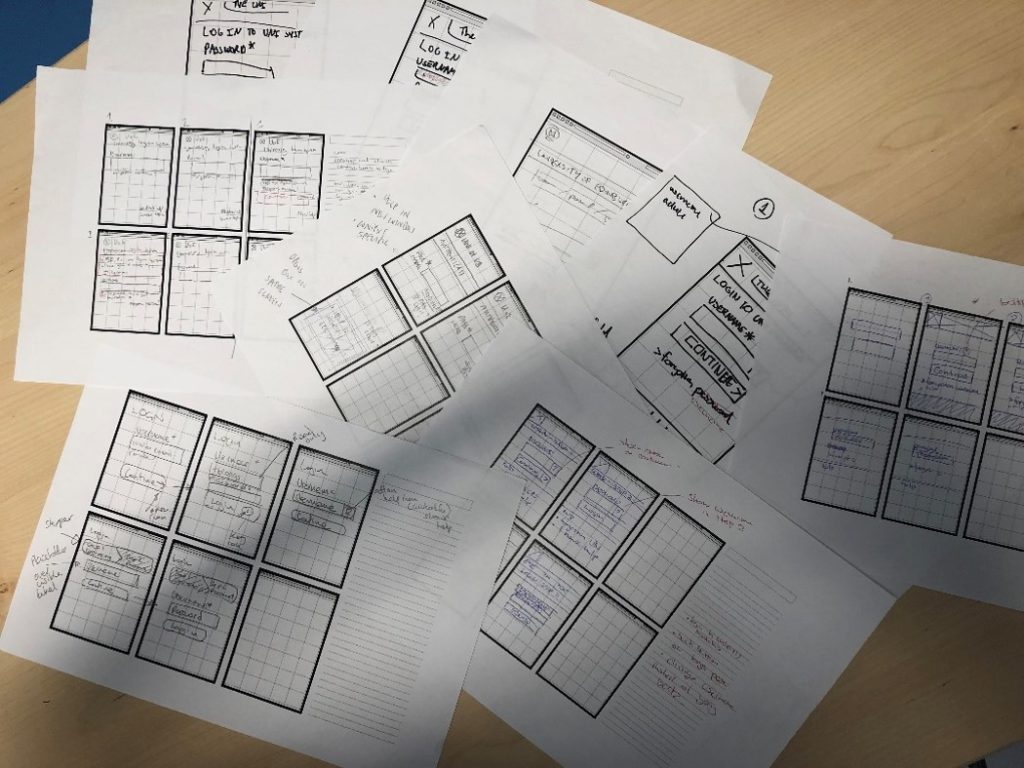
By the end of the session we had produced and refined numerous sketches and ideas.
Conclusion
It’s important that we make the most of the wide variety of skills we have on our project teams. Everybody has something to offer, and the collaborative sketching session can uncover new ideas and prospects that might have been bottled up by team members who traditionally feel outside of the design process.
Deciding to tackle design challenges and exploring multiple solutions together as often as we can increases the chance we create better designs to test on our users.
Give it a try. Above all it’s good fun.
Find out more from previous blog posts about collaborative sketching sessions
More from this series
This is part of a series of blog posts showcasing some of the tools and techniques the UX Service uses. The aim is to inform the wider user-focused community that adopting these tools and techniques is simple and extremely beneficial.
Read more blog posts in this series
Get in touch
If you’d like to find out more or bring the UX Service on board to help you better understand your users, get in touch.
Contact the User Experience Service
1 replies to “A guide to collaborative sketching”