DIY Rubber Band Guitar Making Toolkit

DIY Rubber Band Guitar Making Guide
Time Required: 20 Minutes
Mission Statement: DIY Rubber Band Guitar Toolkit
What participants can expect:
This toolkit allows participants to create a simple rubber band guitar. Participants will learn to construct, tune, and play their guitar through practical activities. The toolkit not only offers opportunities to practice a segment of “Happy Birthday”, but also encourages freestyle.
What participants should not expect:
This toolkit is not a comprehensive guide about music theory and professional instrument construction. It also does not include advanced tuning mechanisms. Participants should not expect specialized training but rather a playful, exploratory learning experience of sound.
1. Introduction (1 Minute)
You will create a simple rubber band guitar and learn how to play a segment of “Happy Birthday.” By adjusting your playing techniques, know the various sounds of simple materials in daily life.
2. Materials Needed (1 Minute)
Required Materials:
•A cardboard box (approximately 30 cm long and 10 cm wide)
•4 rubber bands of the same thickness (different colors would be better to distinguish different tone)
•one pencil
•one Scissor
•A plectrum (or a student ID or coin as a substitute)
3. Guitar Assembly (9 Minutes)
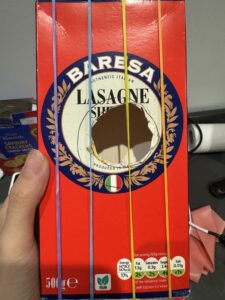
Step 1: Prepare the box
Cut a circular hole (about 5 cm in diameter) in the center of one side of the box to enhance sound resonance.

Step 2: Install the rubber bands
Stretch the 4 rubber bands vertically across the length of the box (30 cm side).
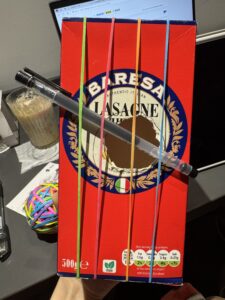
Step 3: Position and adjust the pencil
Place the pencil diagonally underneath the rubber bands, about 5 cm from one end of the box, at an angle of approximately 30 degrees.
Tuning Tips:
•Move the pencil: Sliding the pencil closer to the end of the box raises the pitch, while moving it toward the middle lowers the pitch.
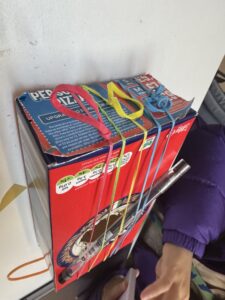
•Adjust the rubber bands: Change the vertical position of the rubber bands on the back of the box to adjust tension and produce different pitches.
Or make the rubber bands shorter like this:
4. Tuning and Playing Techniques (9 Minutes)
Step 1: Basic Tuning
Starting with the closest rubber band, try to find pitches below:
Do (1), Re (2), Mi (3), Fa (4).
If it’s not easy for you to find pitches by ear, try to use tuner online website below:
Step 2: Playing Techniques
•Change Position:
Bands that near the pencil produces higher-pitched tones, while moving closer to the middle of the rubber bands creates fuller, rounder tones.
•Volume Control:
Pluck lightly for softer tones, or pluck harder for louder sounds.
•Pitch Control:
Gently press the edge of the rubber band with your fingers or on the shorter side of the rubber band. Ensure the rubber bands and pencil remain stable to avoid affecting the pitch.
Step 3: Simple Melody Practice: “Happy Birthday” Segment
•Use notes 1, 2, 3, and 4 to play the following melody:
Happy Birthday to You, Happy Birthday to You
| 1 1 2 1 4 3 | 1 1 2 1 4 3 |
•Experiment with different positions near or around the pencil to express “Happy Birthday” using various tones.
Step 4: Free Exploration and Creation
Practice Options:
- Practice the “Happy Birthday” segment and explore tone variations by playing at different positions.
- Try playing all four strings rapidly, either from 1 to 4 or 4 to 1, and experiment with higher or lower positions to create your own melodies.
•While improvising, try strumming two or more strings simultaneously, combining different positions and rhythms to compose a short melody.
Finally, record your practice or original melody and upload it to link below:
DIY 橡皮筋吉他制作工具包:STEAM 教育资源© 2 by B 已获CC BY-SA 4.0许可![]()
![]()
![]()
Notes:
•Ensure the pencil is stable and press the edges of the rubber bands to prevent them from moving during play.
•If the sound is unclear, check if the rubber bands are tight enough.
•Place the box on a flat surface to keep it stable while playing.
(https://media.ed.ac.uk/media/happy+birthday+to+you/1_70nyskkc https://media.ed.ac.uk/media/freestyle/1_jegiwq1r)