Non-digital memory-EmoBody Map
Reading Time: 5 minutes“Life is about feeling,
For example, tense and stressed shoulders, and cover the area with red.

In the digital age, we are surrounded by screens and have lost the sense of touch to connect directly with life.
Non-digital recording is not just nostalgia, it’s a way to reconnect with life.
“Life is about feeling, not recording.“
By mapping body emotions, we can explore the relationship between emotions and body perception and improve our understanding and awareness of ourselves.
Try five minutes of body awareness exercises before you start .
1. Find a quiet place
Sit or stand with your back relaxed but straight,
and close your eyes or gaze softly at the ground.
2. Deep breathing (1 minute)
Inhale slowly through your nose for a count of four;
Exhale slowly through your mouth for a count of six.
Notice the sensation of air passing through your nose, chest or abdomen.
3. Quick body Scan (2 minutes)
Quick body scan from toes to top of head:
How do you feel in your toes? (Cold, hot, touching the ground?)
What about calves, thighs, waist?
Are your chest and shoulders tense or relaxed?
Is there any pressure or relaxation on the face or top of the head?
There is no need to change any feelings, just notice them.
4. Focus on one area (1 minute)
Choose a place where the feeling is most obvious (such as a tense shoulder or warm hand).
Take care of it with your breath: bring your attention to this area as you inhale, and try to make it more relaxed as you exhale.
5. Summary (1 minute)
Take another deep breath and notice how your body feels overall: is it more relaxed or clear than when you started?
Open your eyes and return to the activity with awareness.
Start creating!
Step 1: Prepare the tools (2min)
List of tools:
o paper (one sheet is fine)
o Colored pens or any pens with color(soft and easy to apply)
o Black marker or pen(to mark key areas)
o Various stickers (stars, arrows or other shapes)(optional)
Environment setting:
o Find a quiet, comfortable place where you can play soft music or light up aromatherapy.
o Make sure your desk is flat and well-lit.
Step 2: Enter the status (3min)
Relax:
Sit or lie down, close your eyes, and take a few deep breaths to calm your body and emotions.
Spend three minutes reviewing important events from the past week, focusing on the highs and lows of your mood swings.
Body Scan:
Gently close your eyes and feel your body from head to toe, noticing where there is tension, pain, or comfort.
Step 3: Paint the emotion layer (3min)
Choose a color-Choose the right color according to the mood color table
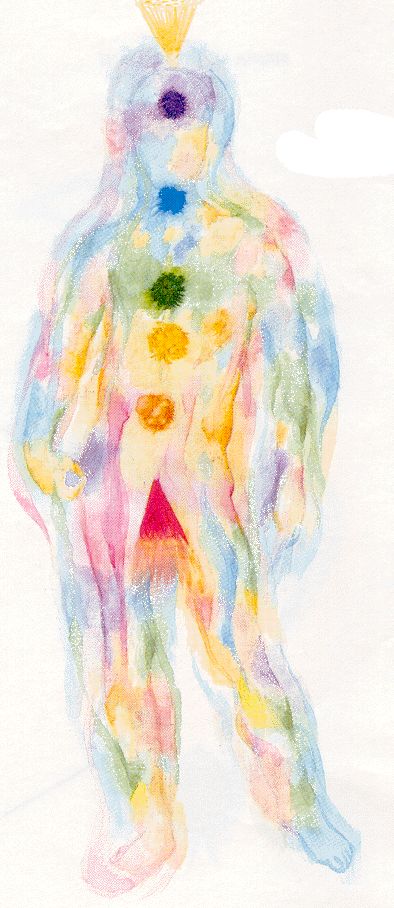
Emotional color mapping table:
Red: excited, angry, nervous
Yellow: joy, anticipation, excitement
Blue: calm, sad, calm
Green: harmony, growth, hope
Purple: mystery, confusion, creativity
Orange: warmth, social, energy
Operation method:
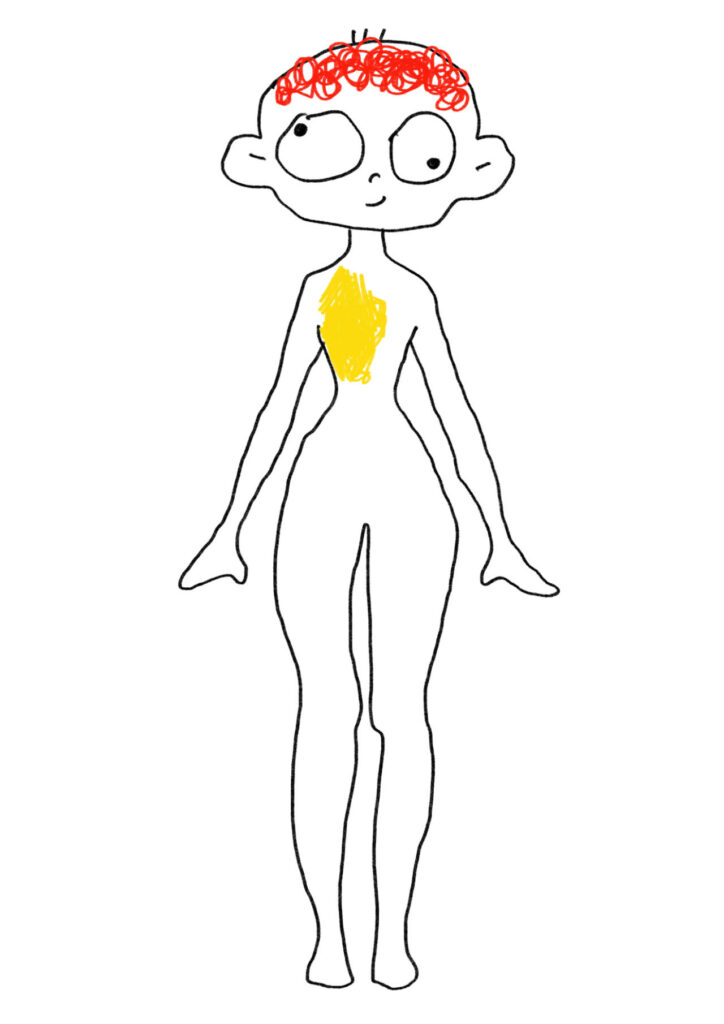
Label the emotional distribution on the outline of the human body:
Cover the parts of your body that feel emotion with color.
For example, if you feel joy in your chest, paint yellow on your chest area.
Color shades indicate emotional intensity: dark for intense, light for mild.
Mixed colors indicate mixed emotions:
If you have multiple emotions in the same area (such as anticipation and nervousness), mix yellow with red.
Check and supplement:
Recall if you missed any emotions and add them as appropriate.
Step 4: Draw the Body Perception layer (3 minutes)
Mark physical condition:
Pain/tension area:
Use a black marker to circle the area of discomfort,
such as a small circle to indicate shoulder pain.
The direction of energy flow:
Arrows represent a perceived flow of energy,
such as from the sole of the foot to the top of the head or from the shoulder to the arm.
Coloring Supplement:
Apply emotional colors to areas of stress or pain,
For example, tense and stressed shoulders, and cover the area with red.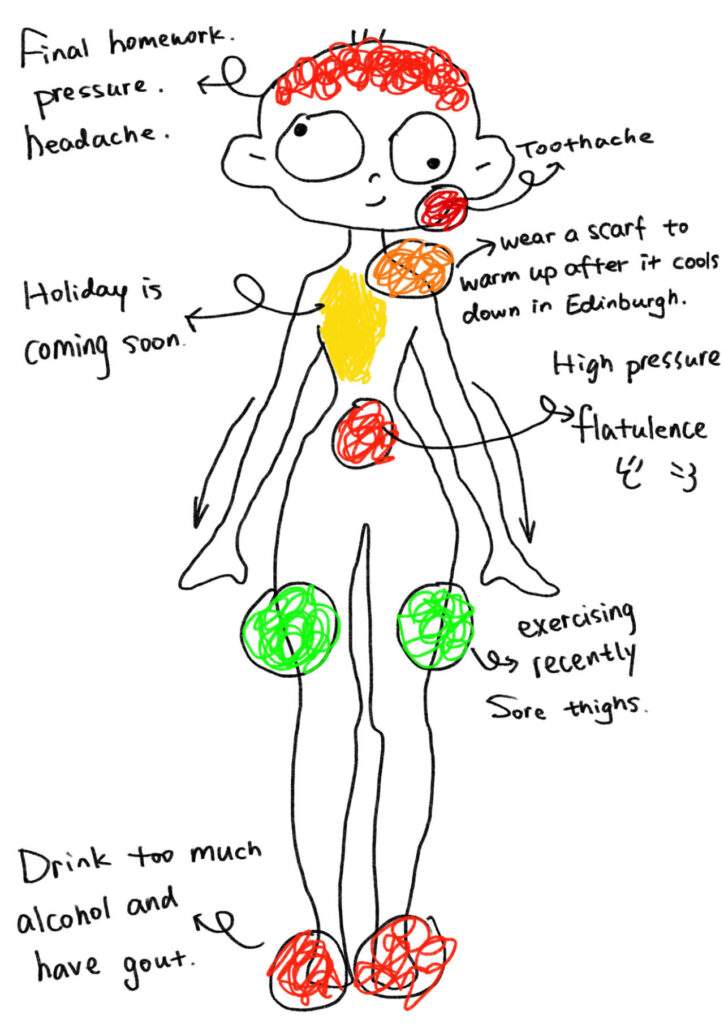
Step 5: Record Small changes (3 minutes)
Pay attention to your body:
In front of the mirror, carefully observe the details of your body over the past week:
New wrinkles appear and skin conditions change.
Hair changes (shedding more or becoming shinier).
Fine-tune your weight and muscle tension.
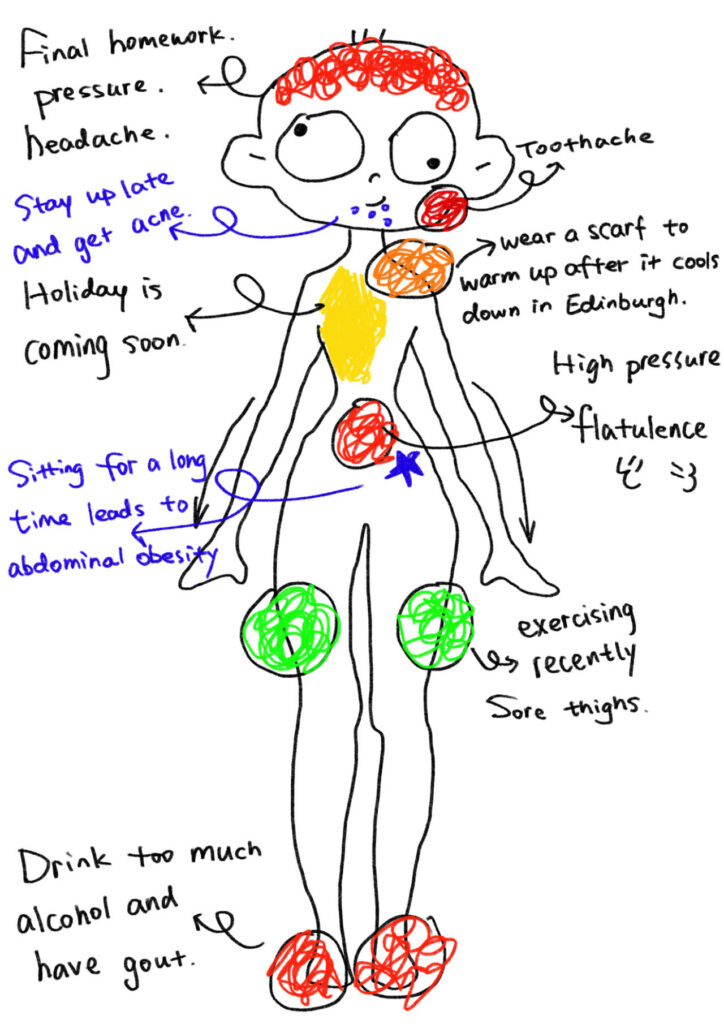
Mark with a sticker or symbol:
Put a small sticker or draw a symbol on the corresponding place,
For example, a star sticker indicates an improvement in physical condition.
Arrow stickers point in the direction of muscle tension.
Add next:
Write down any mood, stress, or life events that these changes might correspond to.
Step 6: Summary and Reflection (4 minutes)
Complete the final record:
Review your mood map and add any missing details.
Compare the overall state of the map, such as color distribution, to past records to discover new patterns.
Answer the following questions:
What emotion dominated you this past week?
What parts of the body are most uncomfortable?
What are the positive emotions or areas for improvement?
Set goals for the next week:
If there is chronic tension in certain areas, you can plan to add relaxation exercises
(such as stretching or meditation).
Step 7: Save and Outlook (2 minutes)
record:
Save the completed mood map in a folder for easy comparison later.
Looking ahead to next week:
Think about how you can improve your physical state and emotional distribution by adjusting your lifestyle habits or emotional management.
🎉🎉🎉🎉🎉🎉🎉🎉🎉🎉🎉🎉🎉🎉🎉🎉🎉🎉🎉🎉🎉🎉🎉🎉🎉
Congratulations! You successfully completed the body map!
Self-Assessment and Reflection
🔴 Have you managed to perceive your body and document it by mapping it?
🔴 Are you willing to incorporate what you’ve learned into your daily life?
🔴 Has it helped you reduce your dependence on electronic devices and stimulated your interest in documenting your life through the five senses?
We offer Canvas as an online recording tool that allows you to turn non-electronic insights into digital works that are easy to organize and share👏🏻
↓Copy the following link to open in your browser↓
https://www.canva.com/design/DAGXevFTJPw/UjbonnM1WKlfhcK4trKfmg/edit?utm_content=DAGXevFTJPw&utm_campaign=designshare&utm_medium=link2&utm_source=sharebutton
非数字记忆-身体情绪映射指南 © 2 by x 已获得 Creative Commons Attribution-ShareAlike 4.0 International 许可![]()
![]()
![]()