
I resumed my progress with Microsoft Flow after a pointless side quest attempting to change my favicon in SharePoint. I had very little success there, though I learned a lot, but with this, thankfully, I am having better luck.
To get started, I watched some of a video course on LinkedIn Learning: Microsoft Power Automate: Beyond the Basics, with Gini von Courter. I’ve watched enough of these now that I find Gini quite calming and pleasant to listen to: it’s a no nonsense way to get back in the frame of mind for the Microsoft universe (which is like the Marvel universe, but kind of solid, unmoving and heavy).
As it turned out, this course was ideal for me, because I’d already set up a Teams group for my current project and Gini started off with adding Microsoft Flow to Teams. Being quite new to Microsoft Teams, I hadn’t thought of doing that before, but it does make a lot of sense and offers some useful opportunities worth practising.
Cautionary note
I ran into some difficulties with the best order of doing things, as I didn’t see a way to save the Flow before it was finished. I discovered that it worked out best to create any Teams channels, SharePoint libraries and folders used before creating the Flow, as I would need to enter their details.
Here’s how I created a Flow using Teams:
Click on either the Apps icon in the bottom left corner, or the + sign next to the tabs to bring up the list of apps you can add to Teams:

So much possibility: all of these and more can be added to Teams
Select Flow. It will prompt you to install it if it’s not there.
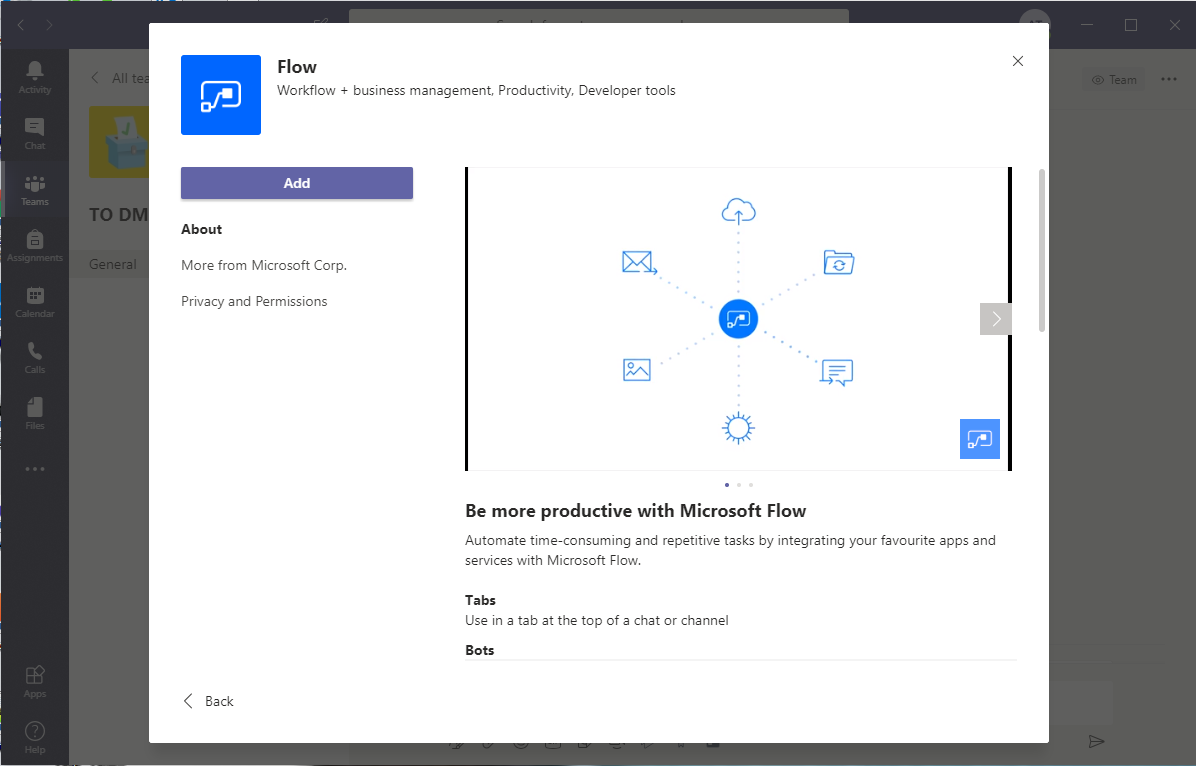
I can watch a short video about Flow at this point if I want to? Of course I do!
If you want to save a bit of time, you can have the installer post an automated message to your Teams group to say that Flow has been installed:
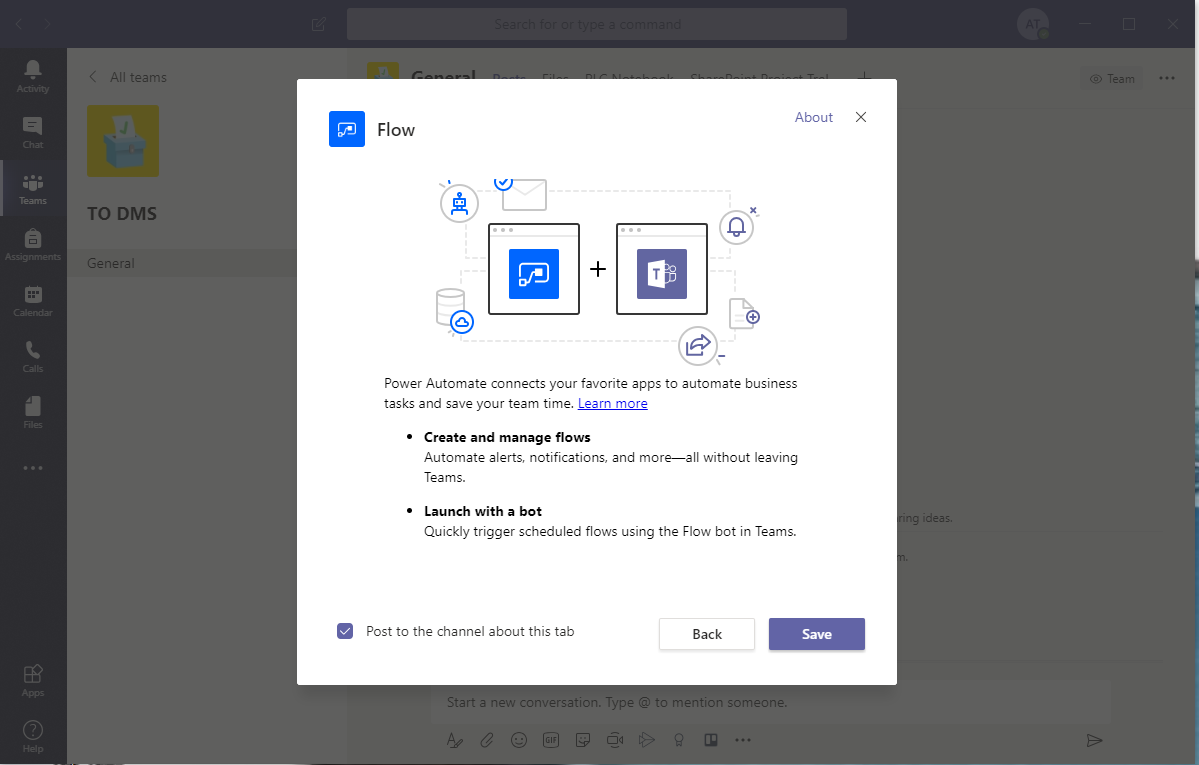
Note the check box you can select to post about your new Flow tab in your Teams group’s General forum
The new Flow tab appears in Teams, with some sample Flows to get you started:
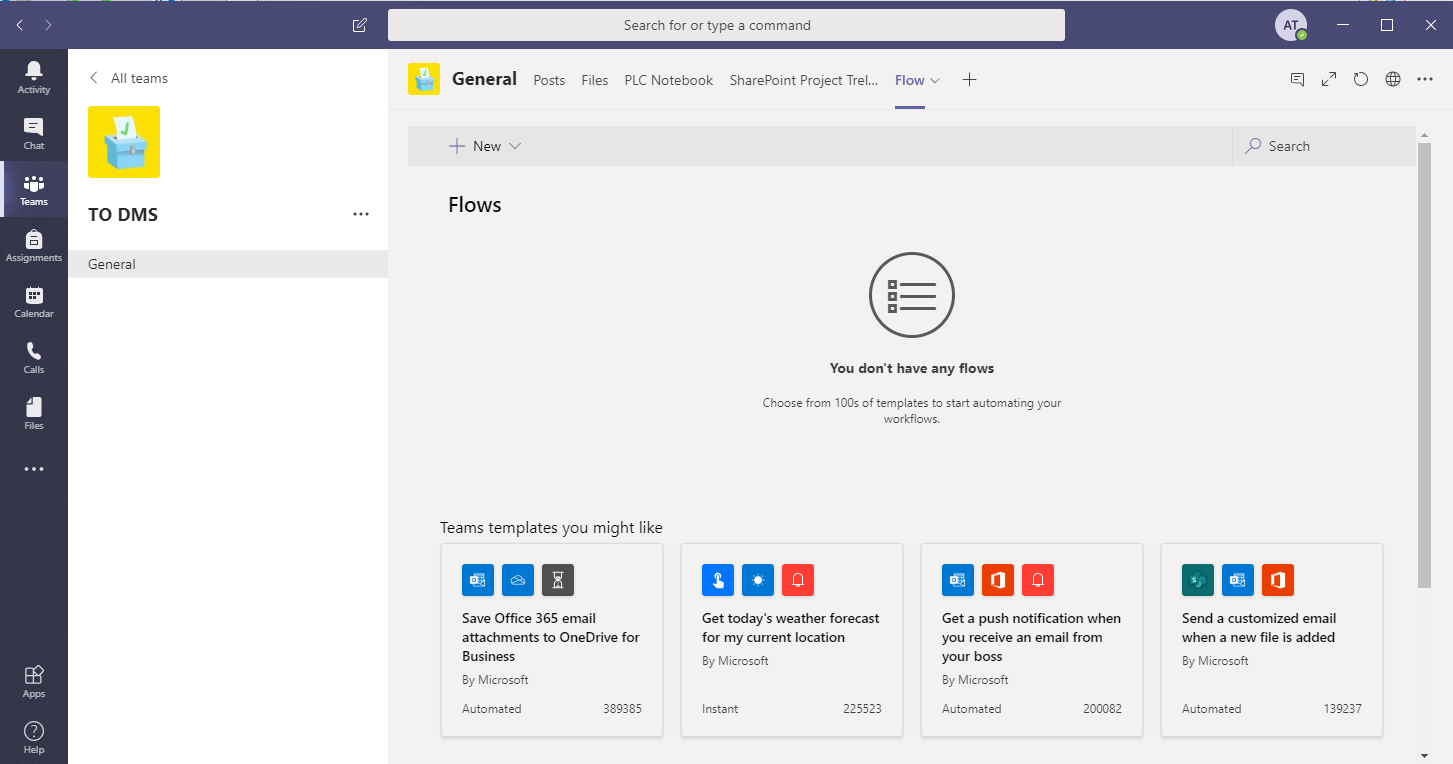
The new Flow installation in the Teams group tab.
Some basic Flow template suggestions are listed.
Here’s the automated message it posts if you choose that option:

Teams has posted the message about my new Flow tab in the General forum
That’s got Flow installed and ready to use.
To begin creating a Flow, select ‘Create from template’ to choose from hundreds of Flow templates available. It’s worth having a good look through them as there are so many possibilities for linking your apps together:
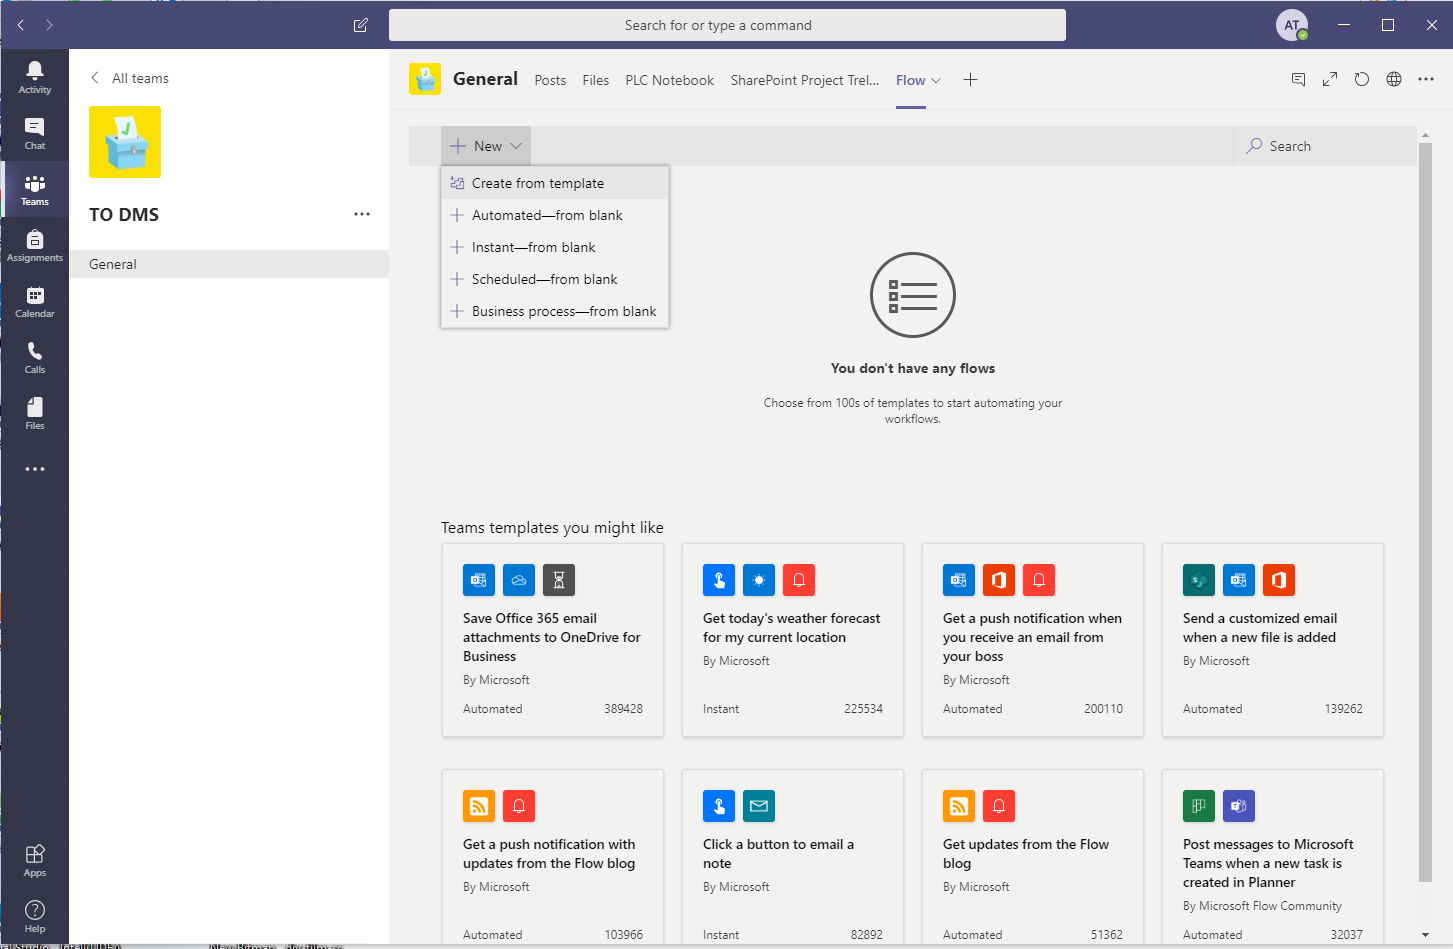
Selecting ‘Create from template’ allows me to scroll or search through the hundreds of basic Flow templates available.
I thought I could build on Gini’s example from the LinkedIn course and create a Flow that would notice when files were uploaded to a Drop Off Library that I created in the Teams Group’s SharePoint site. This is the basic Flow template I started with:
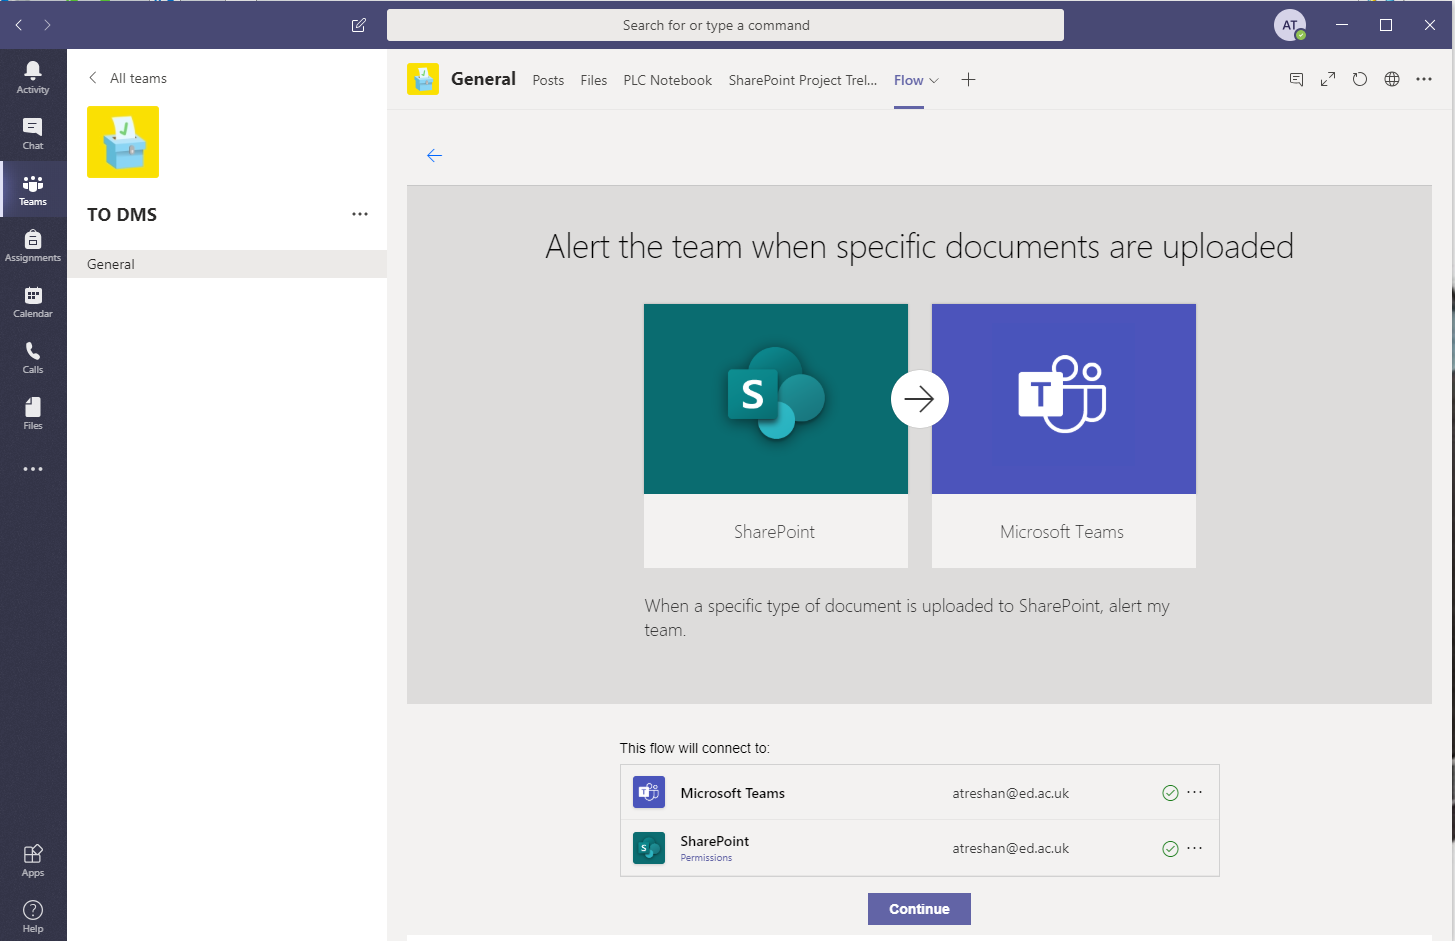
The basic Flow template I used is:
When a specific type of document is uploaded to SharePoint, alert my team
Next, I added a conditional test to my Flow: if the filename included the word ‘urgent’, a message would be posted to the Teams group in an Urgent channel, and if not, a different message would be posted in another channel.
Here’s the Flow that I set up to do that in Teams:
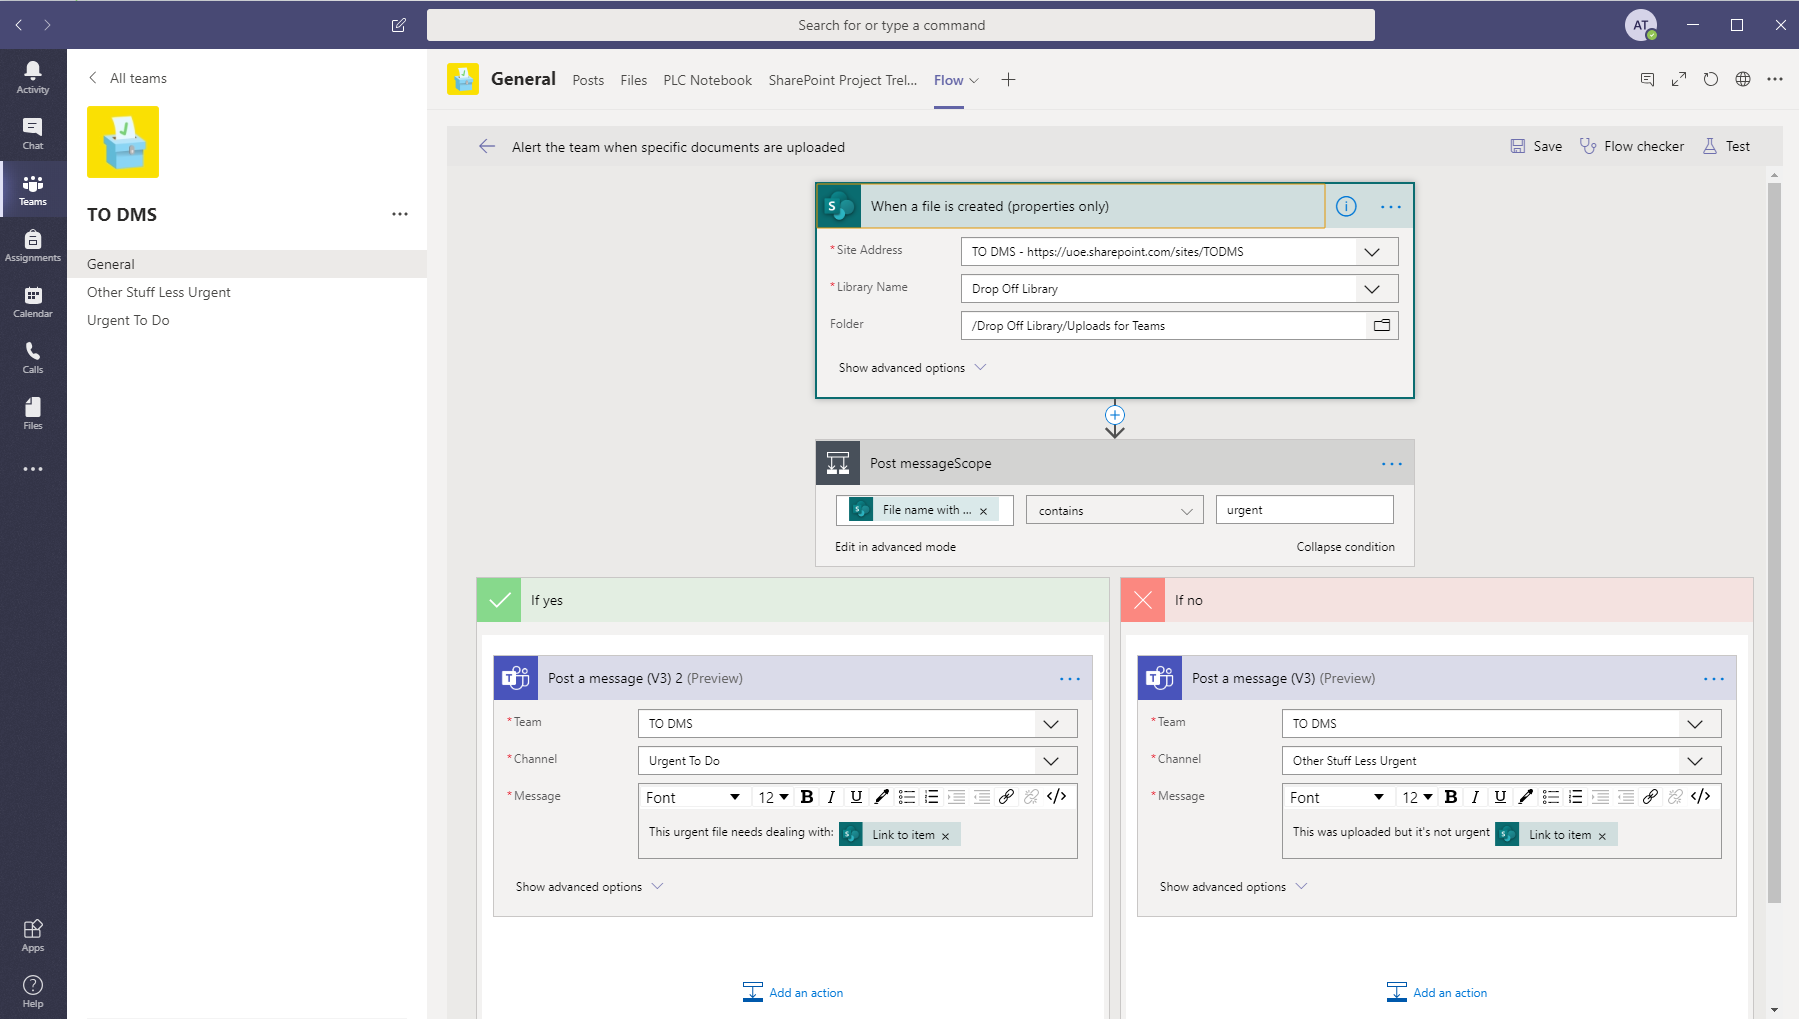
The Flow I set up in Teams, with all the details expanded. Nifty!

This is clearly urgent
And here it is working:
In SharePoint, this is a list of four files I uploaded, two with ‘urgent’ in the filename and two without:
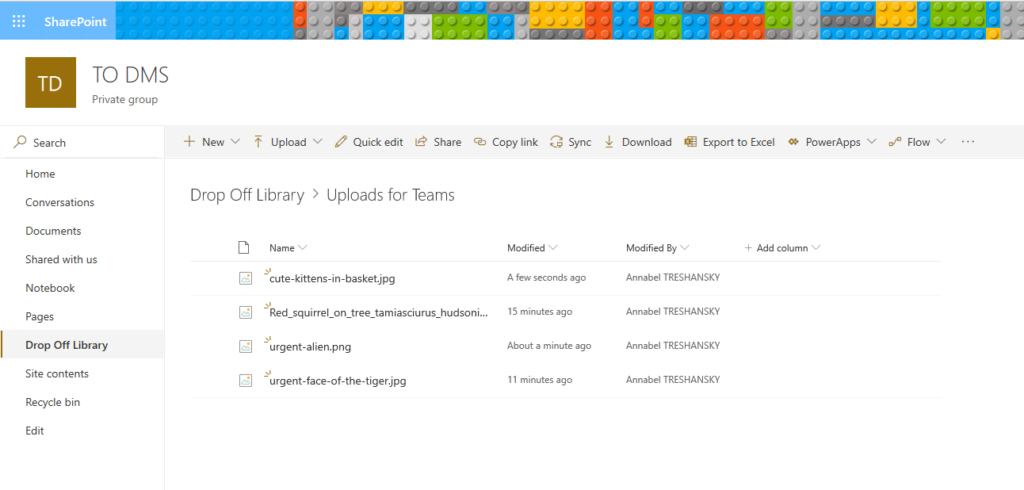
Aliens, kittens, squirrels and tigers: just the kind of things I deal with in my job every day

As is this. I mean, it’s a tiger.
In Teams, uploading a filename with the word ‘urgent’ in it to SharePoint caused a message to be posted in the Urgent channel:
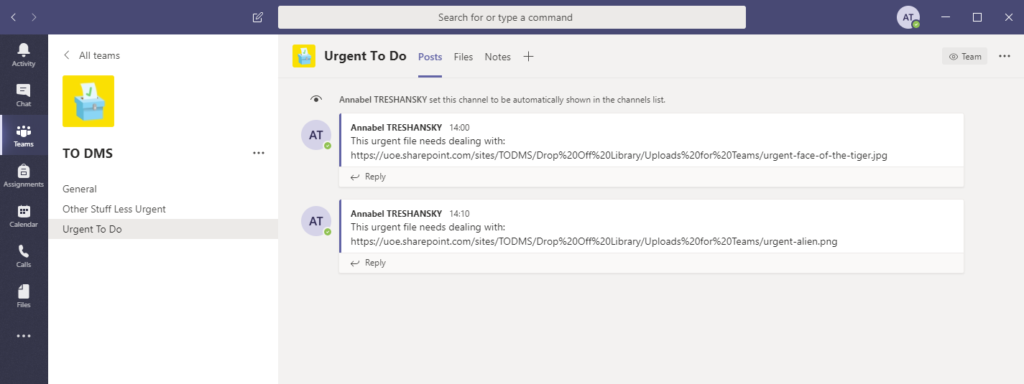
Now they’ll know my alien and tiger need dealing with urgently
And a filename without ‘urgent’ resulted in a message posted to the other channel:
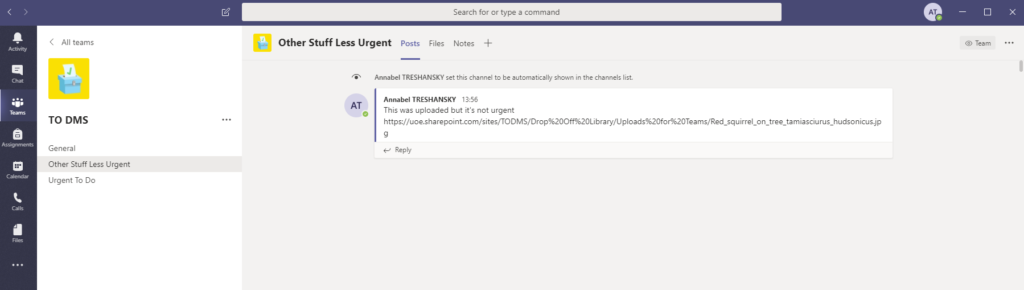
Squirrels: we can look at that later
After I got the conditional test to work, my manager suggested that instead of testing for the word ‘urgent’ in the filename, I should create a choice column in the SharePoint library, which would form part of the metadata entered when the document is uploaded and could be tested in a similar way.
Here’s the new column being added to the SharePoint Library:
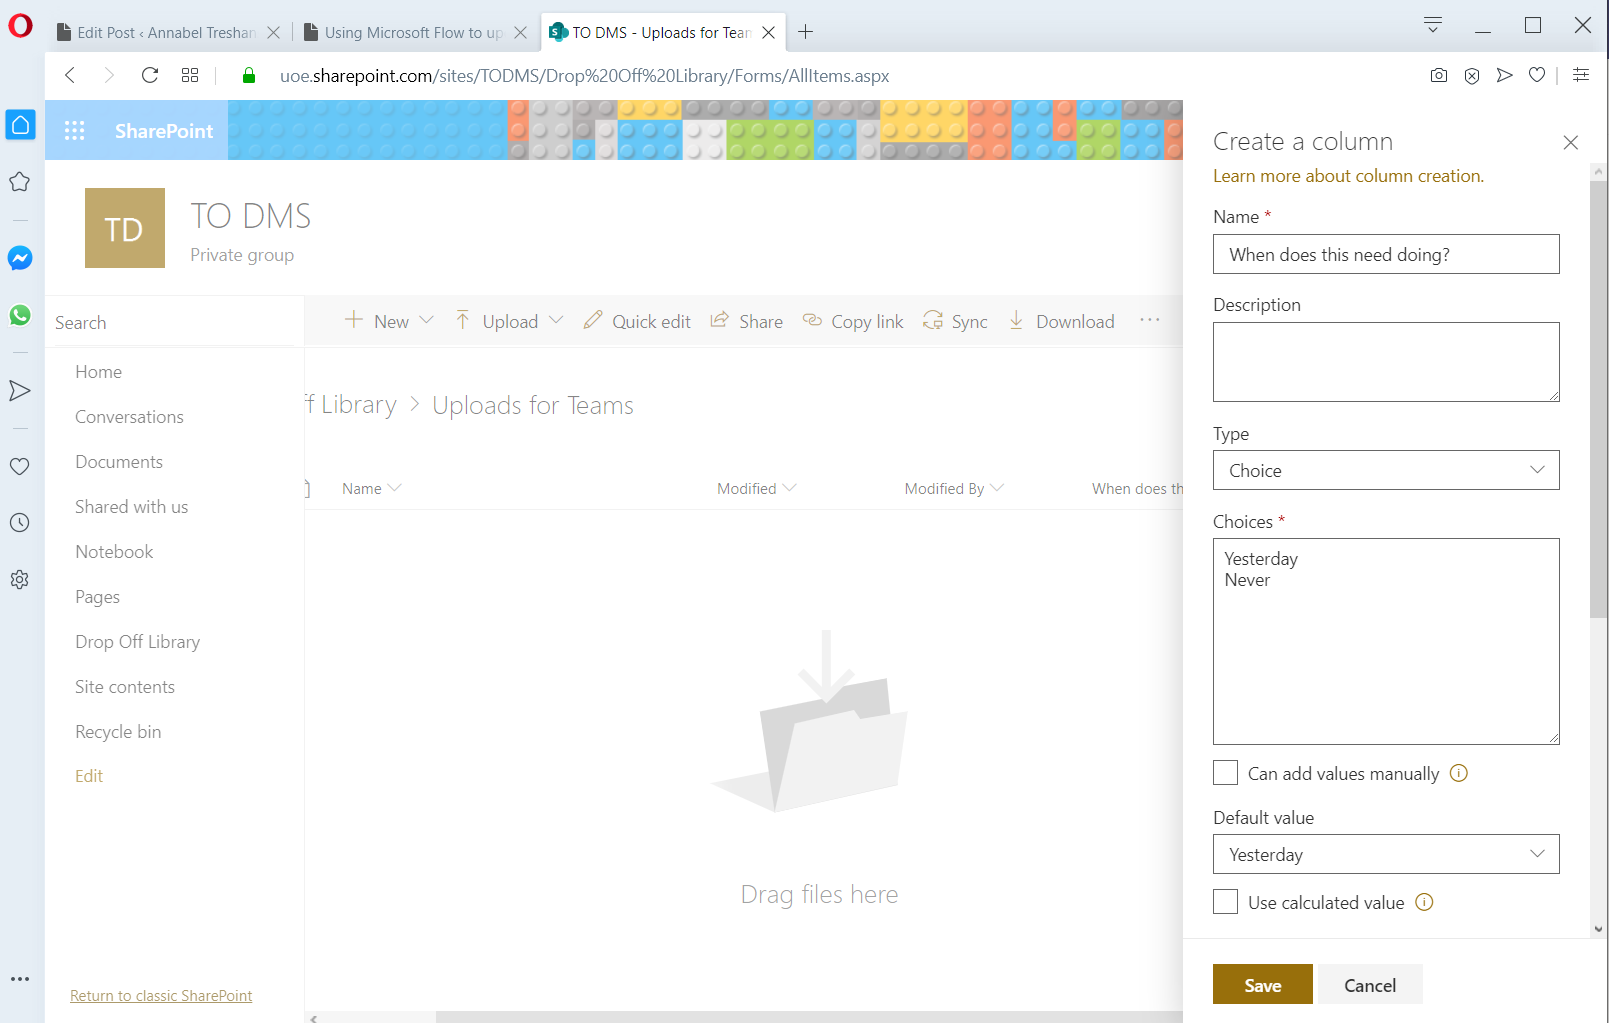
Like much of Life, the new Choice column allows two options for urgency: Yesterday or Never
I made a mistake in this part: can you spot it?
Clue: it’s the default value
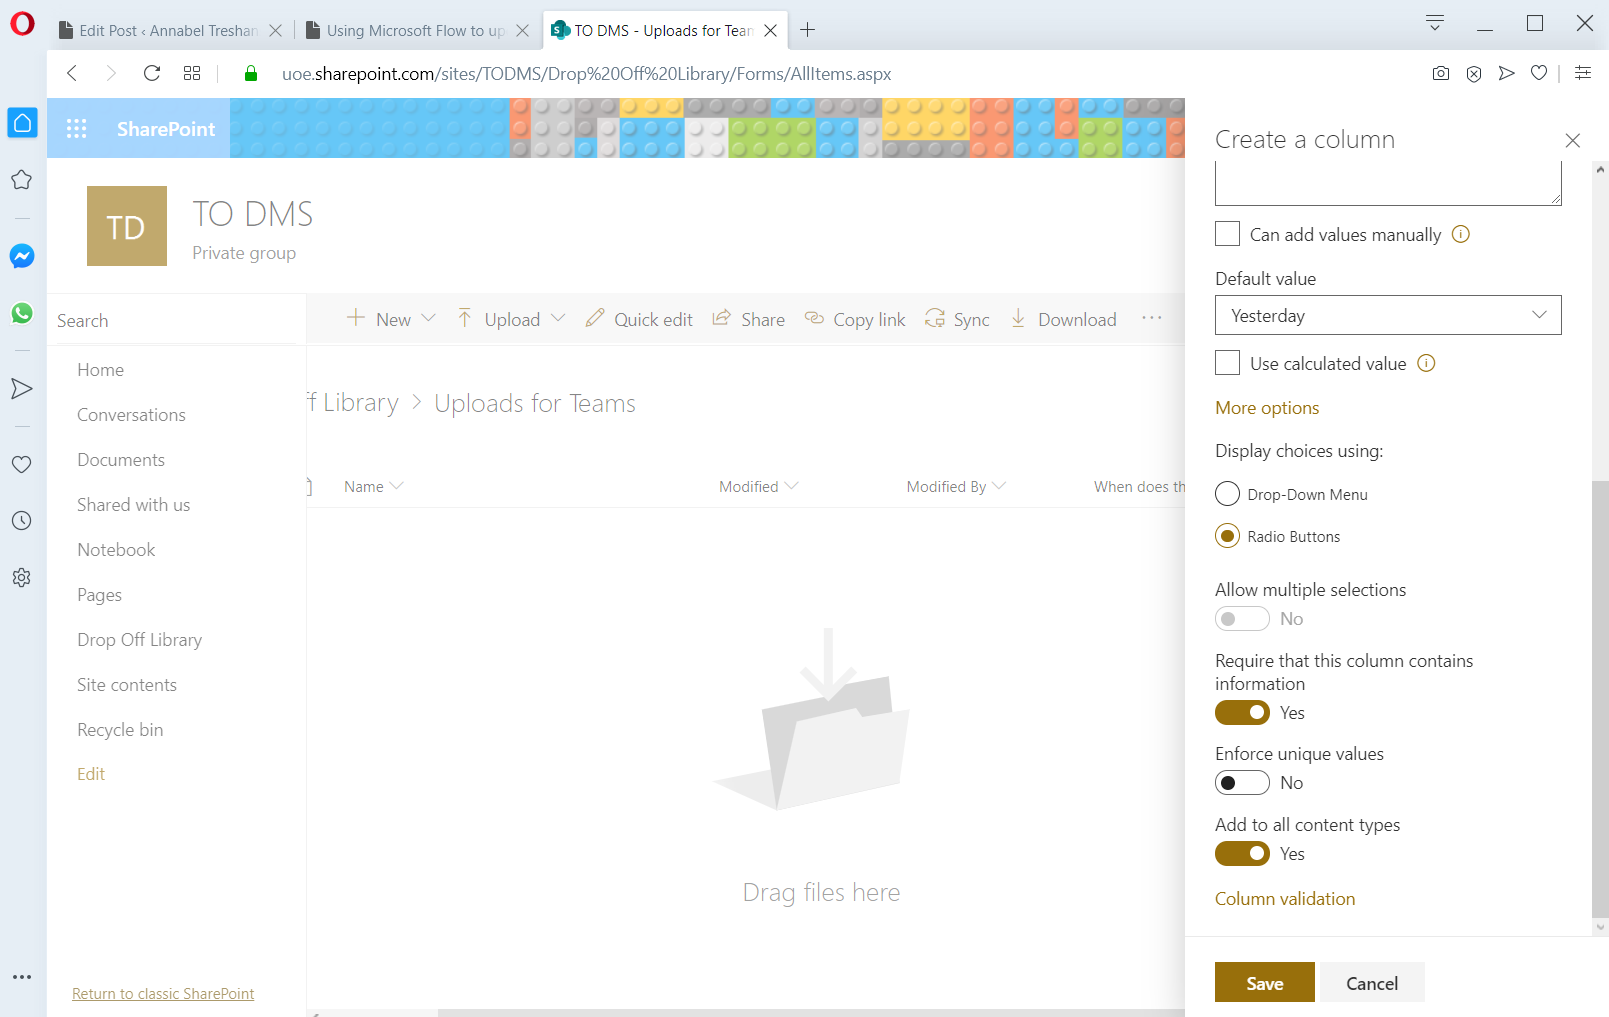
That’s right: if I want to make the new metadata a required field to be entered when the file is uploaded, I also have to set the default value to ‘None’:

To force the choice, files are now uploaded with a required value missing by default
This causes an error message on uploading a file to SharePoint, prompting the user to choose one of the two values:

But doesn’t it matter if we’re always wrong?
Back to Teams now, to update the conditional test in my Flow:

The old Flow: it’s got to go
Here’s the updated version. I’ve displayed the condition in advanced mode, because basic mode was truncating the test condition too much to show that it is the value held in the column that needs testing, not the column itself.
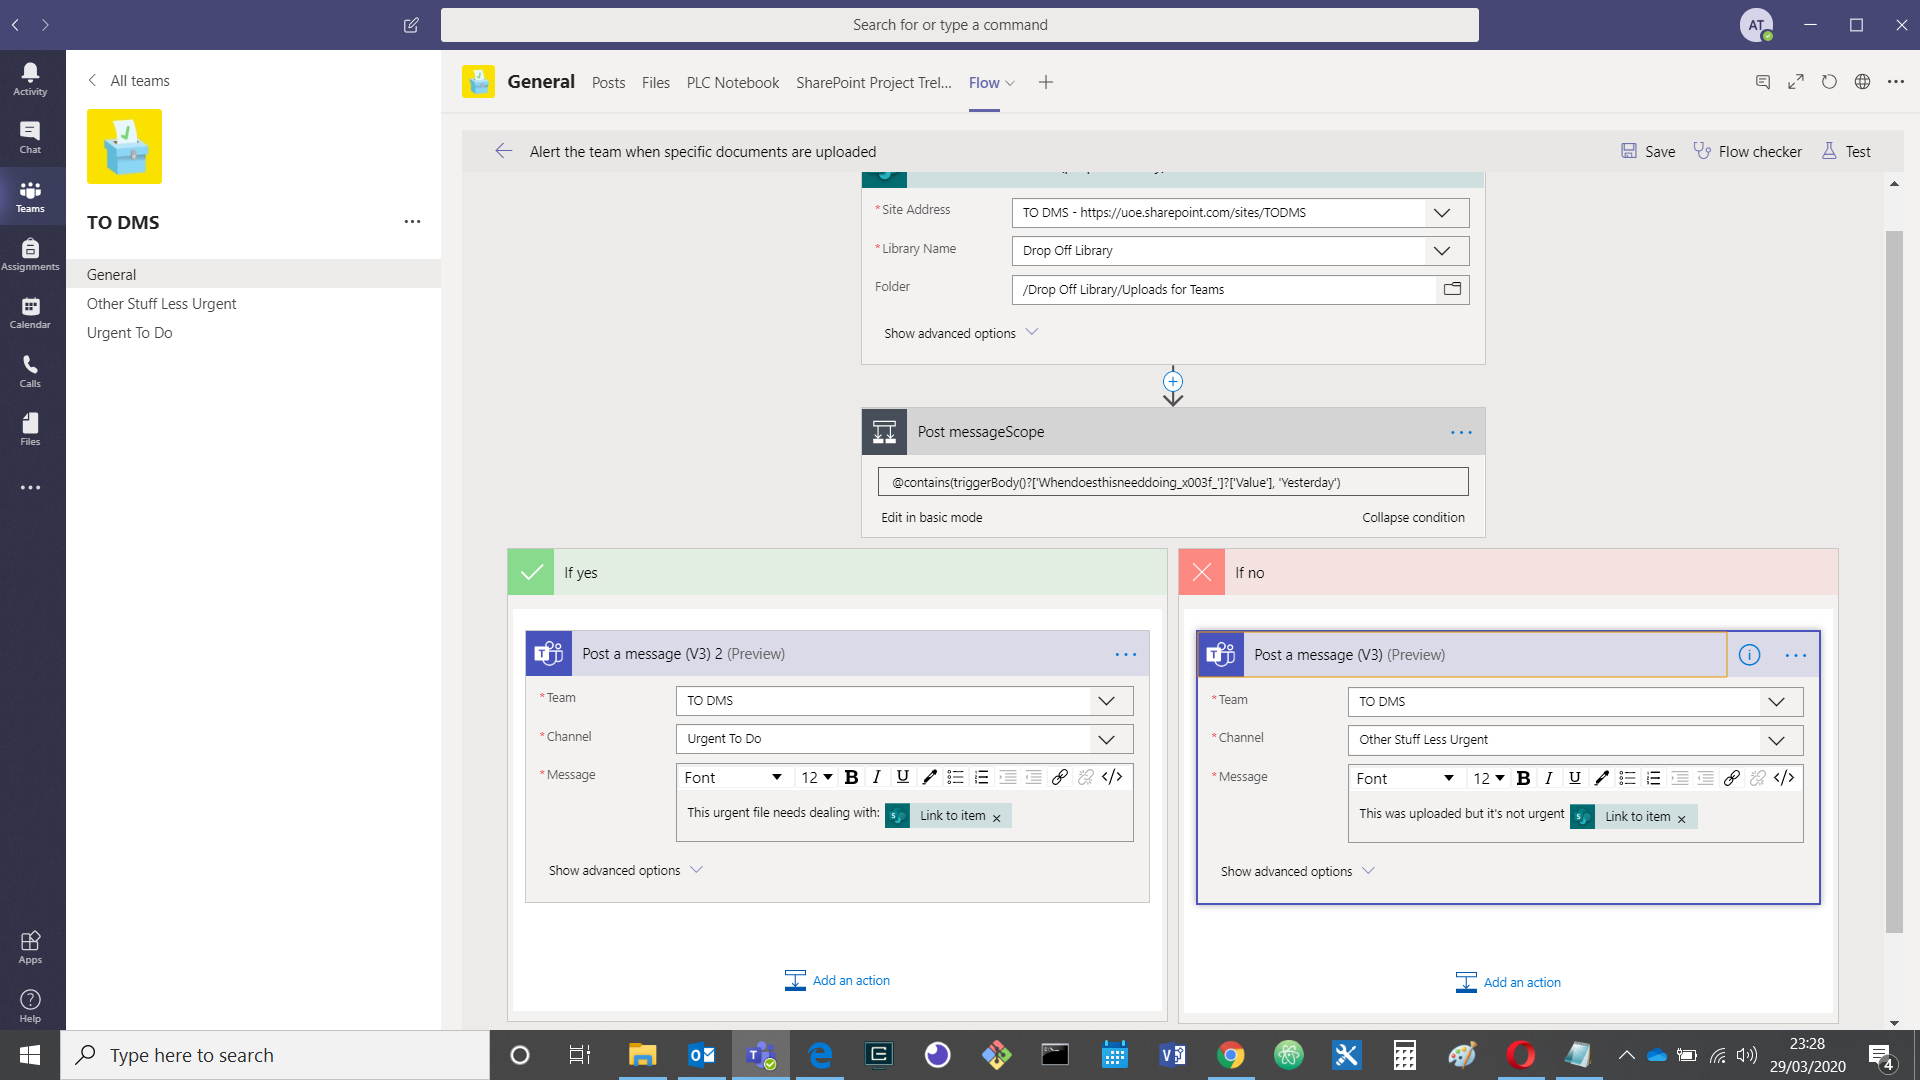
Screenshot from Teams to show conditional testing in Flow based on the value of a choice column in SharePoint. So much Microsoft!
So what’s next?
The next steps will be:
- In the message that’s posted to Teams, change the text displaying the uploaded file’s URL to a working link to the file
- Post the message in Teams using the name of the person who uploaded the file to SharePoint
- Seems my manager would prefer the option labels to say ‘Important’ and ‘Unimportant’ rather than ‘Yesterday’ and ‘Never’😏
- Another thing I would like to do is to add the updates as cards in ‘To Do’ columns in the Teams group Trello board.
To be continued… in Using Flow with Teams, part 2
Here’s that non-urgent squirrel I promised you

Lovely red public domain squirrel from Wikimedia Commons


Leave a Reply