Any views expressed within media held on this service are those of the contributors, should not be taken as approved or endorsed by the University, and do not necessarily reflect the views of the University in respect of any particular issue.
Please see below a list of some new features / UI changes in Media Hopper Replay that will be going love on 30 June 2025.
New Media Player – The new media player should consolidate all the different media player UI that was previously in the platform into one consistent interface across the platform. This interface will allows users easy access to auto-generated transcripts that accompanies videos as a sidebar in the player, more options to change the layout of video sources as well as easy access to Q&A functionality & confusion flags.
New Media Details Page – The new media details page change how the menus for viewing and making changes to media details will appear in Replay. All functionality in terms of changing titles & descriptions, sharing/publishing content, editing content & transcripts and adding polls to videos will remain but the UI has changed to make accessing these features simpler and more intuitive in the platform.
Live Player – A new Live player has been enabled that will change the UI for both instructors and students participating in Live Streamed sessions in Replay. Users joining the platform will now have the option to join a live stream In person which is designed for students attending & engaging a live session in person but who still want to view the live feed. The alternative is to join a session Remotely which is designed for users attending & engaging with live sessions off-campus
As always, if you have any questions, please get in touch.
Our most common enquiry is how to share a recording made in a previous year with a different cohort of students. This may be because something went wrong with this year’s recording* or because it would be of interest to students enrolled on an entirely different course.
In order to share a recording, you need to first make a copy of it, which will add it to your personal Media Hopper Replay library. You can then publish it to another linked course in Media Hopper Replay. This is quick and easy to do, just follow these instructions:
Go to the Learn page for the course from which you want to copy the lecture.
Follow the link for ‘Lecture Recordings’ on that Learn page, which will take you through to a list of all the recordings for that course.
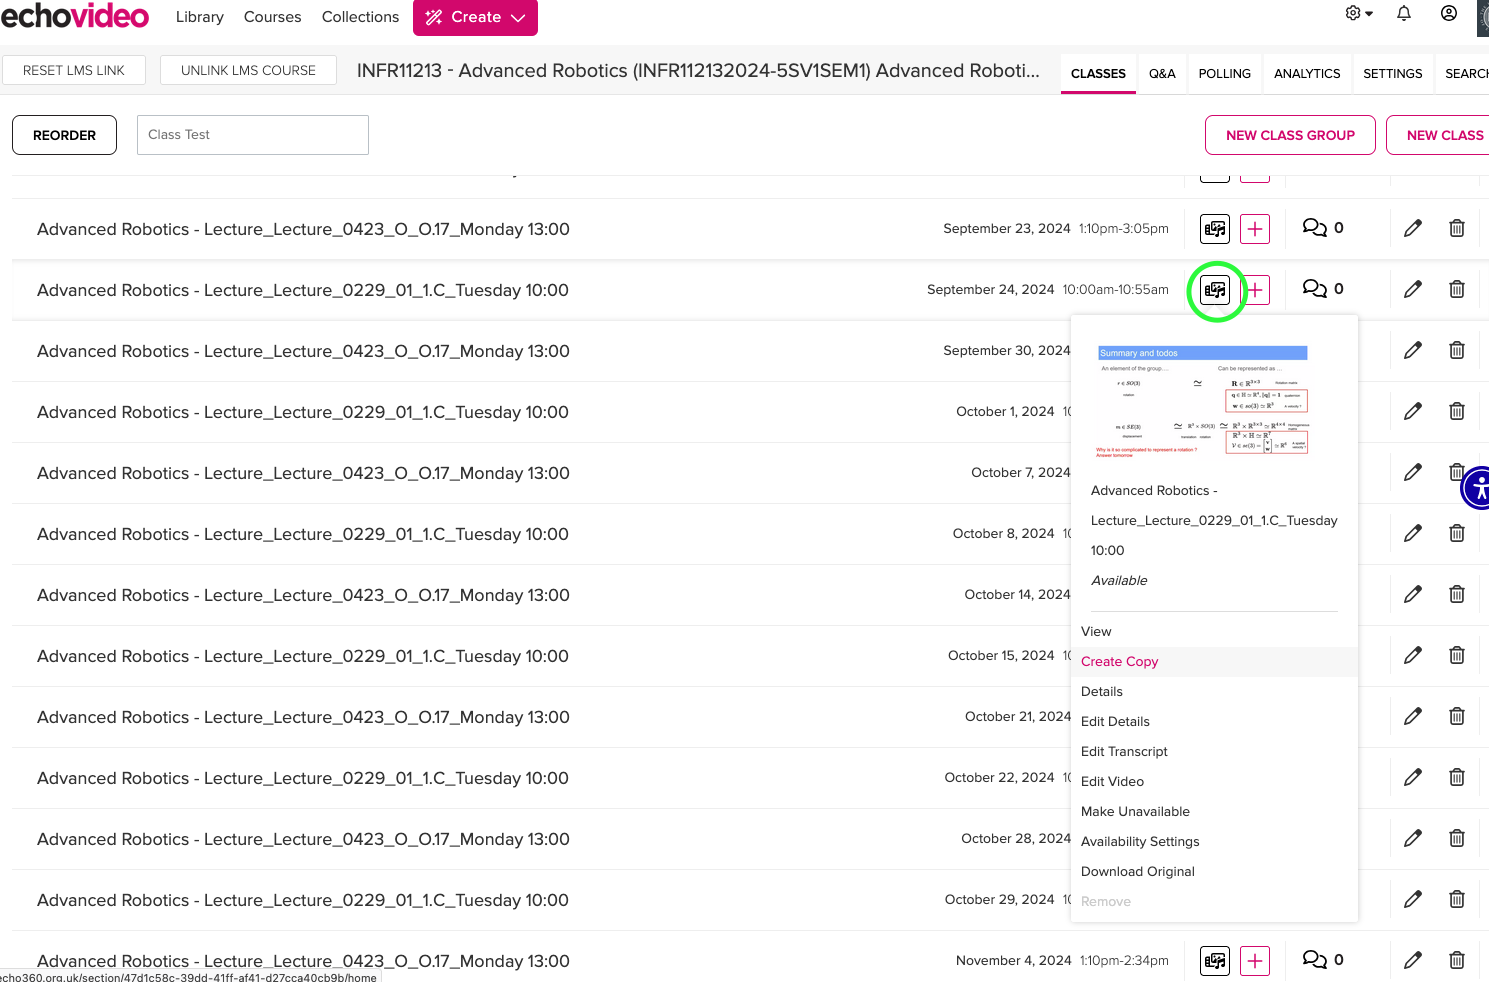
Locate the recording you want to copy from the list and click on the actions menu to the right of the video [circled in green on the screenshot below] and then select ‘Create Copy’. A dialogue box will open asking you to confirm whether you want to copy this video; click OK to go ahead. Once the copy has been generated, there will be a pop-up message at the bottom of the screen confirming that this has been successful.
The copy has now been saved to your library on Echo360.
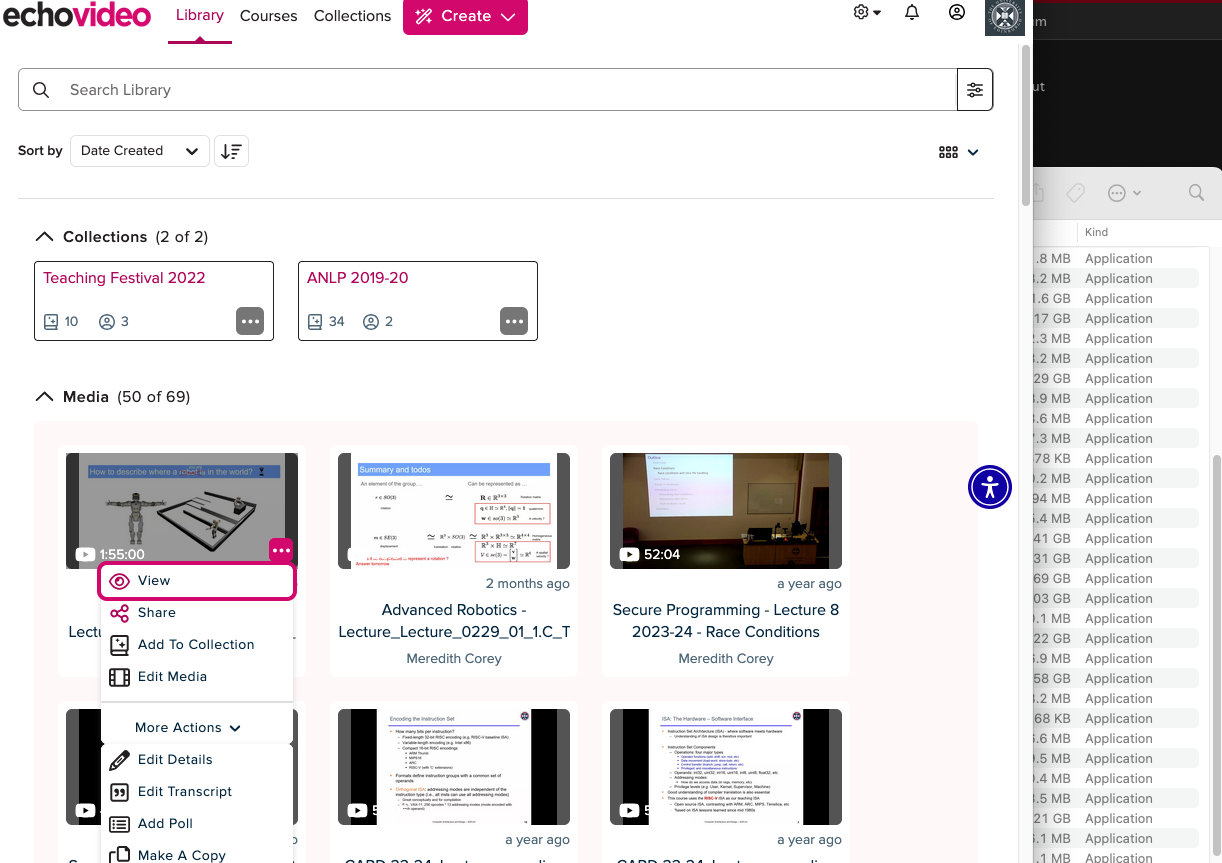
Click on ‘Library’ at the top left of the page.
Find the copy you just created and move your cursor over it to see the three dot (…) actions menu; click to open up the menu and select ‘Share’.
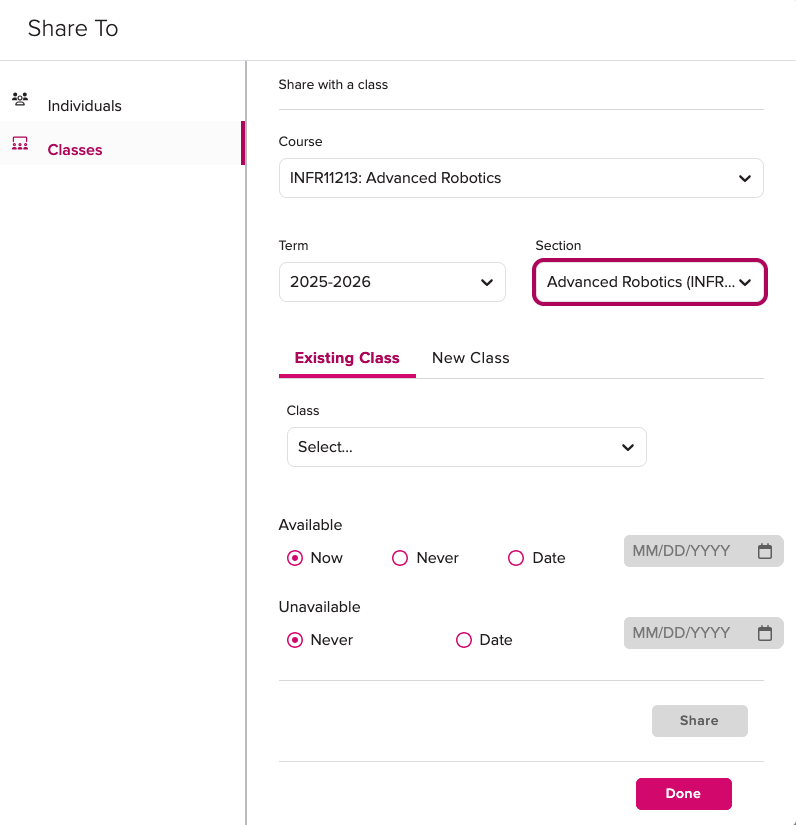
When the ‘Share To’ dialogue box opens, select ‘Classes’, then ‘Add To Class’. You can now select any course you have Instructor access in Echo360. Once you have chosen the course you want, select the ‘Term’, i.e. academic year, and then the ‘Section’ will almost always only have one option to choose.
IMPORTANT: By default, when selecting where you want to copy the recording to, it will go with an ‘Existing Class’ for the course, which will overwrite any recording for that date. If you do not want to overwrite an existing recording, select the option for ‘New Class’ and input the required details.
Click ‘Done’.
*It is, obviously, best to avoid issues with the recording, wherever possible! Make sure students in the room can hear you out of the speakers to ensure the mic is working. If you encounter any problems with the equipment in the lecture room, please contact University’s central Learning Spaces Technology team ASAP using the phone number provided in the room (or listed on their Contacting Us page), as they look after all of that equipment. They can triage over the phone or send a technician. While this may briefly disrupt your class, in most cases the issues can be resolved right away.
The IS Helpline supports Media Hopper Replay throughout the University. Contact details are listed here. You can also find some other information and instructions on the IS Media Hopper Replay Support Sharepoint pages.
Note: The University’s Zoom service will be retired in March 2026.
If your new teaching space does not support Media Hopper Replay (the UoE integrated lecture recording system), and / or if you will be delivering your class either from home or a non-supported room, we suggest the following approach:
Login to the Learn Ultra course for your class.
Browse to the area in the course where you want the link to appear.
Click the plus (+) sign to add content.
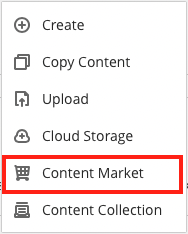
Click Content Market
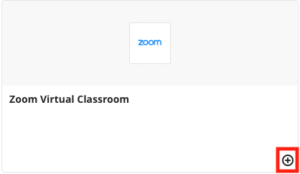
Click the plus sign next to Zoom Virtual Classroom.
Now back on the main content list in Learn, select the link to the Zoom Virtual Classroom that you’ve just added and then “Schedule New Meeting”.
Give your session a sensible name. Enter the date / time of your session. Select “recurring session” for any regularly recurring classes (eg every Wednesday 10-11am).
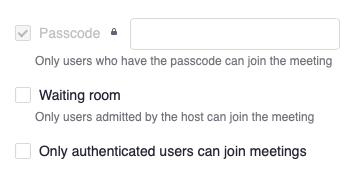
We recommend *not* either selecting the ‘Waiting Room’ or “Only authenticated users can join meetings” options.
Ensure you are happy with the remaining options and select ‘Save’.
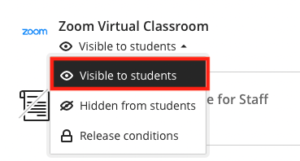
Be sure to remember to make the tool visible to students!
You will not be able to test this link with Student Preview in Blackboard. As long as the link works with your instructor account and is not hidden from student view, then your students will be able to see it.
You now have your link set up in your course. Let your students know about it in advance and direct them there to access your online class.
The passcode for Zoom meetings does not show to students. This should be shared separately.
Note: don’t forget to record your session!*
*The recordings of Zoom sessions set up through a Learn page can be saved to your Media Hopper Replay (lecture recording) library and/or to the course lecture recording area. To find out more about how to enable, this please see IS’s Using Zoom with Media Hopper Replay.
Many of the learning technologies we use for teaching in the School of Informatics are integrated into Learn via LTI links, which ensure that user information (e.g. name, email address, and student number) are fed from Learn through to the other tool. Examples of these are Gradescope, Piazza, Zoom, Media Hopper Create and Replay, and CodeGrade. This also means that information can be fed back from these tools to Learn, e.g. marks in Gradescope added to Learn’s Gradebook. Many of these tools, including Library Resources, Media Hopper Replay (aka Lecture Recordings), and Piazza are included on all Informatics courses automatically through our School Learn template.
The process for adding these tools to a Learn page for students to access has changed in Ultra. Please follow the instructions below on how to add a link to these tools on a course Learn page for students and other staff enrolled on the Learn course to access. (Click on any of the screenshots below to open them full size.)
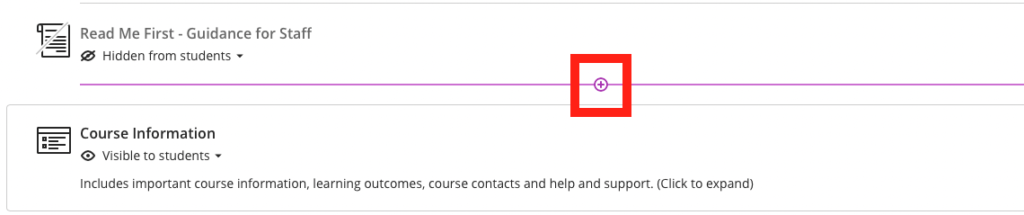
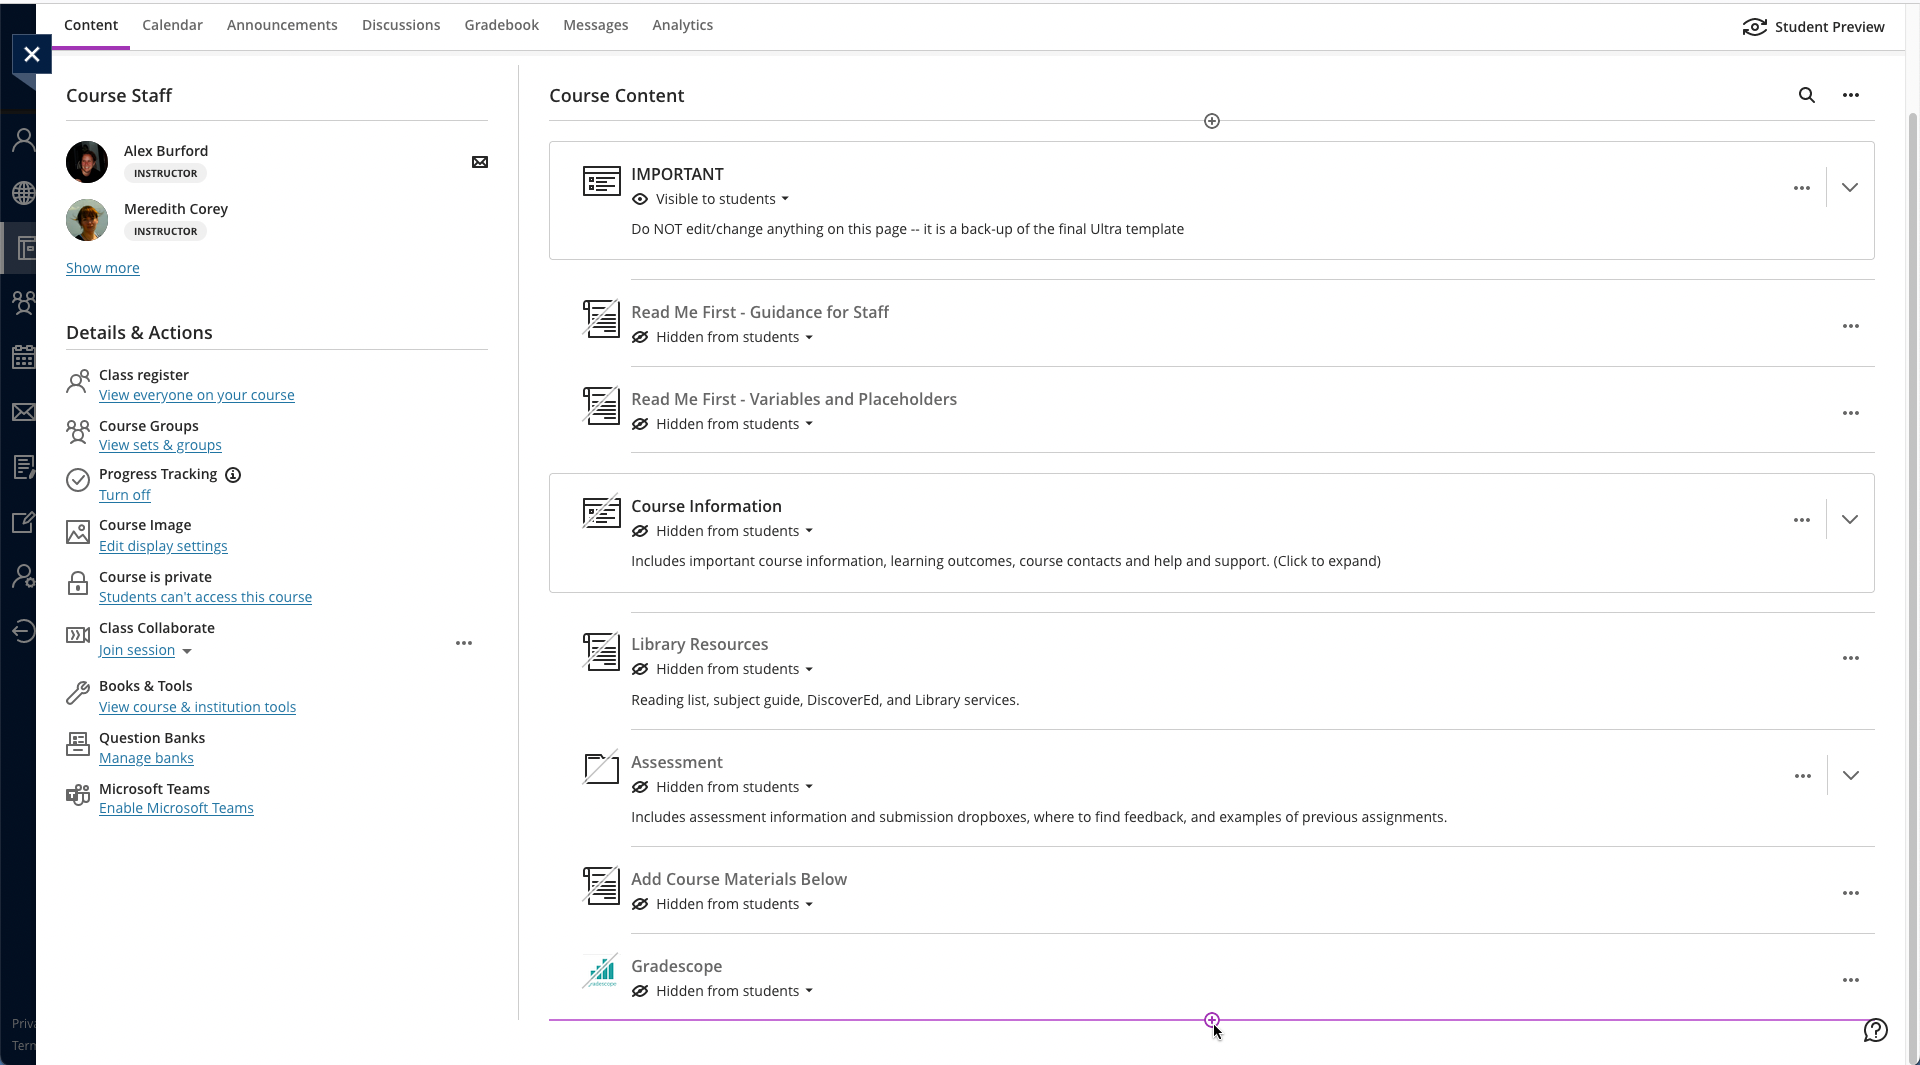
Navigate to the place in Learn that you want to add the link (this might be within a folder, e.g. for an assessment submission) and click on the plus (+) sign where you would like to add it on the Course Content page. You can see that the Gradescope link has already been added below using these steps and, for this demo, we will be adding a link to Piazza below it.
From the pop-up list of options that opens, select “Content Market”.
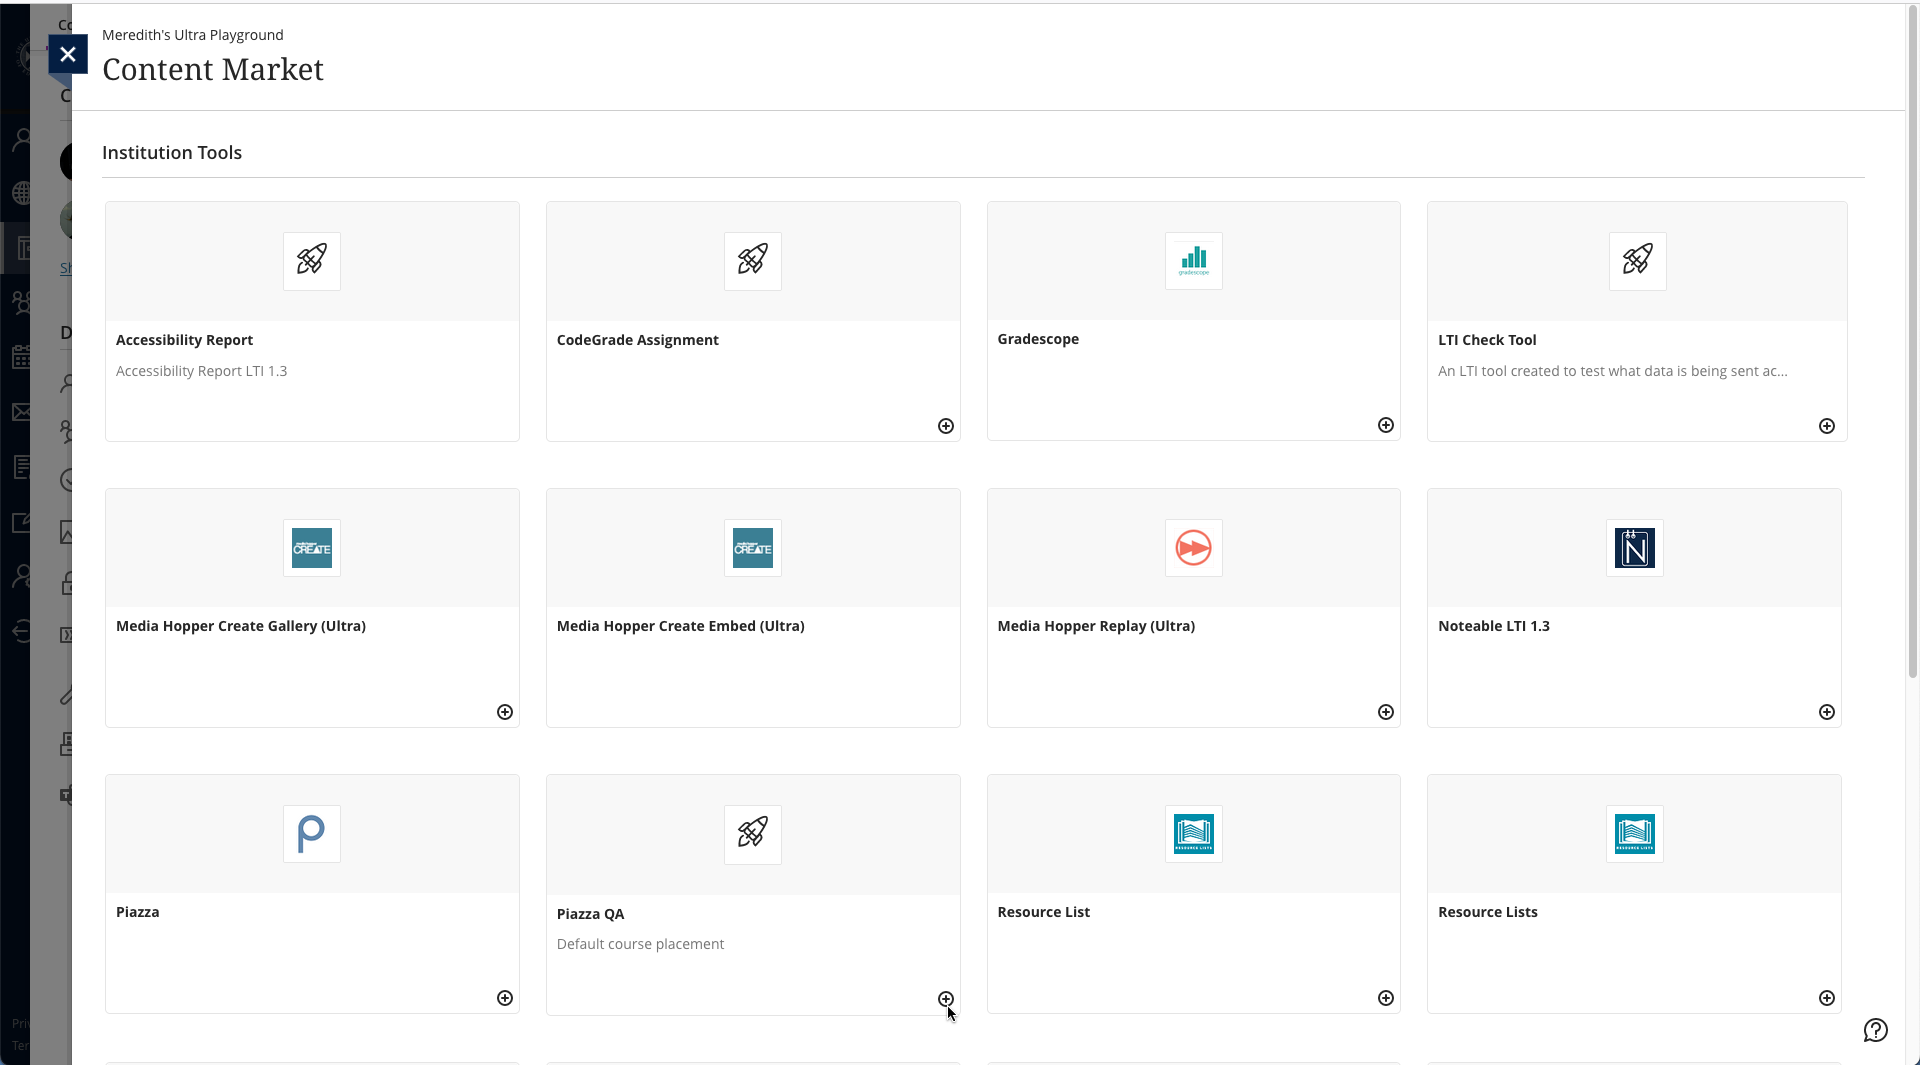
When the Content Market screen opens, navigate to find the tool you need. Do not click on the name of the tool, rather select the little plus (+) sign icon in the bottom right-hand corner for that tool, as shown below for Piazza QA.
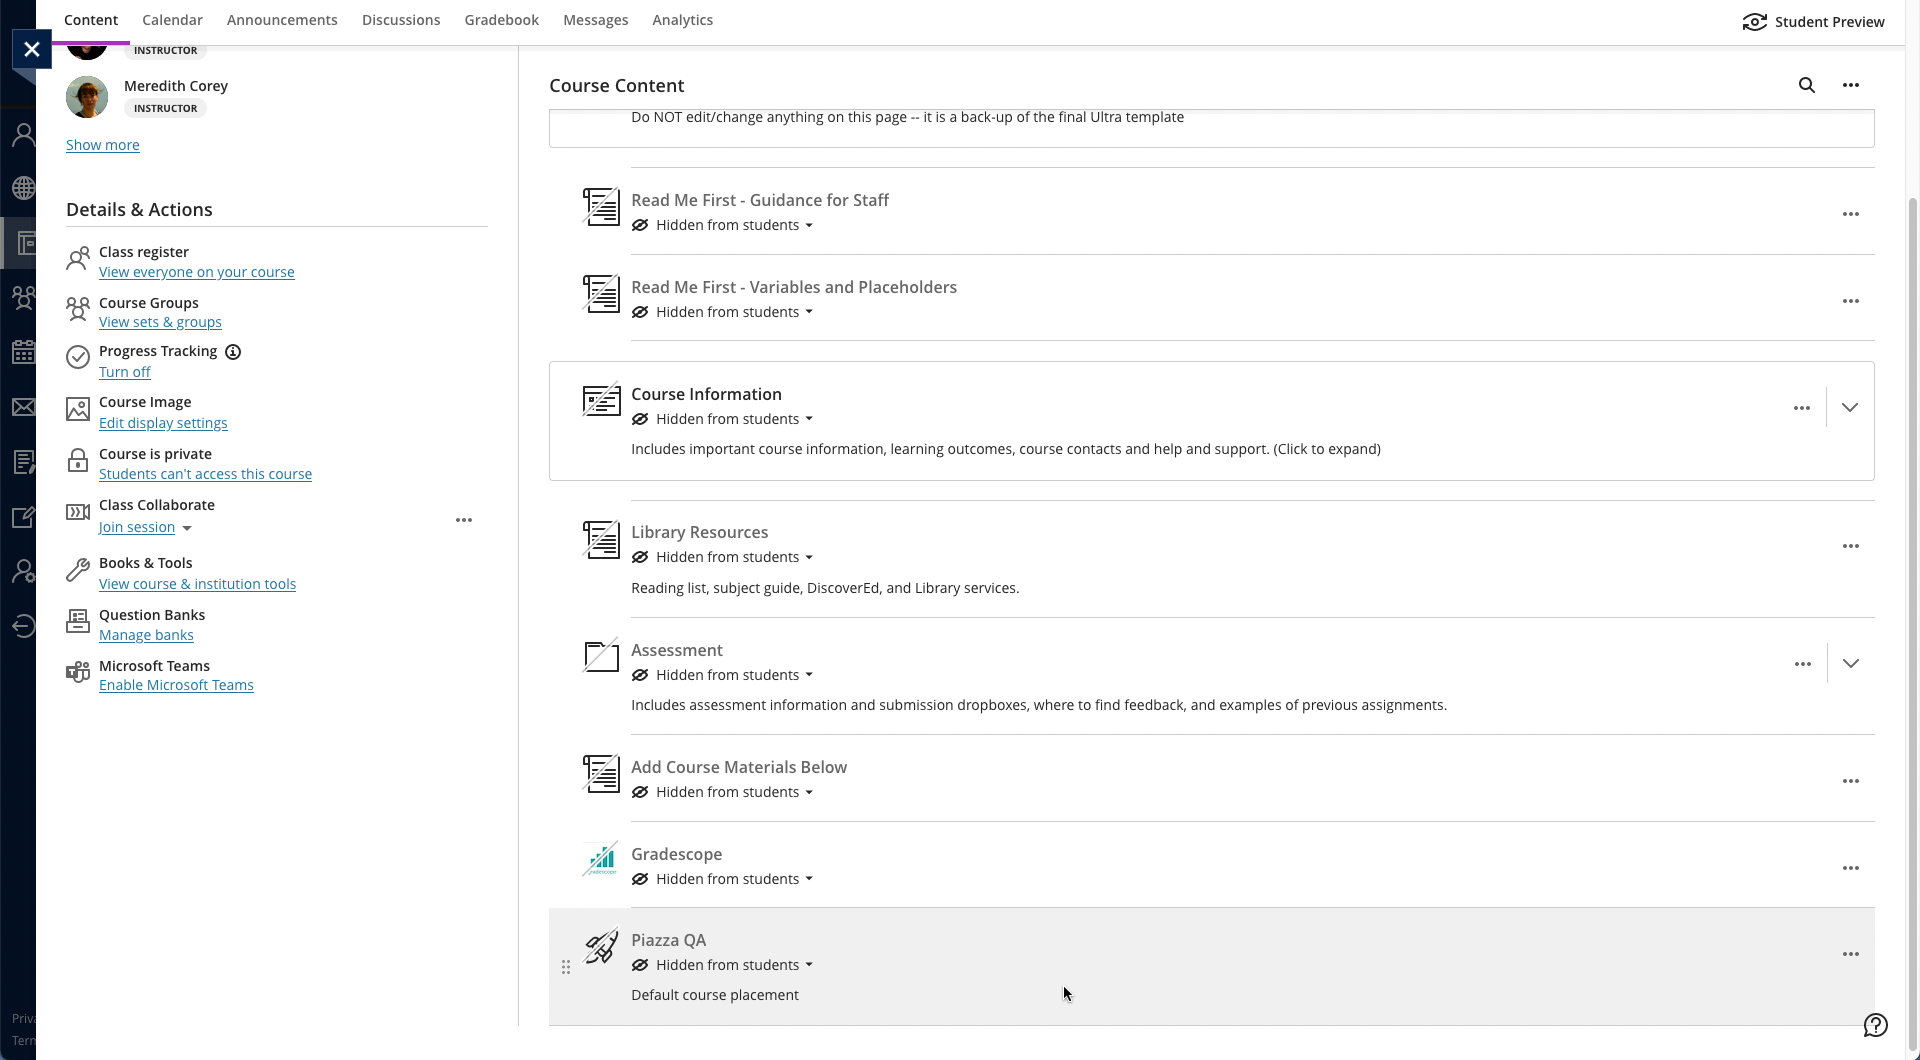
You will then be taken back to the main course Learn page, where you can see that the Piazza QA tool has been added, as you can see below. You can use the three dot icon (…) to open the menu for the item and edit its name and/or description. Once you are ready for students to access it, make it visible to them.
The Informatics Teaching Festival is back for a second consecutive year.
Join us for the opportunity to:
hear interesting presentations around lessons learned in the past year and good practice in online/hybrid teaching from colleagues and inspiring speakers from other schools
listen to the feedback provided by student representatives regarding their experience with studying in an online/hybrid context
listen to the feedback provided by teaching support and administrative staff as to their experience with teaching and administration this past year
learn about new approaches to teaching and educational software
share your own experience with teaching delivery, student support and course administration during workshops and informal GatherTown meetings
reflect and come up with ideas together for improving our delivery of online and hybrid teaching, both as a school and in our different courses.
If you’d like to attend any of the following sessions, and are not a member of the School of Informatics, please register your interest here, and a Collaborate link will be emailed to you in advance of the session(s).
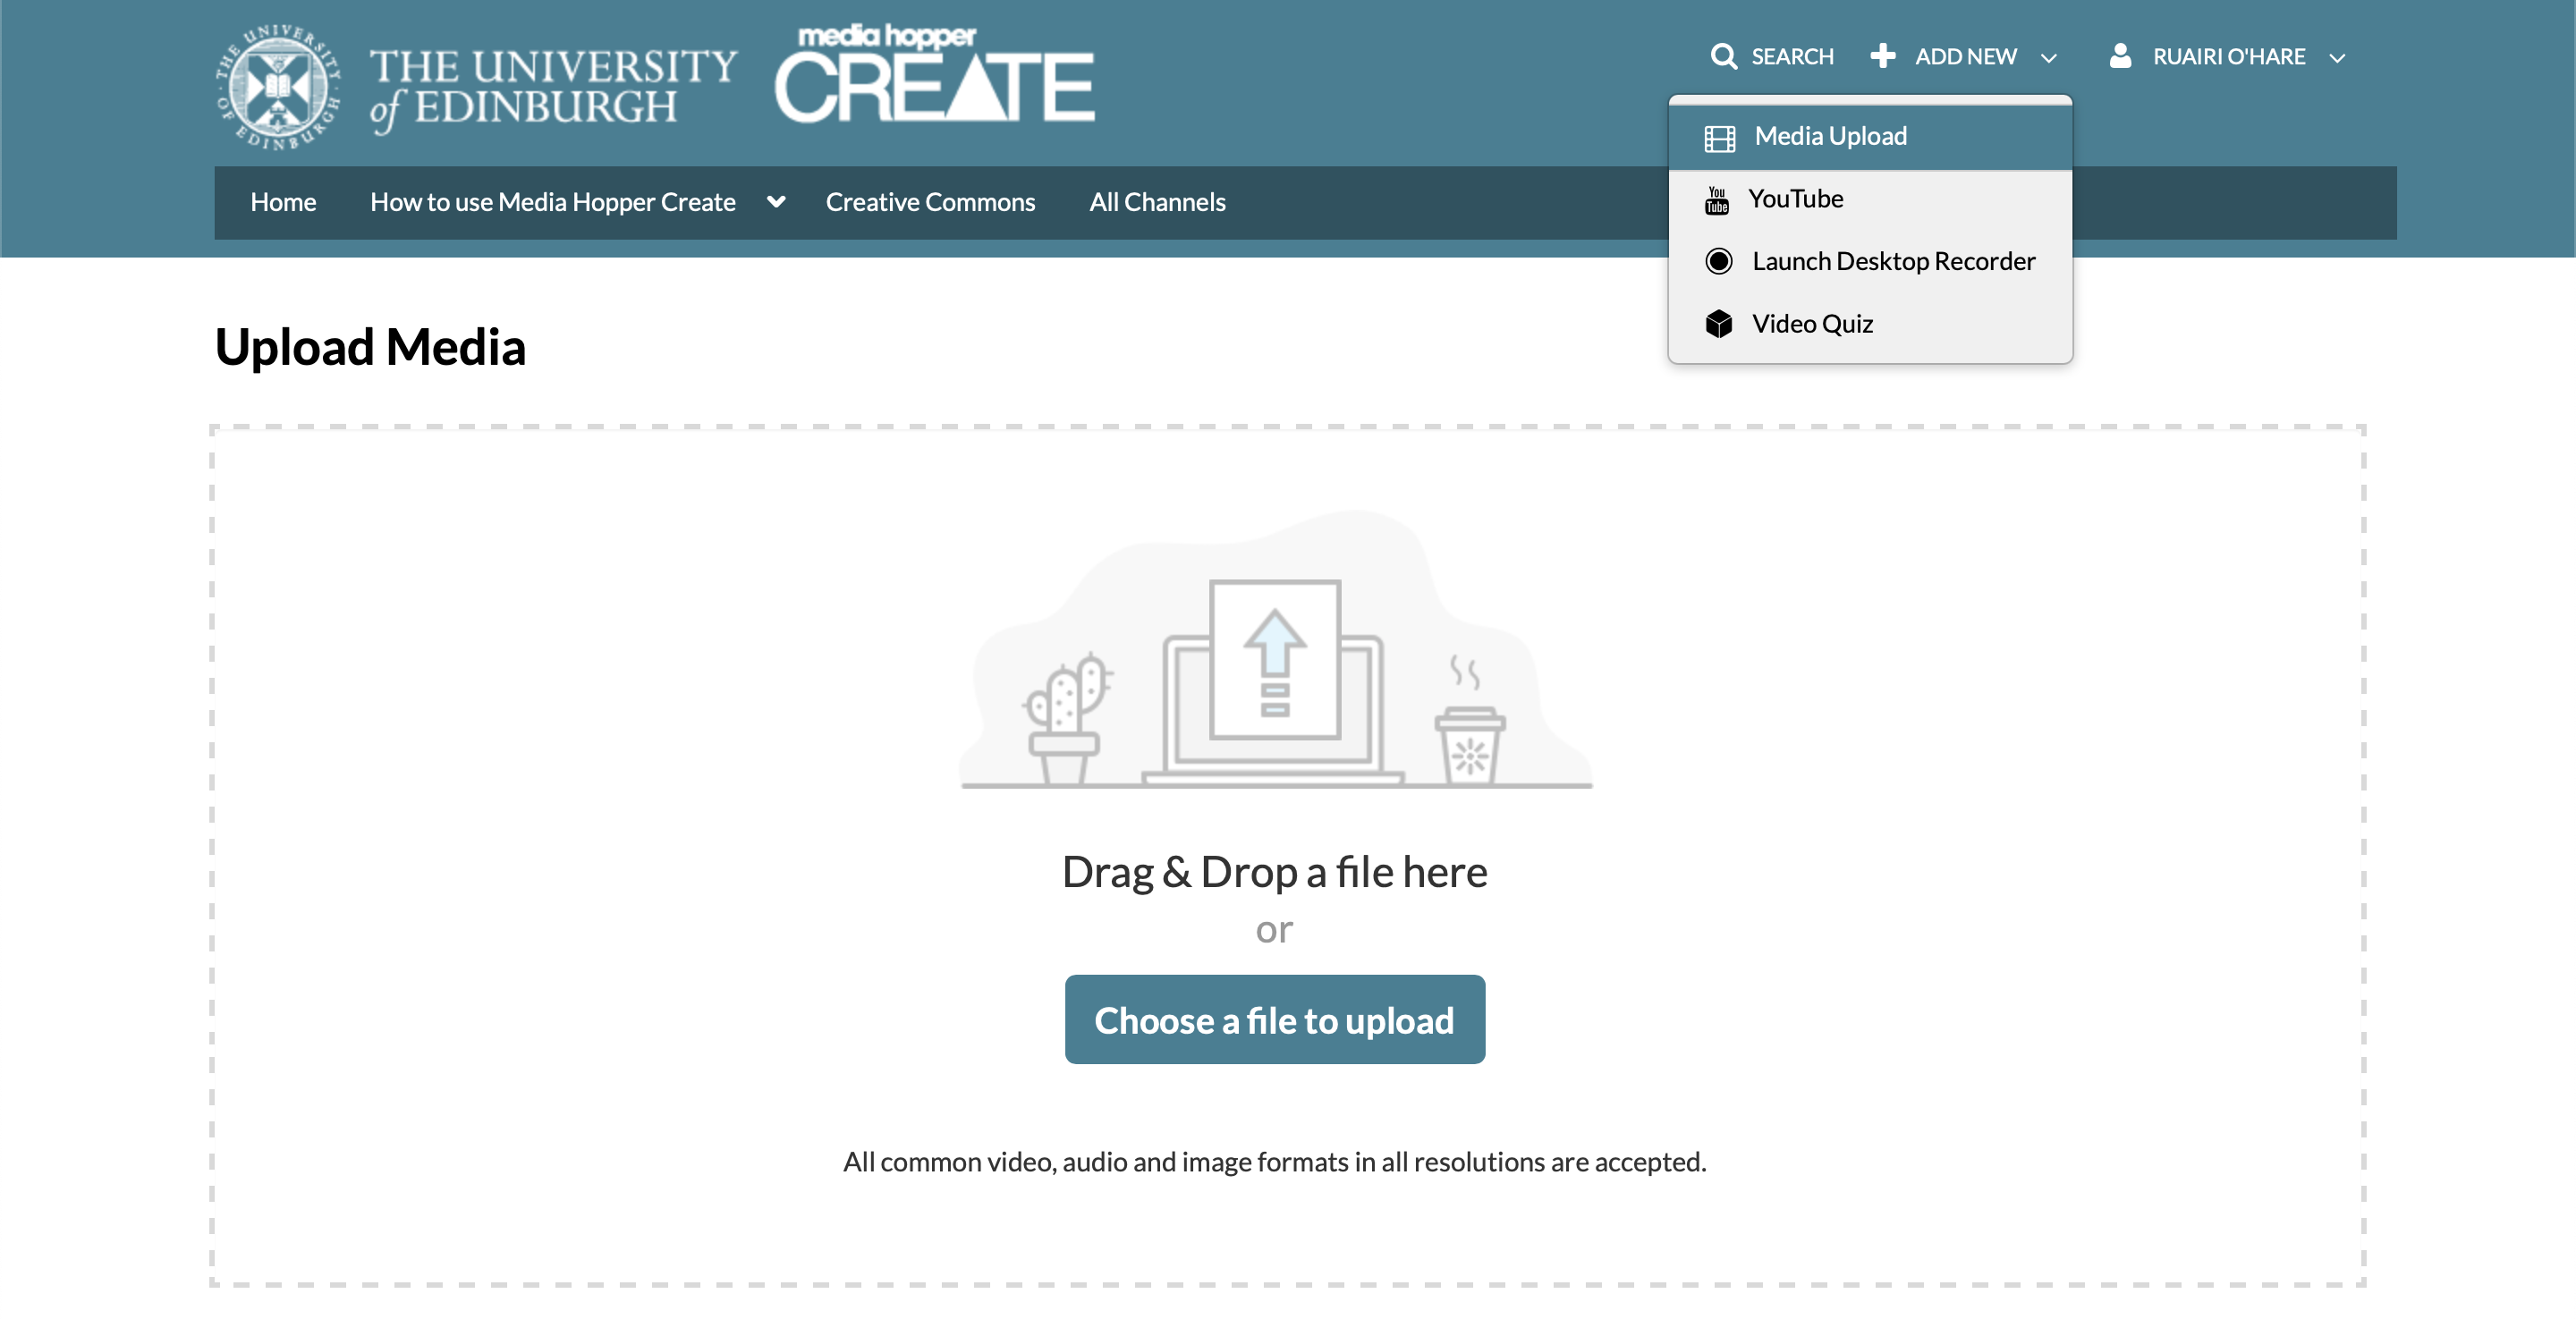
To upload a video, e.g. from another university source such as Blackboard Collaborate, click Add New on media.ed.ac.uk, then click Media Upload to begin.
When uploading a piece of media to Media Hopper Create, certain fields must be filled in order for the video to be published to a course channel. The required fields to publish can be filled in while uploading the content, or after uploading the content by finding the video and clicking Actions>Edit>Details and filling in the fields below. In order to publish the media fill out:
–Name (The title of the video that will be displayed)
–Description (Will be displayed underneath the video)
–Tags (at least one tag word is required for the video to be published and help people find it easier)
–License Type (This is the copyright license to be applied to the content. I normally select All Rights Reserved The University of Edinburgh from the dropdown menu but this is at the content creator’s discretion.)
Course code, Publisher, Language and Date Created do not need to be filled in order to publish the video but can be useful to fill in to make the video easier to retrieve later on. A publishing schedule can also be set so the media can only be viewed for a certain period of time (useful for perhaps making a video only available during one semester).
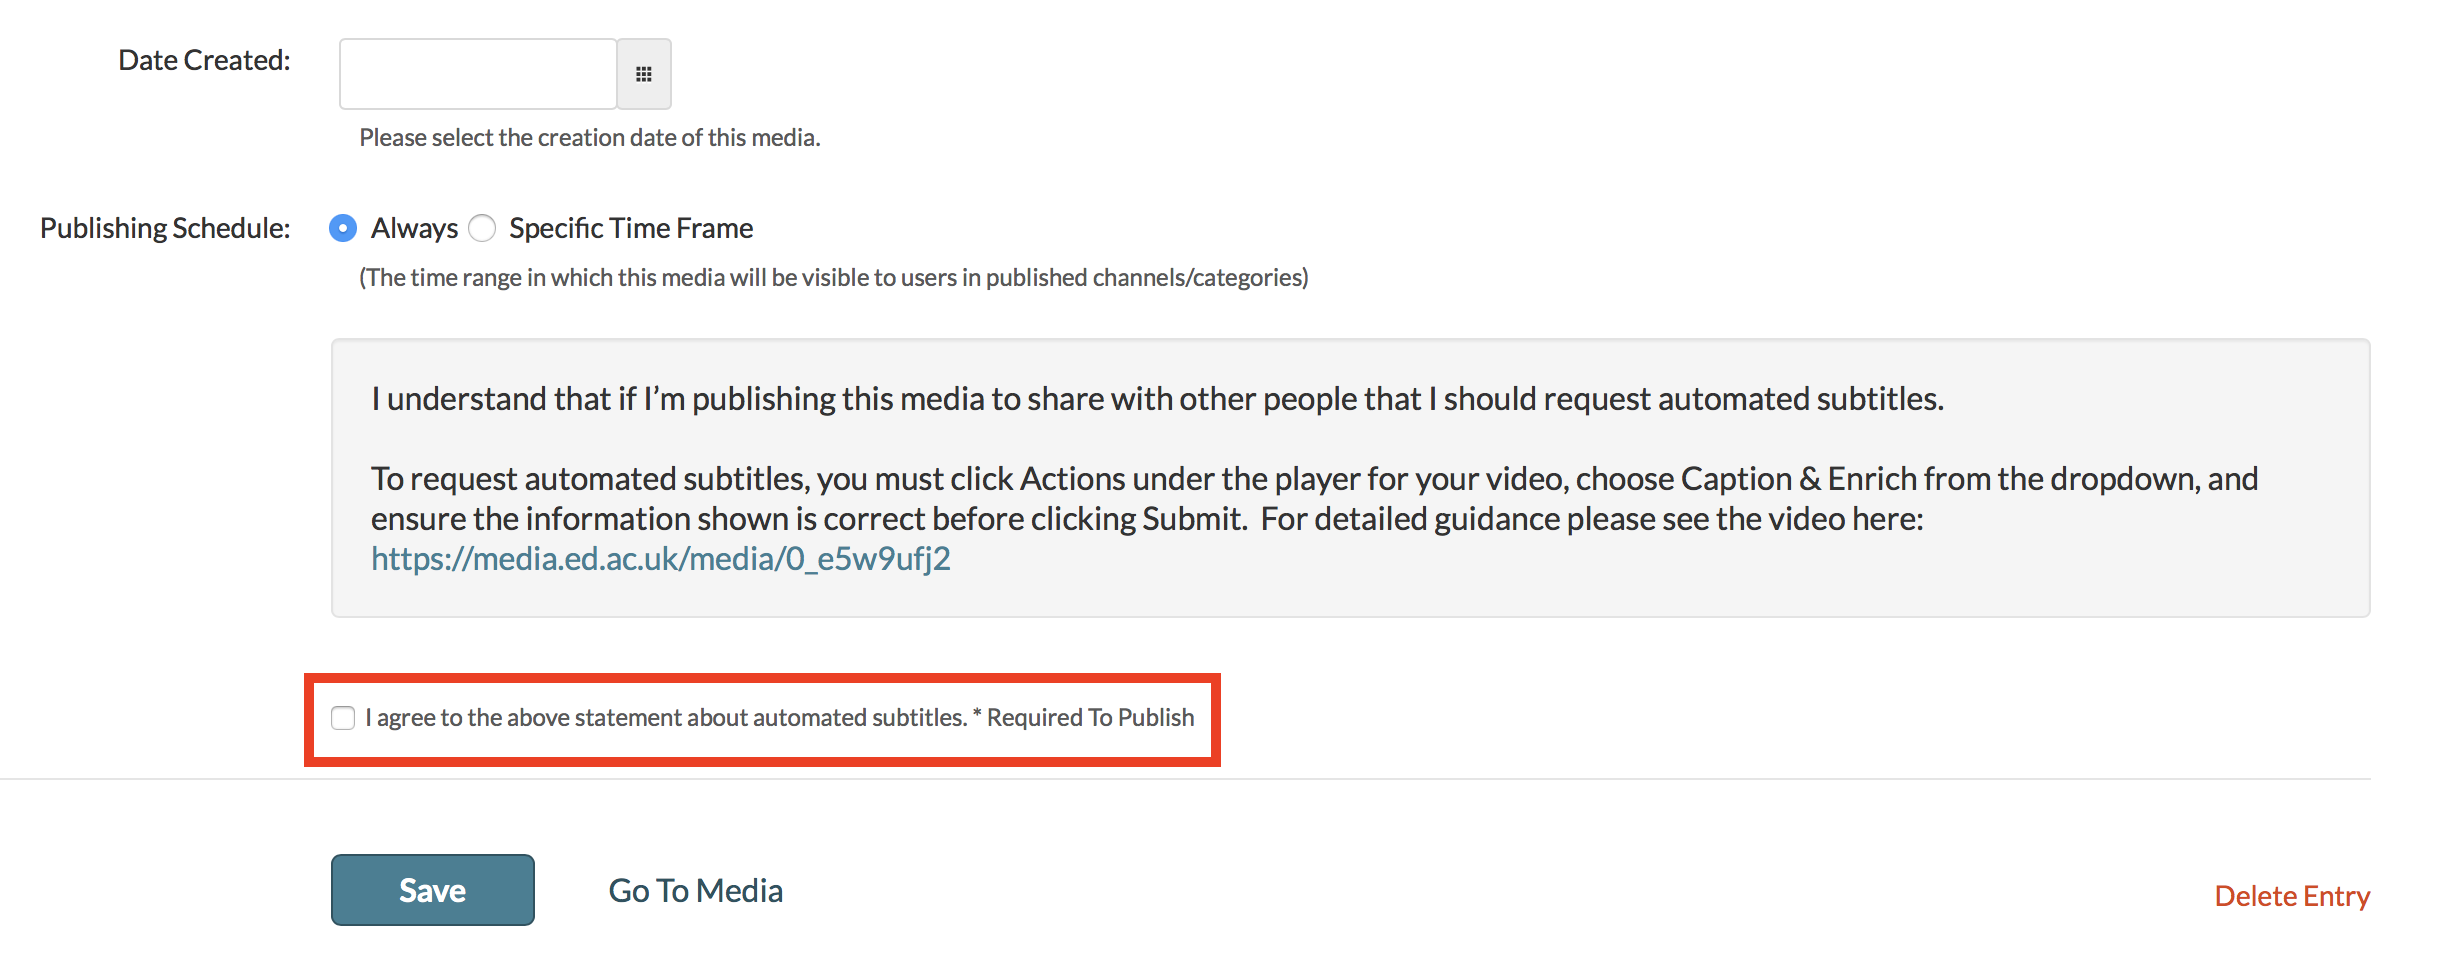
– You now need to agree to request automatic subtitles before you can publish your content.
NOTE: Selecting this box does NOT enable auto-captioning, this is done in the next step.
After the details are filled in, on the video uploading page (or on the video editing page under Publish instead of Details), set the Publishing Status to Published (if Published is not selectable, there are missing video details that still need to be filled in). A drop down menu will appear giving the option to Publish in Category or Publish in Channel. Select Publish in Channel and select a channel you manage to publish to the channel.
In the recent Exploring Whiteboard Approaches blog post we shared different ways of presenting mathematical writing using whiteboards we touched on how OneNote might be used as a tool for demonstrating handwritten content as well as a collaborative space for mathematical note taking.
To expand how how to use this approach we have added some further explanation below:
Writing Maths with OneNote
OneNote is an ideal note-taking tool that allows for simple hand-writing tools to be used, but also have a convert to maths function available.
Writing with the ink and creating a conversion is relatively straight-forward, by using the “Fix it” option you can quickly sub-select components of your handwriting to find alternative symbols used in your maths writing.
This will need to be tried with your handwriting and device to test for suitability.
Use in Tutorial Session
To broadcast live annotations I would suggest the following approach if you have a desktop/laptop with stylus/tablet setup.
Use desktop/laptop for Blackboard Collaborate, and choose to share your screen
Use the tablet input to write your maths on OneNote
Your annotations will appear on the shared screen after a short delay
Potential Issues
There are some reports the convert to maths option is not available on some tablet app versions of OneNote
If broadcasting your screen from a desktop, but writing on a tablet with OneNote there may be slight lag in updating the Cloud version
Heather Yorston has been using a similar approach and gave a short overview of this at a recent Teaching Hour with a session titled, “How do I teach Maths online?”.
The questions around whiteboard approaches and mathematical writing have come up numerous time throughout the summer. There has been some really interesting discussion within the School of Informatics as well as more widely within the College.
Unsurprisingly, there is no single solution that solves all of the scenarios raised by colleagues. A good starting point is to consider the ways that you might want to use a whiteboard – we have summarised some solutions to the following approaches below:
Live demonstration to students
Recorded demonstration to students
Collaborative whiteboard tutorial
The following approaches are suggestions and not the only solution. You can check out further suggestions and alternatives via the Hybrid Teaching Technology and Tools Finder.
Live demonstration to students
If you are delivering teaching via a video conferencing tool / virtual classroom you may wish to demonstrate handwritten content that you would traditionally use a whiteboard for within a classroom.
First consider if you prefer to work with digital ink or using a standard pen and paper approach.
Digital Ink
Although writing with a mouse or trackpad is possible it is often an unnatural feeling for many people, with many preferring to use a stylus attached to a computer or used directly on a tablet device.
Both Collaborate and Teams have a whiteboard that offer some basic writing and annotation tools for whiteboards. These tools are often sufficient for quick demonstrations, but do have some limitations. It is important to note that any content created in the Blackboard whiteboard will be removed at the end of the session so a screenshot should be taken if you would like a digital copy.
An alternative tool is to use OneNote, you can broadcast your screen when writing in OneNote, but there are two additional advantages in the way that the content can be shared to students, and the writing can be converted to Math writing.
It may be that the easiest approach is to use pen and paper, and carefully positioning a camera or additional video-source you can broadcast your paper to the room.
You can choose the video source that you wish to share in both Collaborate and Zoom, additionally you can choose to join a meeting from an additional device such as a smart phone to use this as your additional camera source.
With a small tripod and a well-lit workspace you can share your handwritten work to the rest of the virtual classroom.
Recorded demonstration to students
You may prefer to record your demonstration as a standalone resource. This can often make it easier to focus on the task without having to consider other aspects of the technology compared to running a live demo. Another benefit of pre-recording is that the resource can be used on its own in addition to any other teaching activity.
Screen Recording or Recorded Meeting
As above, you can record your demonstration using the same tools and approaches you would as if you were running a live session. You can record a session (without other participants) in Collaborate or Teams.
You could also use Media Hopper Create to record your screen of any demonstration taking place on your screen.
Camera and Tripod
Using a camera or smartphone you could record a demonstration on whiteboard, or pen and paper.
Point the camera to a piece of paper at a reasonable distance to allow space for handwriting, but still easily legible.
Notes & Tips
Beware of autofocus trying to switch between focus of your hand and the paper, this should be relatively minor, and most phone apps allow a fixed focus if required.
Use a well lit room, but watch out for glare or excessive shadows
Should be relatively easy to colour correct the footage to white by doing a white-balance on the piece of paper (post production).
George Kinnear in the School of Mathematics has written a blog describing how he uses video to share mathematical writing giving a demo of how to do this using Teams.
On Campus Resources
Most teaching rooms have a high quality visualiser that can be used to broadcast/record paper and pen.
The University has also invested in a number of media recording pop-up studios which are equipped with the equipment that you will need for a high quality recording. Some locations have the option of a “clear board” to allow you to write on a transparent board allowing you and your writing to be visible on screen at the same time.
The studio spaces are bookable in advance and are being supported within current health and safety guidance. For further Information please consult the dedicated Media studios for hybrid teaching web pages.
Collaborative whiteboard tutorial
Using a whiteboard in a Collaborative tutorial it is a little harder to pinpoint a single solution. OneNote is clearly a useful tool as it has collaboration at its core in addition to the multiple handwriting tools.
It is possible to create a Class OneNote document and allow people to work on this as they wish. You could even distribute some proforma templates pages if there are specific tasks or formats you would like the students to follow.
The School of Mathematics recently held a workshop on a variety of approaches to collaborative working with whiteboards. This workshop has been written as a short report investigating how to “Share mathematical work synchronously”. In the report they look at filming their workspace, using an online whiteboard such as notebookcast.com, working on a collaborative document like OneNote or using LaTex in an Overleaf document.
Variety of Tools
As you will have seen there are a variety of approaches to tackle this scenario. The ILTS team are happy to advise if you have a specific use-case that you are considering. I’ve listed tools and resources mentioned in this post as well as some alternatives. Feel free to add more to the list using the comments below.
Check the screen feed, camera feed and audio feeds are on.
Hit Record.
When you want to finish recording, you can pause or stop the recording.
Give the video a title, description and tags (optional) and click upload.
When the video is uploaded, a link to the video on media.ed.ac.uk will appear. Click this link to check your video.\
On Media Hopper Create, if your video had a screen and camera stream, both will be automatically controllable by the end user allowing for full screen of either of the videos and multiple split screen views.