On Friday, I took part in a workshop on “sharing mathematical writing” with some colleagues from Mathematics, Informatics and Physics.
We’re all thinking about how best to arrange for students to be able to work together online, and being able to work together on written mathematics is a key requirement for our disciplines.
In the workshop, we tried four different approaches:
- Video – using smartphones as document cameras, to show writing on paper,
- Digital whiteboard – using a free online whiteboard tool, where participants can collaboratively write (we tried NoteBookCast.com),
- Collaborative notebook – using a shared OneNote notebook,
- Typing – in the collaborative LaTeX editor, Overleaf.
I was in the Video group, and found it worked quite well.
Setup
The approach is to use a smartphone (a common piece of kit!) as a document camera.
Ahead of the meeting, I installed software on my phone and on my laptop, that enables the phone’s camera to appear as a webcam on the laptop. I followed the instructions in this article and installed DroidCam on both phone and laptop.
We were using Microsoft Teams for the meeting. It’s easy to switch between different webcams, once you know to click the “…” on the toolbar, and select the “Show device settings” option: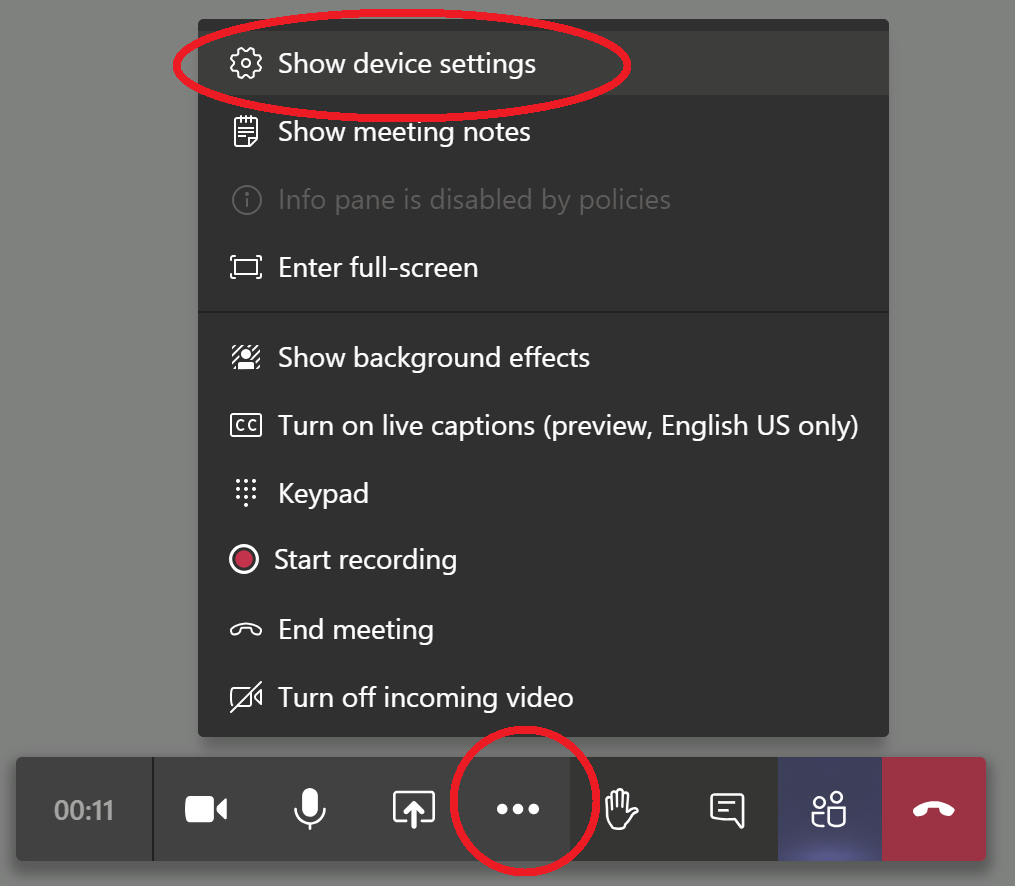
Assuming you’ve got DroidCam (or equivalent) running, you should then see it appearing as an option in the dropdown list under Camera.
During the meeting, I was able to switch between using my laptop’s webcam, and my phone’s camera. I have a cheap tripod that holds my smartphone, so I was able to use that to point the phone camera my page of writing. Others were making do with holding their phone above the page, but given how cheaply you can get hold of a reasonable holder (e.g. this one for £12) I think that would be worth the investment!
Alternative method in Teams
It’s also possible to join the Teams meeting from the smartphone, if you have the Teams app installed. Make sure you use the options when joining the meeting on your phone to turn off the mic and the audio output – otherwise you will get horrible audio feedback.
If you have the video turned on when joining the call on your phone, that will take over from your laptop webcam. Other participants will see the video from your phone instead. If you want to switch back to your laptop webcam, simply pause the video on your phone (tap the video icon on the toolbar, like the one at the left of the screenshot above).
This approach was much simpler to set up – just install the Teams app on your phone, and no fussing with apps like DroidCam.
However I found it a bit counterintuitive in Teams at first – the view of the call on my laptop showed no indication that my phone was involved at all. It was still showing the little preview of my laptop’s webcam, and I couldn’t see the view from my phone that other people were seeing (though of course, I could see that on my phone screen).
Advanced setup
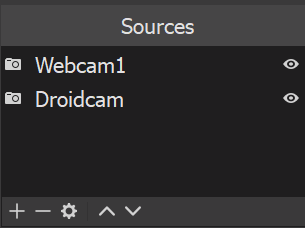
I’ve been doing some further experimenting, to see if I could get round the issue of having to choose which camera to show. The solution I found is to use the DroidCam approach, with some further software on top of it:
- OBS Studio – which lets you control multiple video streams
- OBS VirtualCam – which makes the output from OBS available as a webcam on your system
With those installed, I fired up DroidCam, then set up a picture-in-picture view in OBS Studio by adding both my laptop webcam and the DroidCam as sources:
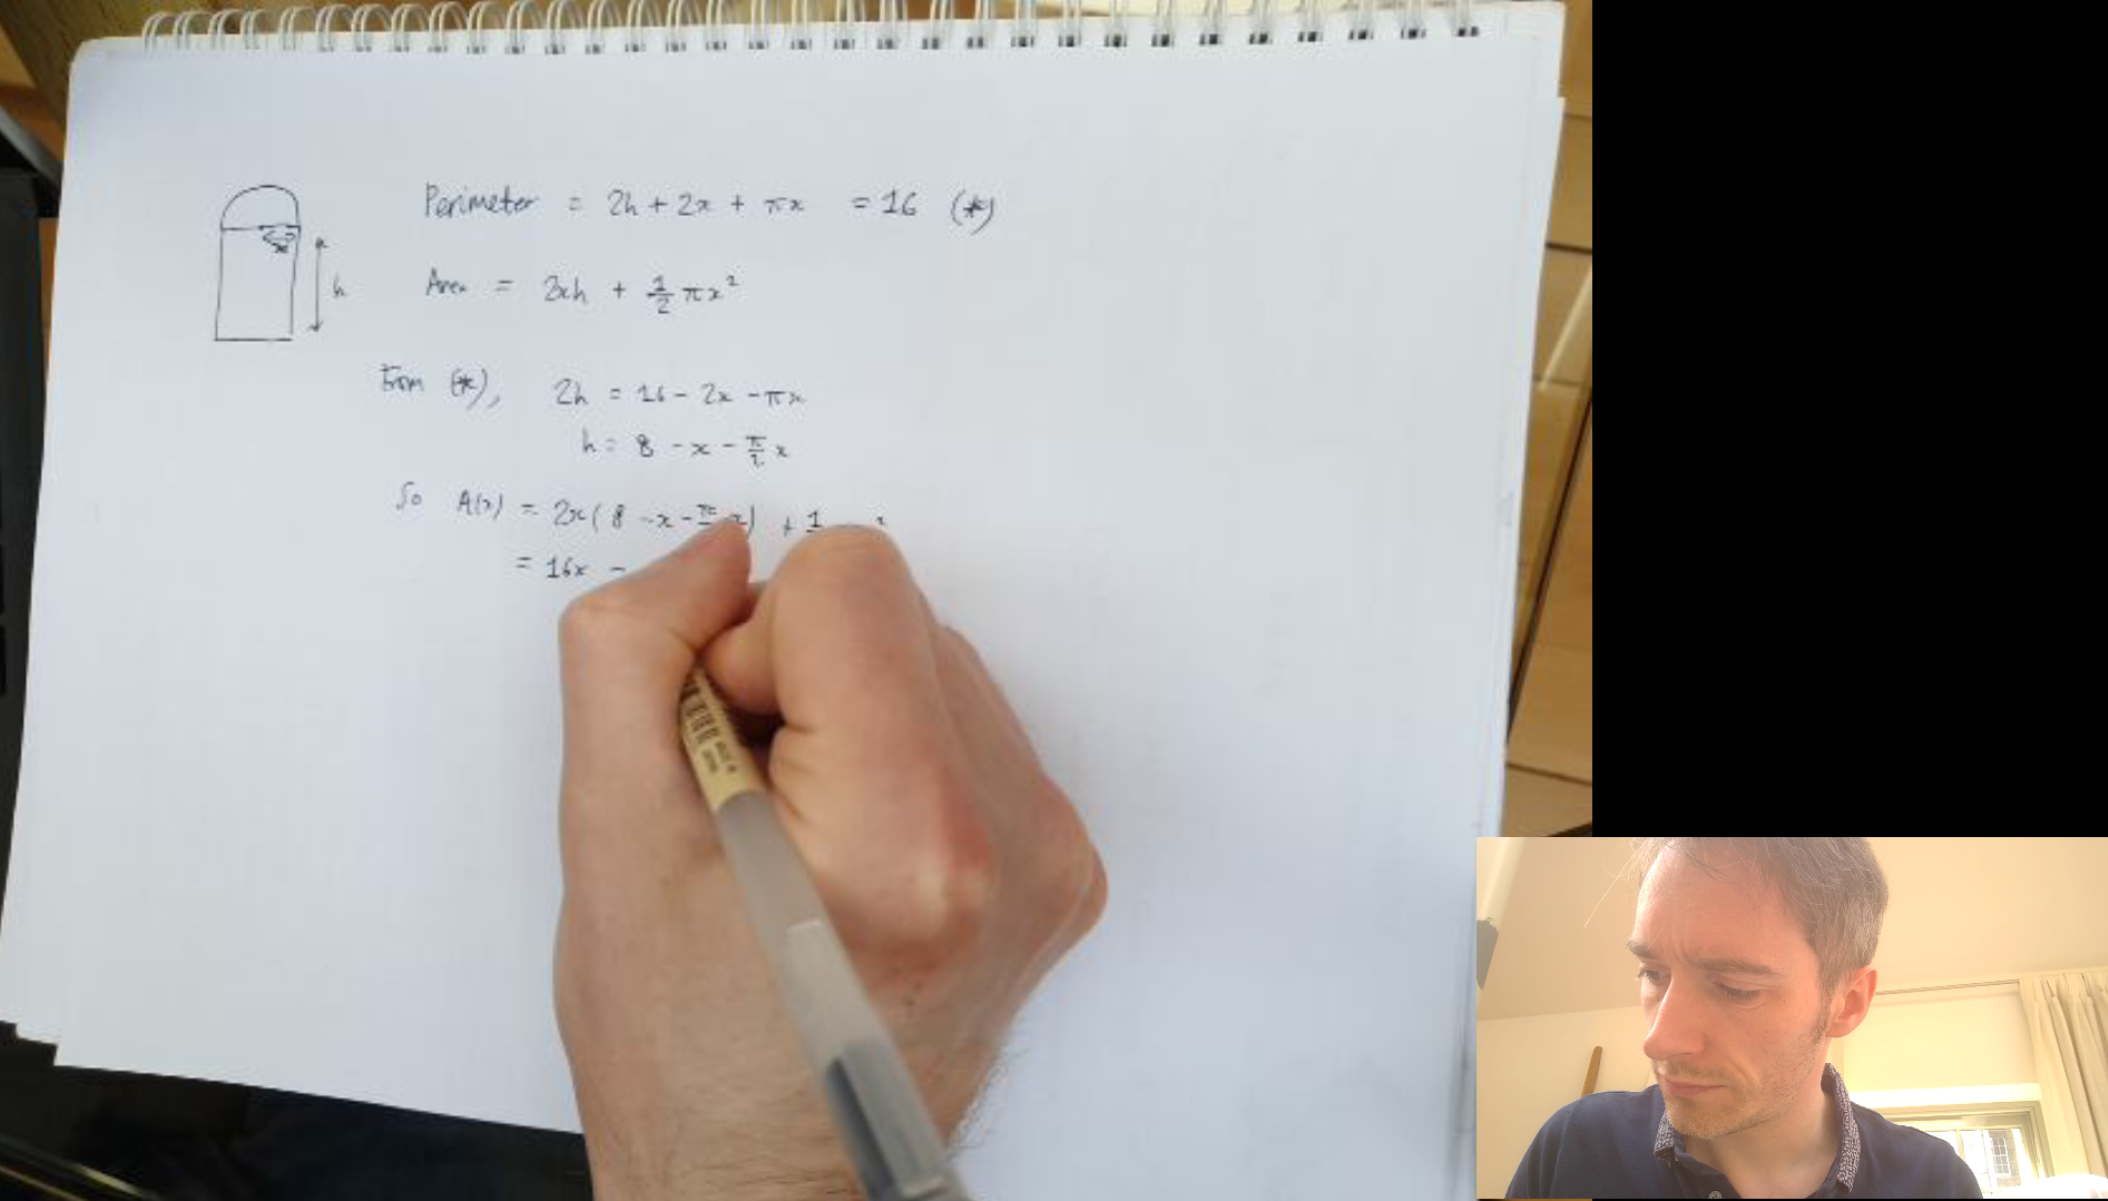
Here is what it looks like:
Final thoughts
During the session, it took colleagues about 20 minutes to get settled in to using the technology. I think that’s a one-off setup cost, that we would obviously need to sort out with all students as part of induction.
On balance, my rank order of recommendations would be:
- using the Teams app on the phone to join the call,
- using DroidCam or similar to let you switch between cameras on your laptop,
- the more complicated picture-in-picture setup.
Using the Teams app on your phone is the simplest technically – and once you are used to how it works, it’s quite straightforward.
This whole approach does have its downsides – in particular, it’s hard for participants to work collaboratively since it relies on one person doing the writing. I think there are ways around that, like having well-defined group roles like “scribe” which students would rotate through. But it would need some careful thought and lots of practice on our part – not least to make sure tutors are comfortable facilitating groups working in this way.
Even if we decide not to use this approach in our teaching, I’m confident that it would be useful for students who might want to work together outside of scheduled classes.
Further reading
- For a more high-tech solution, see Steve Rowett’s blog post for a recommended hardware doc cam.
- There’s been some further discussion in this twitter thread from Michael Seery.


One Reply to “Sharing mathematical writing – using video”