When students answer STACK questions, the Moodle quiz system stores lots of information about their work. How can we get access to the data to learn from it?
There is some advice about this in the STACK documentation, but here I thought I’d share my own experience of using the features.
STACK response analysis
The STACK plugin provides an overview of how students responded to the question. In particular, this shows
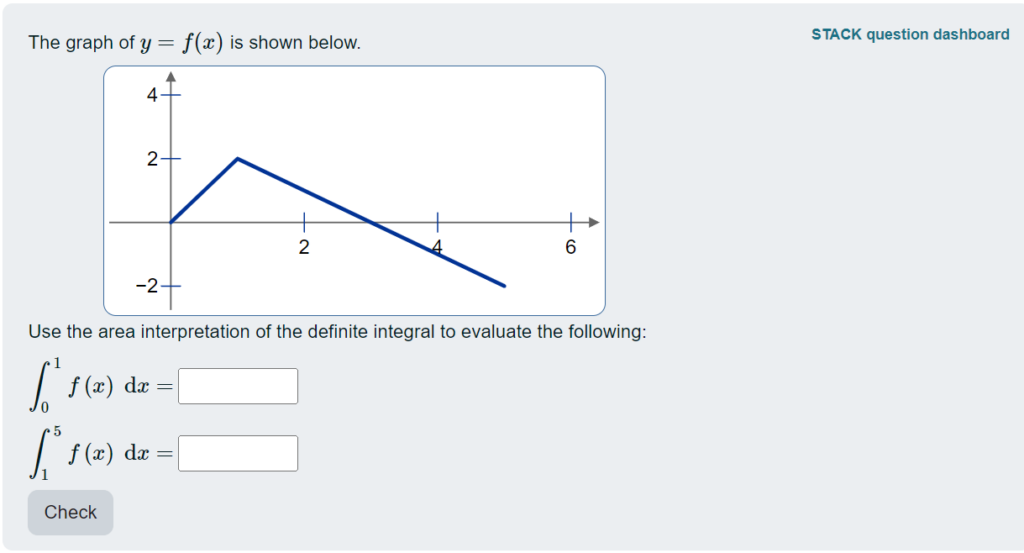
To get access to this report, as a teacher, click on the “STACK question dashboard” link at the top-right of the question:
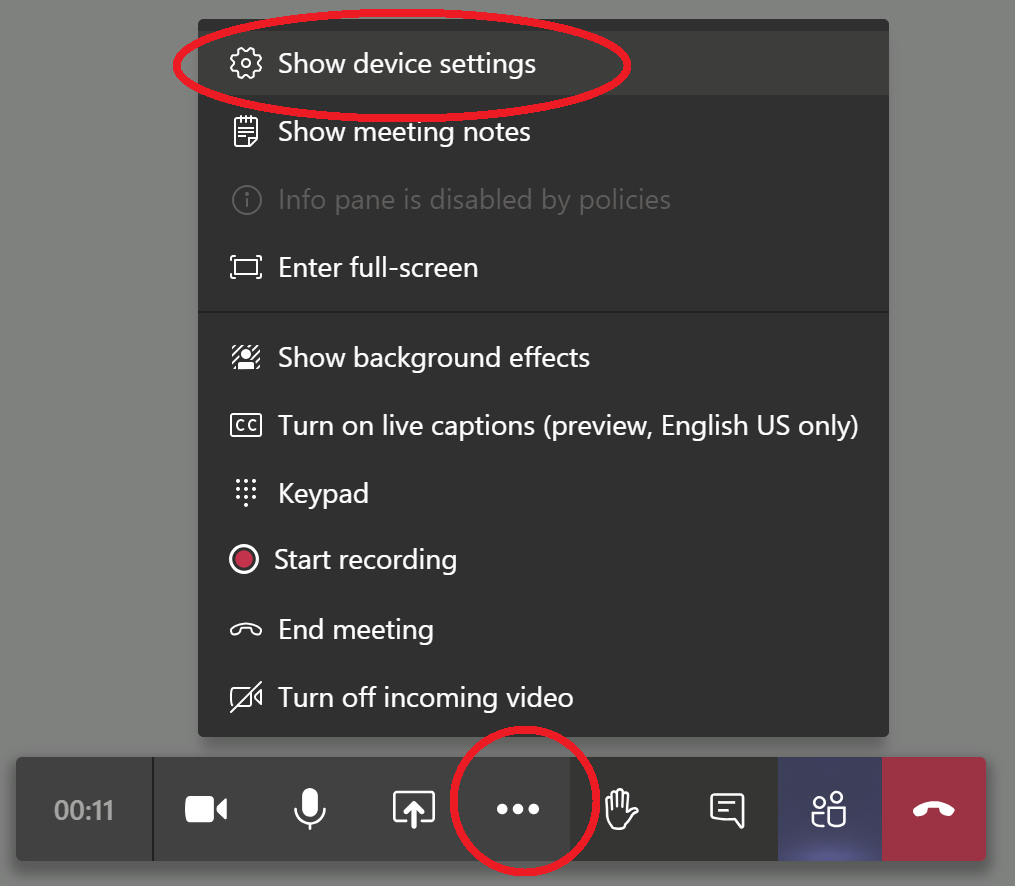
Then select the “Analyze responses” option from the top menu bar:

I find the first section of the response analysis page quite helpful to get an overview of how frequently students ended up at different parts of the potential response tree:
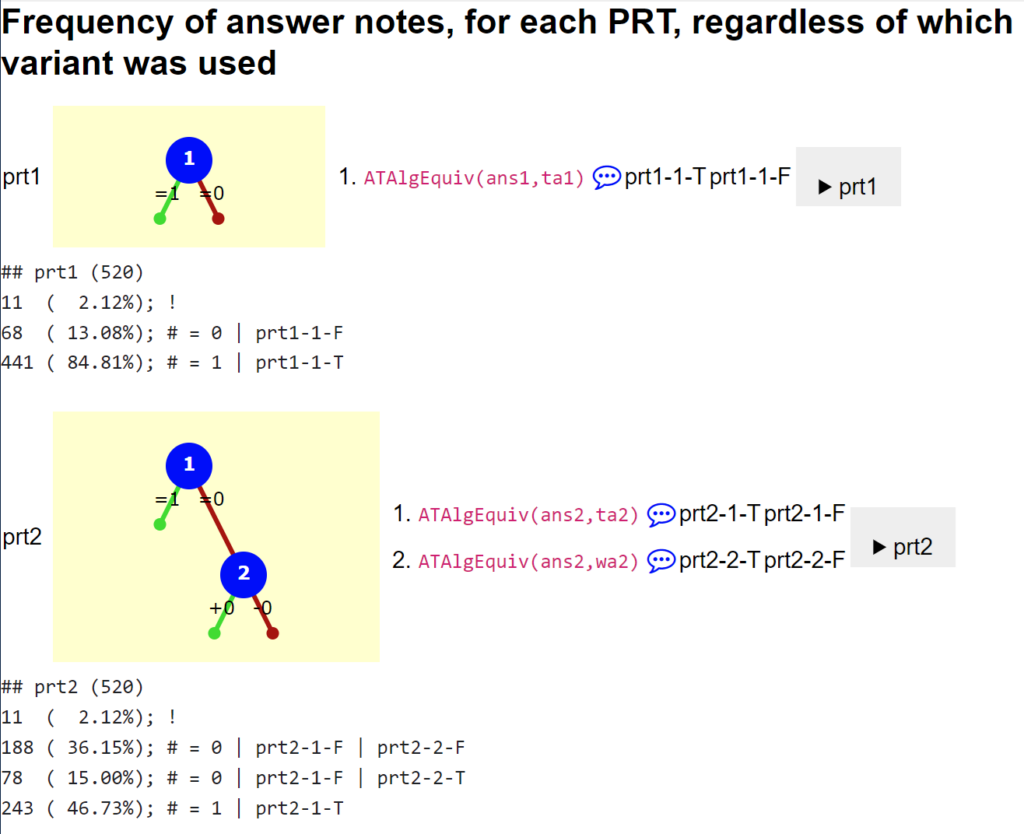
For instance, this shows that in prt2, 78 responses (which was 15% of the total) ended up at prt2-2-T, which was a node that I included to check for a specific error and to give feedback accordingly.
You can also see the raw data at the end of the page:

This packs in quite a lot of information! This example shows that variant number 2 was answered 75 times, and then we see the different responses ordered from most to least common – in particular, 31 of the responses were the correct answer (3/2 for ans1 and 4 for ans2 for this variant of the question).
I find it useful to use the browser’s “find text in page” search function, to look for instances of a particular PRT node that I’m interested in. If you want to do a more methodical analysis, you might want to copy/paste this data into a text file and do some processing offline.
It’s also worth checking in case there are particularly common incorrect responses that you hadn’t anticipated. Of course, it can be tricky to figure out from the final answers alone what error the students might have made! But if you can, then you may want to add a node to your PRT that gives feedback on this error. This paper gives a nice example of the process of updating a PRT based on the response data:
Alarfaj, M., & Sangwin, C. (2022). Updating STACK Potential Response Trees Based on Separated Concerns. International Journal of Emerging Technologies in Learning (iJET), 17(23), Article 23. https://doi.org/10.3991/ijet.v17i23.35929
Quiz results report
If the question attempts took place in a quiz, you can also see data about them from the quiz results report.
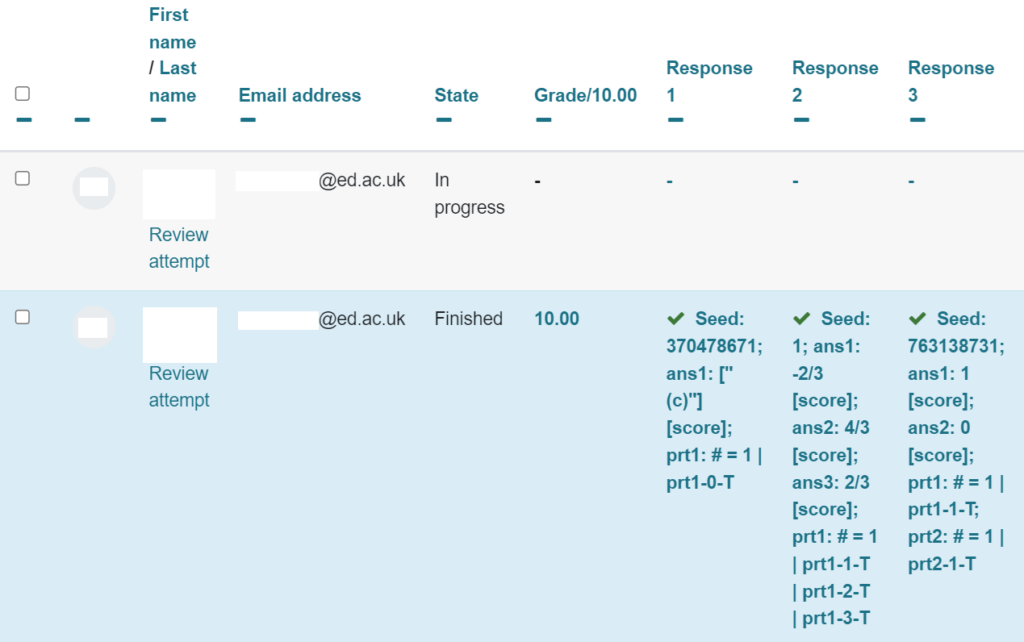
To see this, go to the quiz, then choose the Results tab. You’ll see a table with a row for each student, and a column for each question on the quiz. In the default “Grades” report, the entries in the table are the grades. You can also switch to the “Results” report (using the dropdown list just below the “Quiz / Settings / Questions / Results” tabs), and the entries in the table will show you the same sort of text as in the “raw data” shown above.
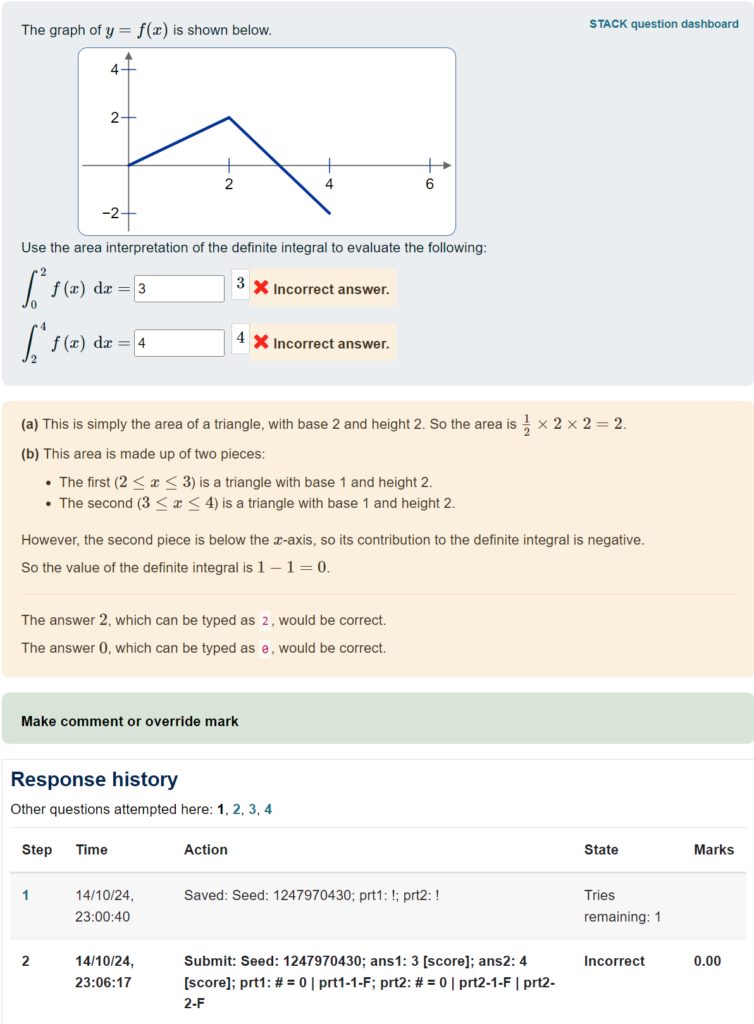
Here’s an example of what it looks like, where “Response 3” shows the same question as above:
You can download a spreadsheet of all this data for offline work. However, it’s important to note that this table only shows the student’s last attempt at the question.
You can also click on an individual entry, to see a preview of the question.
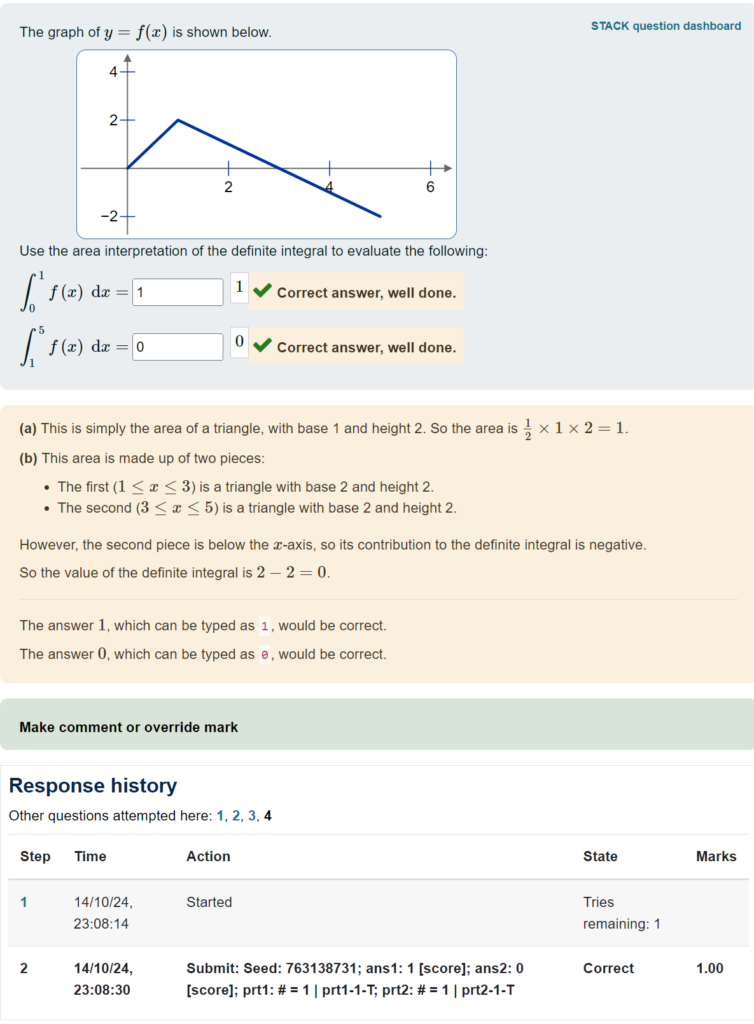
You can see at the bottom of the preview the same response summary, along with the time when the student submitted the answer.
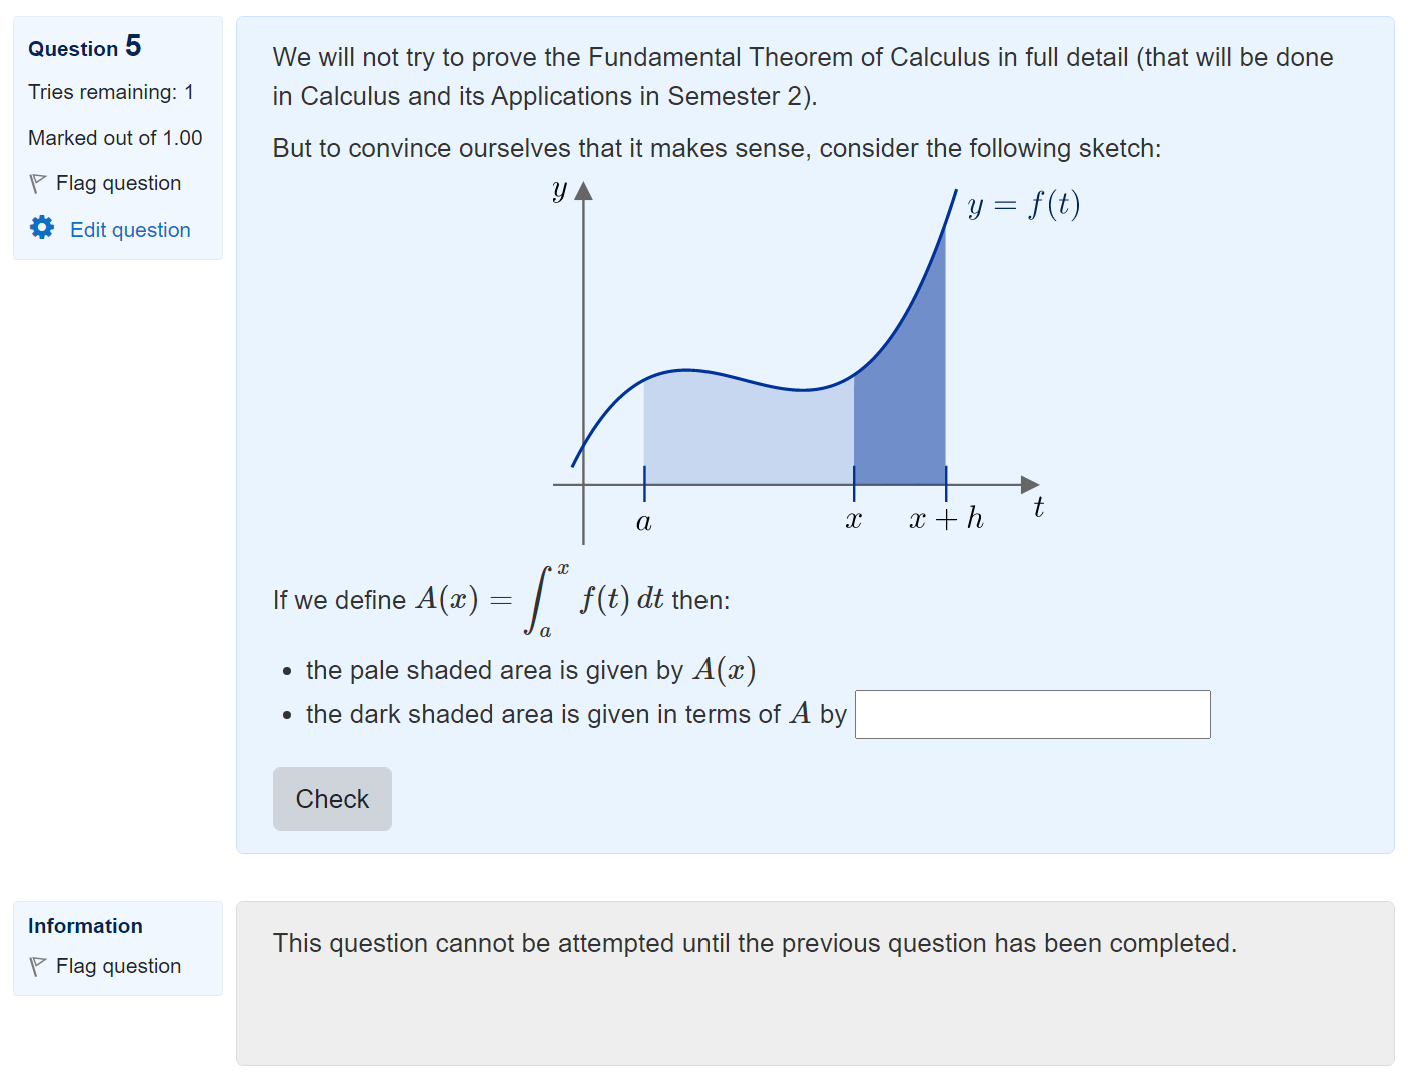
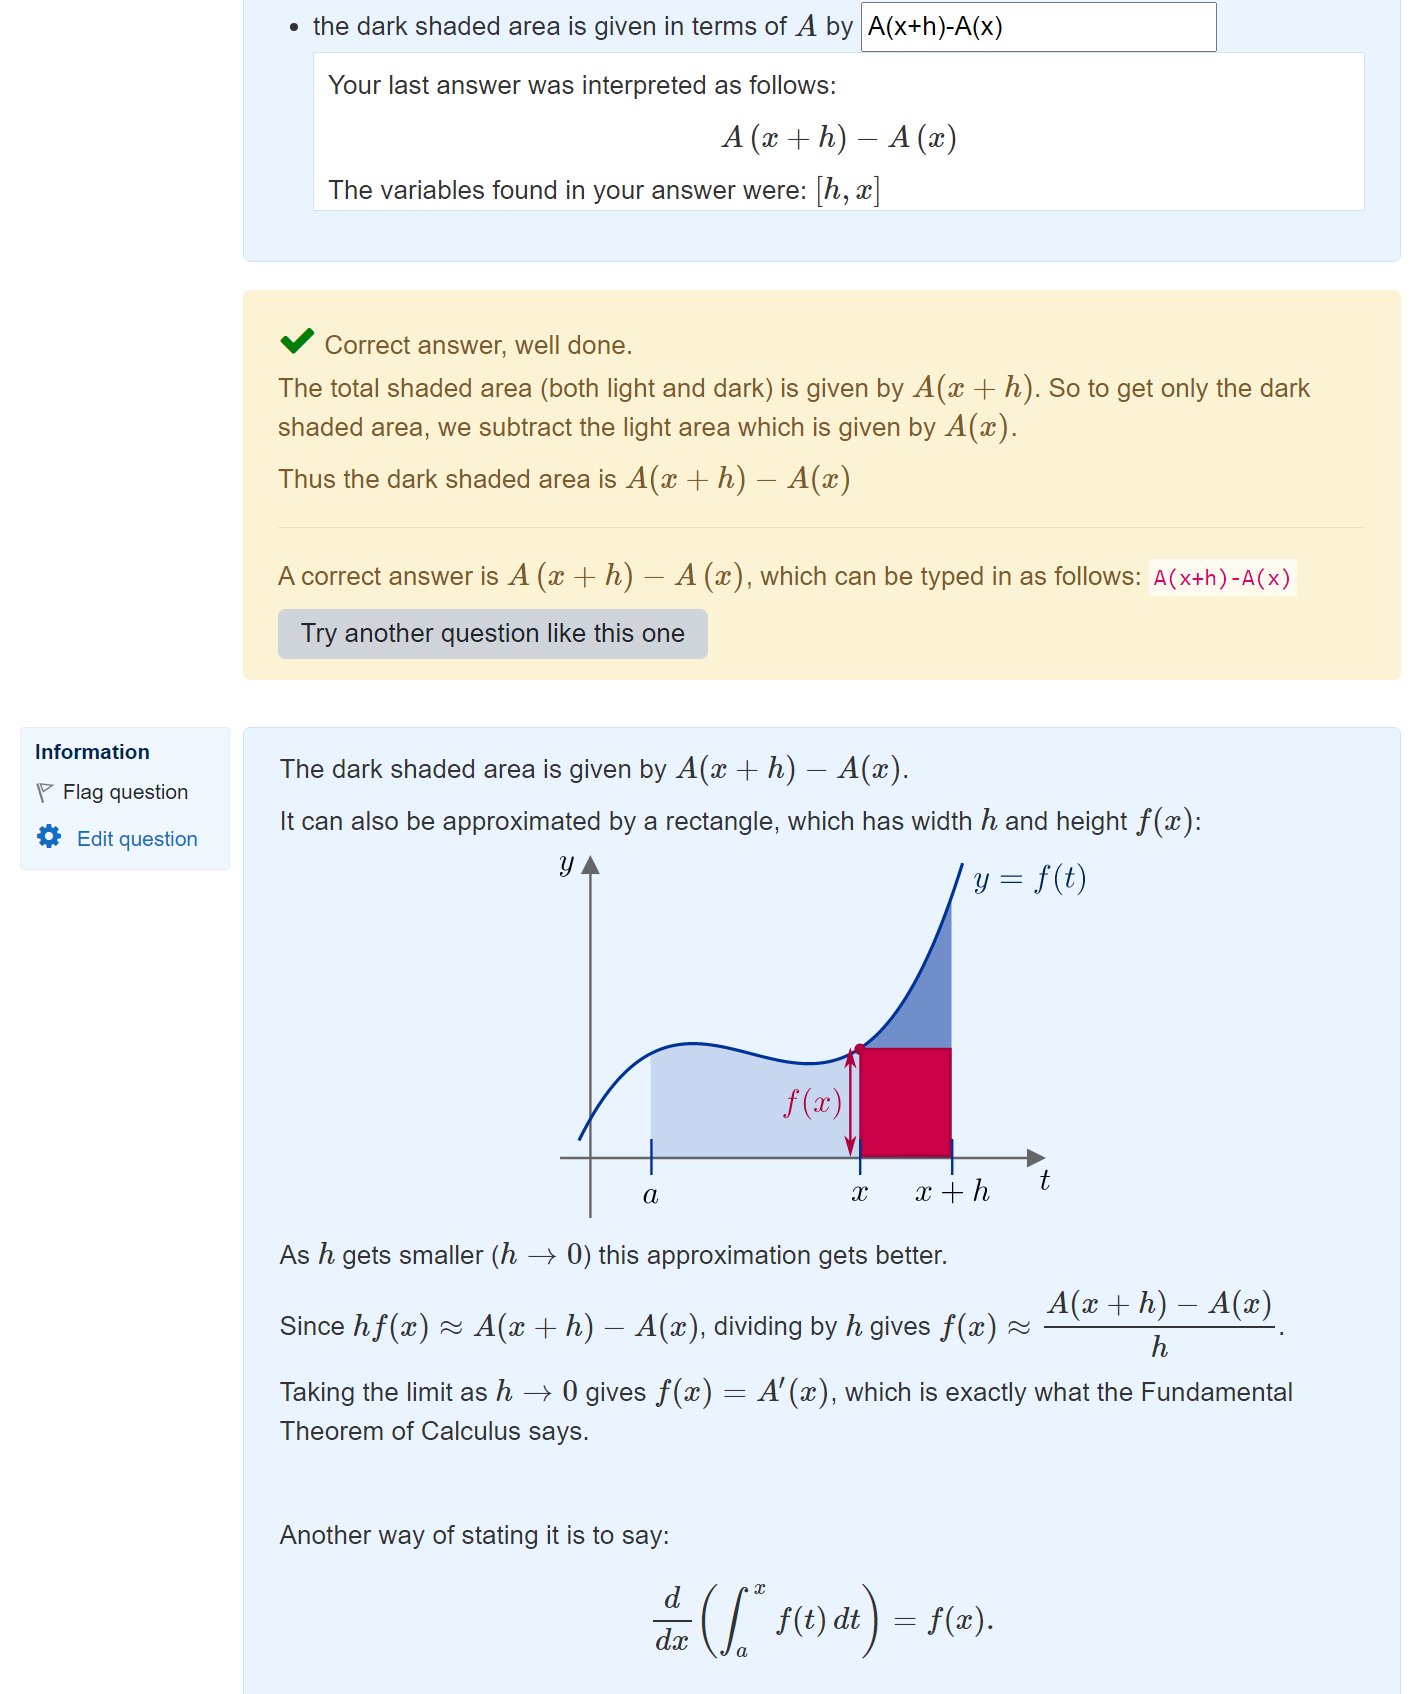
Importantly, this quiz used “interactive mode”, so students were able to “try another question like this”. You can see at the bottom there are links “1, 2, 3, 4” to the different attempts. Here is what the student’s first attempt looked like:
This lets you drill down to see how individual students worked through the questions. But it’s a very manual process…
Database query
It’s helpful to be able to be able to get access to all of the response data at once – particularly for research purposes. I first did this in a study involving hundreds of students, so it was important to be able to get all the data in an efficient way!
Since I had Moodle Administrator access, I was able to use the “Ad-hoc database queries” plugin. (If you want to use the plugin, you’ll either need Administrator access, or ask your administrator to install it and give you access to it.)
I put together an SQL query to extract all student attempts at questions in a given quiz:
When you run the query using the ad-hoc database queries plugin, you are prompted to enter the quiz id. The plugin then produces a report that you can download as a spreadsheet. Here is an excerpt of a few of the relevant columns, showing all four attempts by the student from the example above:
| questionid | variant | questionsummary | responsesummary | state | fraction | stepdate |
| 1617 | 1 | [2,3,4] and [2,-2] gives 2 and 0 | Seed: 1247970430; ans1: 3 [score]; ans2: 4 [score]; prt1: # = 0 | prt1-1-F; prt2: # = 0 | prt2-1-F | prt2-2-F | gradedwrong | 0 | 14/10/2024 23:06 |
| 1617 | 2 | [1,4,5] and [3,-1] gives 3/2 and 4 | Seed: 486334144; ans1: 3/2 [score]; ans2: 11/2 [score]; prt1: # = 1 | prt1-1-T; prt2: # = 0 | prt2-1-F | prt2-2-F | gradedpartial | 0.5 | 14/10/2024 23:06 |
| 1617 | 6 | [1,2,3] and [2,-2] gives 1 and 0 | Seed: 476689955; ans1: 1 [score]; ans2: -2 [score]; prt1: # = 1 | prt1-1-T; prt2: # = 0 | prt2-1-F | prt2-2-F | gradedpartial | 0.5 | 14/10/2024 23:07 |
| 1617 | 4 | [1,3,5] and [2,-2] gives 1 and 0 | Seed: 763138731; ans1: 1 [score]; ans2: 0 [score]; prt1: # = 1 | prt1-1-T; prt2: # = 1 | prt2-1-T | gradedright | 1 | 14/10/2024 23:08 |