Copying a previous lecture recording (Media Hopper Replay)

Our most common enquiry is about how to use a recording made in a previous year in Media Hopper Replay.

As an instructor, you can make a copy of a previous recording in Media Hopper Replay and then upload it to your personal library, thus allowing you to publish it to another linked course in Media Hopper Replay. This one page quick reference guide details the two step procedure to do this for each recording. View the PDF quick reference guide here.

This quick reference guide, along with many others, is available via the IS Media Hopper Replay quick reference guide website.

The IS Helpline supports Media Hopper Replay throughout the University. Contact details are listed here.


Adding a Zoom session to your Learn Ultra course

If your new teaching space does not support Media Hopper Replay (the UoE integrated lecture recording system), and / or if you will be delivering your class either from home or a non-supported room, we suggest the following approach:
  • Login to the Learn Ultra course for your class.
  • Browse to the area in the course where you want the link to appear.
  • Click the plus (+) sign to add content.

screen grab highlighting a plus symbol

  • Click Content Market

screen grab highlighting a menu choice called "content market"

  • Click the plus sign next to Zoom Virtual Classroom.

screen grab highlighting a small plus symbol

  • Now back on the main content list in Learn, select the link to the Zoom Virtual Classroom that you’ve just added and then “Schedule New Meeting”.
  • Give your session a sensible name. Enter the date / time of your session. Select “recurring session” for any regularly recurring classes (eg every Wednesday 10-11am).
  • We recommend *not* either selecting the ‘Waiting Room’ or “Only authenticated users can join meetings” options.

screen grab showing security options in Zoom meeting

  • Ensure you are happy with the remaining options and select ‘Save’.
  • Be sure to remember to make the tool visible to students!

screen grab highlighting "visible to students" menu item

  • You will not be able to test this link with Student Preview in Blackboard. As long as the link works with your instructor account and is not hidden from student view, then your students will be able to see it.
  • You now have your link set up in your course. Let your students know about it in advance and direct them there to access your online class.
  • The passcode for Zoom meetings does not show to students. This should be shared separately.
  • Note: don’t forget to record your session!*

screen grab showing "record to the cloud" option
*The recordings of Zoom sessions set up through a Learn page can be saved to your Media Hopper Replay (lecture recording) library and/or to the course lecture recording area. To find out more about how to enable, this please see IS’s Using Zoom with Media Hopper Replay.


Adding an LTI link to Learn Ultra

Many of the learning technologies we use for teaching in the School of Informatics are integrated into Learn via LTI links, which ensure that user information (e.g. name, email address, and student number) are fed from Learn through to the other tool. Examples of these are Gradescope, Piazza, Zoom, Media Hopper Create and Replay, and CodeGrade. This also means that information can be fed back from these tools to Learn, e.g. marks in Gradescope added to Learn’s Gradebook. Many of these tools, including Library Resources, Media Hopper Replay (aka Lecture Recordings), and Piazza are included on all Informatics courses automatically through our School Learn template.

The process for adding these tools to a Learn page for students to access has changed in Ultra. Please follow the instructions below on how to add a link to these tools on a course Learn page for students and other staff enrolled on the Learn course to access. (Click on any of the screenshots below to open them full size.)

  1. Navigate to the place in Learn that you want to add the link (this might be within a folder, e.g. for an assessment submission) and click on the plus (+) sign where you would like to add it on the Course Content page. You can see that the Gradescope link has already been added below using these steps and, for this demo, we will be adding a link to Piazza below it.
    Screenshot showing how to add an item within a Learn Ultra page
  2. From the pop-up list of options that opens, select “Content Market”.
  3. When the Content Market screen opens, navigate to find the tool you need. Do not click on the name of the tool, rather select the little plus (+) sign icon in the bottom right-hand corner for that tool, as shown below for Piazza QA.
    Screenshot showing the Content Market in Learn Ultra
  4. You will then be taken back to the main course Learn page, where you can see that the Piazza QA tool has been added, as you can see below. You can use the three dot icon (…) to open the menu for the item and edit its name and/or description. Once you are ready for students to access it, make it visible to them.
    Screenshot showing Piazza link on a Learn Ultra page


Informatics Teaching Festival 2021: Sharing experience and planning for online and hybrid teaching

The Informatics Teaching Festival is back for a second consecutive year. 

 Join us for the opportunity to:

  • hear interesting presentations around lessons learned in the past year and good practice in online/hybrid teaching from colleagues and inspiring speakers from other schools
  • listen to the feedback provided by student representatives regarding their experience with studying in an online/hybrid context
  • listen to the feedback provided by teaching support and administrative staff as to their experience with teaching and administration this past year
  • learn about new approaches to teaching and educational software
  • share your own experience with teaching delivery, student support and course administration during workshops and informal GatherTown meetings
  • reflect and come up with ideas together for improving our delivery of online and hybrid teaching, both as a school and in our different courses.

If you’d like to attend any of the following sessions, and are not a member of the School of Informatics, please register your interest here, and a Collaborate link will be emailed to you in advance of the session(s).


Schedule
Topic and links to recordings Date/Time Resources
Opening/Welcome Monday 7 June, 10-10.30am Björn Franke
Keynote: Experience with online/hybrid teaching in 2 other schools Monday 7 June, 10.30-11.30am Charlotte Desvages

Brian Rabern

Coffee break & GatherTown meet and greet Monday 7 June, 11.30am-12pm n/a
Student experience with online/hybrid teaching in 2020-21; Suggestions for the future Monday 7 June, 12-1pm n/a
Personal Tutoring and Student Support: Sharing best practice and providing views on upcoming changes Monday 7 June, 2-3pm n/a
Lectures in an online/hybrid context Tuesday 8 June, 10-11.15am Iain Murray

Mary Cryan

Fiona McNeill

Coffee break & GatherTown meet and greet Tuesday 8 June, 11.15-11.45am n/a
Teaching support staff experience with online/hybrid teaching in 2020-21; Suggestions for the future Tuesday 8 June, 11.45am-12.45pm n/a
Practical sessions (tutorials, labs, workshops, etc.) in an online/hybrid context Wednesday 9 June, 10-11.15am Fiona McNeill

Pawel Orzechowski

Tim Drysdale

Sharon Goldwater

Coffee break & GatherTown meet and greet Wednesday 9 June, 11.15-11.45am n/a
Case study: practical sessions in IRR and IPP Wednesday 9 June, 11.45am-12.45pm IRR/IPP
Case study: Teaching Ethics in Computing Wednesday 9 June, 3-4pm David Sterratt

email James for Shannon’s paper

Assignments in an online/hybrid context Thursday 10 June, 10-11.15am Padlet
Coffee break & GatherTown meet and greet Thursday 10 June, 11.15-11.45am n/a
Exams in an online/hybrid teaching context Thursday 10 June, 11.45am-12.45pm Padlet
Learn Foundations: UX (Emma Horrell) Thursday 10 June, 2-3pm Emma Horrell
Equality and Inclusion (Decolonizing the curriculum and Congressive Teaching methods)
Friday 11 June, 10-11.15am Decolonizing the curriculum
Coffee break & GatherTown meet and greet Friday 11 June, 11.15-11.45am n/a
Final reflection, Informatics Awards Ceremony Friday 11 June, 12-1pm will be uploaded after the session


Publishing videos to a Media Hopper Create channel.

How to publish a video

To upload a video, e.g. from another university source such as Blackboard Collaborate, click Add New on media.ed.ac.uk, then click Media Upload to begin.


When uploading a piece of media to Media Hopper Create, certain fields must be filled in order for the video to be published to a course channel. The required fields to publish can be filled in while uploading the content, or after uploading the content by finding the video and clicking Actions>Edit>Details and filling in the fields below. In order to publish the media fill out:

Name (The title of the video that will be displayed)

Description (Will be displayed underneath the video)

Tags (at least one tag word is required for the video to be published and help people find it easier)

License Type (This is the copyright license to be applied to the content. I normally select All Rights Reserved The University of Edinburgh from the dropdown menu but this is at the content creator’s discretion.)

Course code, Publisher, Language and Date Created do not need to be filled in order to publish the video but can be useful to fill in to make the video easier to retrieve later on. A publishing schedule can also be set so the media can only be viewed for a certain period of time (useful for perhaps making a video only available during one semester).

– You now need to agree to request automatic subtitles before you can publish your content.

NOTE: Selecting this box does NOT enable auto-captioning, this is done in the next step.

screen shot showing where to agree to automatic subtitles

After the details are filled in, on the video uploading page (or on the video editing page under Publish instead of Details), set the Publishing Status to Published (if Published is not selectable, there are missing video details that still need to be filled in). A drop down menu will appear giving the option to Publish in Category or Publish in Channel. Select Publish in Channel and select a channel you manage to publish to the channel.


Sharing OneNote in Virtual Classroom

In the recent Exploring Whiteboard Approaches blog post we shared different ways of presenting mathematical writing using whiteboards we touched on how OneNote might be used as a tool for demonstrating handwritten content as well as a collaborative space for mathematical note taking.

To expand how how to use this approach we have added some further explanation below:

Writing Maths with OneNote

OneNote is an ideal note-taking tool that allows for simple hand-writing tools to be used, but also have a convert to maths function available.

Writing with the ink and creating a conversion is relatively straight-forward, by using the “Fix it” option you can quickly sub-select components of your handwriting to find alternative symbols used in your maths writing.

This will need to be tried with your handwriting and device to test for suitability.

Use in Tutorial Session

To broadcast live annotations I would suggest the following approach if you have a desktop/laptop with stylus/tablet setup.

  1. Use desktop/laptop for Blackboard Collaborate, and choose to share your screen
  2. Use the tablet input to write your maths on OneNote
  3. Your annotations will appear on the shared screen after a short delay

Potential Issues

Heather Yorston has been using a similar approach and gave a short overview of this at a recent Teaching Hour with a session titled, “How do I teach Maths online?”.


Exploring Whiteboard Approaches

The questions around whiteboard approaches and mathematical writing have come up numerous time throughout the summer. There has been some really interesting discussion within the School of Informatics as well as more widely within the College.

Unsurprisingly, there is no single solution that solves all of the scenarios raised by colleagues. A good starting point is to consider the ways that you might want to use a whiteboard – we have summarised some solutions to the following approaches below:

  • Live demonstration to students
  • Recorded demonstration to students
  • Collaborative whiteboard tutorial

The following approaches are suggestions and not the only solution. You can check out further suggestions and alternatives via the Hybrid Teaching Technology and Tools Finder.

Live demonstration to students

If you are delivering teaching via a video conferencing tool / virtual classroom you may wish to demonstrate handwritten content that you would traditionally use a whiteboard for within a classroom.

First consider if you prefer to work with digital ink or using a standard pen and paper approach.

Digital Ink

Although writing with a mouse or trackpad is possible it is often an unnatural feeling for many people, with many preferring to use a stylus attached to a computer or used directly on a tablet device.

Both Collaborate and Teams have a whiteboard that offer some basic writing and annotation tools for whiteboards. These tools are often sufficient for quick demonstrations, but do have some limitations. It is important to note that any content created in the Blackboard whiteboard will be removed at the end of the session so a screenshot should be taken if you would like a digital copy.

An alternative tool is to use OneNote, you can broadcast your screen when writing in OneNote, but there are two additional advantages in the way that the content can be shared to students, and the writing can be converted to Math writing.

A description for how to broadcast your OneNote in a Virtual Classroom can be found in this additional post.

Pen & Paper

It may be that the easiest approach is to use pen and paper, and carefully positioning a camera or additional video-source you can broadcast your paper to the room.

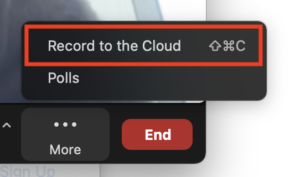
You can choose the video source that you wish to share in both Collaborate and Zoom, additionally you can choose to join a meeting from an additional device such as a smart phone to use this as your additional camera source.

With a small tripod and a well-lit workspace you can share your handwritten work to the rest of the virtual classroom.

Recorded demonstration to students

You may prefer to record your demonstration as a standalone resource. This can often make it easier to focus on the task without having to consider other aspects of the technology compared to running a live demo. Another benefit of pre-recording is that the resource can be used on its own in addition to any other teaching activity.

Screen Recording or Recorded Meeting

As above, you can record your demonstration using the same tools and approaches you would as if you were running a live session. You can record a session (without other participants) in Collaborate or Teams.

How to record and view your iPad screen on desktop

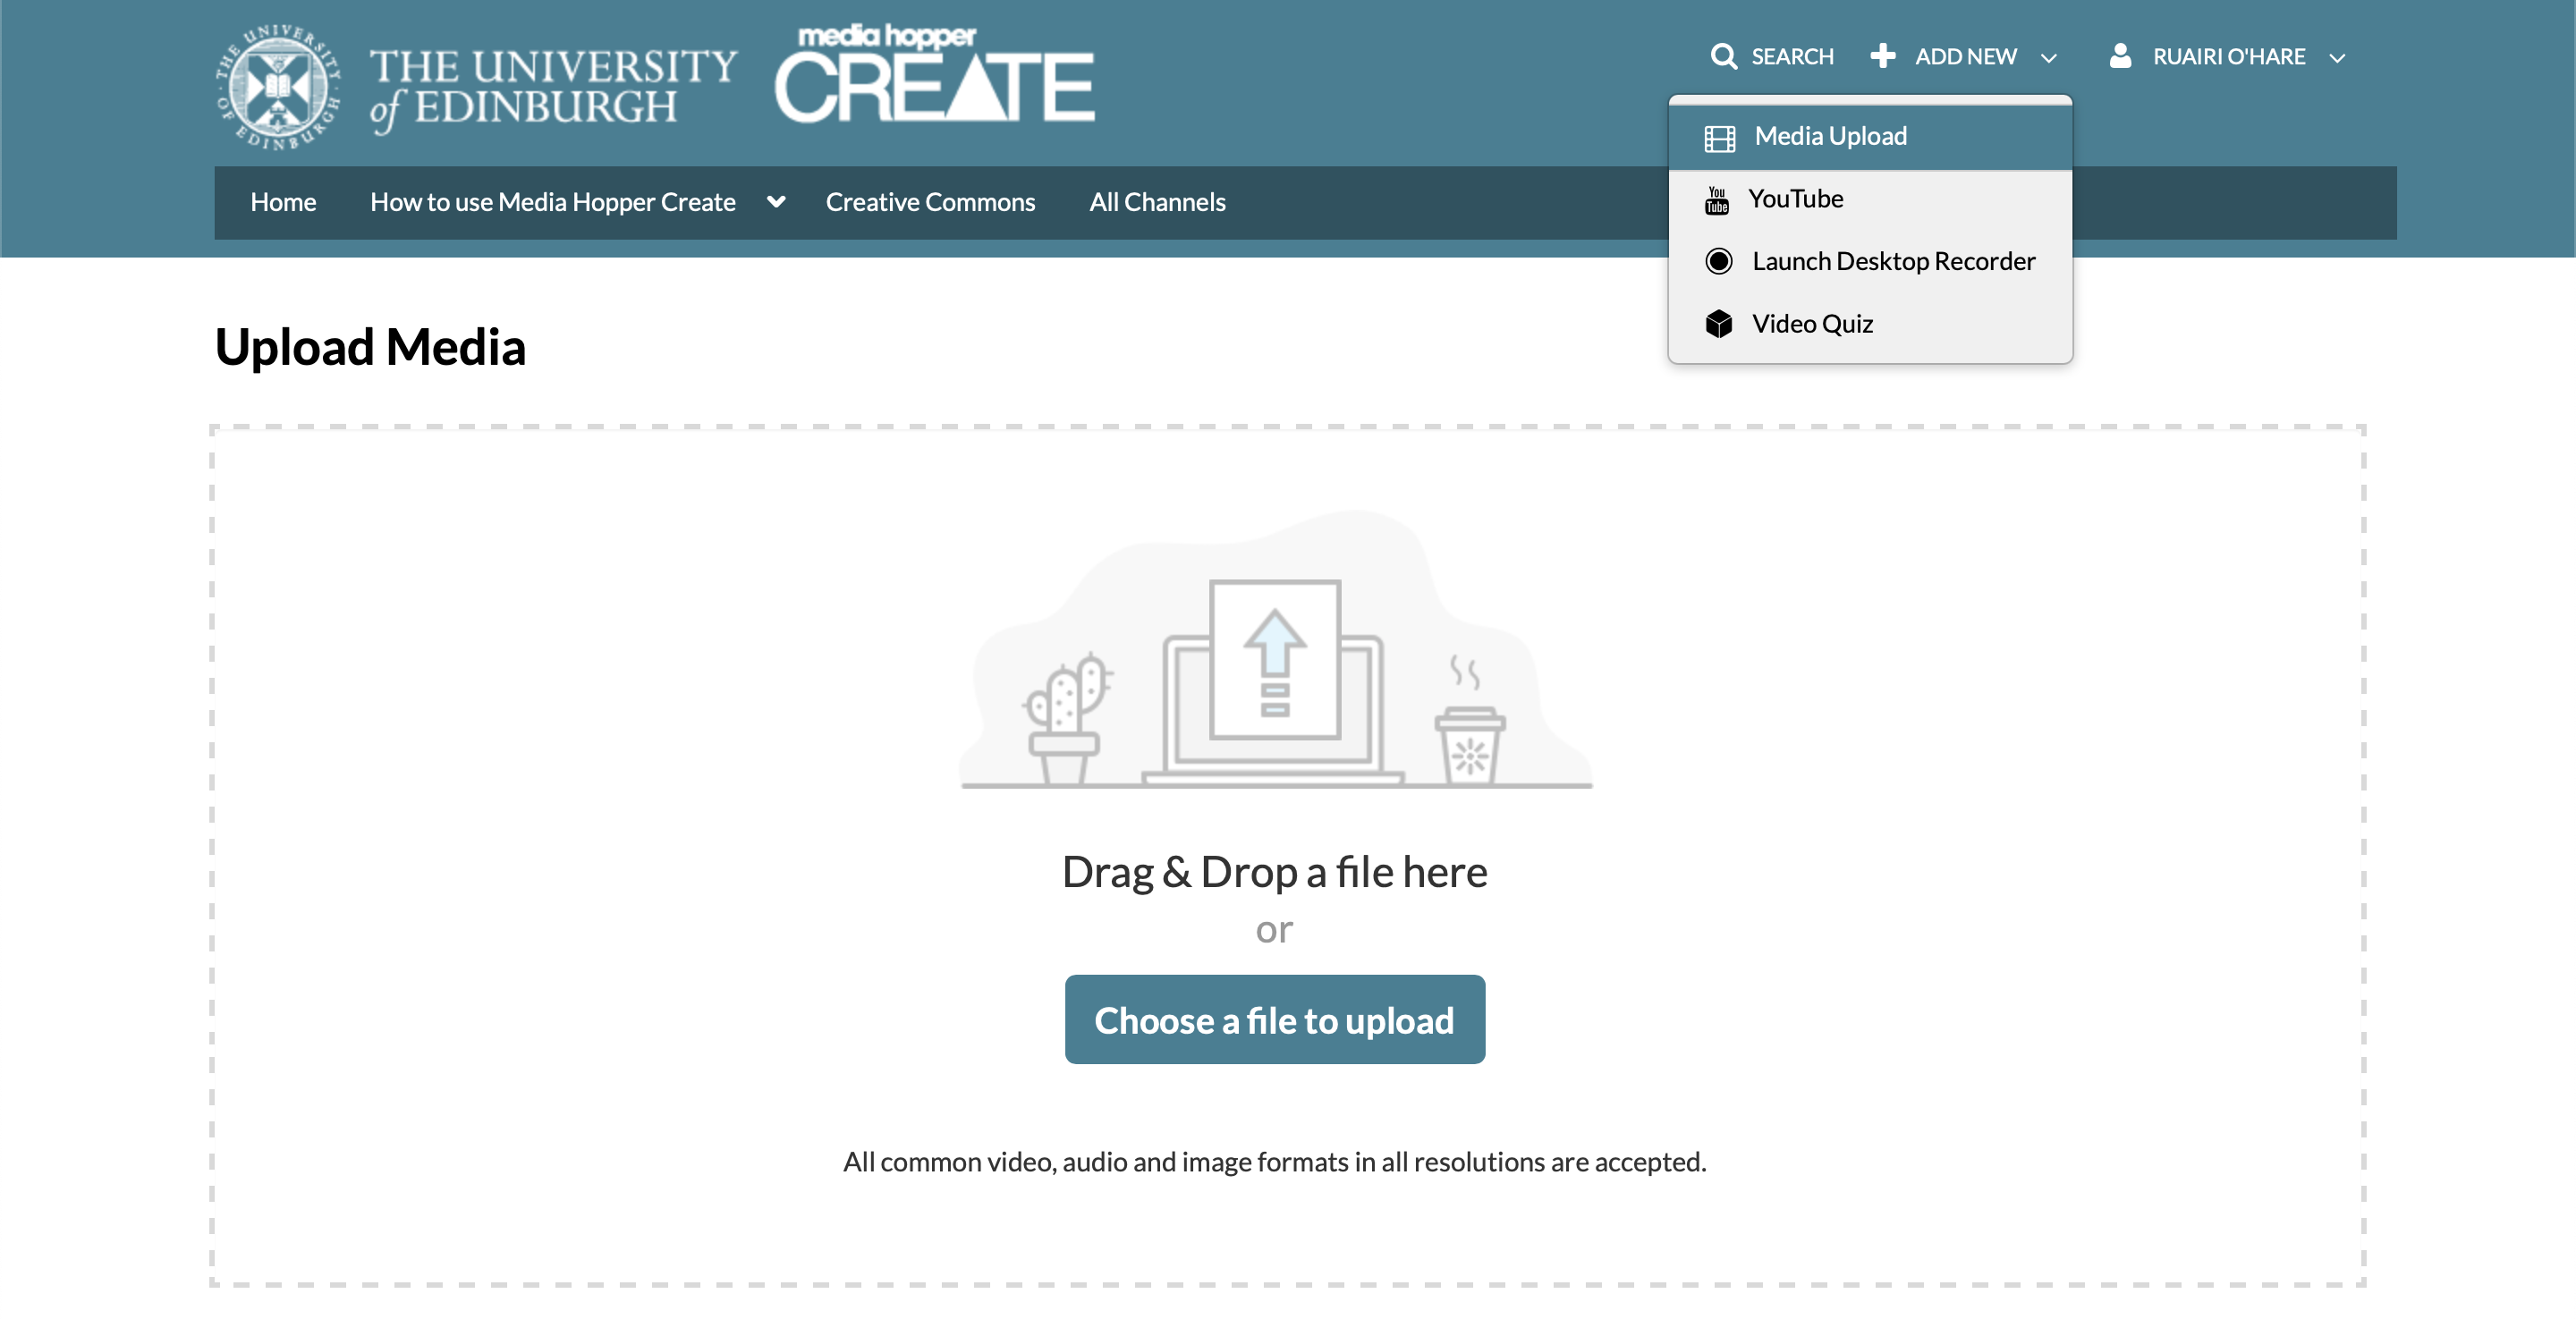
You could also use Media Hopper Create to record your screen of any demonstration taking place on your screen.

Camera and Tripod

Using a camera or smartphone you could record a demonstration on whiteboard, or pen and paper.

Point the camera to a piece of paper at a reasonable distance to allow space for handwriting, but still easily legible.

Notes & Tips

  • Beware of autofocus trying to switch between focus of your hand and the paper, this should be relatively minor, and most phone apps allow a fixed focus if required.
  • Use a well lit room, but watch out for glare or excessive shadows
  • Should be relatively easy to colour correct the footage to white by doing a white-balance on the piece of paper (post production).

George Kinnear in the School of Mathematics has written a blog describing how he uses video to share mathematical writing giving a demo of how to do this using Teams.

On Campus Resources

Most teaching rooms have a high quality visualiser that can be used to broadcast/record paper and pen.

The University has also invested in a number of media recording pop-up studios which are equipped with the equipment that you will need for a high quality recording. Some locations have the option of a “clear board” to allow you to write on a transparent board allowing you and your writing to be visible on screen at the same time.

The studio spaces are bookable in advance and are being supported within current health and safety guidance. For further Information please consult the dedicated Media studios for hybrid teaching web pages.

Collaborative whiteboard tutorial

Using a whiteboard in a Collaborative tutorial it is a little harder to pinpoint a single solution. OneNote is clearly a useful tool as it has collaboration at its core in addition to the multiple handwriting tools.

It is possible to create a Class OneNote document and allow people to work on this as they wish. You could even distribute some proforma templates pages if there are specific tasks or formats you would like the students to follow.

The School of Mathematics recently held a workshop on a variety of approaches to collaborative working with whiteboards. This workshop has been written as a short report investigating how to “Share mathematical work synchronously”. In the report they look at filming their workspace, using an online whiteboard such as notebookcast.com, working on a collaborative document like OneNote or using LaTex in an Overleaf document.

Variety of Tools

As you will have seen there are a variety of approaches to tackle this scenario. The ILTS team are happy to advise if you have a specific use-case that you are considering. I’ve listed tools and resources mentioned in this post as well as some alternatives. Feel free to add more to the list using the comments below.

Hybrid Teaching Technology and Tools Finder

  • OneNote
  • Blackboard Collaborate
  • Teams
  • Microsoft Whiteboard

Other tools mentioned by colleagues


Kaltura Capture Video Tutorial – Allowing End User To Control View Of Multiple Video Streams

  1. Open the KalturaCapture App.
  2. Check the screen feed, camera feed and audio feeds are on.
  3. Hit Record.
  4. When you want to finish recording, you can pause or stop the recording.
  5. Give the video a title, description and tags (optional) and click upload.
  6. When the video is uploaded, a link to the video on media.ed.ac.uk will appear. Click this link to check your video.\
  7. On Media Hopper Create, if your video had a screen and camera stream, both will be automatically controllable by the end user allowing for full screen of either of the videos and multiple split screen views.


Sharing mathematical writing – using video

Dr George Kinnear from the School of Informatics has written an interesting blog post on his experience of sharing mathematical writing using video. It can be found here: https://blogs.ed.ac.uk/georgekinnear/2020/05/16/sharing-mathematical-writing-using-video/


Teaching and assessing online

This is a reminder of the tools and services available to you in the event of disruption to campus based activities, such as the current COVID-19 epidemic.

If your *students* can’t access campus
  • If students can’t come to lectures, they can access the lecture recordings via the Lecture Recordings link in Learn. Please note: this is only for those lectures delivered in a centrally supported room.
  • Any room which supports lecture recording, also supports Live Streaming. Please get in touch if you would like to enable live streaming of your lectures.
  • For those courses requiring to use submit, students can download and install Virtual DICE or remote access to normal DICE machines via XRDP or SSH. Please log a call with computing help for further information.
  • For those courses which don’t require to use submit, remember that Learn has an assignment tool which will more than likely meet your needs. The Informatics Learning Technology Service can help with this – please get in touch.
If *you* can’t access campus
  • The same product used for lecture recording at scale across campus (Echo360) has an application users can download from the website. Please note: the application is only available for Mac and PC. If you require a loan device, please get in touch.
  • The Echo360 application – called Universal Capture – allows you to capture audio, screen + video. You can then publish direct to your course via the recording interface. This means students will access your recording in the same place as recordings of campus based lectures. See the bottom of the page for links to video and written guidance.
  • The Echo360 player (the interface students use to watch lecture recordings) also has a nice feature where they can ask questions at specific points in the presentation. The lecturer can then review these and answer questions in the appropriate context. See Media Hopper Replay: Q&A discussions, flagging confusing content, and bookmarking for further guidance.
  • You may want to deliver smaller, tutorial sized classes via Blackboard Collaborate. Collaborate sessions can be scheduled via MyEd or Learn. All sessions run in the browser (Chrome is recommended) and so there’s no need to worry about user devices.
Further Help

In addition to local help via the Informatics Learning Technology service, Blackboard are running sessions on Tuesday 10 March called “Preparing to scale online teaching and learning during Coronavirus”. This webinar is for anyone involved in administering or delivering teaching and learning, including but not limited to system administrators, eLearning technologists, IT managers, Heads of Teaching and Learning, faculty and academic staff. Register here: http://bit.ly/COVID-19EURUG


Media Hopper Replay’s universal capture tool – video instructions
Media Hopper Replay’s Universal Capture tool – Mac

http://www.docs.is.ed.ac.uk/skills/documents/Lecture%20Recording/Guides/3873_v2.pdf

Media Hopper Replay’s Universal Capture tool – Windows

http://www.docs.is.ed.ac.uk/skills/documents/Lecture%20Recording/Guides/3872_v2.pdf

Media Hopper Replay: Q&A Discussions, flagging confusing content and bookmarking

http://www.docs.is.ed.ac.uk/skills/documents/Lecture%20Recording/Guides/3887.pdf

An Instructor’s guide to Media Hopper Replay: Viewing course and student analytics

https://media.ed.ac.uk/media/An+Instructor%27s+guide+to+Media+Hopper+ReplayA+Viewing+course+and+student+analytics/1_rs96etgi