Carve & Feel: Emotional Trace Expression Kit

Summary
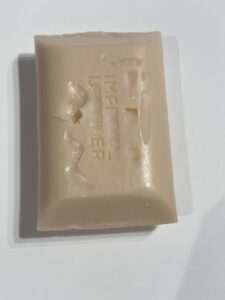
Welcome to Carve · Feel – The Emotional Traces Toolkit. Here the focus is on your actions and sensations, not technique or scoring: every mark from your hand—hesitant, forceful, messy, or gentle—is welcome. You don’t need any artistic training; this online toolkit simply invites you to notice “how I just made that cut” and carve out a small space for yourself. Over about twenty minutes, you’ll use carving, scratching, and pressing to let your current feelings settle onto a surface such as soap, rubber, cardboard, or wood, without aiming for a “pretty” result. The kit provides clear instructions, audio guidance, tool tutorials, openly licensed reference images, process diagrams, and finished examples, so if inspiration doesn’t come, you can simply start from these. If sharp tools feel inconvenient or unsafe, you can use blunt pencils, keys, or other non-cutting tools for the entire process.
Aim
· The purpose of this exercise is to help you transform inarticulate emotions into visible traces within a limited timeframe, making the act of ‘carving’ a safe, gentle outlet rather than a source of pressure.
· We encourage you to focus on the process itself: your breathing, the application of force, the pauses, and the feedback from the materials – rather than whether the piece looks ‘pretty’.
· We also encourage you to cultivate a little more self-compassion amidst uneven, asymmetrical, or even seemingly “flawed” lines, recognising that these marks too can be embraced. Simultaneously, as an open-licensed online toolkit, it invites you and others to revisit, adapt, and share it, allowing this small carving practice to continue unfolding across different times, screens, and communities.
Steps (Total duration: approximately 20 minutes)
Step 1 · Select your preferred method (approx. 1 minute)
First, choose the approach that suits you best: you may click the audio to be guided step by step.
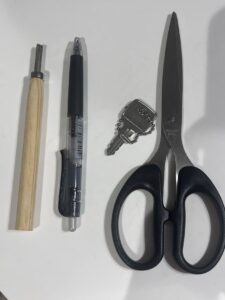
If this is your first time using cutting tools, please watch the safety video in full before returning here; Alternatively, you may opt to complete the entire exercise using a blunt pencil, key, or other non-cutting tools.
· Knife Safety Tutorial: https://www.youtube.com/watch?v=FR6Z1C3z3EY (watch 0:33–1:10)
· Toolkit audio:
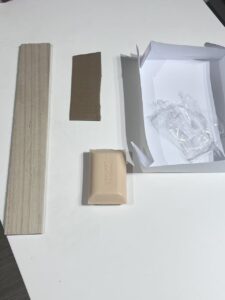
Step 2 · Prepare your materials and a ‘home’ for the scraps (approx. 2 minutes)
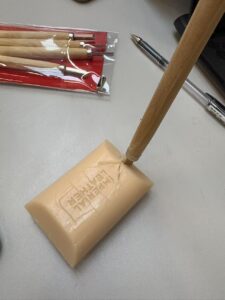
From the options listed in the kit, select one material you wish to carve and one tool you wish to use, provided you feel it is safe and easy to handle.
Place a small plate, bowl, or folded paper box in a corner of your work surface to catch the shavings as they are scraped off.
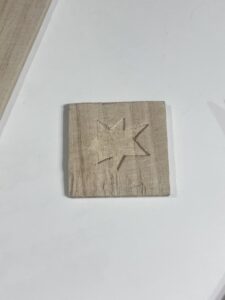
Step 3 · Glance at the reference image and make a few warm-up strokes (approx. 3 minutes)
If you’re currently lacking inspiration, begin by selecting the simplest pattern from an open-licence website – such as clouds, waves, tree shadows, or an abstract block shape.
Then do a little warm-up on your materials: carve a few lines, sketch some curves, press out a slightly deeper area. Just get used to the feel and sound – it doesn’t need to look good, and don’t overthink it.
· You can find open-licensed images on this website: https://duckduckgo.com/
Suggested keywords: simple line drawing, high contrast shape, etc.
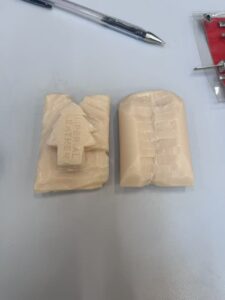
Step 4 · Carve Your Emotions into the Material (approx. 9 minutes)
Now, focus your attention on your present physical state and emotions—be it tension, irritability, fatigue, or alternatively calmness, a dazed state, or feeling nothing at all.
Gradually carve these sensations into the material using variations in the line’s weight, length, and direction. Should any area prompt you to make additional strokes, follow that impulse freely.
If you wish to change direction, switch materials, or alter your tools, do so without hesitation.
During this period, the audio will occasionally offer gentle reminders to pause, take a breath, and then decide where to place your next stroke.
Step 5 · Observe what you have just done (approx. 3 minutes)
Set your hands to rest, lay your tools aside, and simply observe the marks before you.
You might ask yourself a simple question: Which section was carved most deeply? Which section is almost empty? Was there a line that felt particularly meaningful as you carved it?
If you wish, jot down a single word or record a brief voice memo on your phone, simply stating, “This is how I feel now.”
If you prefer not to record anything, that’s perfectly fine too—simply acknowledge these marks in your mind with the words, “I see you.”
Step 6 · Clear away debris and conclude today’s carving (approx. 2 minutes)
Finally, gently sweep any debris from the work surface into the prepared tray or cardboard box.
You may take a photograph of your creation alongside the shavings, then choose to discard them, preserving this carving session in memory and image; alternatively, store both the piece and shavings together, label them with the date, and revisit them for further play when the mood strikes.
Before concluding, stow your tools away and allow yourself a moment to reflect: after these twenty minutes, has there been even the slightest shift in your physical state or emotional disposition? With that, this practice session is complete.