Any views expressed within media held on this service are those of the contributors, should not be taken as approved or endorsed by the University, and do not necessarily reflect the views of the University in respect of any particular issue.
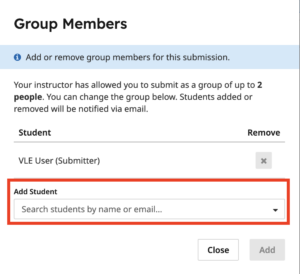
If your instructor has allowed you and other students to submit as a group, you can (and should) add group members to your submission.
To add group members to an assignment submission:
On your submission page, either select Group Members in the action bar (along the bottom of the screen) or select ‘View or Edit Group’ in the outline area of the submission (in the right hand panel).
In the Group Members modal, enter a name to add other students, and then select Add.
Note: If you cannot see your group member(s) listed in Gradescope, please contact the Course Secretary to ask them to re-sync the Gradescope roster with Learn.
All teaching staff will need to interact with Learn Ultra, even if the course materials are hosted on Drupal. We have compiled links to instructions on the most common tasks you will need to perform in Learn below. If you do not see what you need below, please check out the following page, which has additional instructions and guidance materials on a range of other aspects of Learn Ultra: Using Learn as an Instructor.
Introduction to Learn Ultra: a series of short videos providing an overview of Ultra and how to navigate the site.
Adding and organising content:
Types of Course Content – start here to get a definition of the terminology used for content types in Ultra
*If you want to share a link with students to a file you have uploaded to the Content Collection for a course, you will need to adjust the permission settings in the Content Collection folder following these instructions from Blackboard.
Assessment and marking:
Please remember that the Course Secretary is now in charge of setting up most assignment submissions, so please contact the ITO about the creation of assignment submission boxes. Below we have provided links for guidance on accessing student submissions and how to give marks and feedback.
If you don’t use Piazza for your course, you can set up a discussion board in Learn. This can be linked to Groups, so that students can talk to their group members: Create and manage Discussions
Note: All students, the Course Organiser, and Course Secretary will be automatically enrolled on the Learn course via a feed from EUCLID. All other teaching staff (i.e. additional lecturers and teaching support staff) will be enrolled via a feed from the School’s own databases; teaching support staff will only be enrolled in Learn once their contract is confirmed in PiP.
This blog post is intended to help course organisers decide which platform is most suitable for their needs with regards to coursework submission and marking. Learn Ultra – and its accompanying Gradebook – is quite a different beast to Learn Original, and so I thought it work highlighting the advantages and challenges of each approach. For simplicity sake, I have highlighted only those assignment types which are commonly used in the School of Informatics. If you have a requirement which sits outside of what is listed below (eg a graded blog) please get in touch with us and we can talk you through further options.
Learn Ultra
Learn Ultra supports the following ways of assessing students online:
Exam (more about the history of using Gradescope for exam marking can be found here)
Scenario 1 – student submits one individual PDF for marking
Learn Ultra
Learn Ultra can accept multiple files and file types. If one PDF is submitted, this should be displayed in the marking interface (although there have been multiple problems with how Learn handles PDFs in its own reader – particularly on a Mac – and so users are encouraged to download the PDF and open in their native application). A space is provided for the marker to enter grades and feedback. Delegated grading can be enabled for large courses where marking is distributed amongst a team of markers. In addition, parallel marking is now supported in Learn Ultra. This allows two markers to mark the same submission independently, with the course organiser acting as reconciler. Please note: parallel marking can only be enabled for individual submissions (ie *not* group assignments).
Gradescope
The Gradescope Homework assignment can only accept one PDF file upload. Marking can be distributed ‘horizontally’ – ie different markers marking different sections of the submission. Like all the Gradescope assignment types, anonymous marking is supported intuitively – and can be enabled and disabled as needs dictate. A marking scheme can be created in advance, encouraging consistency. Rubrics can be created in advance, or ‘on the fly’. One of the main advantages of Gradescope is the ability to change rubric values mid-way through marking, with marks previously assigned recalculated automatically.
Scenario 2 – group assignment
Learn Ultra
Learn Ultra can support a group assignment. The workflow remains: the groups needs to be created, a group assignment is submitted, one member of the group submits on behalf of the group. This is marked and the marks / feedback are cascaded to each member of the group. Please note: parallel marking can *not* be enabled for a group assignment – nor can delegated grading. So this is best suited for courses with only one marker. Also, anonymity can not be enabled for group assignments.
Gradescope
Gradescope can now support group assignments. As with Learn Ultra, the marker(s) mark as normal, but the grades / feedback are cascaded to each member of the group. However, with Gradescope group assignments, the responsibility for creating the group falls to the student submitting the coursework. Unlike with Learn Ultra, anonymity can be enabled however double blind marking is also not supported.
Gradescope has a dedicated programming assignment type. Students can upload unlimited files, of any file type. Markers can build and use an autograder to automatically grade parts of the submission. Markers can also manually grade submissions. One of the main advantages of using Gradescope over Learn Ultra for programming assignments is you can perform a code similarity check within Gradescope.
* Please note: Gradescope Programming Assignments behave differently to Gradescope Homework assignments, in that the student can choose which submission they would like the marker to mark. Consider this when designing your assignment policy and communications.
Scenario 3 – multiple choice quiz
Learn Ultra
Learn Ultra has an inbuilt test functionality. Since the move from Learn Original, many of the question types are no longer supported. LaTex is, in theory, supported in Learn tests. However, in practice, this has proved problematic across the College and we currently do not recommend this approach.
Gradescope
Gradescope’s online assignment type can be used for MCQ type tests / quizzes. It has several advantages over Learn Ultra test:
a more intuitive interface for both question setter and student
you can use LaTeX and Markdown to format the question text
an in-built student preview (not available in Ultra tests).
Scenario 4 – marking by tutorial group
In the past, you may have appreciated the ability to mark by tutorial group in Turnitin. It is worth noting that Gradescope can now support this workflow. Please speak with a member of the ITO to help you set this up.
Summary
Gradescope provides a good user experience for all users and has become the default assessment platform for many courses across the School. We hope the above is useful, but please don’t hesitate to get in touch with us if you’d like to discuss specific requirements for your course.
If students are permitted extra time on timed pieces of coursework as part of their extended time adjustments, then you will need to set this up for any timed quizzes/tests on your course.
If you are a member of teaching staff, please ensure that you talk to the ITO about this before enabling it for any student on your course, as there are different types of extra time adjustments that a student may have and they will help clarify for your course how these need to be applied.
Below are links for how to add these extended time adjustments in the two commonly used coursework quiz/test platforms. For both Gradescope and Learn tests, you can set up an adjustment for a student that extends across a whole course and any timed assignments within that course or grant an adjustment just for one or more individual assignments.
Note: Due to an ongoing bug in Learn Ultra, if you upload feedback to submission box in Learn, it will not be visible to students. If you want to upload feedback for an assignment that students submitted to via Learn, follow the instructions below to create a new “item” directly within the Gradebook itself, which (for some reason!) allows students to view the feedback you upload. Update: This bug appears to have been fixed, but let us know if you encounter any problems with the visibility of feedback for students.
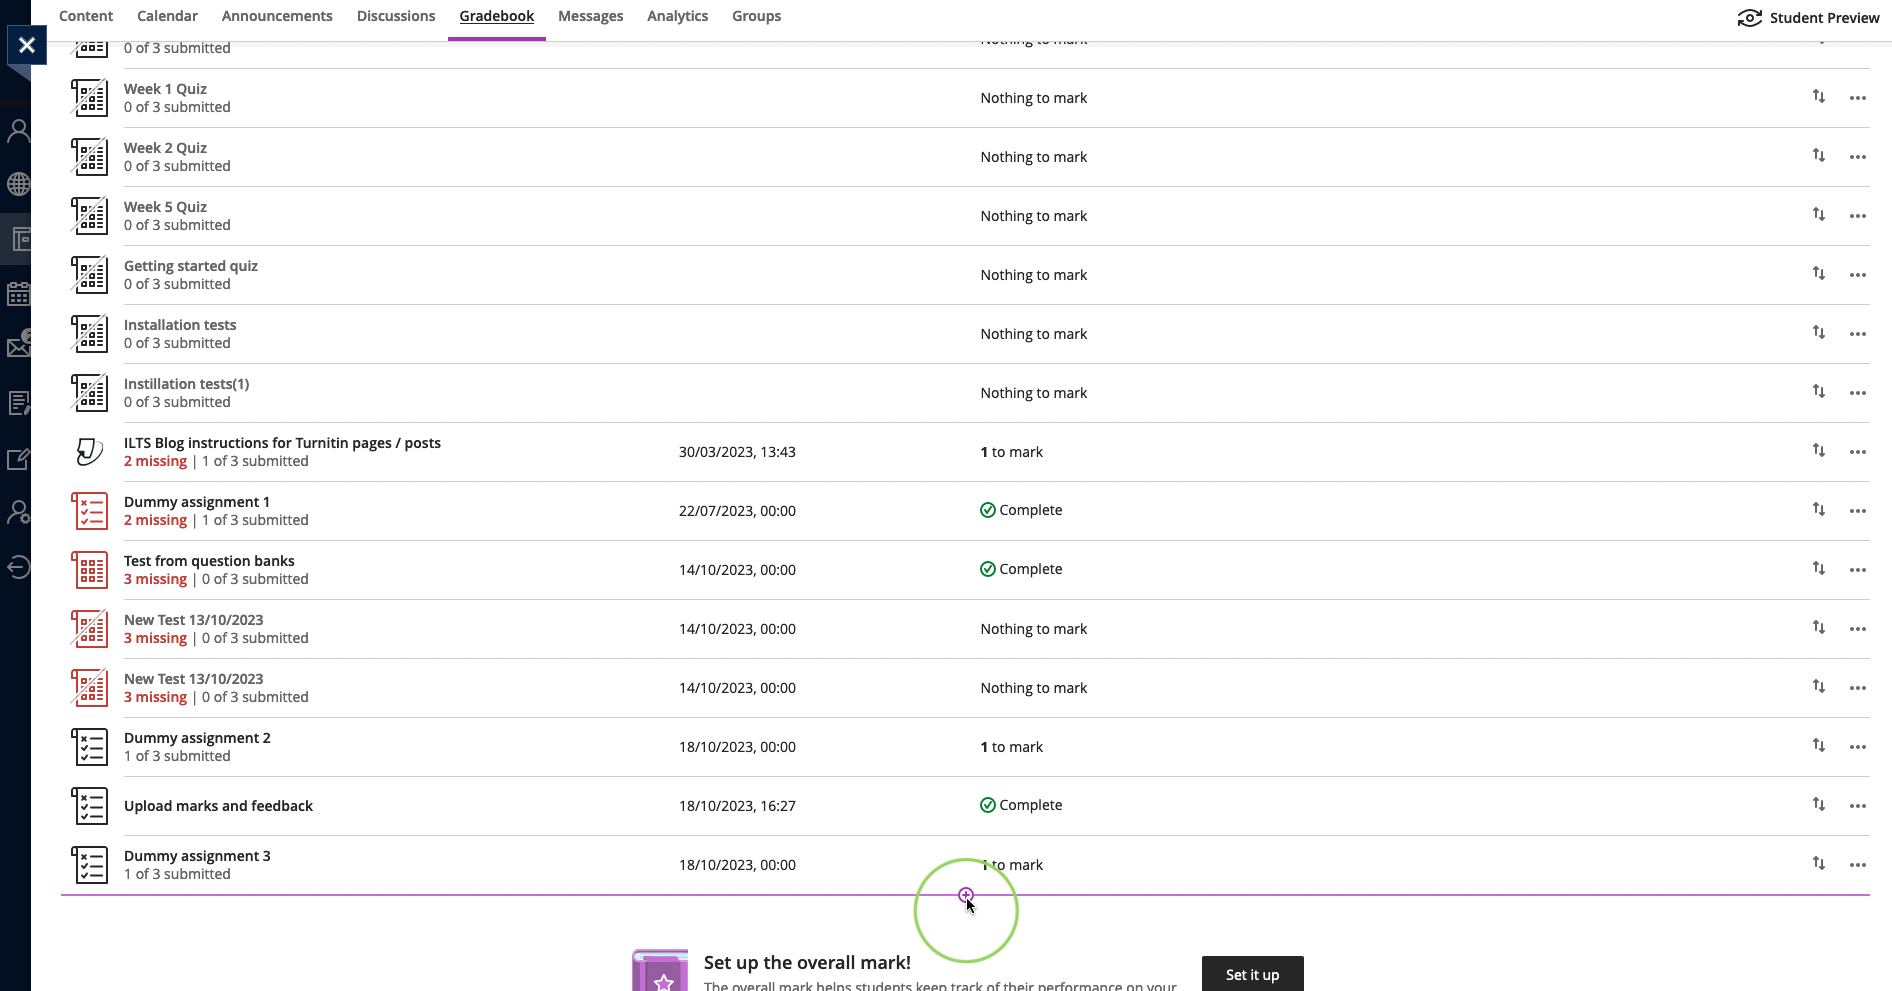
Go to the Gradebook in the course Learn page.
Add a new Item to the Gradebook by hovering over where you want to add it in the list and clicking on the purple (+) when it appears and then select “Add Item”.
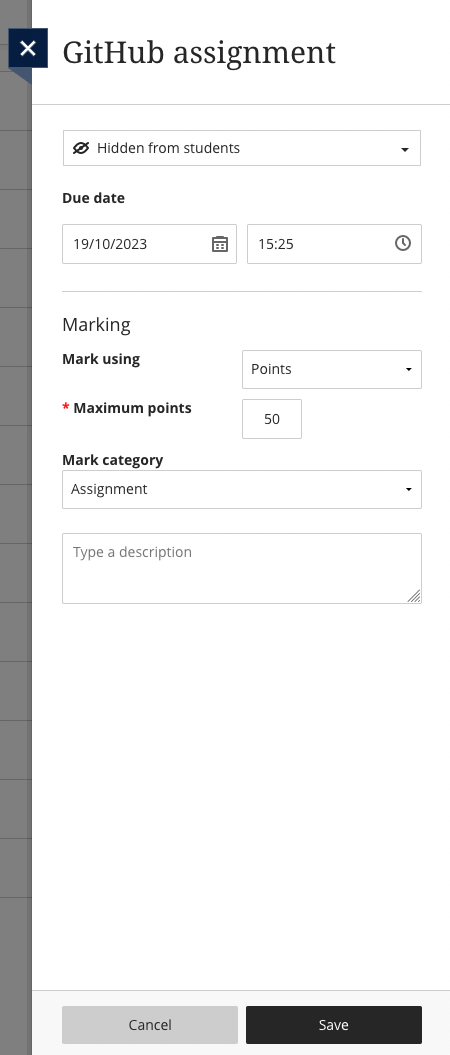
Then make the following adjustments when the item settings window opens:
It will give the item the default name of “New Item and the current date”; change this to the actual assignment’s name to ensure that students can locate it easily.
We recommend keeping this item hidden from student view for now.
The due date doesn’t really matter for this, so you can leave it as the default of the current time.
Set the marking as required (points, percentage, etc.) and, if points, the maximum number possible for this assignment.
For “Mark category”, choose Assignment.
Add a description if you want, but it’s not required.
Press Save.
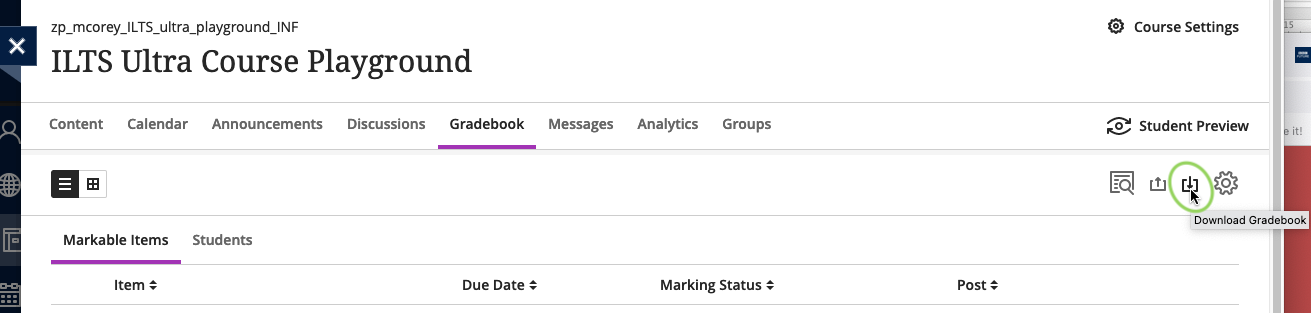
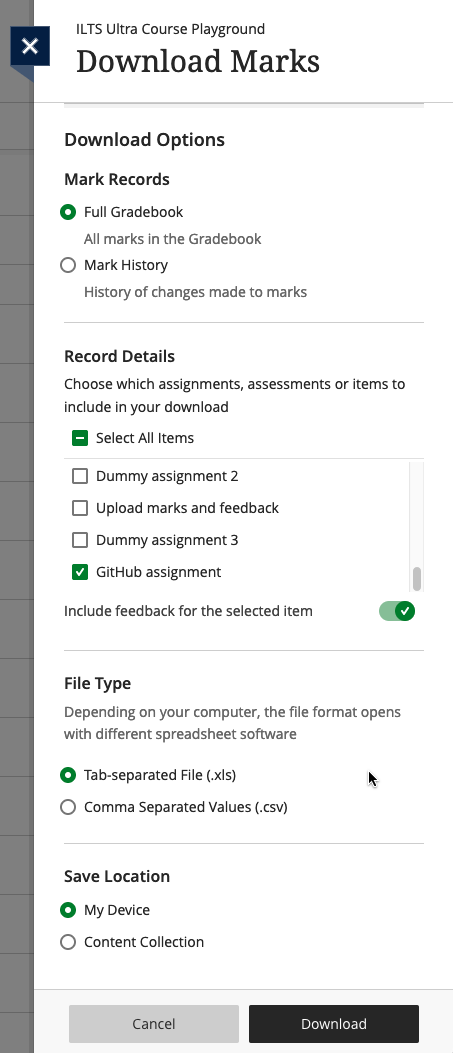
Download the Gradebook, selecting just the new item that you created. Make sure to tick the option to include Feedback (unless you just want to upload marks, in which case, leave it unticked). Choose to save it as an xlsx file and save it to your computer.
Open the file on your device.
Make sure that the header for Column G is the assignment you want to be uploading marks for (i.e. the item you just created in the Gradebook).
Input the marks in Column G.
Input the feedback in Column J, if you need to share this with students.
Note: Make sure you do not change the header of any of the columns or Learn may not be able to read the file properly when you upload the marks. If you need to copy and paste data from another spreadsheet, make sure that it aligns with the columns as laid out in the file you downloaded from Learn.
Save the file.
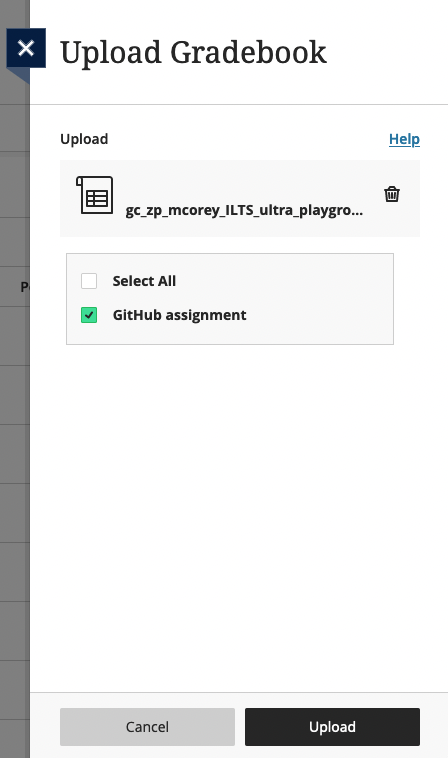
Return to the Gradebook in Learn and now select “Upload Gradebook”.
Choose “Upload Local File” and select the spreadsheet you have just saved. Once it has loaded, untick the option for “Select All” and just leave the assignment you want to upload marks for ticked. Click “Upload”.
Once Learn has uploaded the document, you will see how many students there are not marks for (i.e. those who did not submit the assignment) and also the option to post the marks that you just uploaded.
Before you post the marks, it’s worth quickly checking that your upload worked. Click on the assignment name and you will be taken through to a list of all the students on the course. You can then check the a few of their marks and feedback in Learn with your spreadsheet to make sure that the upload worked properly.
Note: If you only want to post marks to certain students, you can do that from this view. Just click the “Post” button next to the name(s) of the student(s) whose marks you are to post.
Once you are ready to share the marks with the students, Click to Post the marks. And then “Post All Marks” when the dialogue box opens.
Go back in to the Edit view of the assignment (by clicking the three dots … at the end of the row for it) and from the drop-down menu choose to make it “Visible to students”. Press Save. The students will now be able to view their marks and feedback for this assignment.
With the new release of Noteable in August 2022, ISG have configured a new way to connect your Learn course to Noteable – Noteable LTI 1.3.
The Noteable LTI 1.3 integration has been successfully set up in Learn and Learn Ultra and the old connection method for Noteable will be switched off by 16th September. If there are any old links in any of your courses, they will break. Please simply delete them and add the new Noteable LTI 1.3 instead. Instructions below.
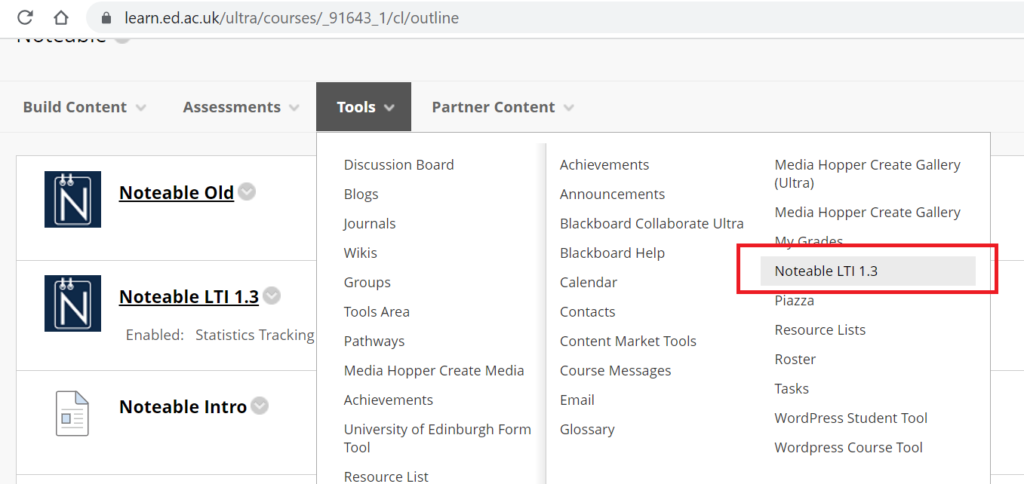
Step 1. Select the Noteable LTI 1.3 link from the Tools menu.
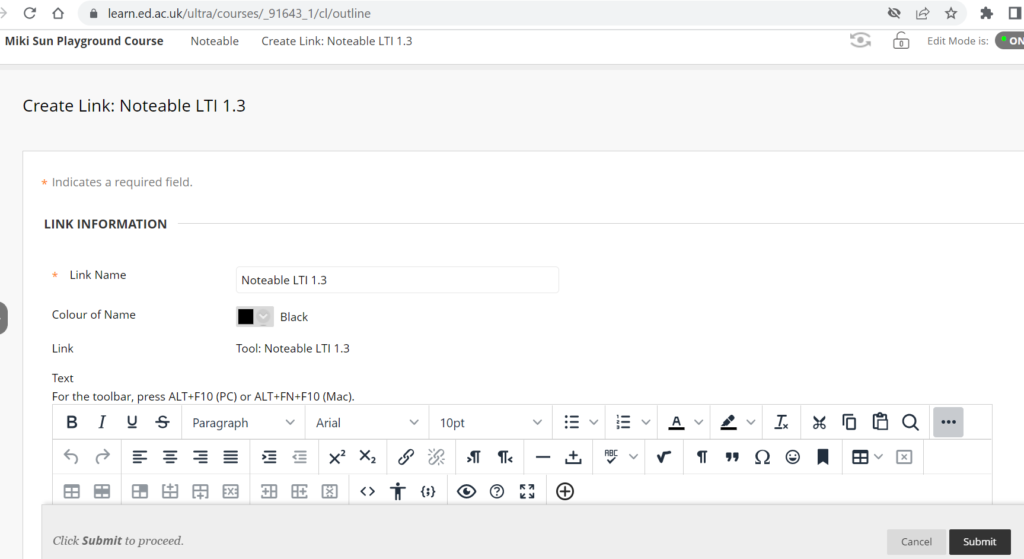
Step 2. Check the settings and then click on Submit.
Step 3. The Noteable link will appear in the Learn course page. Click on it, it will launch on a new tab.
There are many times when you may need to check submission dates and times for coursework or exam hand-ins. The way you do so will depending on the mechanism used to submit.
The following instructions are for when a student has submitted via the Gradescope link within Learn.
Go to the course in Learn and find and select the link to Gradescope.
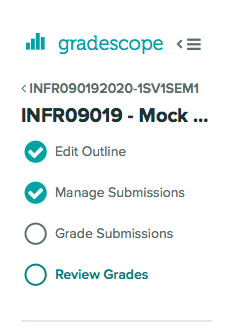
Select the assignment name within Gradescope to open. Select Review Grades.
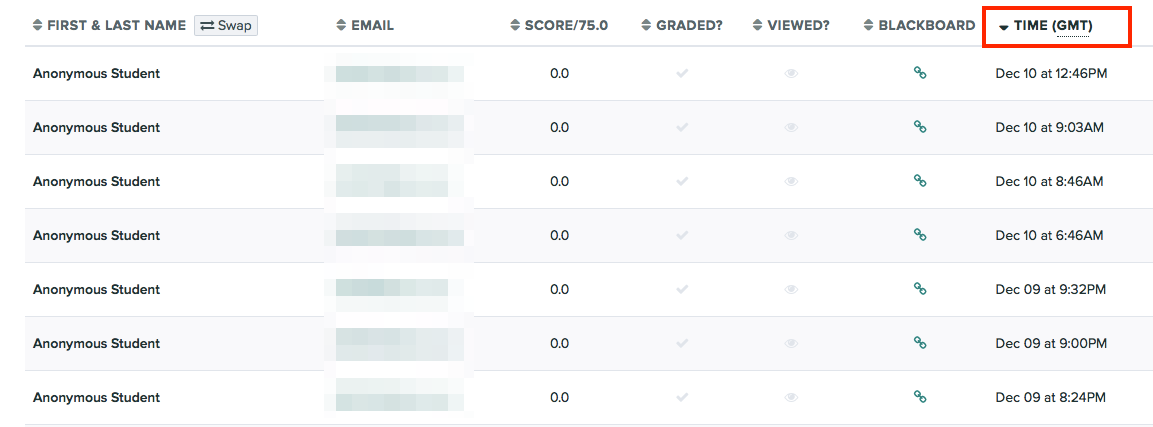
Sort by the Time column header to see which submissions were made after the deadline.
This blog post is aimed at all students sitting an exam or submitting coursework using Gradescope Homework assignment.
Submitting your PDF to Gradescope
Navigate to the appropriate area in your Learn course (this will be the “Exam” content area for taking an exam, or the “Assessment” area if submitting coursework)
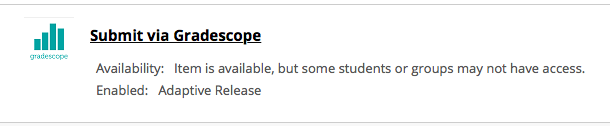
Open Gradescope by clicking “Submit via Gradescope”
Gradescope will open in a new tab
You will be taken directly to the corresponding course area in Gradescope
Open the submission area for the question
Select the file you wish to upload for your answer – this can be uploaded directly from your device. Upload your file – note that Gradescope does not provide a progress bar, and so it will look like nothing is happening while your file submits. Please be patient and do no click Back or Submit again while you wait.
You will be shown a preview of your submission. You can rearrange pages if required.
You will be required to tag which pages from your document correspond to the question part being answered. If your answer to a particular section spans multiple pages please tag each corresponding page. Please also make sure you have labelled each page with a note of which question you are answering. This tagging process takes place after the submission and can be done after the submission deadline without affecting your timestamp for submitting your response.
Check all pages have been tagged correctly, and confirm your submission by clicking Submit.
Video Demonstration of the PDF Upload & tag process
Gradescope is now the School of Informatics’ default platform for marking exams and some coursework assignments.
The technology takes a much more innovative approach to marking which better aligns to the standard practices for marking paper-based exams, with some added benefits over traditional marking.
Horizontal marking (i.e. Mark papers by question) by default
Rubric based marking, with the option of dynamic edits which recalculate previously marked papers
Inline annotation / notes for markers
The exam spaces and initial setup is now managed by the ITO team.
Marking Submissions
You’ll find detailed help and guidance from the Gradescope Help section, but some key elements and videos have been highlighted in this article.
Horizontal Marking
The preferred marking workflow is to mark each question across all submissions, rather than marking a whole paper one submission at a time. The interface for marking is set up this way to apply your mark to the question and then proceed to the next ungraded question.
Rubric Marking
The points per question will be setup prior to the exam. The rubrics will use positive marking by default. Ahead of the exam, course organisers will have a chance to discuss with ILTS how they want their rubric initially setup for all questions. One of the key features for Gradescope is that the rubric can change and be adapted throughout the marking process with the changes being reflected in papers that have already been marked.
Making changes to the rubric can be done by any marker and could be for the following reasons:
Tagging responses marked in a certain way
Tagging responses for additional review
Awarding partial points based on certain criteria
Realising the original rubric design needed altered
Students map their questions to the pages submitted
As part of the submission process students are asked to map which questions have been answered on which page of their PDFs. Some question components may be answered across multiple pages. You can check to see if there is an additional page by using the next arrow or using the “K” keyboard shortcut.
Rubric components can be scored the same and culminative
You can use rubric components for identifying features of how a question has been answered. You can award a rubric item the same points as any other rubric element. This allows you to allocate marks while identifying features of how the question was answered. You can then report on the marking breakdown by each rubric component to get a detailed understanding of how each question was answered across the cohort.
You can select more than one rubric element for each question and the score can build a running total. These settings can be customised and configured as required.
Moderation during the marking process
A suggested workflow for moderation during the marking process is as follows:
CO marks first sample of questions to confirm the rubric fits well
Markers continue to mark remaining questions
CO reviews rubric changes and areas for attention in stages throughout the marking process
Papers can be filtered based on the rubric criteria to look for anomalies
Standard moderation after marking can still take place
Keyboard Shortcuts
To help speed up marking Gradescope uses a number of keyboard shortcuts to apply the rubric components using the number keys, and you can traverse your stack of marking using a number of keyboard shortcuts.
Finally, we would like to stress the importance of running a practice exam, using Gradescope accessed via Learn. As with the real exams, the ILTS team will set these up, but you should identify a suitable timescale to run these, and ensure all students have completed this process prior to the date of their real exam.
Feature requests?
If you are interested in the development of Gradescope, you can view and contribute towards their roadmap here:
Following a successful pilot in 2019-20, pre-honours Informatics students will have access to CodeGrade for select courses. Please get in touch to see if there is a budget to cover a CodeGrade license for your course.
If you do not have access to YouTube, or prefer your guidance in text format, you can find extensive documentation on using CodeGrade here: https://docs.codegra.de.