Creating 3D Models from Text Prompts Using Meshy

Summary
Purpose:
This toolkit provides a step-by-step guide to help learners quickly create 3D models using Meshy, a user-friendly, web-based platform that converts text prompts into 3D digital models.
Learning Objectives:
Access and navigate the Meshy platform effectively.
Generate 3D models from text prompts.
Refine and preview models within Meshy.
Save and export models for use in other projects.
Structure:
Introduction to Meshy:
Overview of Meshy’s features and capabilities.
Navigating Meshy:
Detailed tour of the interface and key functions.
Creating a 3D Model:
Step-by-step instructions on inputting prompts, customizing results, and refining models.
Saving and Exporting:
Instructions on saving models and exporting them in various formats.
Self-Assessment and Reflection:
Checklist and reflection prompts for evaluating learning progress.
Intended Audience: Beginner to intermediate learners interested in digital art, 3D modeling, and integrating AI tools into their creative workflow.
Completion Time: Designed to be completed in 20 minutes or less.
Format: 20-Minute Instructional Toolkit
License: CC BY 4.0 (Creative Commons Attribution 4.0 International)
Target Audience: Beginners and intermediate learners interested in digital art, 3D modeling, and AI-assisted creativity.
Learning Objectives
By the end of this toolkit, learners will:
- Understand how to access and navigate the Meshy platform.
- Learn how to input text prompts to generate 3D models.
- Explore basic settings and features in Meshy for refining models.
- Save and export 3D models for use in further projects.
Required Tools and Resources
- Platform: Meshy (web-based platform). web:https://www.meshy.ai/
- Device: A computer or tablet with an internet connection.
- Browser: Chrome, Firefox, or any compatible browser.
Step-by-Step Guide (20-Minute Plan)
Unit 1: Introduction to Meshy (2 minutes)
- Overview:
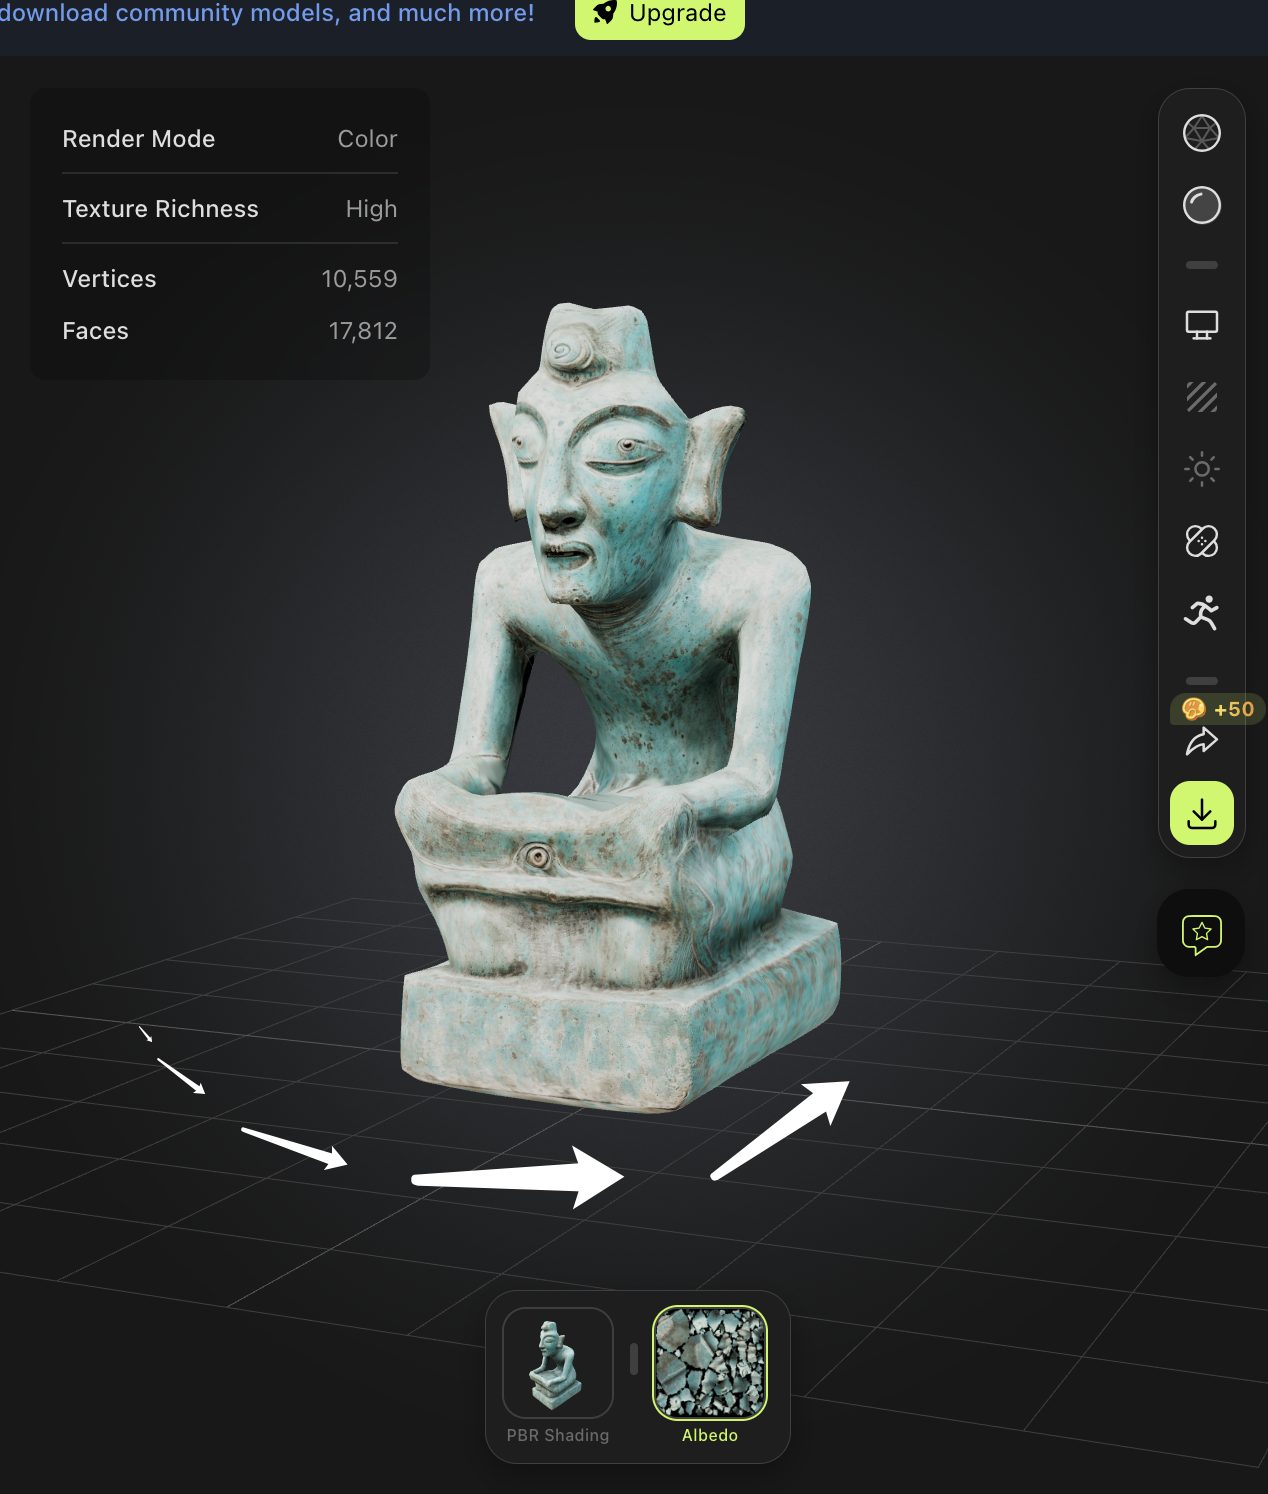
Meshy is a user-friendly platform that allows users to create 3D models from text prompts quickly. This toolkit will guide you through the process of turning a concept into a 3D model with ease. - Example Model:
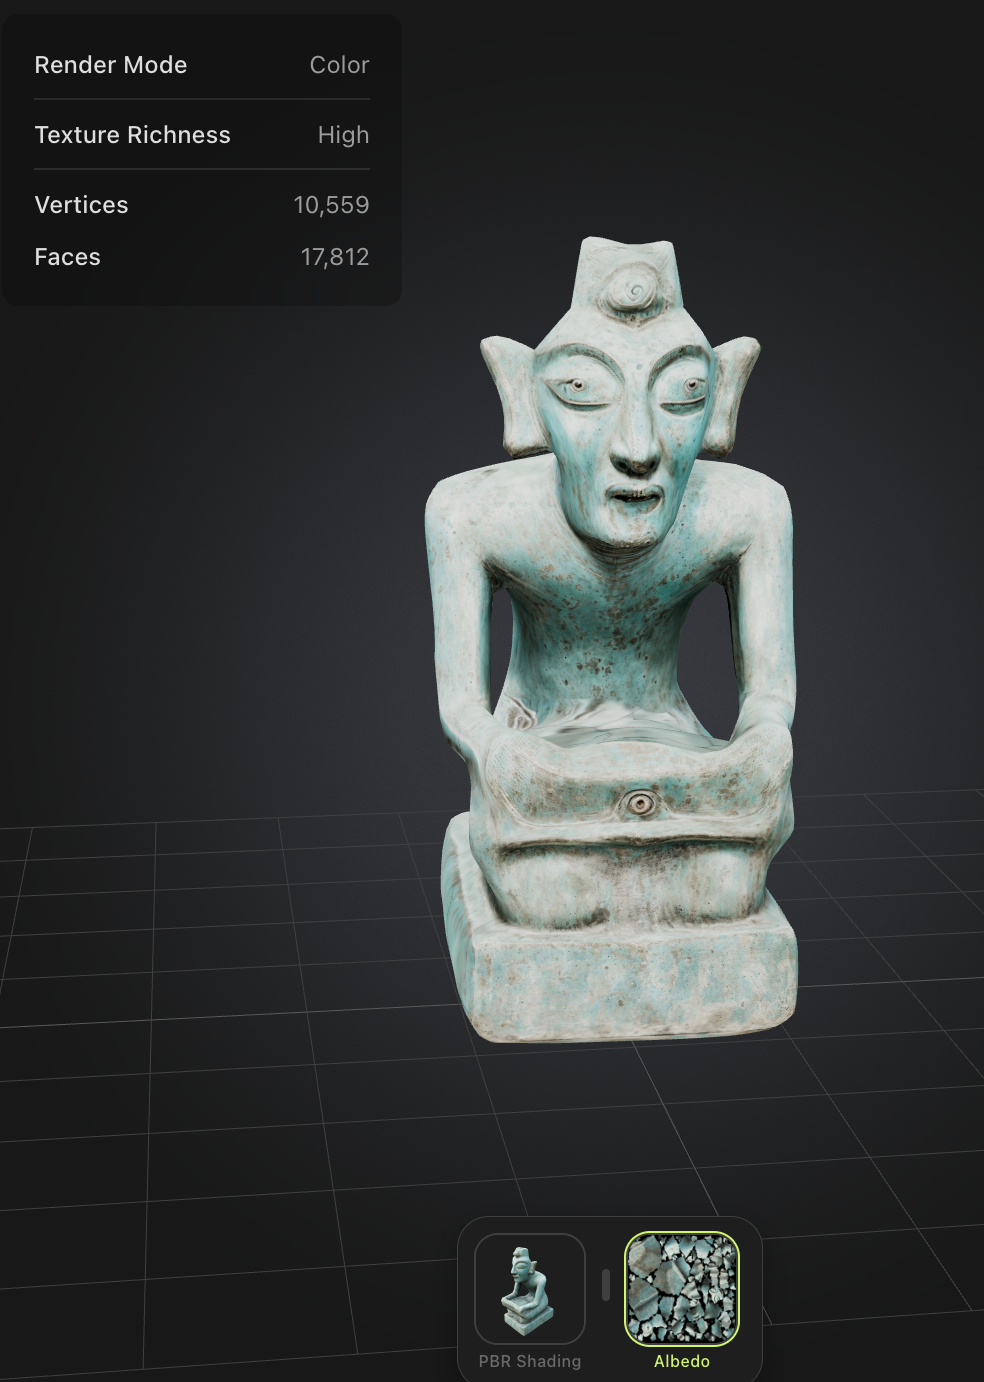 Prompt:Kneeling figure with twisted head, Sanxingdui, The image shows a weathered, greenish-blue metal object with a face-like design. The face features a large eye, a nose, and a mouth, all of which are intricately detailed. The object appears to be an artifact, possibly a mask or a piece of sculpture, with signs of age and wear, including rust and corrosion. The background is dark, which contrasts with the object, making it the focal point of the image.
Unit 2: Accessing and Navigating Meshy (4 minutes)
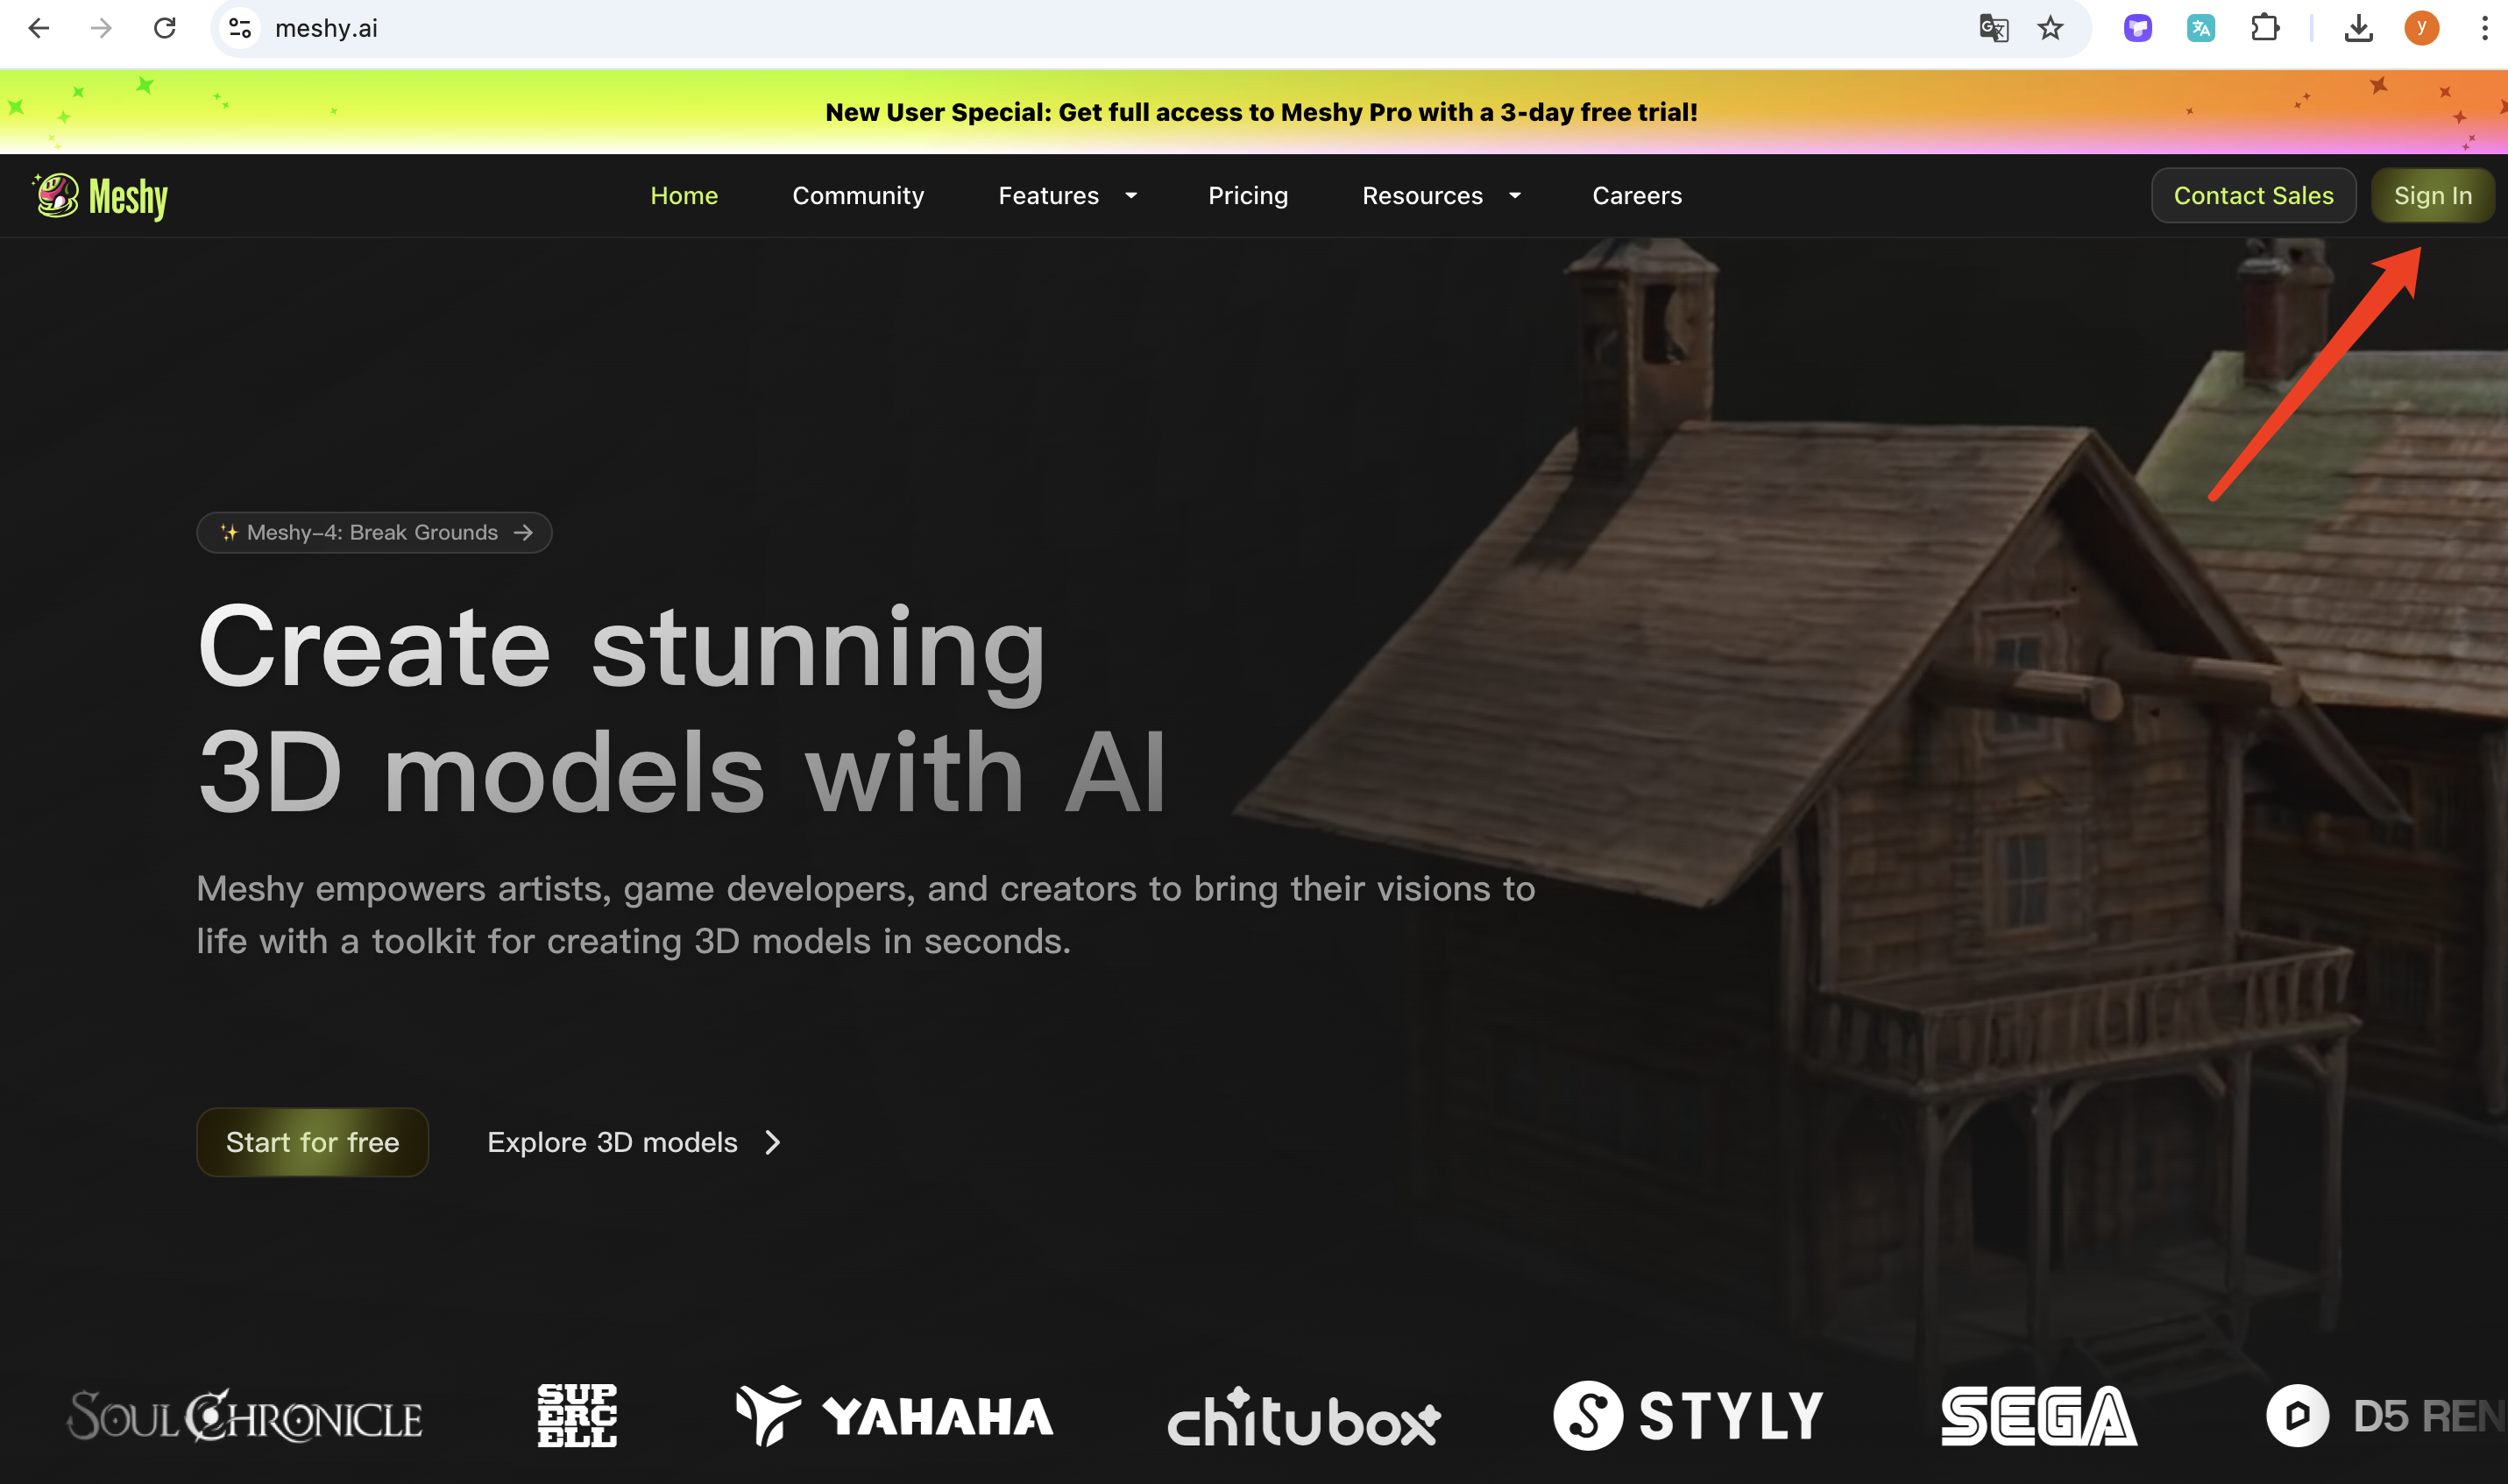
- Visit the Meshy Website (2 minutes):
- visit Meshy’s website and log in or create an account if you haven’t already.
- visit Meshy’s website and log in or create an account if you haven’t already.
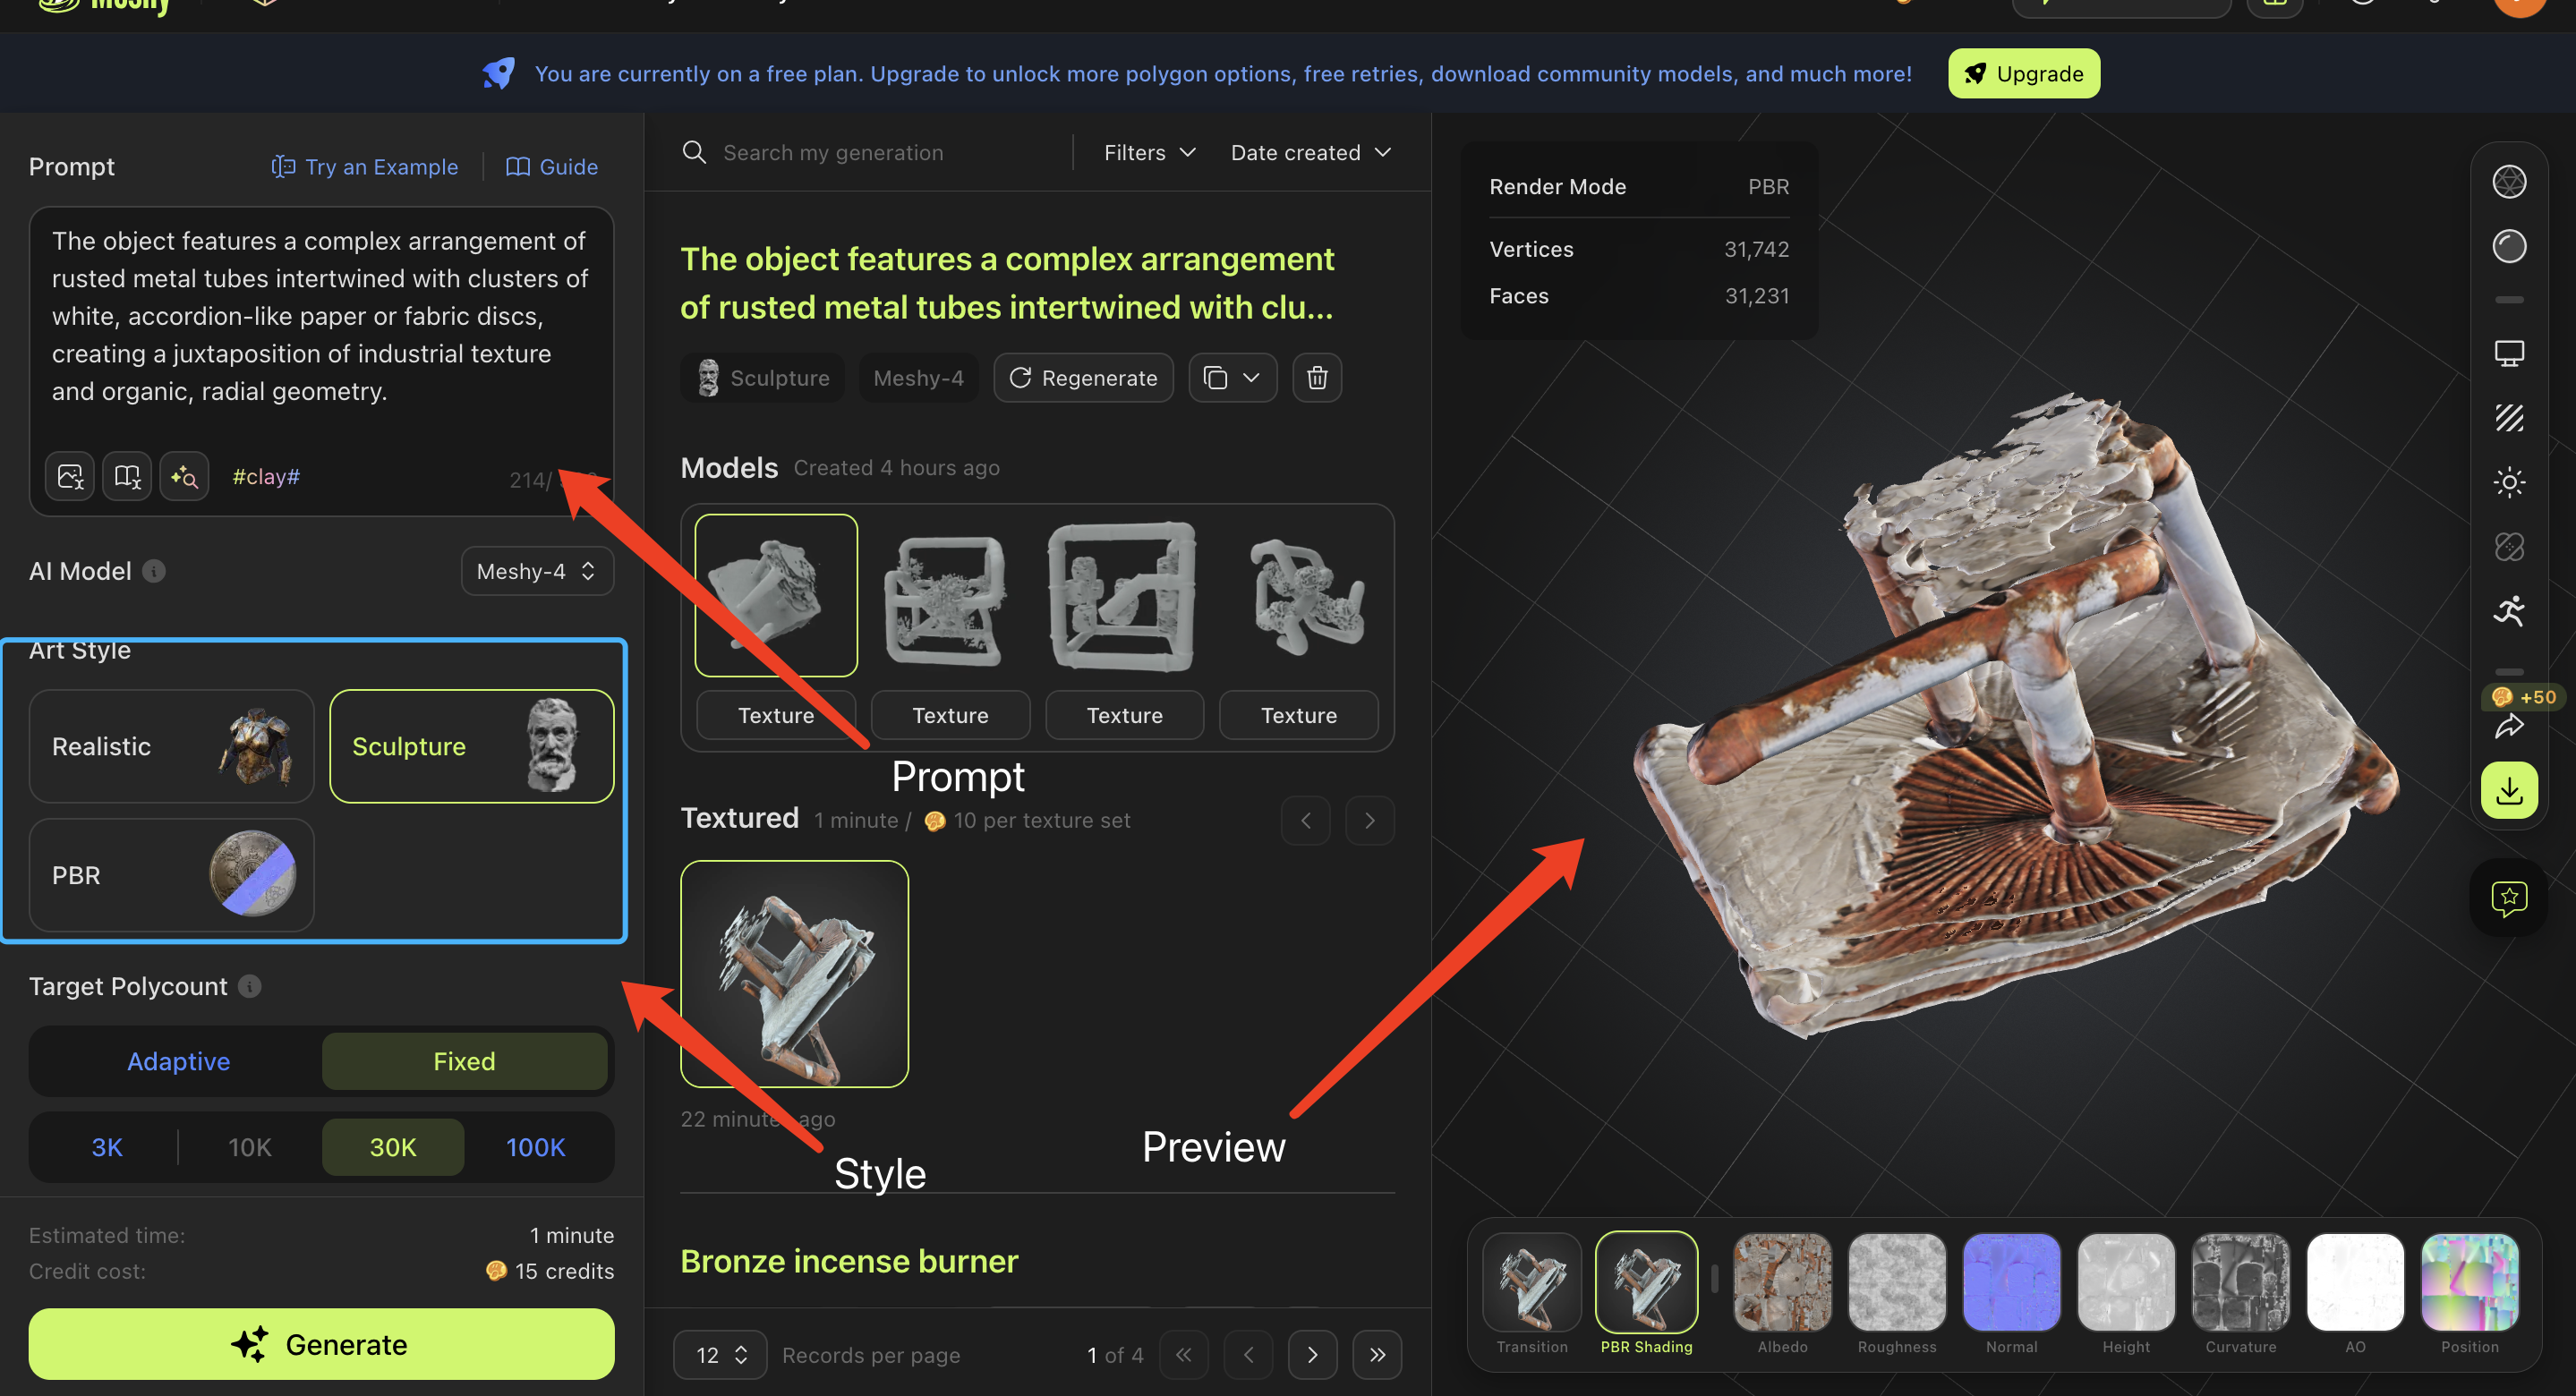
- Tour of the Interface (2 minutes):
- key sections of the platform:
- Text Input Box: Where learners will type their prompts.
- Settings Panel: Options for adjusting the generated model.
- Preview Area: Where the model will be displayed.
- key sections of the platform:
Unit 3: Generating a 3D Model from a Text Prompt (10 minutes)
- Inputting the Prompt (2 minutes):
- Explanation: Prompt is very important for model generation. For example:
- “A futuristic abstract sculpture with smooth, flowing lines” for a modern look.
- “A geometric tower with layered cubes and arches” for a detailed, structured model.
- Writing Effective Meshy Text Prompts ’
Write text prompts that generate accurate 3D models in the following steps:
Specify the object: specify the model to be generated (e.g. animal, building).
Specify details: add shapes (round, square), materials (wood, metal), styles (abstract, realistic).
Optimise syntax: use short, clear statements such as ‘Create a fluffy, brown teddy bear with black button eyes’.
- Explanation: Prompt is very important for model generation. For example:
- Customizing the Prompt (3 minutes):
- Experimentation: To modify keywords and phrases in their prompts to see different results. Example:
-
- Optimize Grammar: Use concise, direct sentences.
- Example:
- Less effective: “Create a beautiful vase.”
- More effective: “Create a tall, slim vase with a glossy blue finish in a modern abstract style.”
- Example:
Example Prompts:
- “Create a large butterfly with colorful wings in a realistic style.”
- “Design an abstract vase with smooth curves and a shiny metallic surface.”
- Optimize Grammar: Use concise, direct sentences.
-
- Experimentation: To modify keywords and phrases in their prompts to see different results. Example:
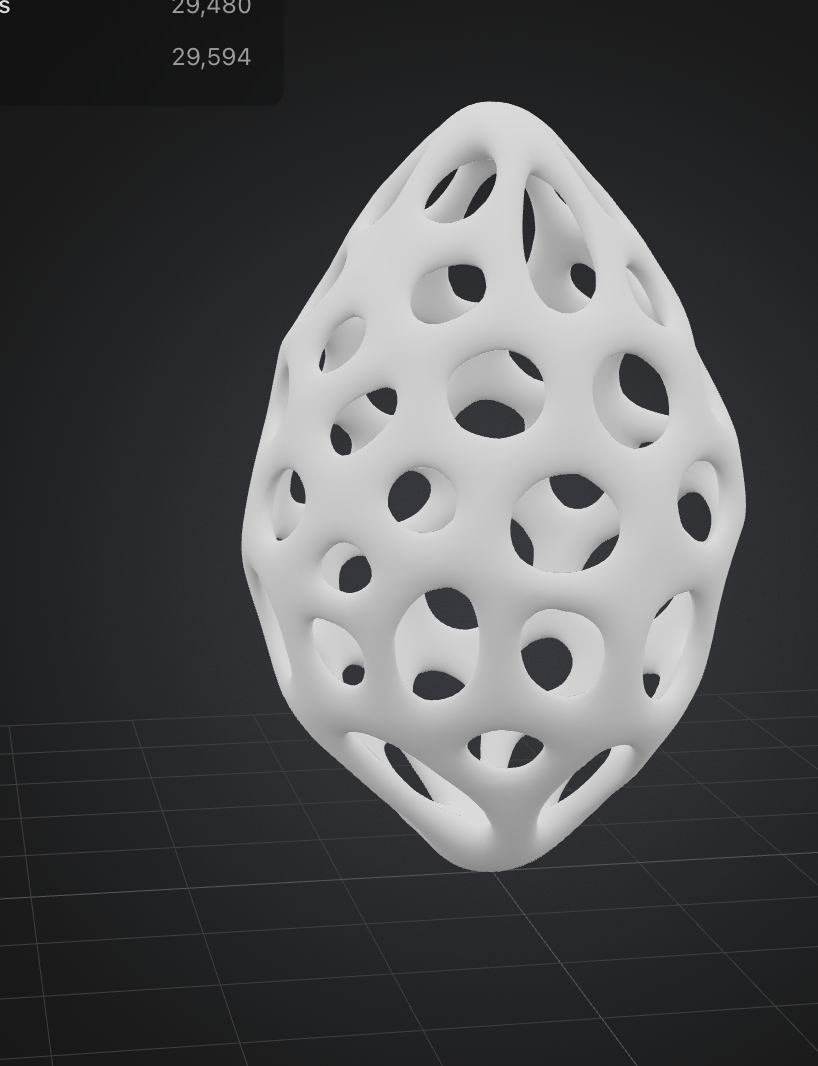
- Previewing the Model (3 minutes):
- Viewing Options: How to rotate, zoom, and pan the model. Demonstrate:
- Rotate: Click and drag in the preview area.
- Zoom: Use scroll or zoom buttons.
- Pan: Hold the space bar and drag.
- Viewing Options: How to rotate, zoom, and pan the model. Demonstrate:
4. Refining the Model (2 minutes):
-
- Prompt Adjustments: tweaking their prompts. Example:
- Original prompt: “spiral sculpture.”
- Refined prompt: “Abstract shapes, postmodernism, magicalism, metallics, the style of the artist Henry Moore.”
Technical Support and FAQs
To enhance the user experience, here are answers to common questions and challenges:
Q1: What should I do if the rendering speed is slow?
- Simplify your text prompt to avoid excessive details.
- Close unnecessary applications to optimize network bandwidth.
- Use the platform during non-peak hours.
Q2: The generated model doesn’t match my expectations. What should I do?
- Ensure your text prompt is specific and clear.
- Example: Replace vague descriptions like “beautiful” with specific attributes like “smooth, glossy, and metallic.”
- Experiment with different keywords to refine the output.
Q3: What should I do if the platform crashes or freezes?
- Refresh the page and log back in.
- Clear your browser cache or try a different browser (e.g., Google Chrome).
- If issues persist, contact Meshy’s support team.
Q4: How can I edit the model’s color or texture?
- Currently, Meshy does not support direct color or texture modifications. However, you can use external tools such as:
- Blender: Free software for editing 3D models.
- Sketchfab: A platform offering texture libraries and editing capabilities.
Q5: Are there resources to improve my 3D modeling?
- Sketchfab: Free 3D models and textures.
- Poly Haven: High-quality texture libraries.
- Blender Tutorials: Learn to edit 3D models.
- Prompt Adjustments: tweaking their prompts. Example:
Unit 4: Saving and Exporting the 3D Model (4 minutes)
- Saving the Model (2 minutes):
- Instructions: Locate the “Save” button on the Meshy interface. Instruct learners to name their project clearly, such as “desk”

- Instructions: Locate the “Save” button on the Meshy interface. Instruct learners to name their project clearly, such as “desk”
- Exporting the Model (2 minutes):
- File Format Selection: it about common file formats:
- .obj: Works well with most 3D software.
- .stl: Ideal for 3D printing.
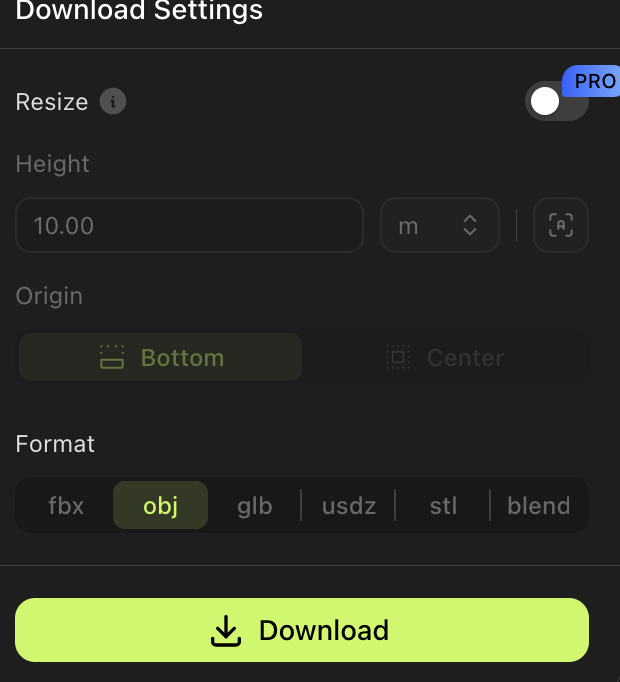
- File Format Selection: it about common file formats:
Advanced Tips and Optional Features
For learners looking to expand their skills:
- Try combining prompts to create hybrid models. For instance, “Create a butterfly with dragon-like wings and metallic textures.”
- Export models into advanced tools like Blender for post-processing.
- Explore Meshy’s experimental features (if available) for more customization options.
Self-Assessment and Reflection
Checklist:
- I successfully logged in to Meshy and explored its interface.
- I created a 3D model using a text prompt.
- I previewed and refined my 3D model.
- I saved and exported my model for later use.
Reflection Prompts:
- What aspect of generating 3D models from text prompts did I find most engaging or challenging?
- How might I use this tool in future creative or academic projects?
- What new prompts or techniques would I like to try next time?
Enhanced User Experience
To address user feedback, the following changes have been made:
- Added a “How to Write Effective Prompts” guide with examples.
- Included troubleshooting steps for technical challenges.
- Provided external resources for further learning and model customization.
Structure and Accessibility
This Open Toolkit is structured for both beginners and advanced users, with:
- Clear instructions and examples.
- Visual guides for better understanding.
- External links to relevant resources for extended learning.
By following this Toolkit, learners can quickly and creatively generate 3D models, expanding their skills in digital sculpture and artistic experimentation.