On MS Stream, Channels act more like a way to organise videos of different topics without permission methods. In MS Stream, Groups are created to give permission to users to view videos, with a channel added within a group, normally meant to organise videos by different topics for the group. This blog post will demonstrate how to create a channel for a group of users and upload a video to that channel.
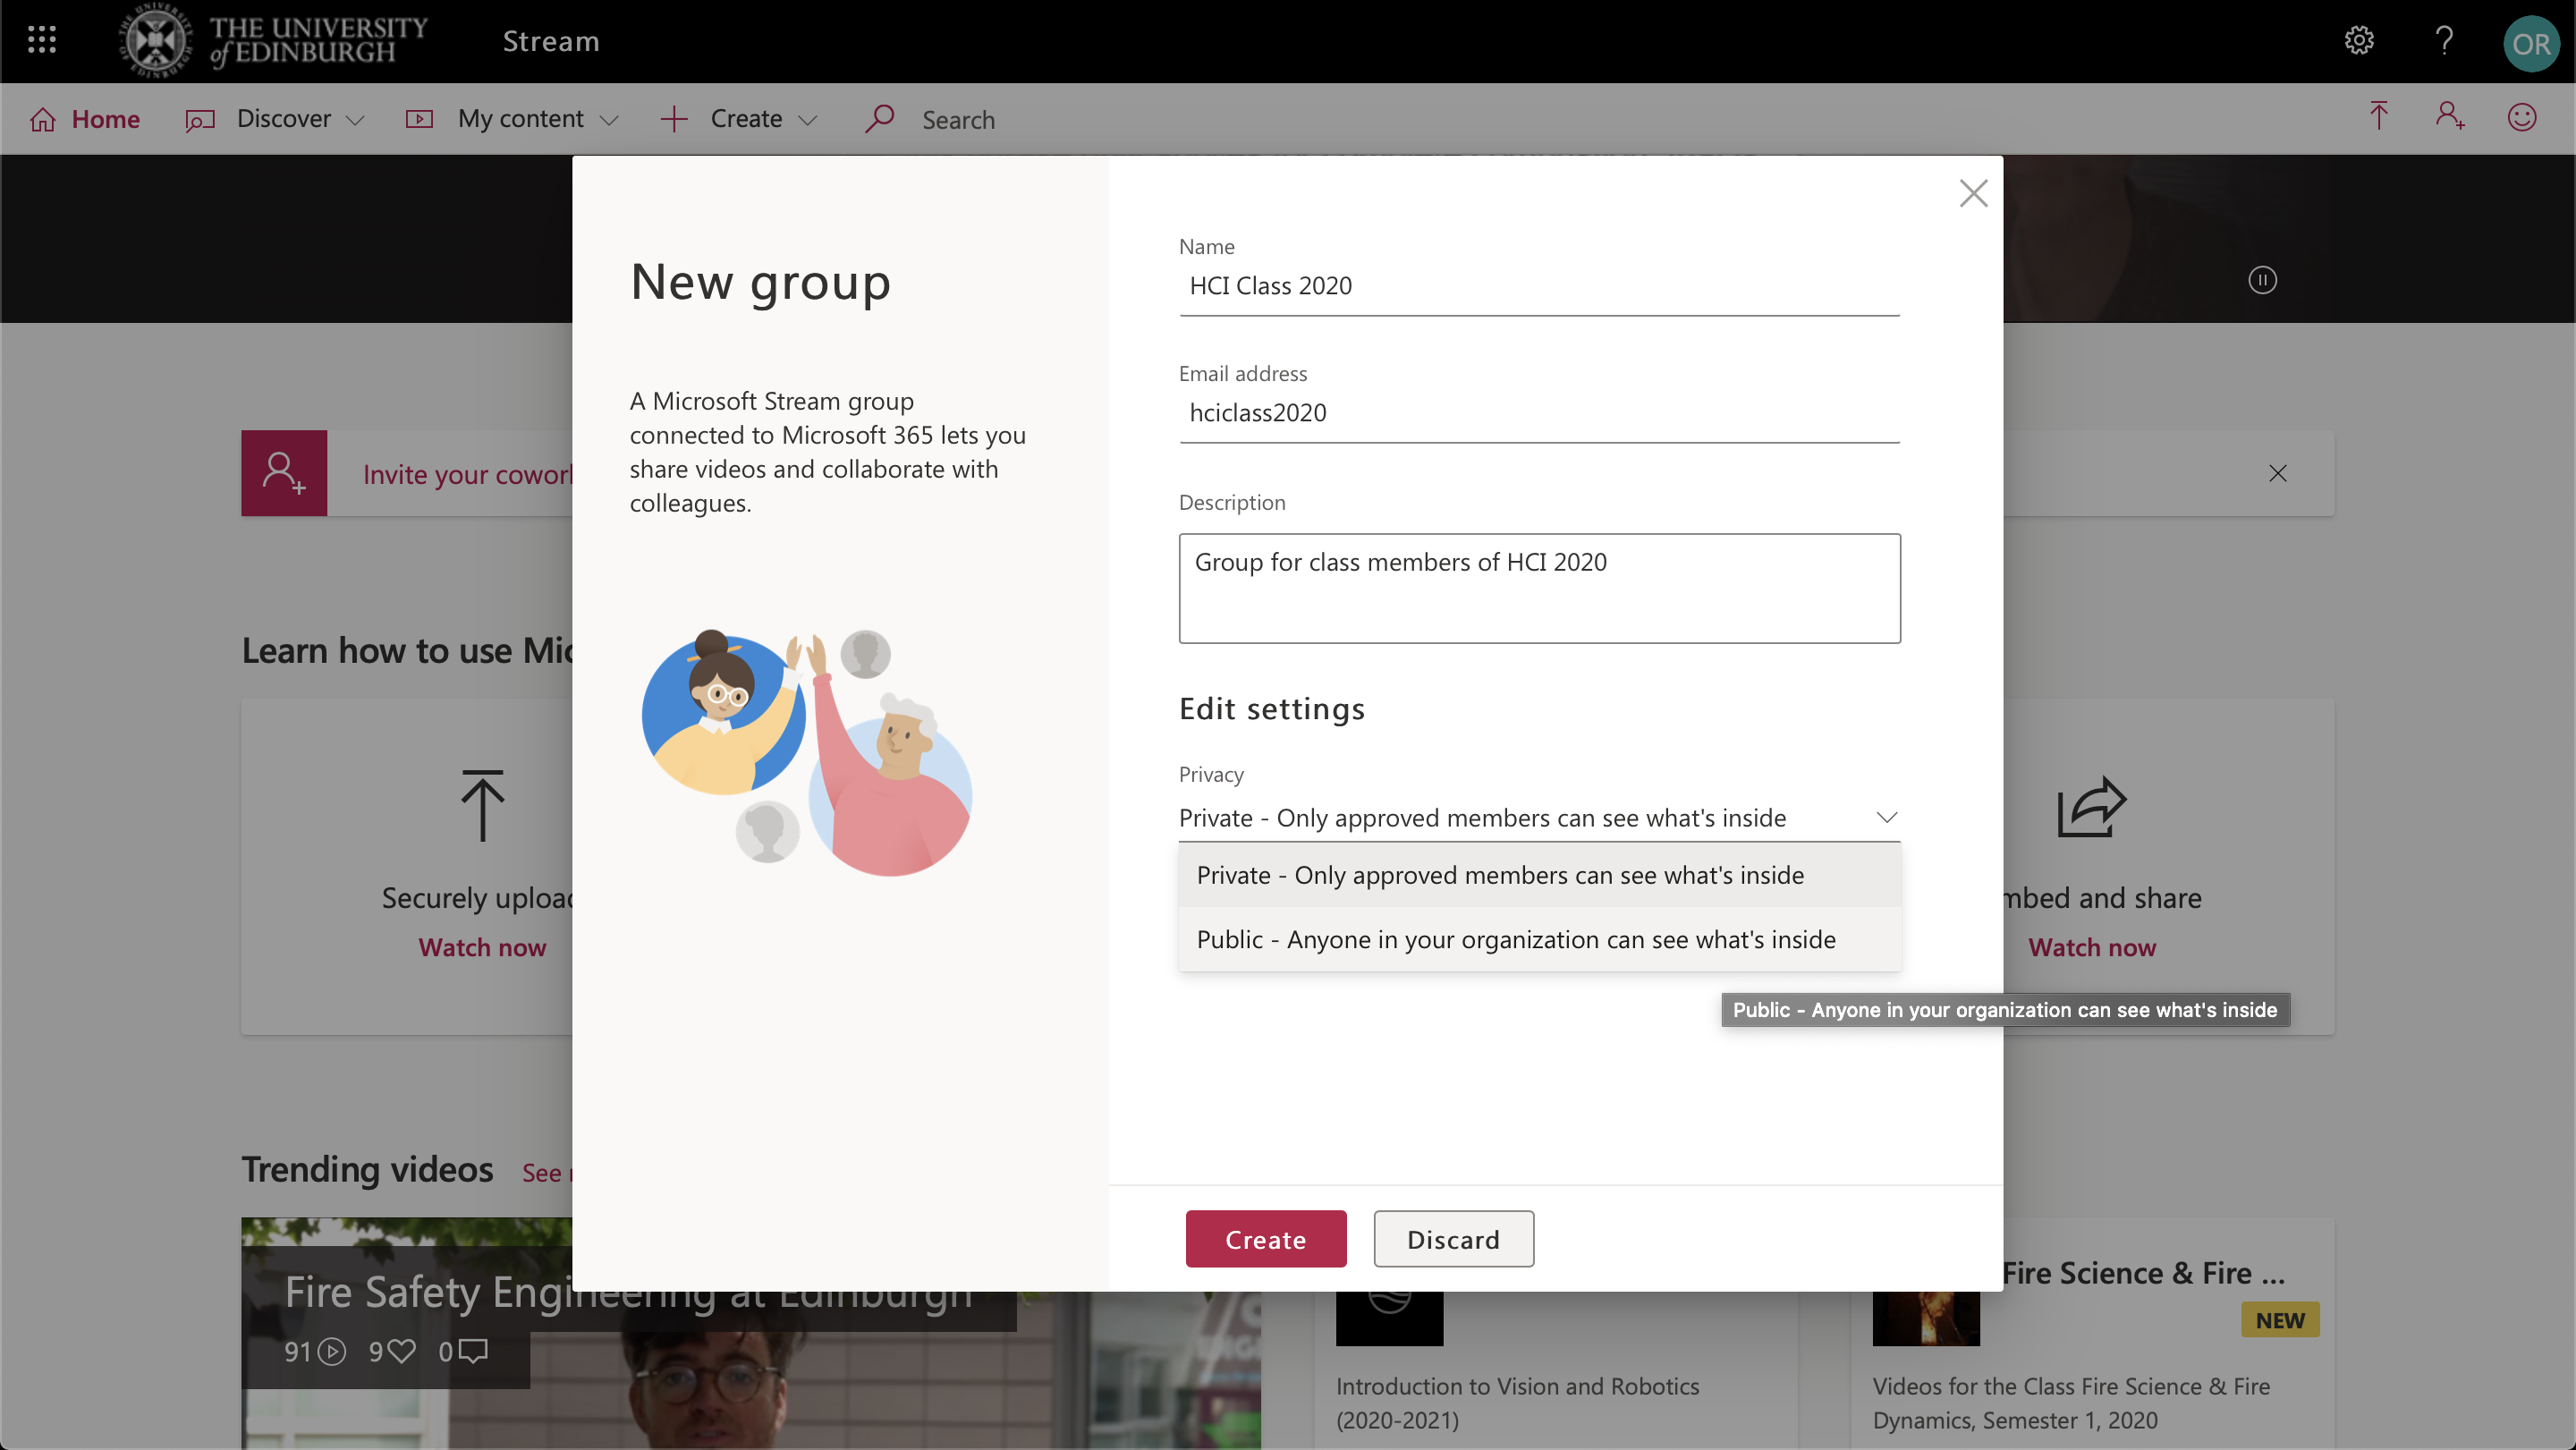
- Click +Create>Group to make a new group. Give the group a name and description (an email will be autogenerated). Select if the group is public (for the whole university to see the content), or private (accessible for those enrolled in the group).
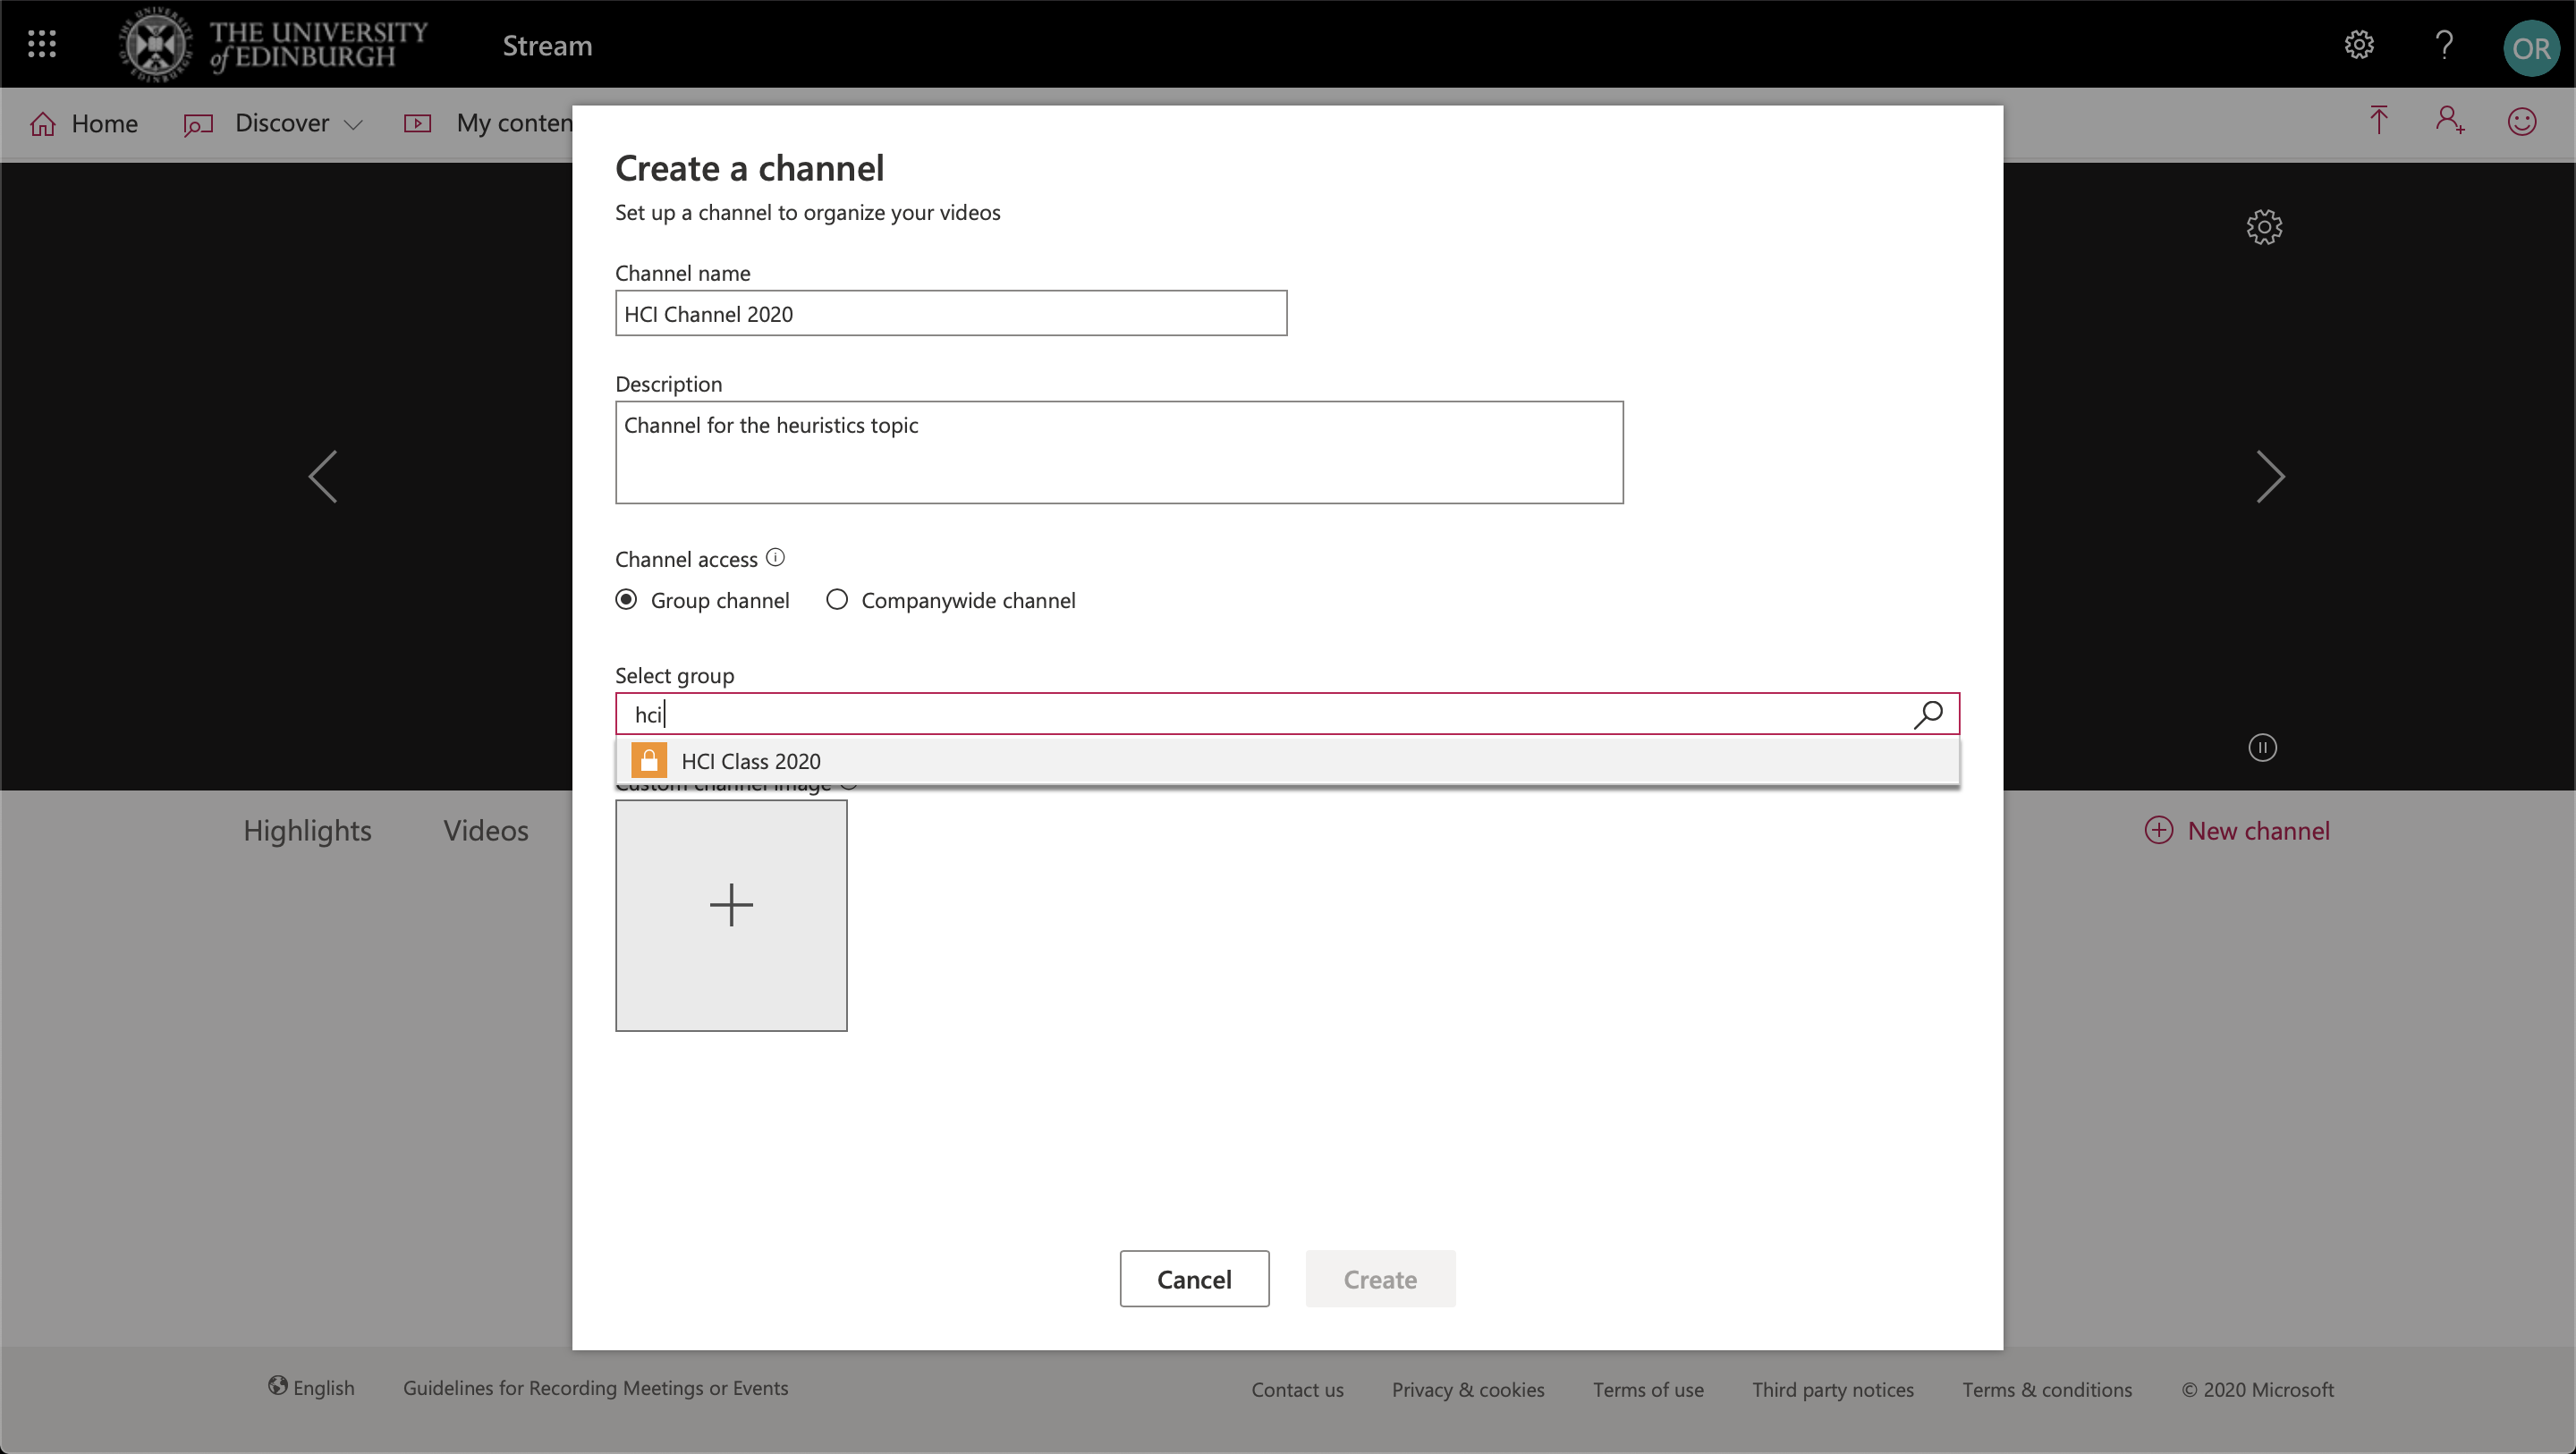
- Click +Create>Channel to make a new channel. Give the channel a name and description. Select channel access to group channel so the channel is associated with and accessible by the group you created in step 1. Select the group by searching for your group’s name.
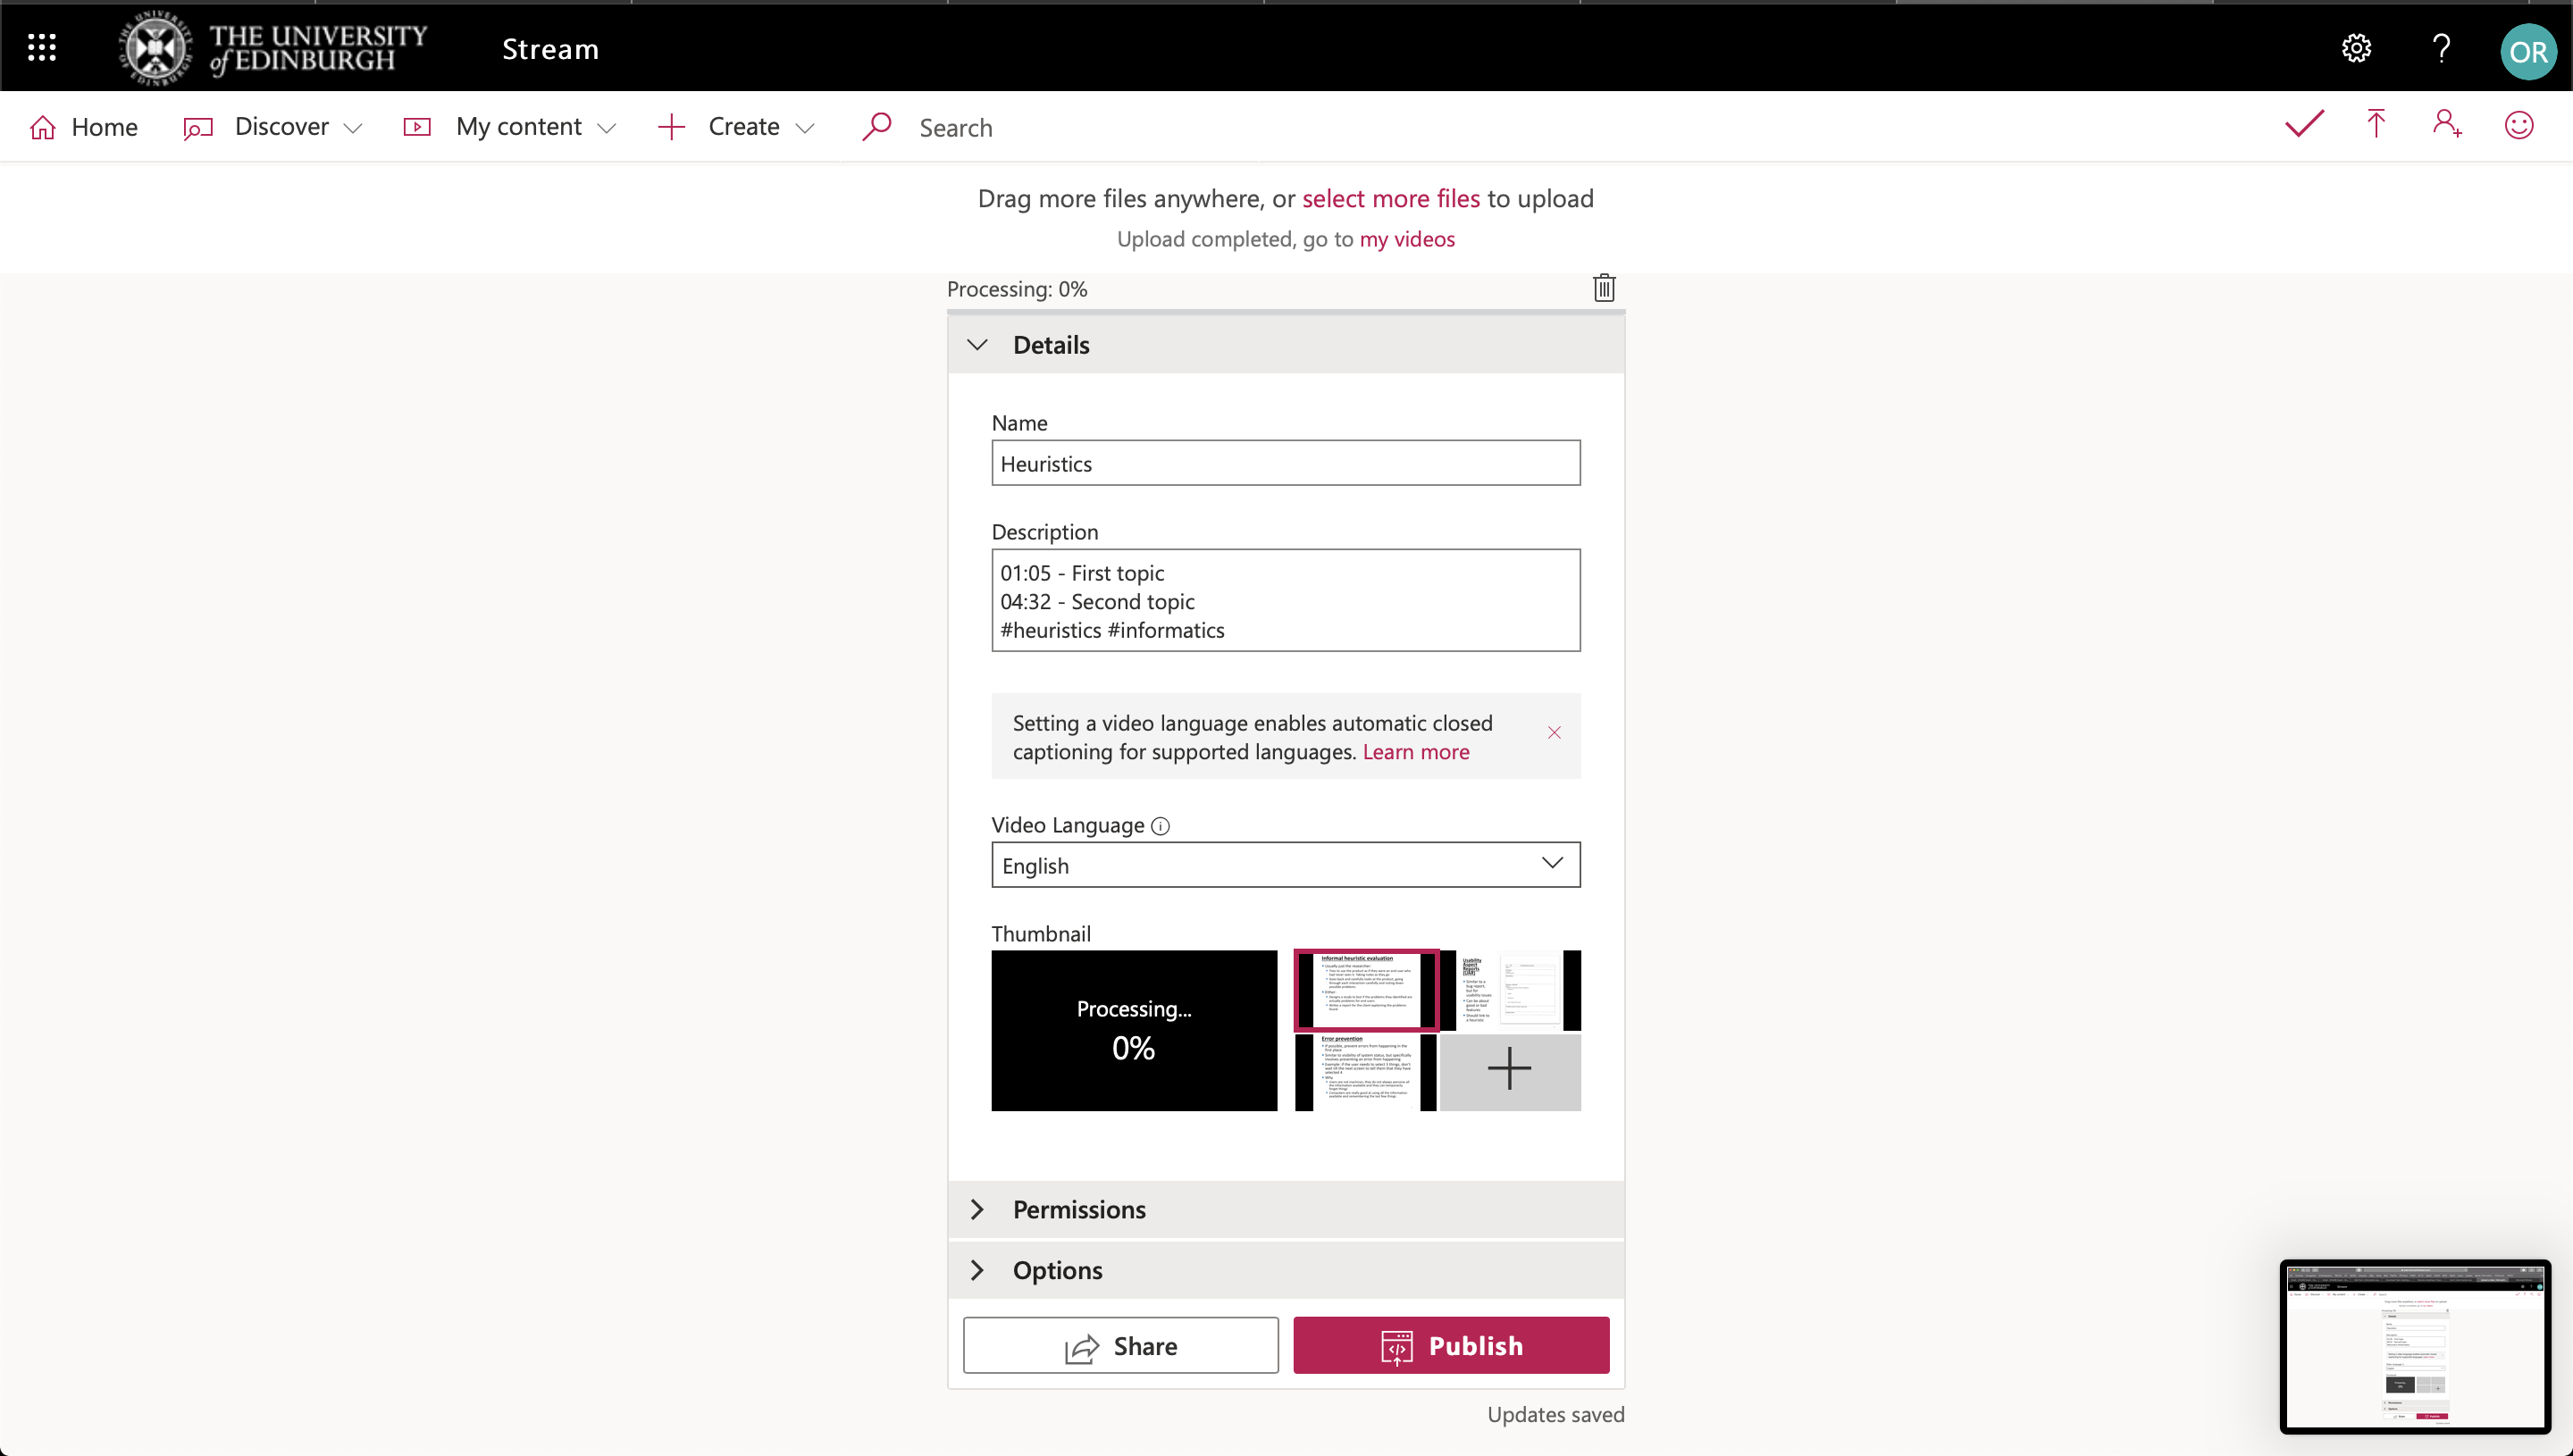
- Click the upload arrow in the top right side of the page. Drag and drop the video file to be uploaded. While the video uploads, you can edit the video’s details as below. In MS Stream, you can add timestamps in the Description that users can click on during the video to instantly move to that part of the video. Tags can also be added to help the video be easy to search. In MS Stream, videos can even be searched for by words found in their transcript.
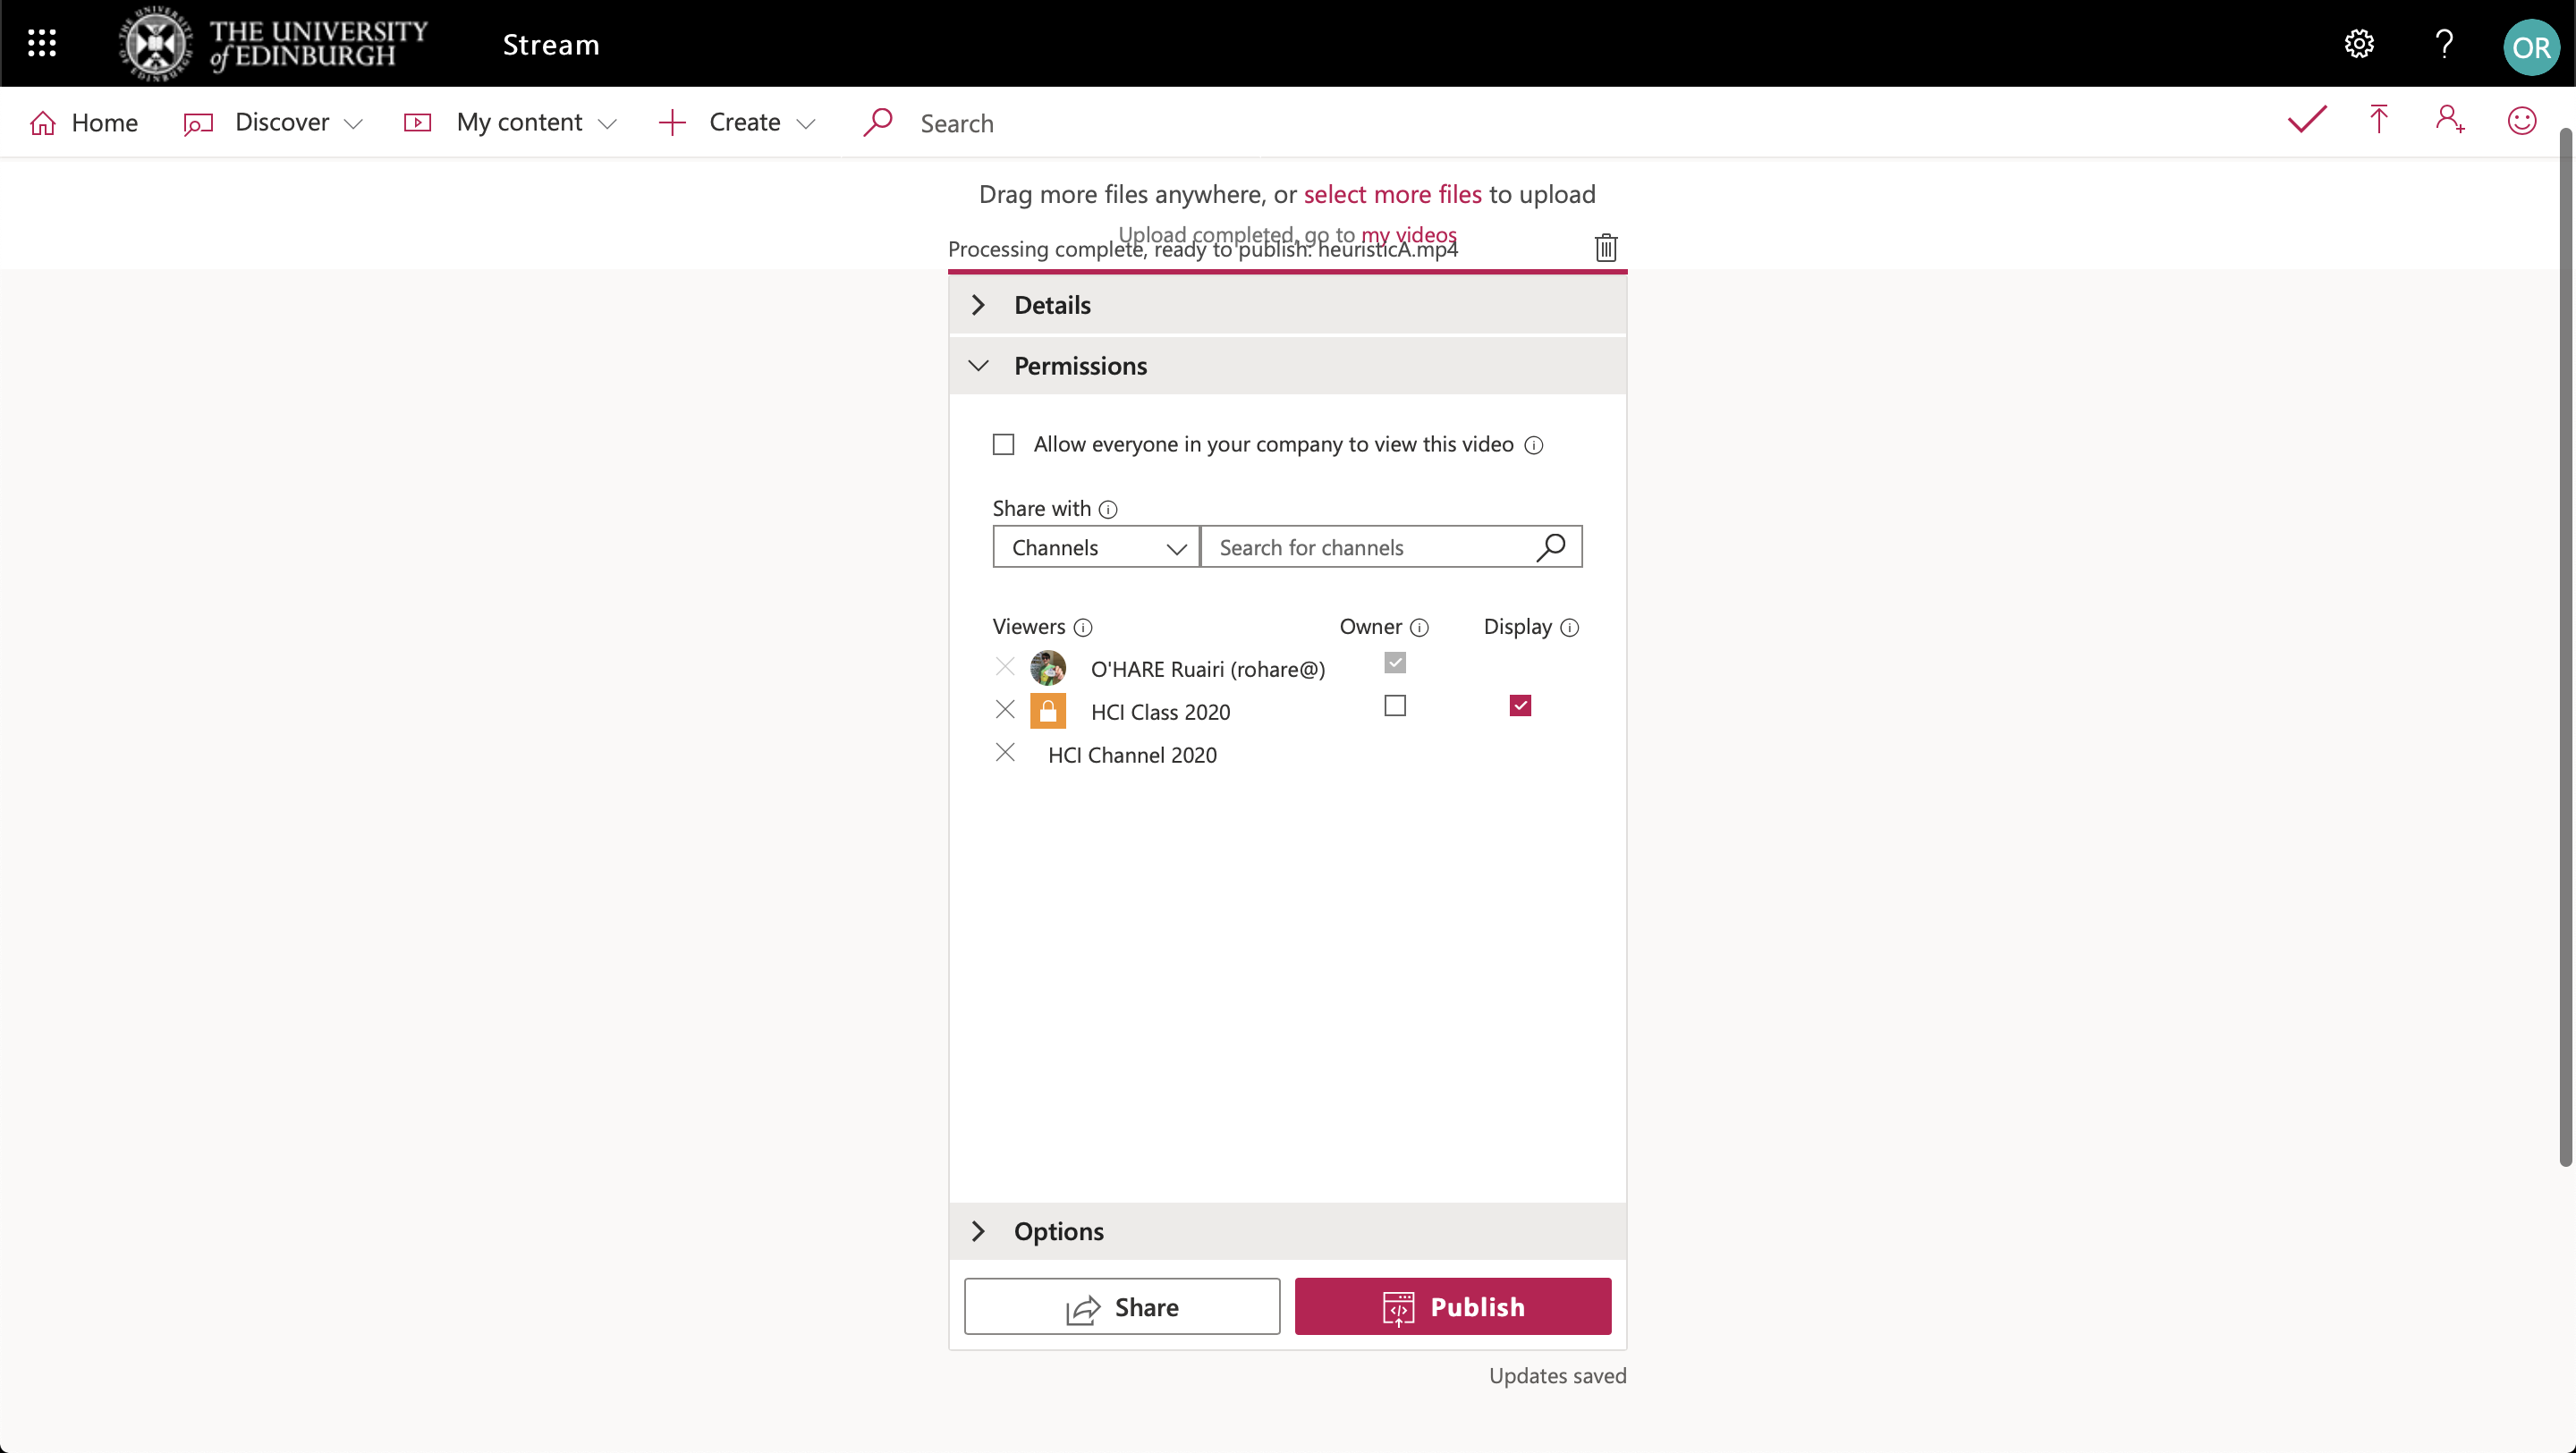
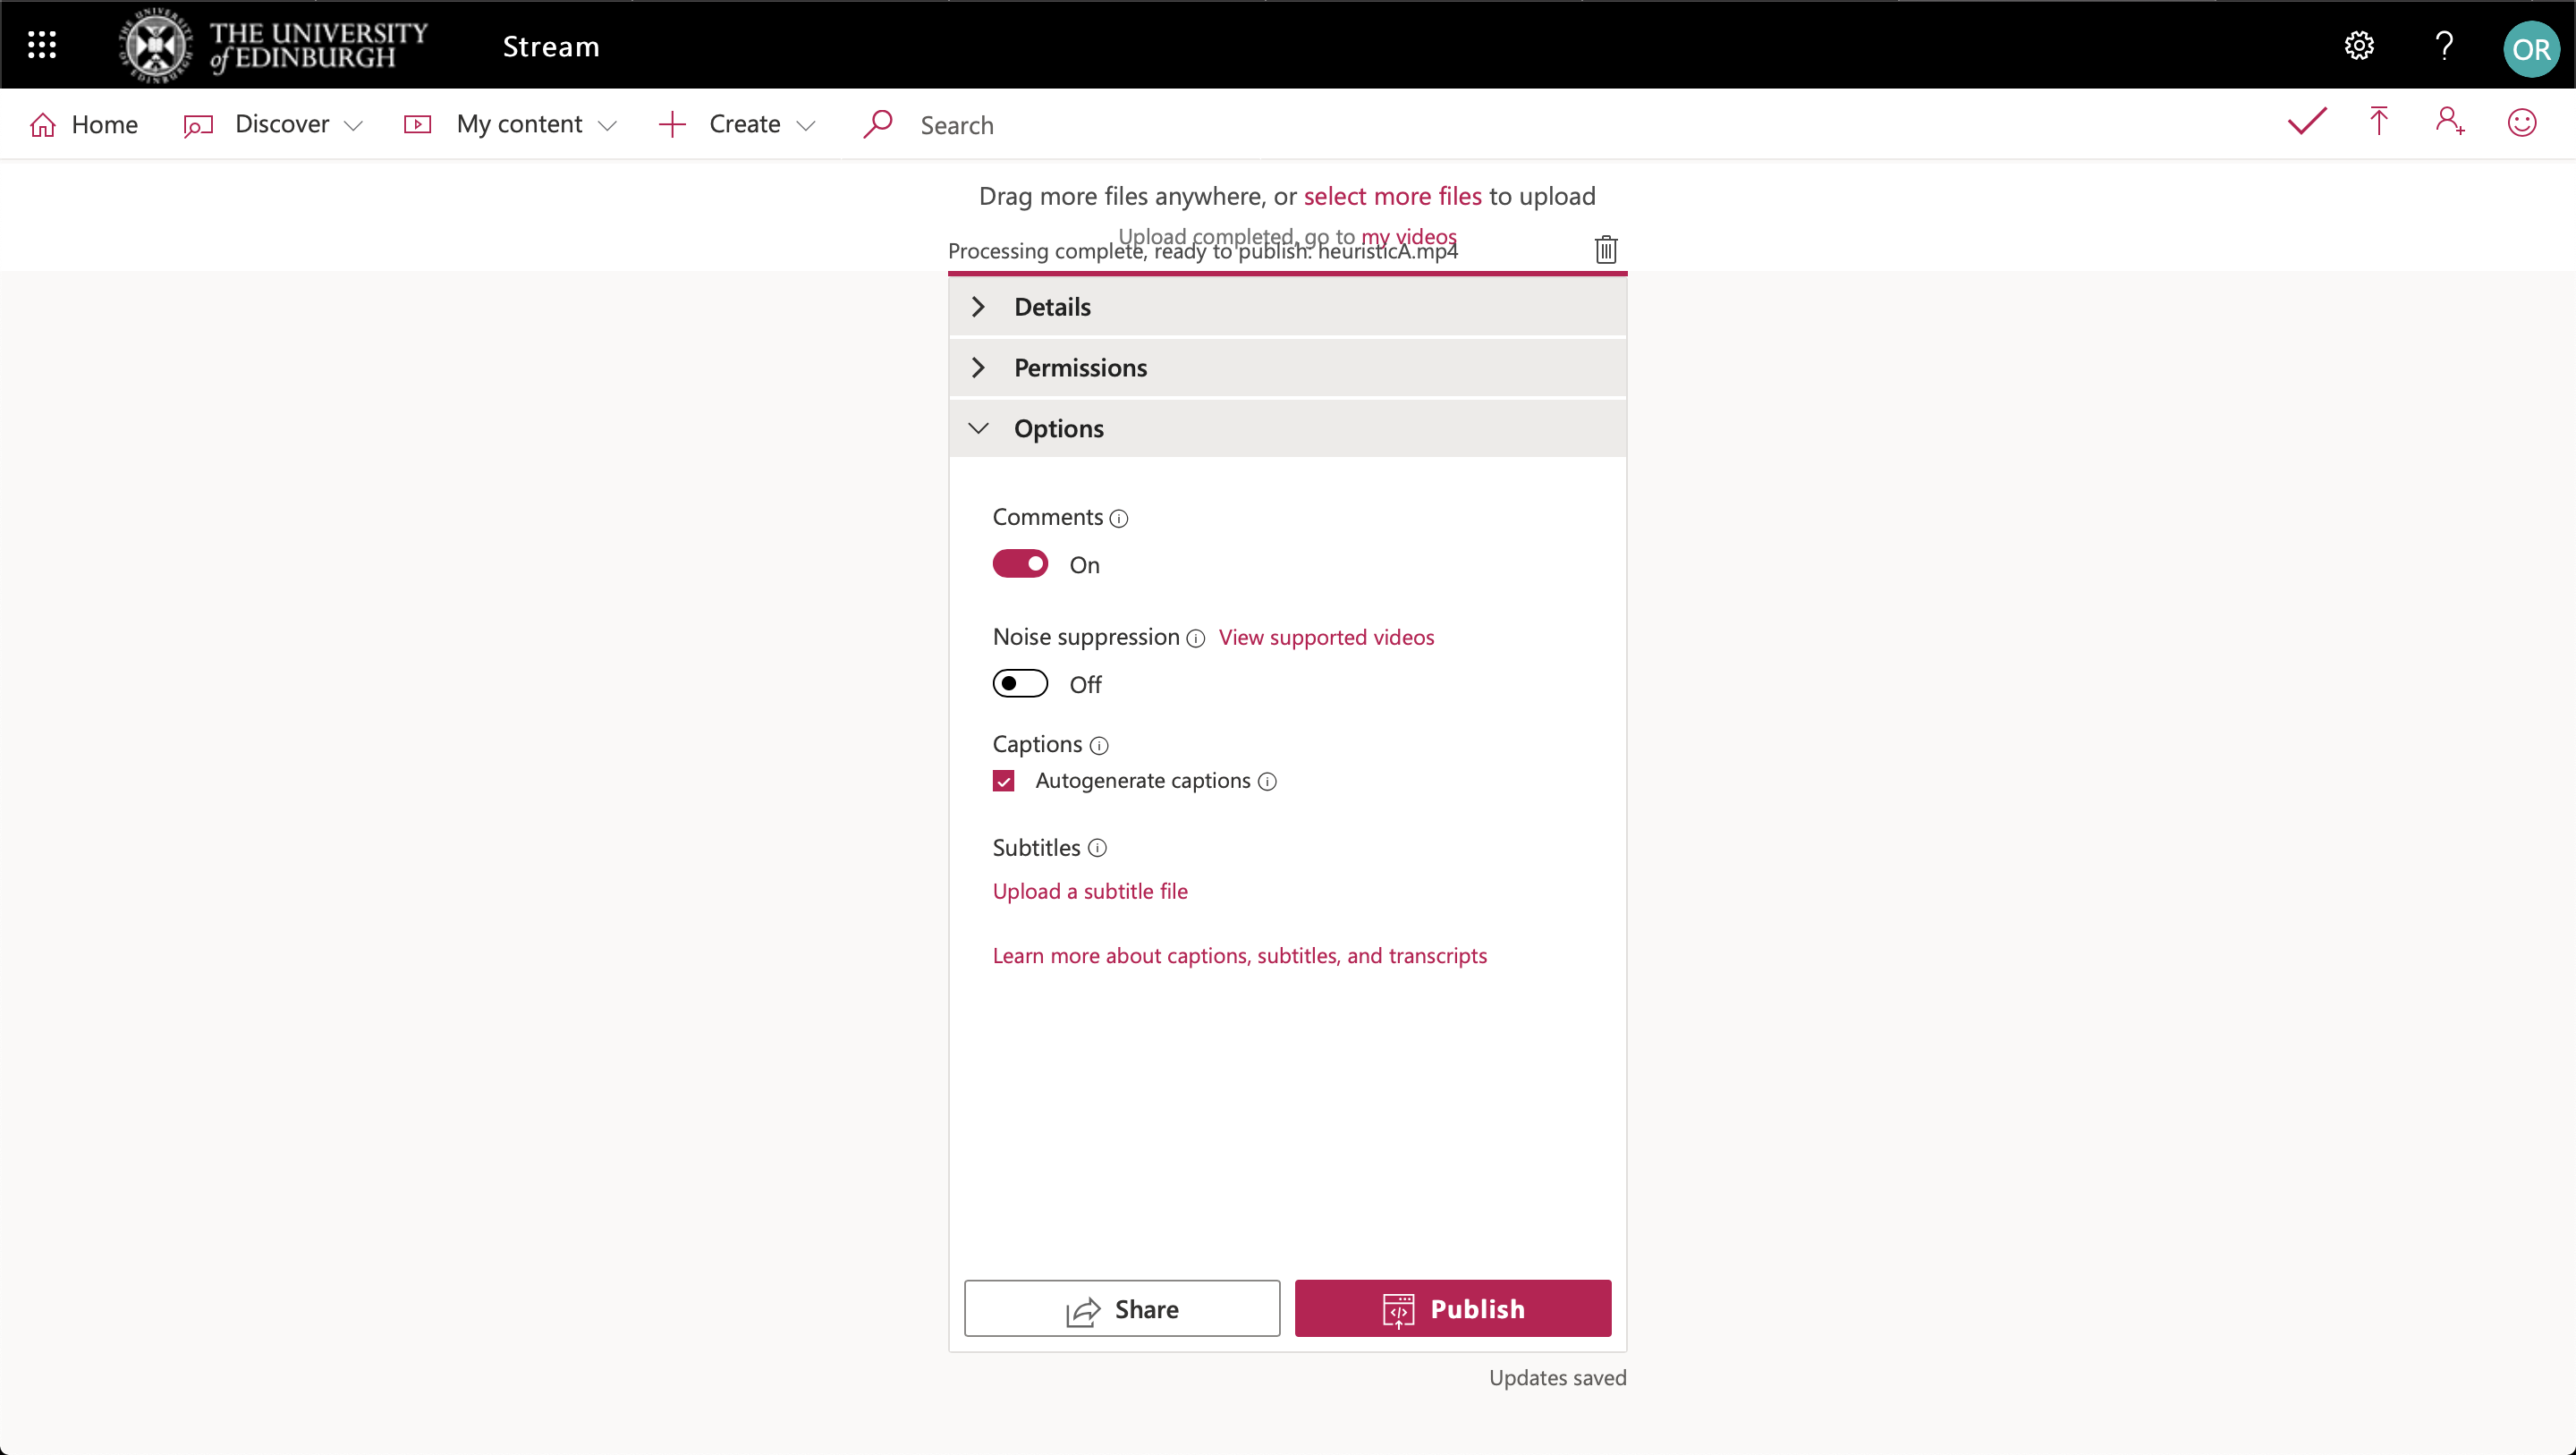
- Select the group/channel who will be able to view the video. If you give permission to a channel, the group of users that channel belongs to will automatically be able to see the video as well. In Options, you can also turn comments on/off, and choose whether automatic captioning is turned on or not (it should be turned on by default). Once you’re happy with the video’s details, select Publish and the video will be viewable within the group and group channels given permission.