Accessing your Course Materials in Drupal
The following guidance is designed to help you get up and running with your Course Materials content in Drupal. Please comment below with suggested amendments / additions.
- You will log in to Drupal using your UoE EASE account.
- Go to https://opencourse.inf.ed.ac.uk (or https://opencourse.inf.ed.ac.uk/<your course acronym>
- Select ‘Log in to edit’ in the top right of the screen. This will take you to an EASE login page. Enter your EASE credentials.
Once you are logged in, you will only be able to access courses for which you are a member of teaching staff. Each course will be listed as a separate “group” in Drupal. See the details below about how to access the group for the course(s) you teach on.
- Contact ILTS if you do *not* have access to your course(s) in Drupal.
Edit existing content
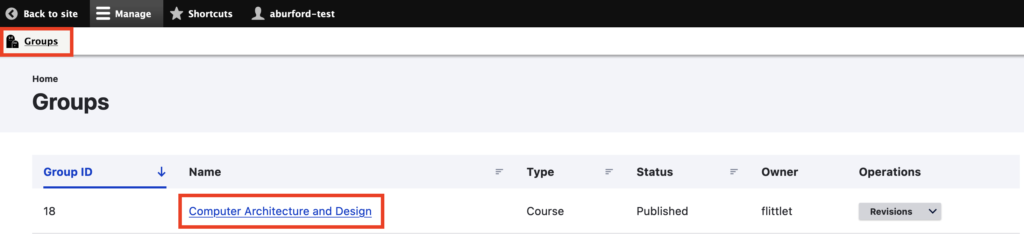
- If your course has run before, you will likely start with course materials already migrated to your Drupal site. We have created a framework for you and hope you find this helpful. It is also designed to bring some consistency of experience for our students. To view existing content, select the Groups tab in the top left of the page (under Manage). Any courses for which you have edit permissions will be listed on this page. Select the group (course) name which you wish to edit.
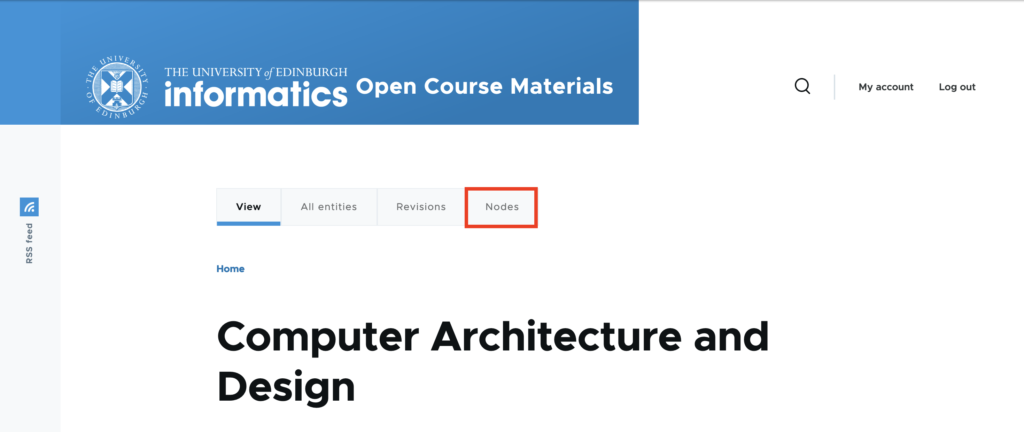
- Select the ‘Nodes’ tab to see the list of nodes (pages) for this course.
- Select ‘Edit node’ to edit a node (page)

- You will now see a web form with some content already added. You can edit content in any of the fields which follow. Change the Text Format option to ‘Full HTML’ if required.
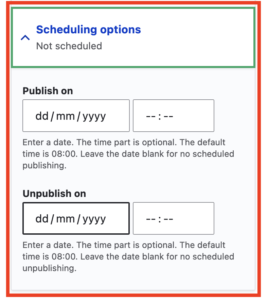
- If you wish to hide a page until a later date, you can do so by using the scheduling options panel towards the right of the page. Set a date in the future for the page to be published.
- When you have finished, select Save.
Adding new content
- Select the Groups tab in the top left of the page. Any courses for which you have edit permissions will be listed on this page. Select the group (course) name for which you wish to add content.
- Select the ‘Nodes’ tab to see the list of nodes (pages) for this course.
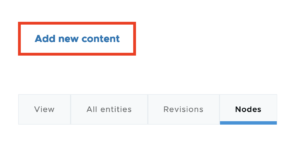
- Select ‘Add new content’ to add a page to your course materials site.
- You are now taken to the ‘Add Group nodes (Book pages)’ page. Adding content via the group ensures that your new page is assigned to the correct course. You need to give the page a title, e.g. Week 7, or perhaps a particular topic you are covering. For the time being, please ensure that the title for every new page you create starts with the course acronym, e.g. ‘ANLP: Week 7, Lecure 2’ etc. You can then add text to the Body field. Change the Text Format option to ‘Full HTML’ if required.
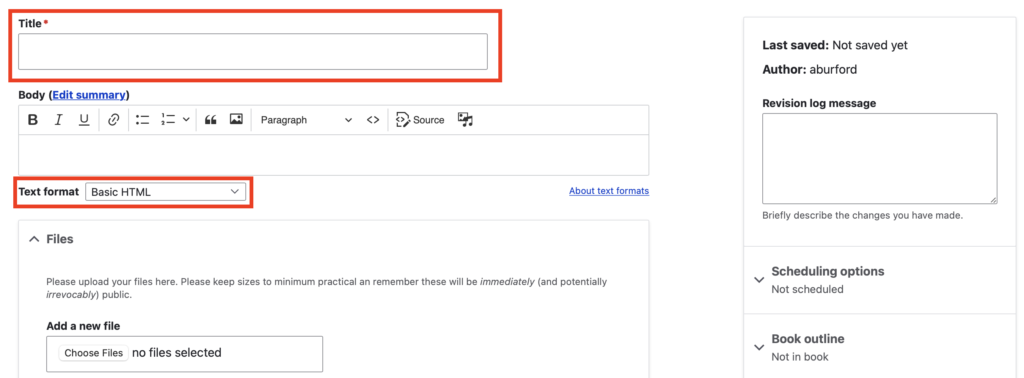
- A ‘Files’ field is made available to you. Adding files here will allow you to display the files towards the bottom of the page. You can also choose not to display the file(s) as a list, but rather copy the URL to use inline in existing text. For more detailed instructions on how to add files, see our blog post: Adding files in Drupal
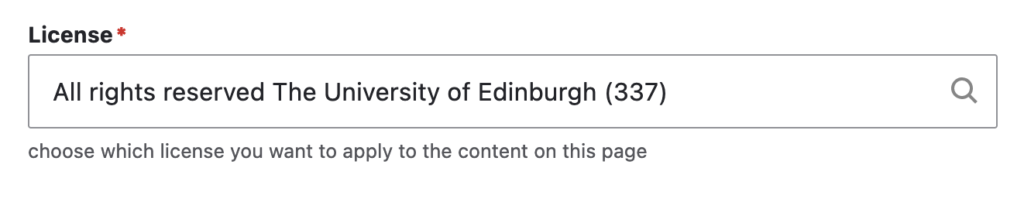
- Finally, there is a license field at the bottom of the page. This defaults to ‘All rights reserved The University of Edinburgh’. However, you can choose to change this to a Creative Commons license as you wish (if you are unsure what Creative Commons licenses are, you can find out more here). This licenses the content on the page.
- To the right of the page are three further options you should consider:
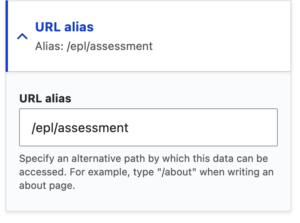
- Firstly, you should assign a URL alias to your new page. This should begin with your course acronym eg /anlp/course-materials/week-7.
-
- When adding a new page you need to ensure you you assign it to the correct ‘book’ to keep the navigation of your site comprehensible. You can assign a ‘parent’ page if you wish to nest your content and can choose the order of the pages by using the weighting mechanism.

-
- Finally, you can also schedule a suitable date and time for the publication of this new page. Enter a date and time for when you wish the page to be published. You can also enter a date to unpublish the page.
- When you have finished, select Save.
Files
We are pleased to say that we have now configured the site to allow the upload of zip files and code based files. If a file type is not currently supported, please get in touch with us to request. For instructions on how to add files, see our blog post: Adding files in Drupal
Student Preview
You can mimic the student view by simply accessing the site in an alternative browser *where you are not logged in*.
Support
The ILTS team are here to support you throughout this process. Please contact the team and we will be happy to help you. Contact details here.