Whilst auto-captioning services through Media Hopper Replay/Create are very helpful and generally reliably accurate, for very specialised academic language, including important names and definitions, auto-captioning can fill in the blanks inaccurately, making the closed captioning less useful and accessible to students. At the same time, writing accurate captions along to a playing video and making the time-stamps of the subtitles line up is quite challenging. The good news is that whilst auto-captioning systems aren’t 100% reliable for word-accuracy, they are extremely reliable for matching up a pre-written video script to the timings in the video.
We can use Google’s time-stamp generating service to achieve this goal, using YouTube, with no need to publish the video publicly facing on the platform. Firstly, write the script for your video without any time-stamps. Whatever you write will be the final captions, even if there are minor changes to what was said in the video. Log into YouTube, click Create>Upload Video.
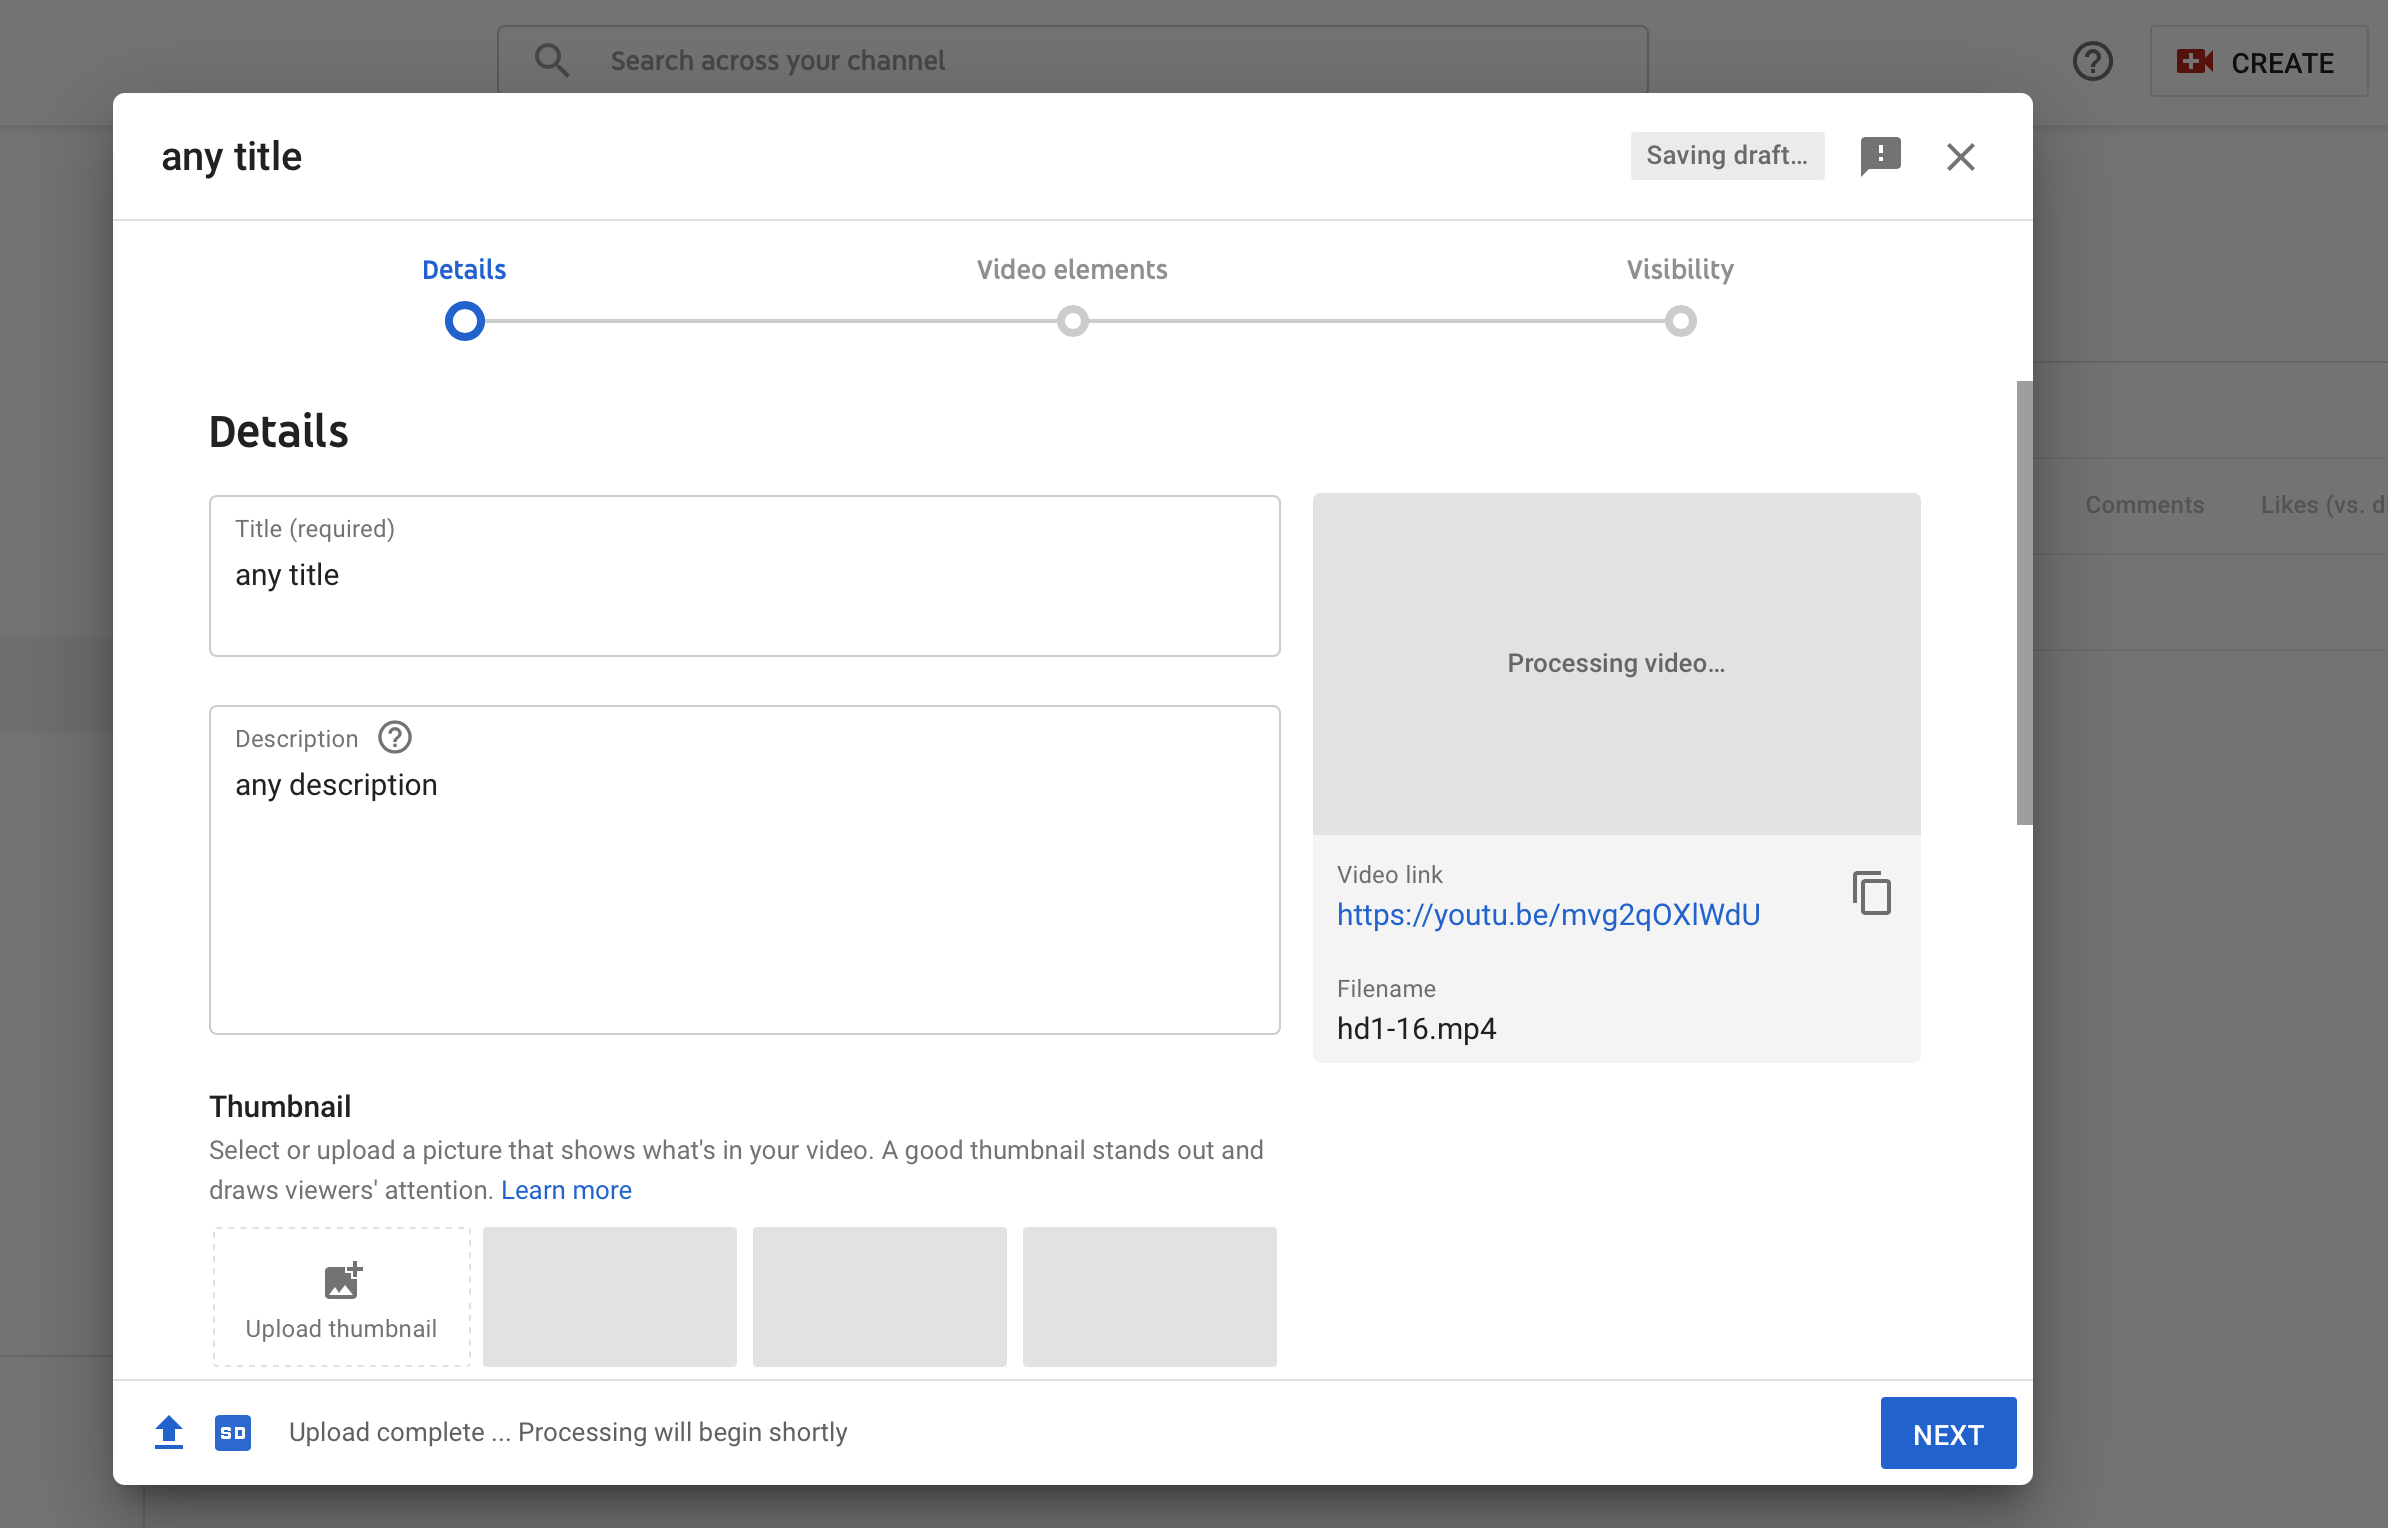
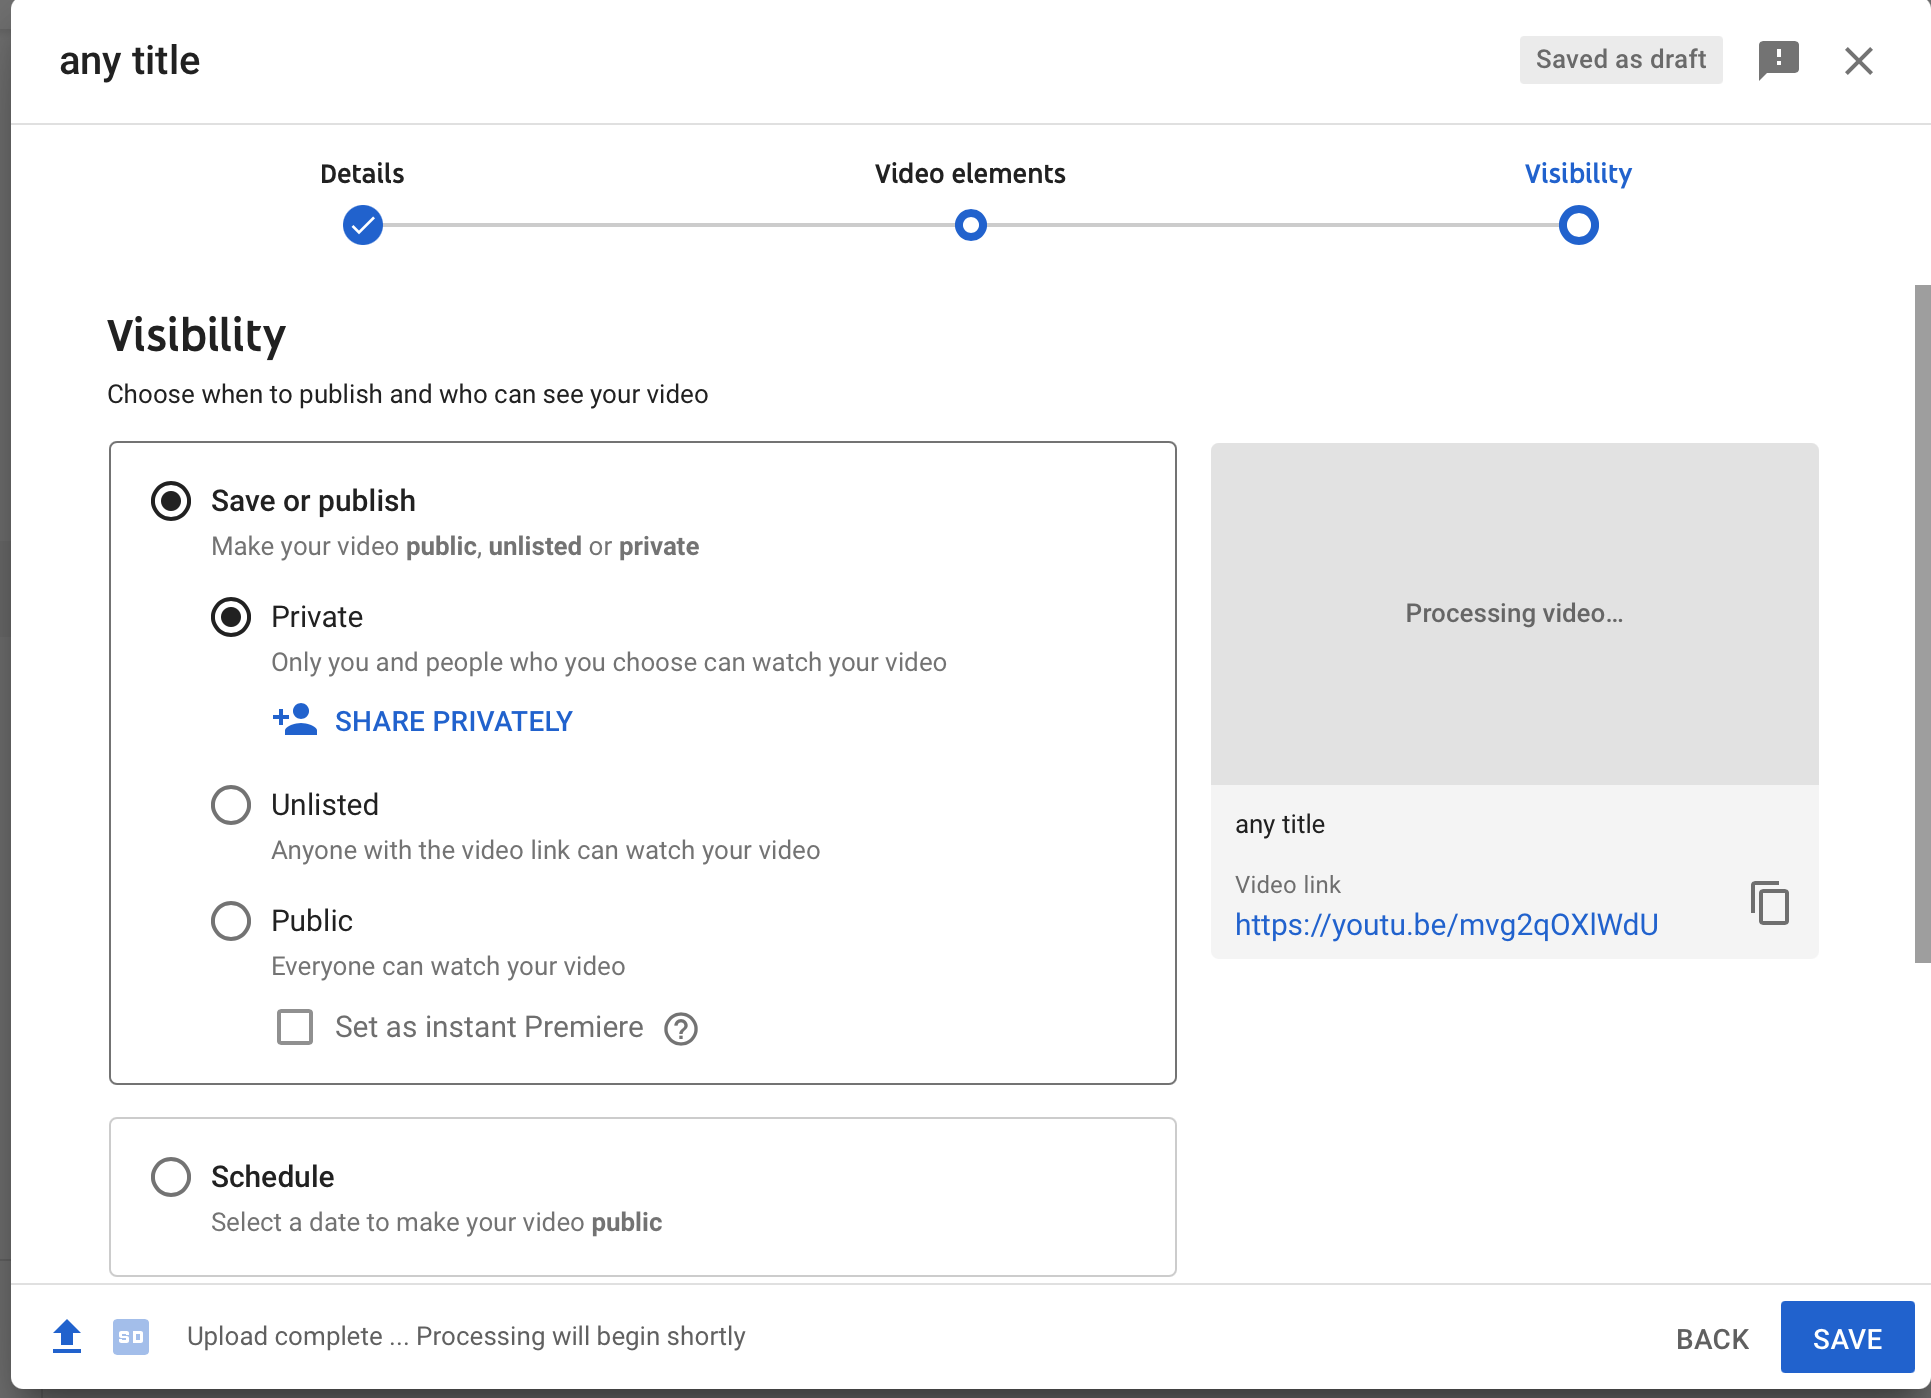
Give the video any title or description. Next, set the video to Private so it can only be viewed by you and those you share it with.
In channel content in Youtube Studio, click the Details button (pencil icon). On the screen shown below, click Subtitles, Click Add.

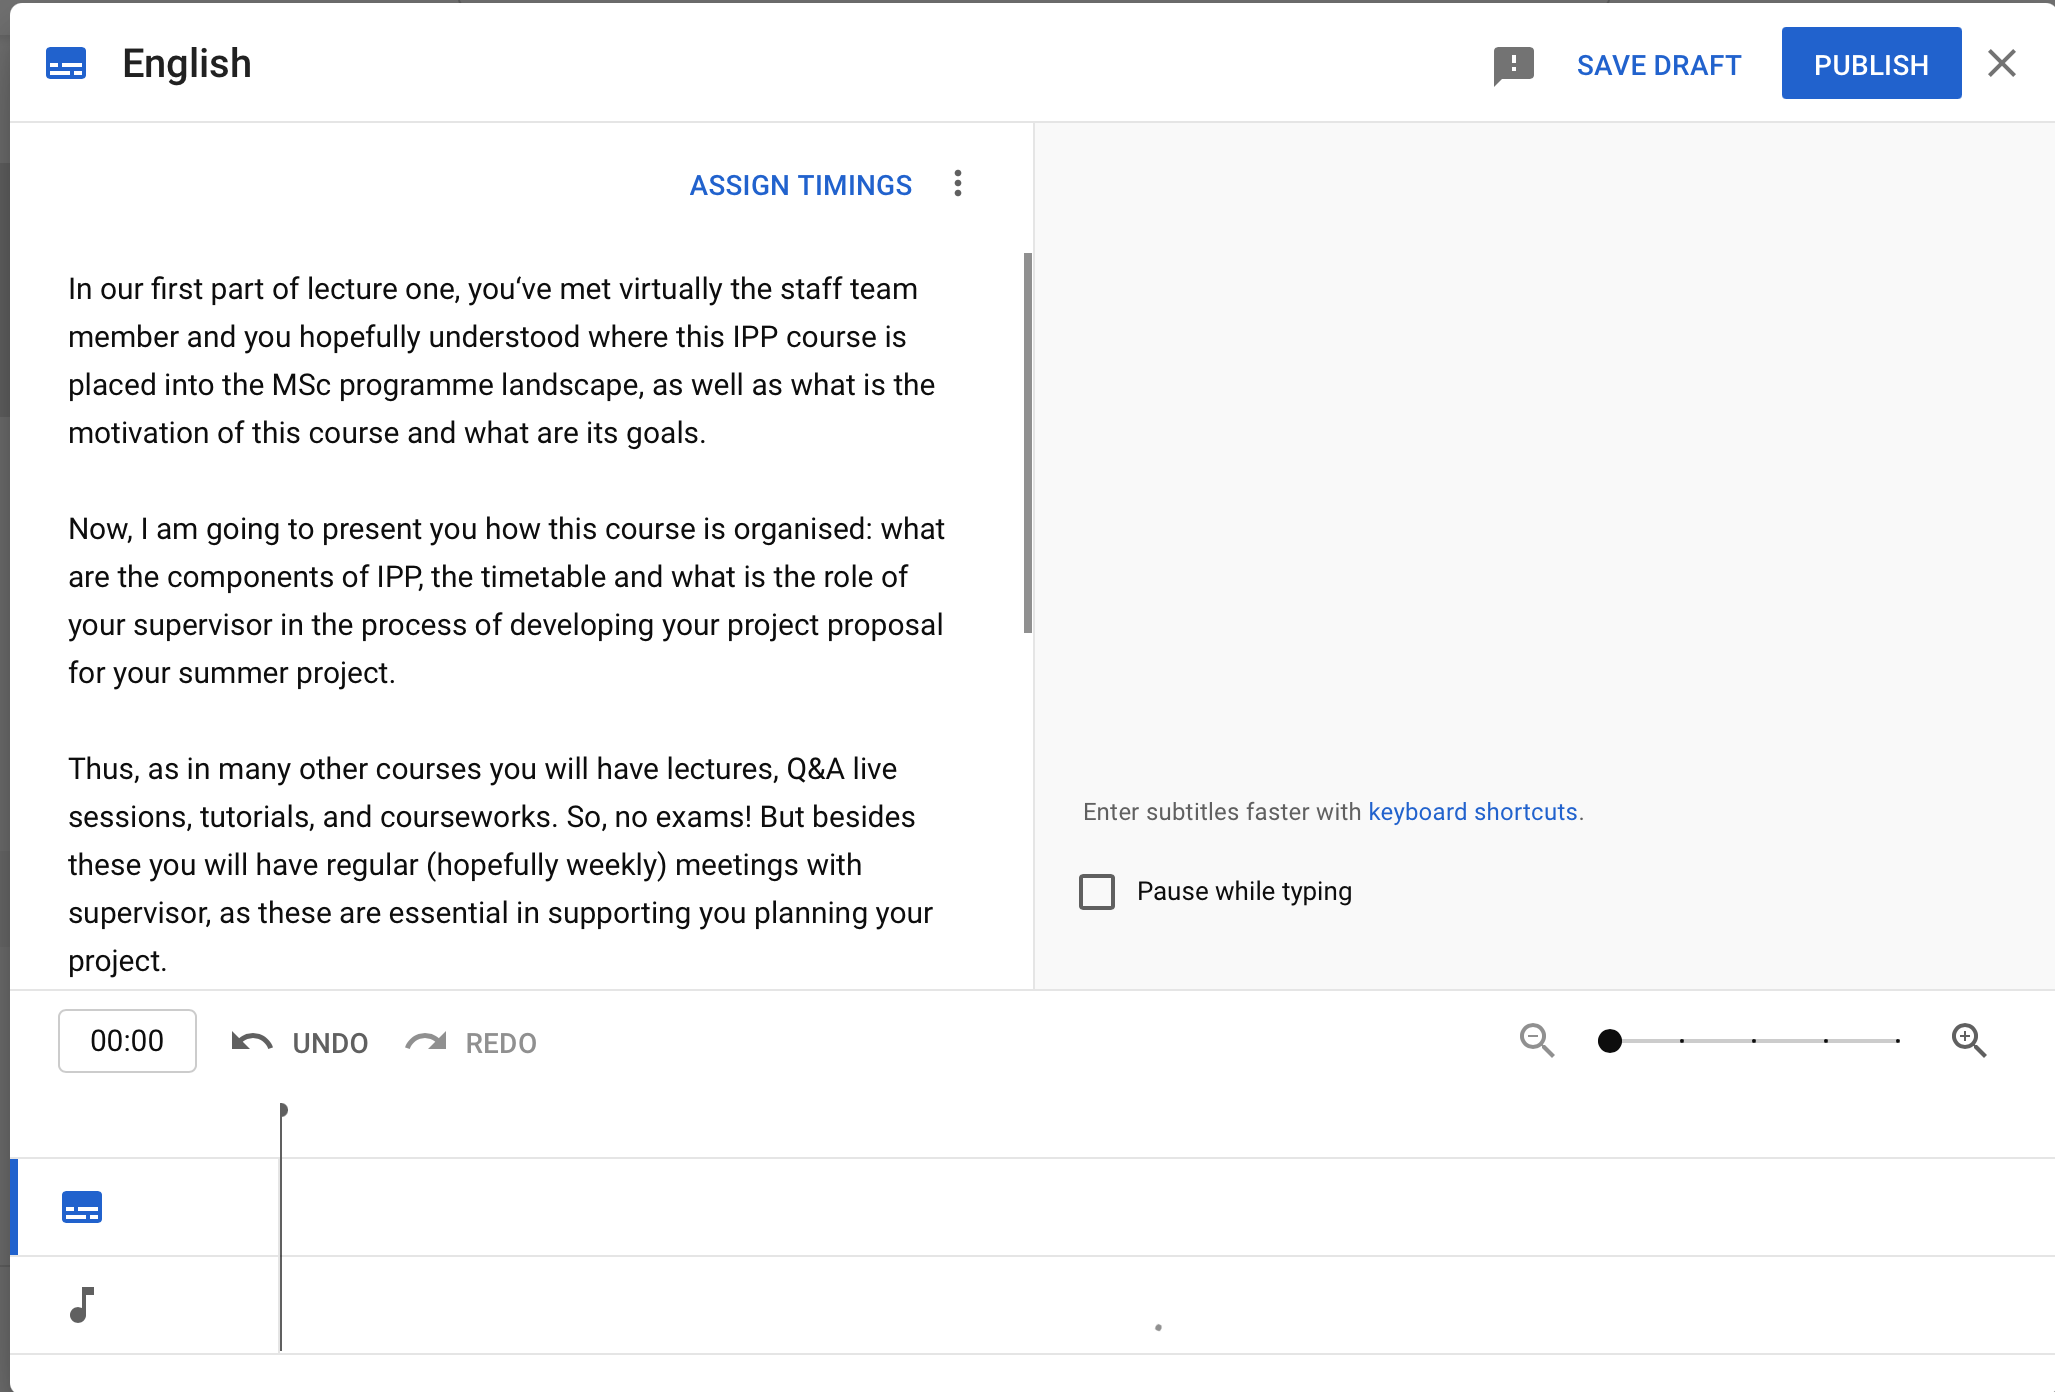
Click Auto-Sync. This will bring up the following menu where you can copy and paste your entire script. Click Publish, and YouTube will begin generating the subtitles with correct time-stamps.
Come back shortly to the Subtitles page where you clicked Add. Click the 3 dots>Download, then select the captions file type (.srt and .vtt are the best options for uploading the captions to University services). You can then use this file to upload highly accurate subtitles to your lecture videos on Media Hopper Replay or Media Hopper Create.