Fully revised January 2026.
Our most common enquiry is how to share a recording made in a previous year with a different cohort of students. This may be because something went wrong with this year’s recording* or because it would be of interest to students enrolled on an entirely different course.
In order to share a recording, you need to first make a copy of it, which will add it to your personal Media Hopper Replay library. You can then publish it to another linked course in Media Hopper Replay. This is quick and easy to do, just follow these instructions:
- Go to the Learn page for the course from which you want to copy the lecture.
- Follow the link for ‘Lecture Recordings’ on that Learn page, which will take you through to a list of all the recordings for that course.
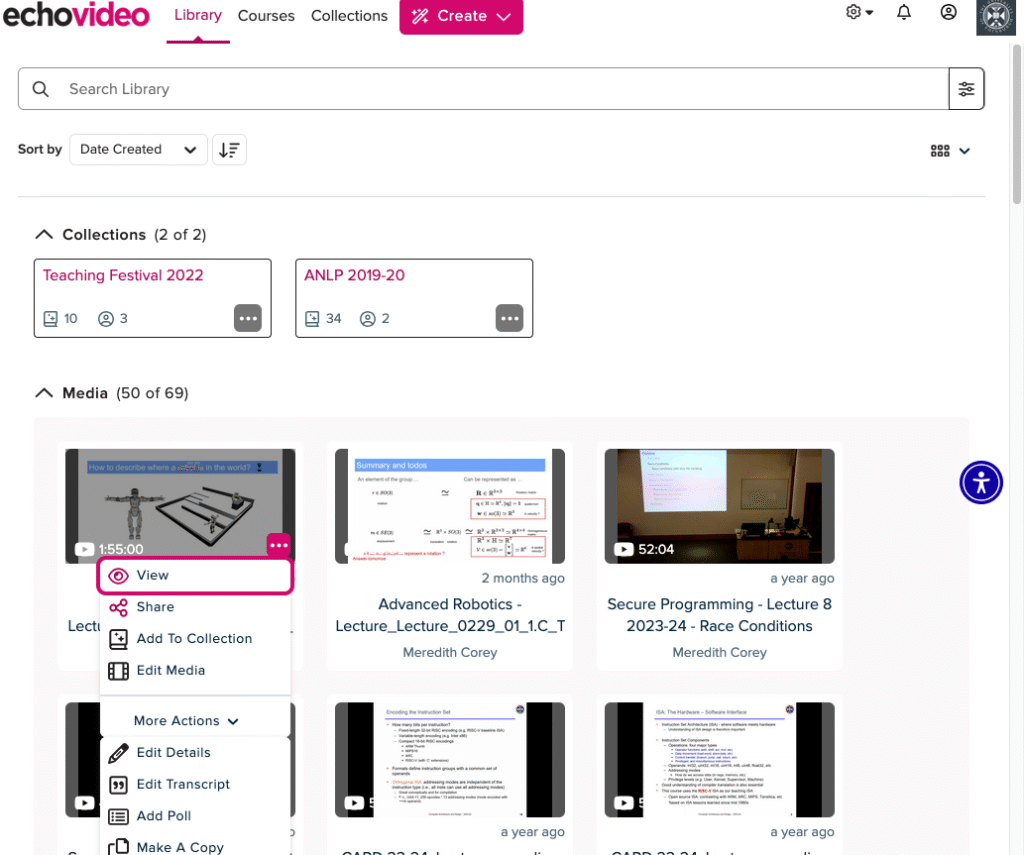
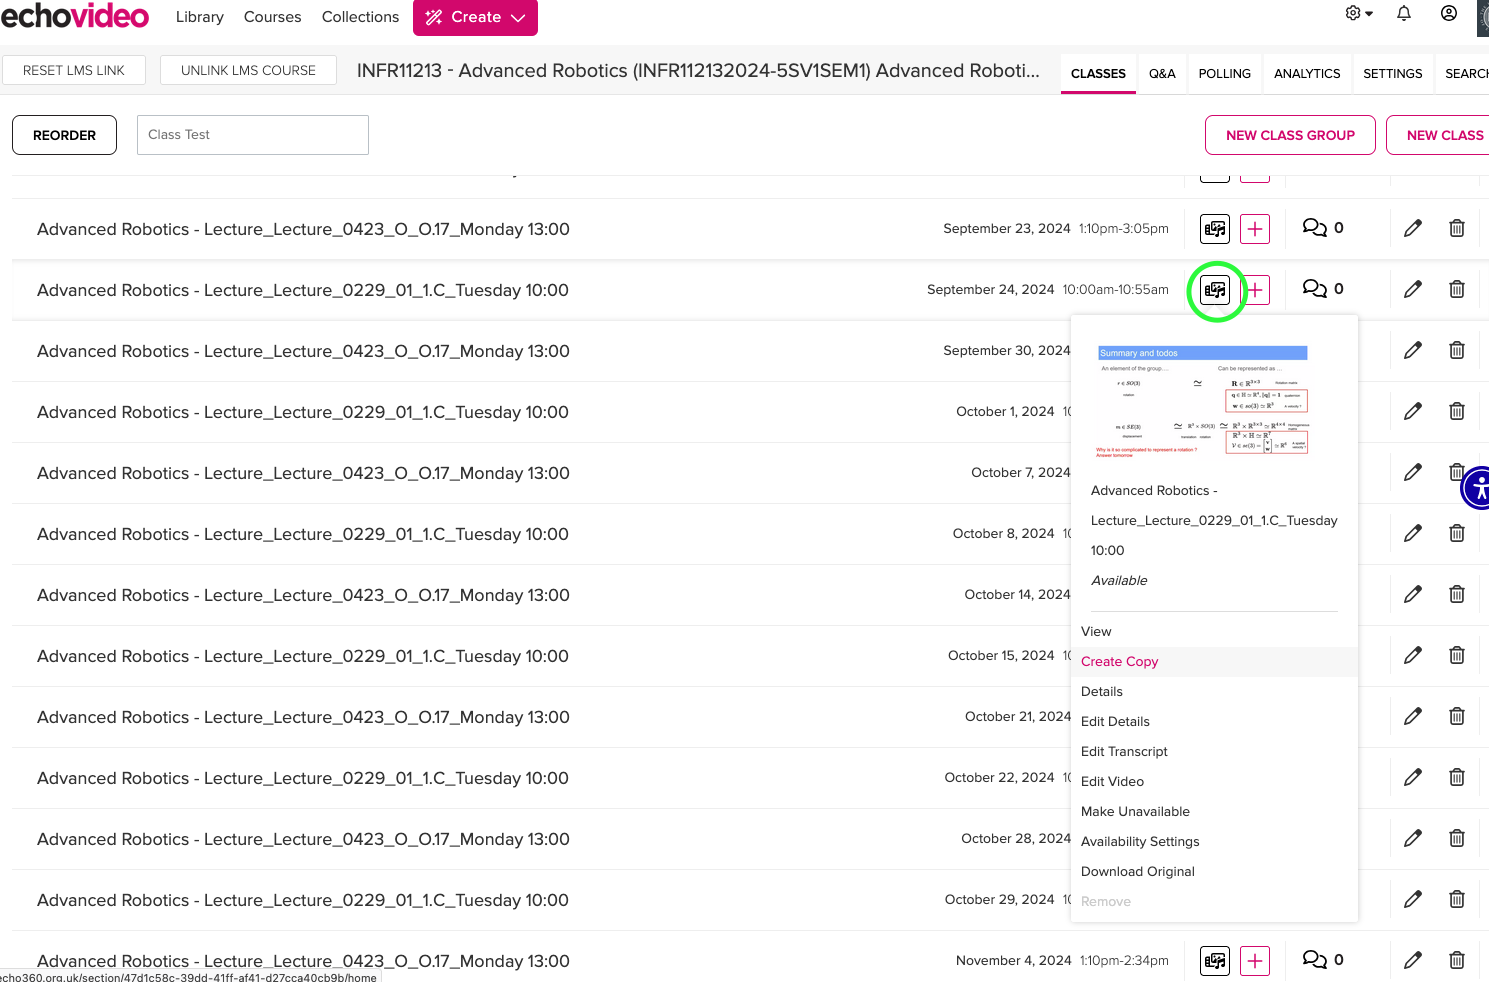
- Locate the recording you want to copy from the list and click on the actions menu to the right of the video [circled in green on the screenshot below] and then select ‘Create Copy’. A dialogue box will open asking you to confirm whether you want to copy this video; click OK to go ahead. Once the copy has been generated, there will be a pop-up message at the bottom of the screen confirming that this has been successful.
The copy has now been saved to your library on Echo360.

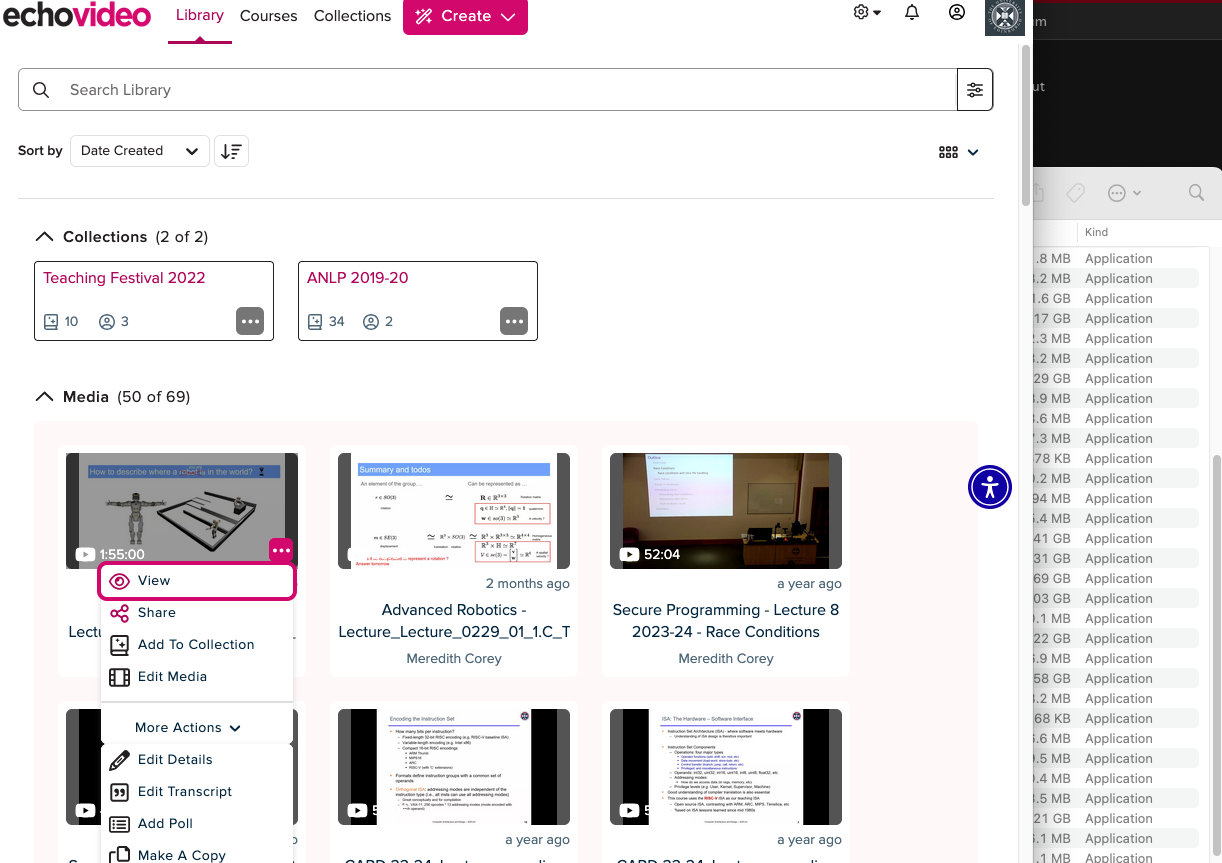
- Click on ‘Library’ at the top left of the page.
- Find the copy you just created and move your cursor over it to see the three dot (…) actions menu; click to open up the menu and select ‘Share’.
- When the ‘Share To’ dialogue box opens, select ‘Classes’, then ‘Add To Class’. You can now select any course you have Instructor access in Echo360. Once you have chosen the course you want, select the ‘Term’, i.e. academic year, and then the ‘Section’ will almost always only have one option to choose.
IMPORTANT: By default, when selecting where you want to copy the recording to, it will go with an ‘Existing Class’ for the course, which will overwrite any recording for that date. If you do not want to overwrite an existing recording, select the option for ‘New Class’ and input the required details.
Click ‘Done’. 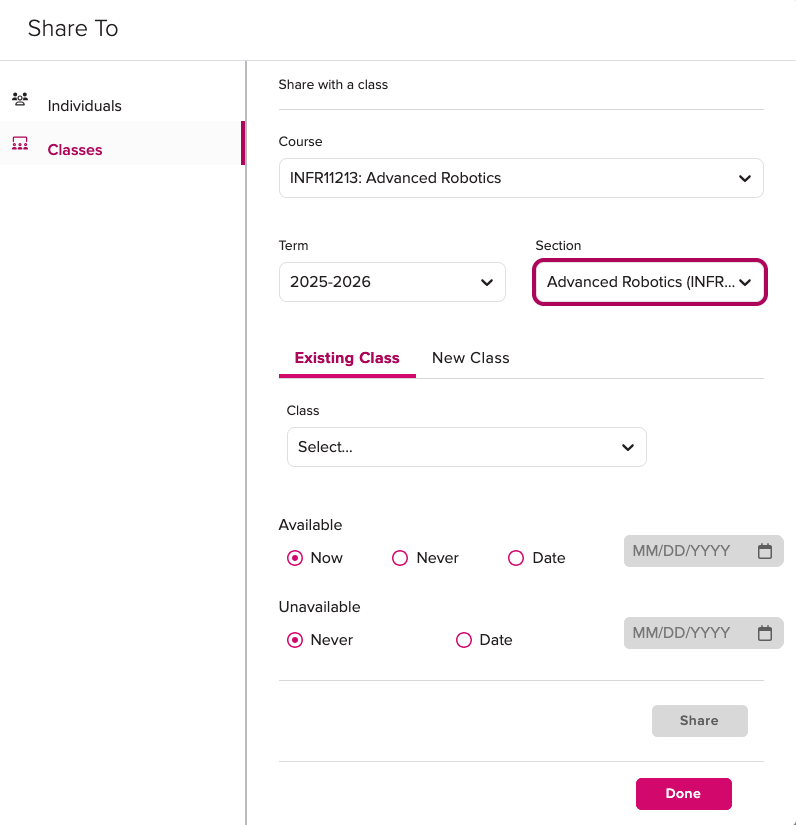
*It is, obviously, best to avoid issues with the recording, wherever possible! Make sure students in the room can hear you out of the speakers to ensure the mic is working. If you encounter any problems with the equipment in the lecture room, please contact University’s central Learning Spaces Technology team ASAP using the phone number provided in the room (or listed on their Contacting Us page), as they look after all of that equipment. They can triage over the phone or send a technician. While this may briefly disrupt your class, in most cases the issues can be resolved right away.
The IS Helpline supports Media Hopper Replay throughout the University. Contact details are listed here. You can also find some other information and instructions on the IS Media Hopper Replay Support Sharepoint pages.