
Week 11
My Projects final lighting plans
This time when I made the reflected ceiling lighting plans, I made sure to choose the luminaires I wanted to use for my project, and that way, I could calculate the number of luminaires I would need for a specific area within the space. The plans below are my final draft. My Lighting consists of downlights, LED picture luminaires I’m using as a bookcase light and LED paper tuneable paper sheets combined with opal acrylic sheets which softly diffuses the light for my main lighting.
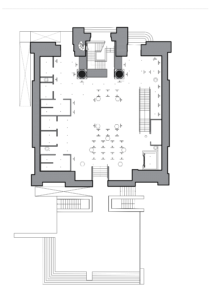
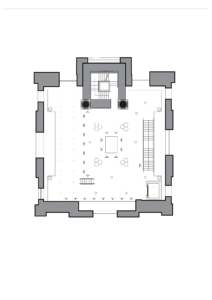
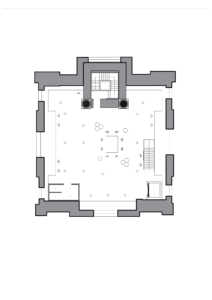
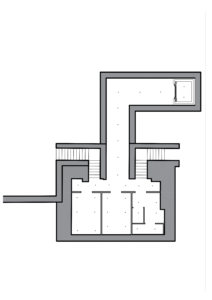
Originally, I was going to use strip lights instead of LED picture lights for my bookcases, but I didn’t like the aesthetic. I wanted a central wash of light on my bookcases and a luminaire that you could see. When doing research, I came across the picture light and thought it would be perfect for my bookcases.
As for the LED paper tuneable sheets combined with opal acrylic sheets, I got that idea from when our class was visited by product manufacturers who had this luminaire. I had a specific design in mind for my main luminaires, but I couldn’t find it anywhere, so I knew I would have to have custom-made luminaires. To do this, I first found tuneable LED paper sheets that were cuttable. Then I calculated how many sheets I would need for a certain area within the space. Based on that number I figured out how large my luminaires would look. For example, one of my calculations led to 30 LED sheets; however, the sheets were very small, and I wanted larger luminaires, so, to combat this I combined two of the sheets to create one luminaire. This would have been a simple task because the LED sheets were cuttable, and the lighting could be adjusted. From this, I could then cut the opal acrylic sheets to size. The design for that luminaire fixture is honeycomb shaped. So, the LED sheets can be cut to fit the honeycomb-shaped opal acrylic sheets. In total, I have one large honeycomb luminaire, which is 2 LED sheets, and one small honeycomb luminaire which is 1 LED sheet.


Recent comments