Author: Quentin_Bac

image_pdfimage_print

Final Reflection

Now that the course is over, I wanted to reflect on what I had learned, where I had improved, and also what I still need work on.

Firstly, it undeniably helped me in terms of practice. I had a tendency to learn something, and then not do any of it until I needed it for a project, but that meant I didn’t know as much, or didn’t have as much experience with it. So being forced to practice different drawing techniques regularly really showed me the importance of practice. It’s fun seeing how some later drawings in the course look compared to ones from the start, which at the time I thought were the best I could get.

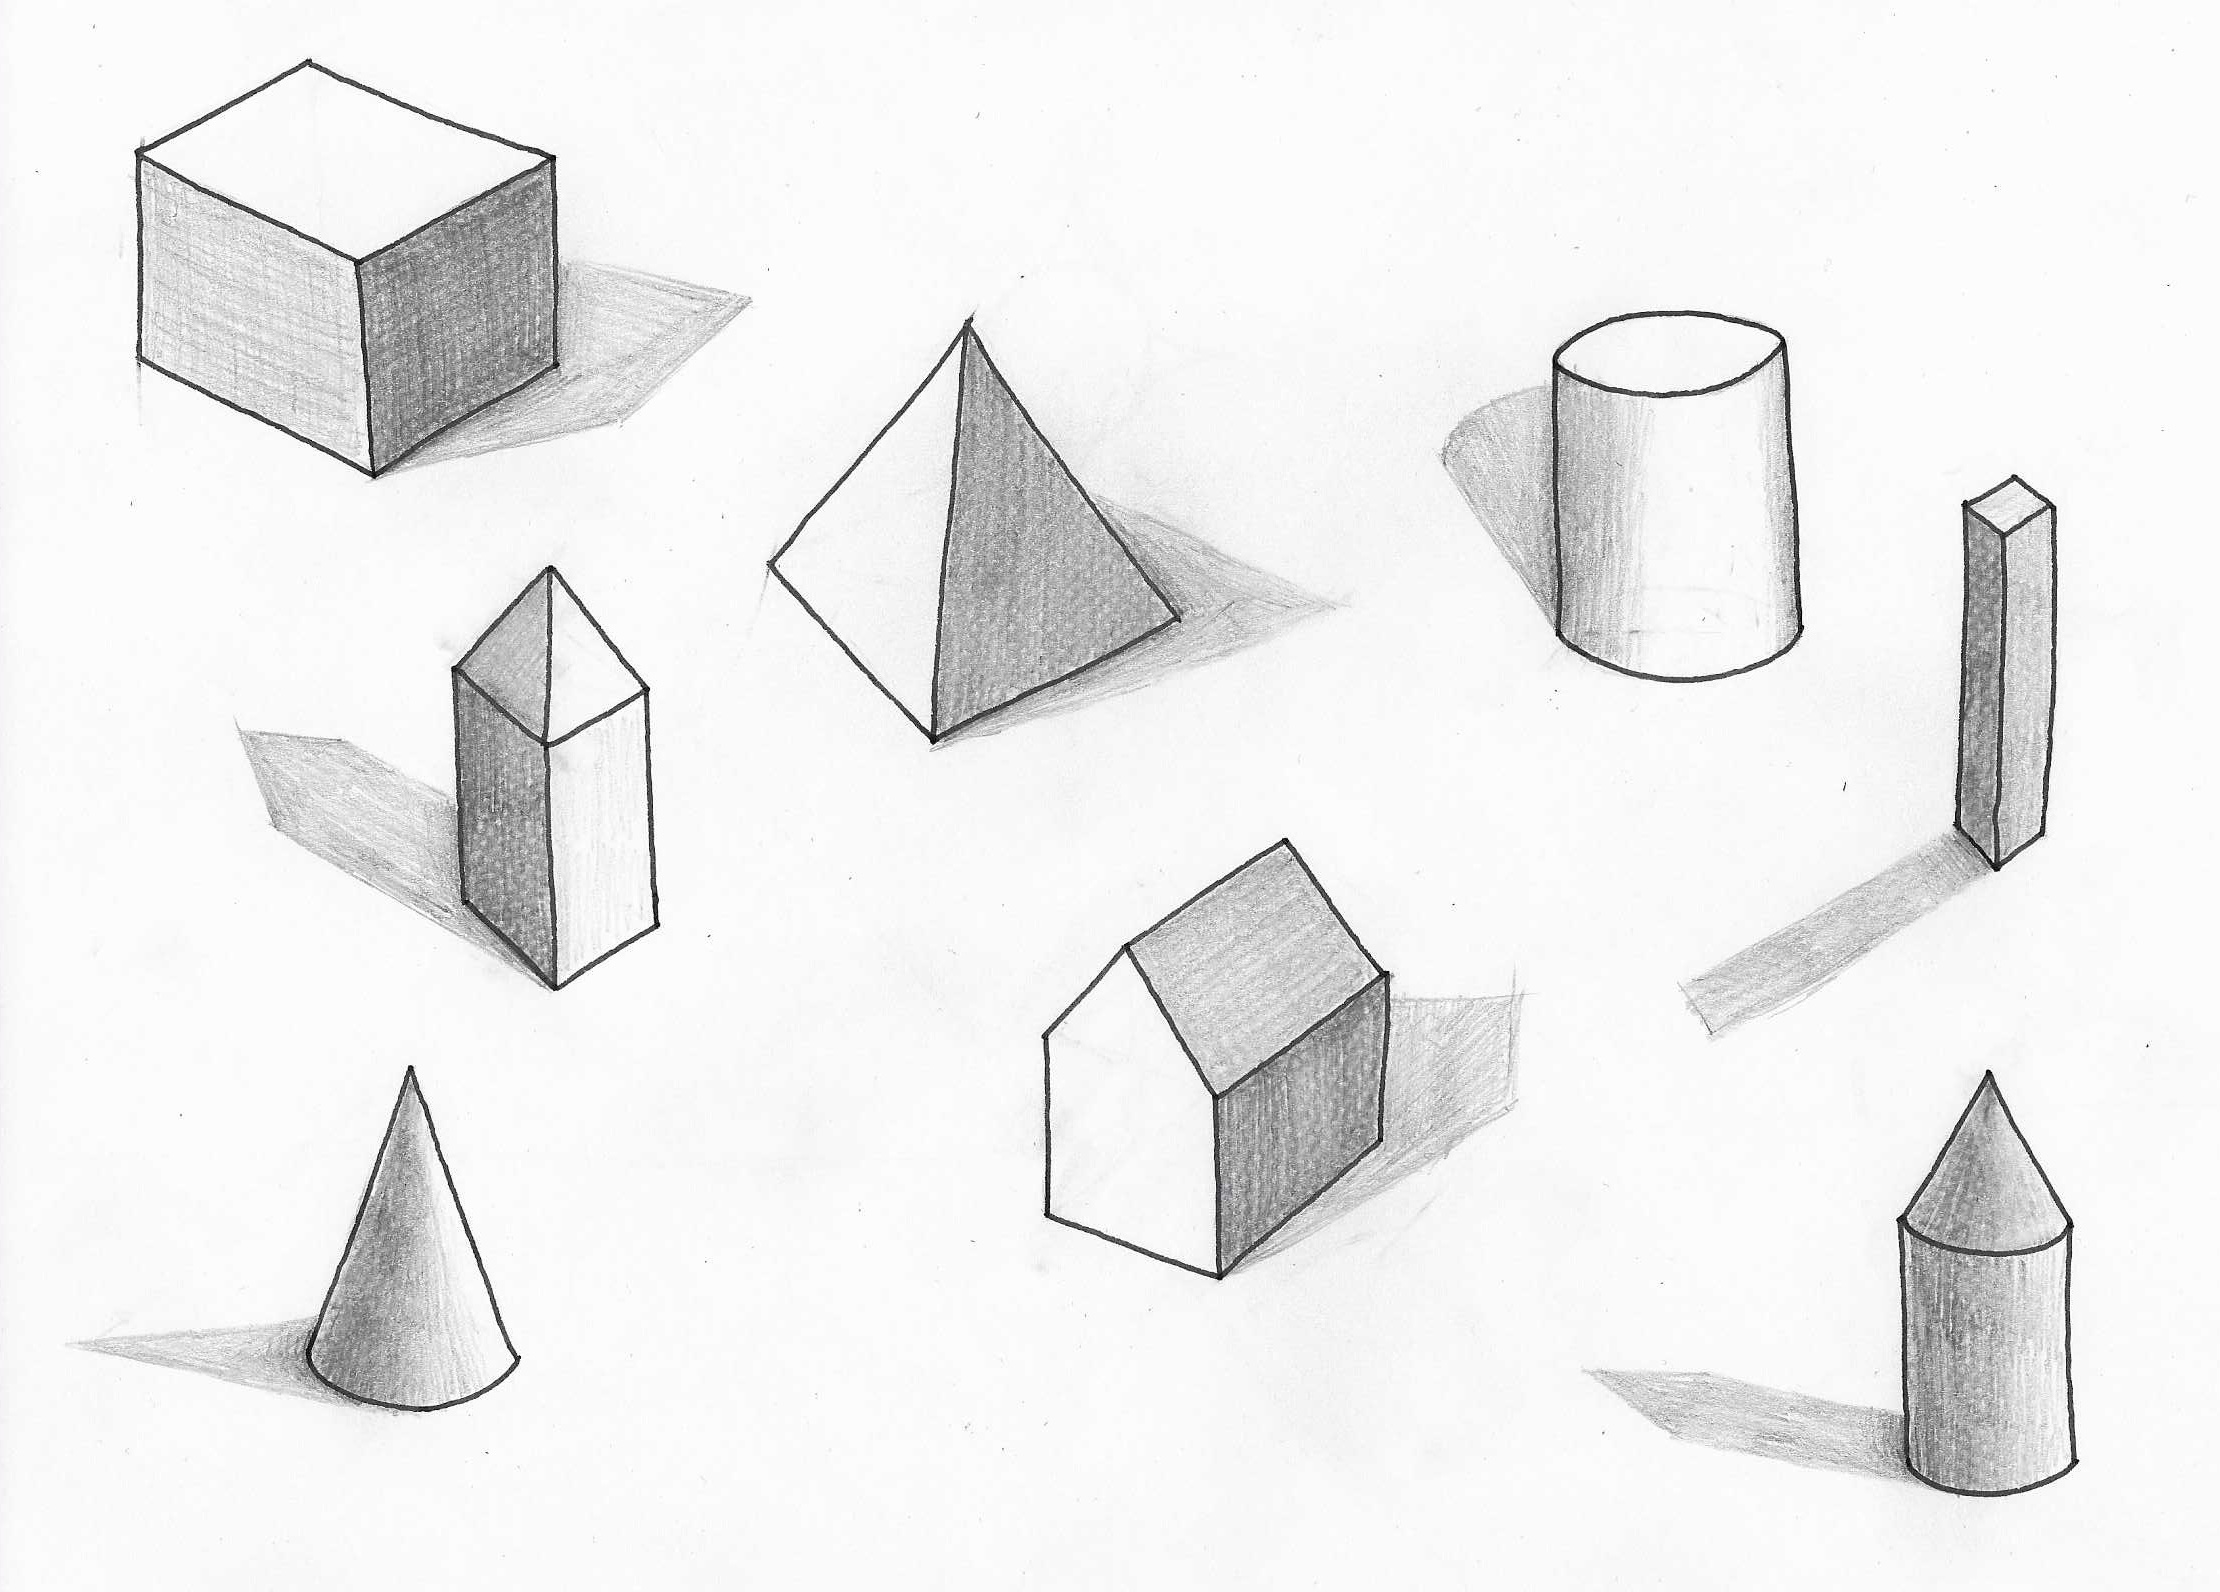
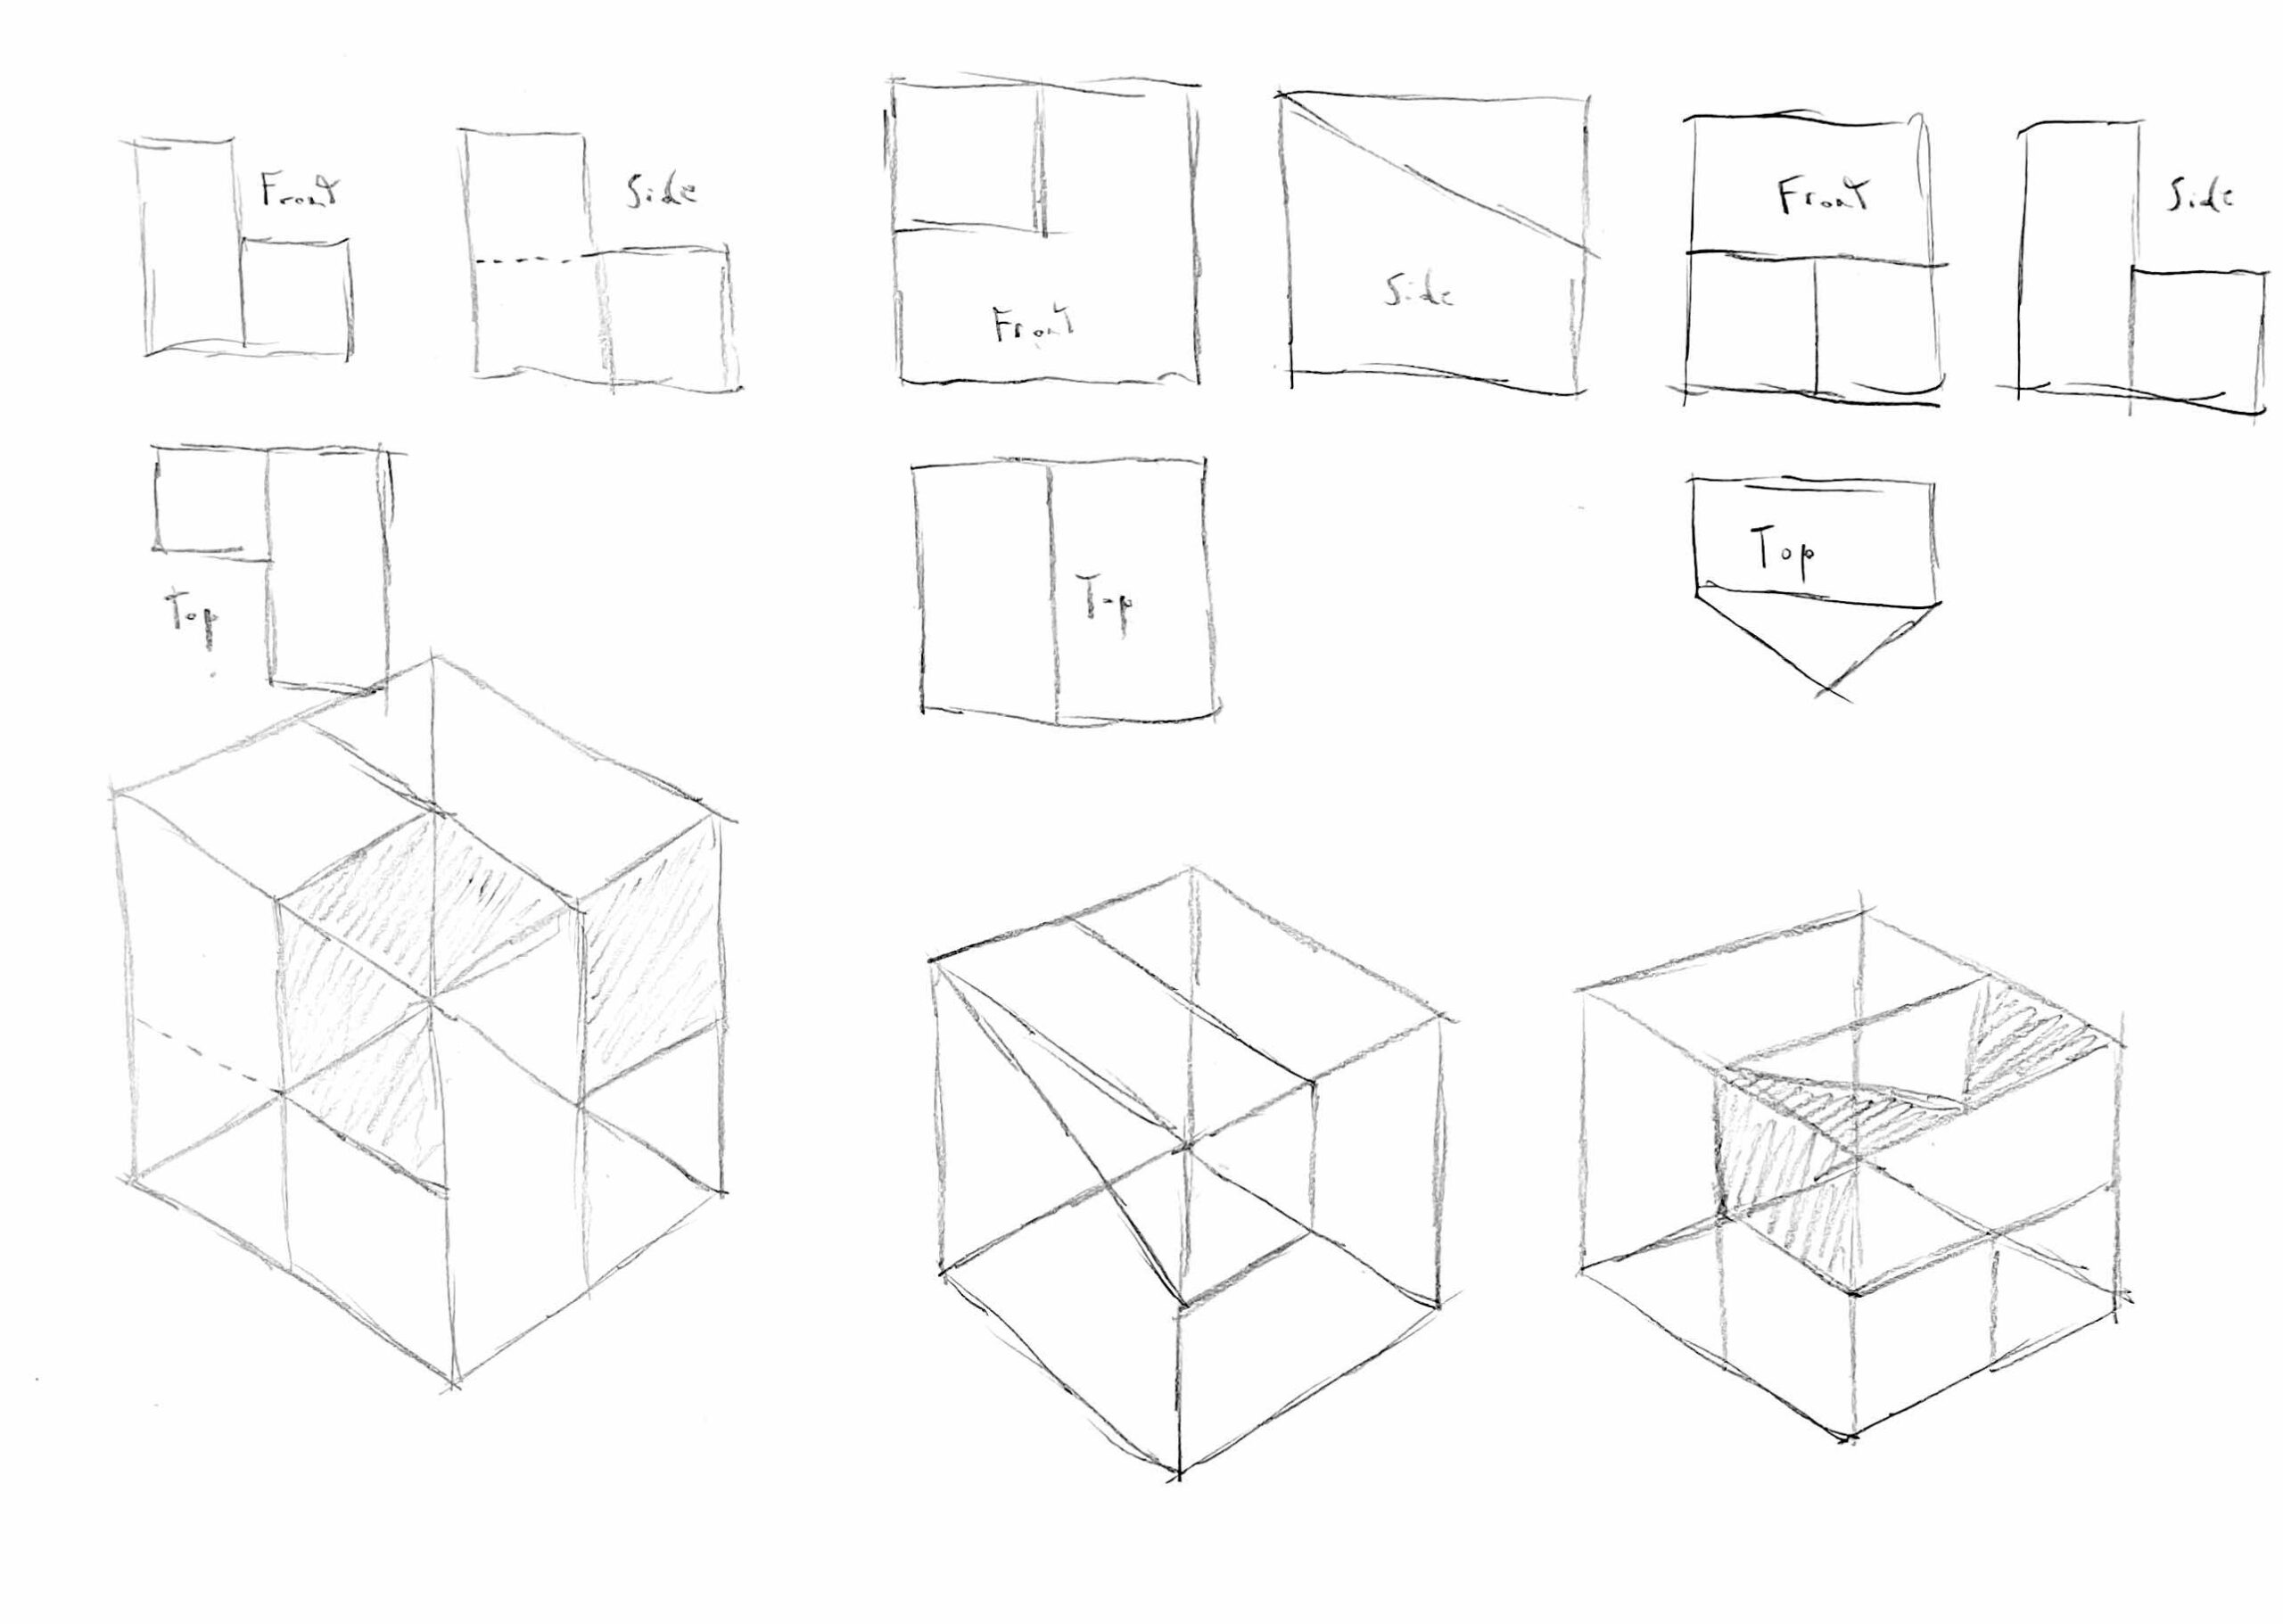
The course also made me go outside my comfort zone more. It forced me to try more drawing techniques, and ones which I wasn’t comfortable with and tended to avoid like perspective. It also forced me to try new ones, like the rotated plan method. However, I feel I still tend to stick to one or just a few styles, and easily be afraid of techniques I’m less comfortable with, so I definitely to keep practicing different things, in order to be more open in that sense.

And though I should try different things, I’m happy I’ve maybe started developing my personal style, which is really fun to see looking back at my work. I feel it gives the different things I did somewhat of a coherence, and I definitely want to keep exploring that, whilst of course still trying different techniques and styles.

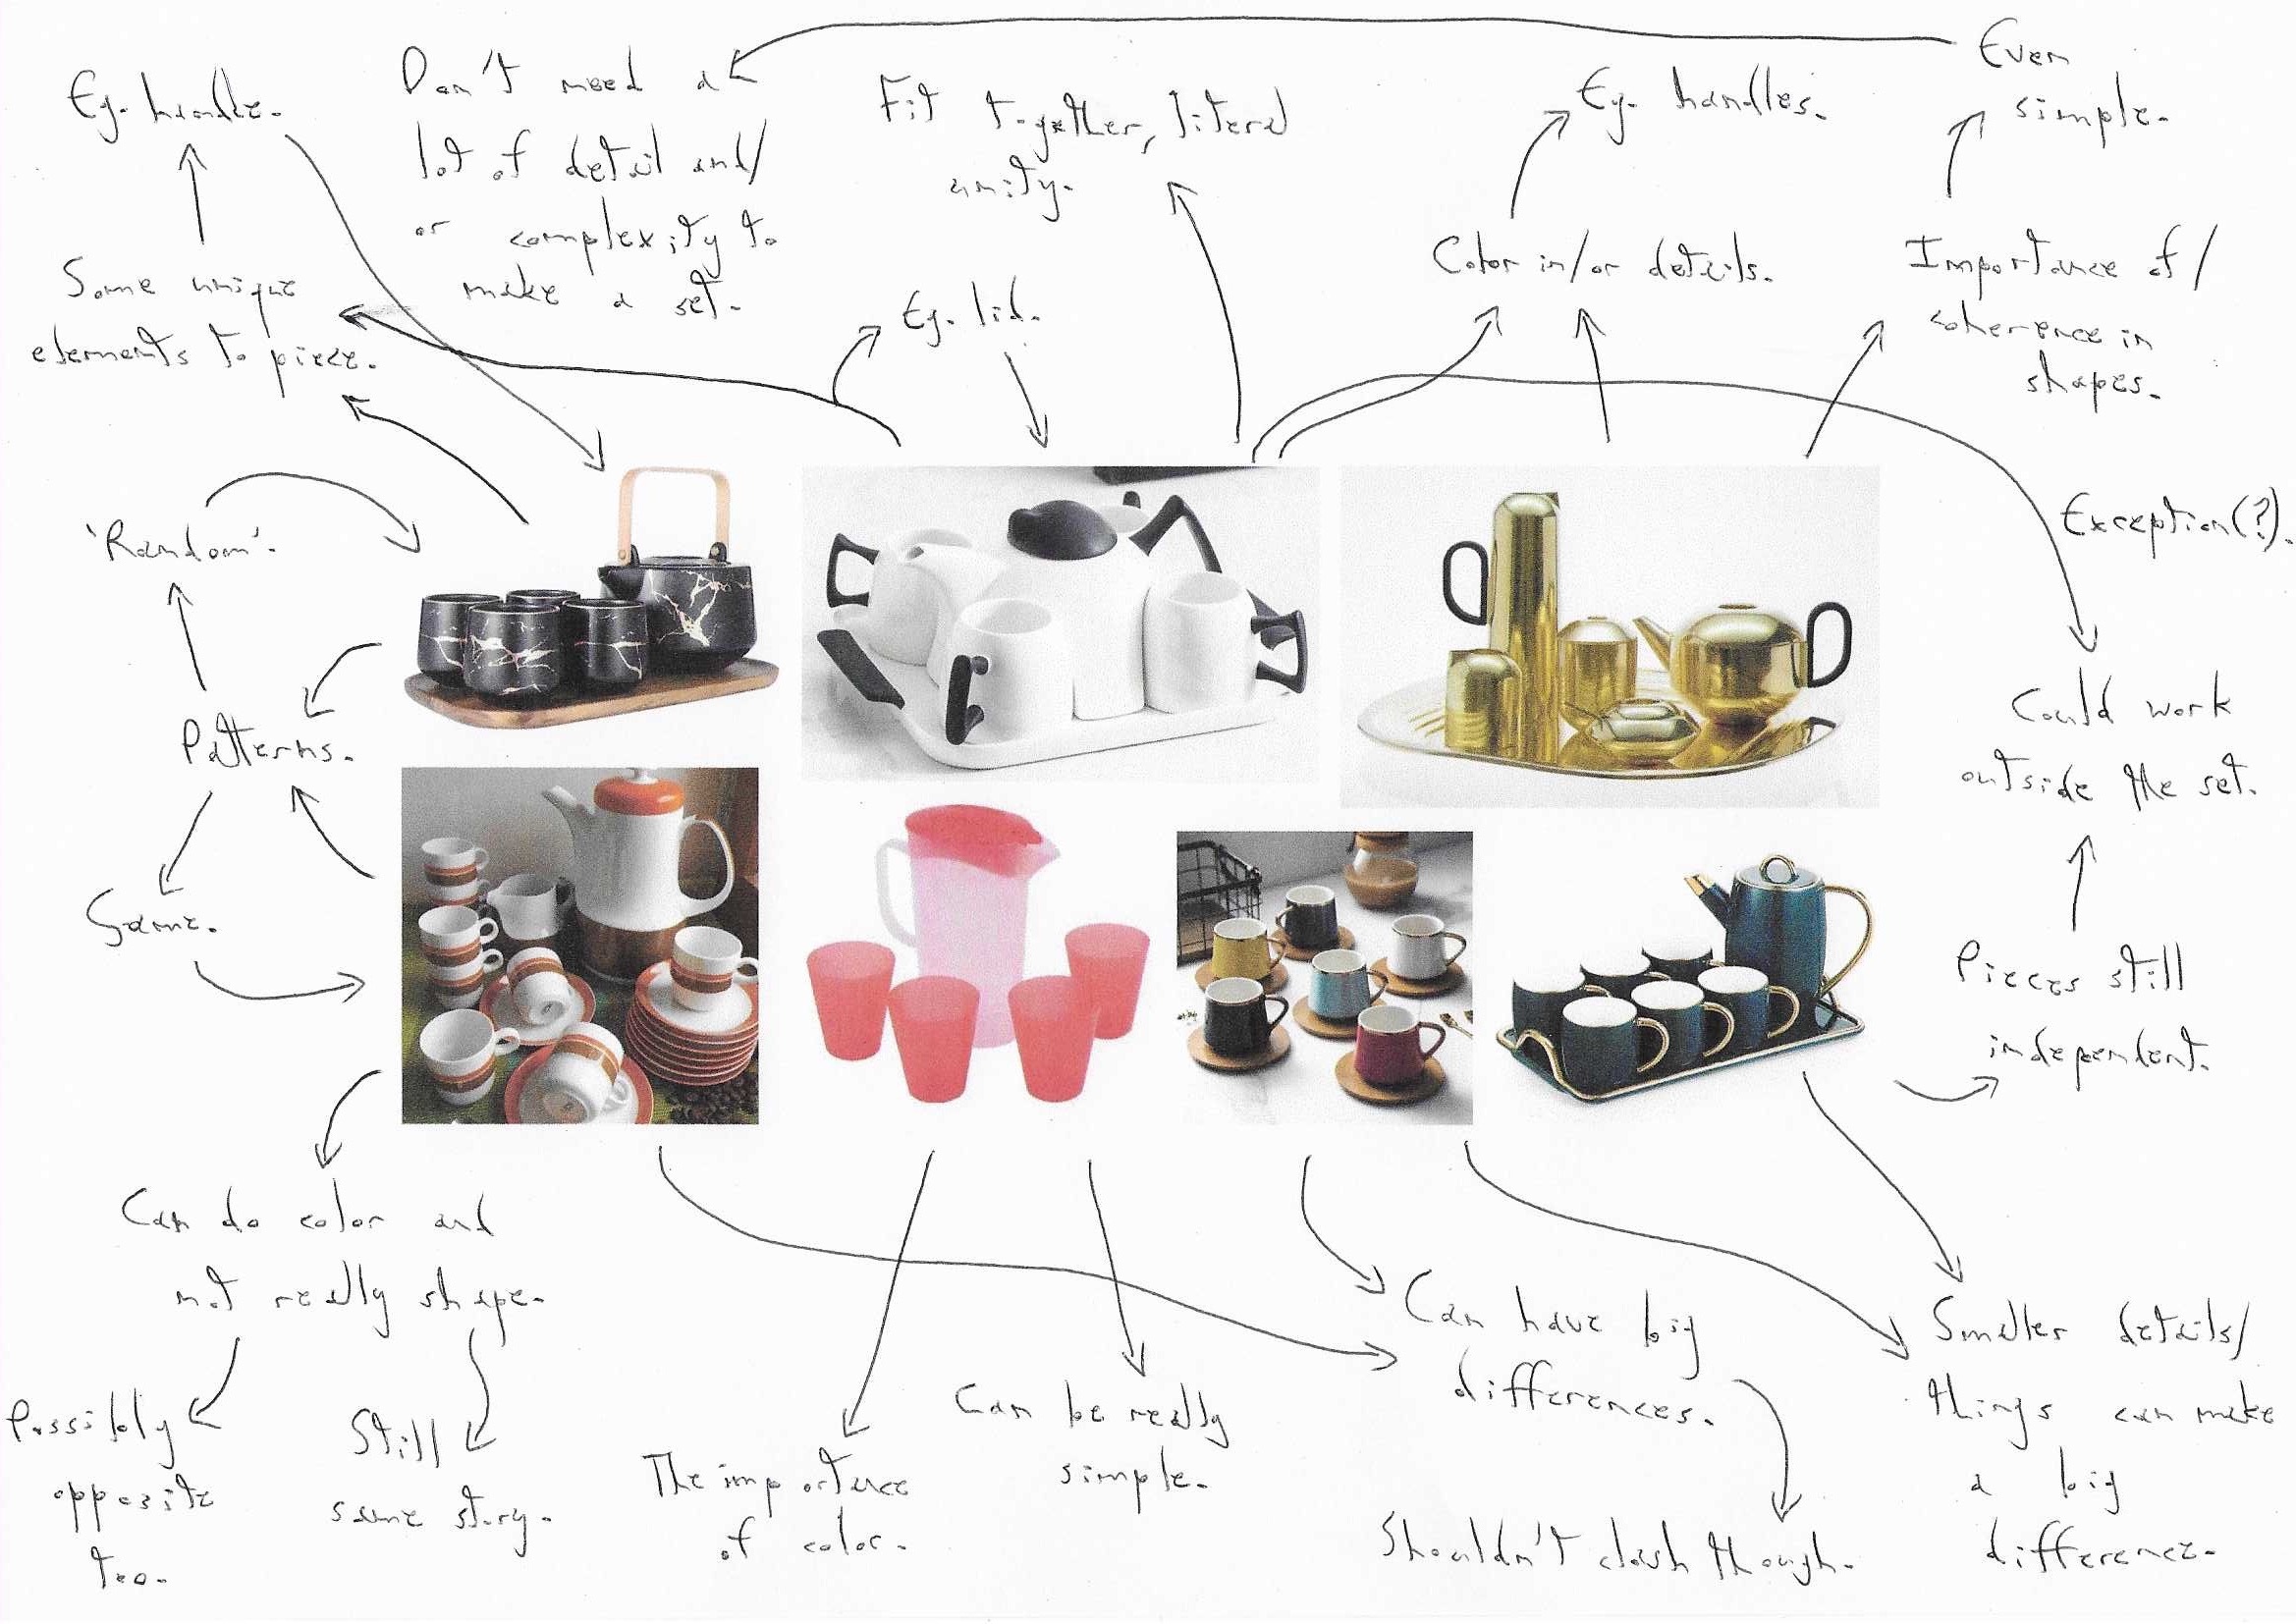
This course also made me collaborate with others in the focus groups project, and encouraged me to interact with others throughout other projects. This was so interesting as it allowed me to get some really interesting ideas and perspectives. I have a tendency to avoid group work, but I really want to force myself to do this more as it can be really insightful and useful.

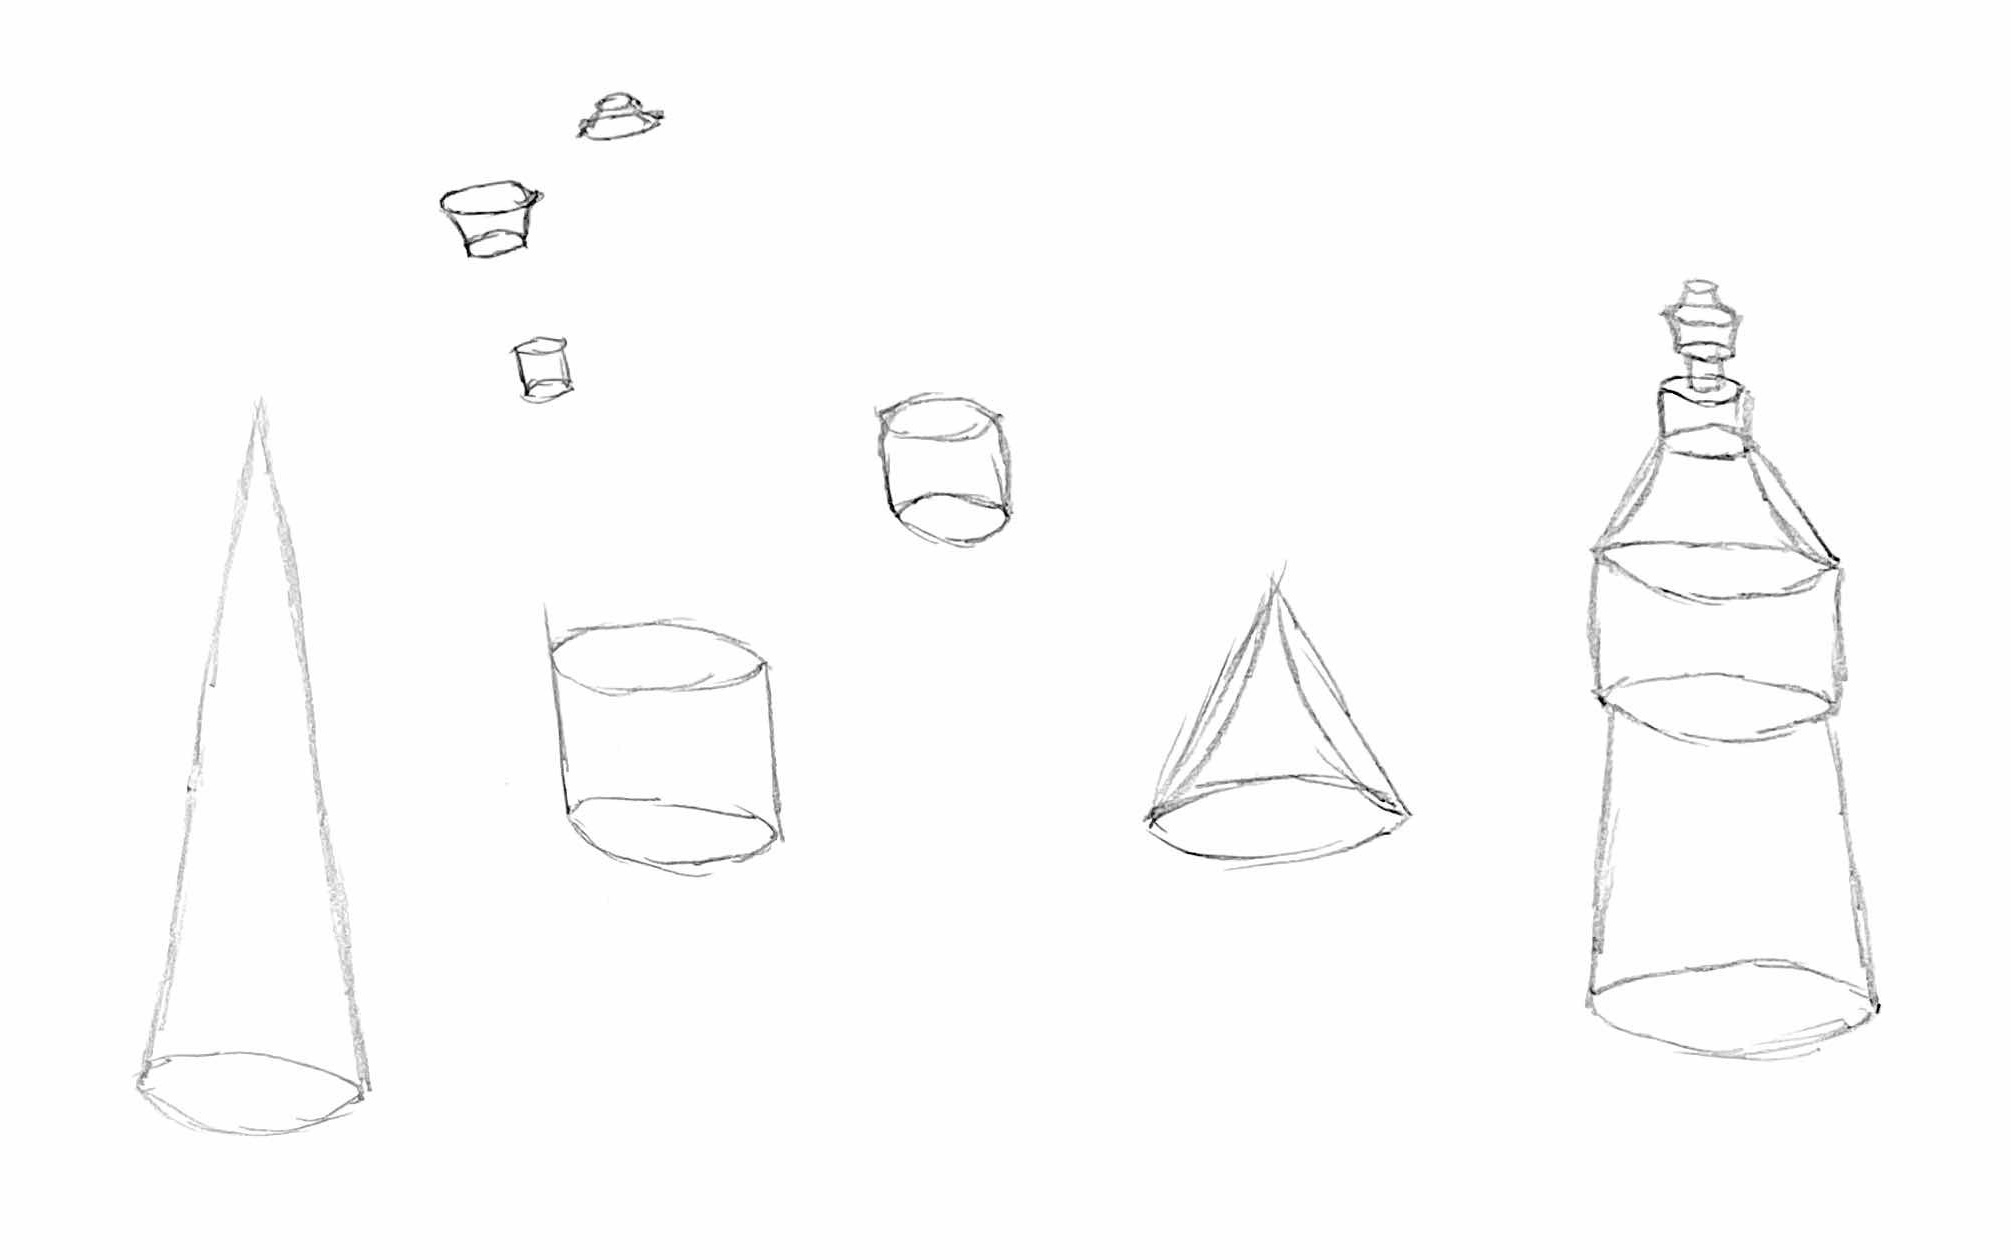
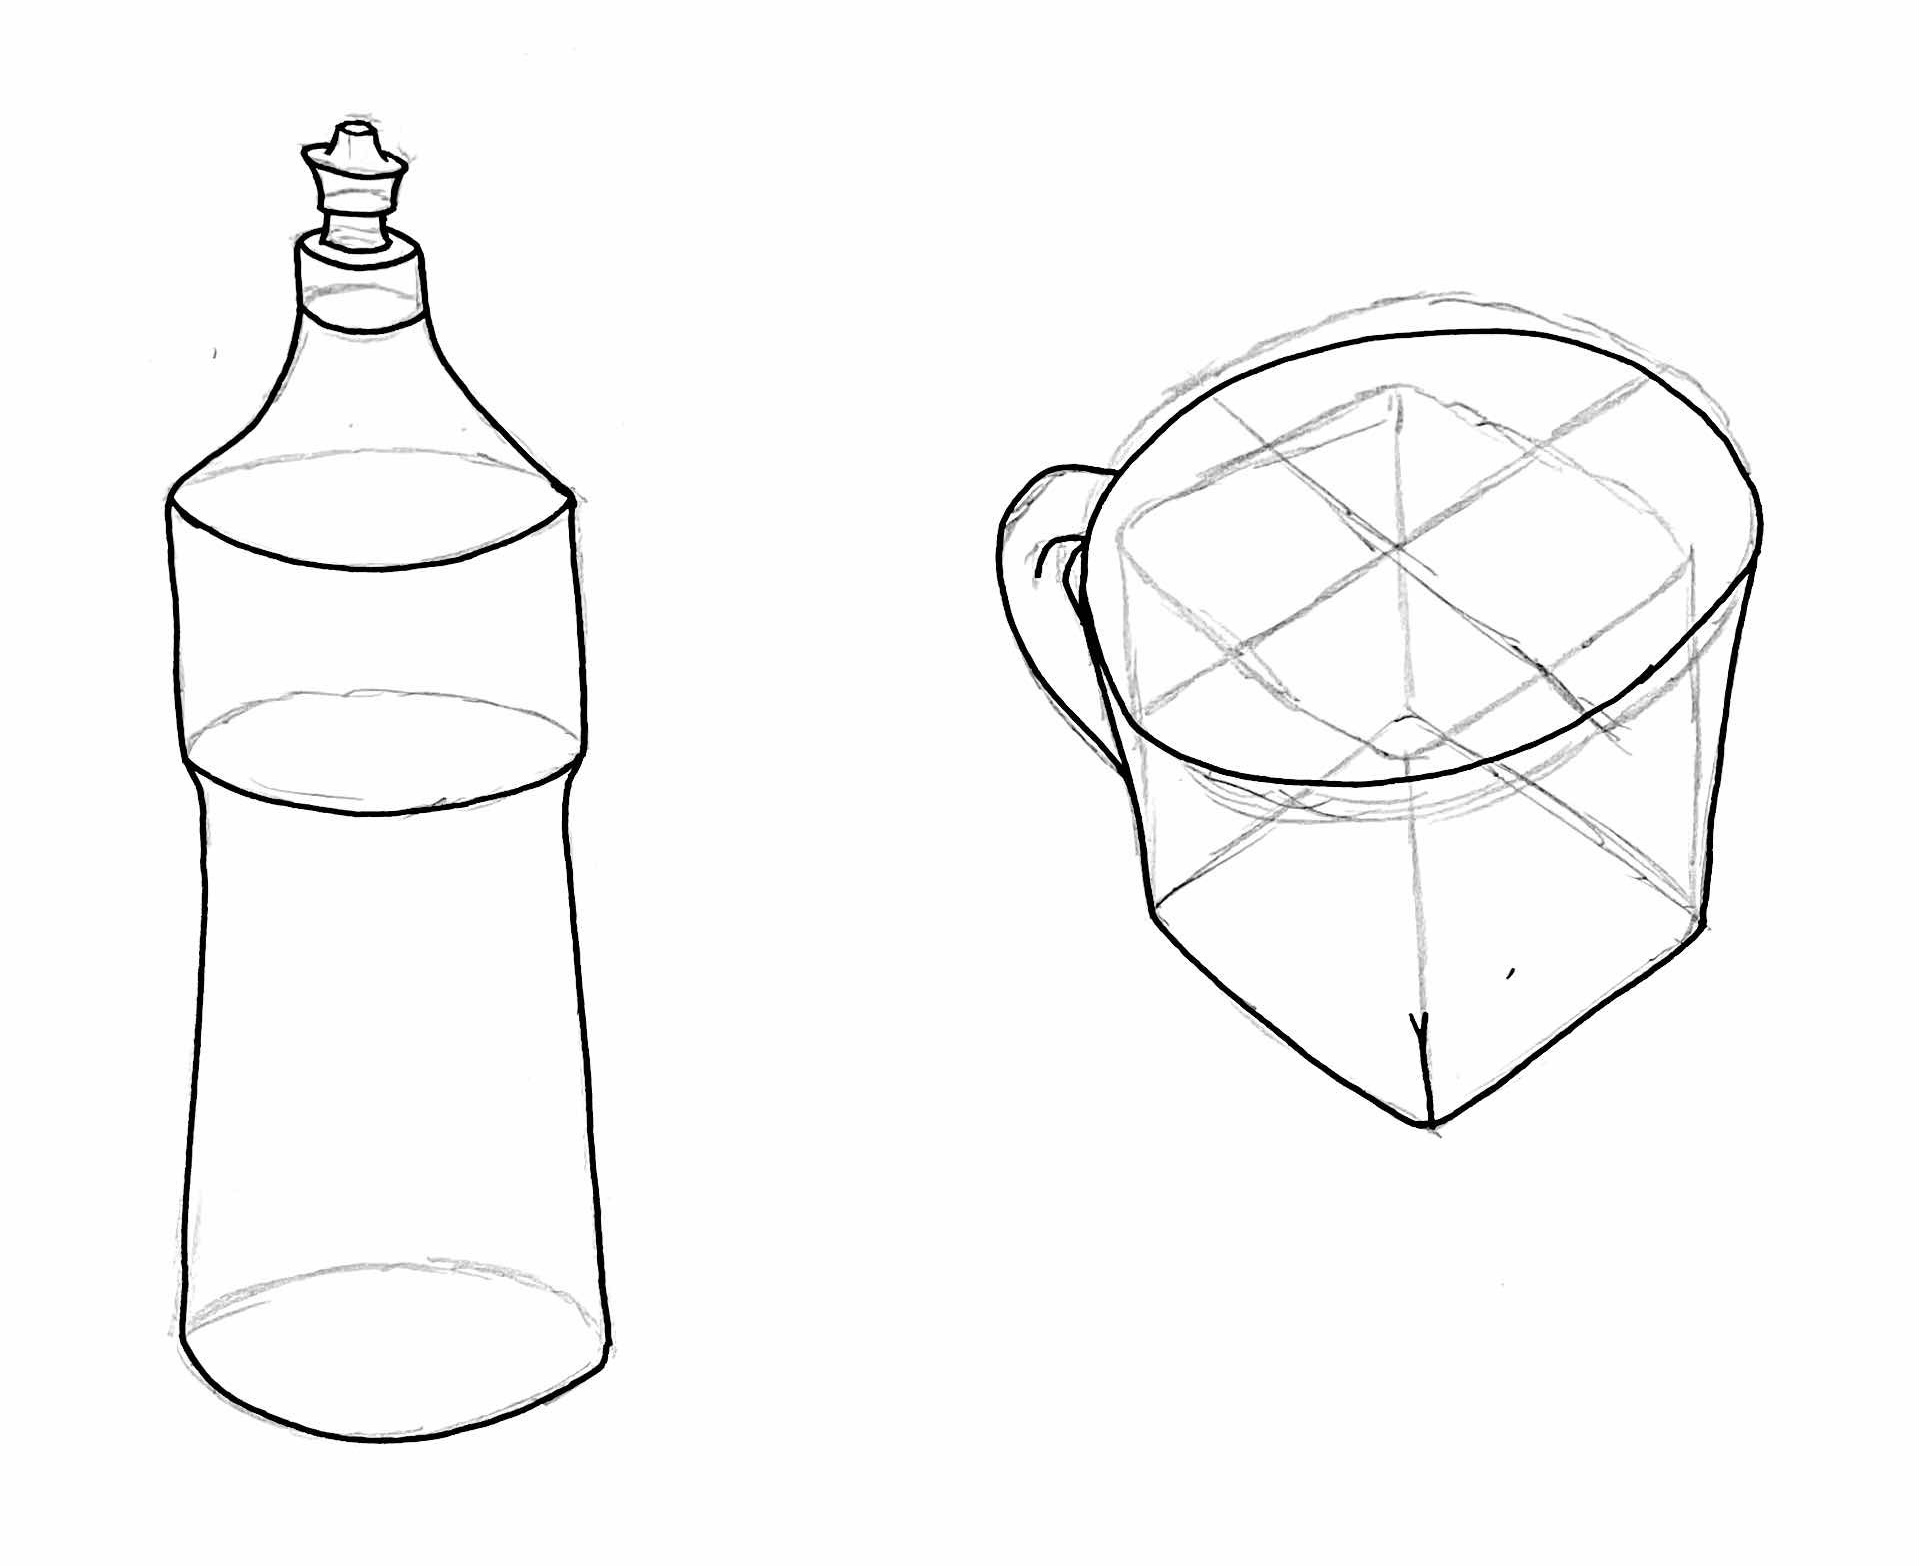
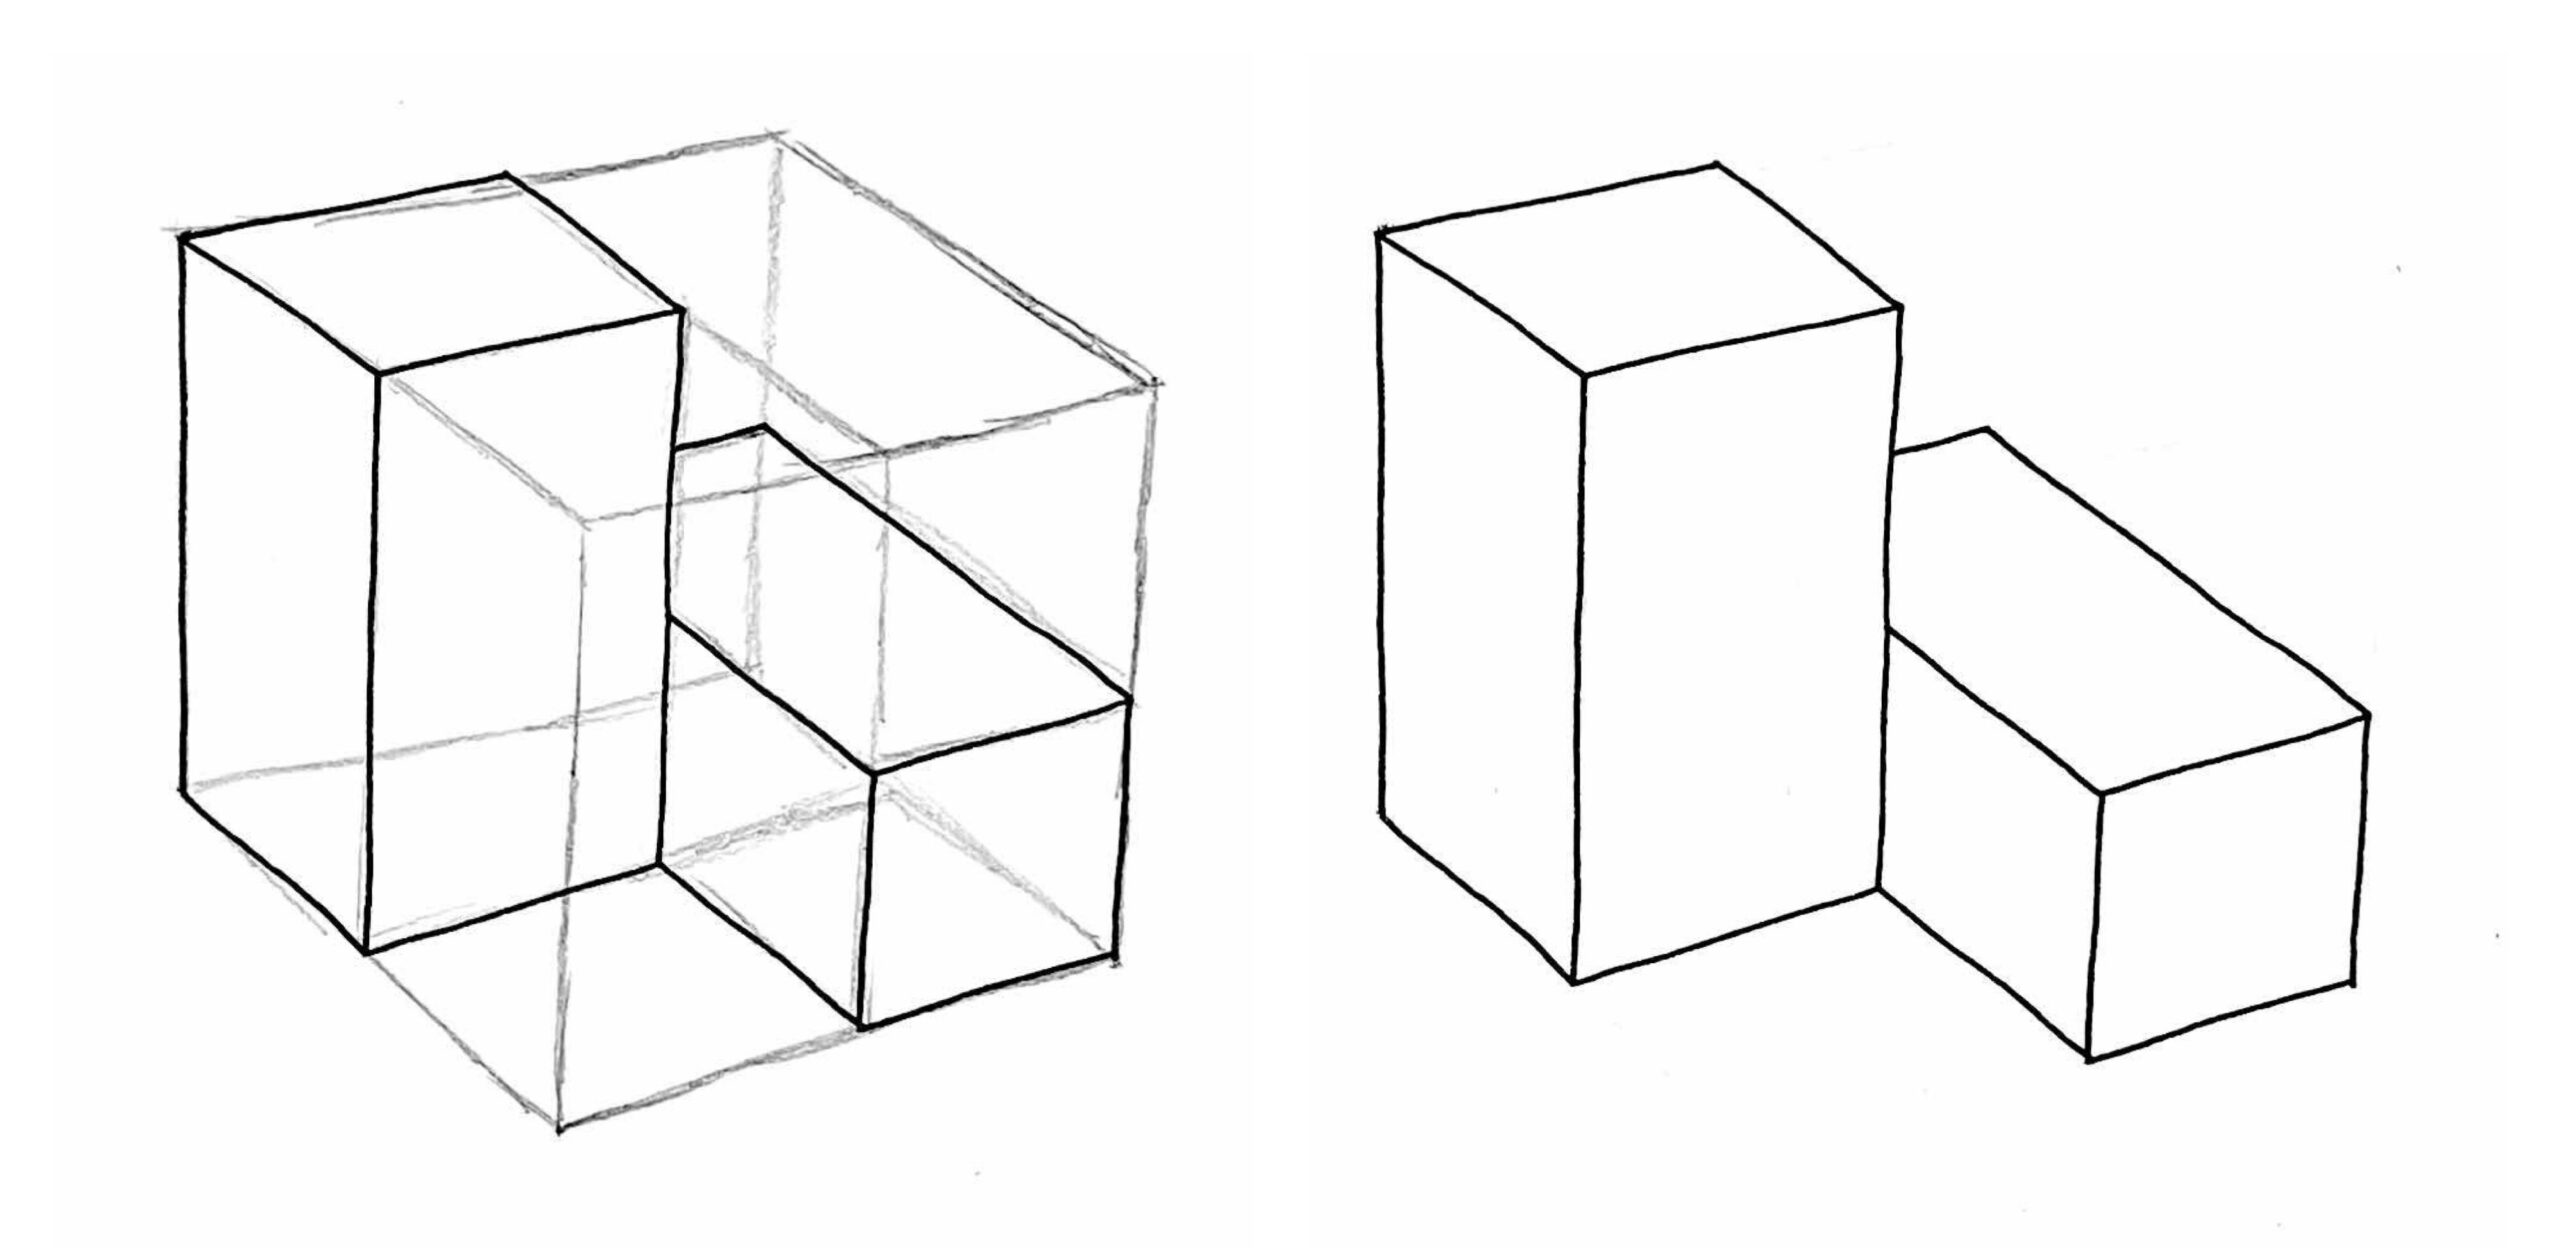
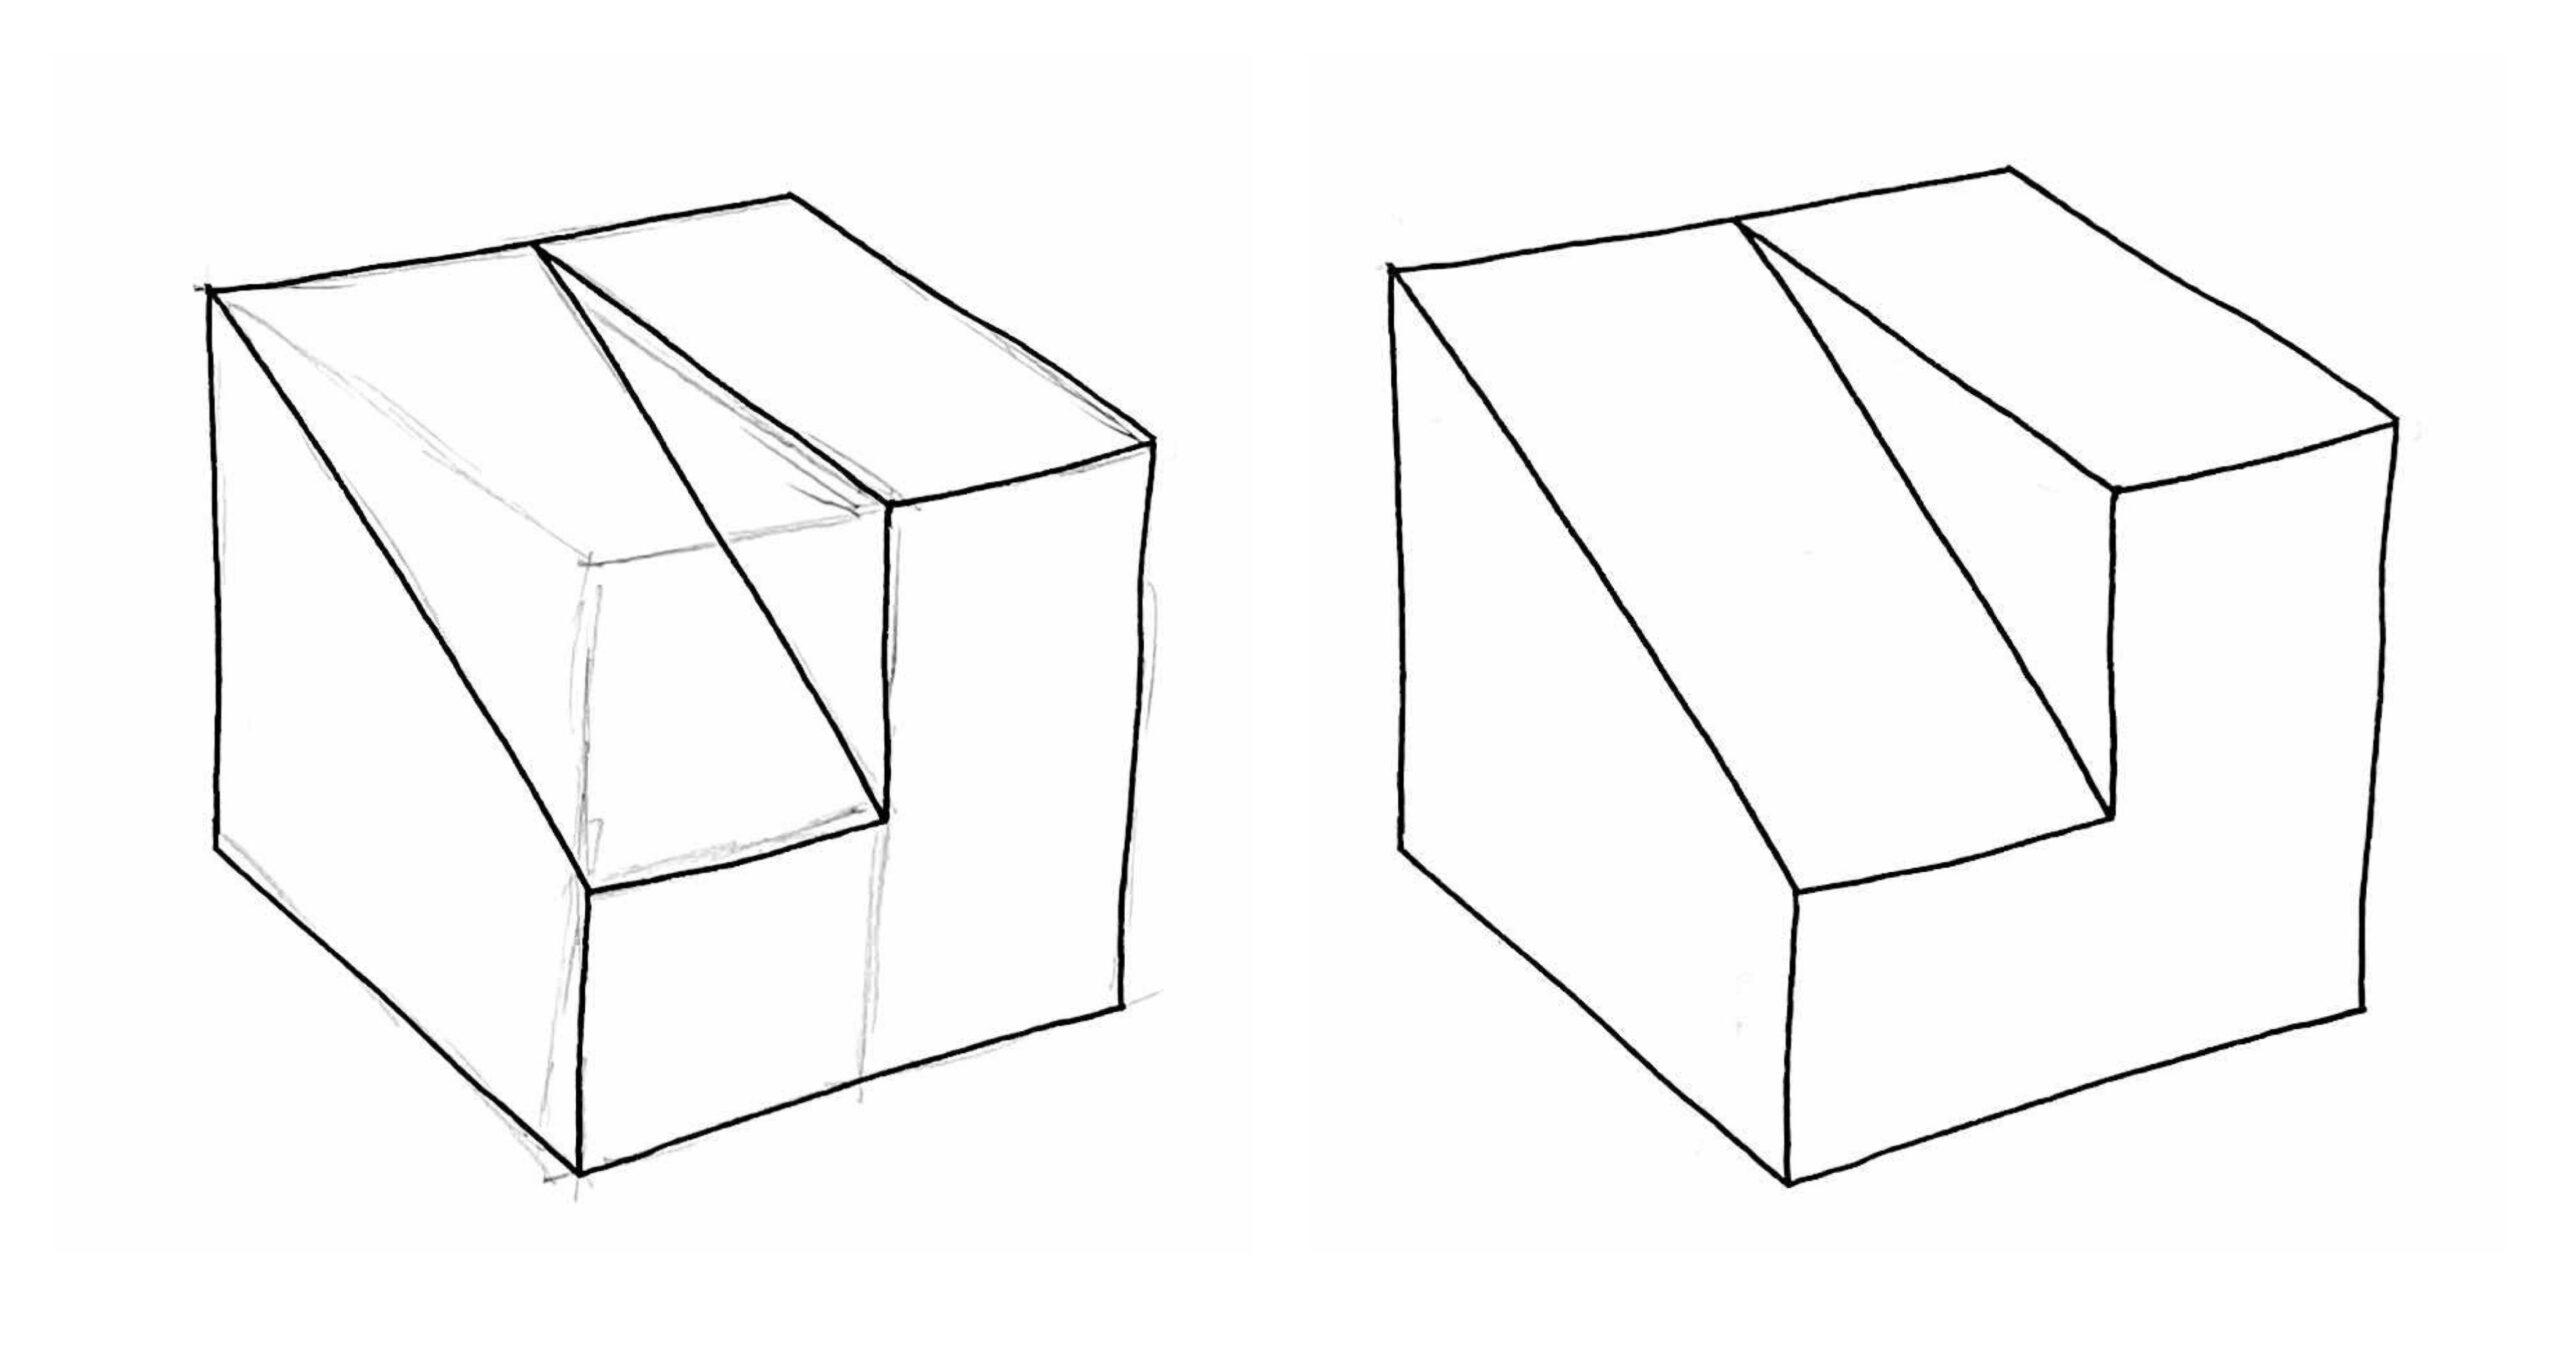
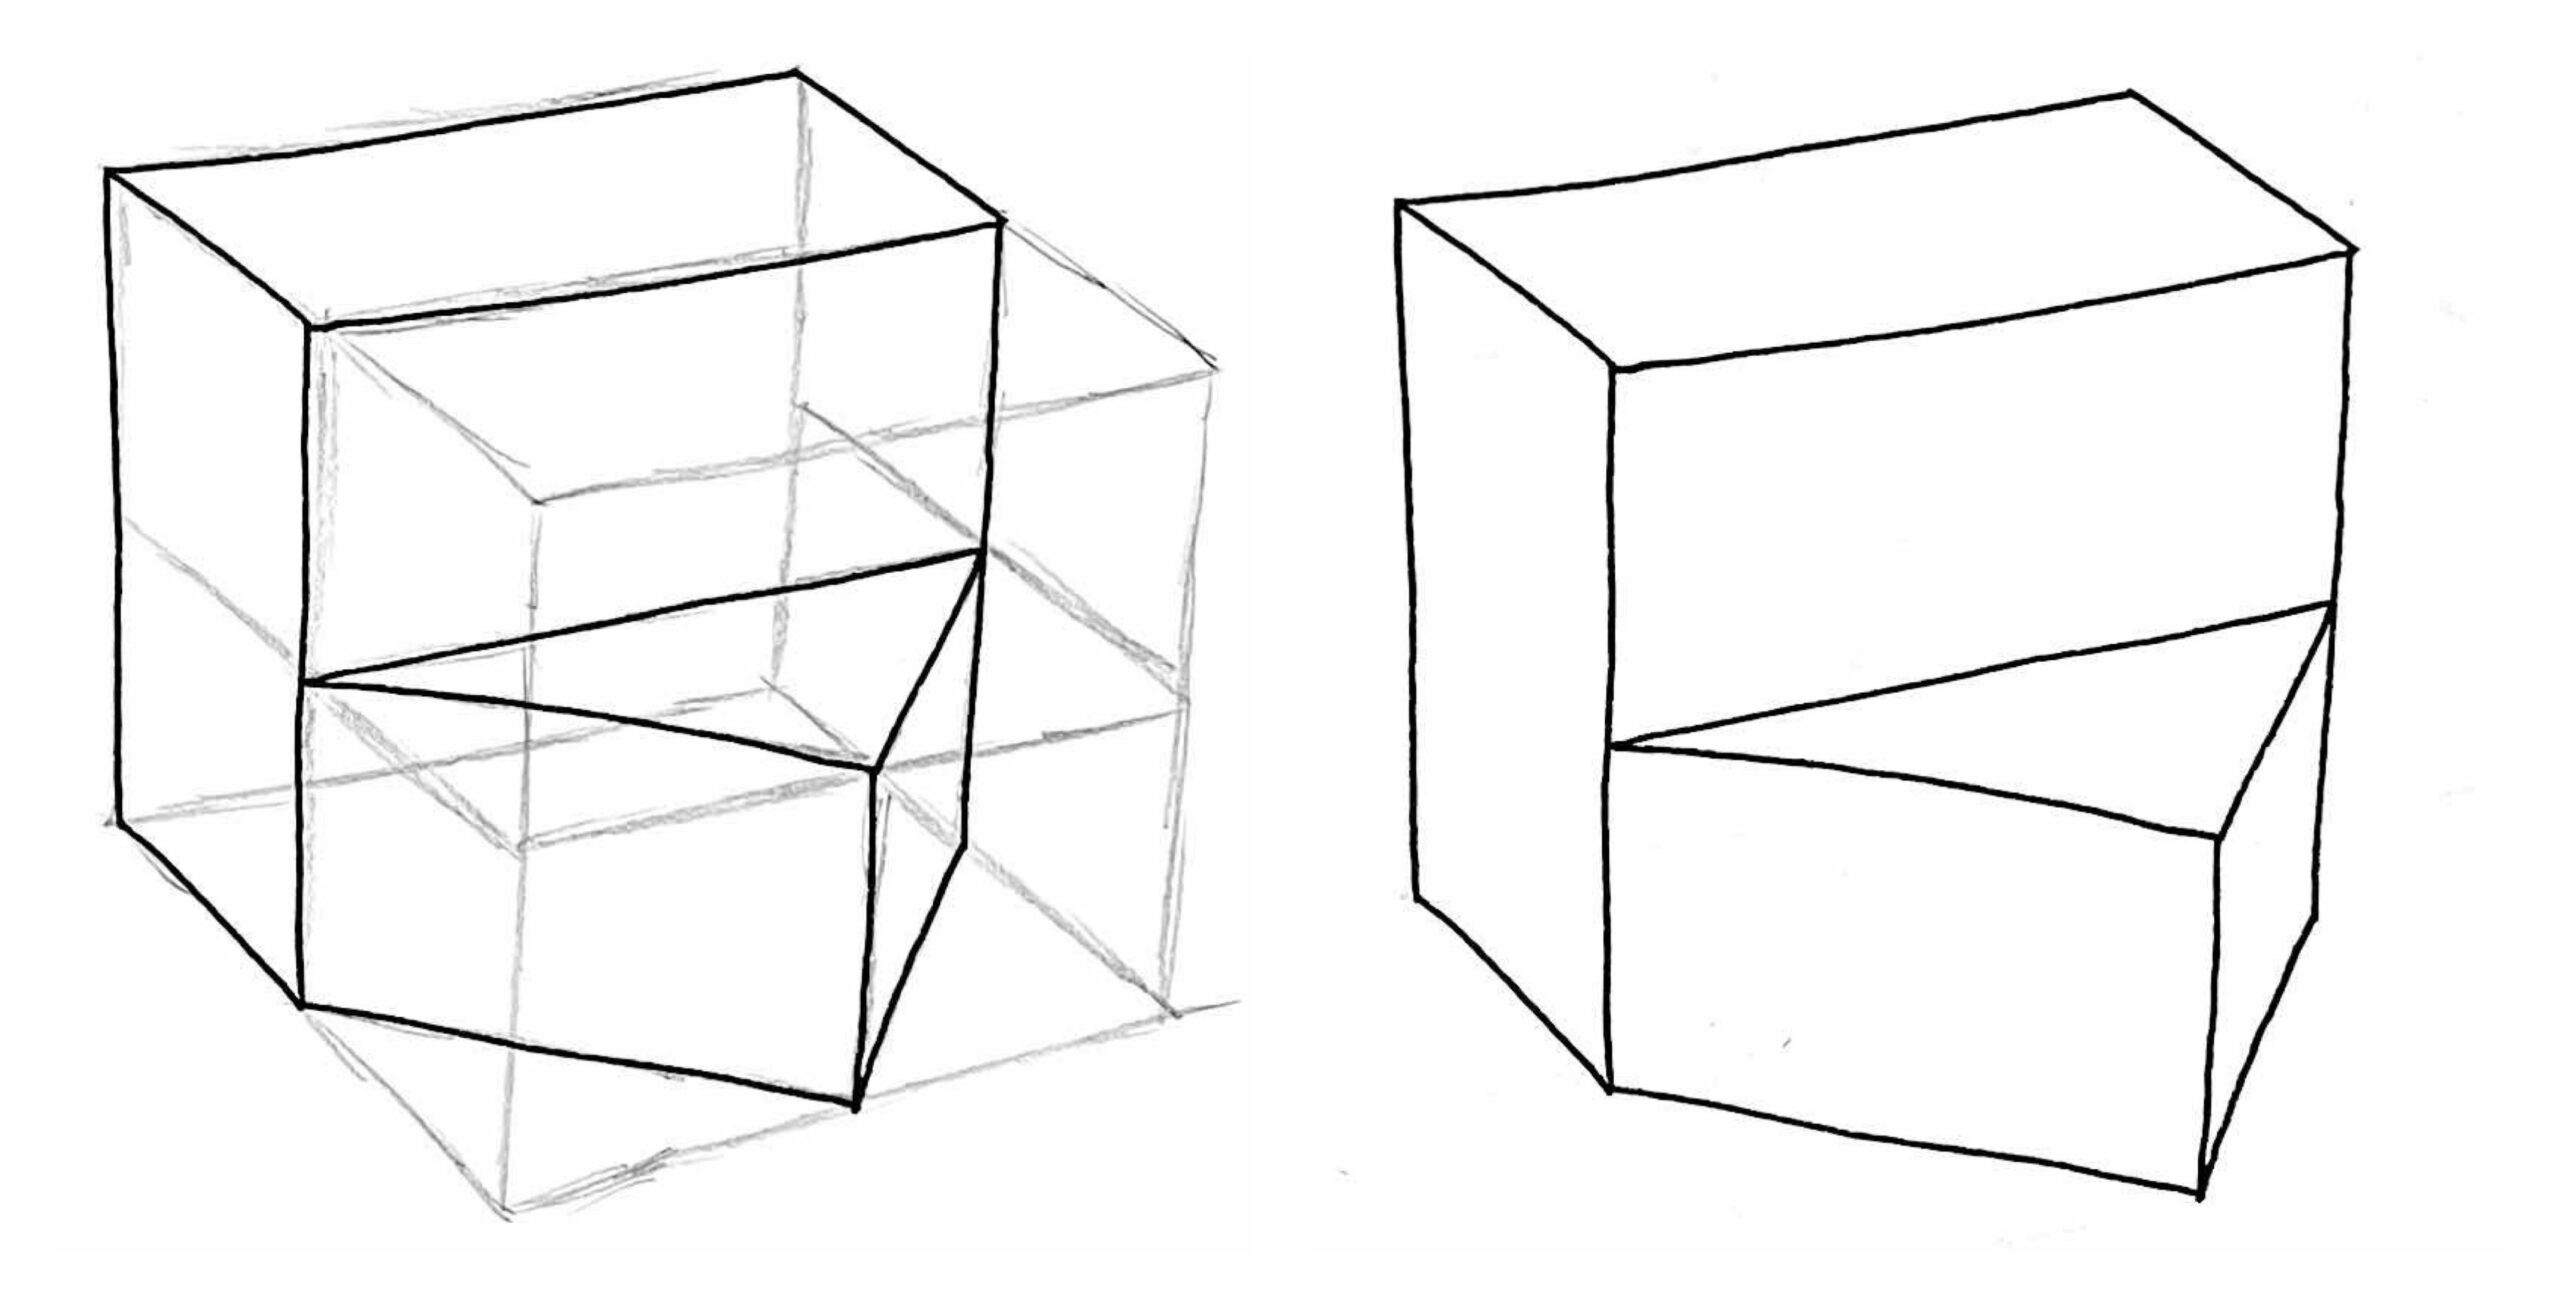
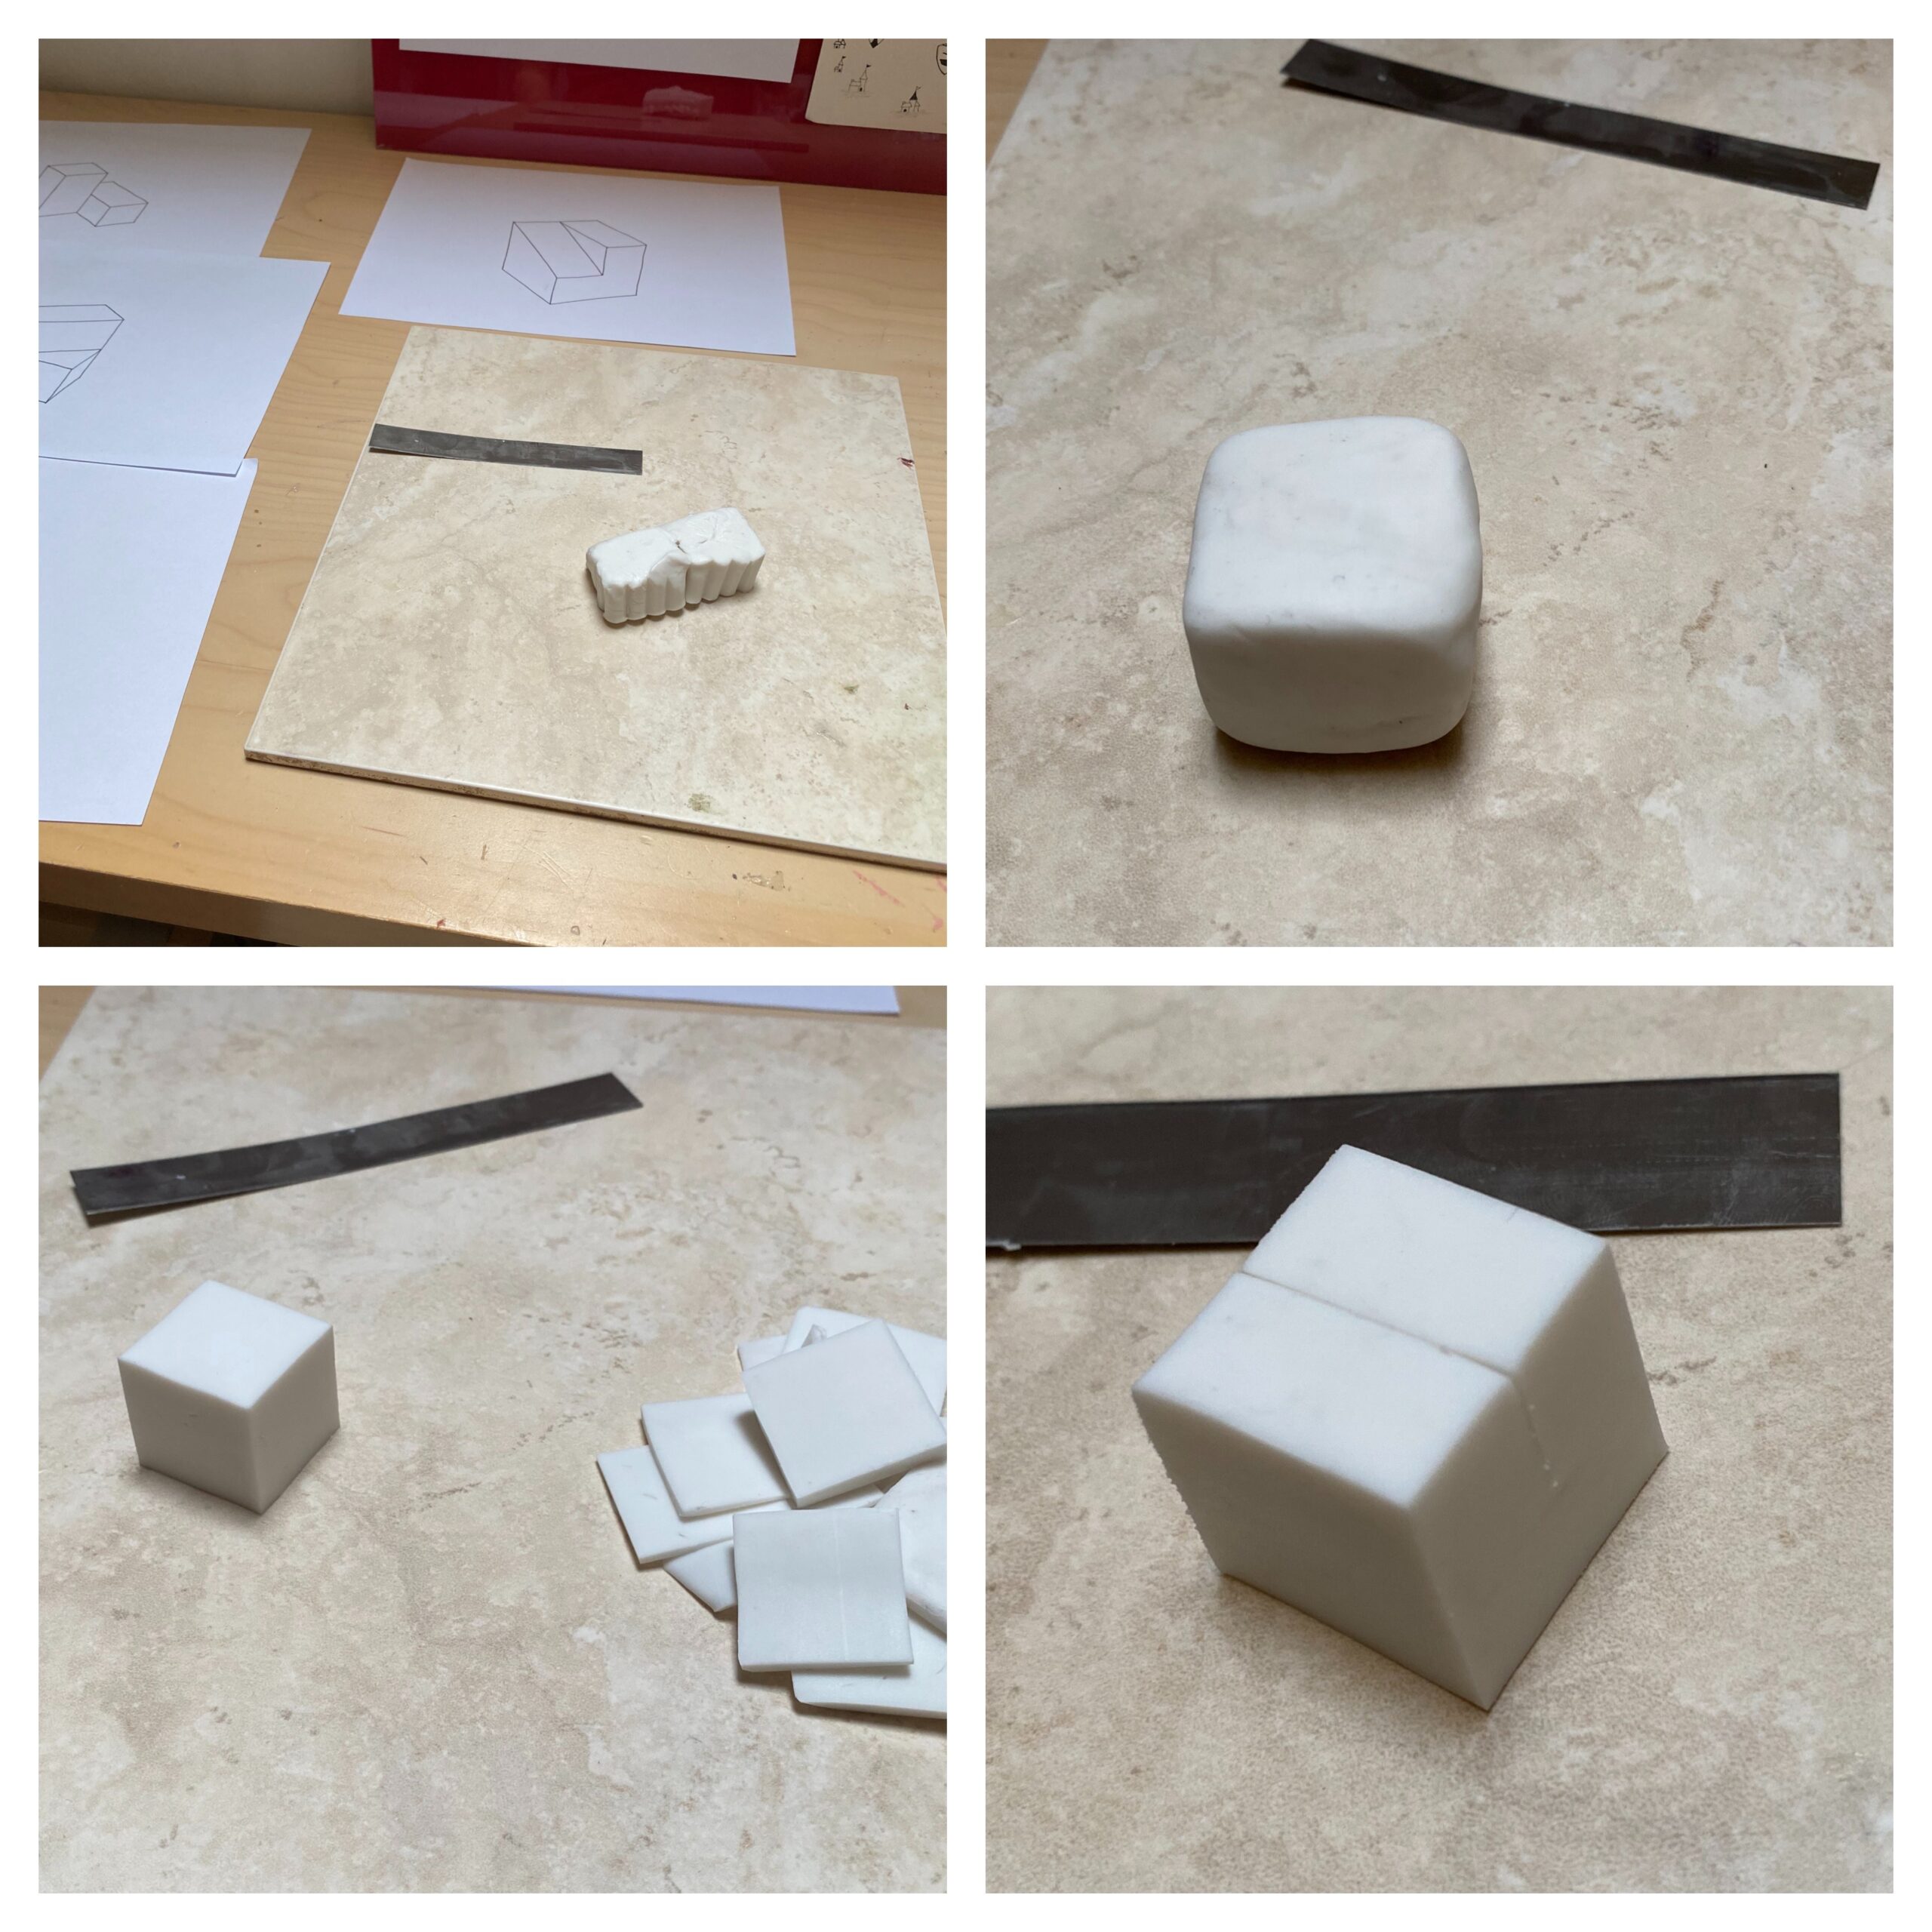
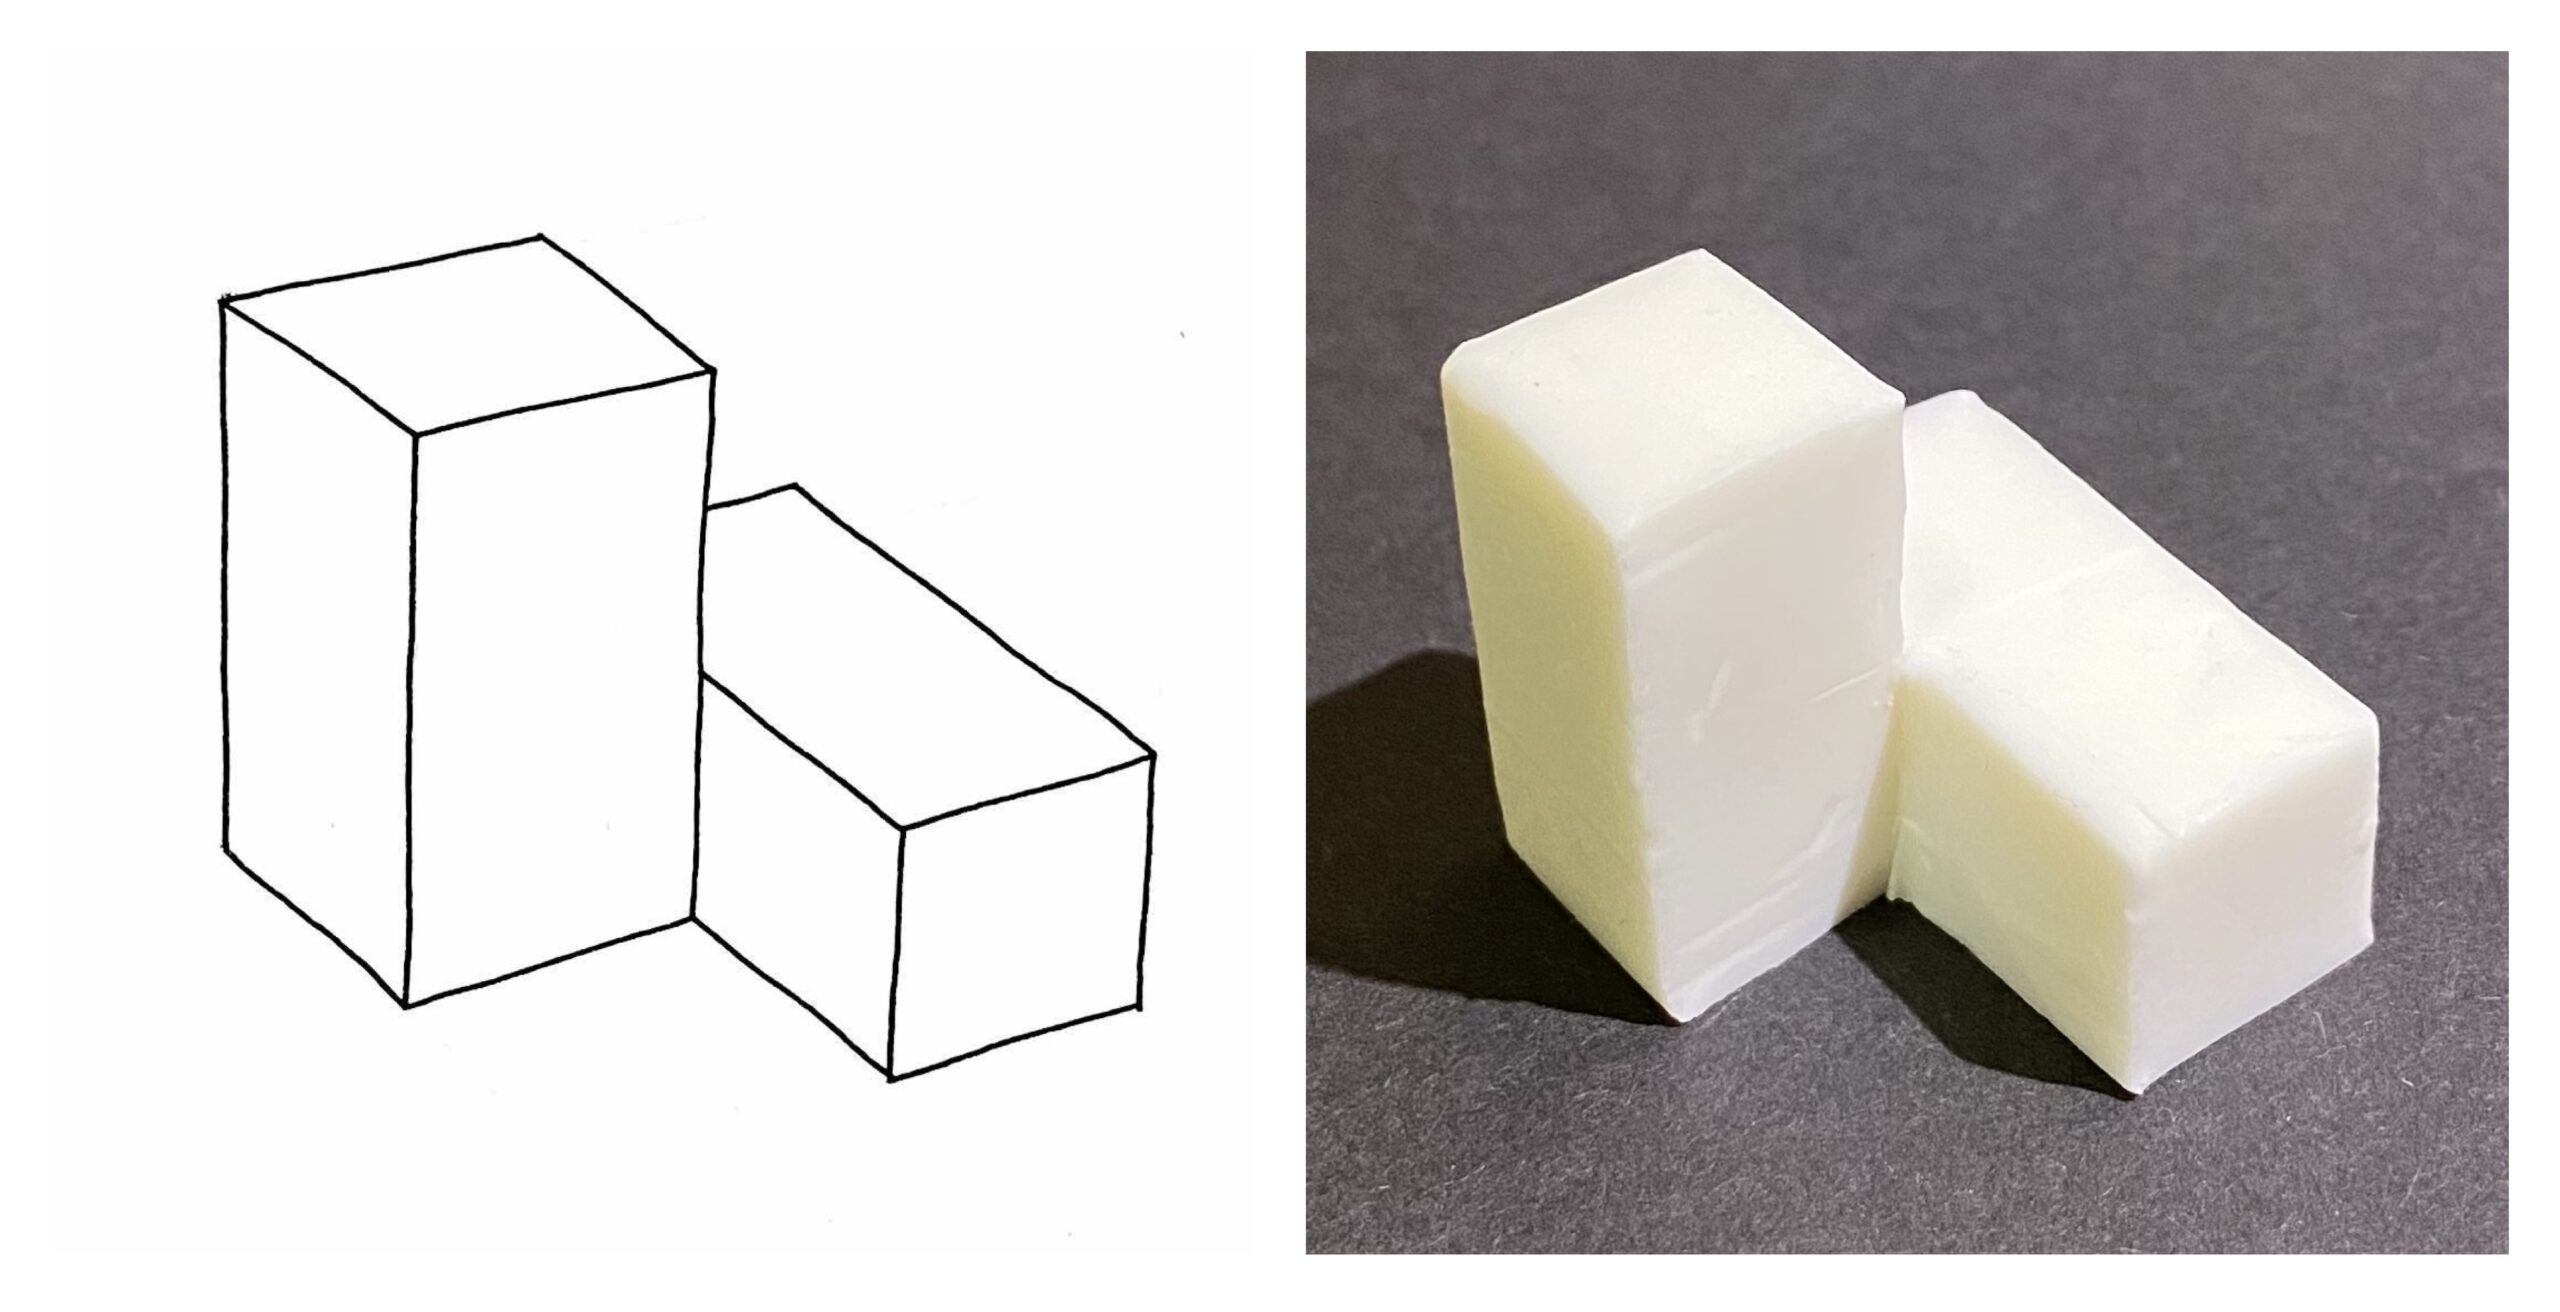
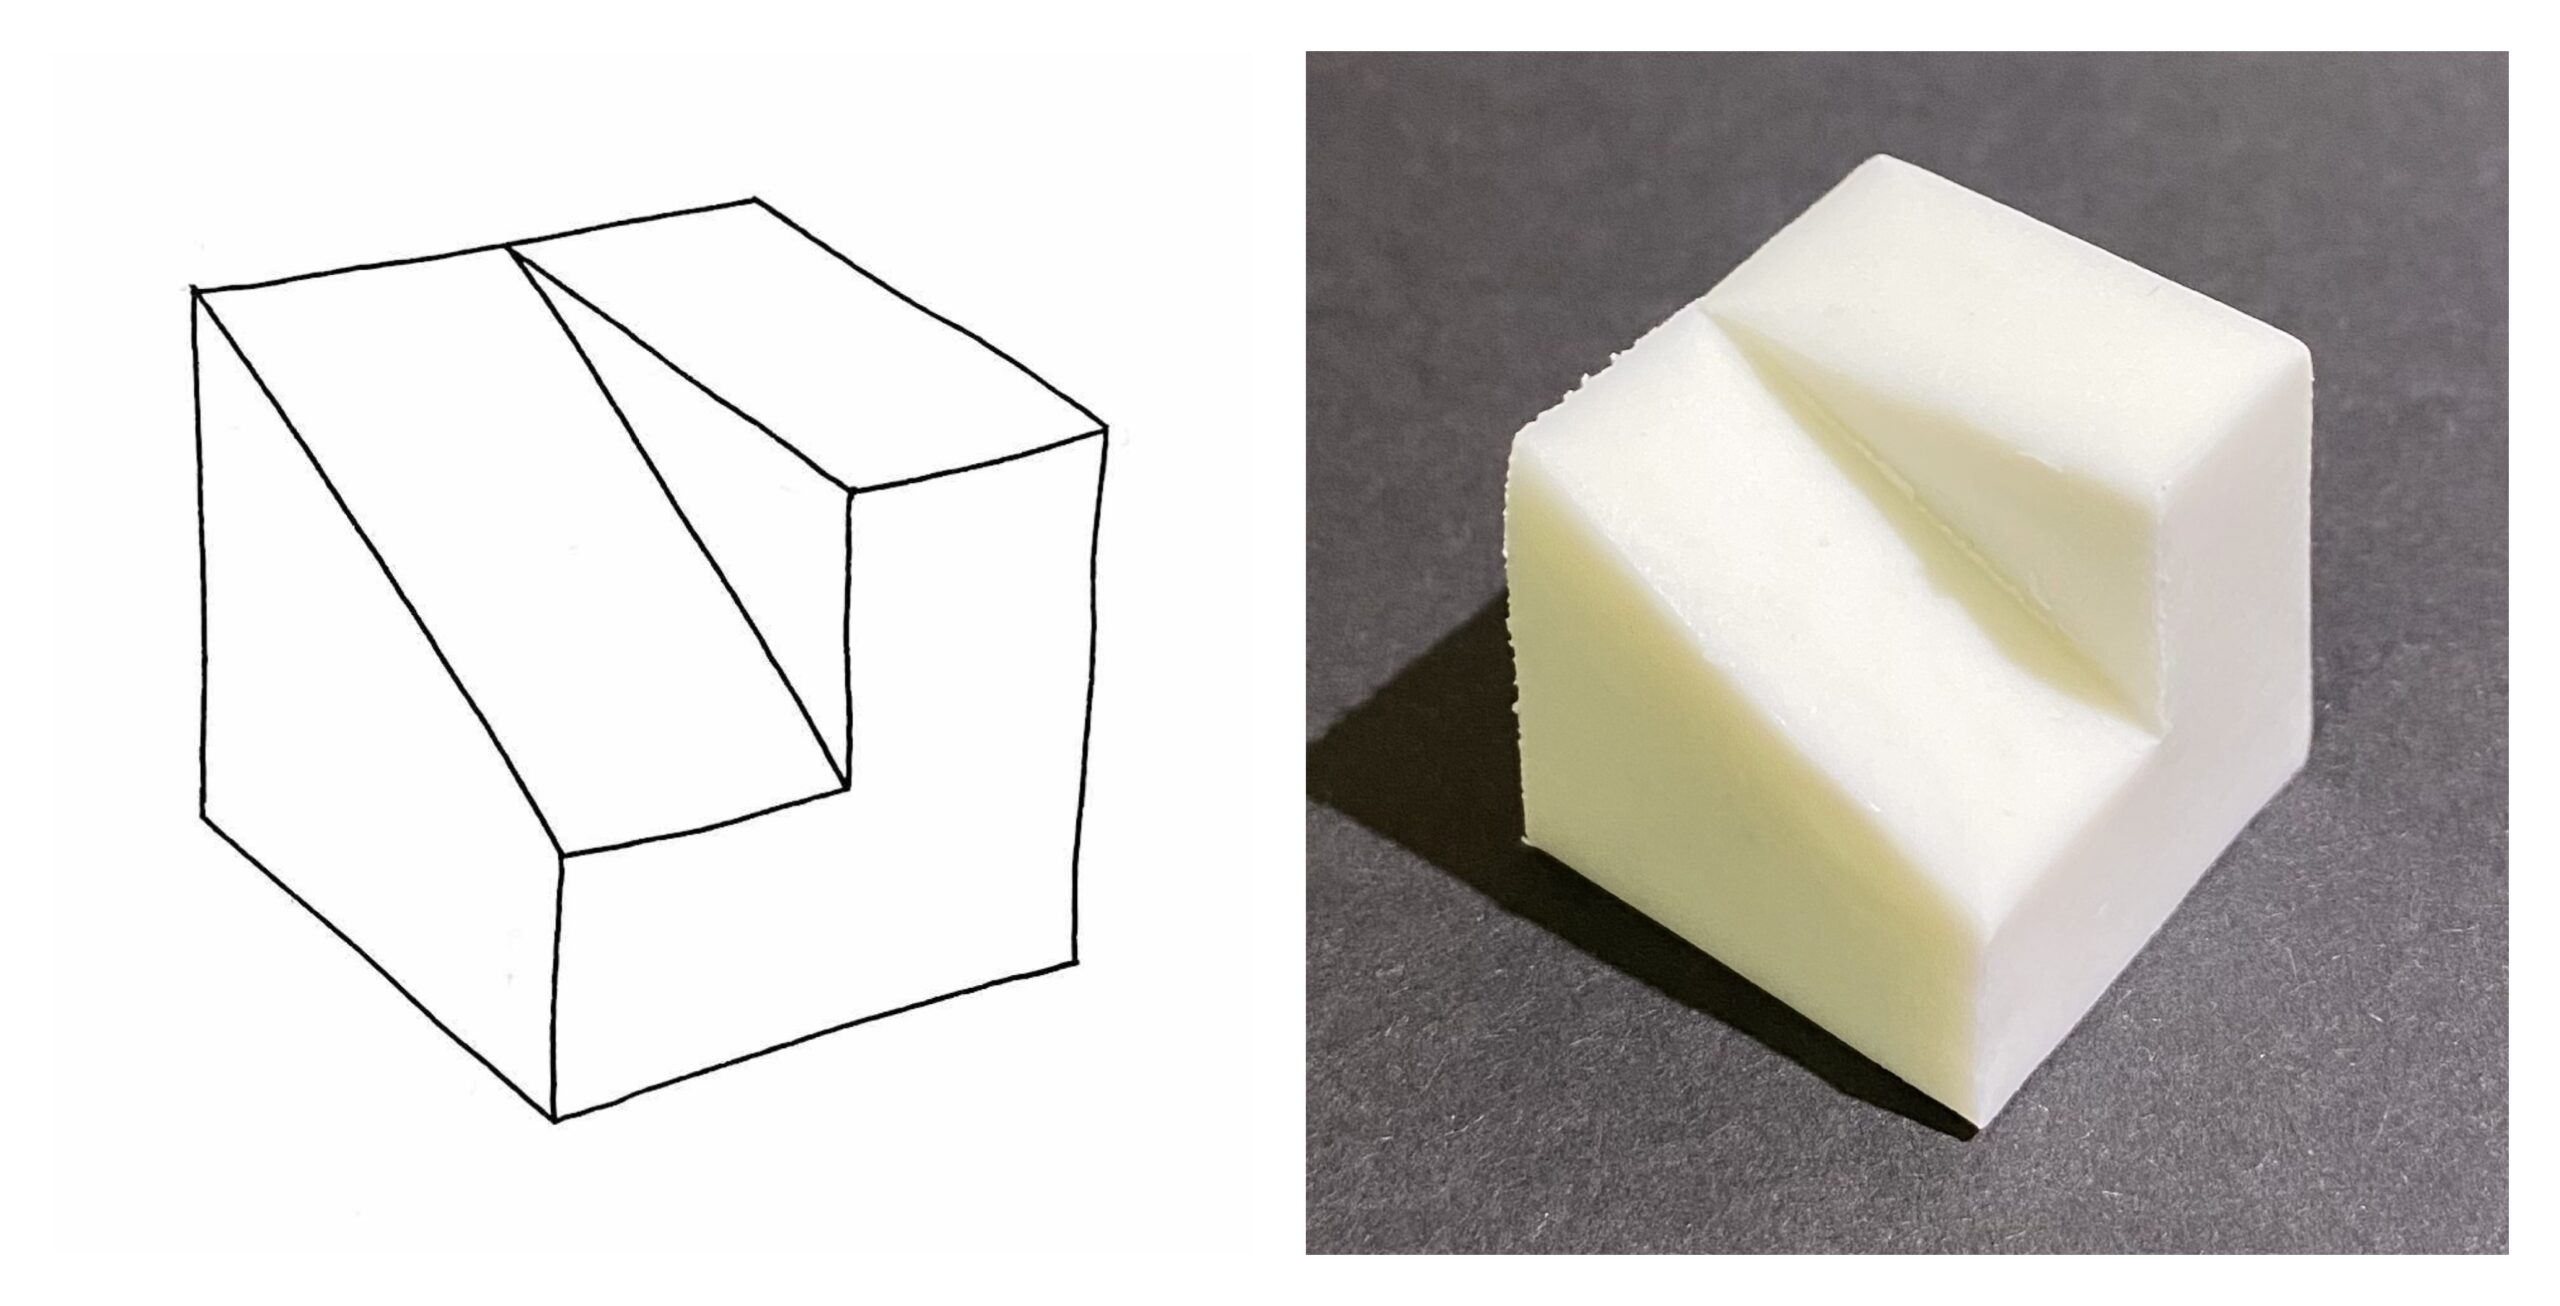
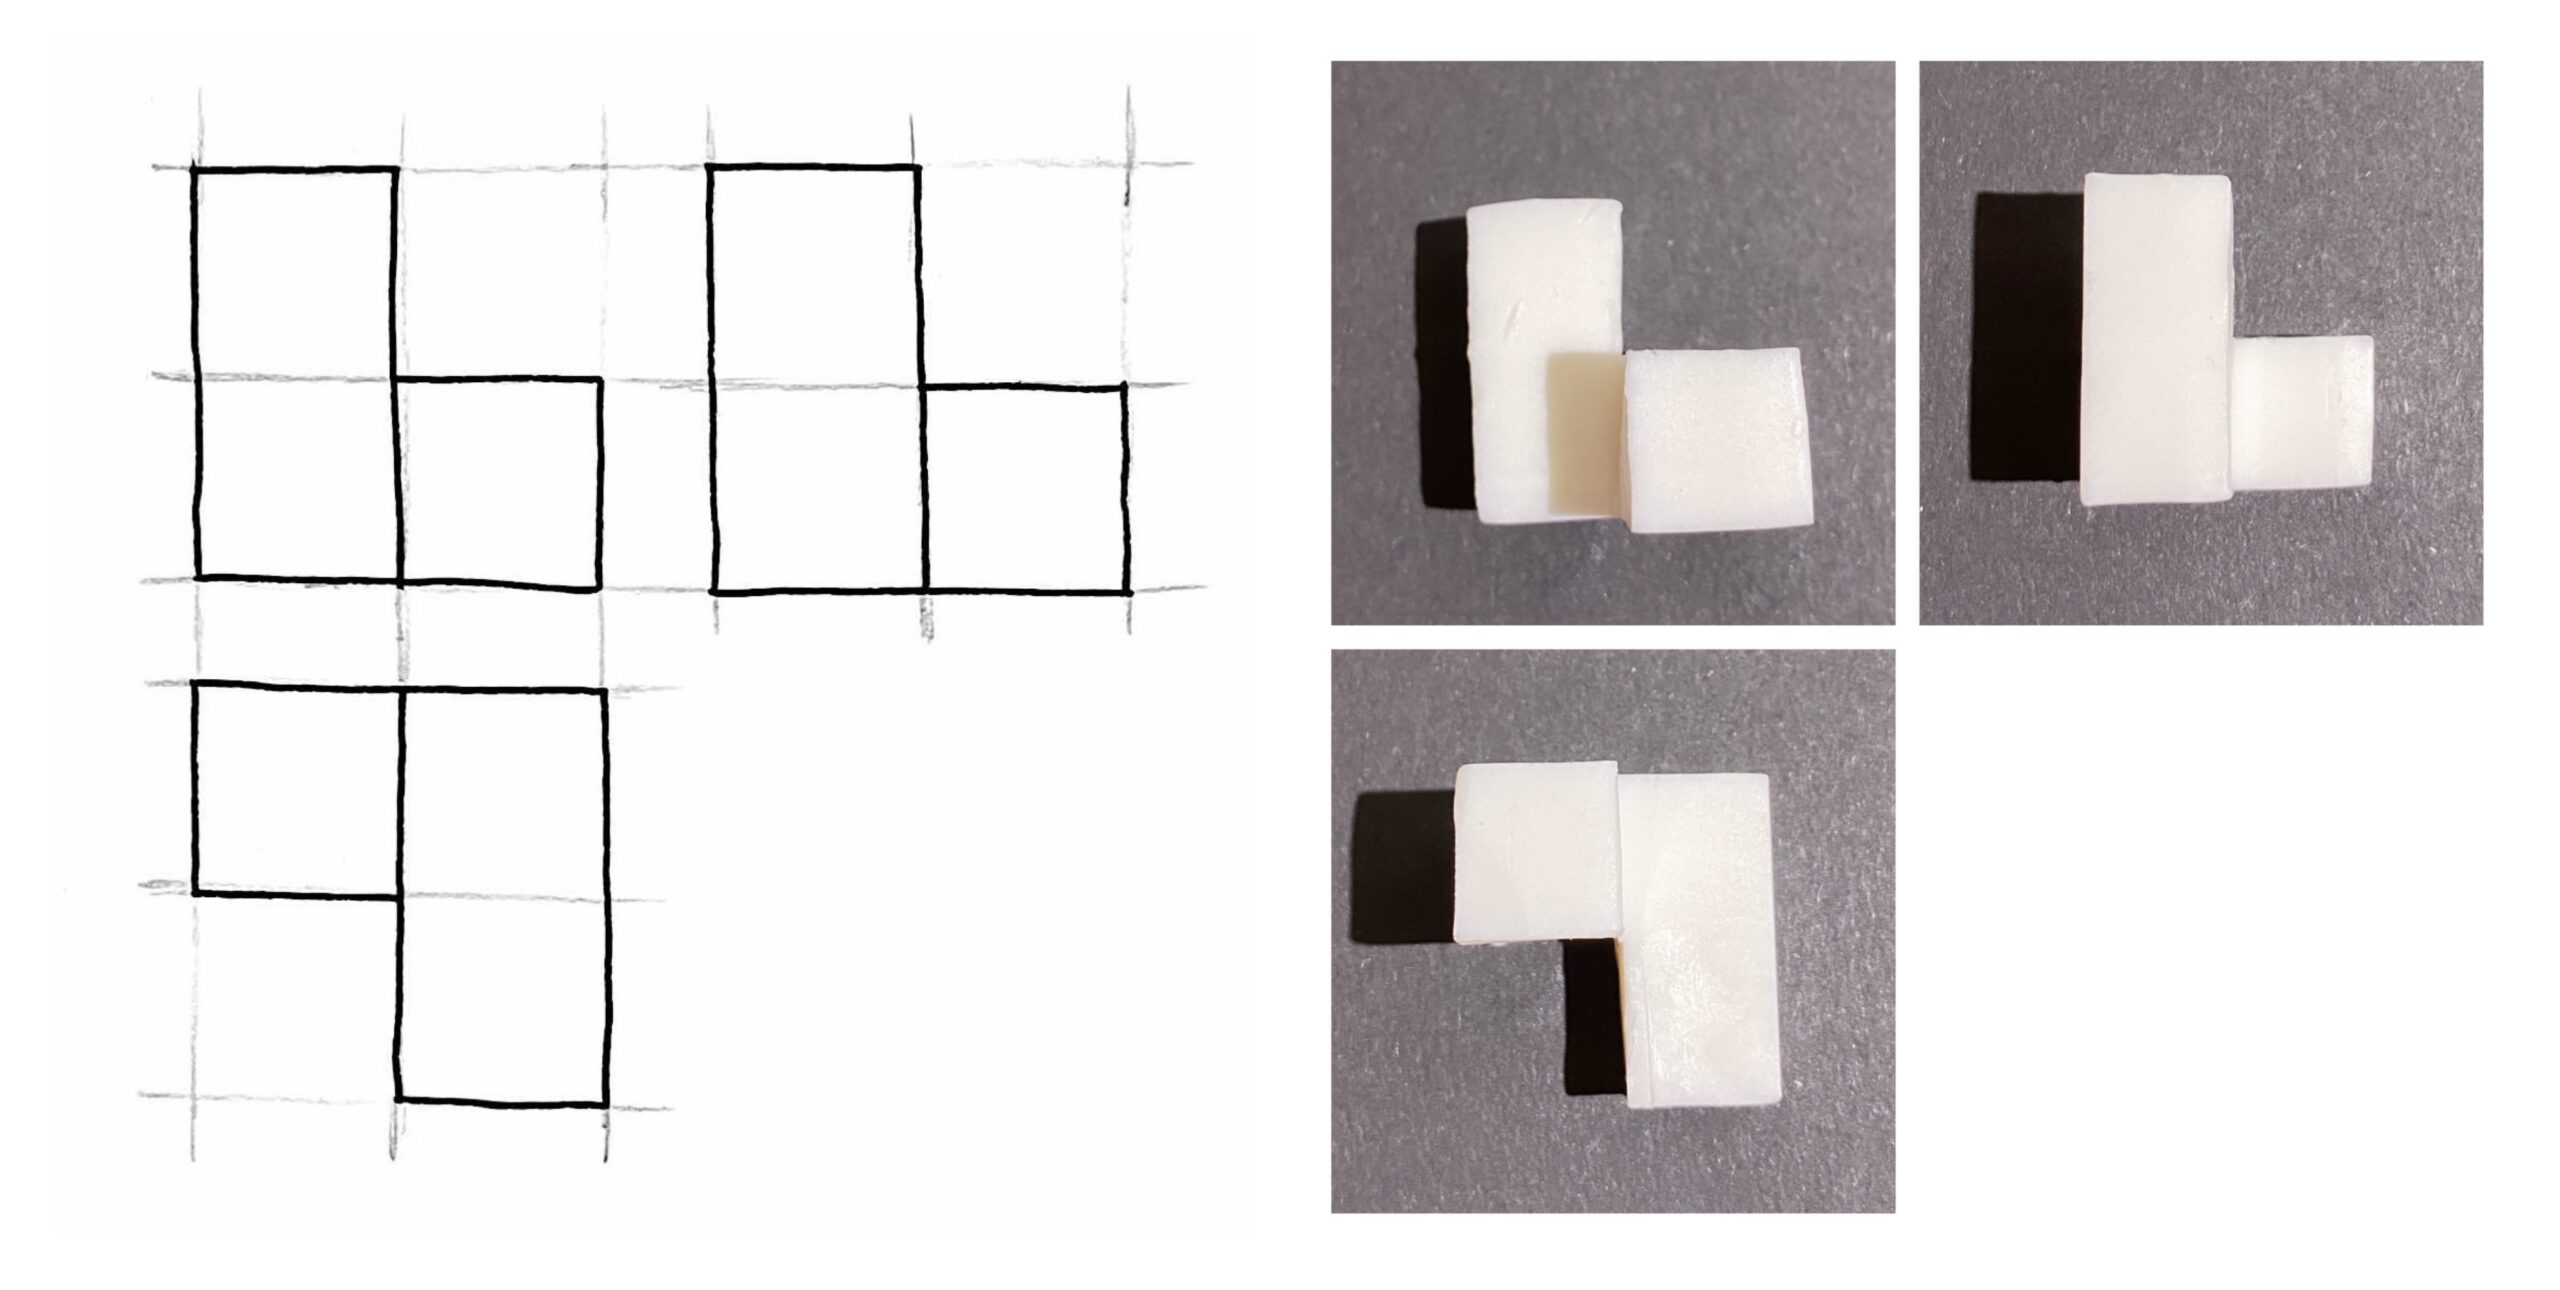
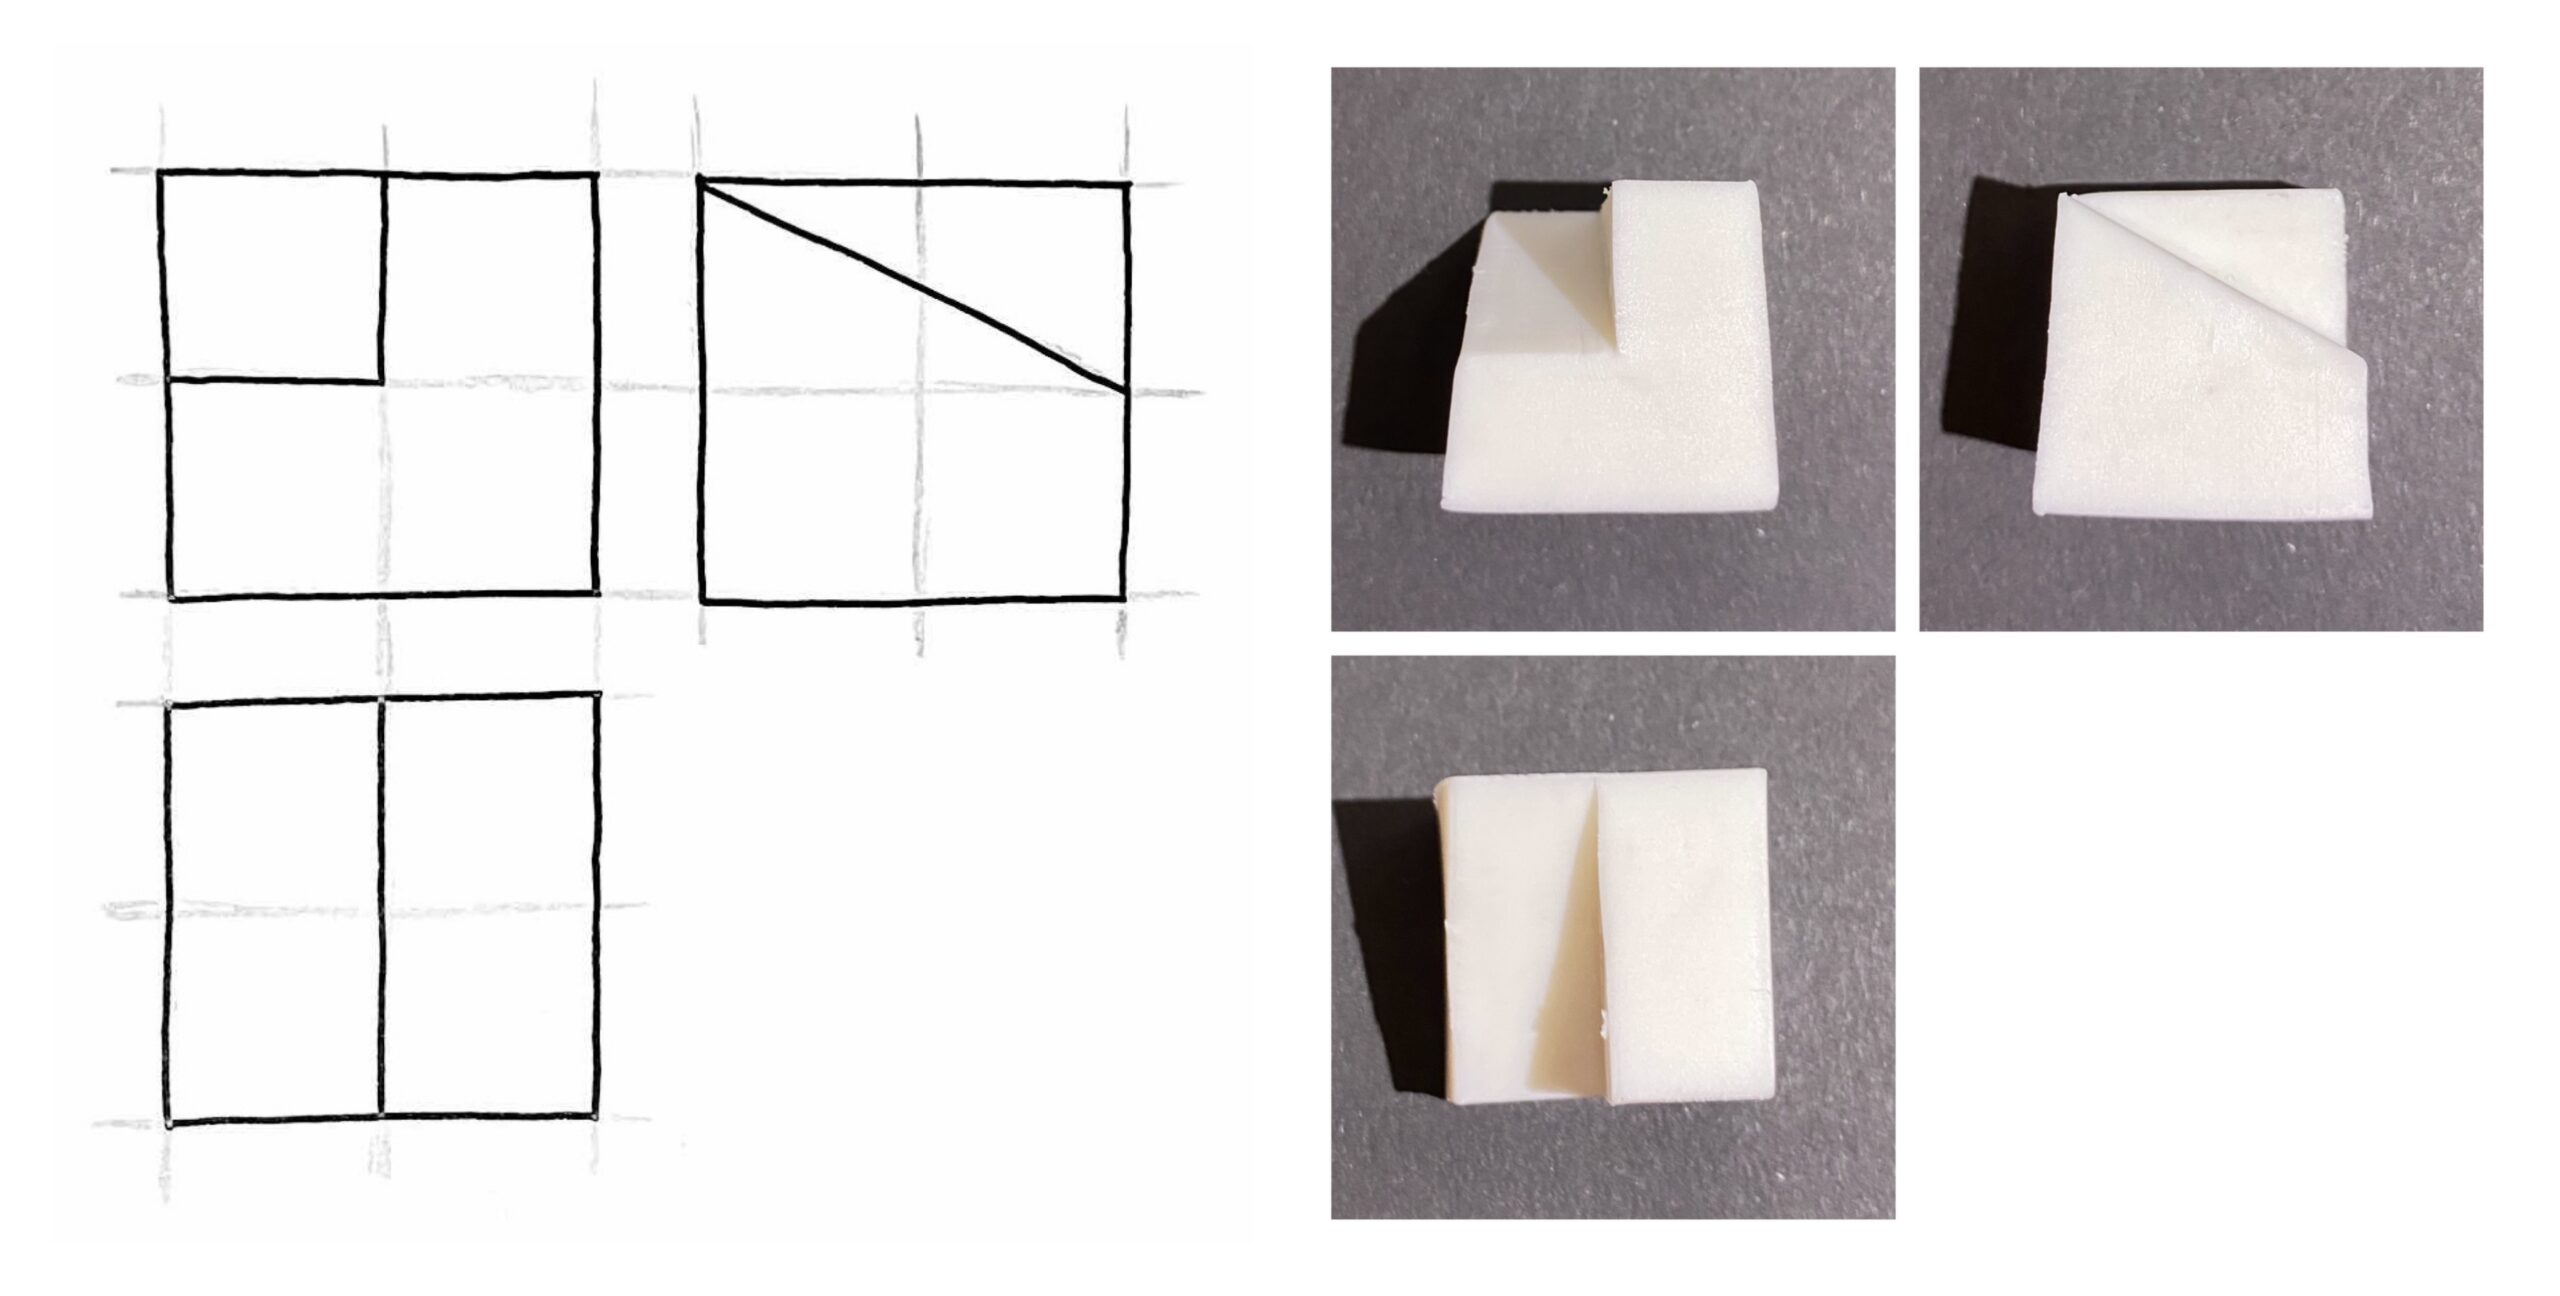
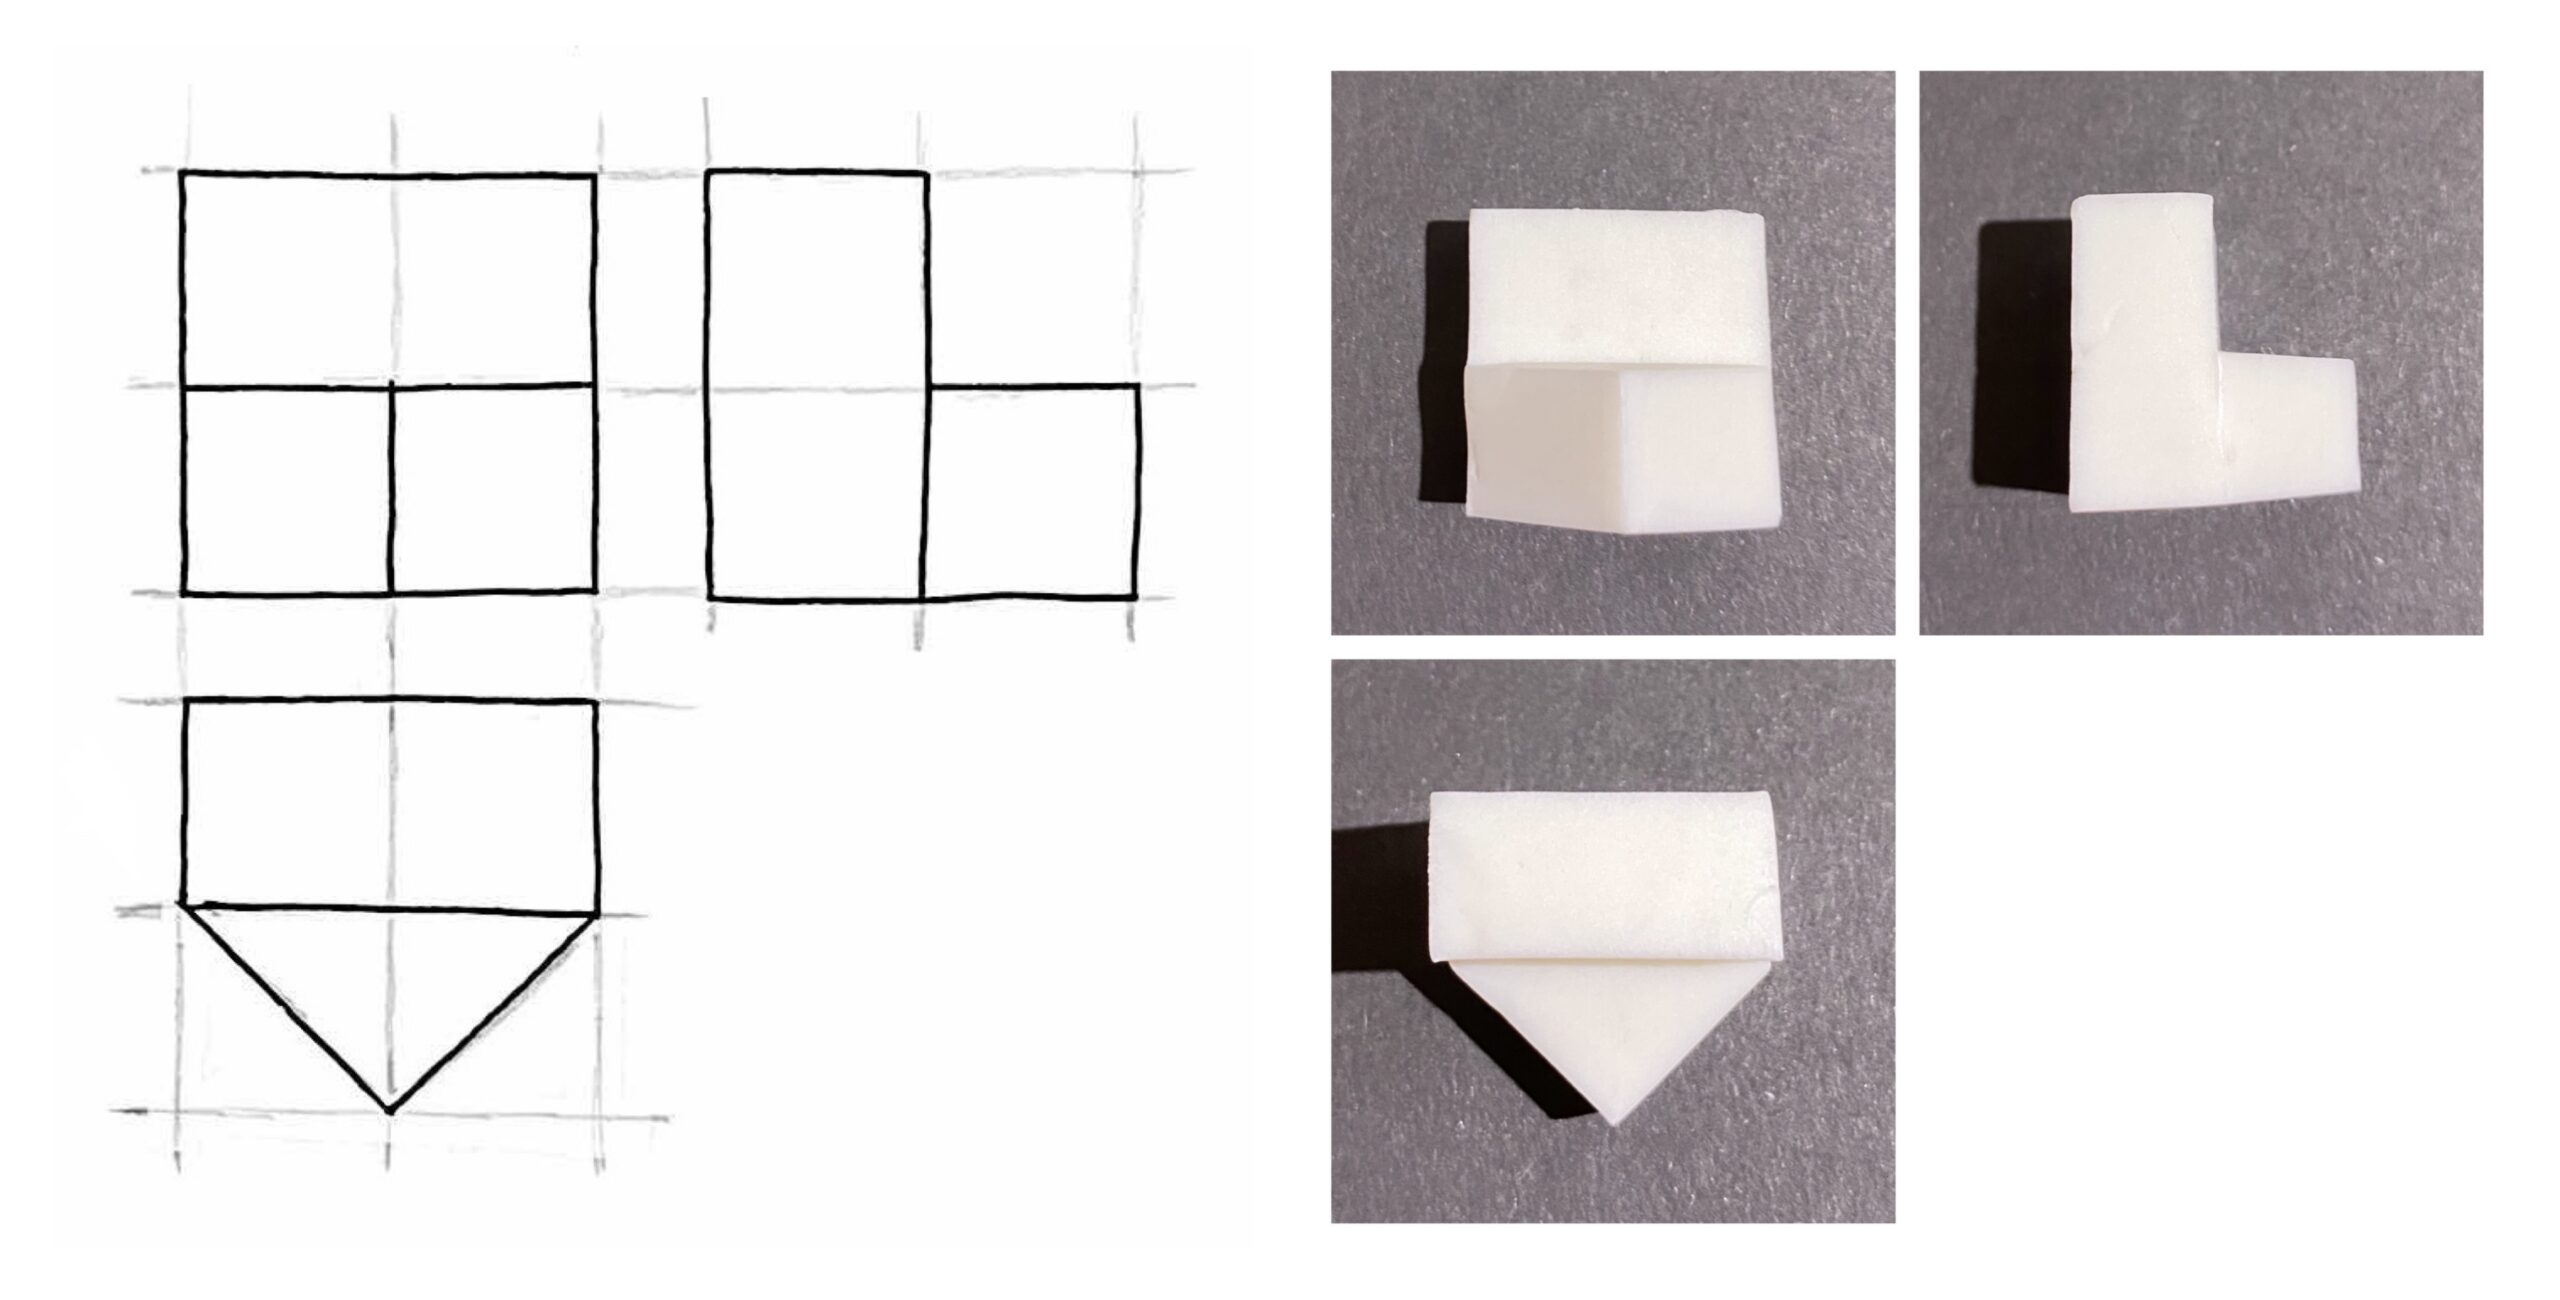
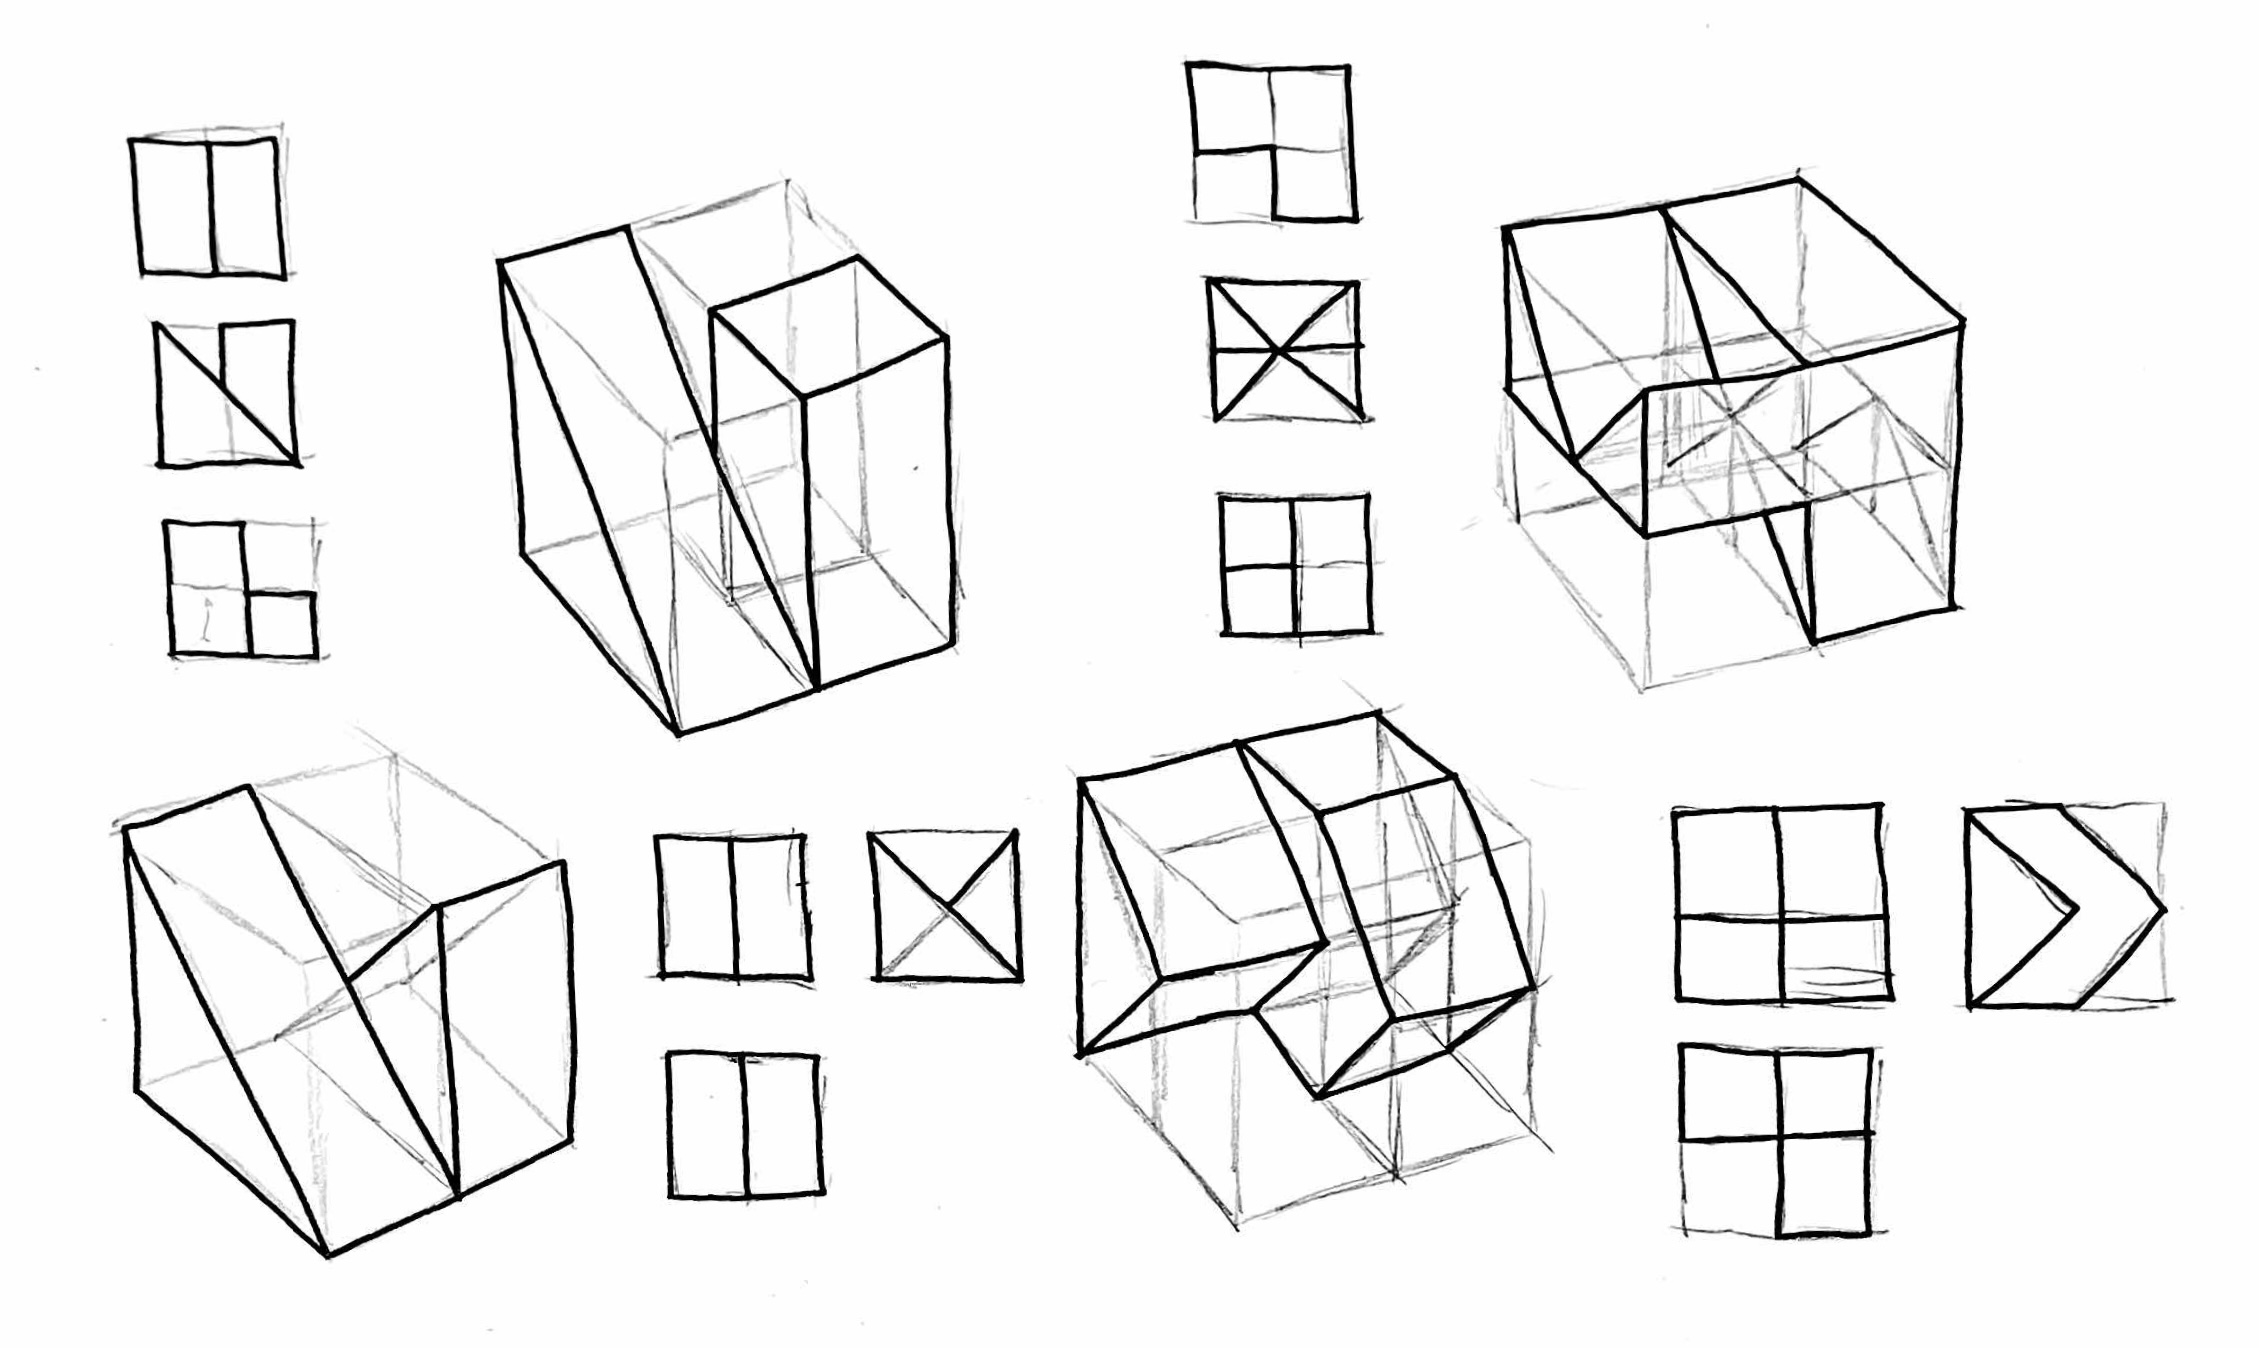
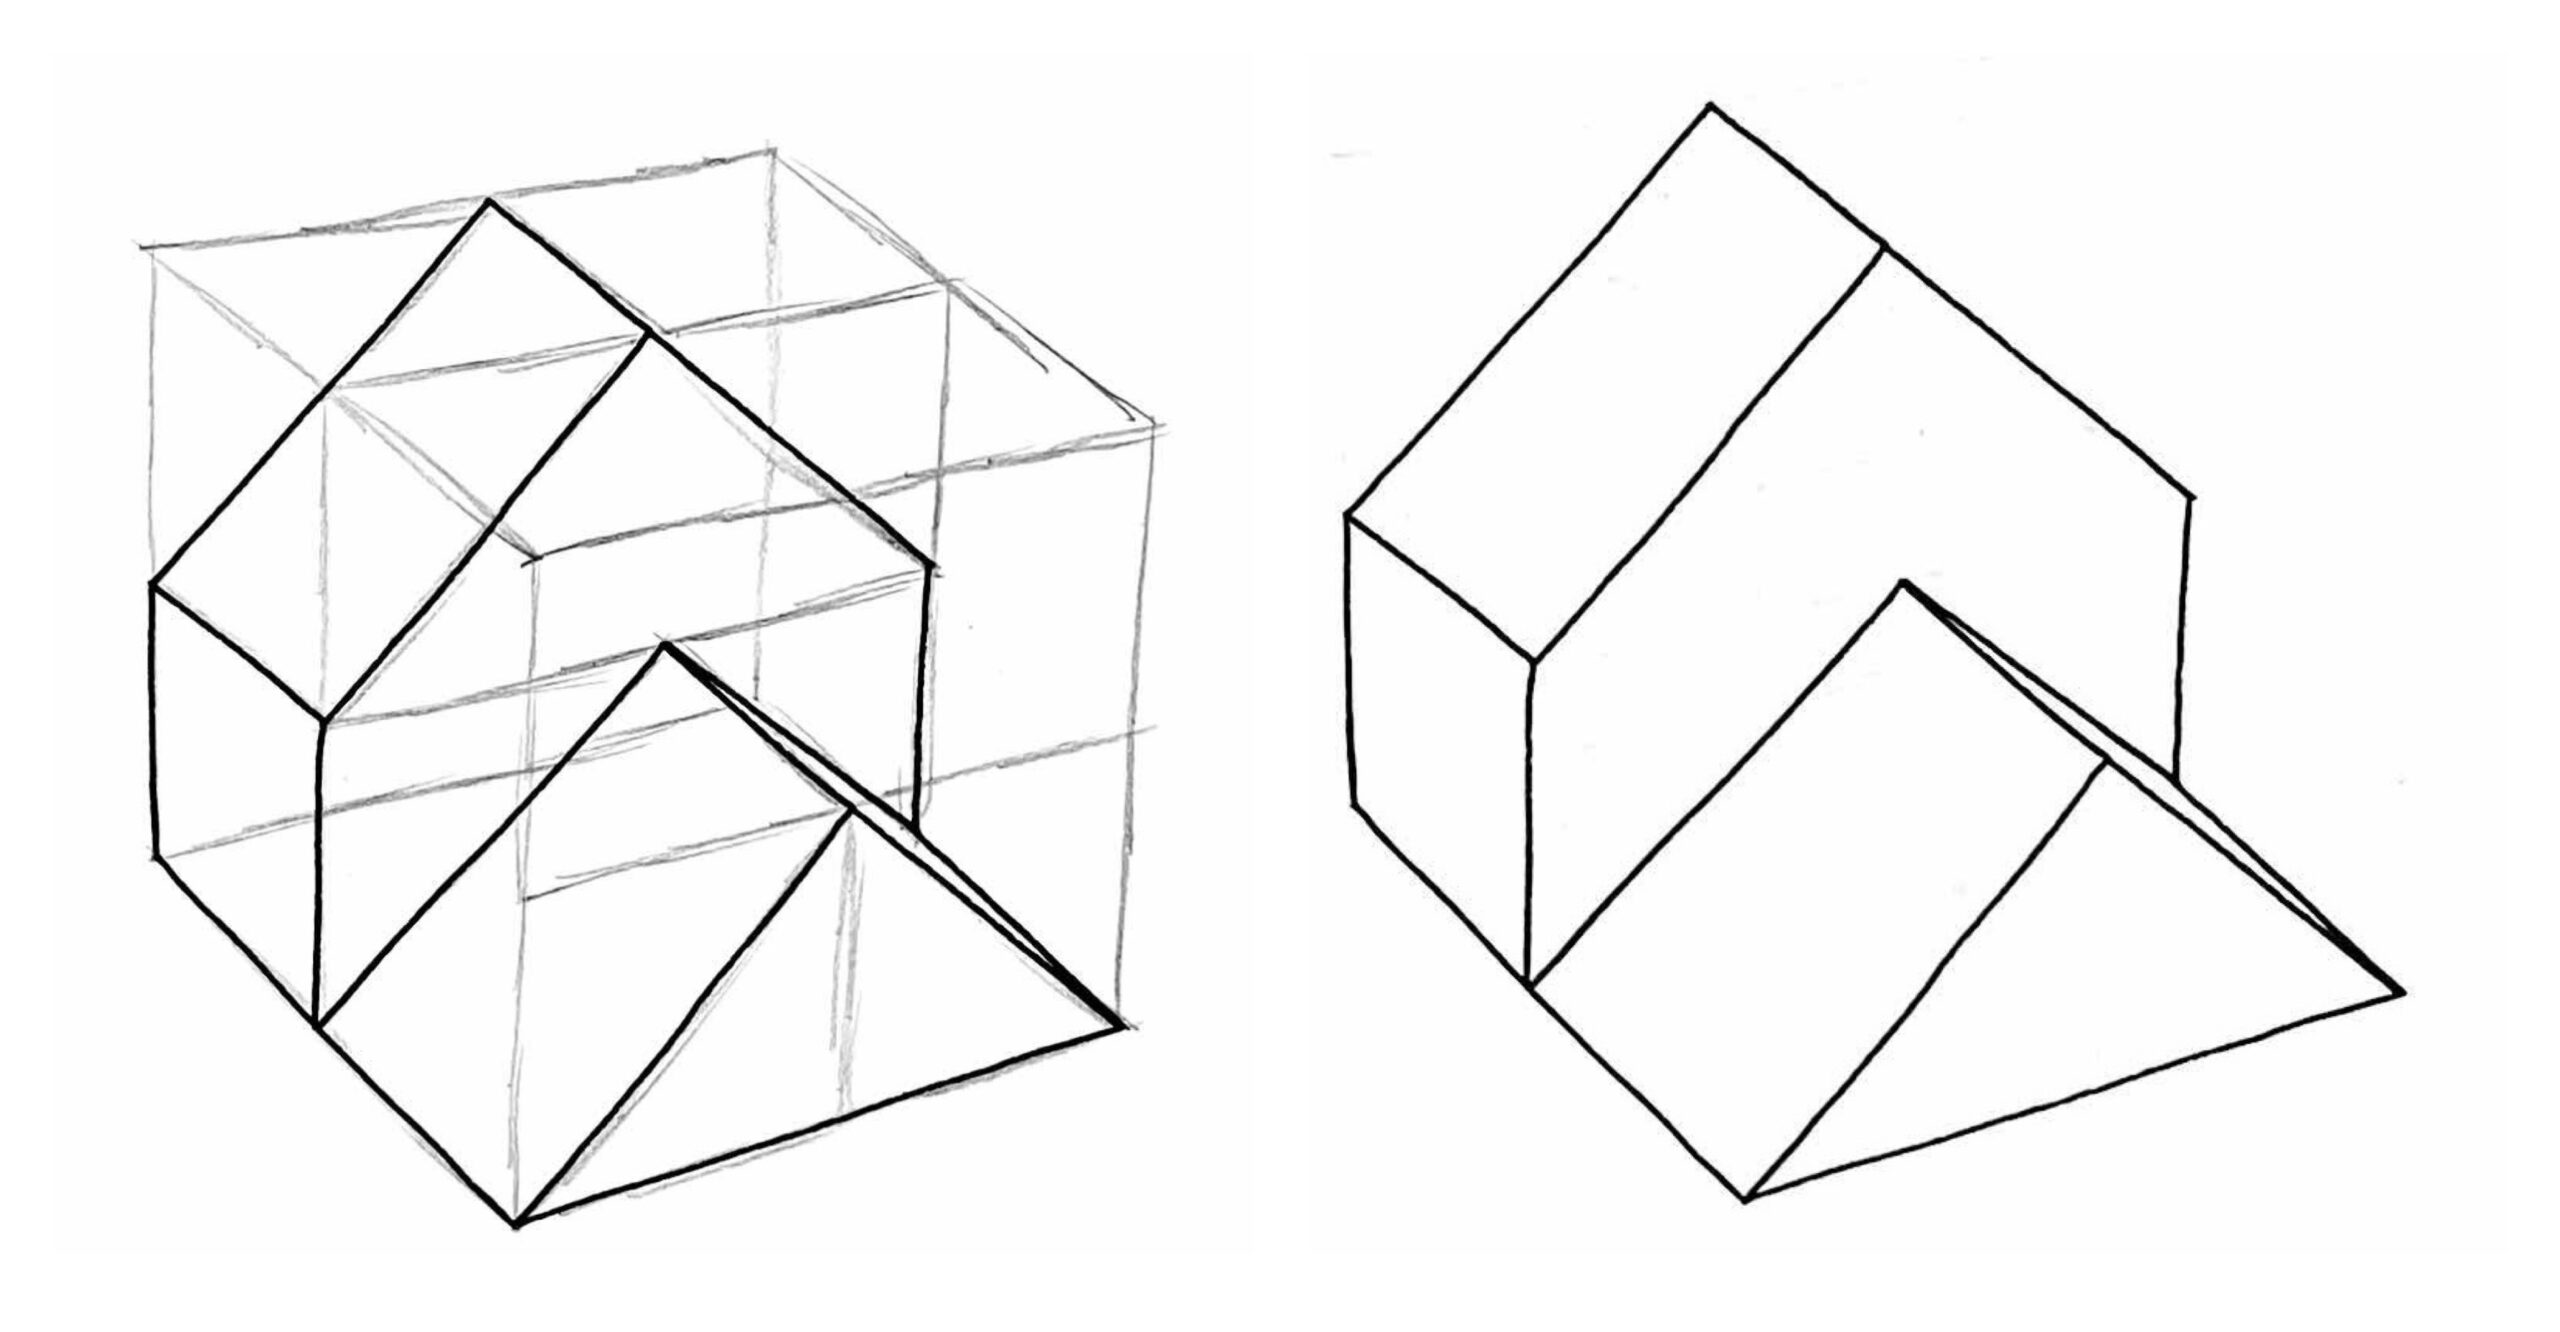
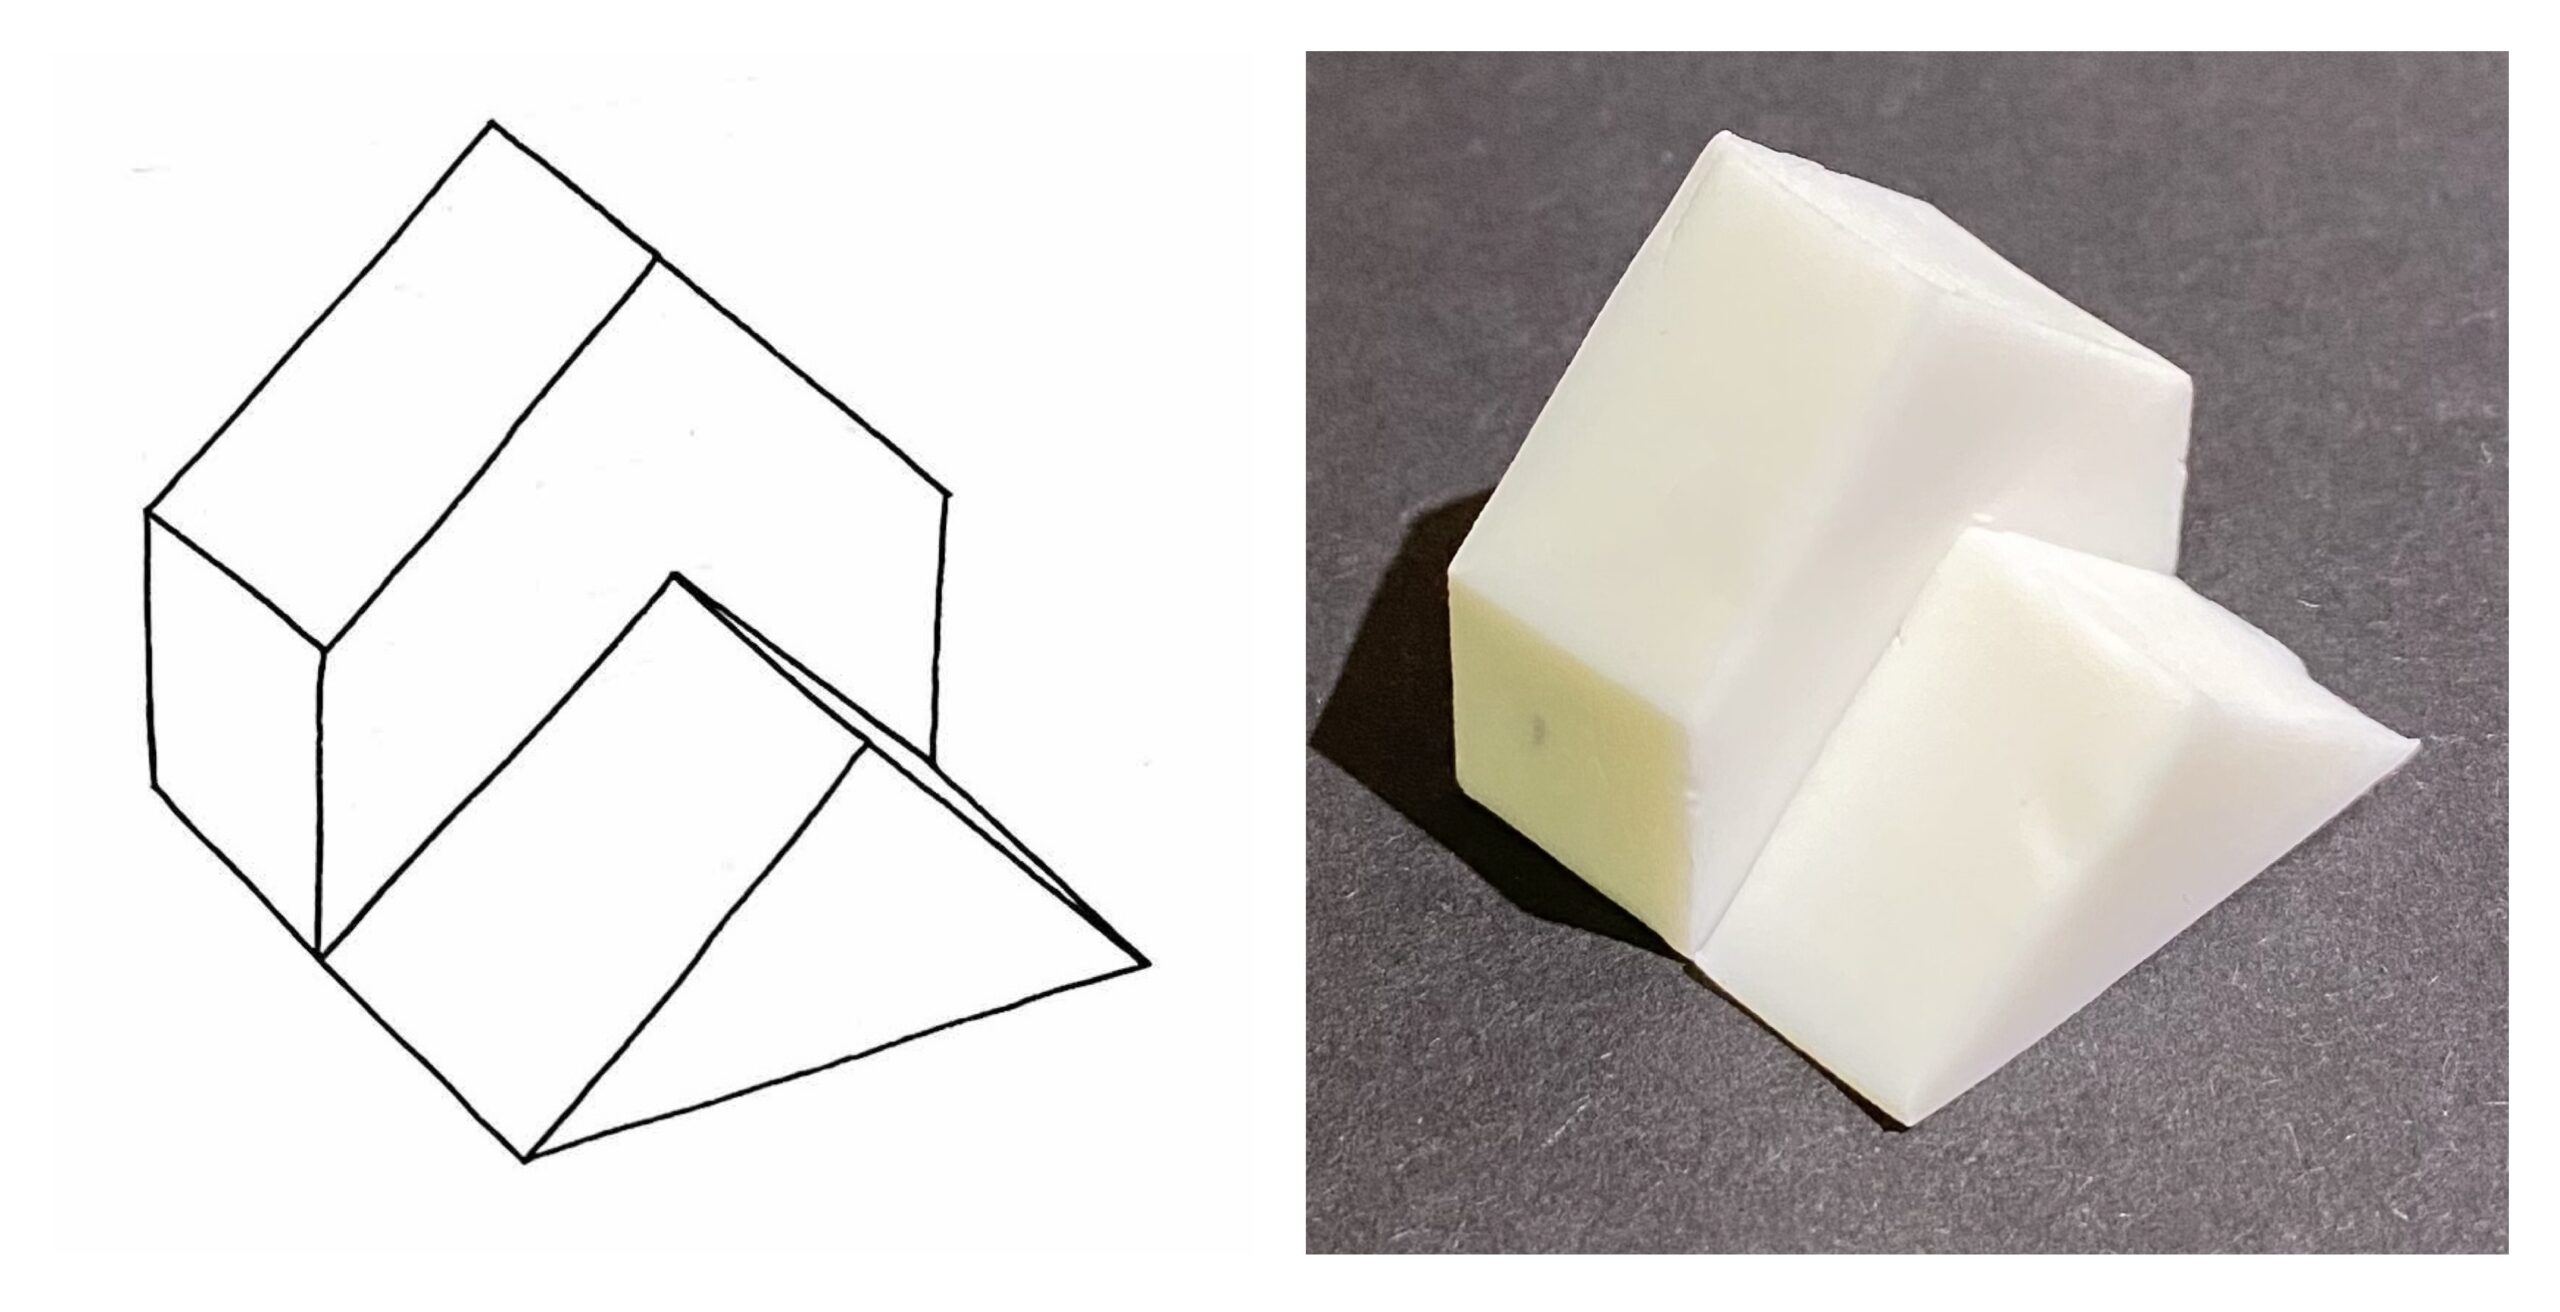
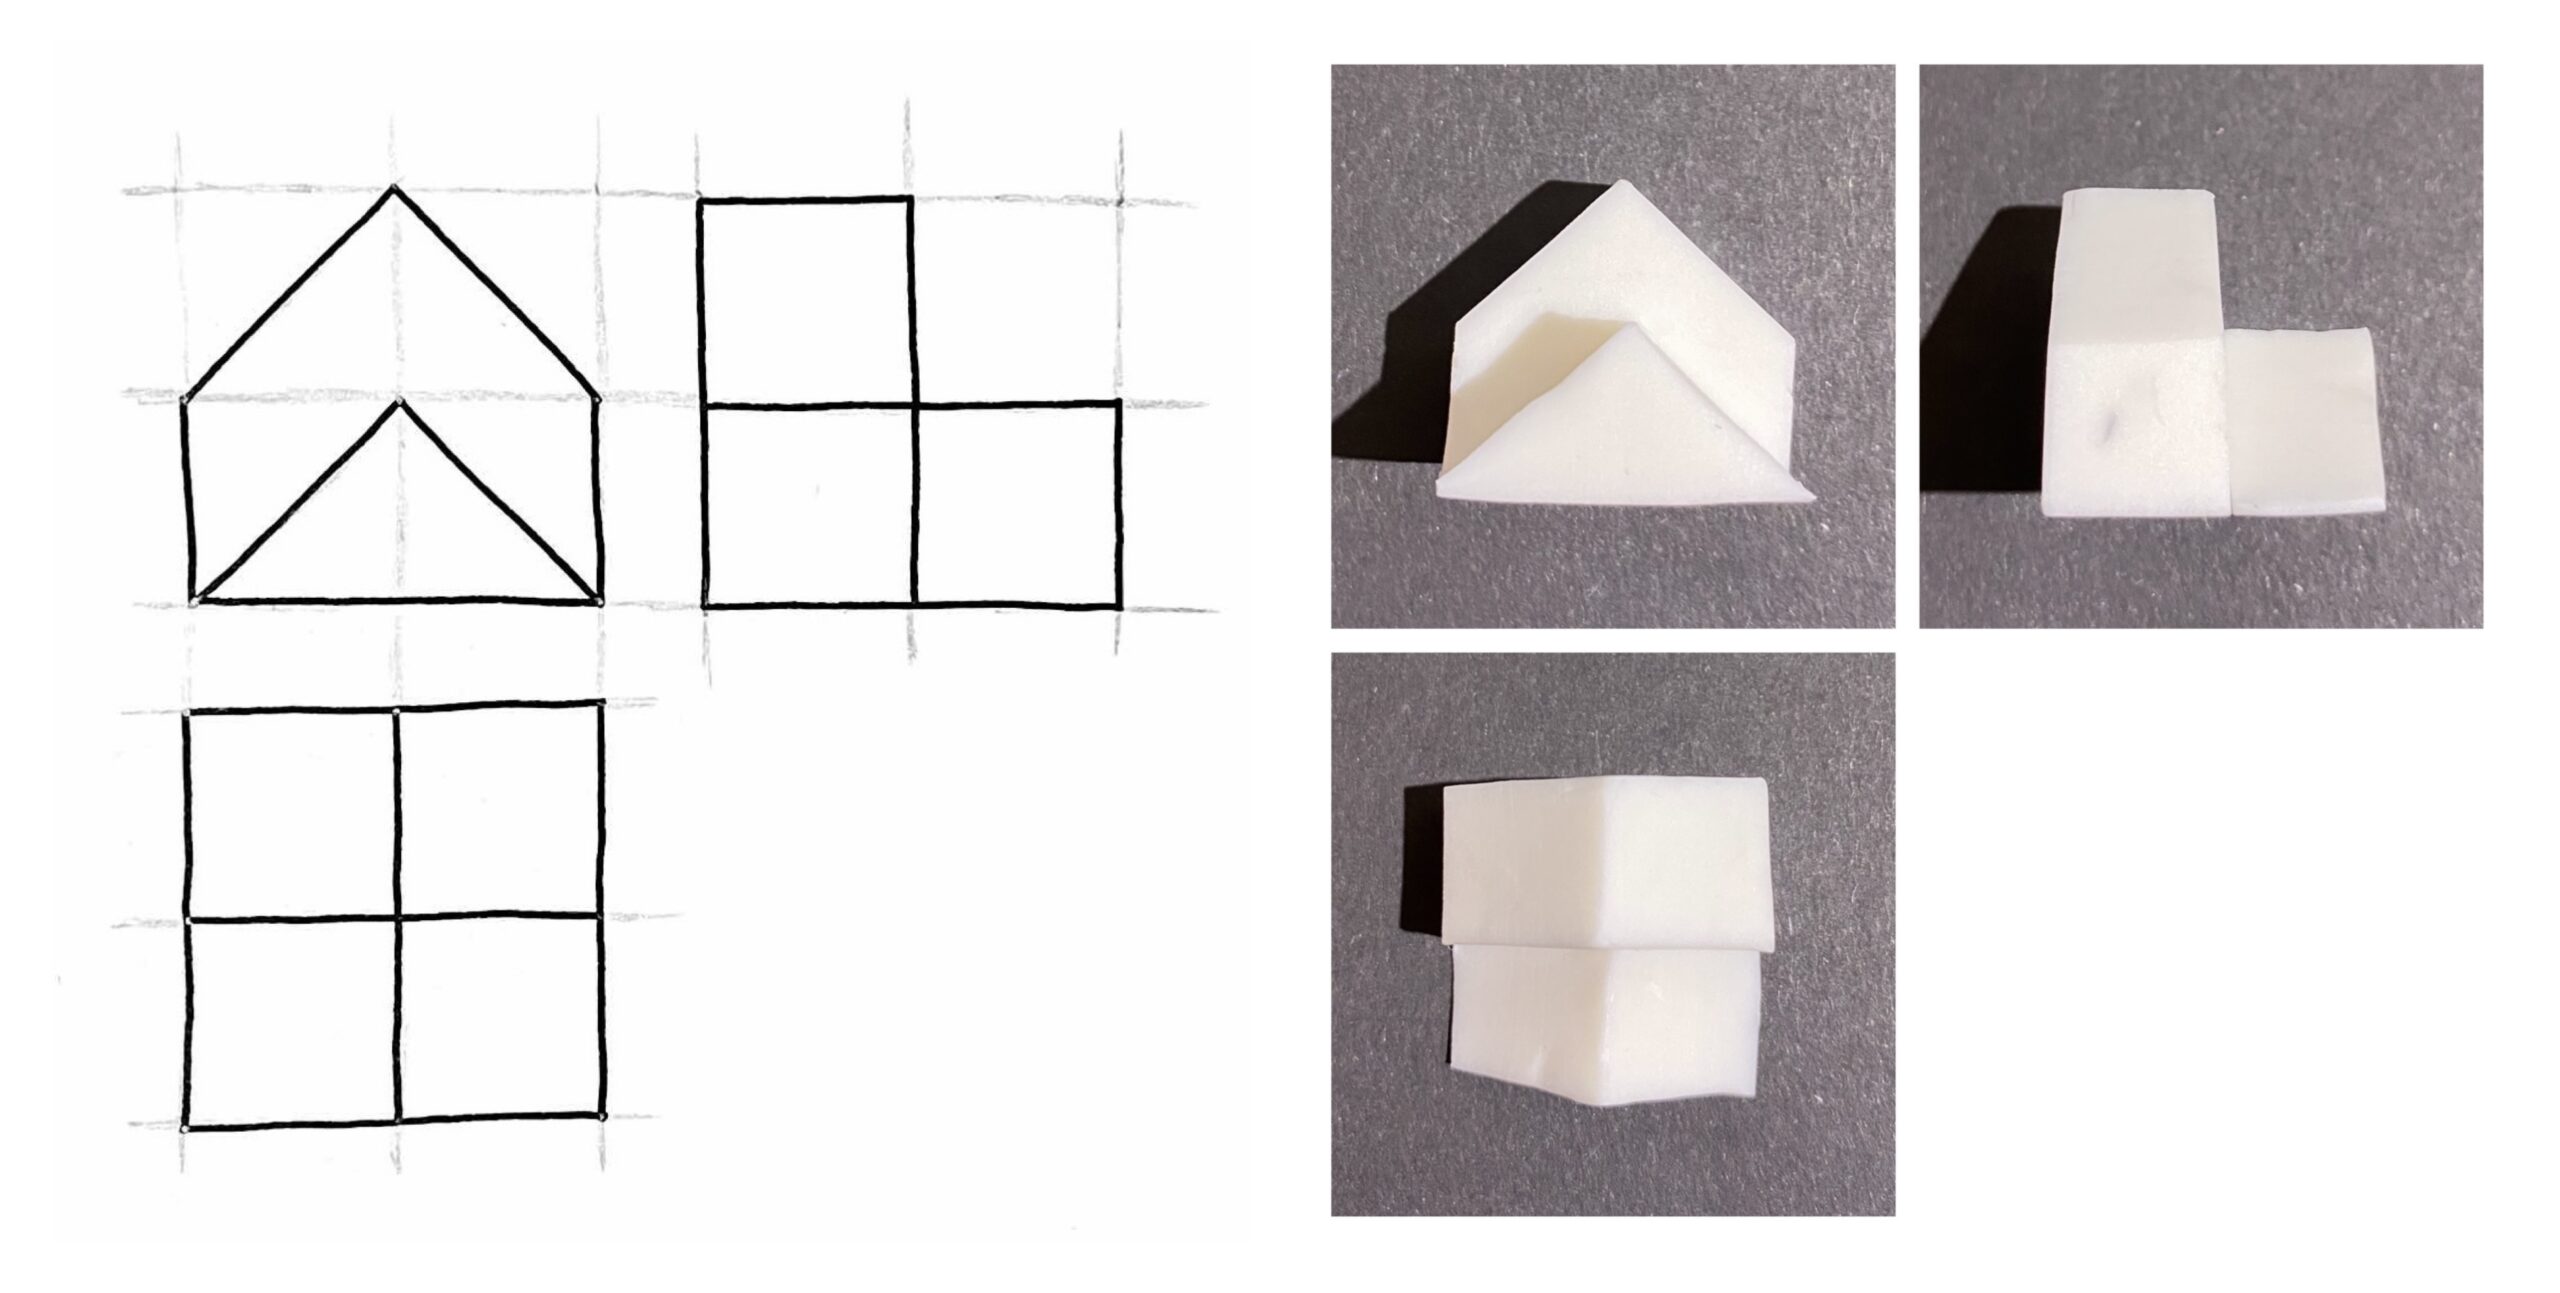
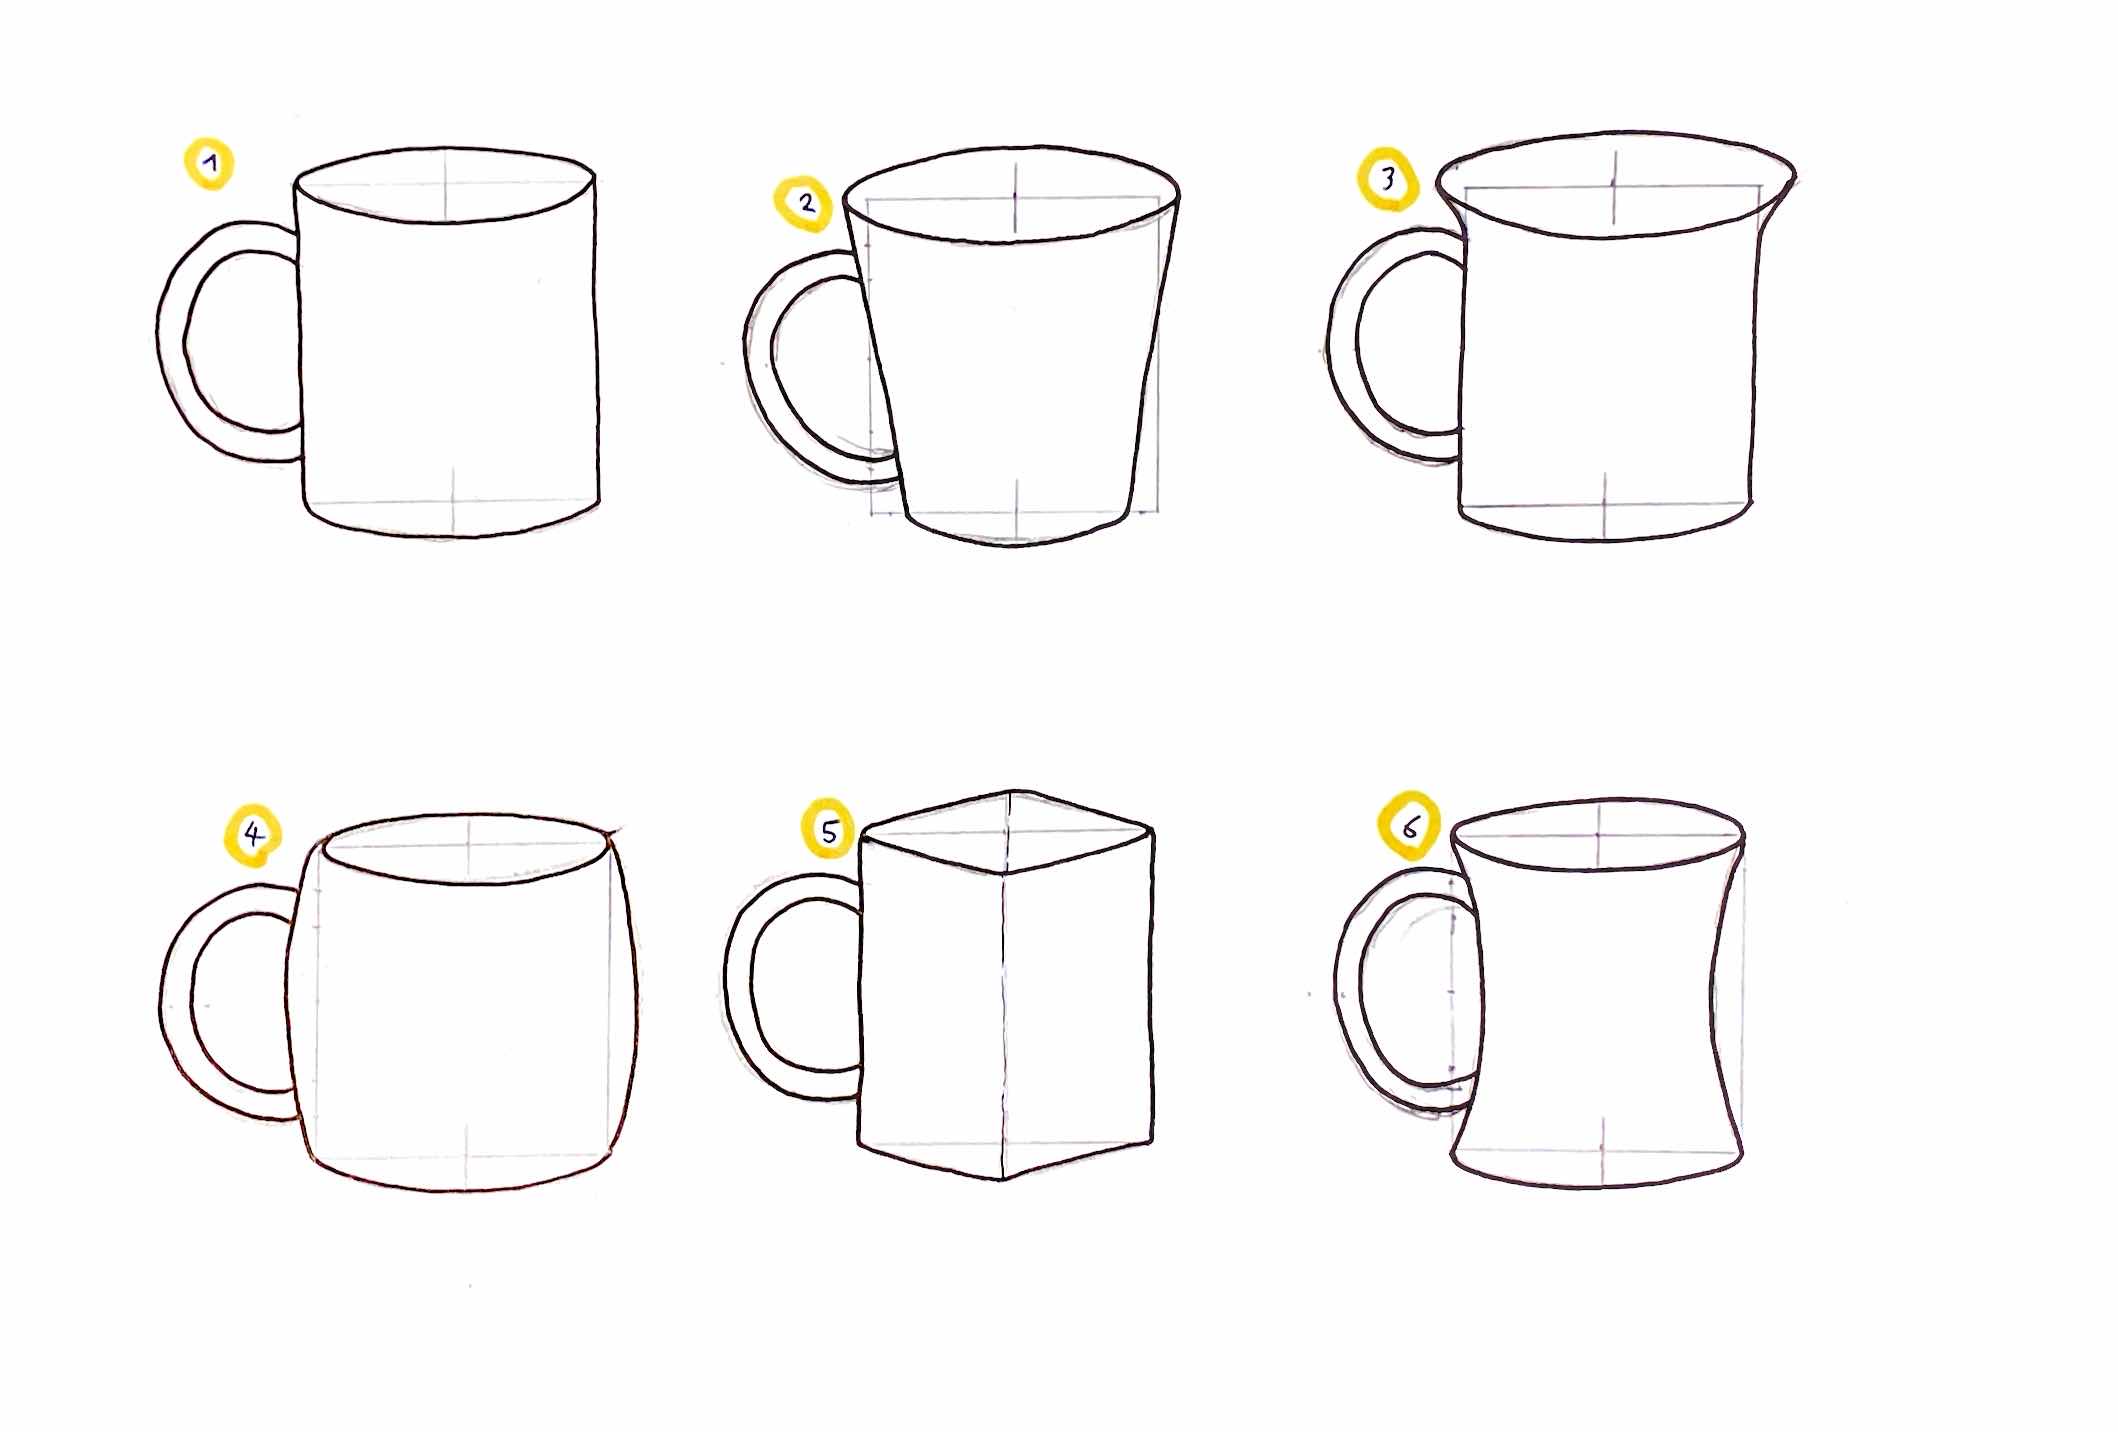
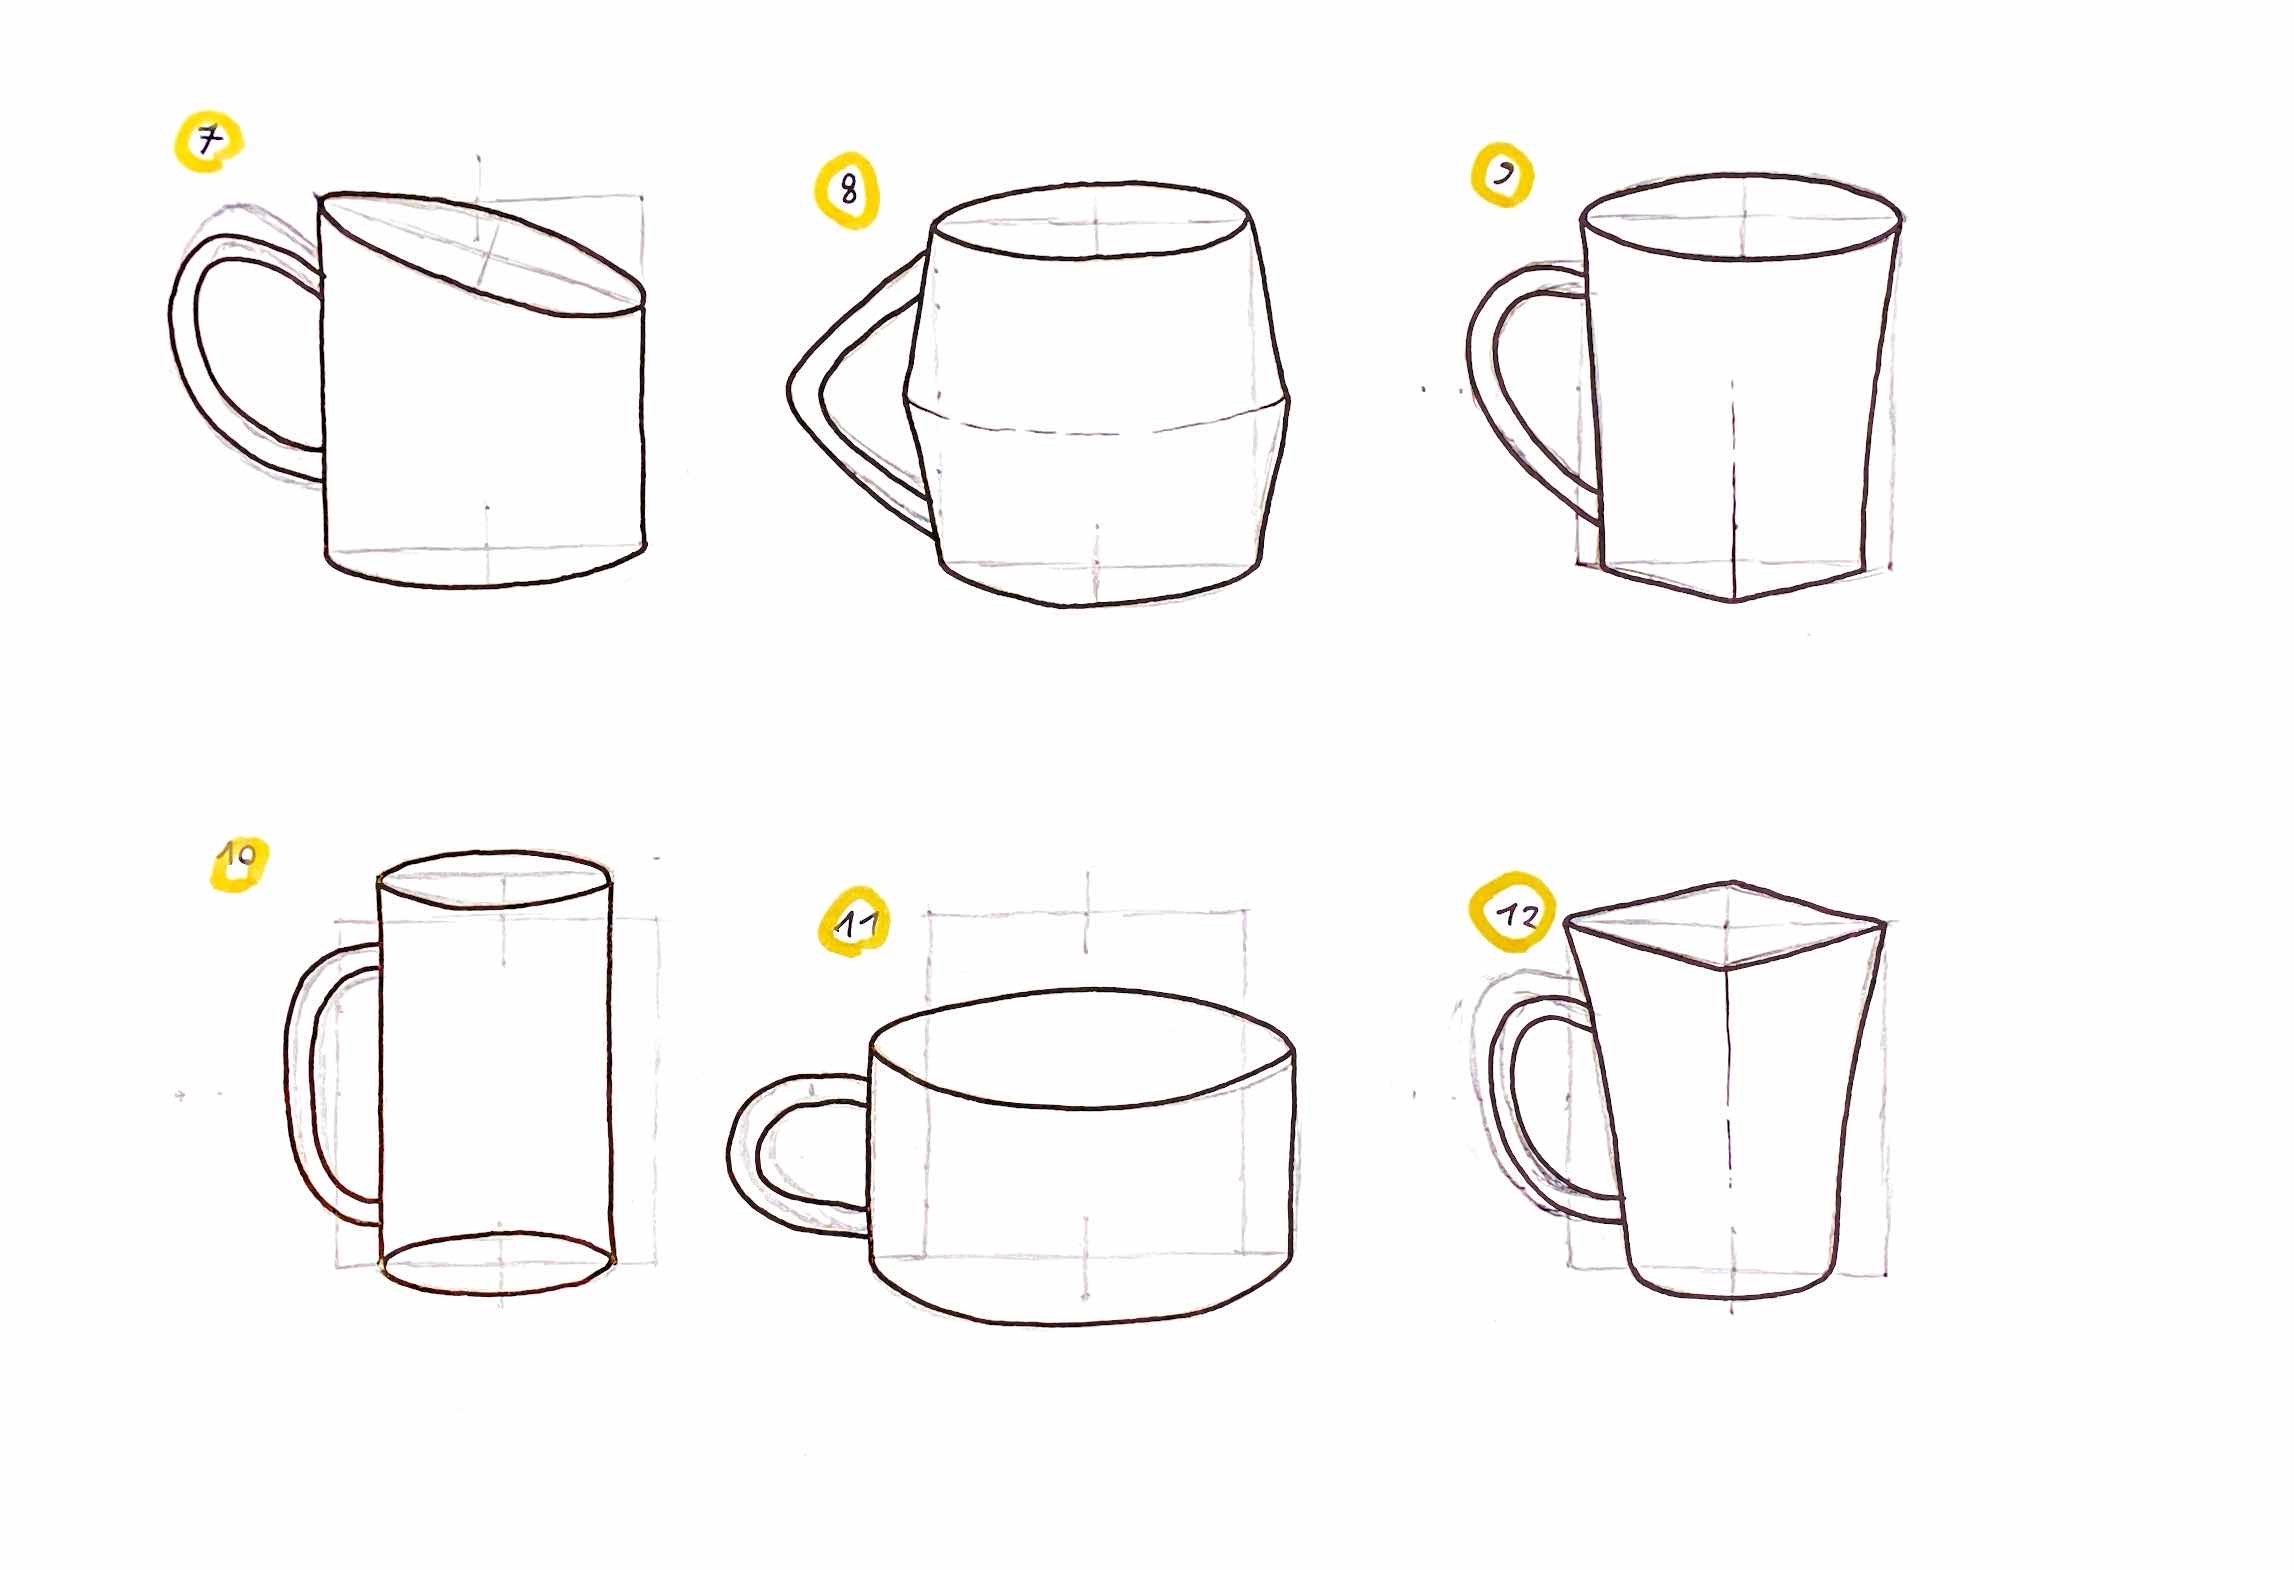
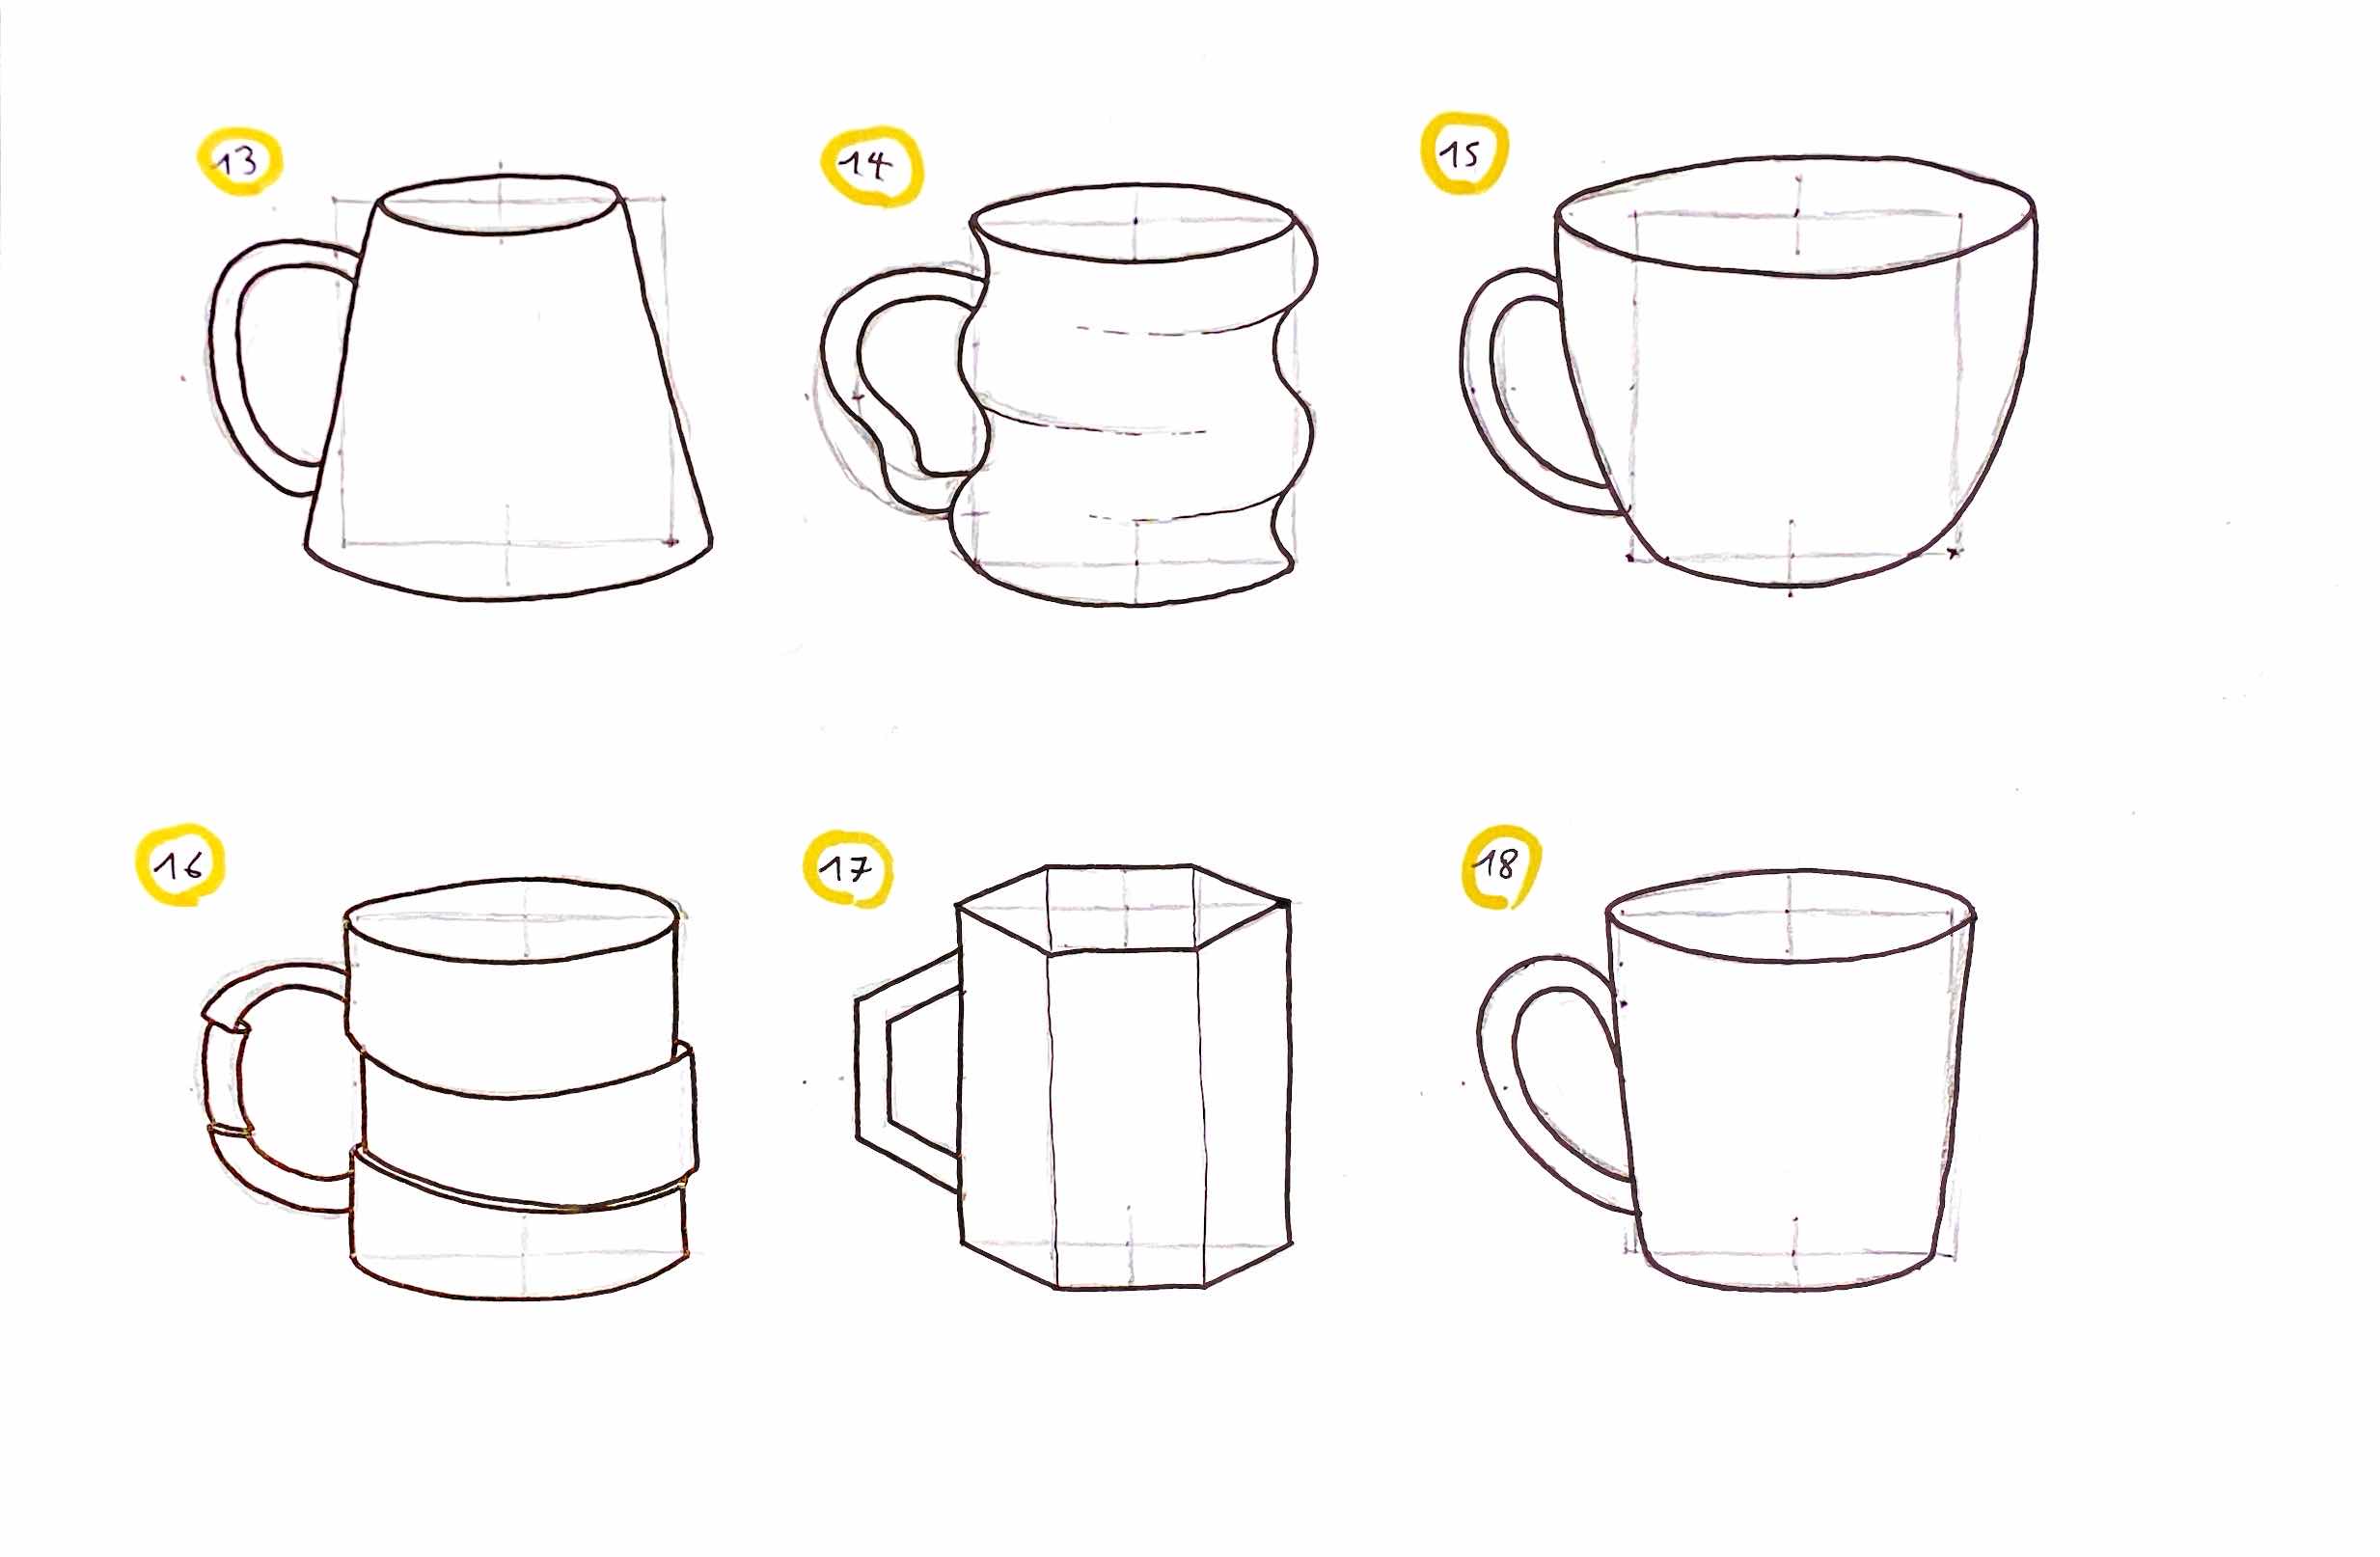
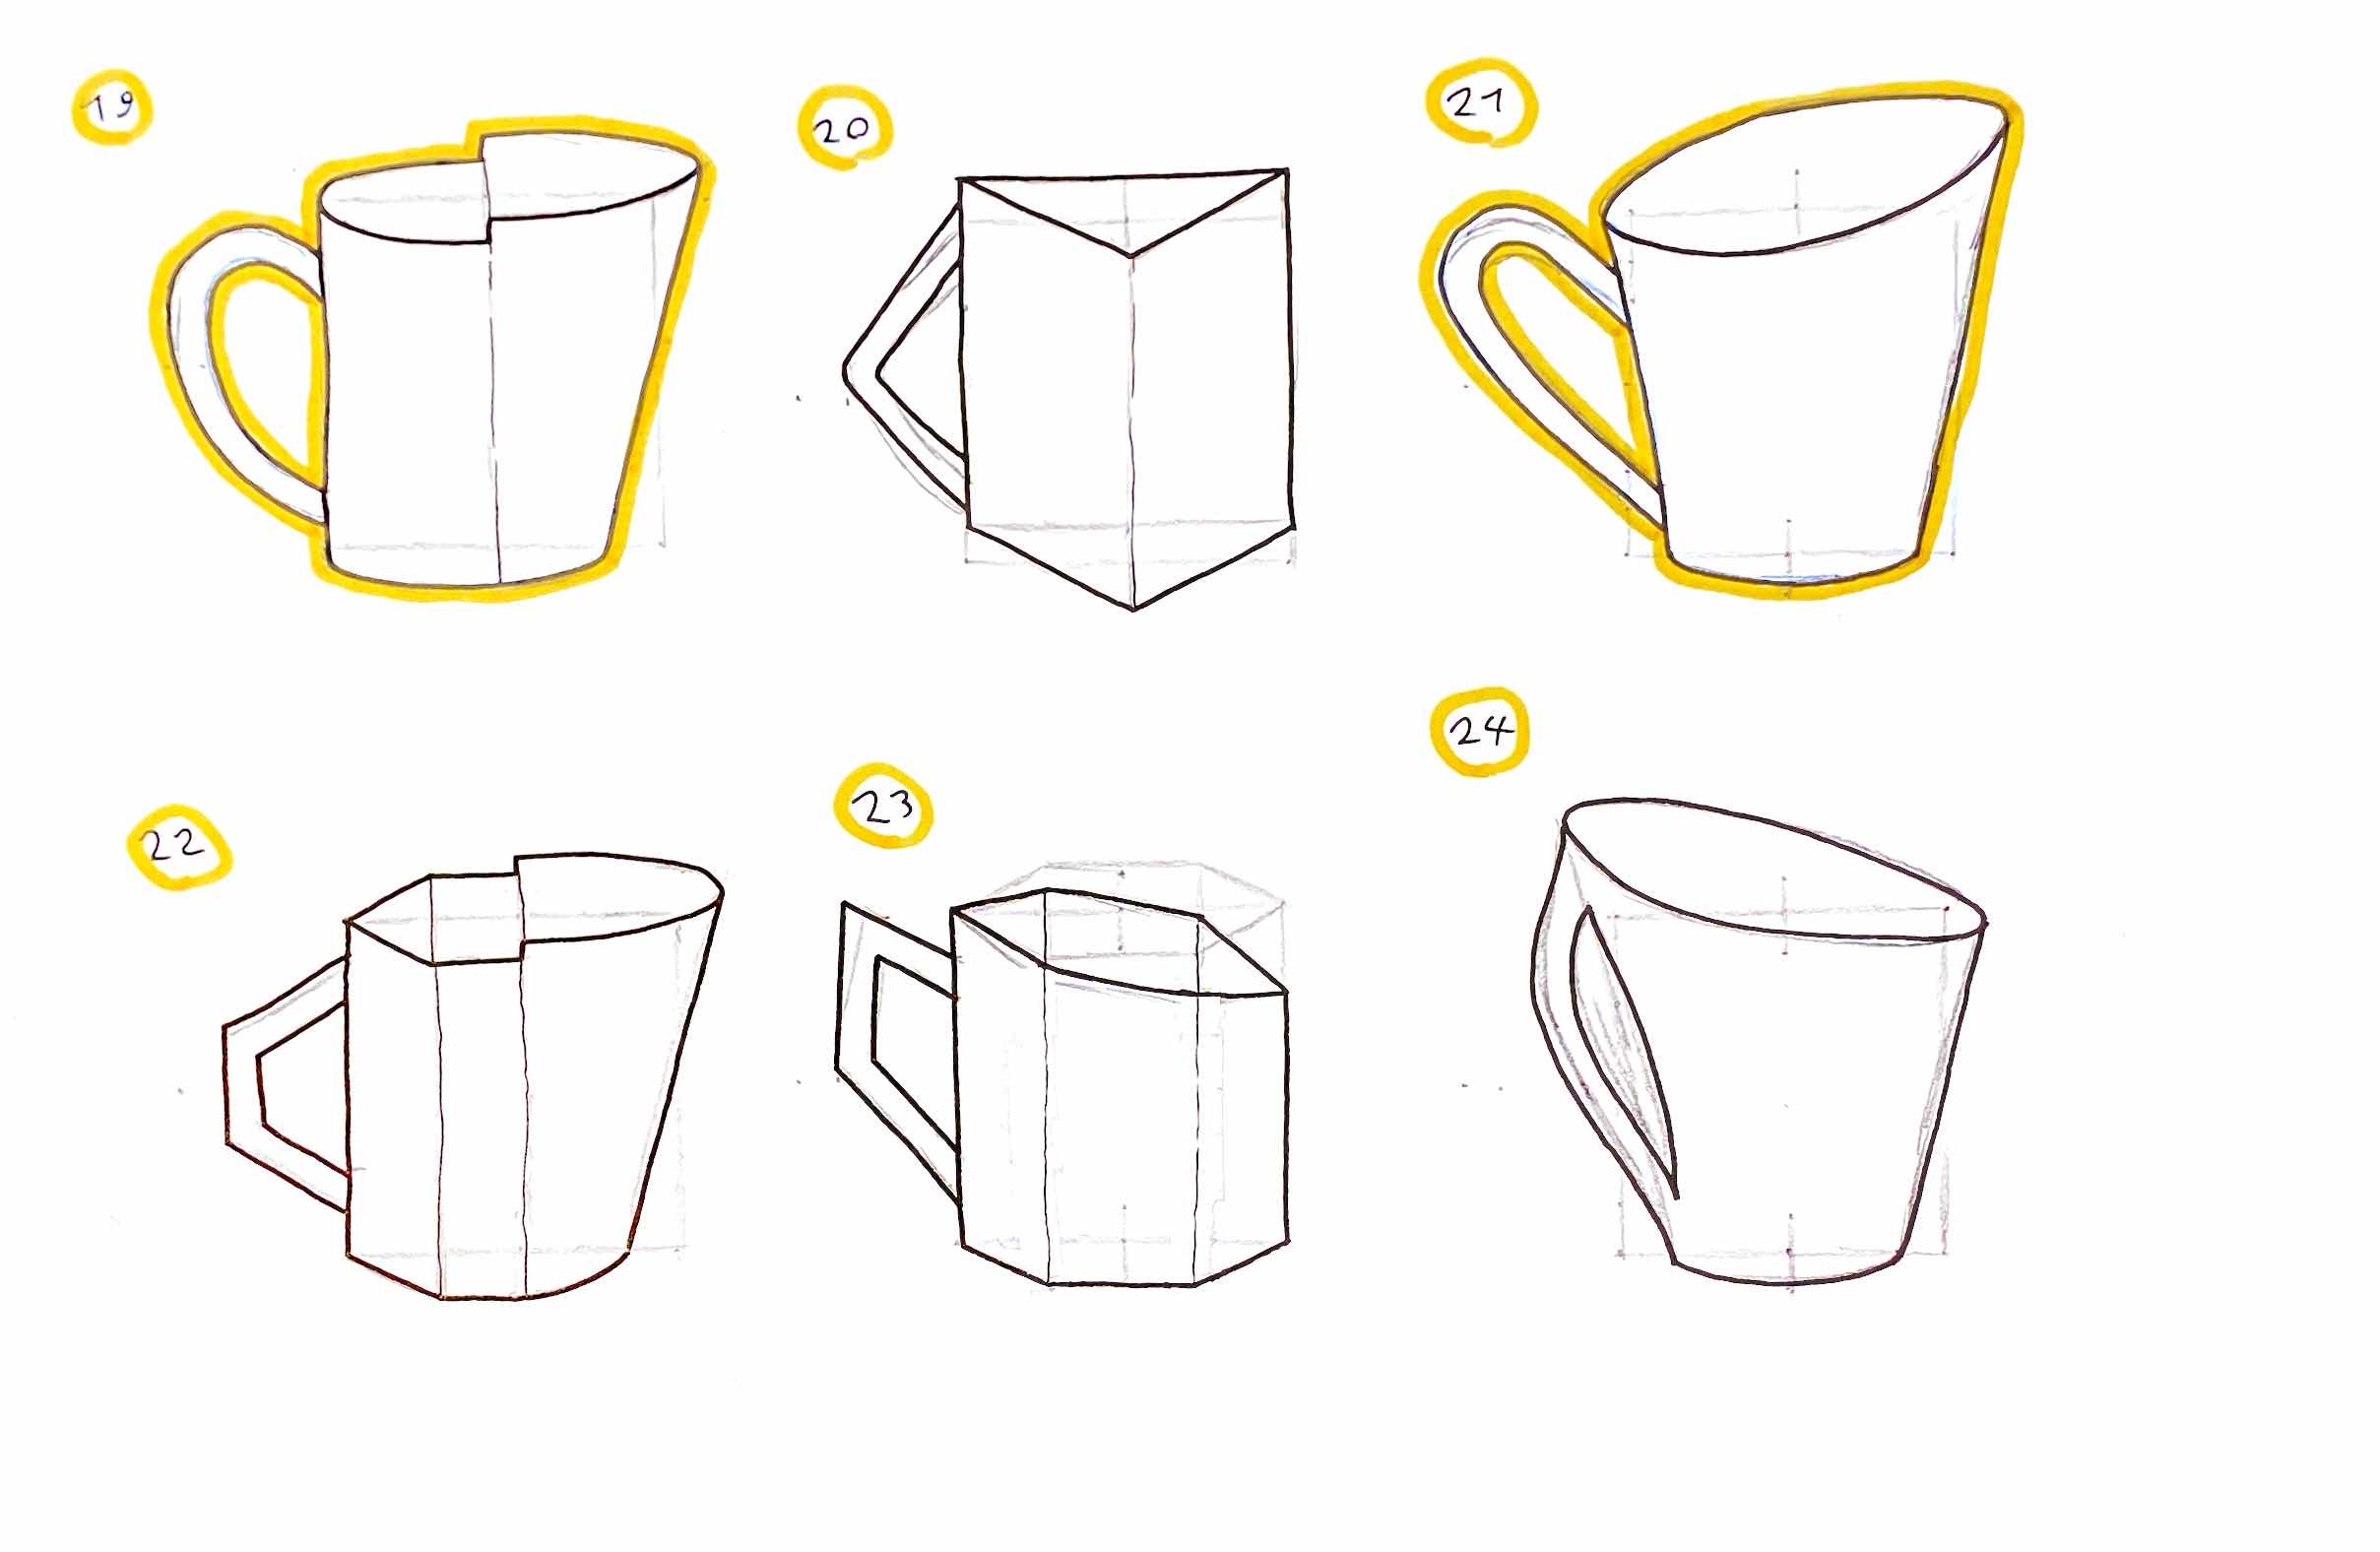
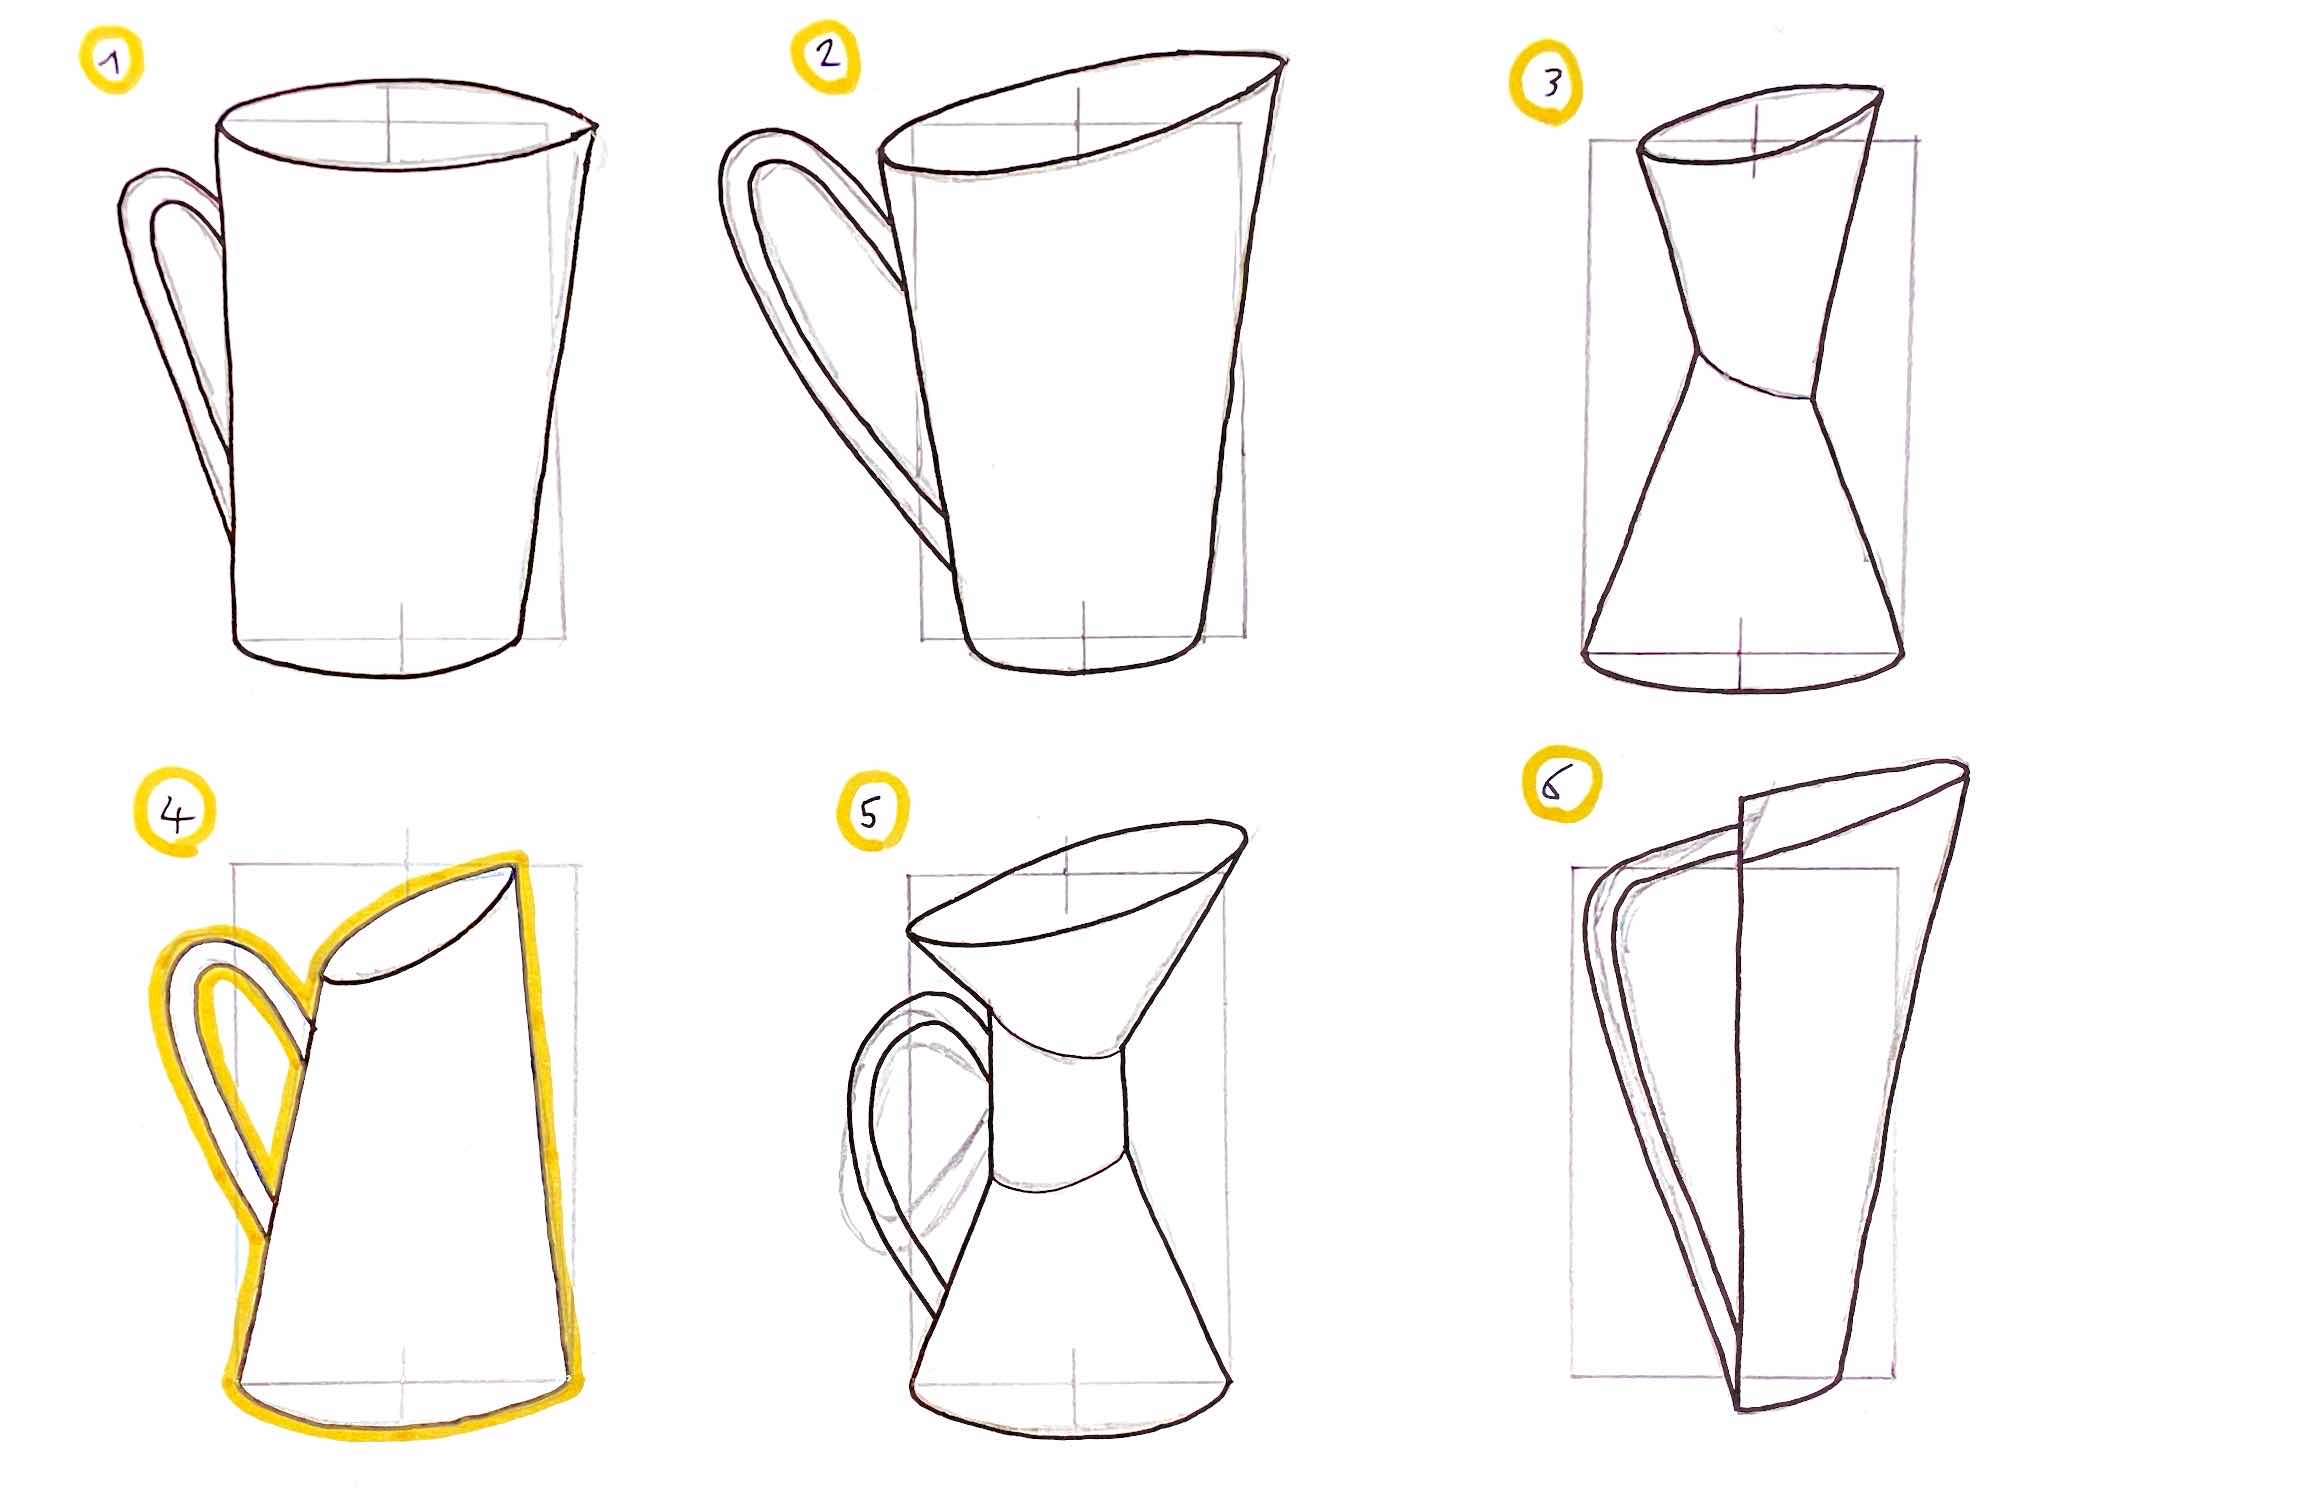
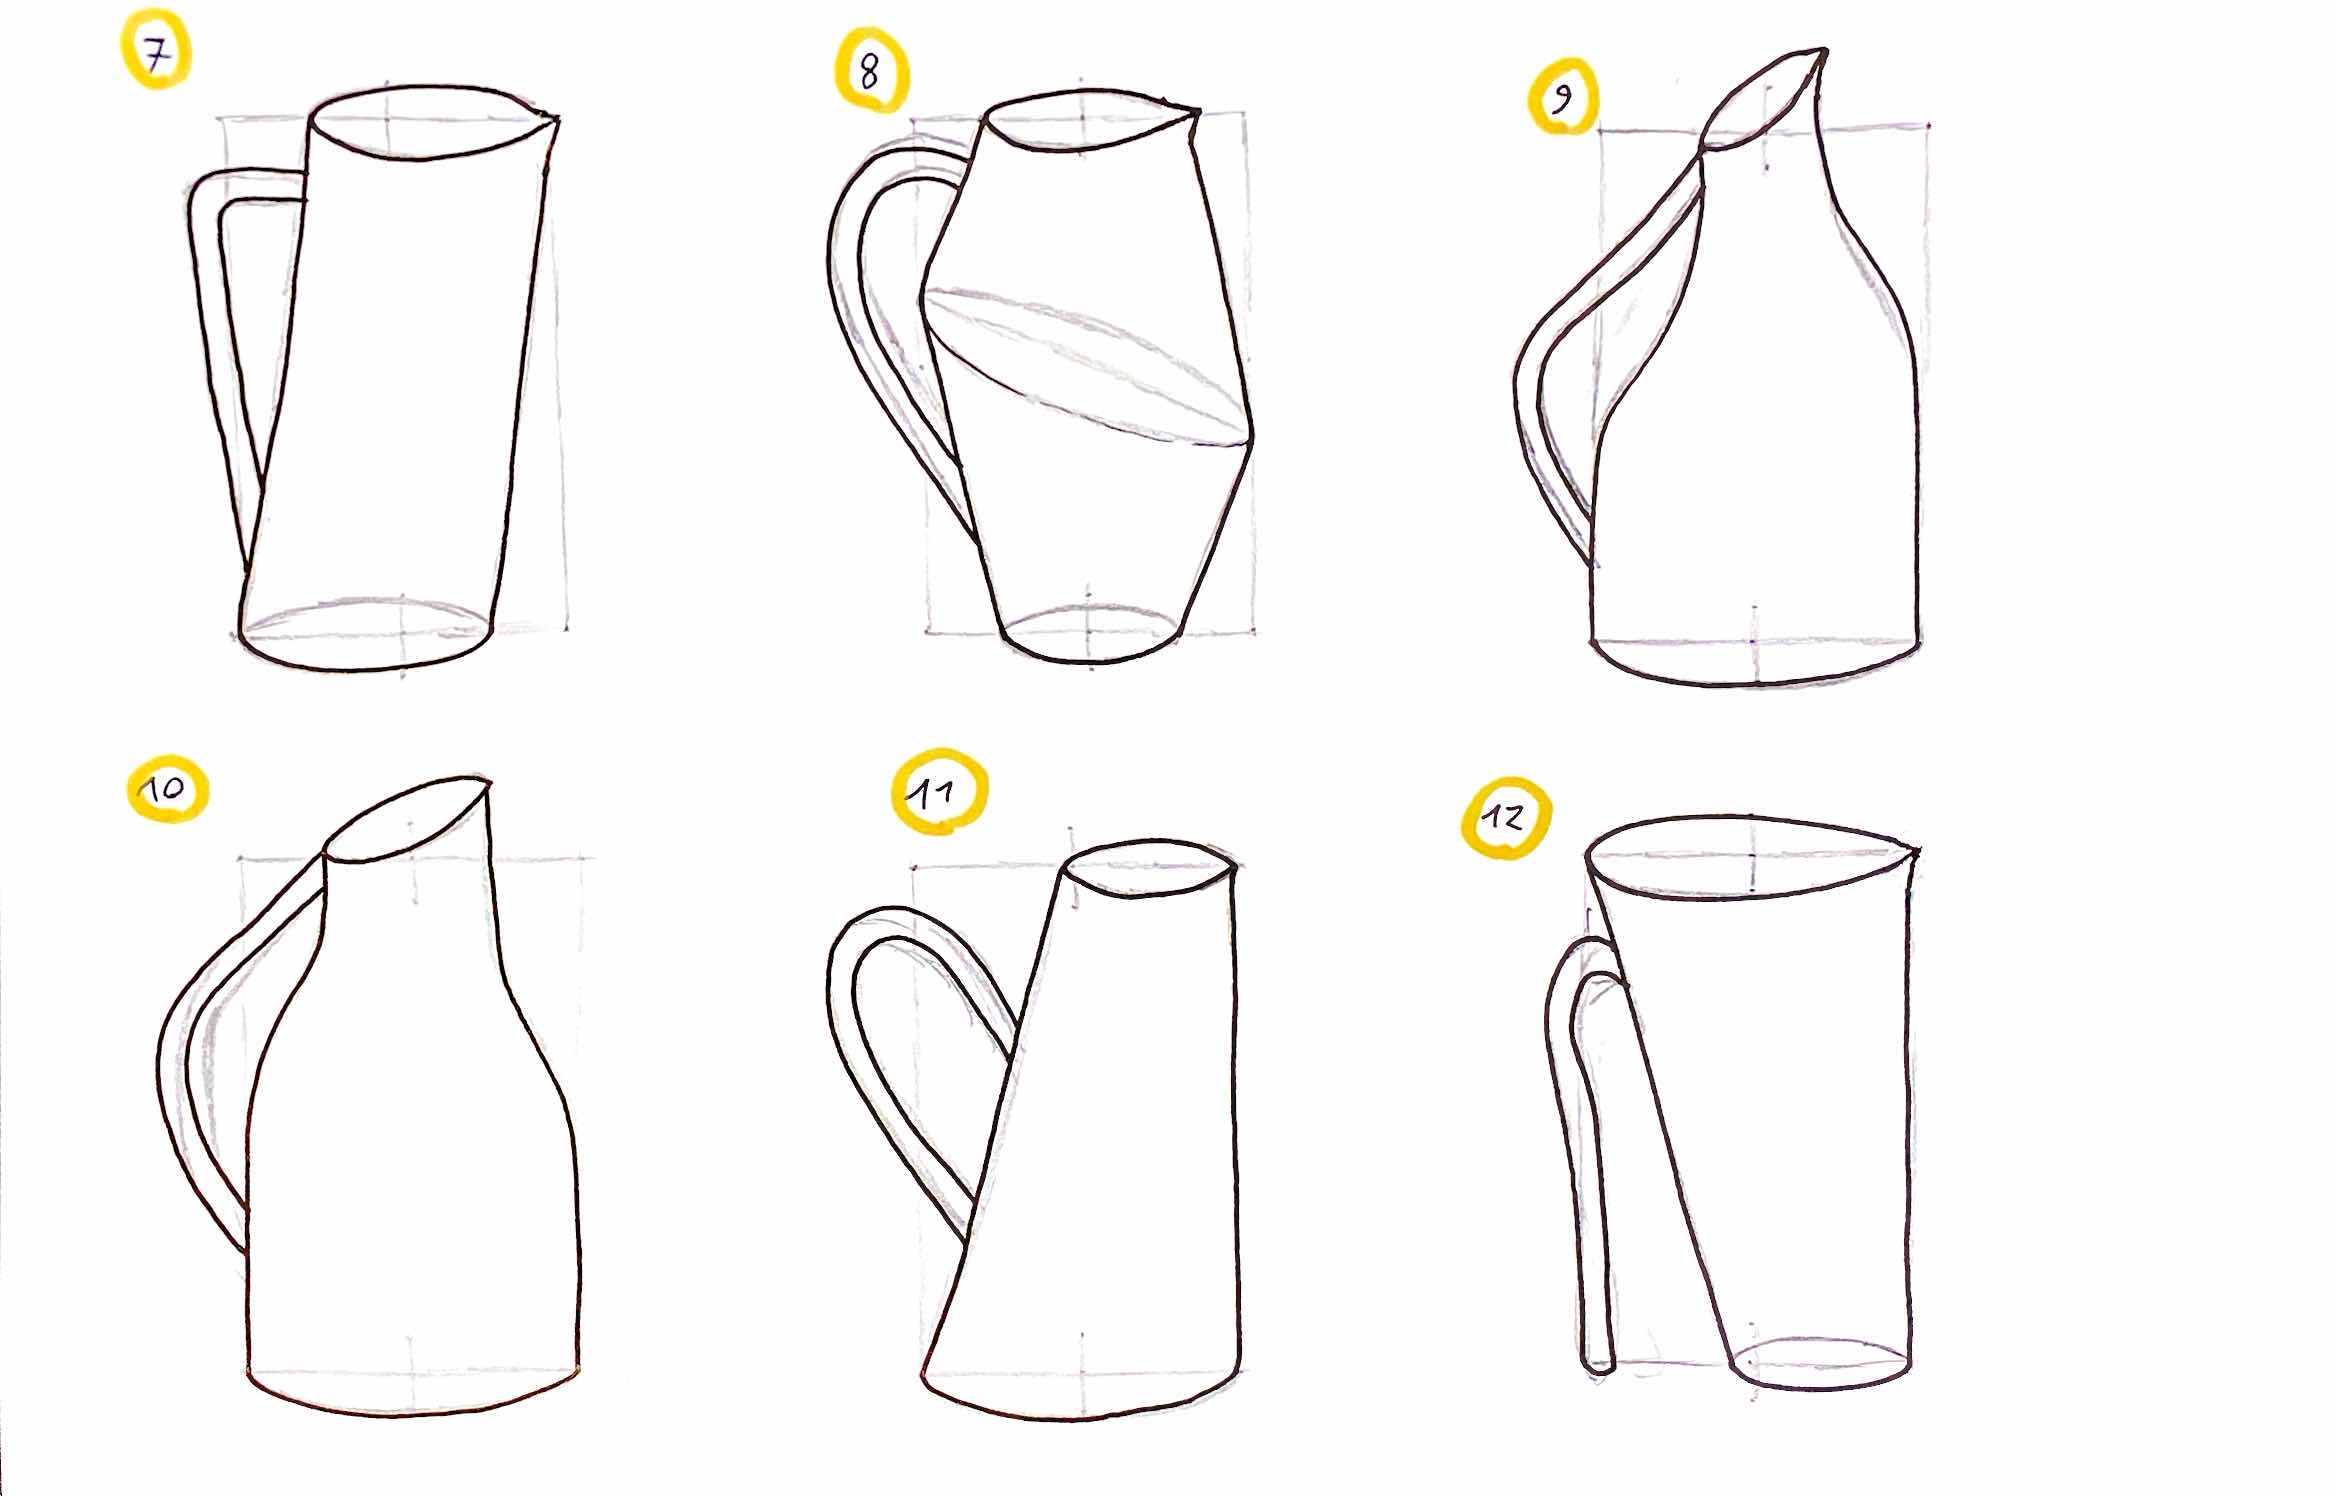
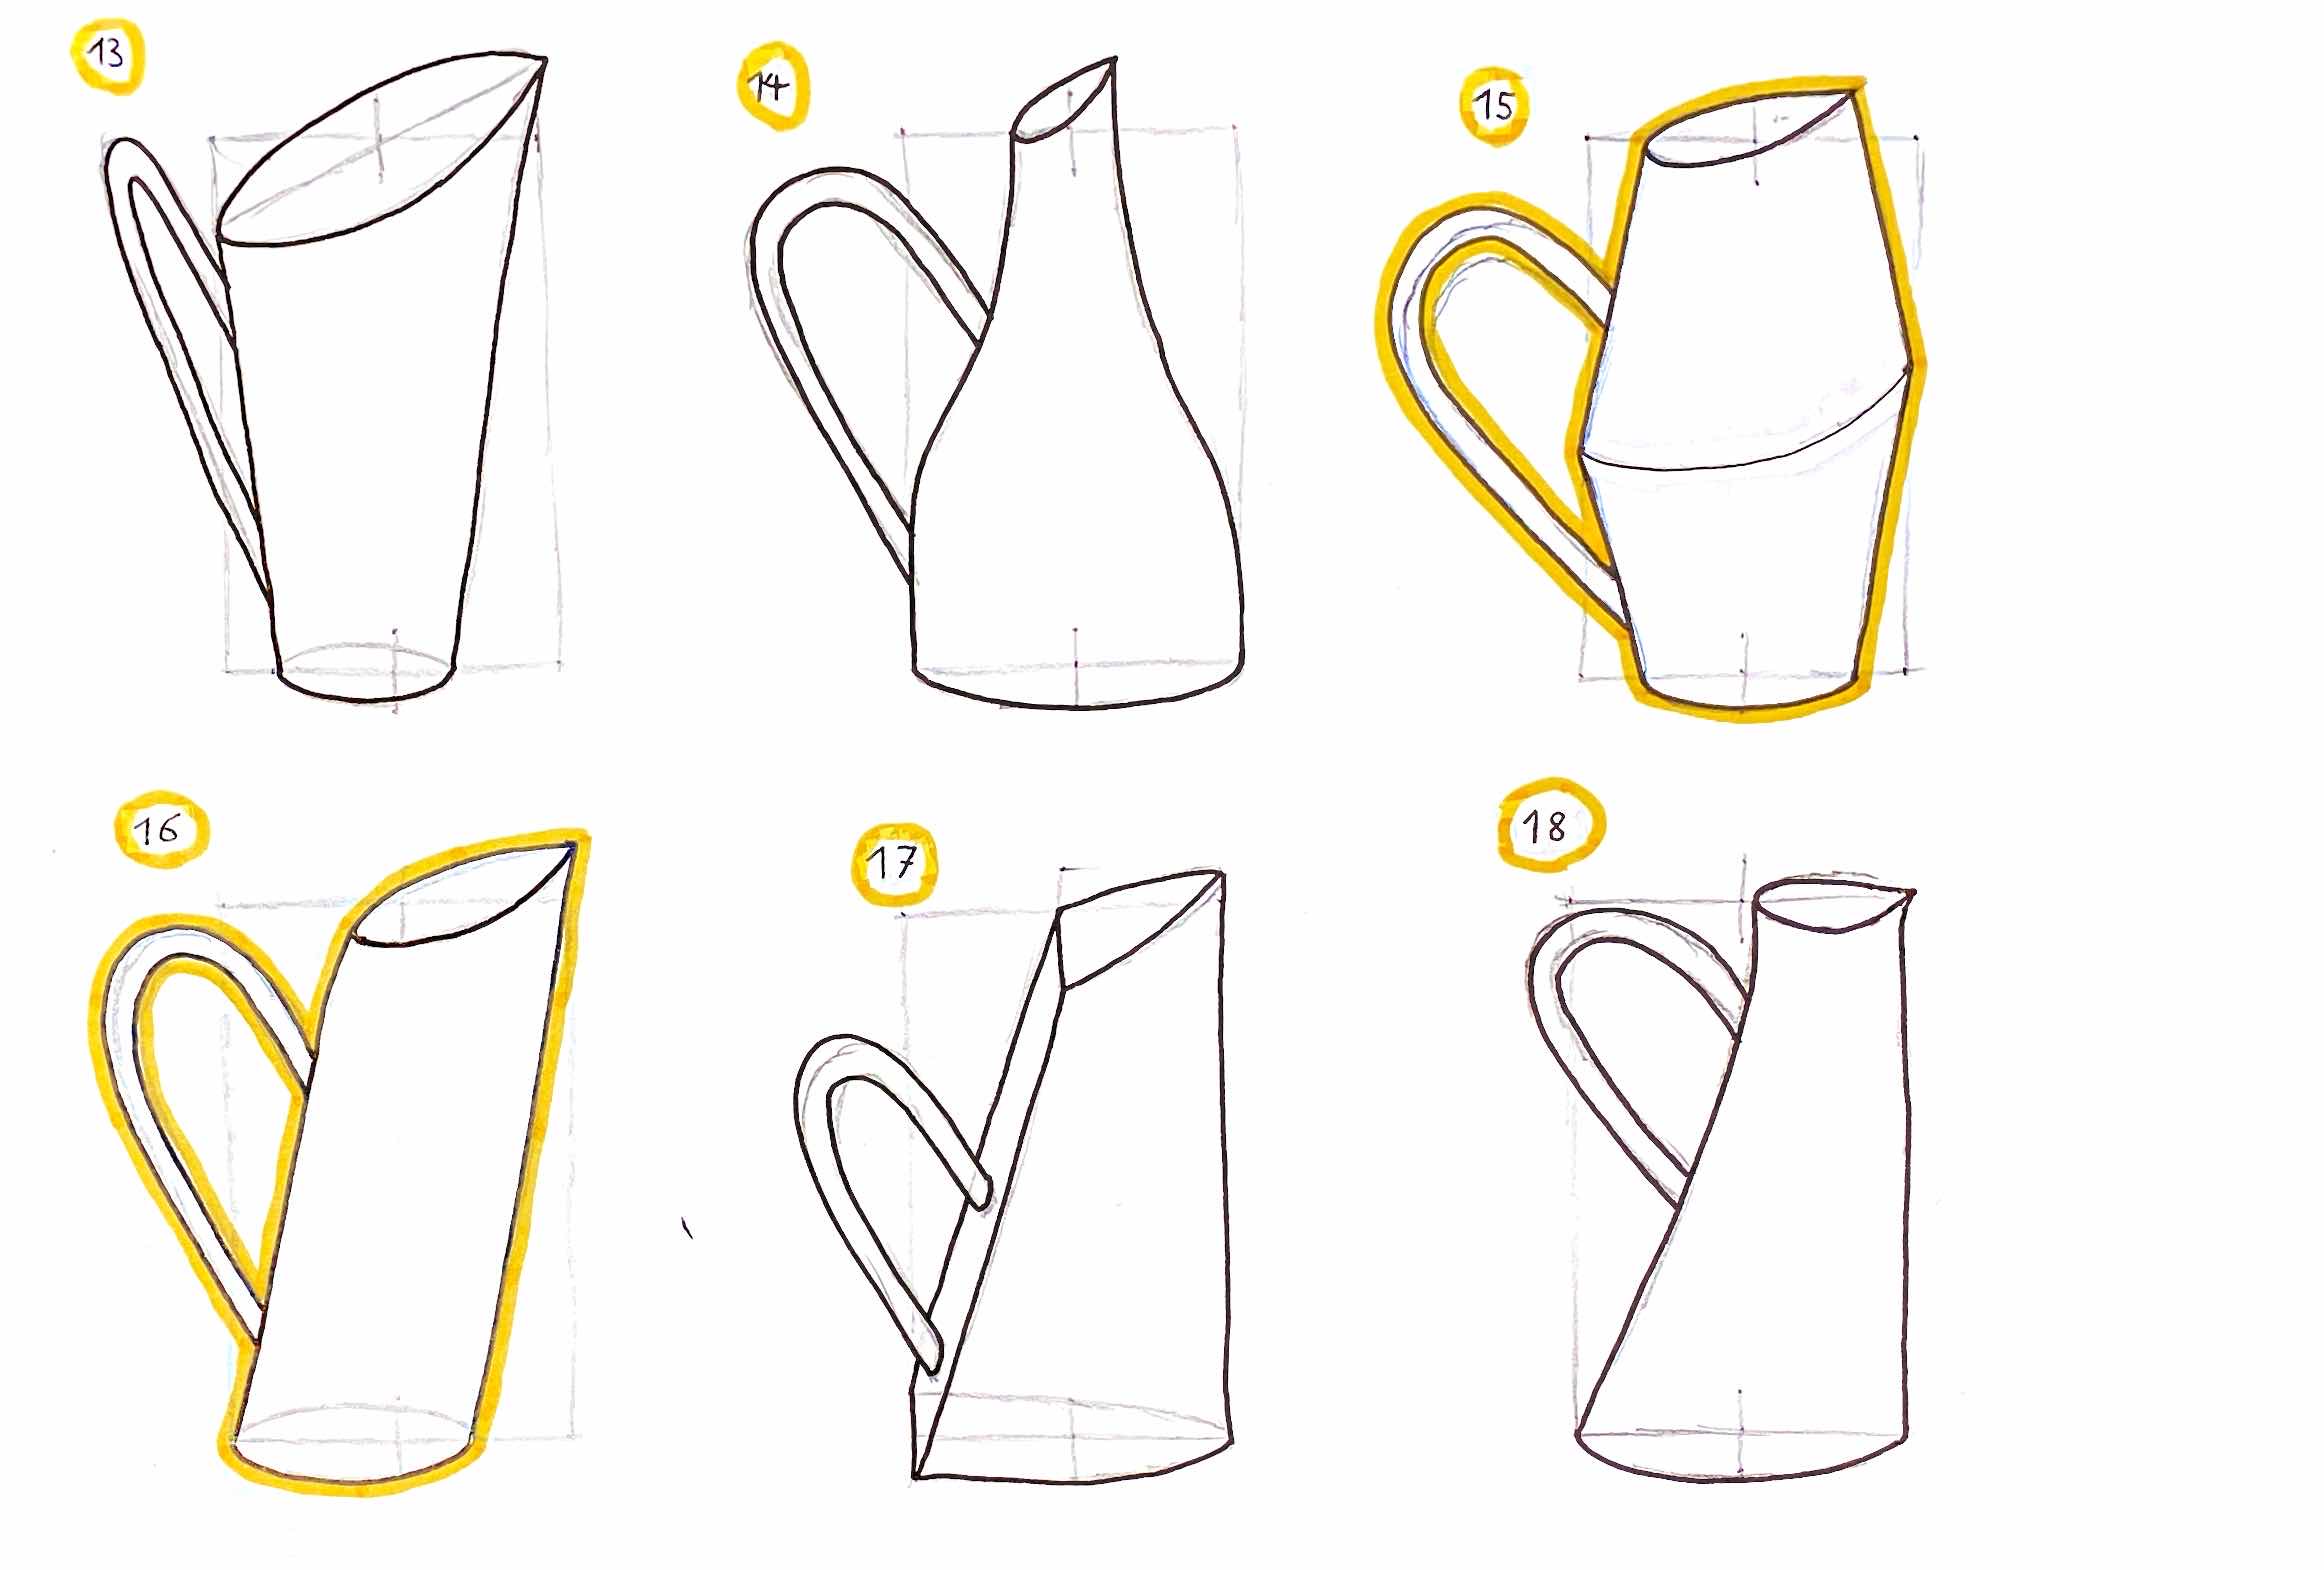
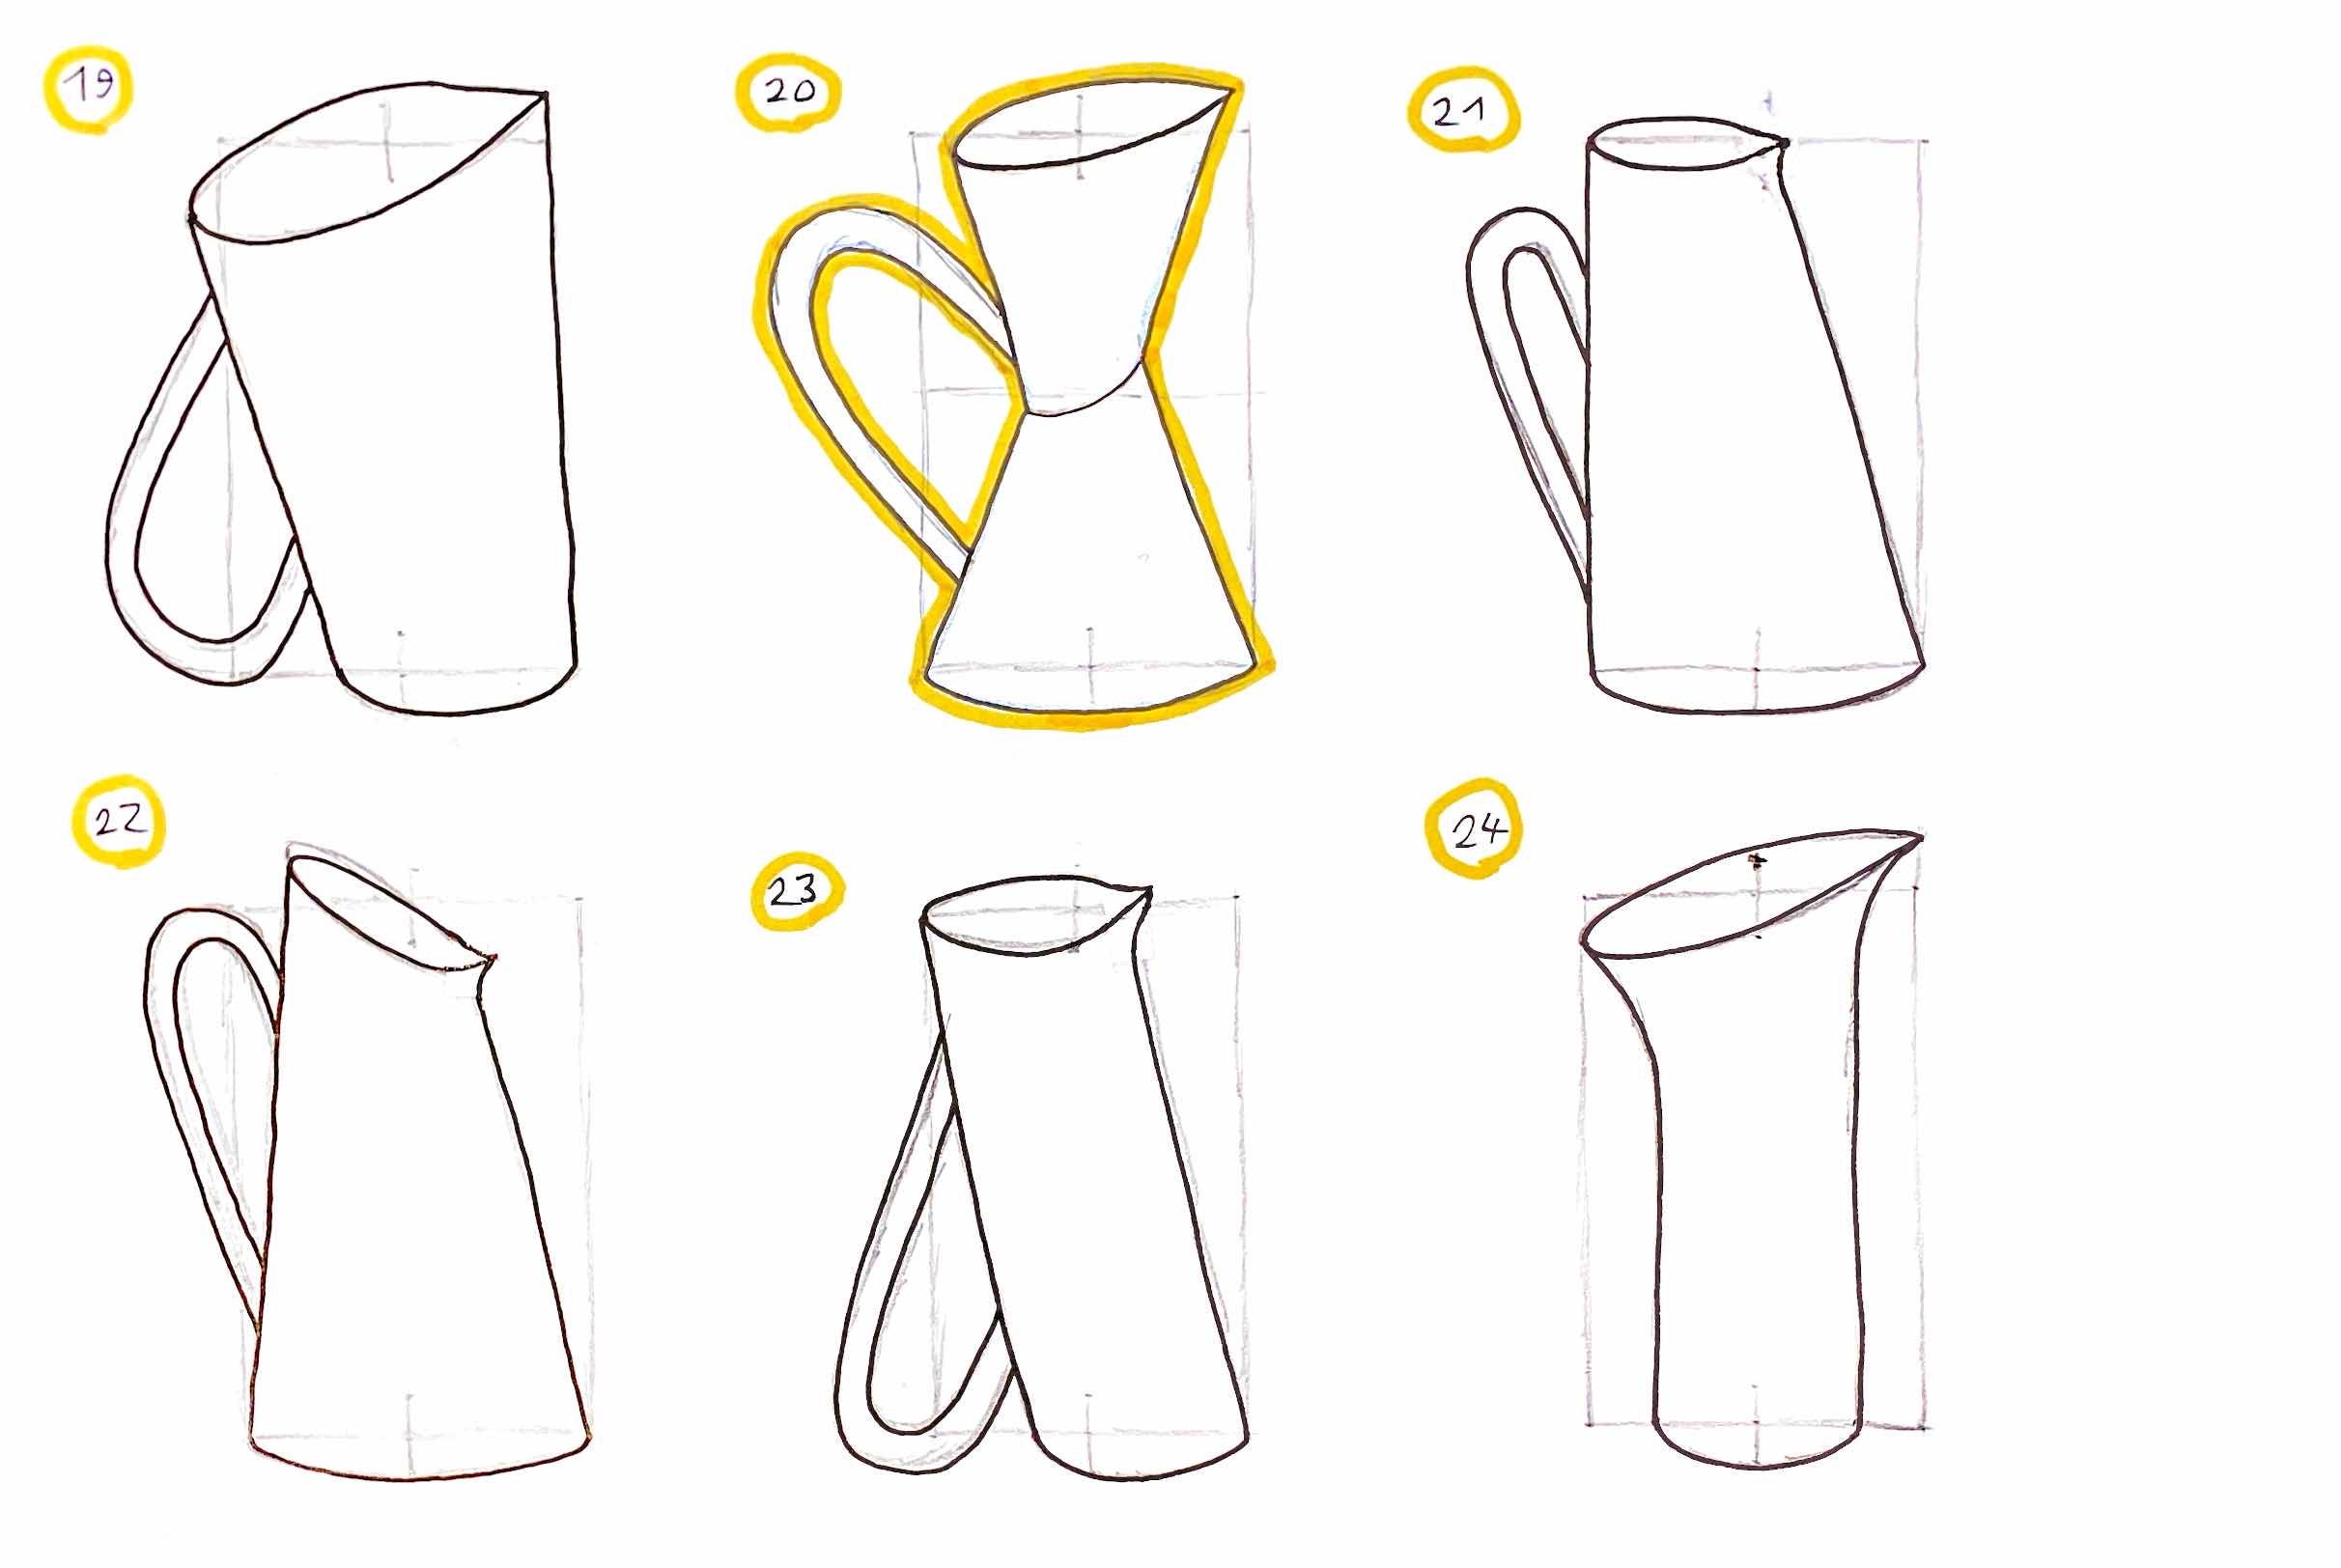
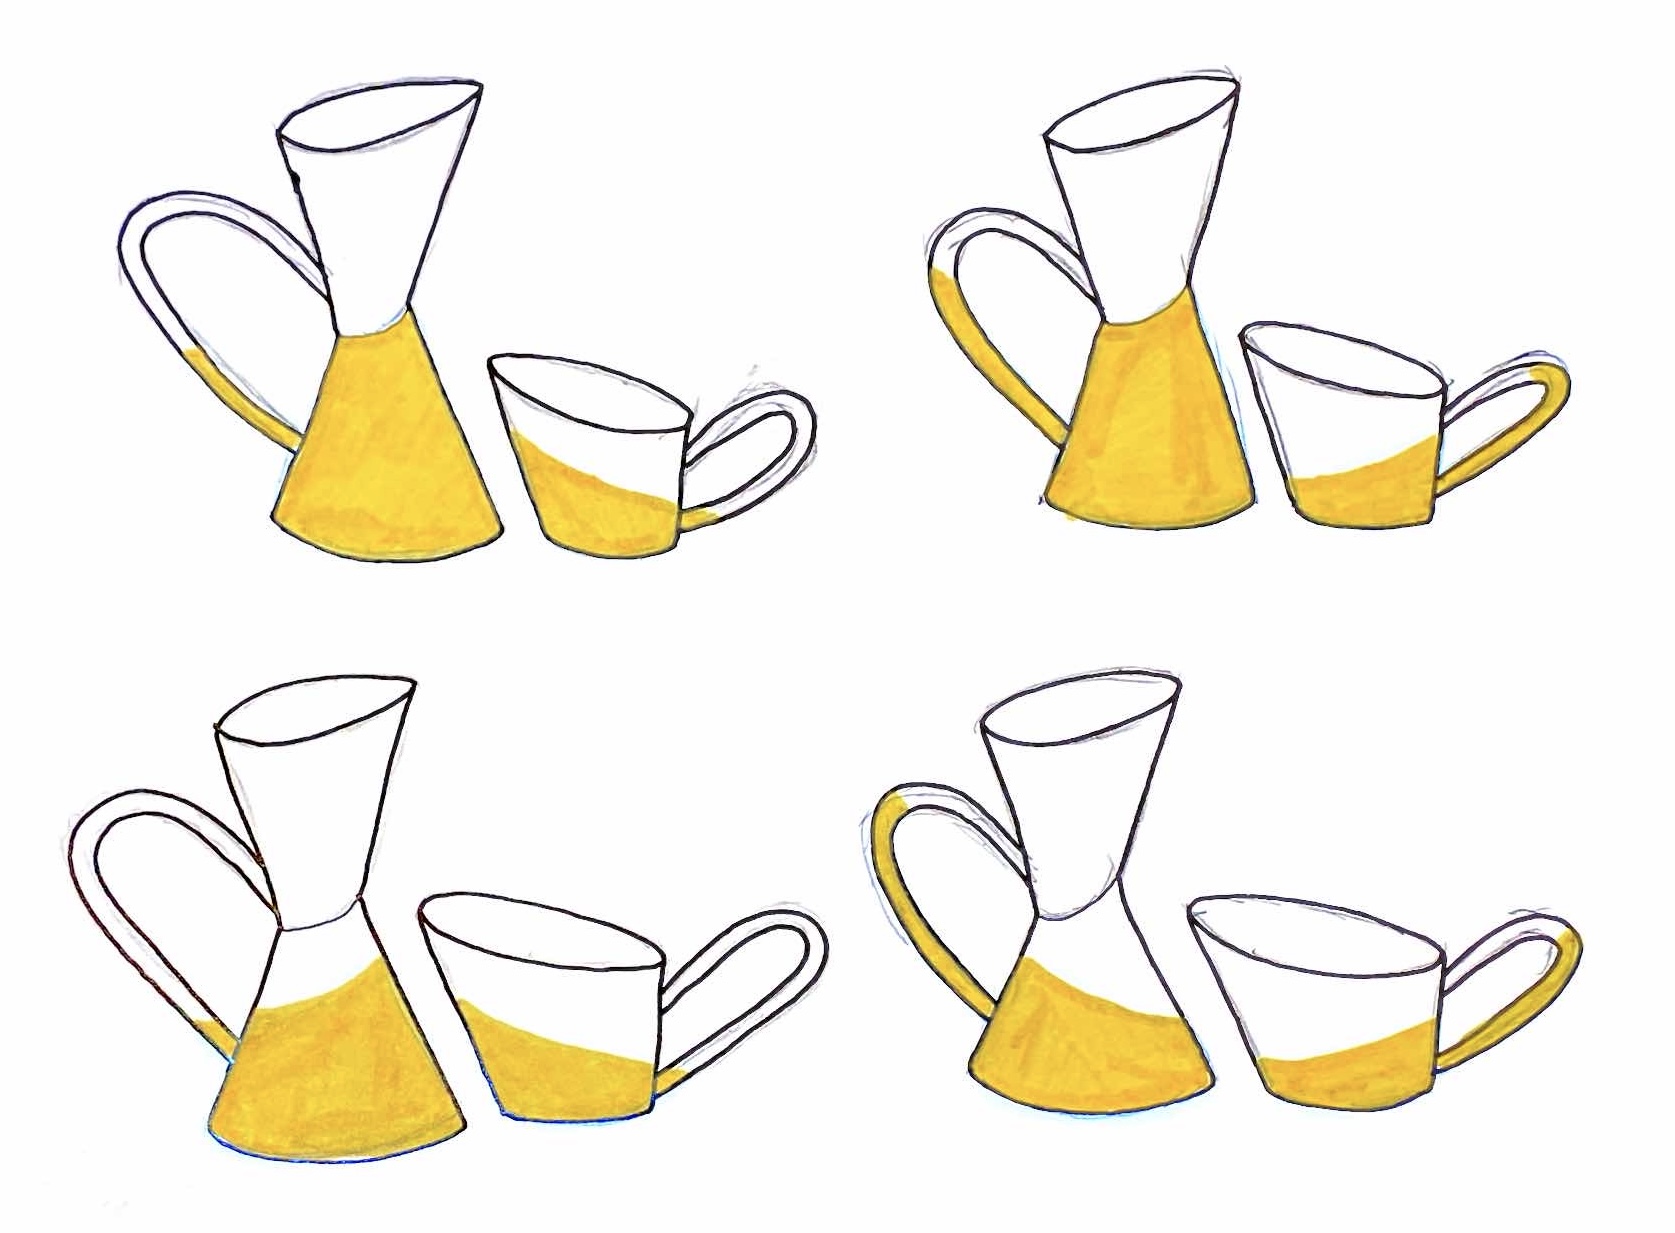
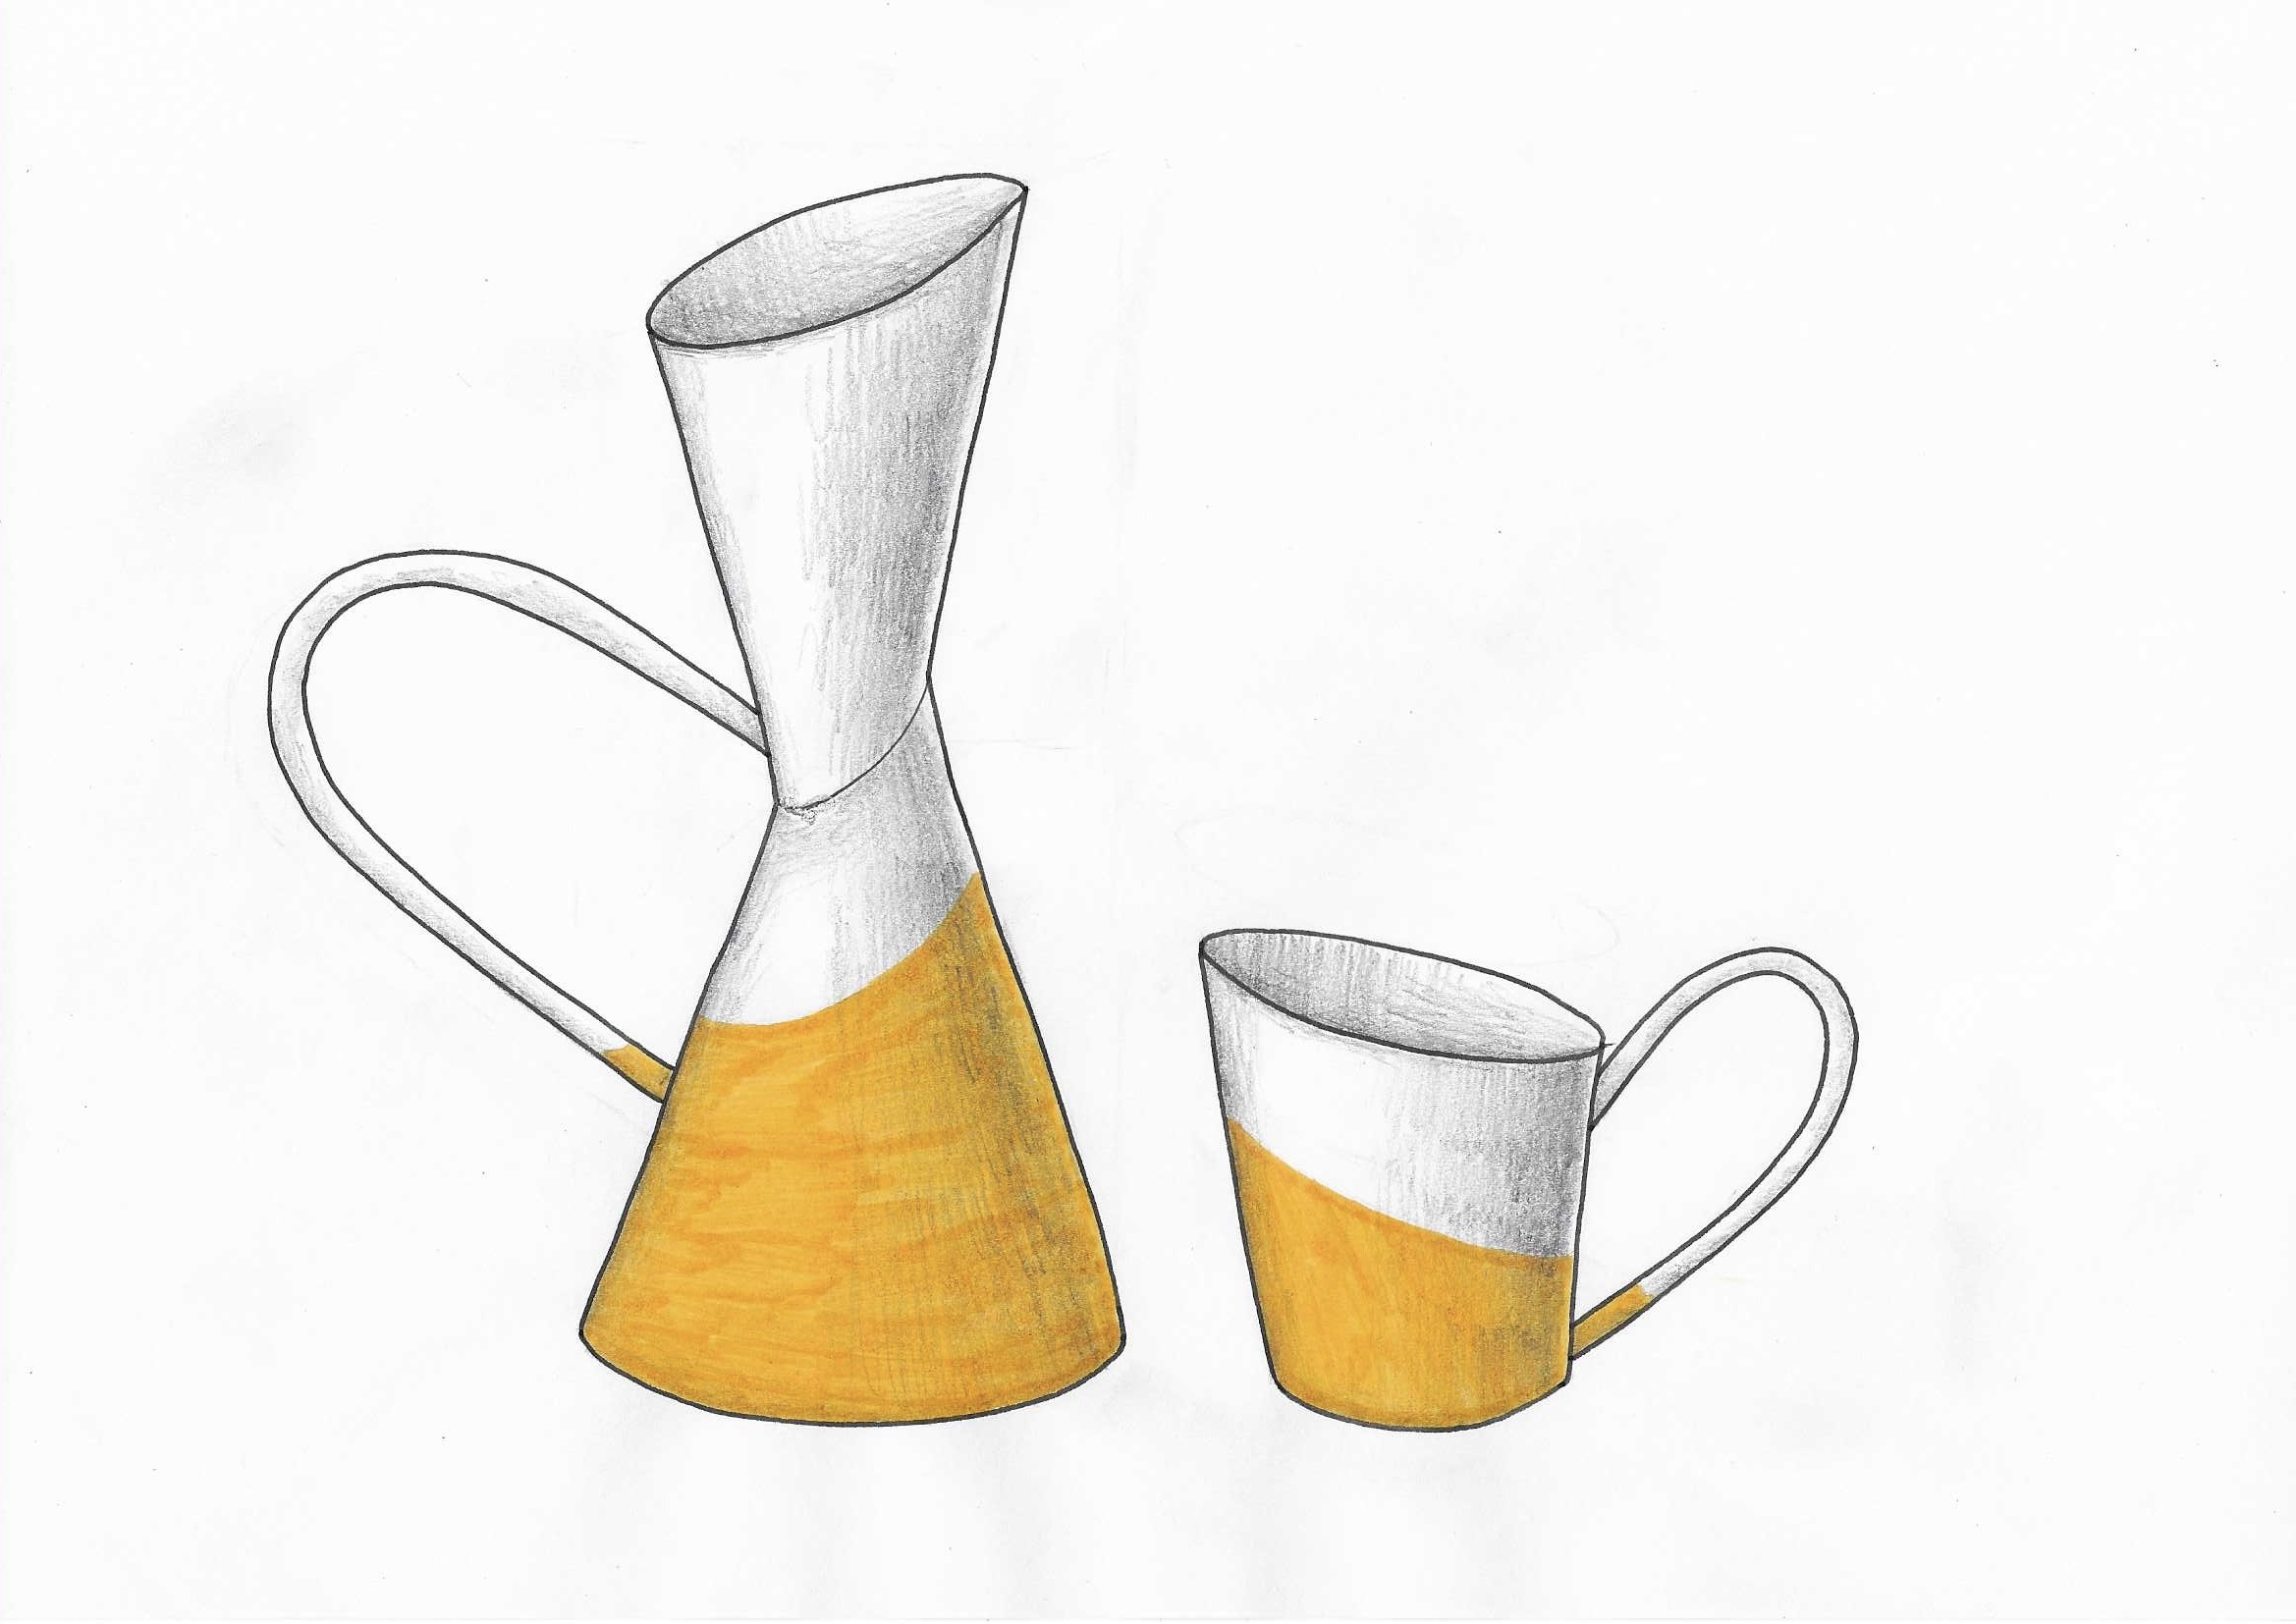
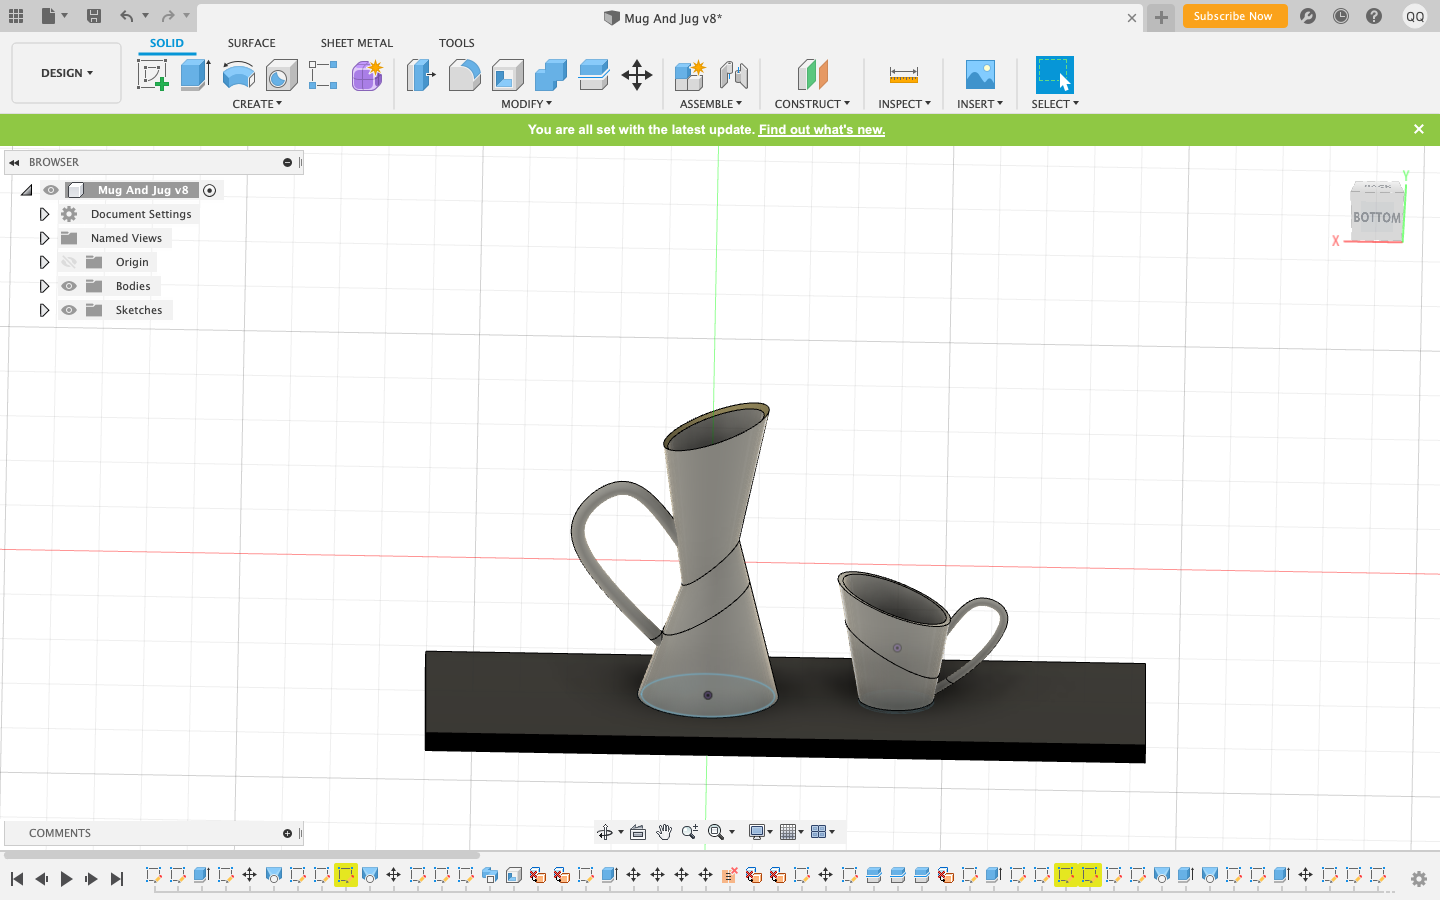
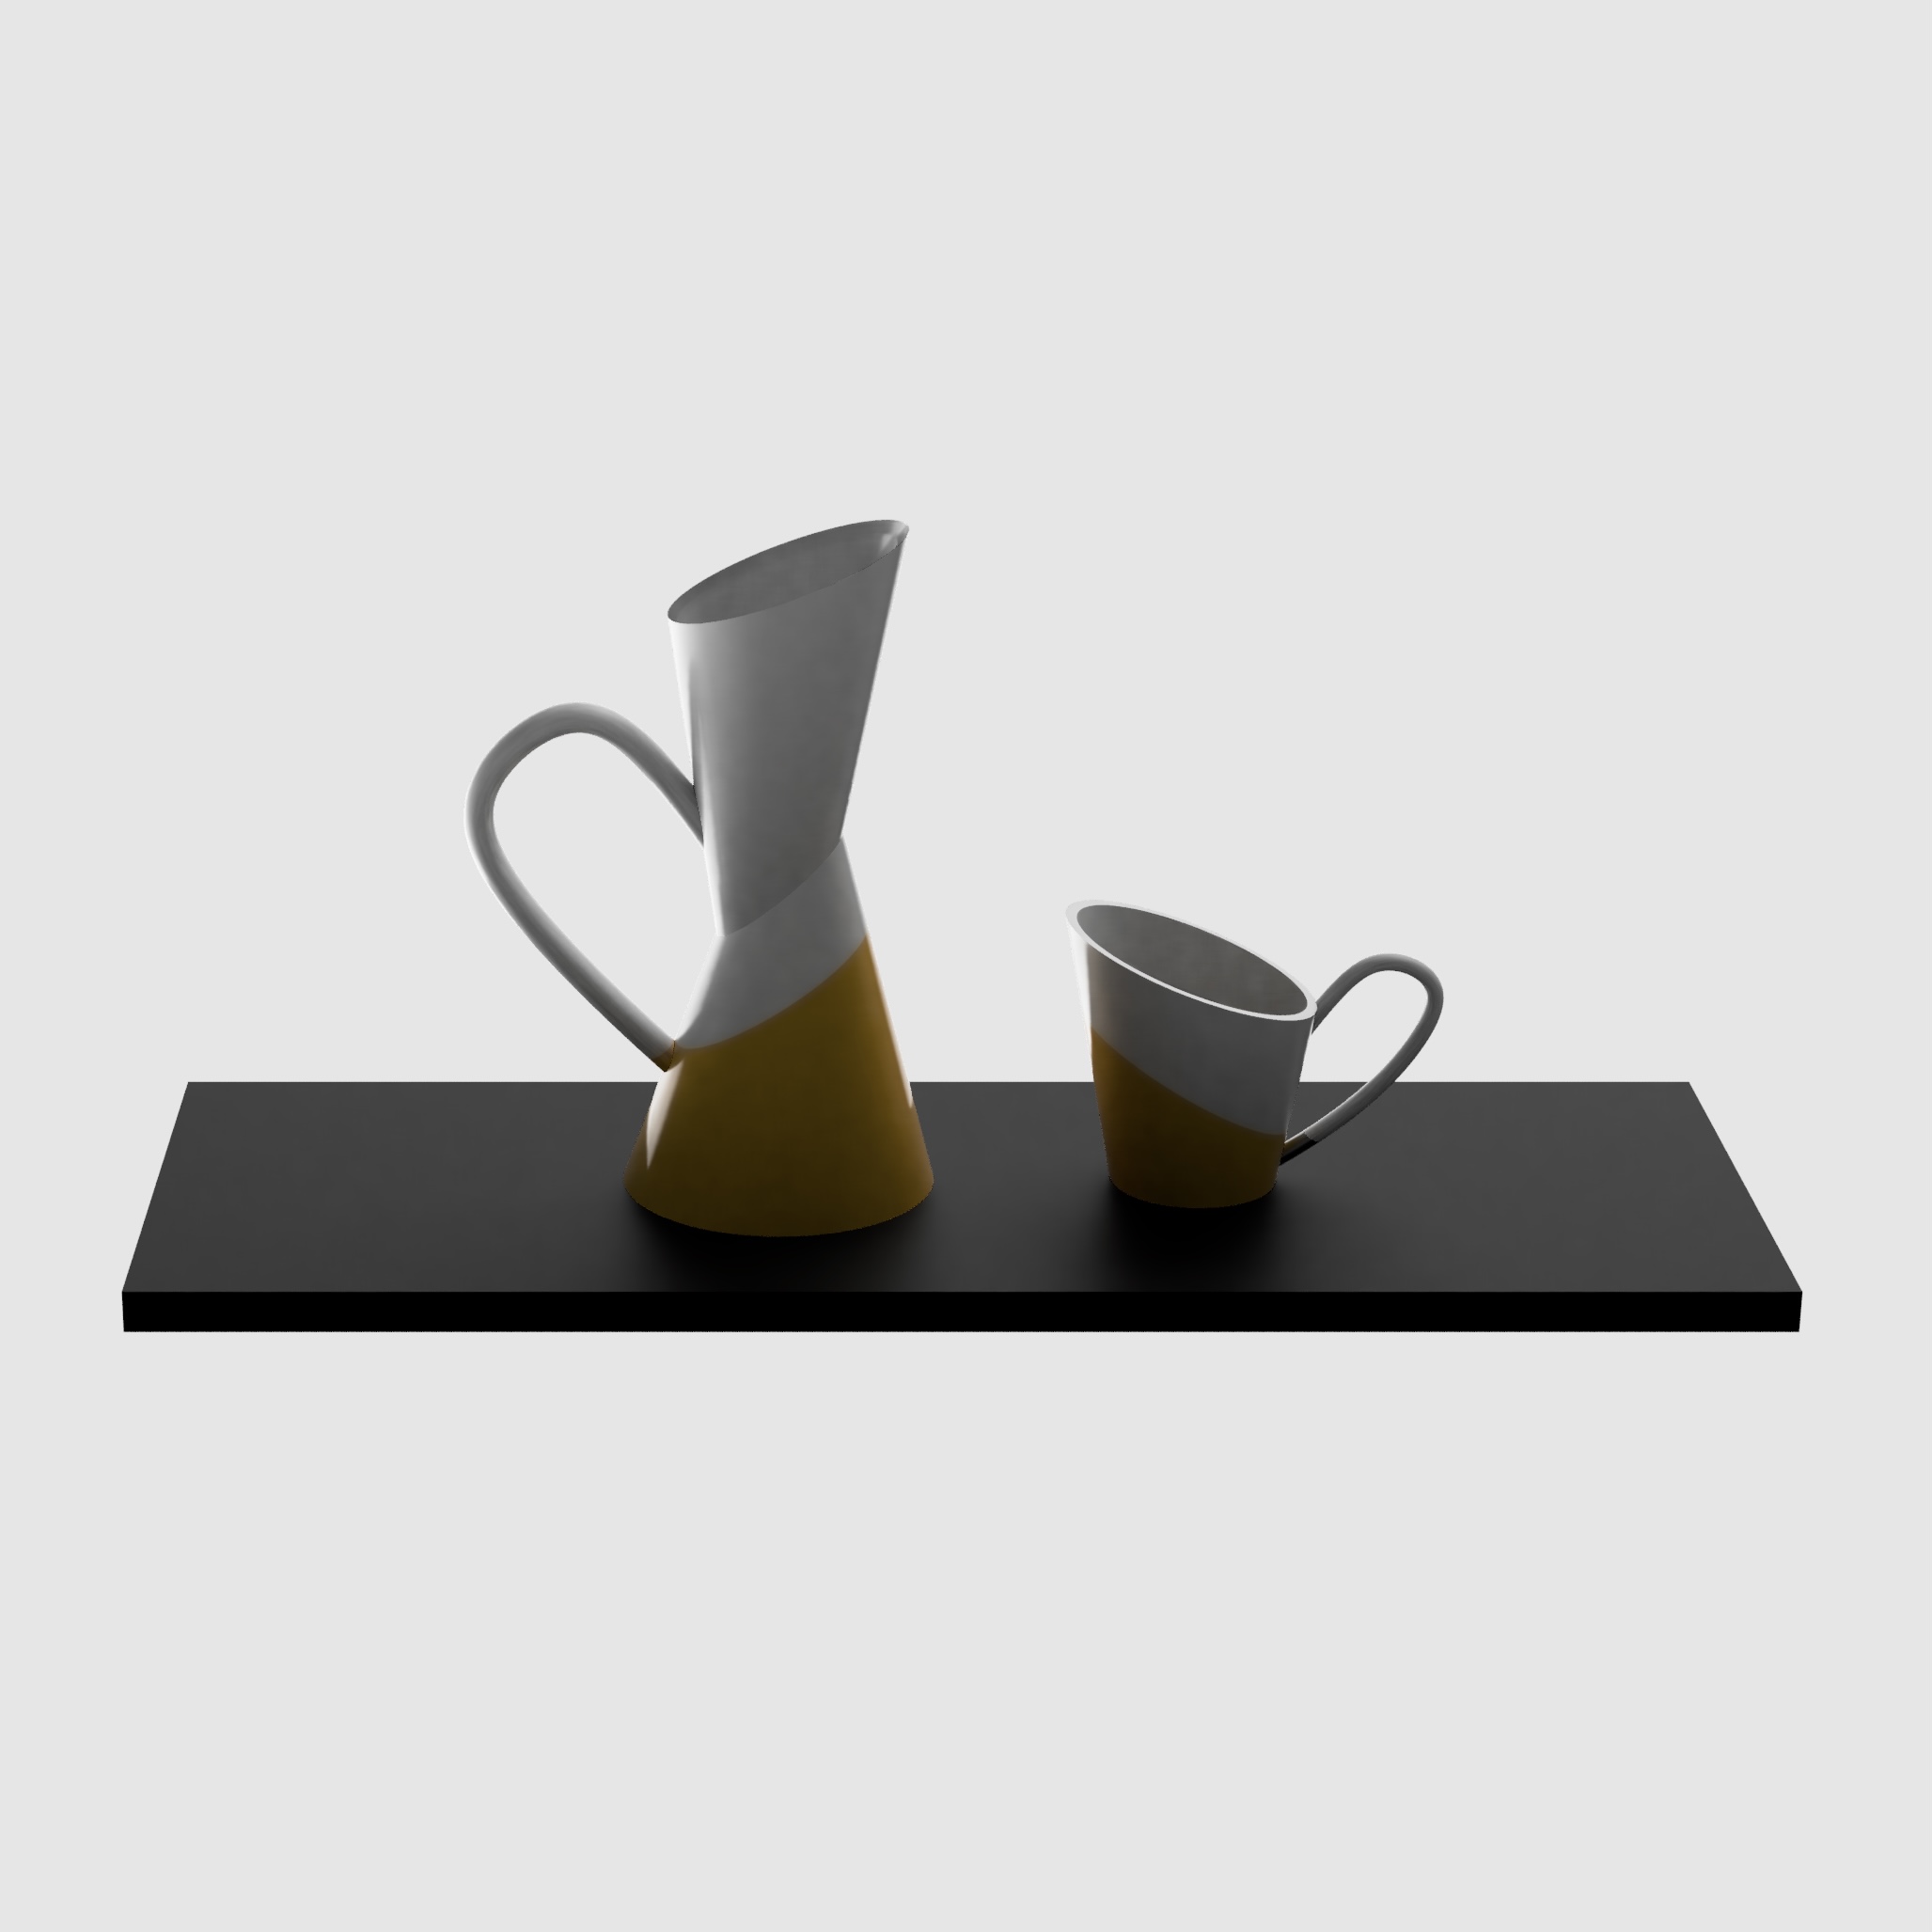
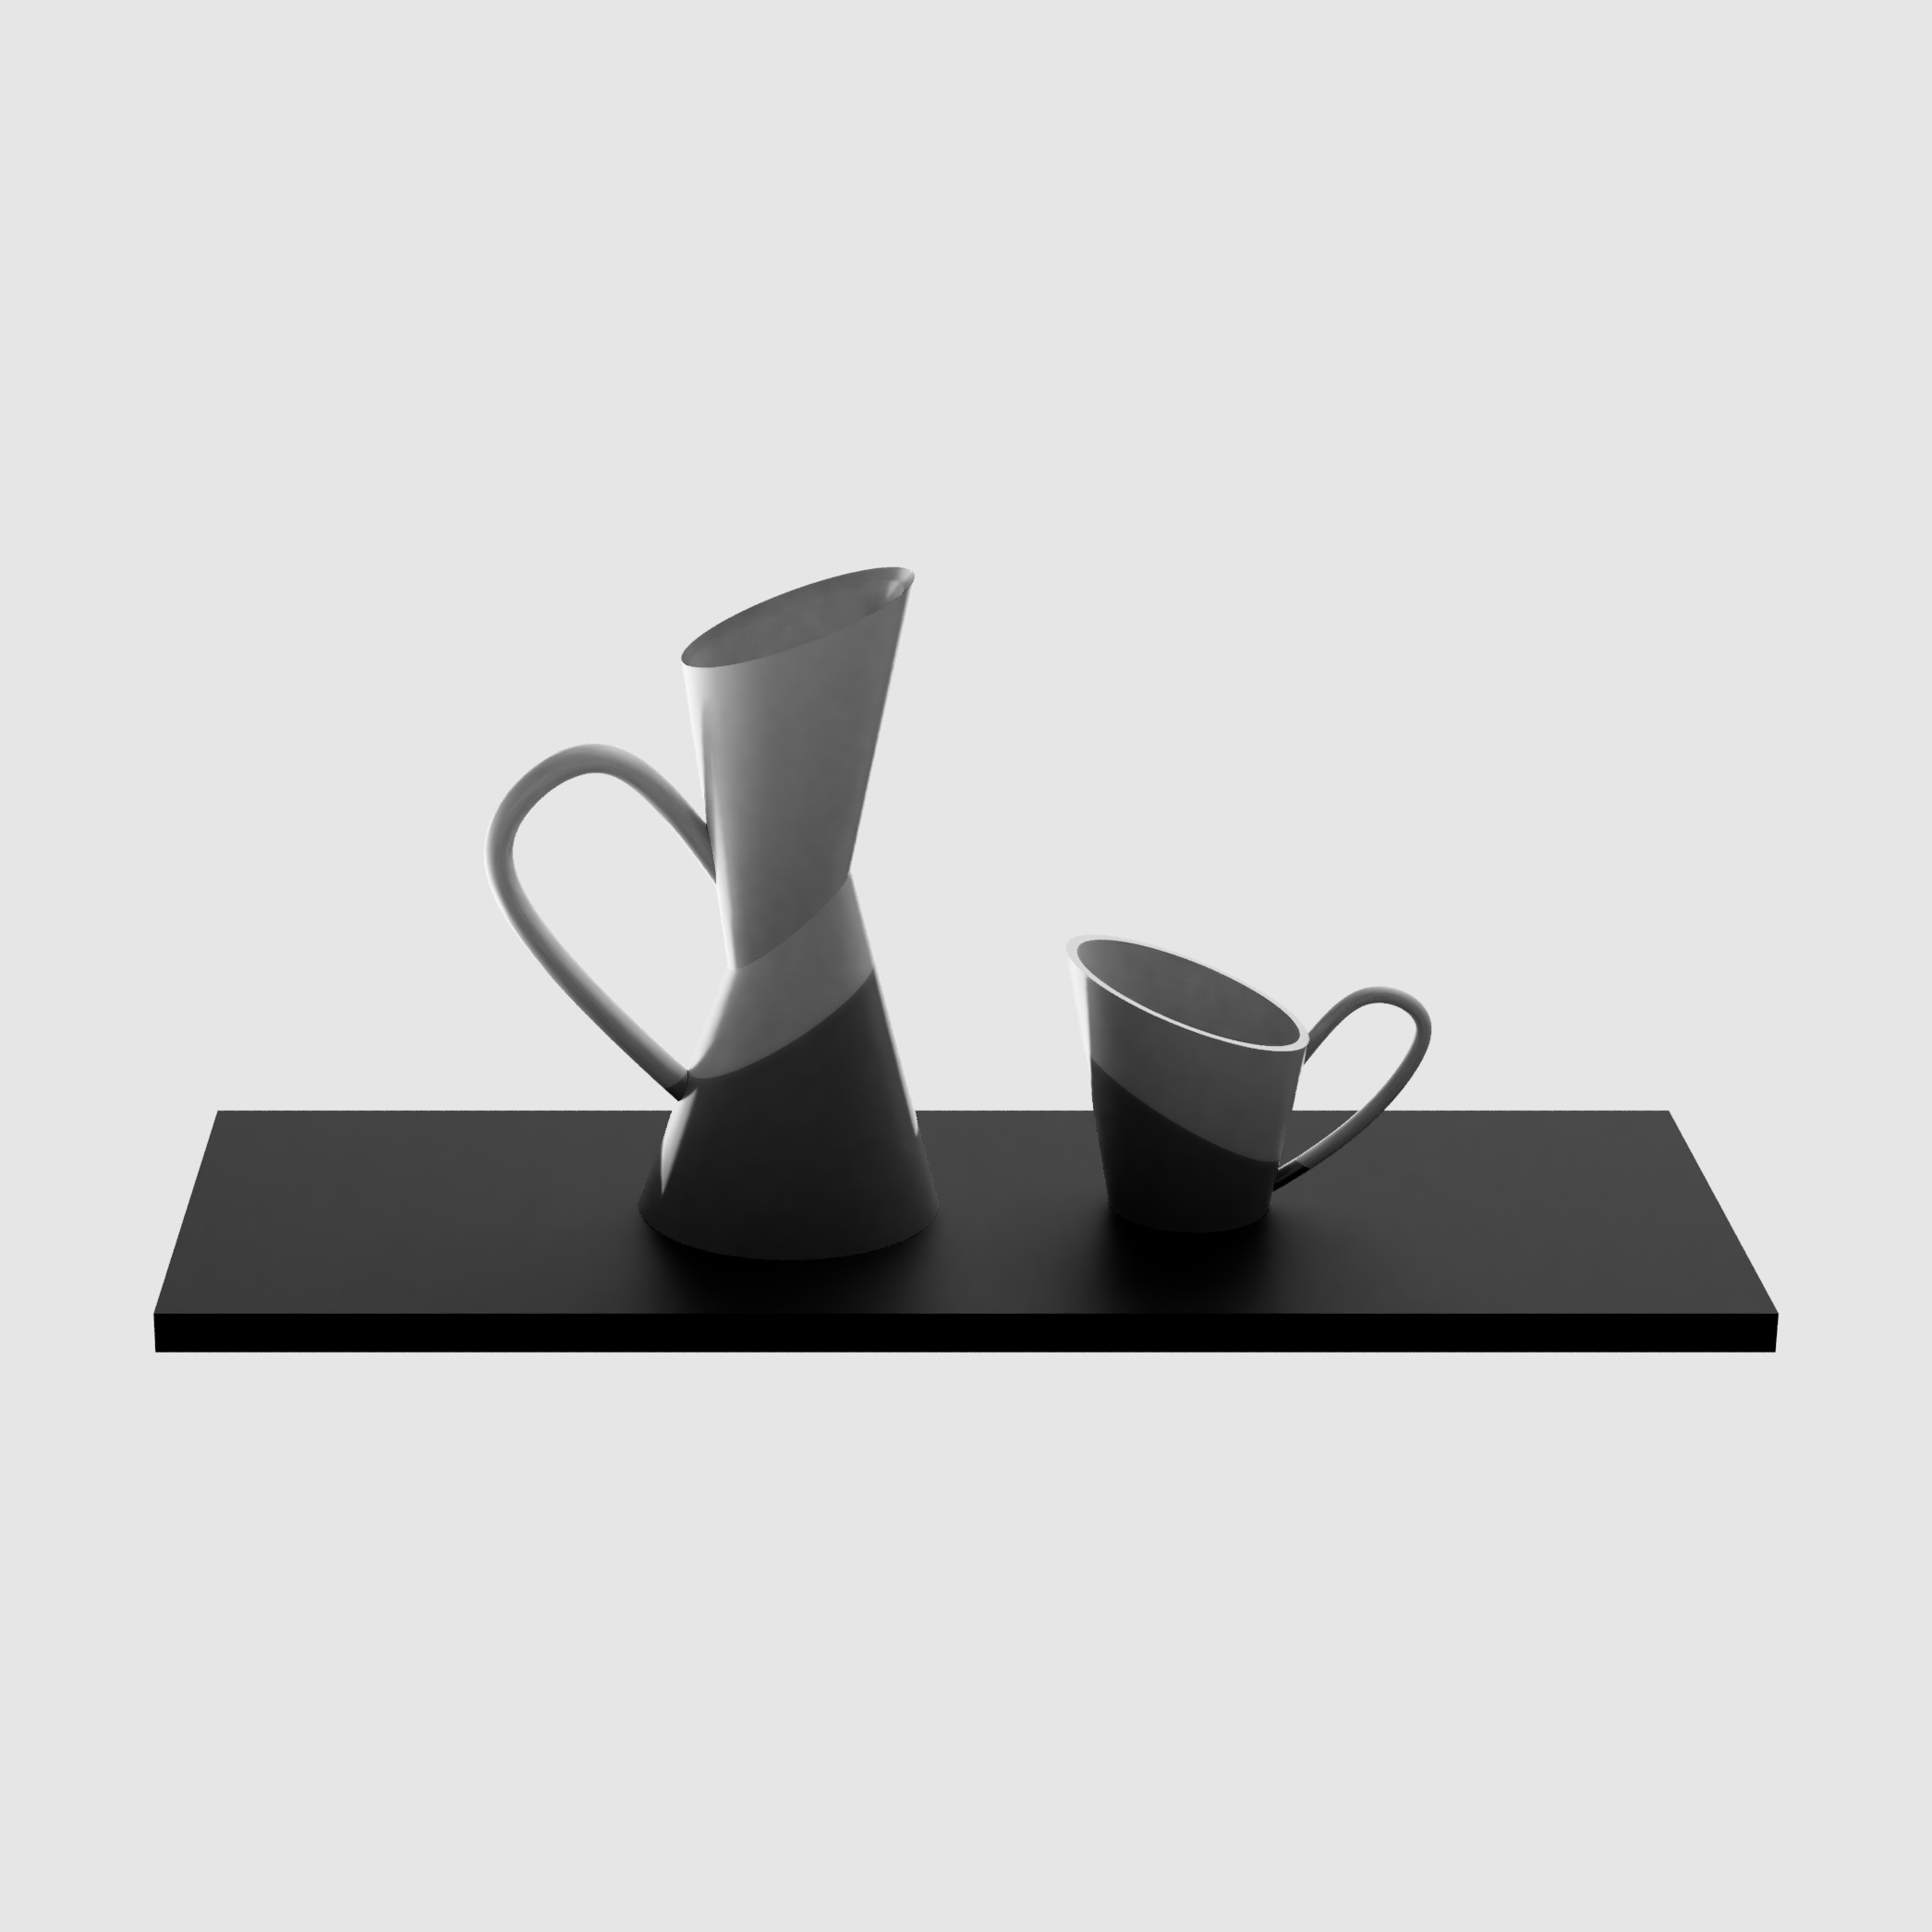
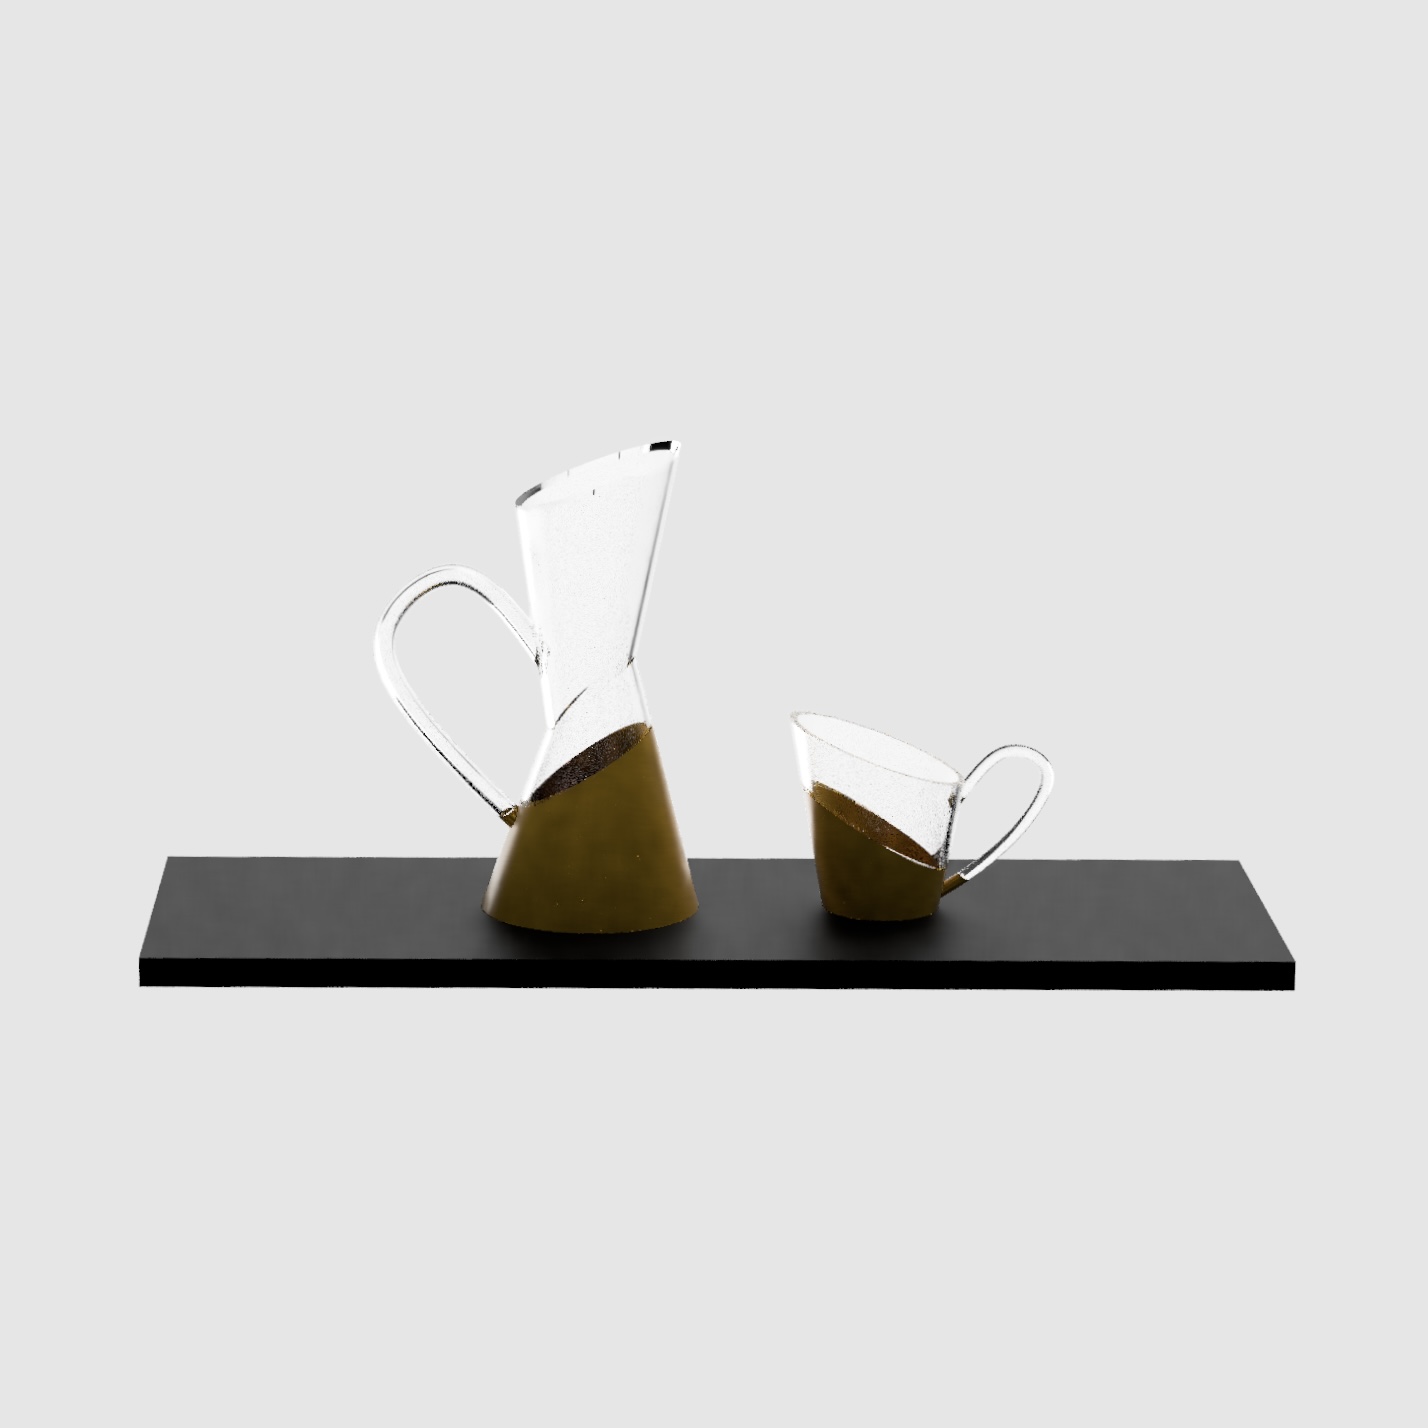
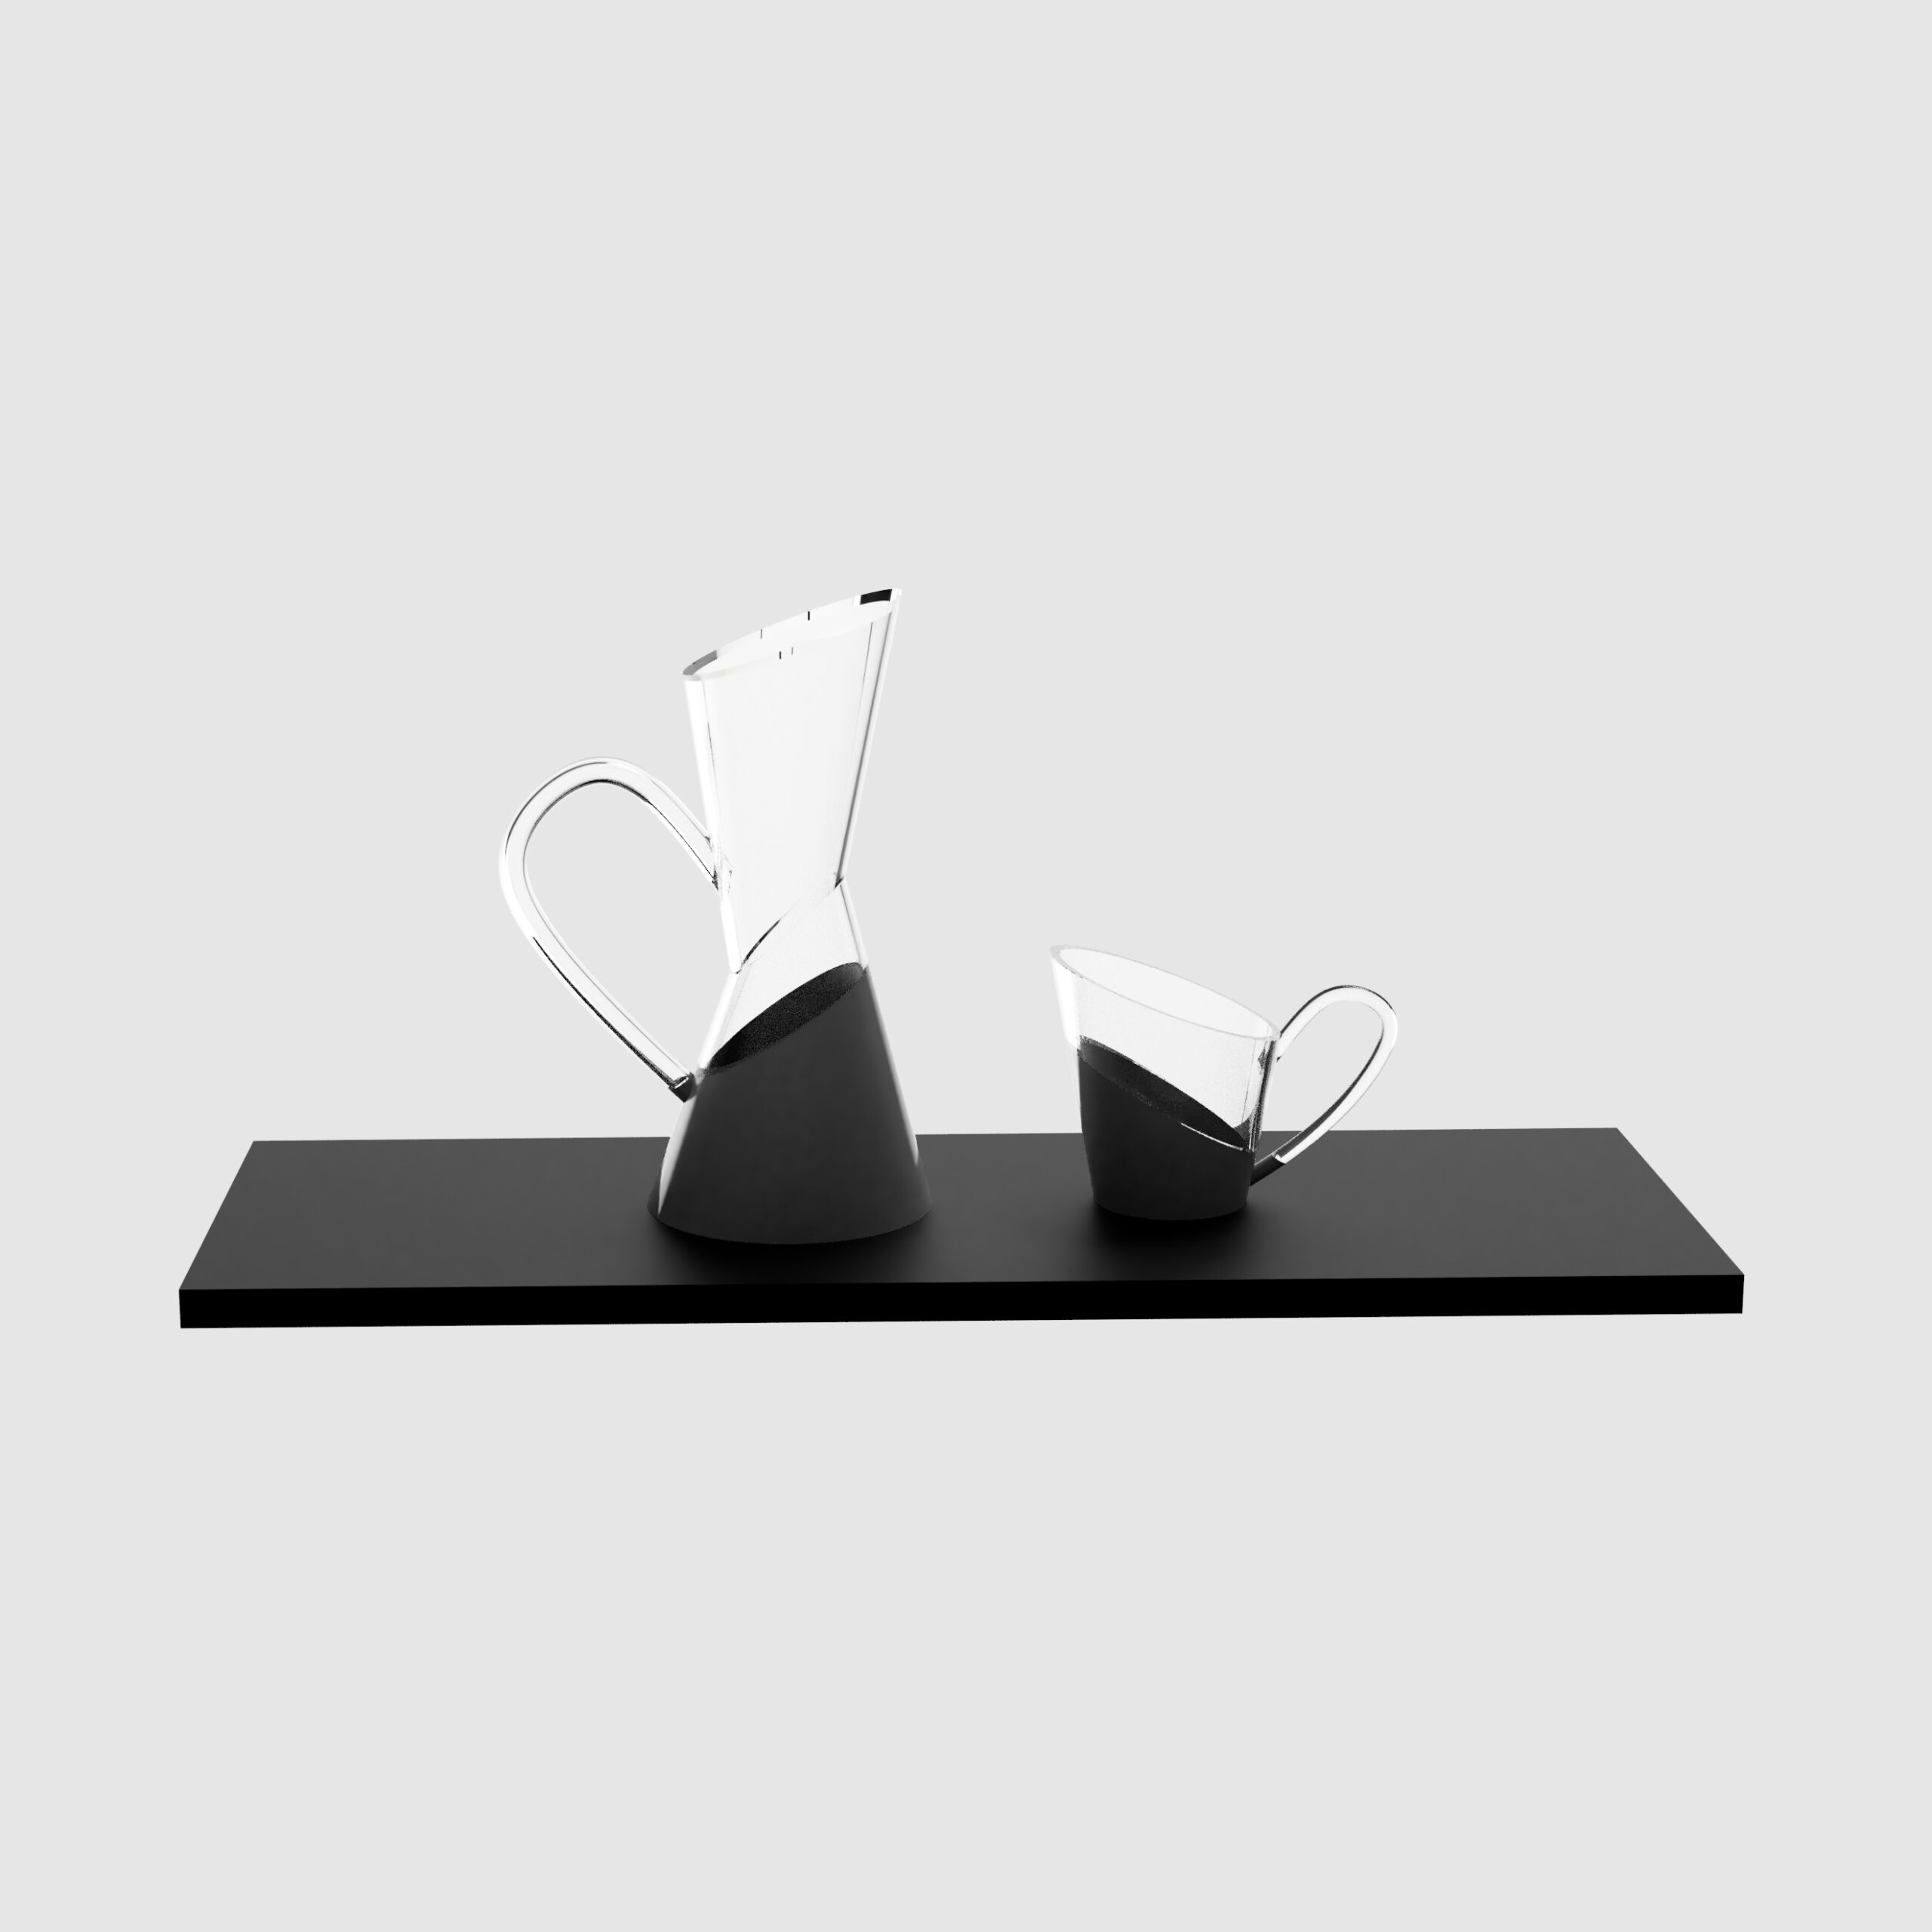
Finally, another really useful thing this course did is give me a better understanding of some processes. I often would practice with a drawing, or a prototype, or a single element, without really considering the full process. So drawing the iterative mugs and jugs, and then making the CAD model, or having to draw the rectilinear volume compositions after making them forced me to have that broader process view, which was really interesting and I think really good practice.

Shadows And Shade : Week 10 Drawing Challenge

I tried to focus on more basic primitives and primitive combinations, as I am still not so used to shading, and so I didn’t want to make it too complicated for me.

I think at this point I understand the shading process, however the cast shadows are rally challenging, especially for combined shapes like the house. However, I feel like I didn’t do too bad at it, and I’m generally happy with how I’ve evolved in terms of shading.

Plasticine Shapes – ILA 10 : 2D Orthographic to 3D Form

I started by directly translating the orthographic projections on the faces of cubes, which allowed me to visualise the shapes better.

I was then able to imagine and understand the shapes, and I drew them out, once again using a cube as a base. This use of the cube would also allow the sculpting process to be easier, as I would know easily what to leave and what to remove.

I was then able to sculpt these using plasticine. It was a bit challenging to get really straight edges and clean lines, but as I had a longer blade it allowed me to make the shapes pretty regular. And as I had thought, the cube based drawings made it so easy to know how to go about making the shapes.

I also took photos of the different sides, to be able to compare the 3D shape back to the orthographic projections. This was also really interesting as the more confusing elevations suddenly made a lot more sense when seeing it all like this.

To come up with my own shape, I sketched a few out, trying to find ones that had more ambiguous orthographic projections, like the three given ones.

I picked one, and I went through the same process as for the others, drawing it in a cube, sculpting it, and comparing back to the orthographic.


What made this really interesting is that I tended to think an orthographic could on its own perfectly show how a shape was. But it turns out it can actually be pretty ambiguous, and challenging to translate it back into 3D. So this also shows the importance of modelling, or using several drawing types when communicating an idea.

Mugs And Jugs – ILA 9 : Iterative Design

I picked a really basic mug to start (Number 1 below), so I’d have somewhat of a blank canvas. I then developed my different ideas.

In the end I hesitated between the two marked in yellow, but I went with number 21 as I felt the other one would be more restrictive for what I could do with the jug.

Before working on the jug, I looked into a range of very different sets, to try and see what kind of factors were important in creating a good set.

Based on the research, I sketched many jug ideas that I felt could work in a set with the cup. I hesitated in the end between the 4 marked in yellow, but I decided to go with number 20, as it has a good balance of being close enough to the cup to make a set, but different enough to keep the set interesting.

I also wanted to try and add color to make the set more interesting. I wanted to go with a ‘dipped in paint’ look to match with the dynamic diagonal and asymmetrical lines.

I tried several options, but decided on the bottom left one as it looked the best and interfered the least with the design.

I then did my final, shaded drawing of the set.

I was really curious to see what the set could look like in 3D, and I thought it would be a great opportunity to do some CAD work.

This was a challenge due to some of the more irregular shapes/ angles, however I’m really happy with how they turned out.

I then got to render the image to see a more ‘real’ image of the set.

I used this as an opportunity to try out different visuals, firstly switching the yellow section with grey, but also trying an option where the top section could be made of glass.

The one thing I would maybe change if I continued with this project is that it’s not really clear what it’s a set for (the jug doesn’t look like it’s for coffee, maybe for tea, but the cup looks more like a coffee cup, etc.)

However overall, I feel the set is interesting, dynamic, and the two pieces fit together without being the same. I’m generally really happy with the result.


Research Images References:

  • https://www.decoist.com/sculptural-modern-tea-sets/?chrome=1
  • https://www.tiggyandpip.com/products/schonwald-porcelain-mid-century-coffee-set
  • https://pt.aliexpress.com/item/32952241705.html
  • https://pt.aliexpress.com/item/4000711473110.html
  • http://nbtopgear.en.hisupplier.com/product-884385-Water-Jug-Cup-Set.html
  • https://www.amazon.com/Sunddo-Marble-Service-Ceramic-4-Piece/dp/B07PVS88W5
  • https://www.turkishtowelsetc.com/products/modern-turkish-coffee-cup-saucer

Pringles : Week 9 Drawing Challenge

Though I’ve been getting better at drawing ellipses, I’m now realising with this task that I need more practiced when it comes to more random/ organic elliptical shapes, as depending on what I’m drawing this kind of shape could definitely come in handy.

Landscape Using The Grid Method : Week 8 Drawing Challenge

Before working on my actual landscape, I decided to do some small scale tests with the grid method, as I wasn’t so familiar with it.

I then started working on my final, bigger scale landscape. Being back home in Switzerland and craving winter, and due to the kind of results I can get with this technique, I thought of doing a snowy mountain ski scene.

However, when I started with my first attempt, I quickly got confused between all the points and lines, and ended up messing up, so I decided to start again.

So from this first try, I concluded on two things I would have to change. Firstly, I slightly decreased the number of points on the grid, as after second thought that number was not necessary. I also then worked with a color coding system, so that I wouldn’t confuse the different lines and columns. This made it way clearer to work with all the points and lines.

At this point, I could have kept working by hand, but it would have been a bit messy, and as I like drawing digitally I thought this would be a good opportunity to do a bit of that.

I started by importing my drawing, which allowed me to redraw a clean version of the grid, without any of the support lines.

I then worked on adding shading, in order to make the mountain look more 3D. I could have done smooth shading, however, I wanted to explore following the grid, to keep that kind of aesthetic going.

Finally, I added some more elements to create more of a finalised scene.

At this point, I would have wanted to fully remove the grid, however I felt it didn’t look as 3D, and I didn’t have the time I would have wanted to rework the shading.

With some experimentation, I ended up making a very light version of the grid, which fit in better and kept it looking more 3D. I also ended up liking how it looked with this grid in.

In the end, I ended up really liking the grid method. It allows for  amore curved, random surface to be created, whilst still allowing my more geometric mind to not get too confused. However, it does get a bit messy when done on a bigger scale, so digital might be the right way to go with this technique.

Circles, Spirals And Irregular Surfaces – ILA 8 : Sketching Pages

For the first ILA this week, I did 4 pages sketching with circles.

I started with more simple sketches, just to practice drawing my circles in (and out) of perspective properly, and I was then able to have more fun with it, creating different 3D shapes, and some more abstract 3D or 2D circle constructions.

I also tried to work a bit with spheres, as they are still a bit confusing to me, but I think I’m getting the hang of them, and drawing them with different sections cut out really helped me have a better understanding of them as a 3D form when drawn in 2D.

This was once again great practice, and once again I feel it definitely helped me improve drawing circles and ellipses.

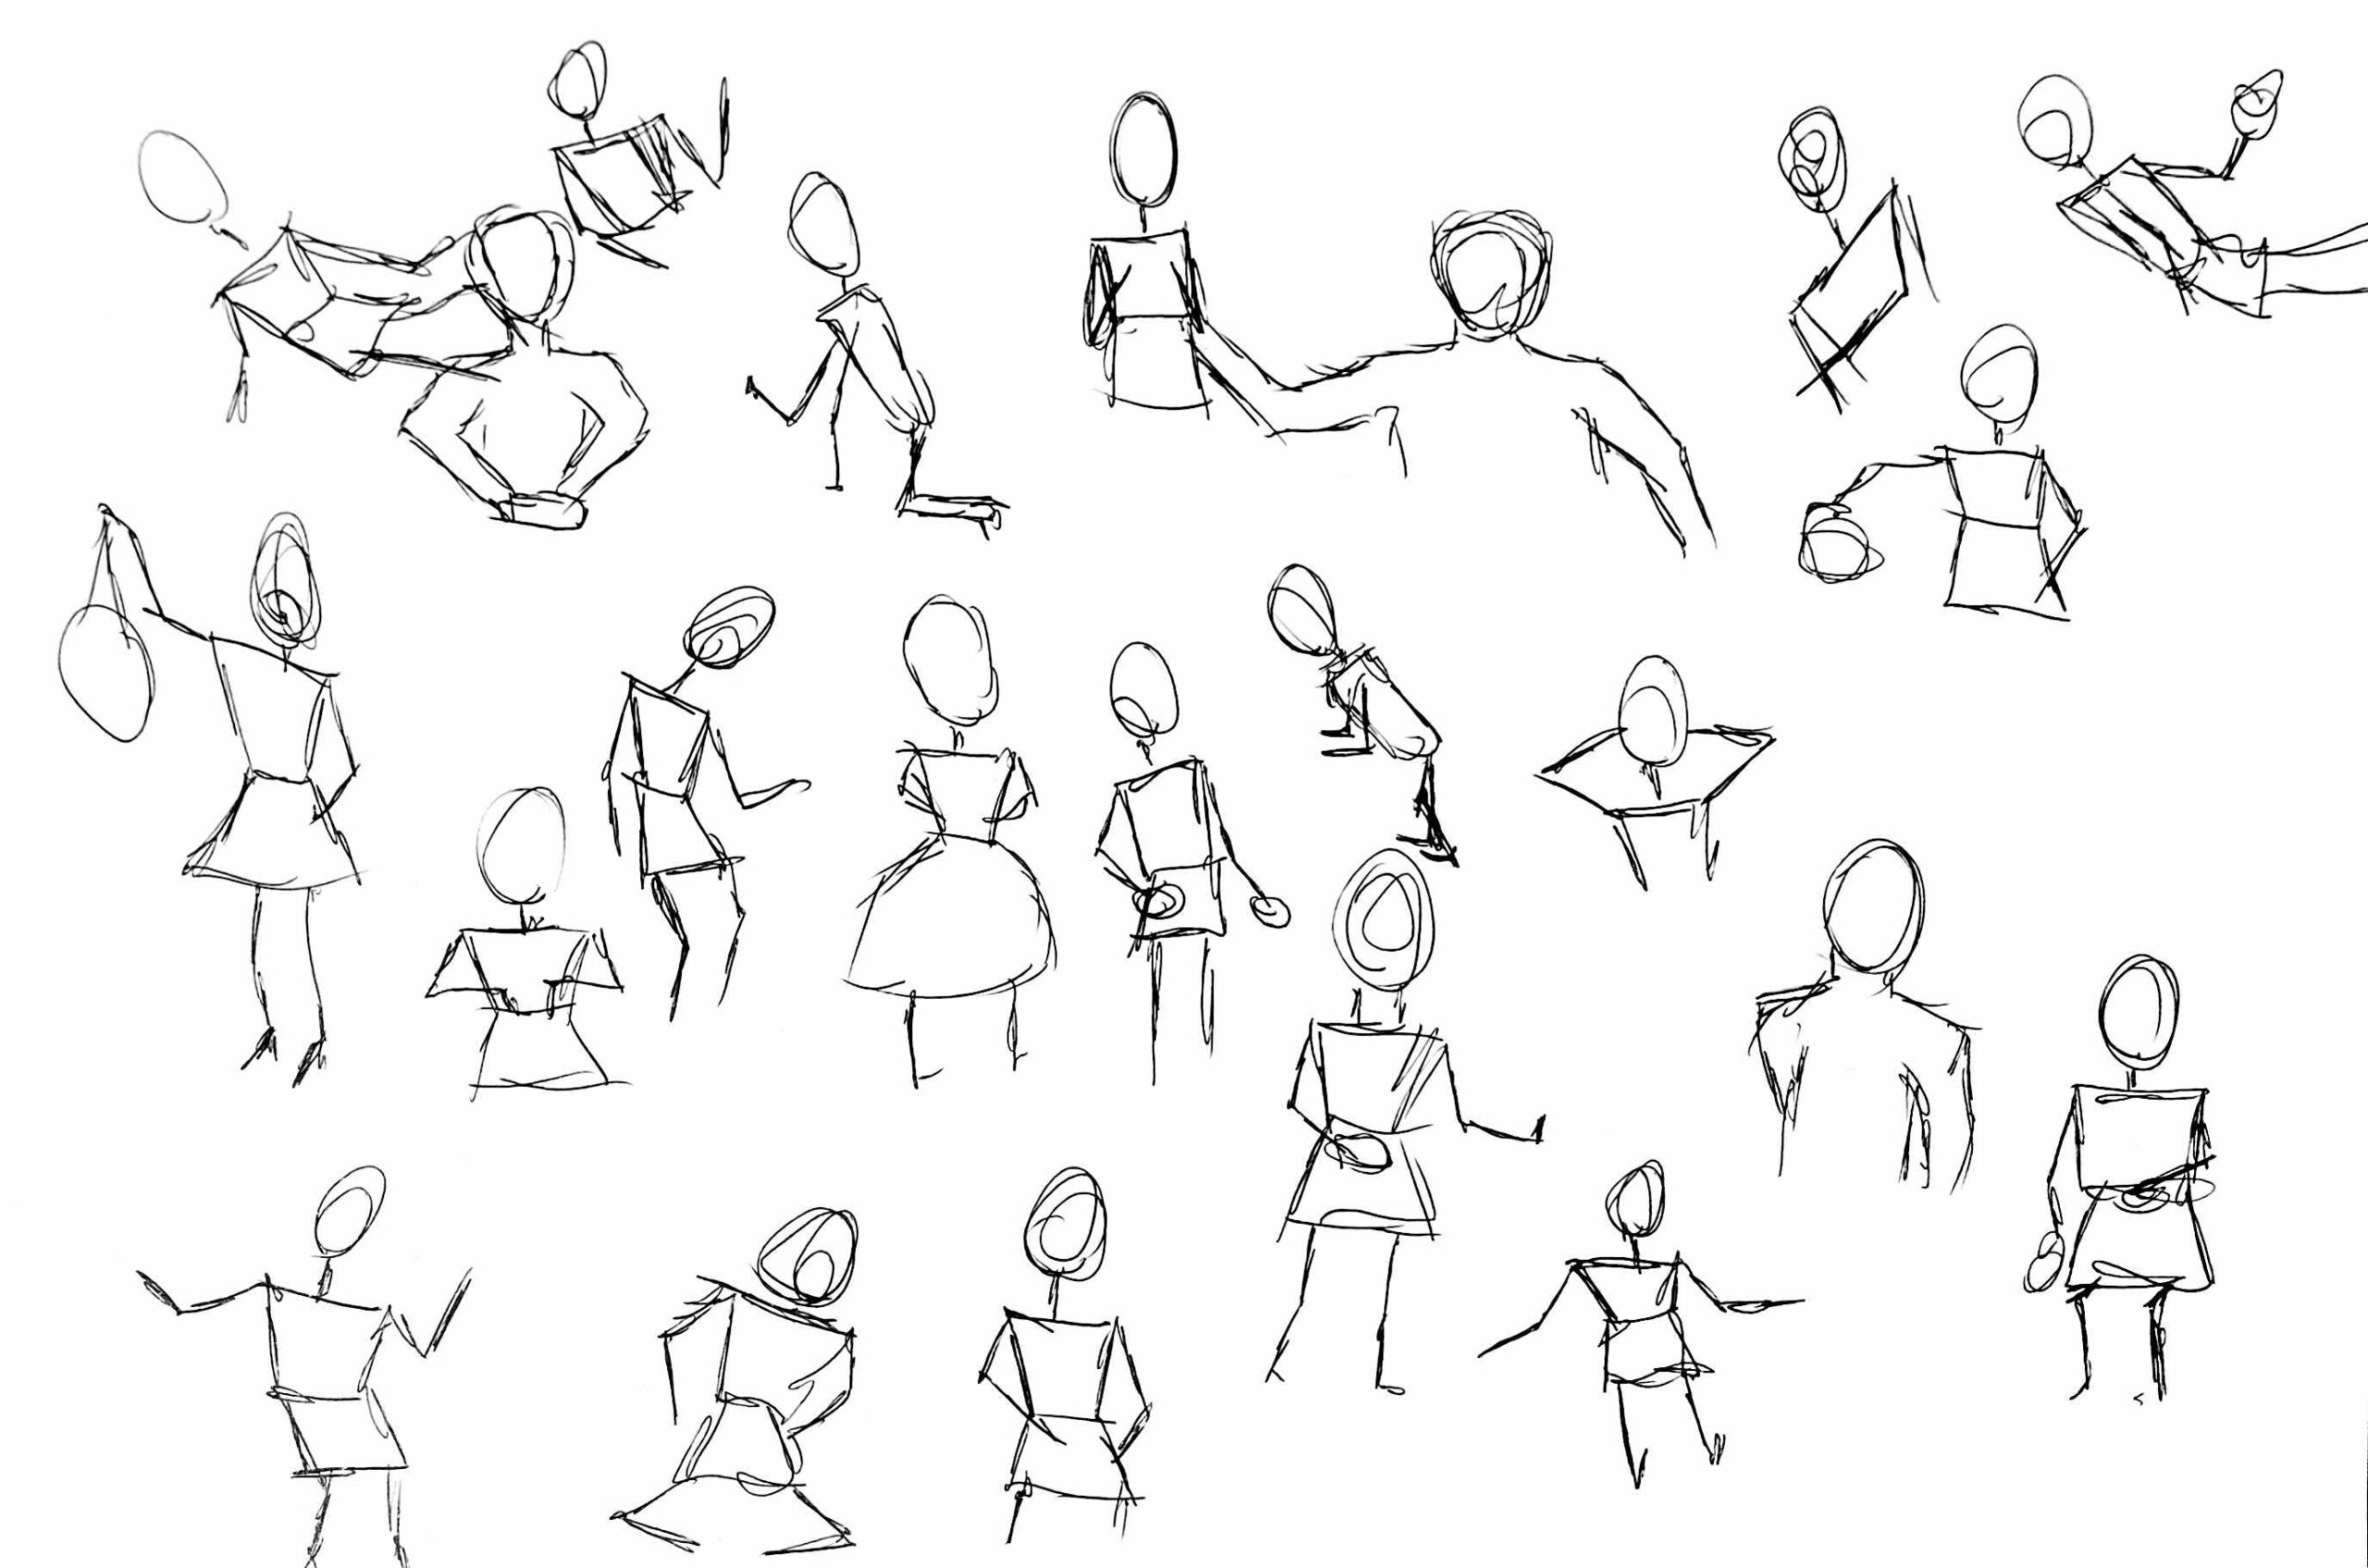
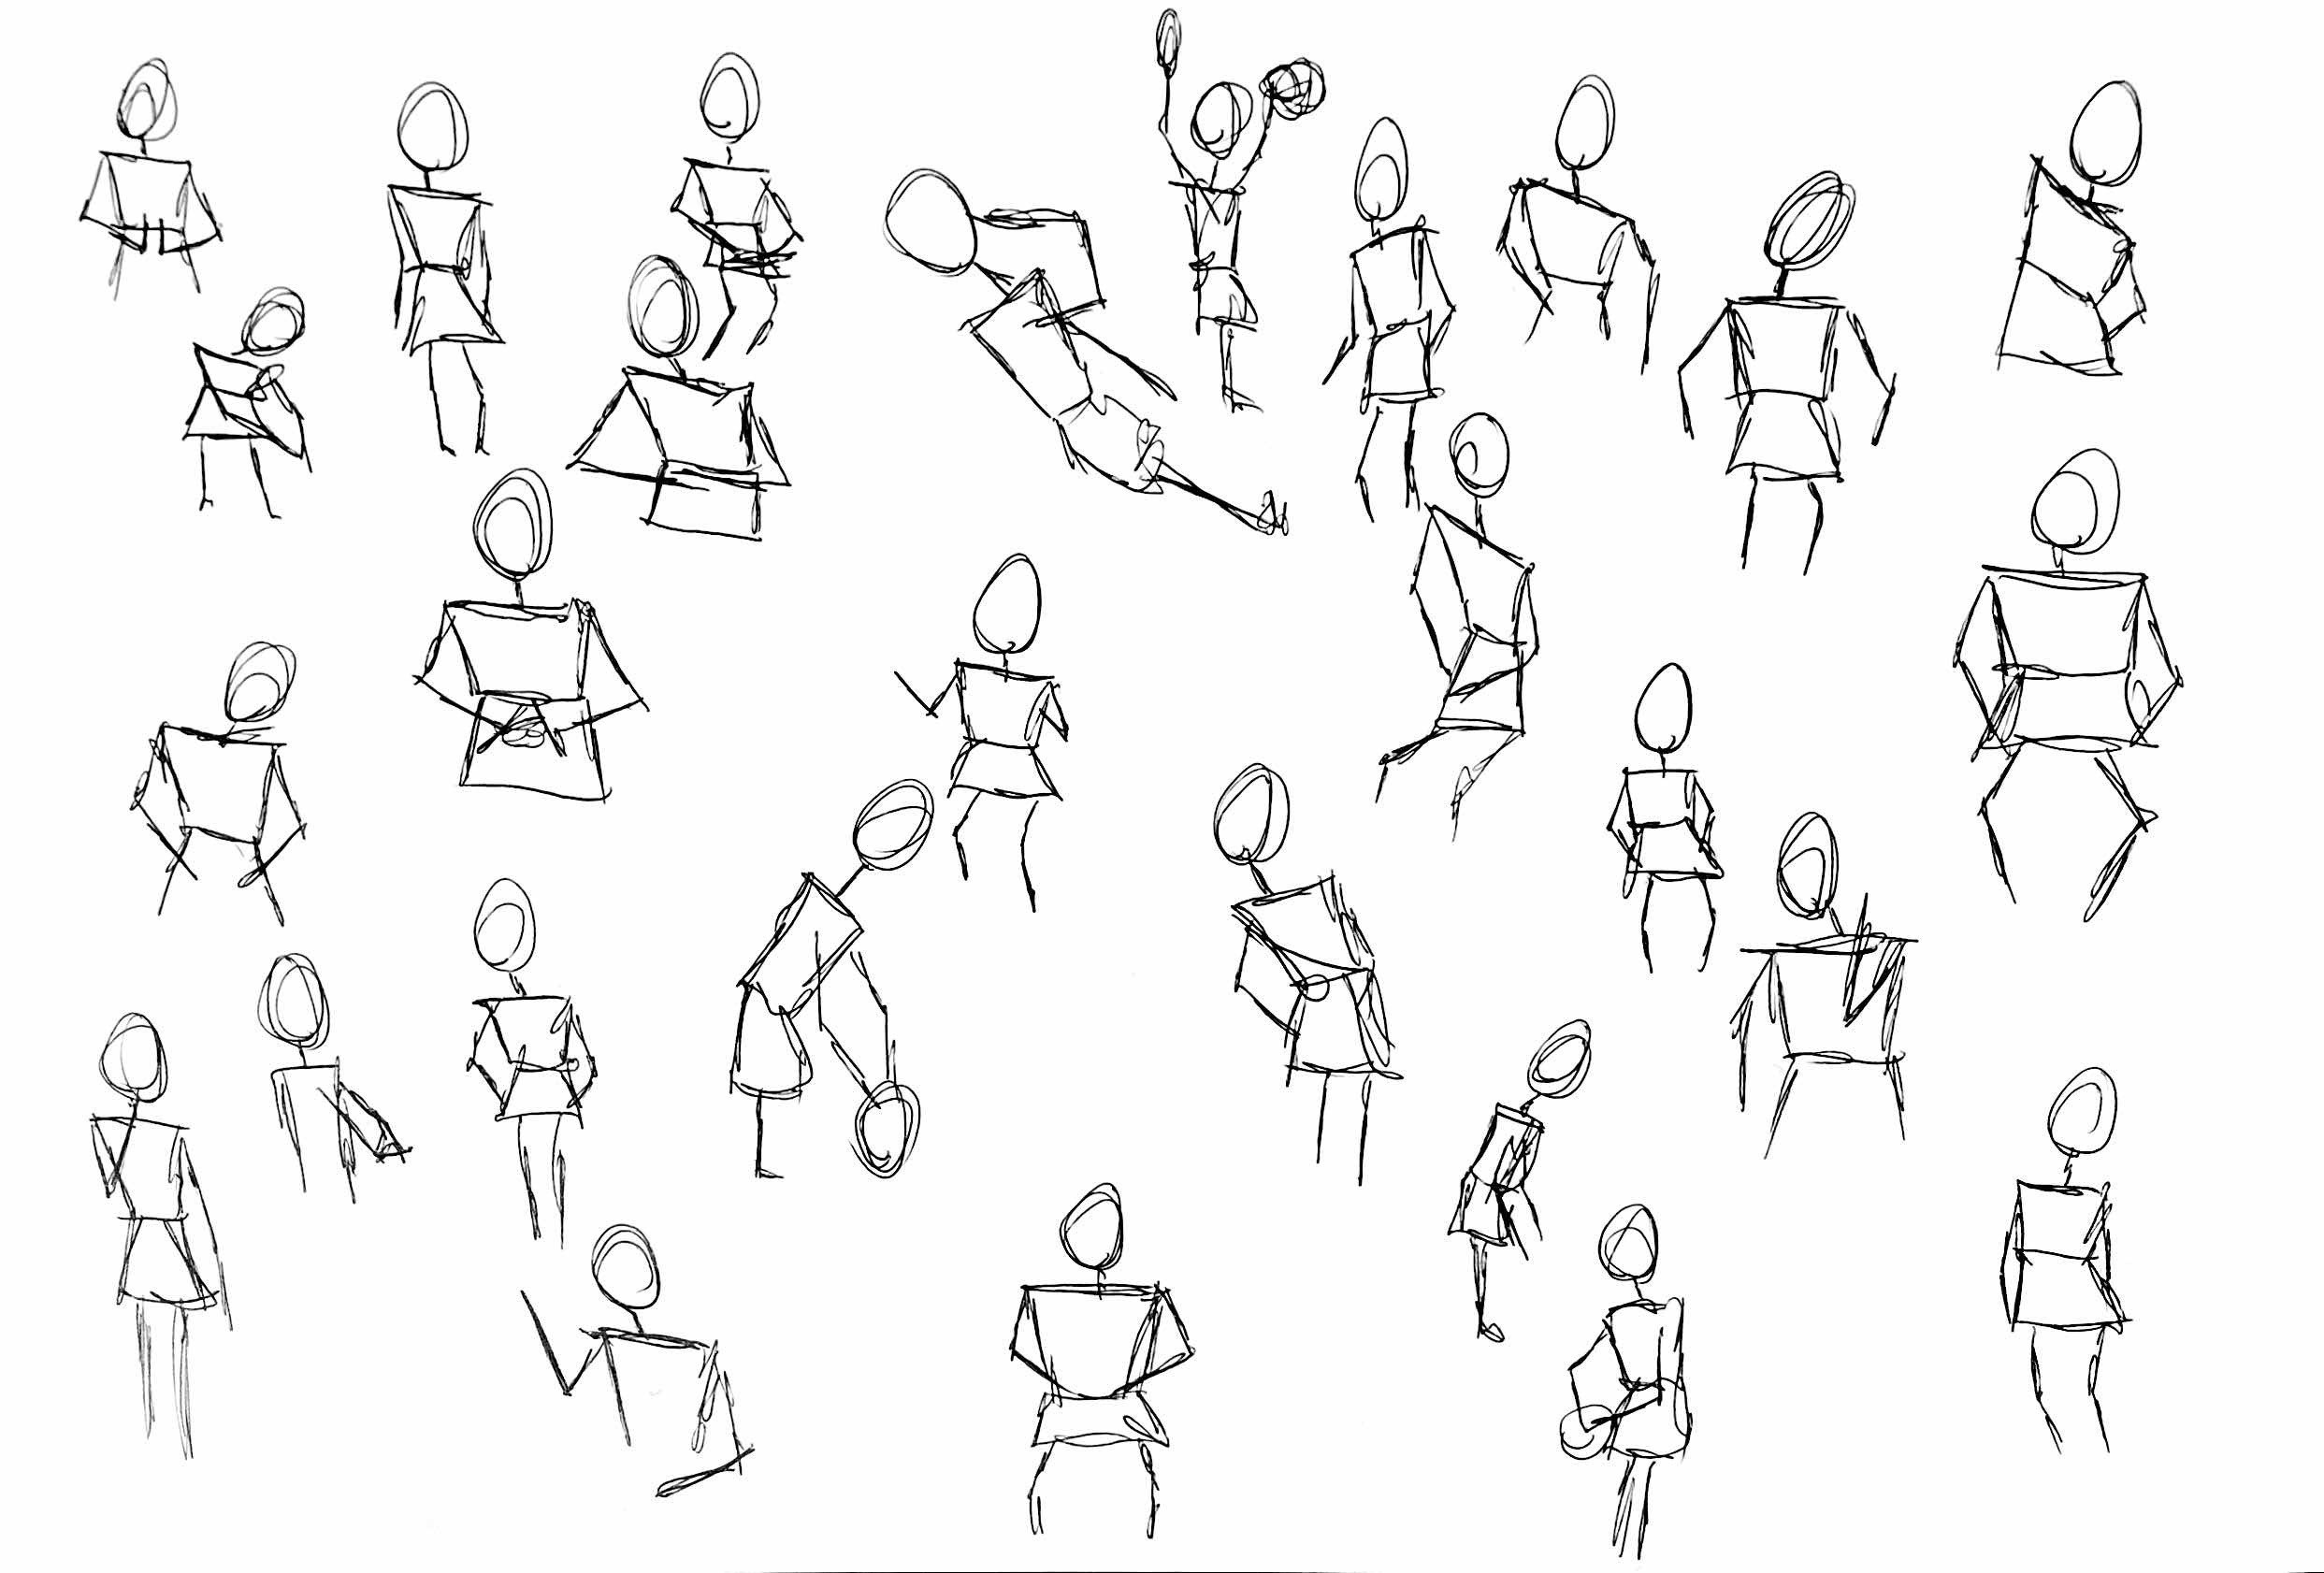
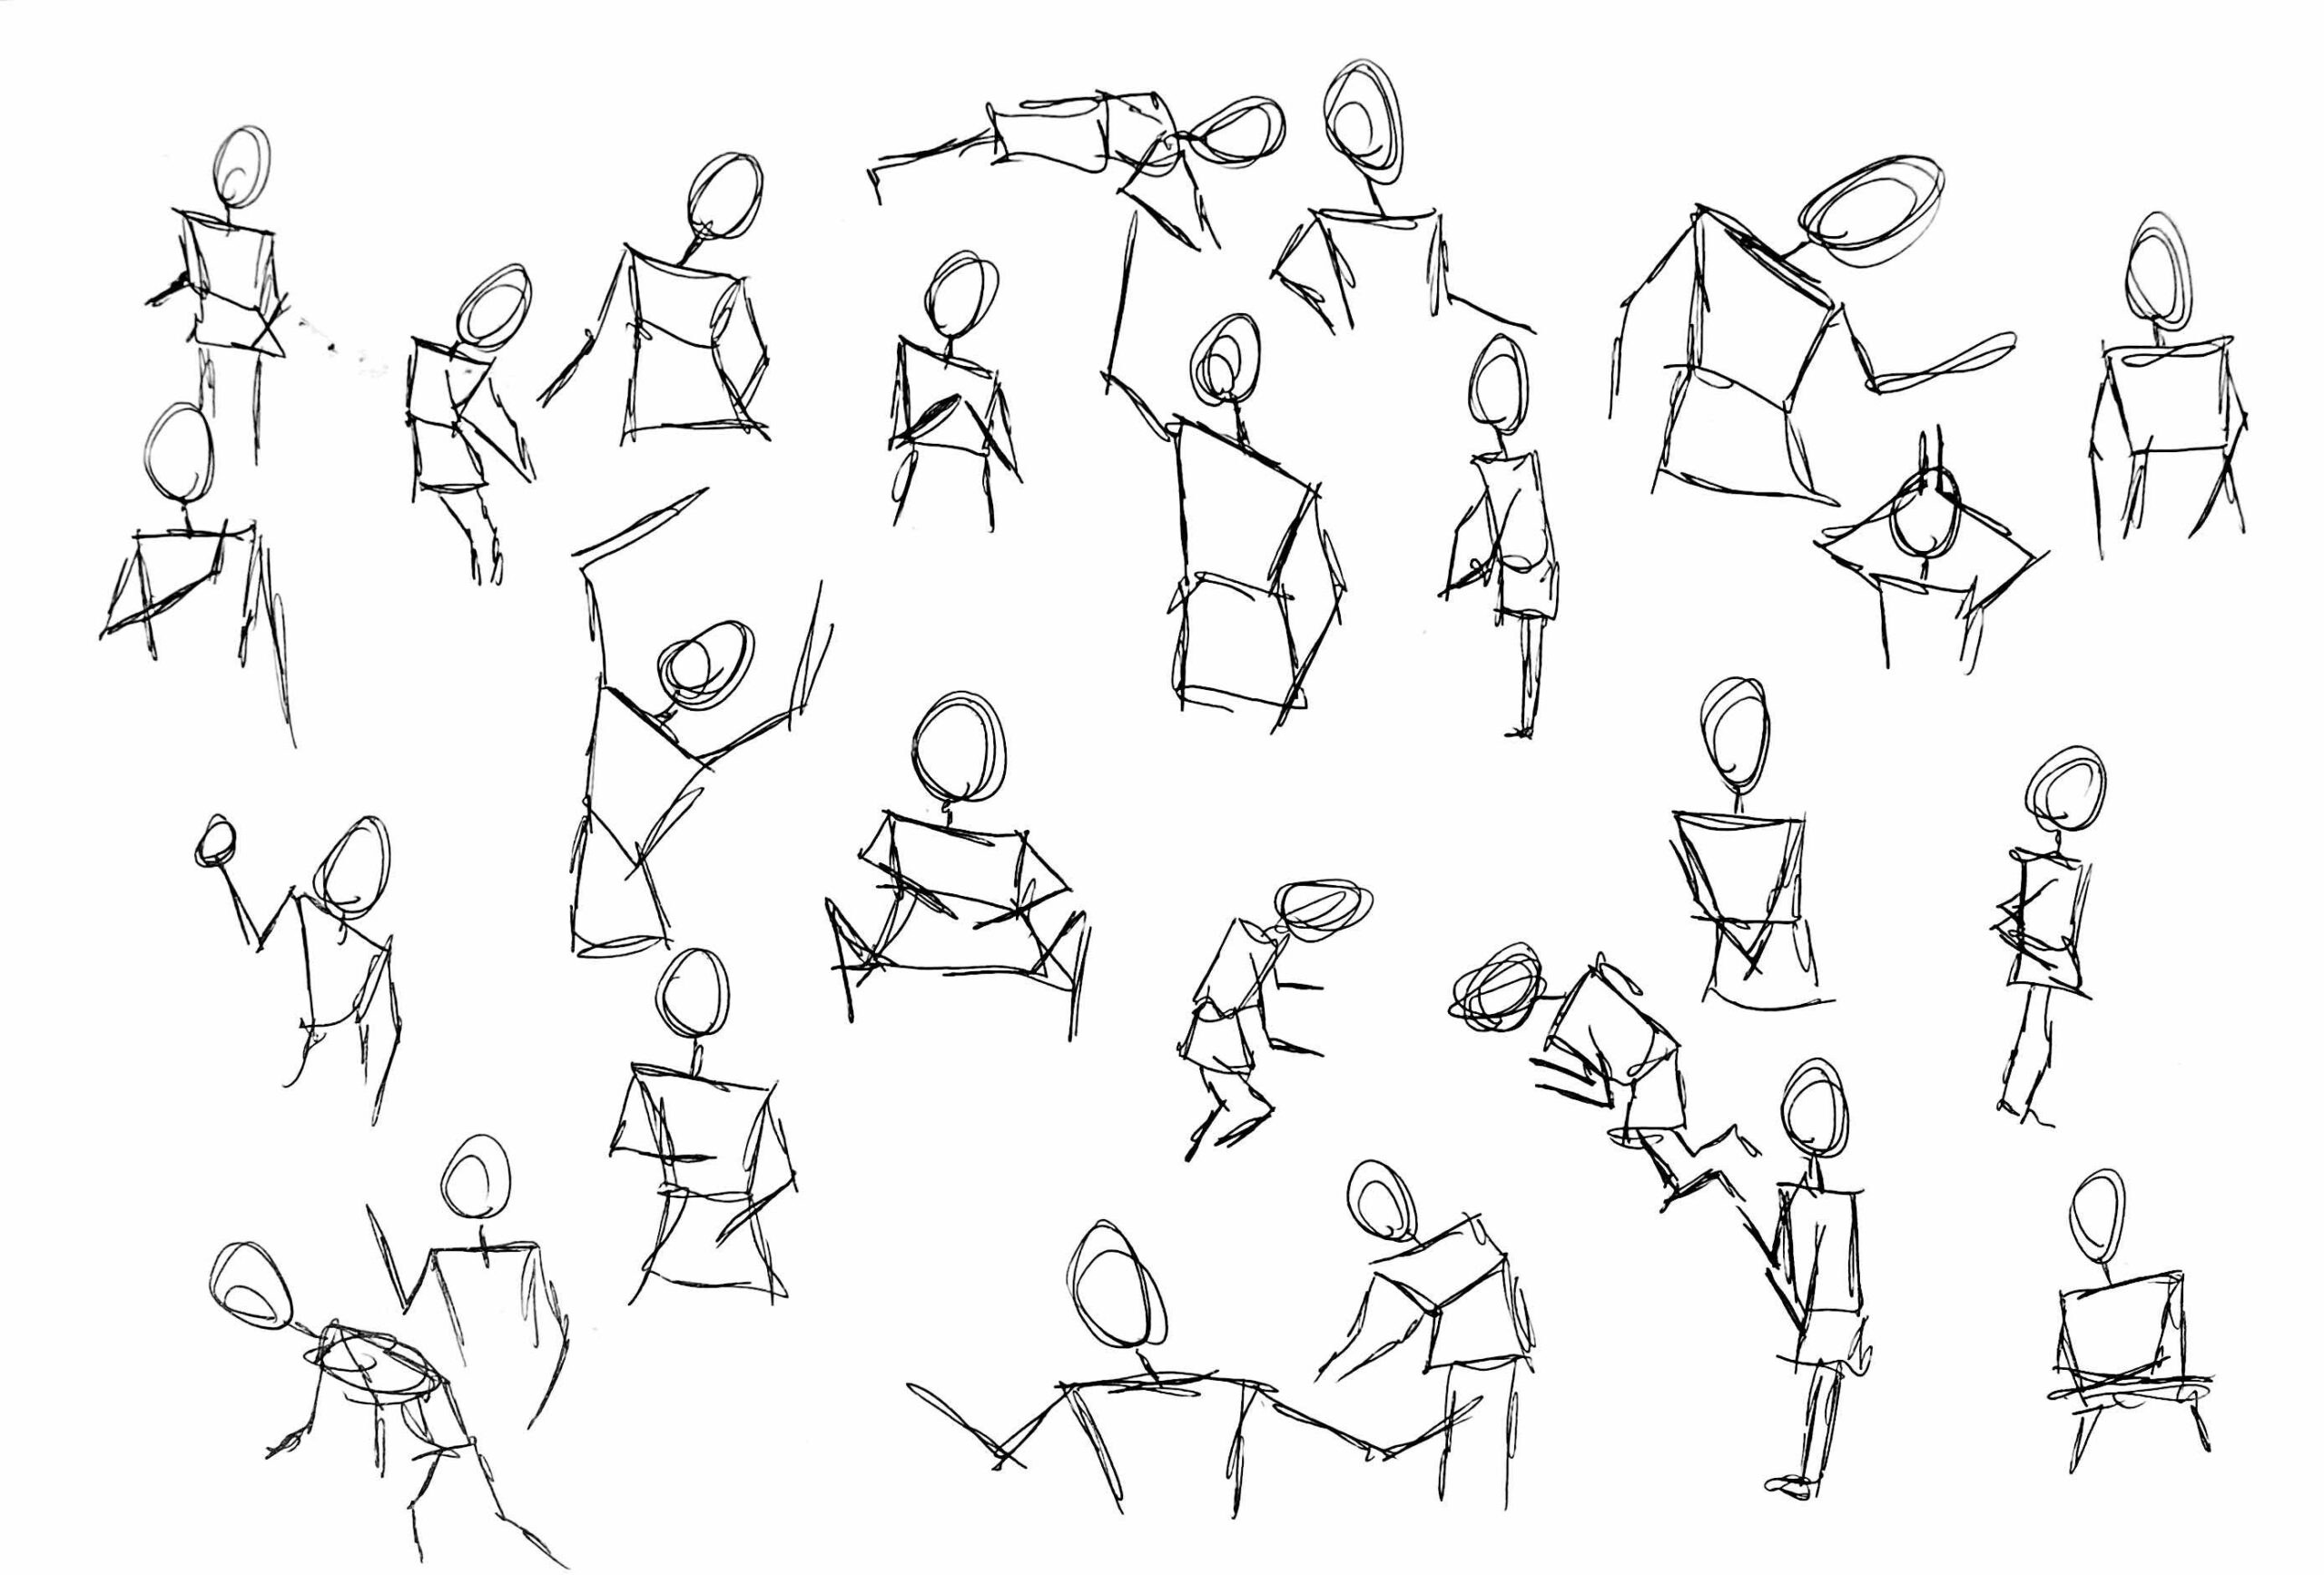
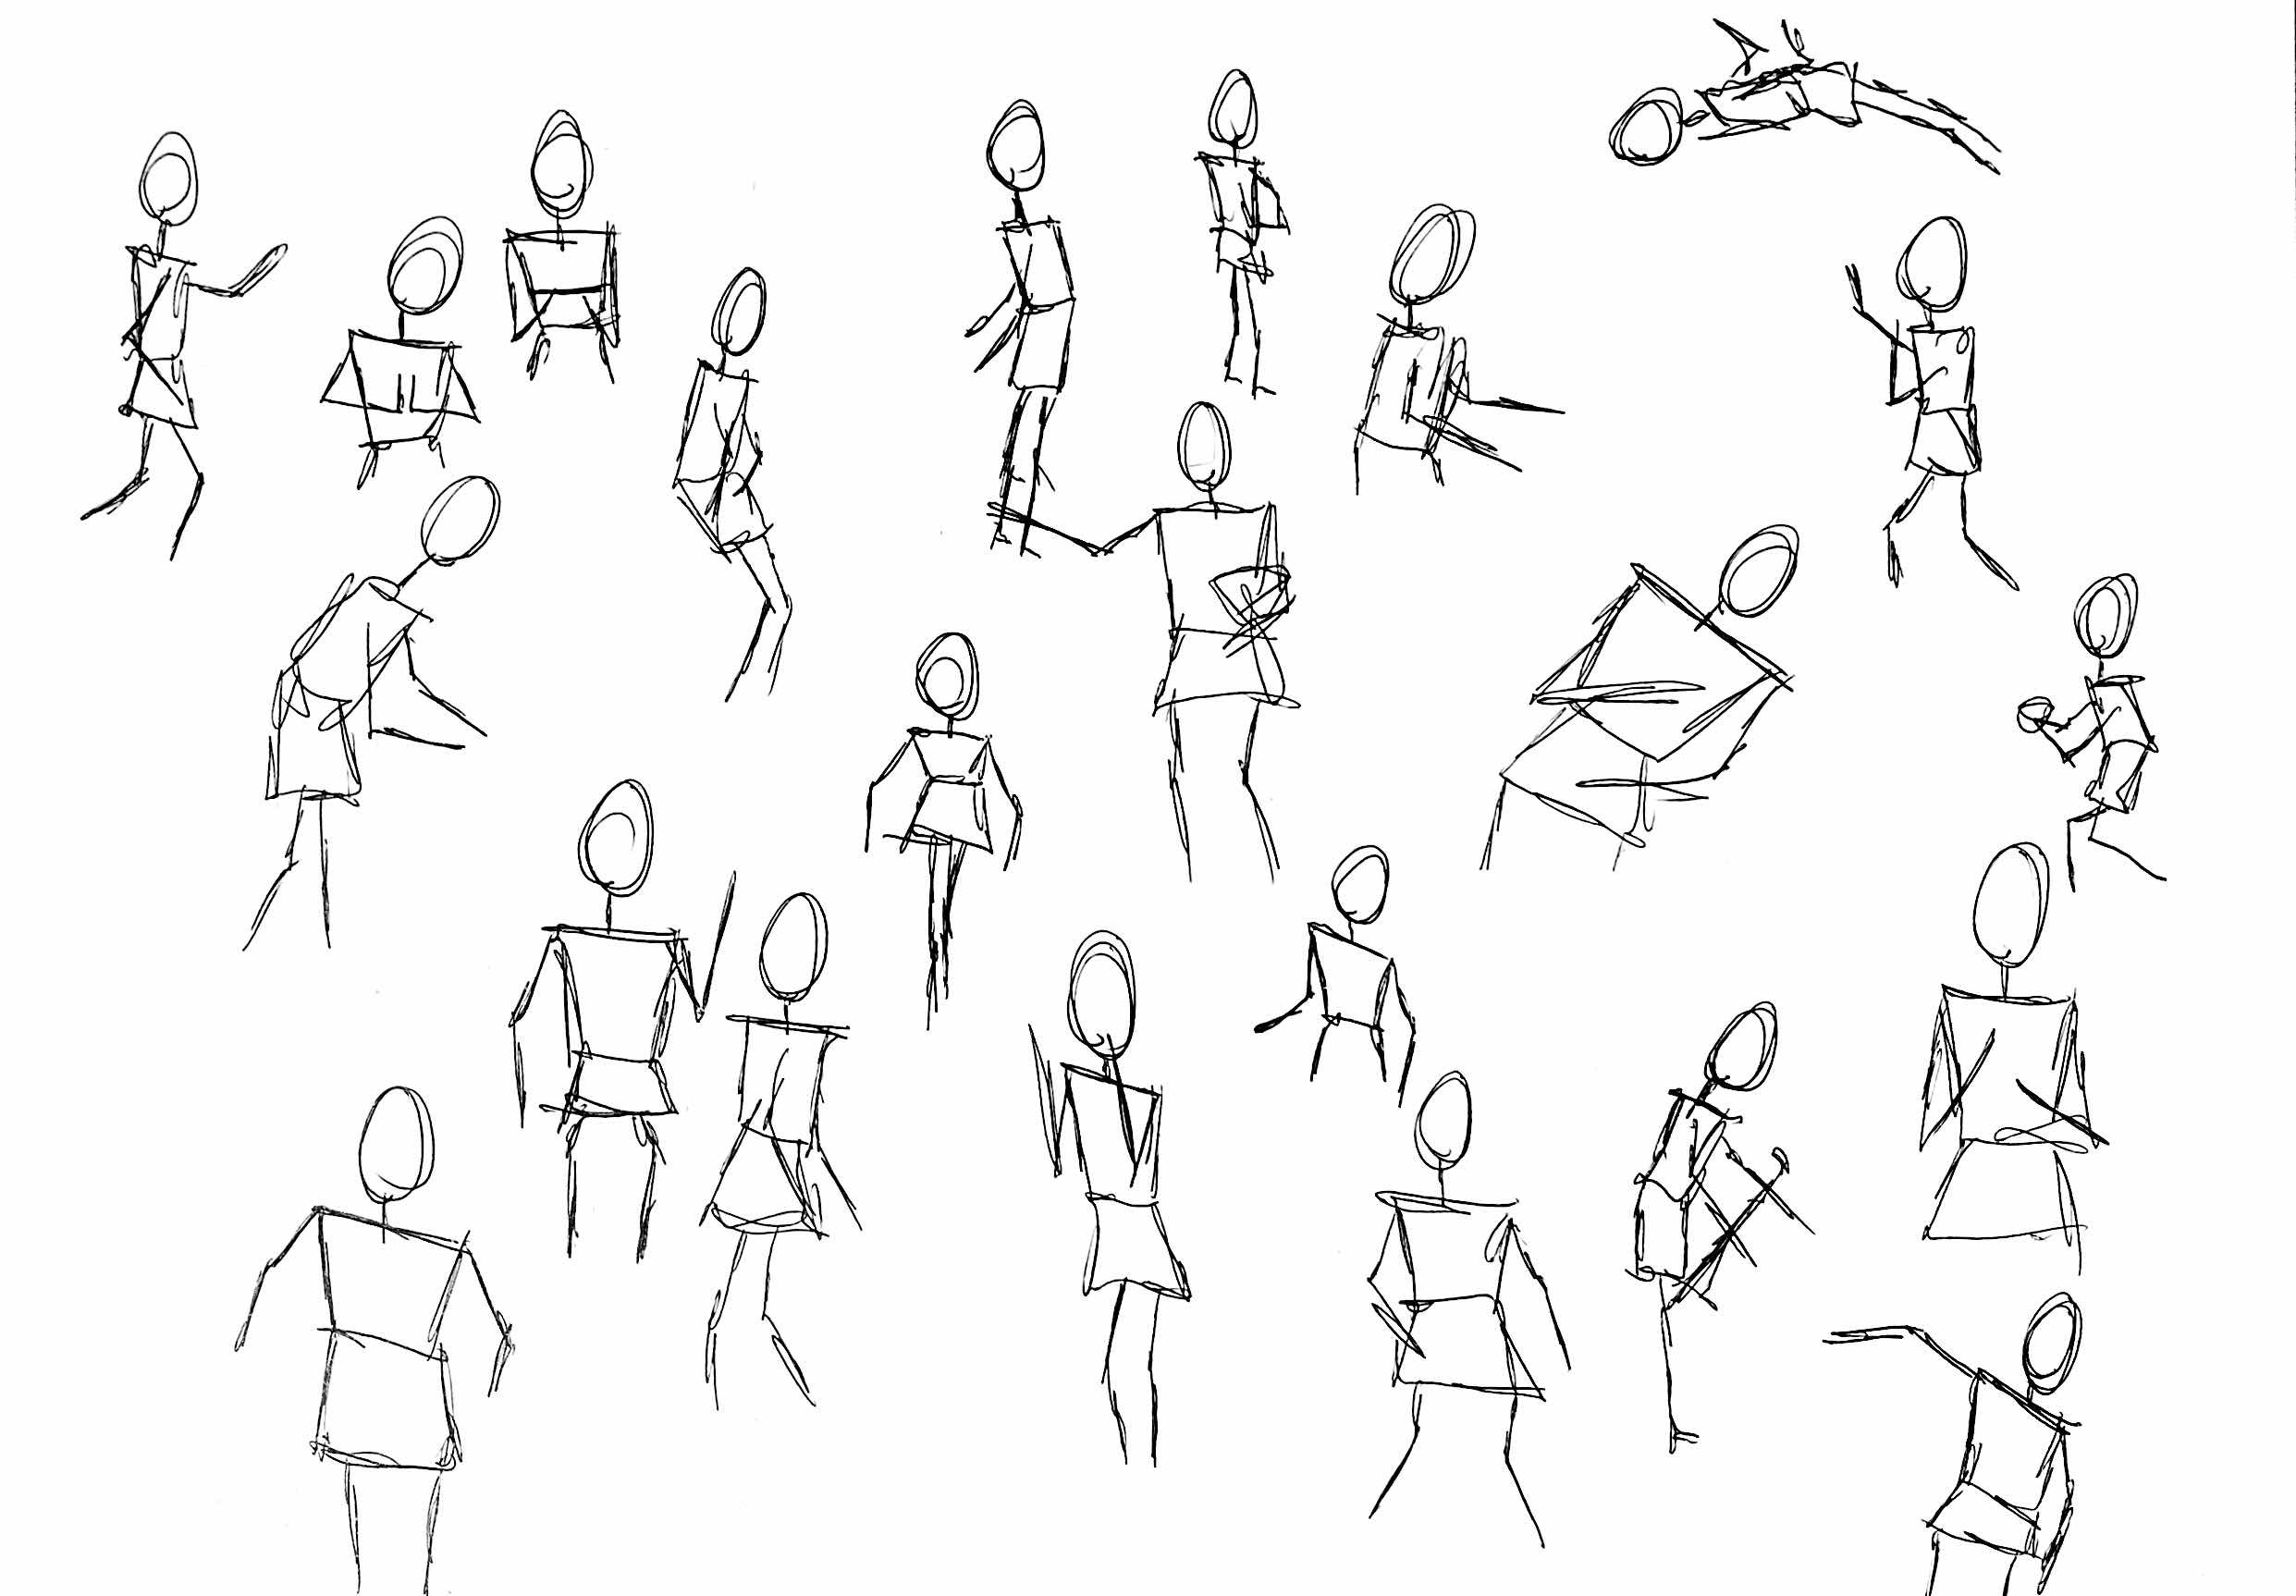
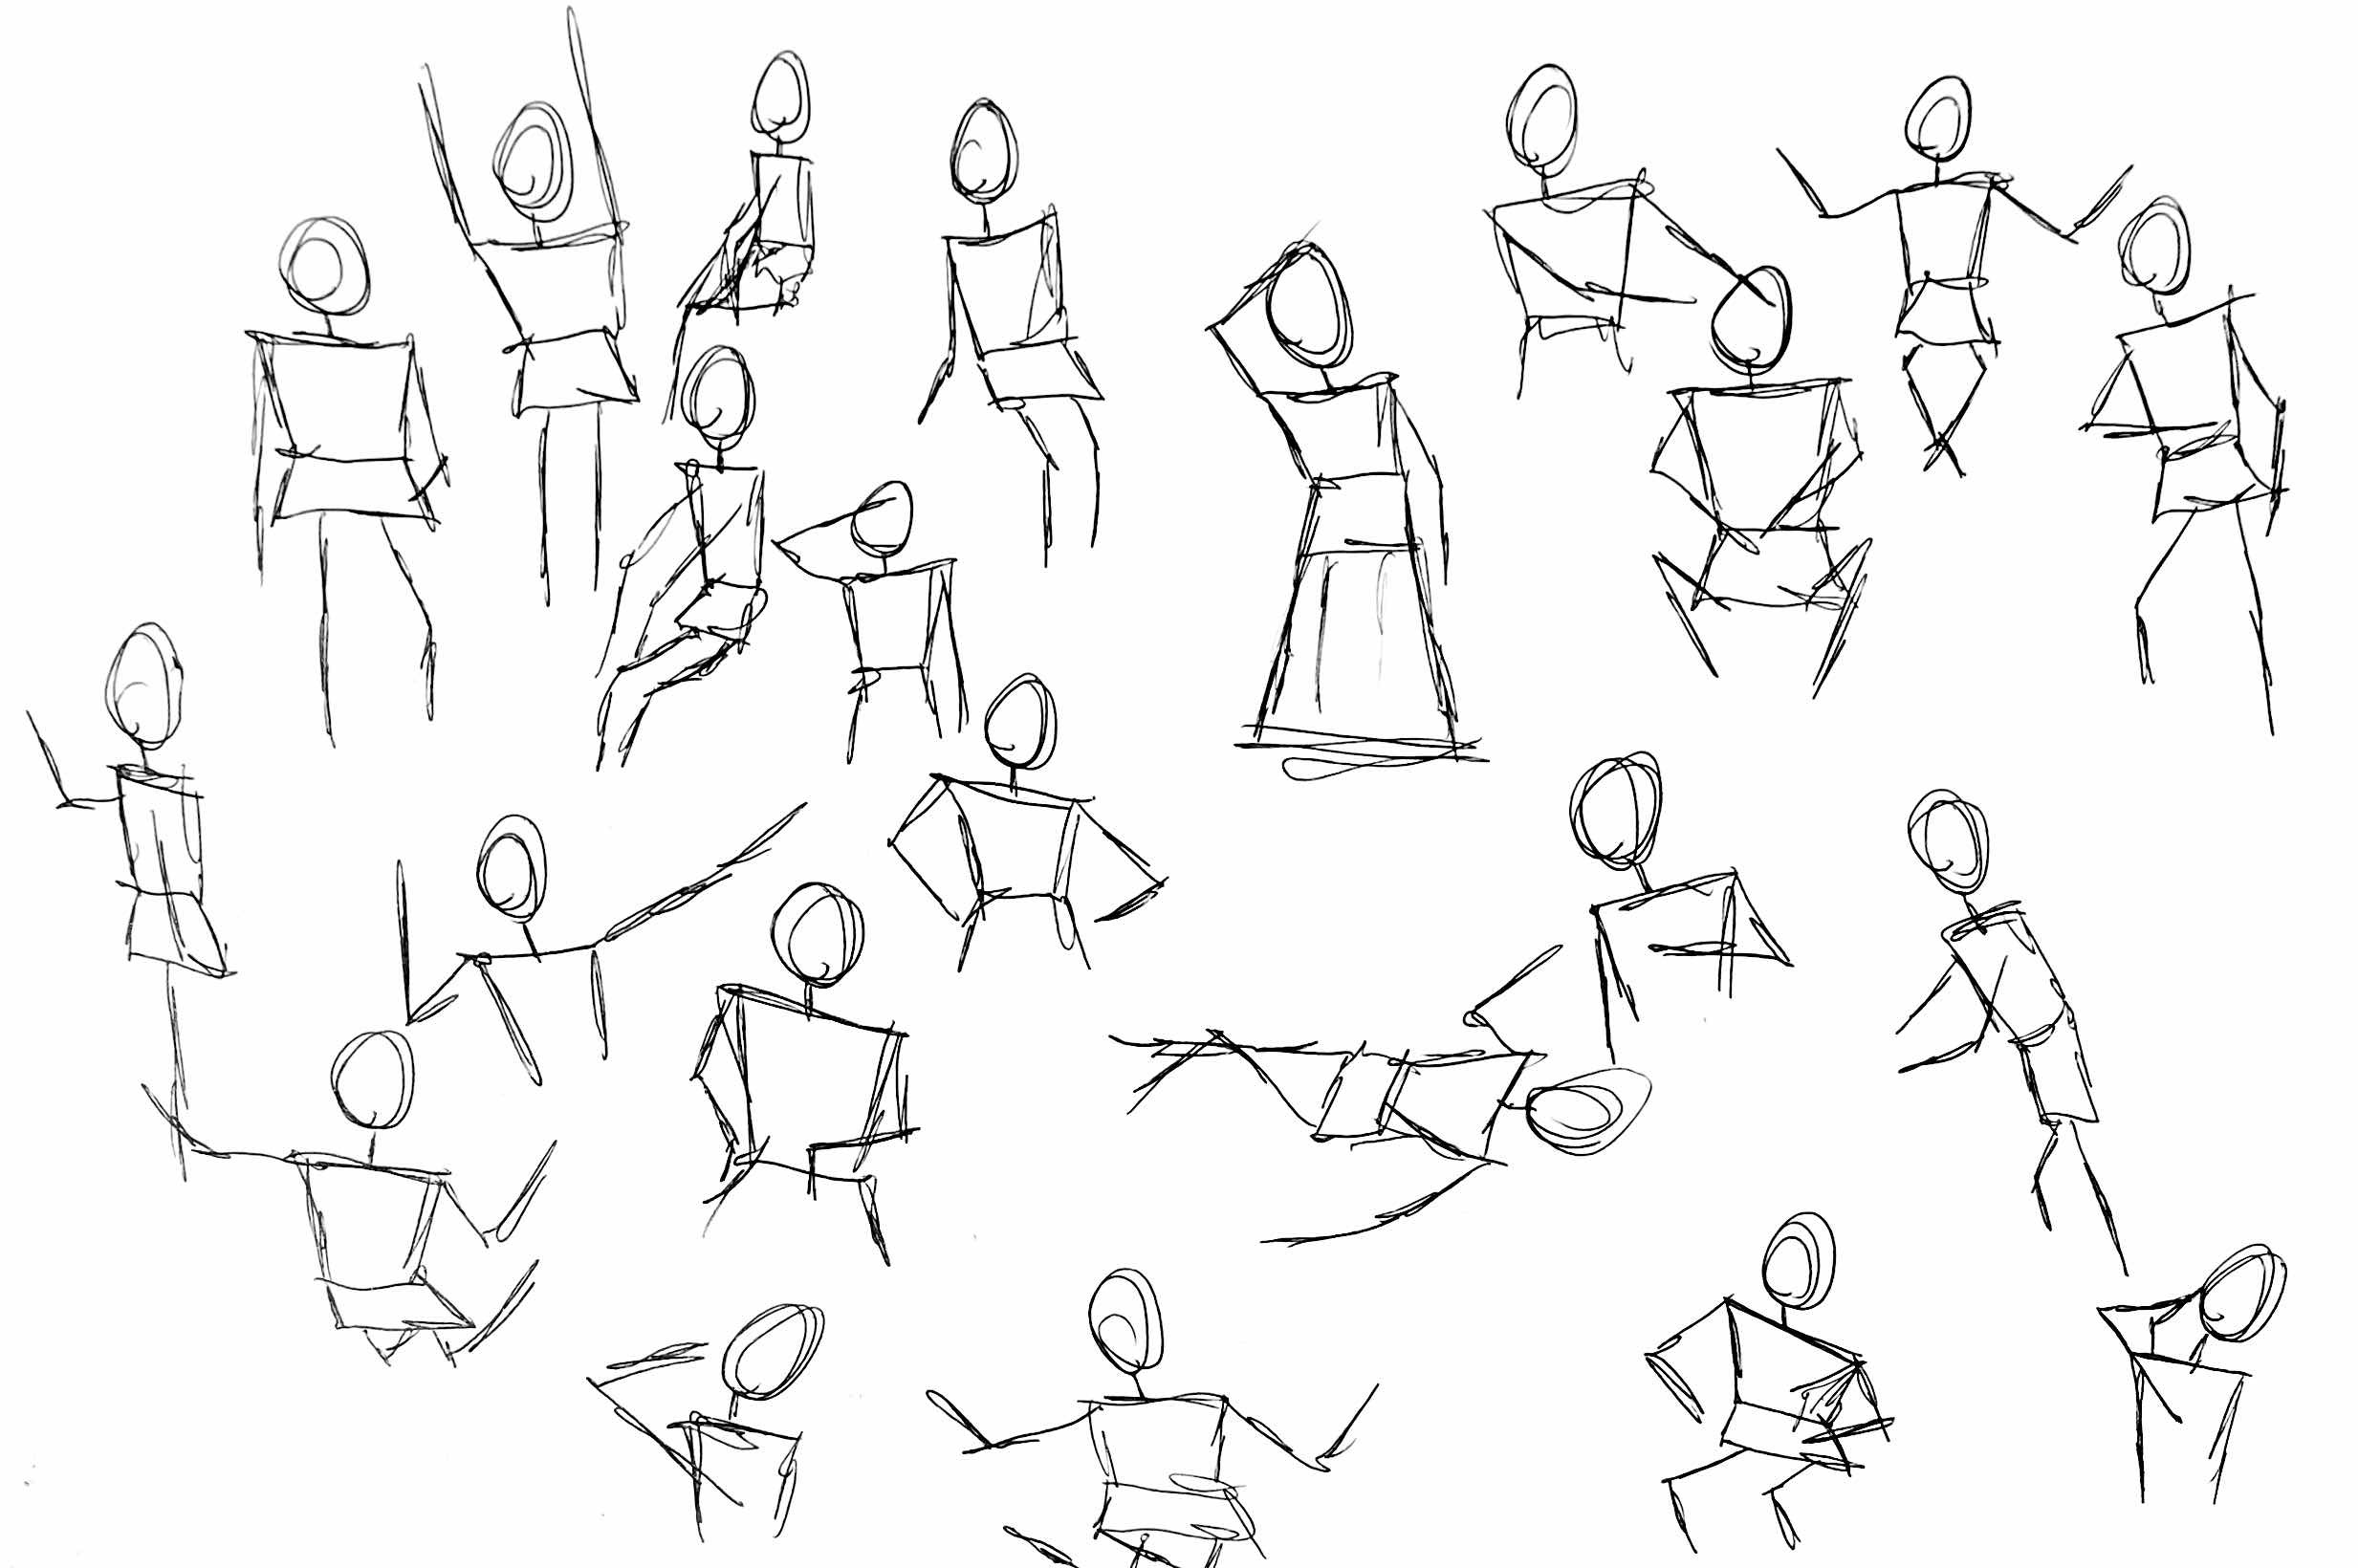
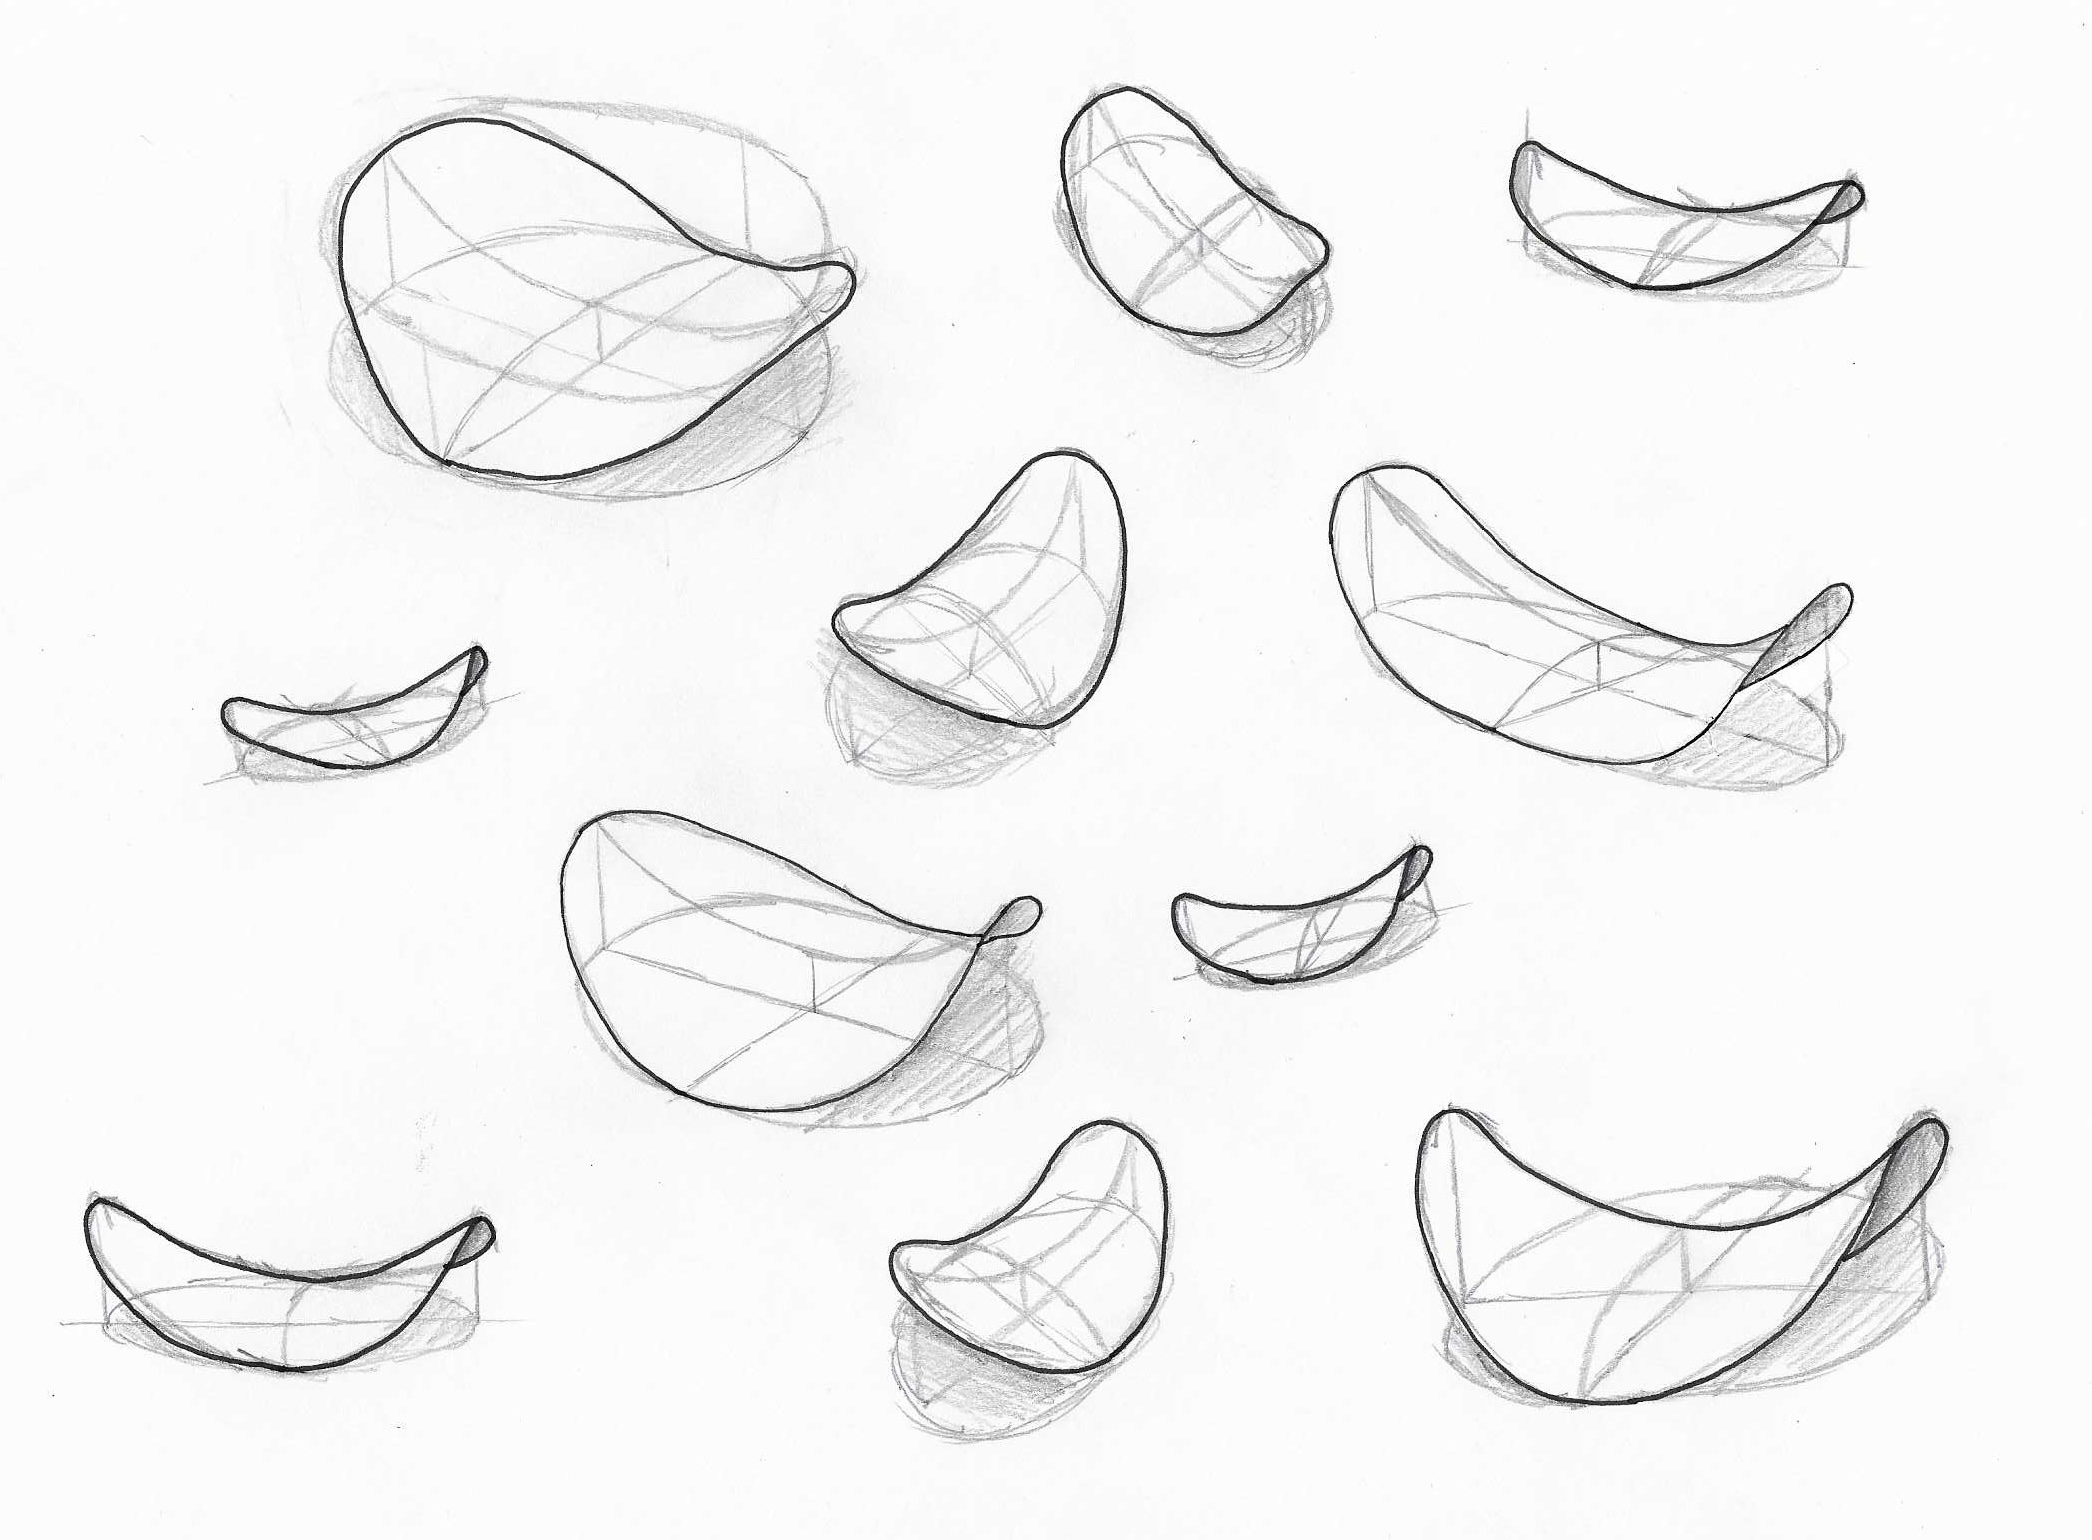
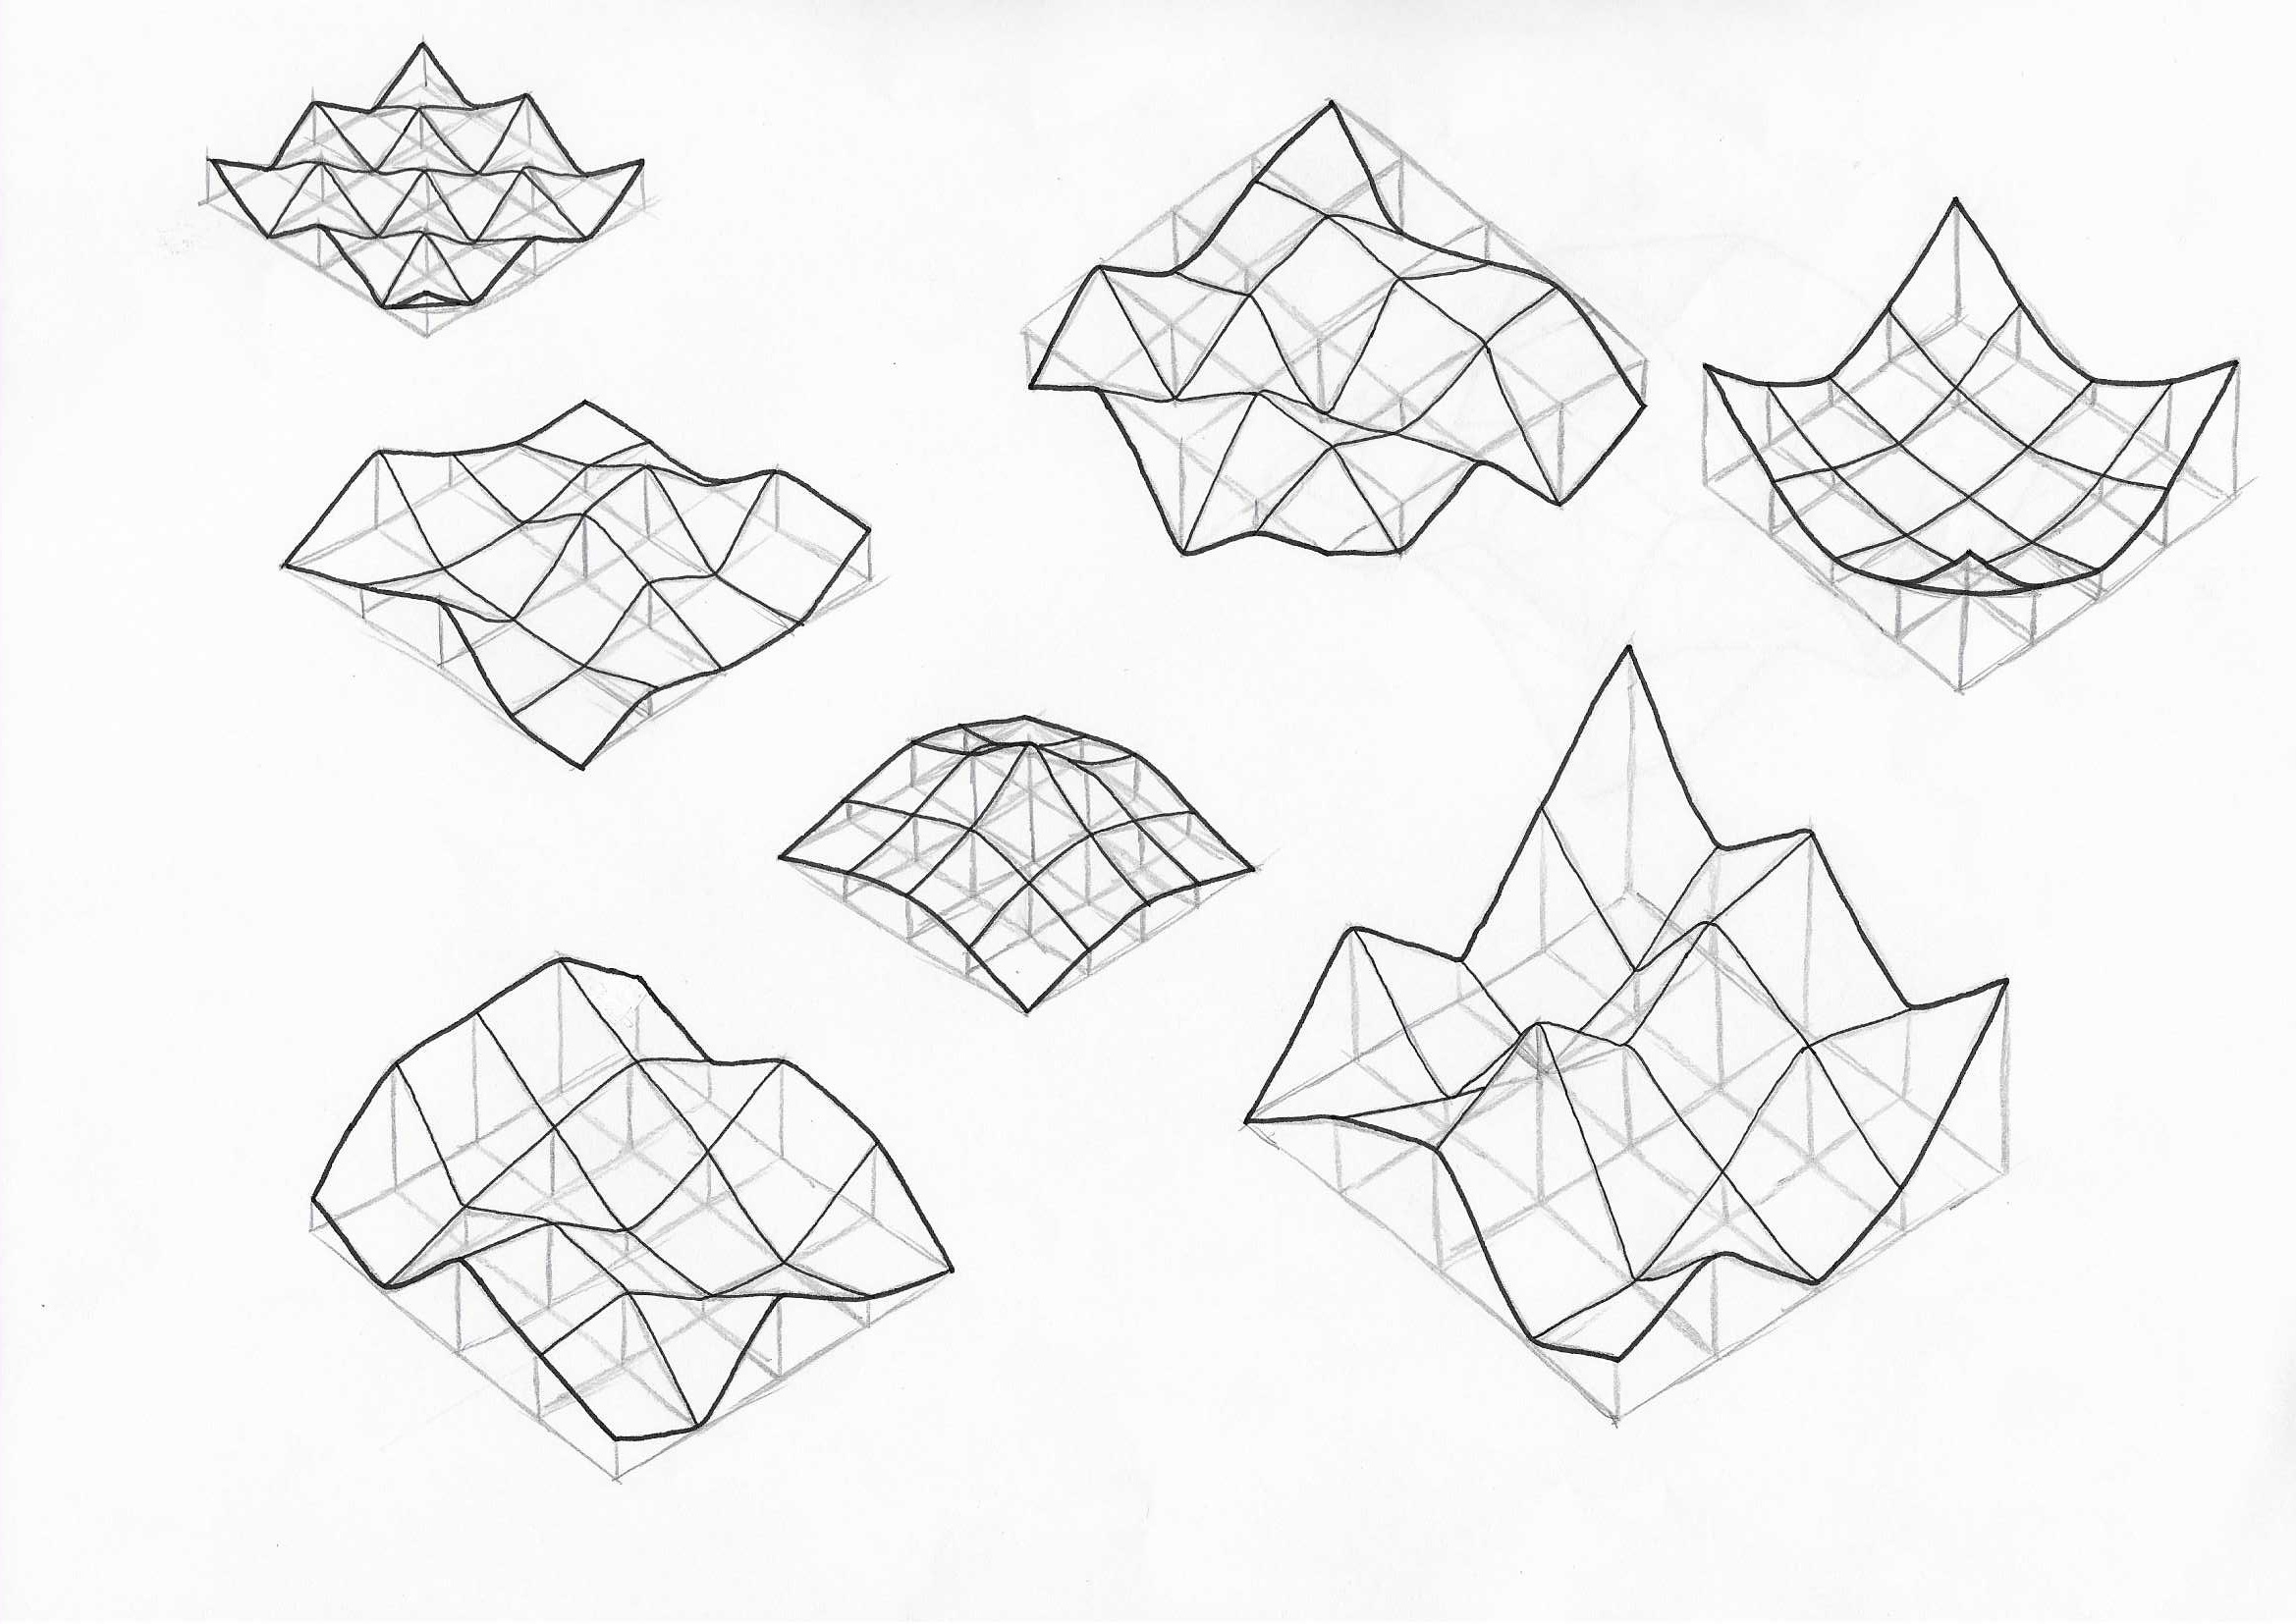
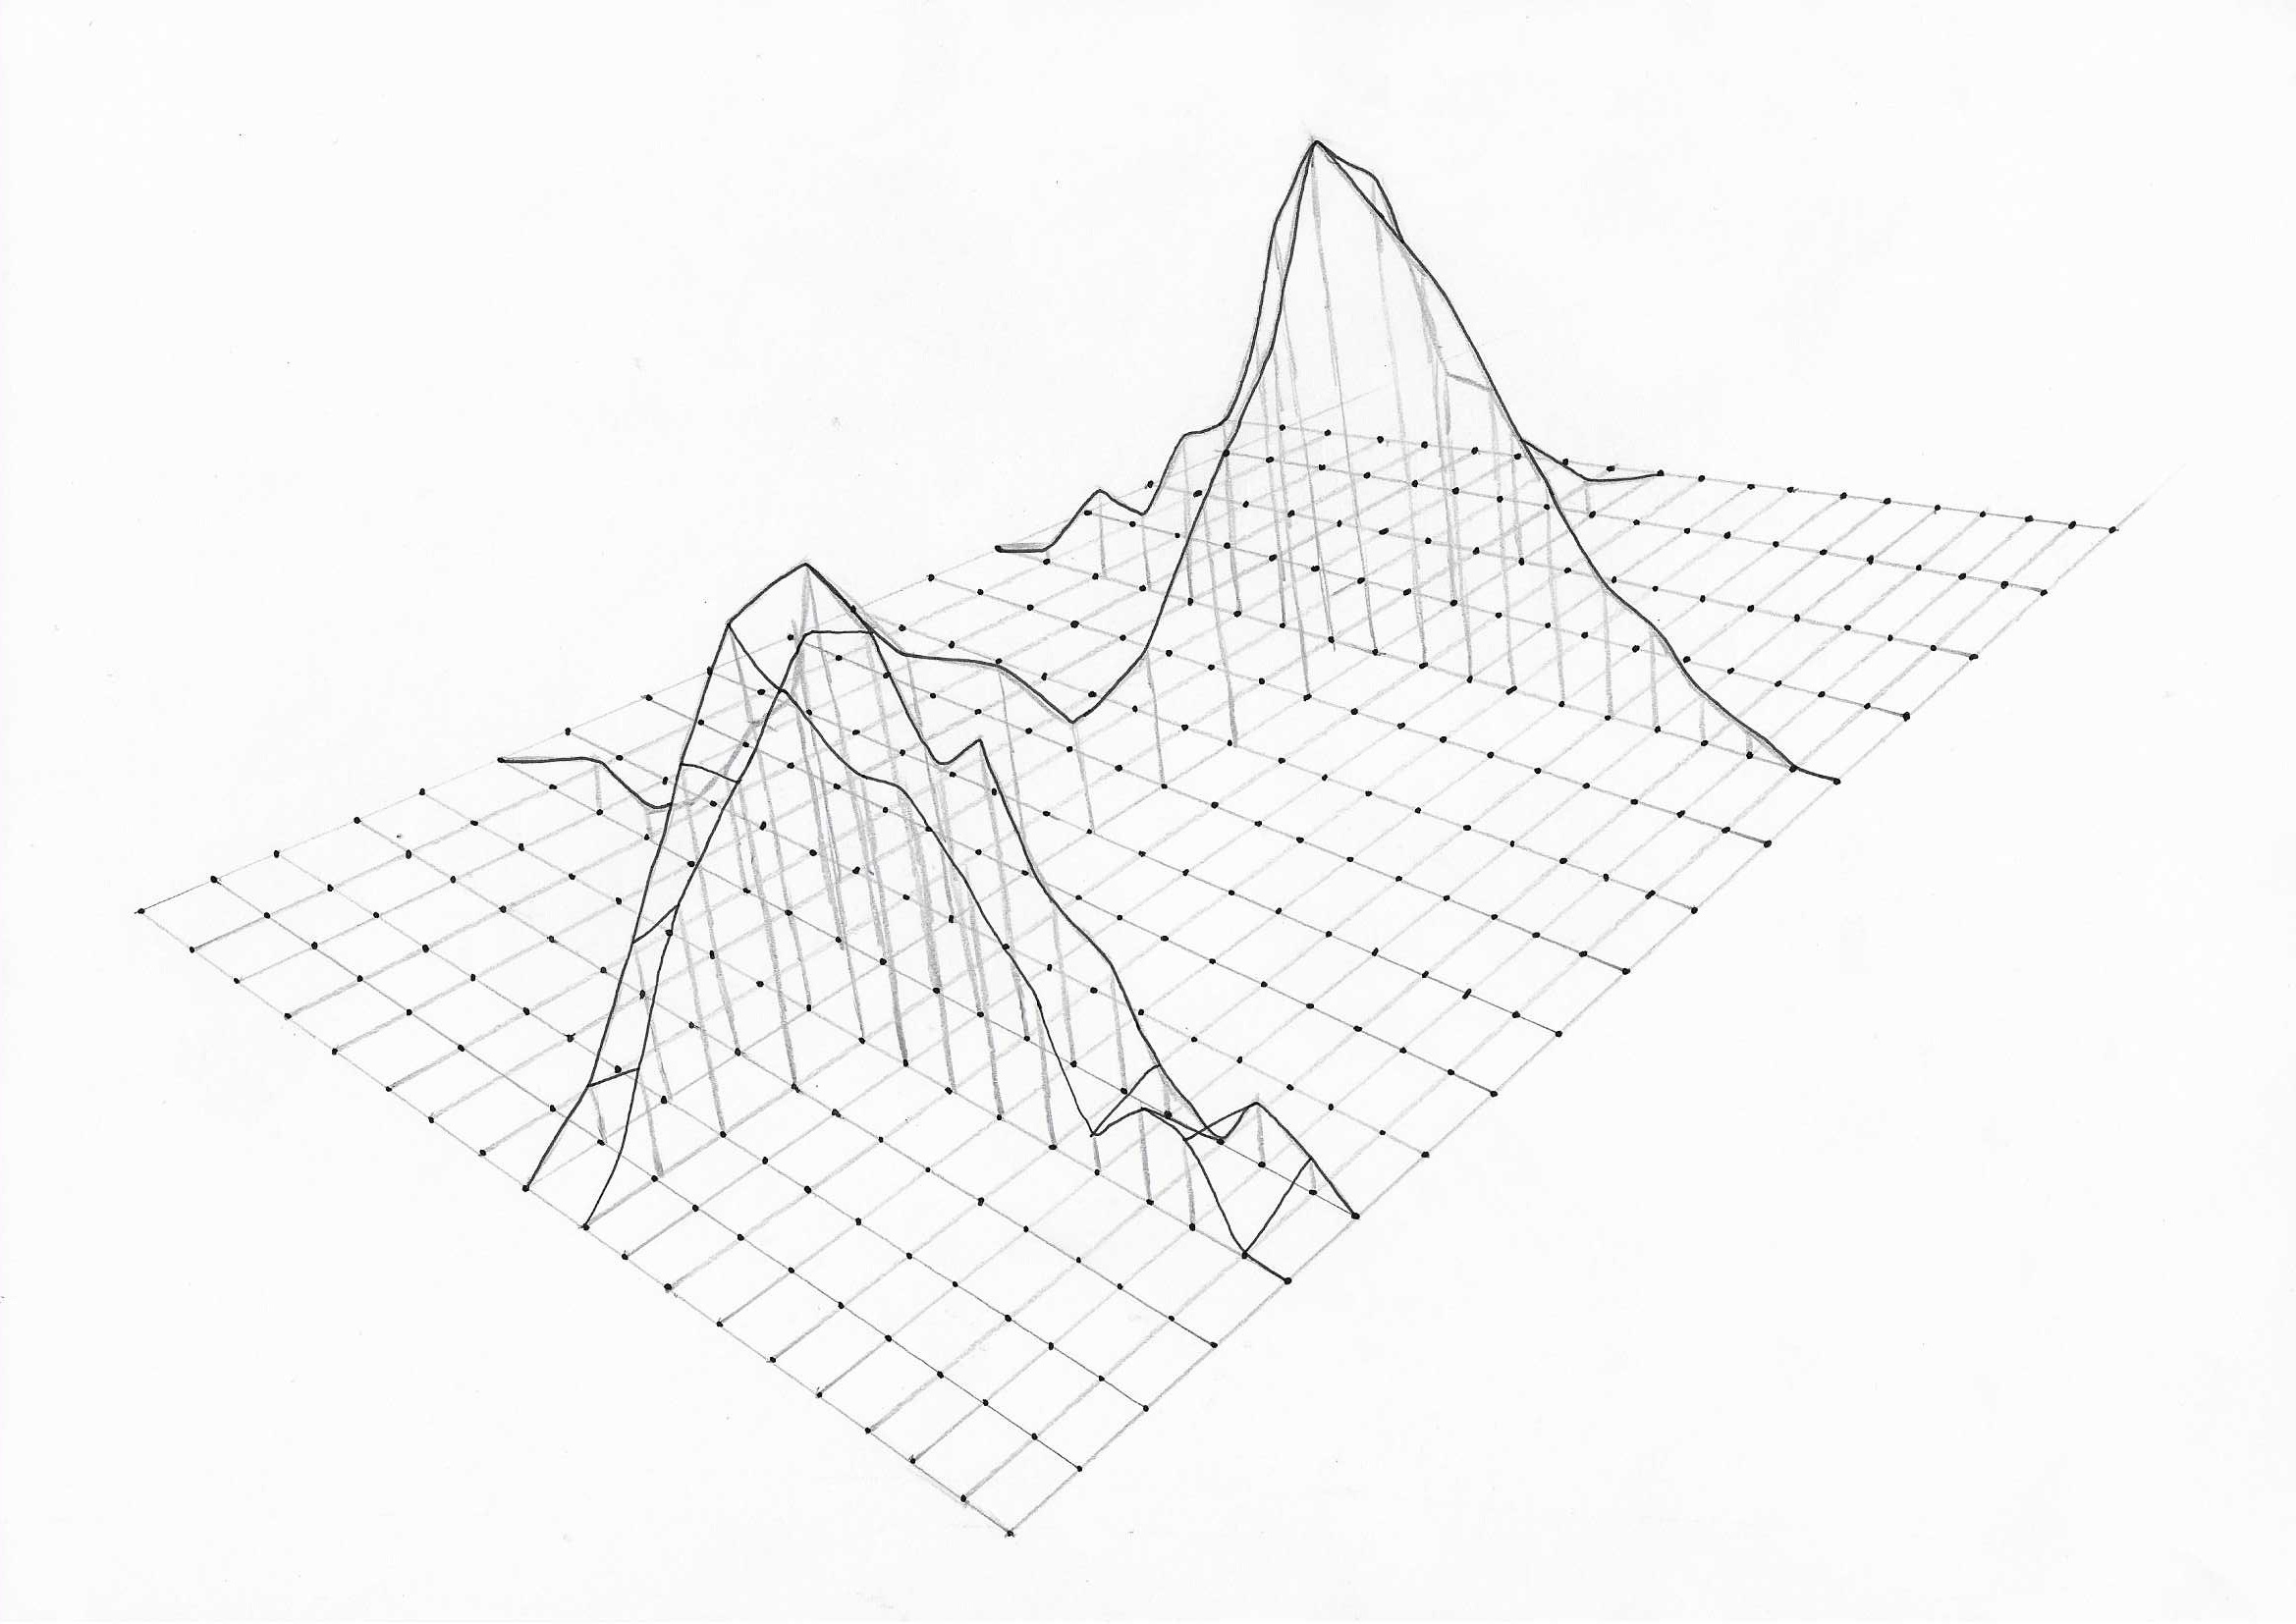
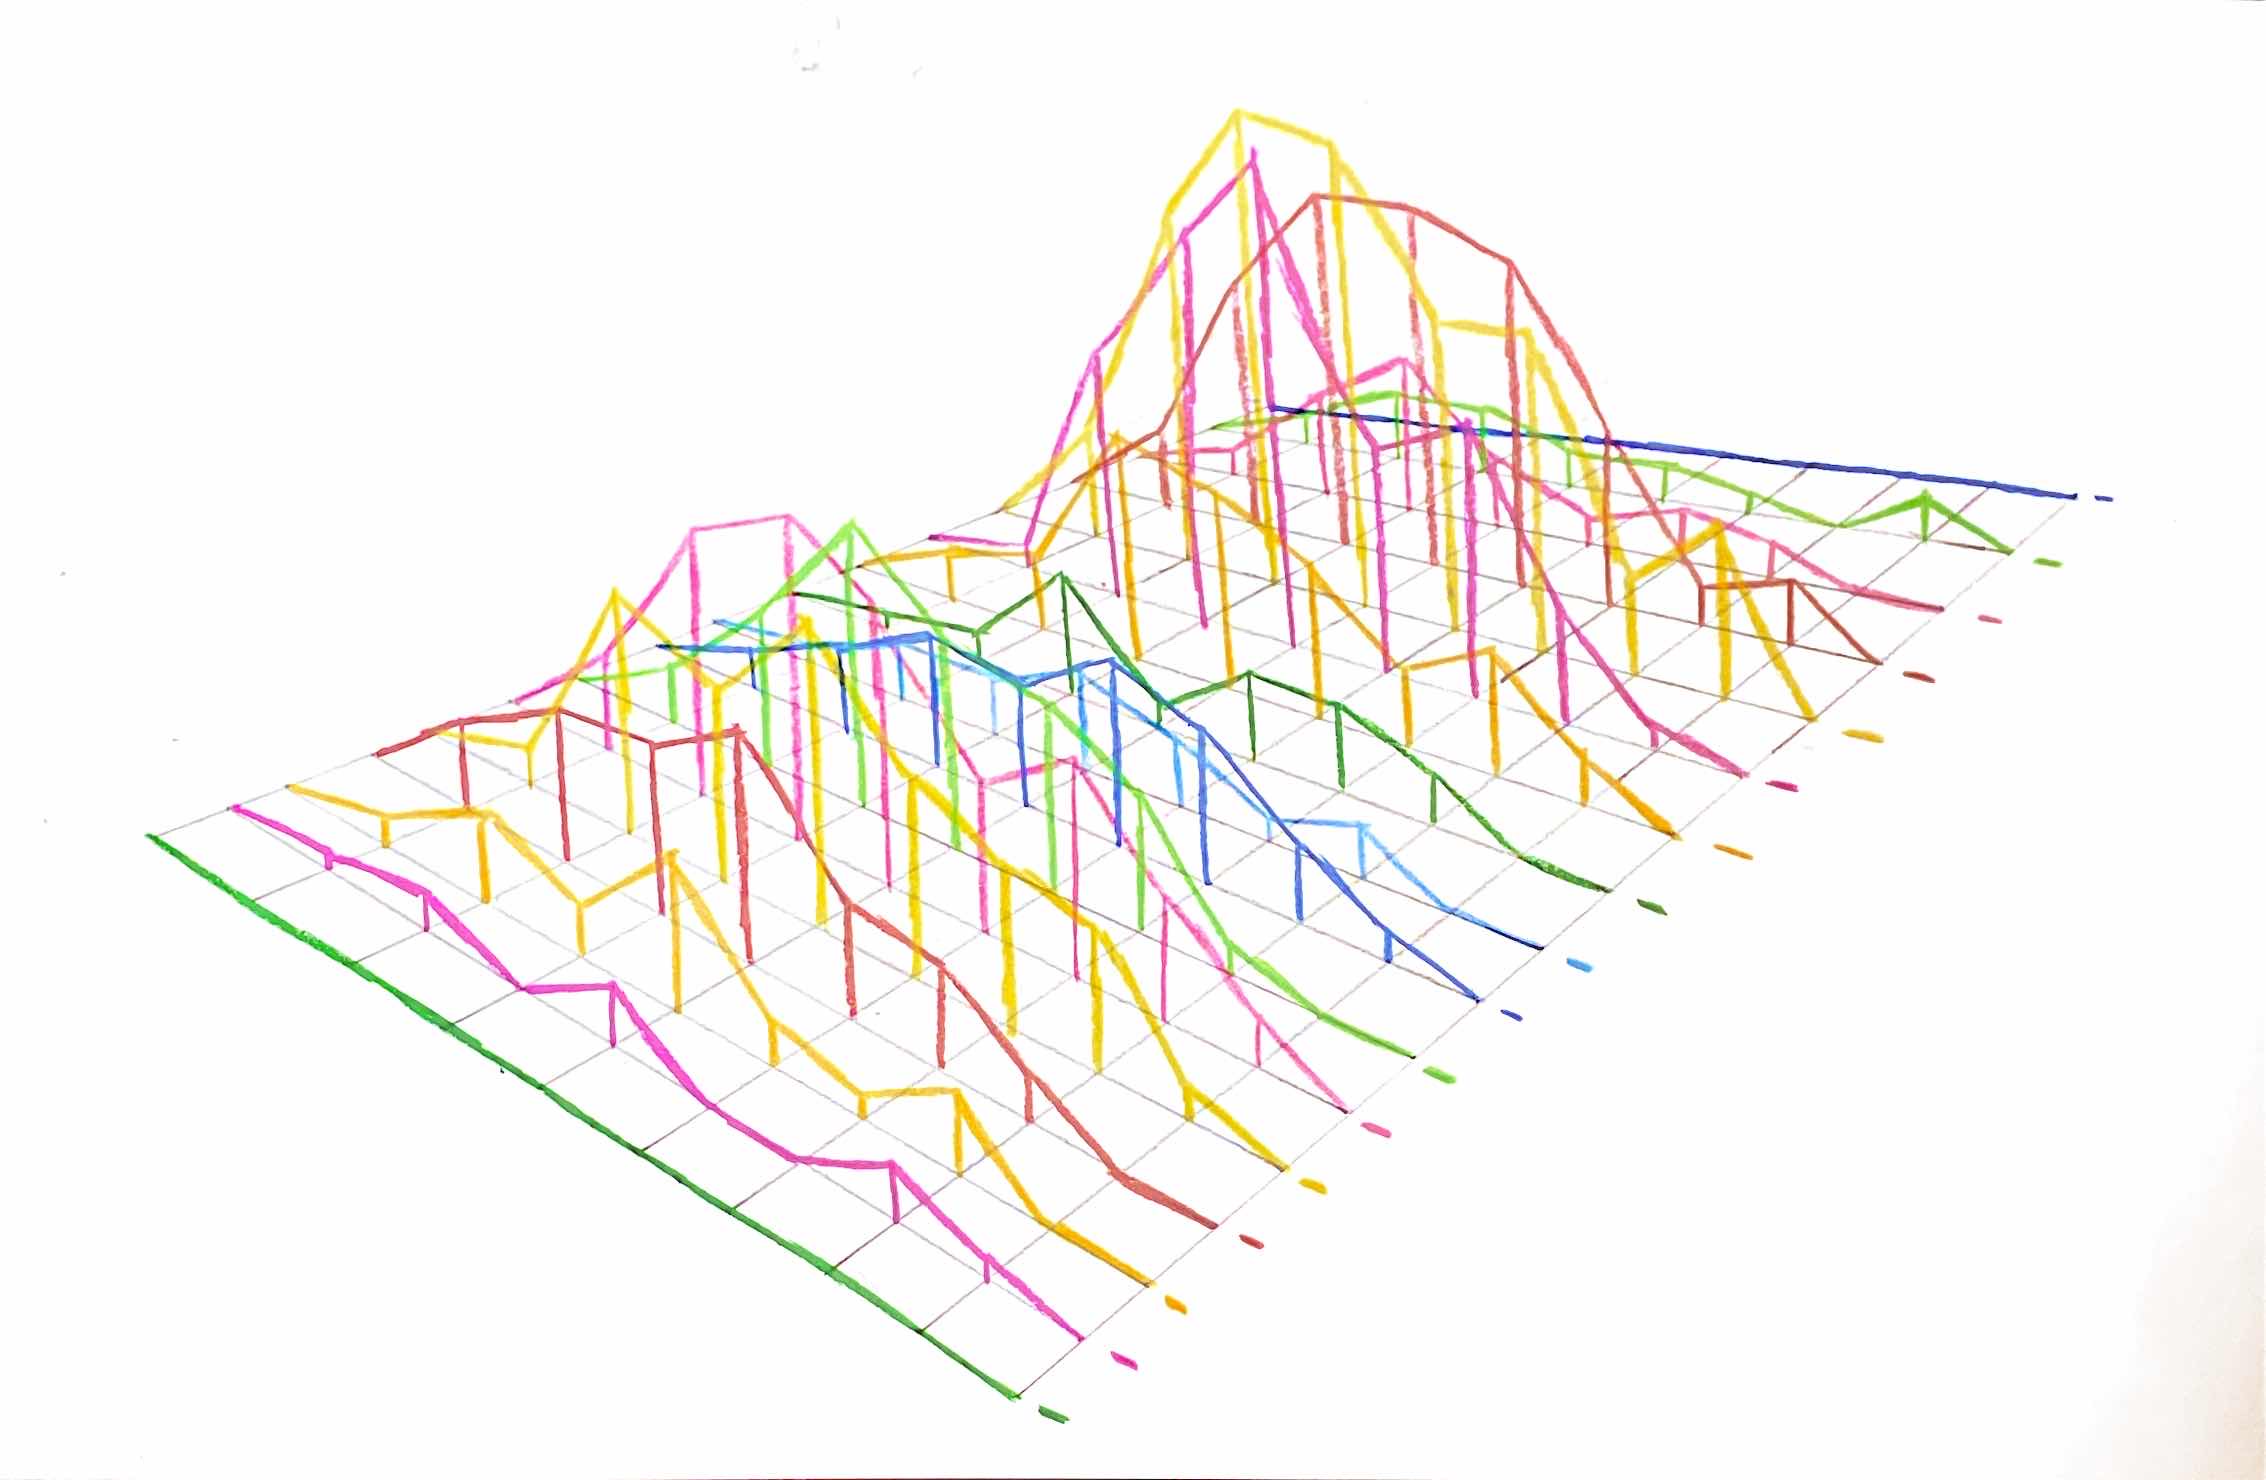
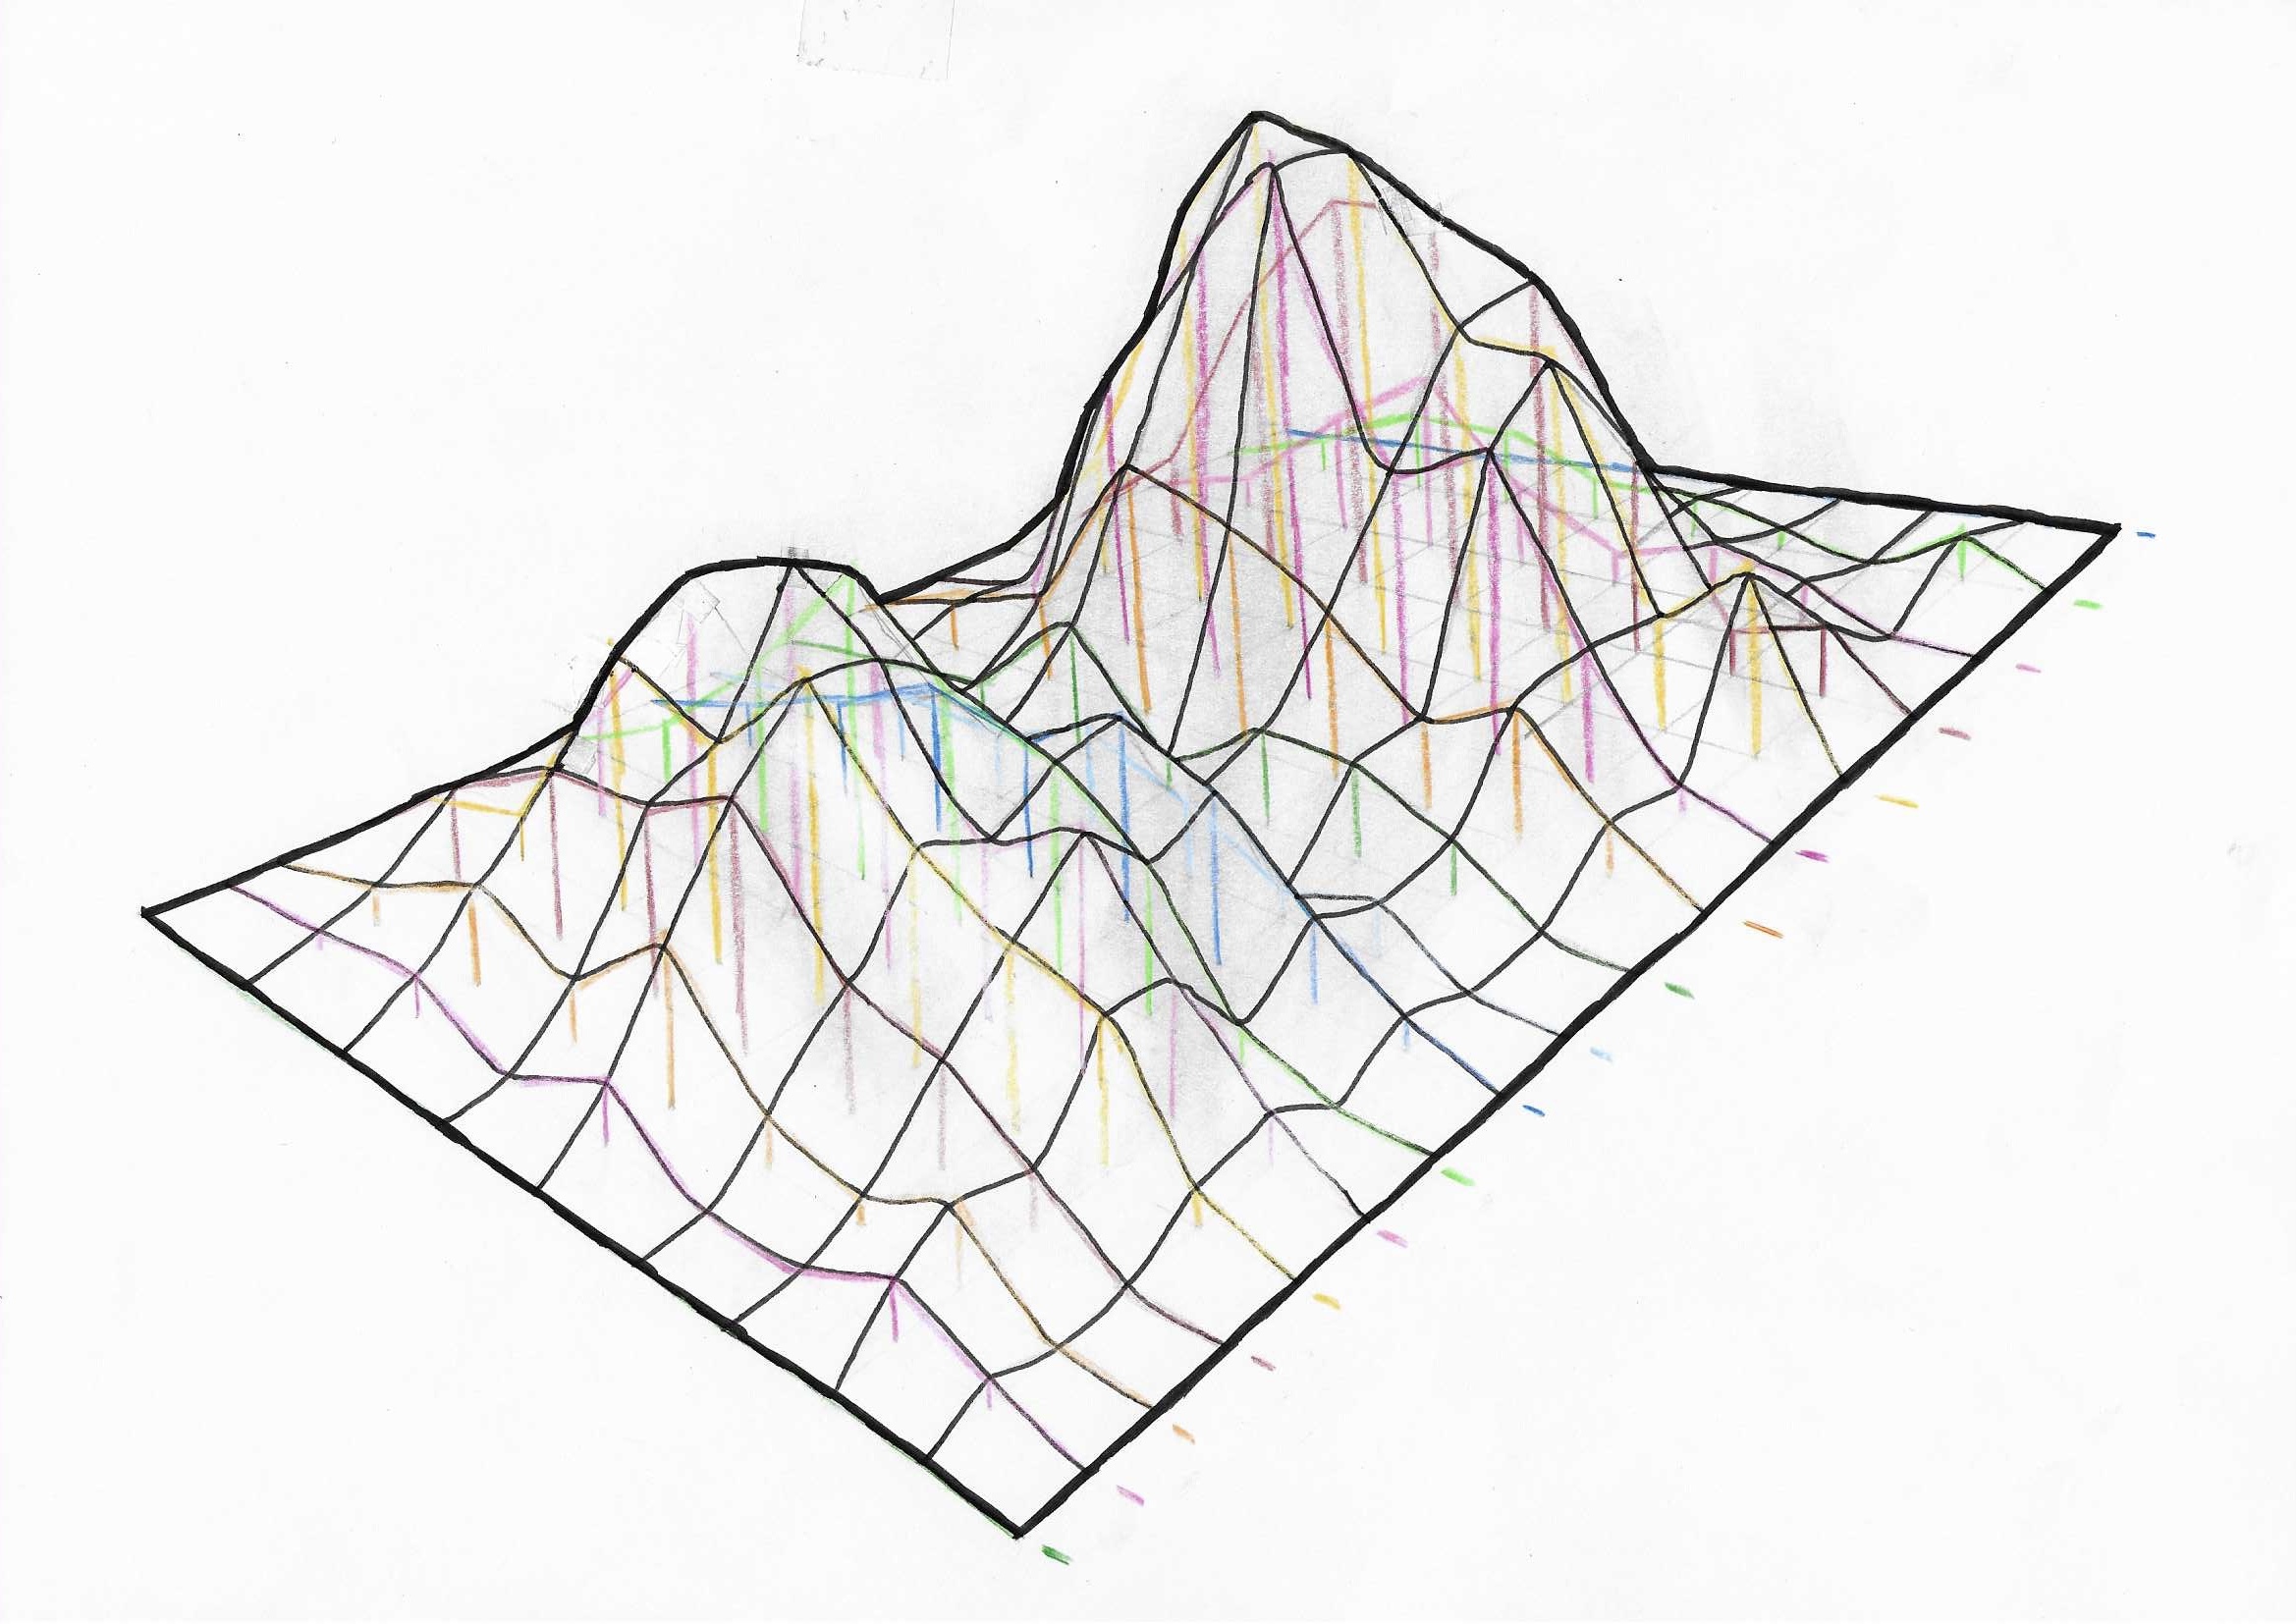
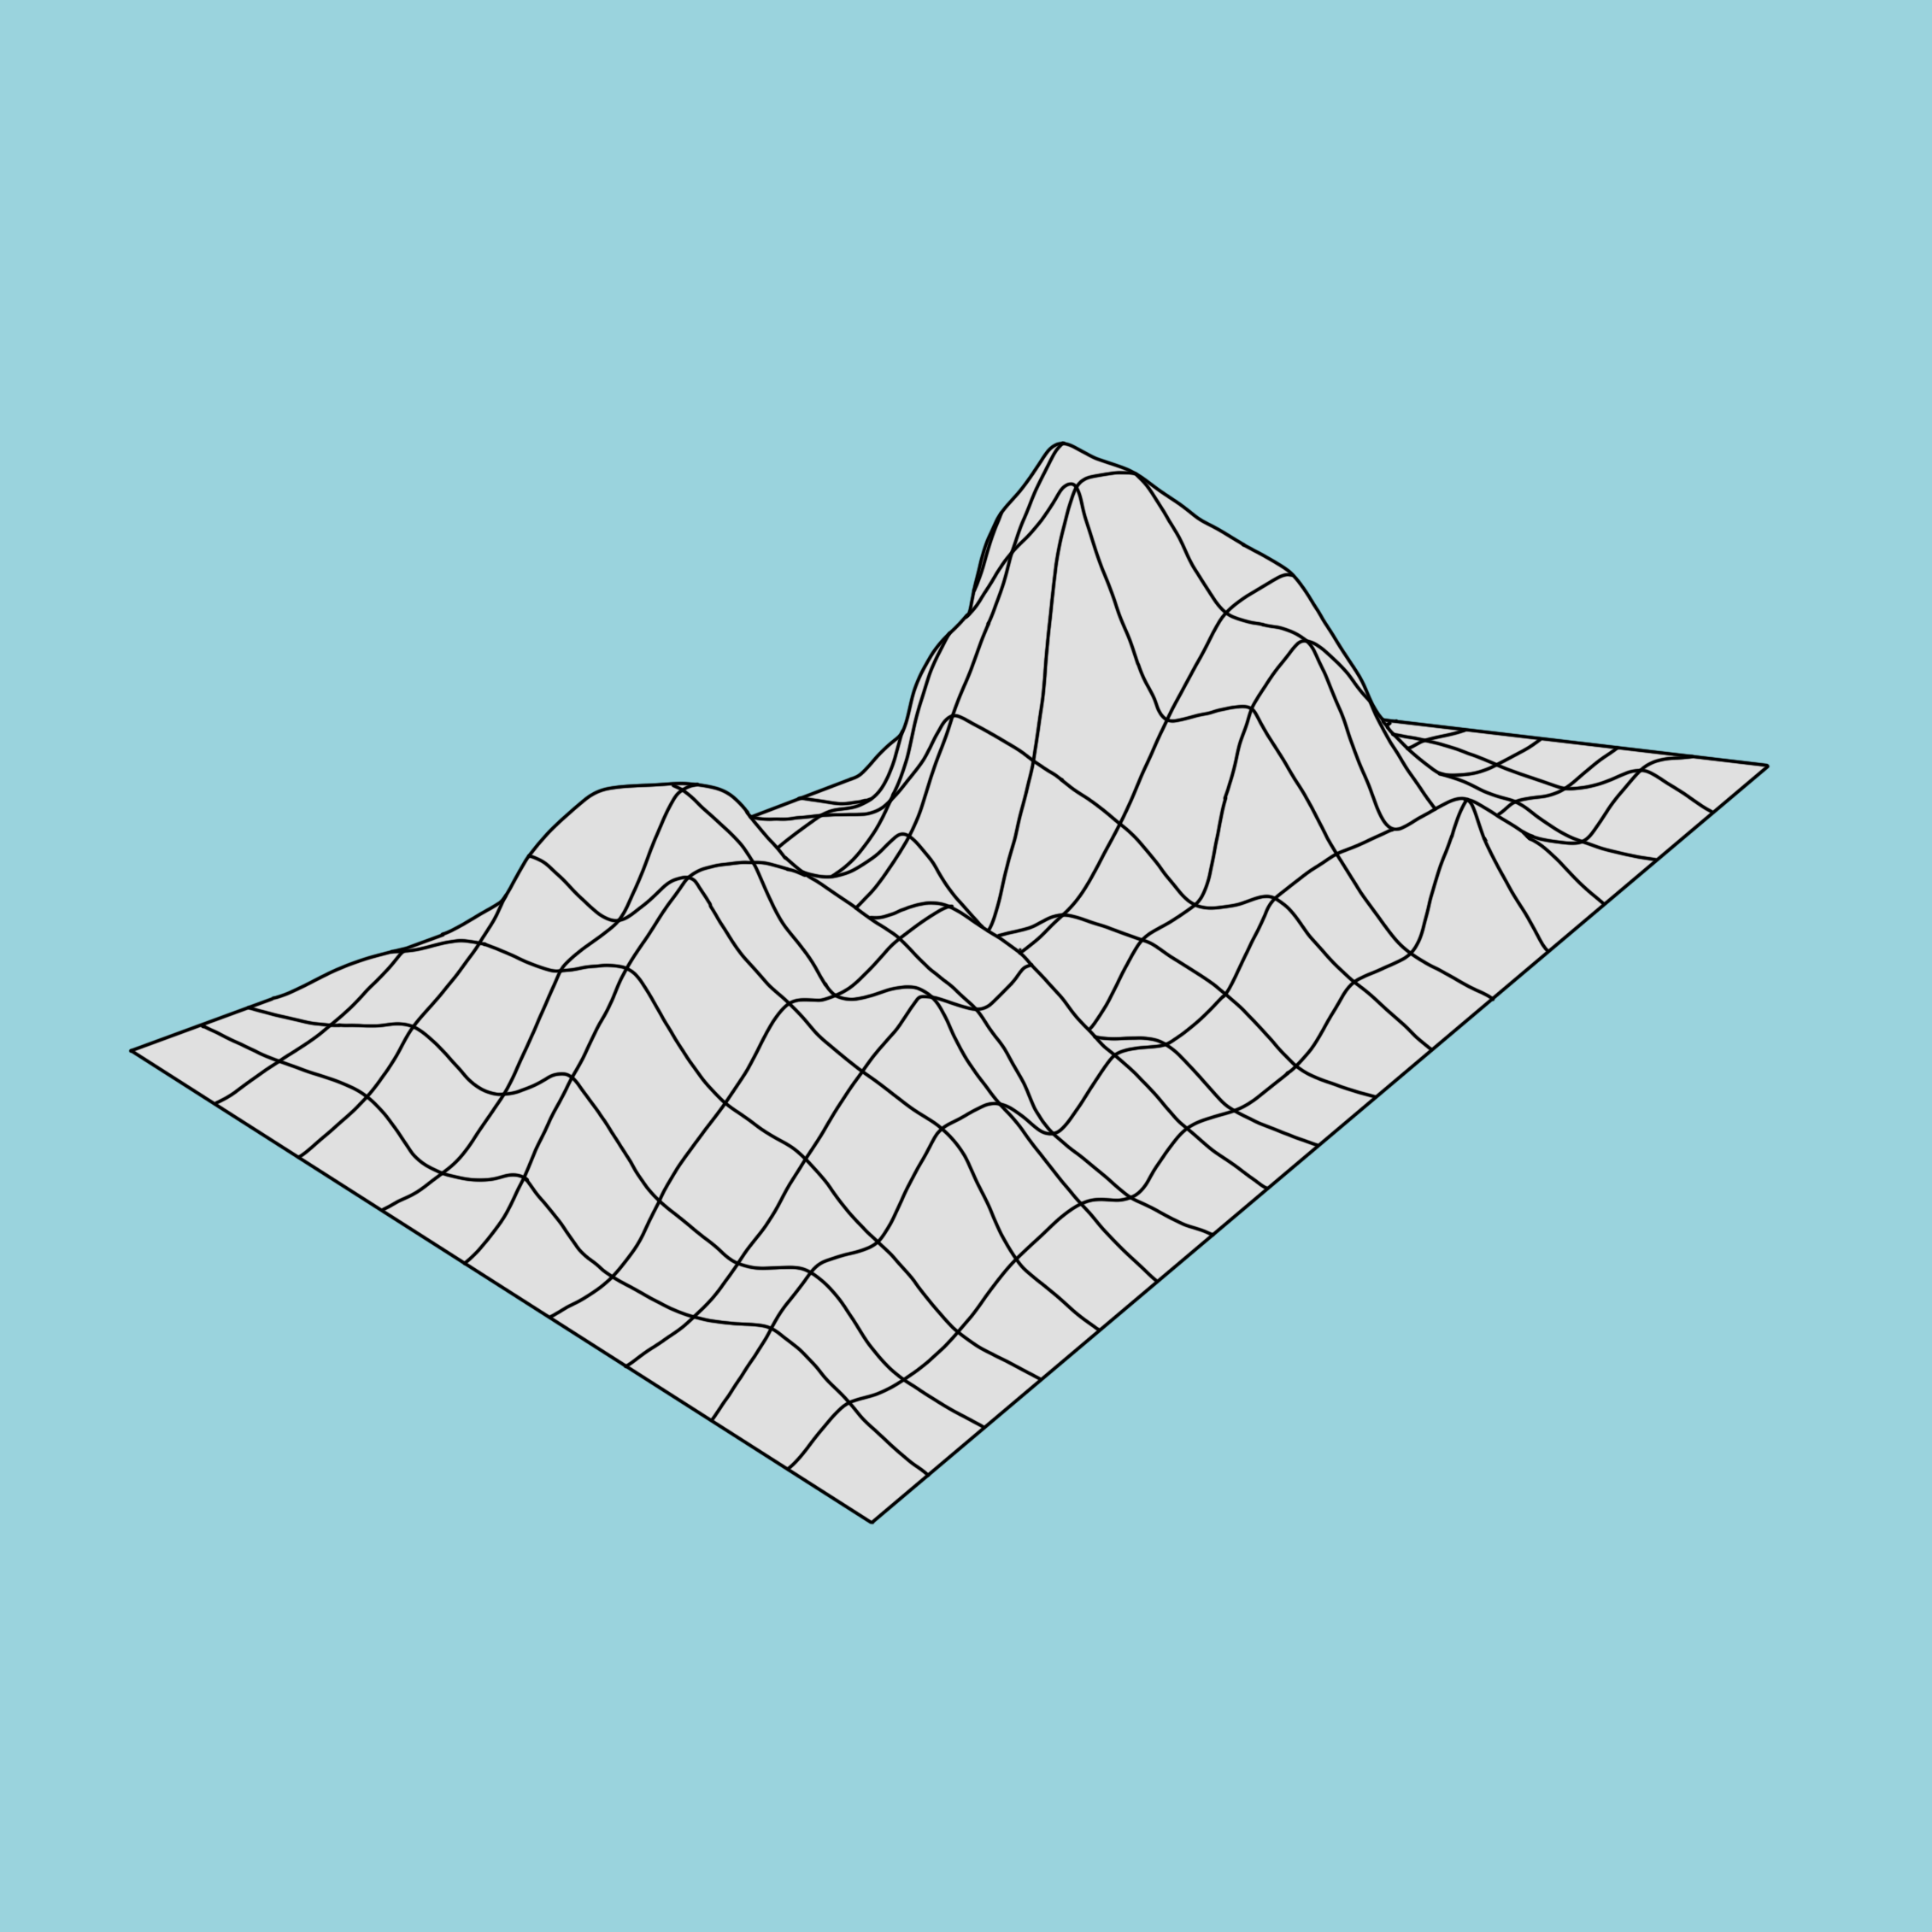
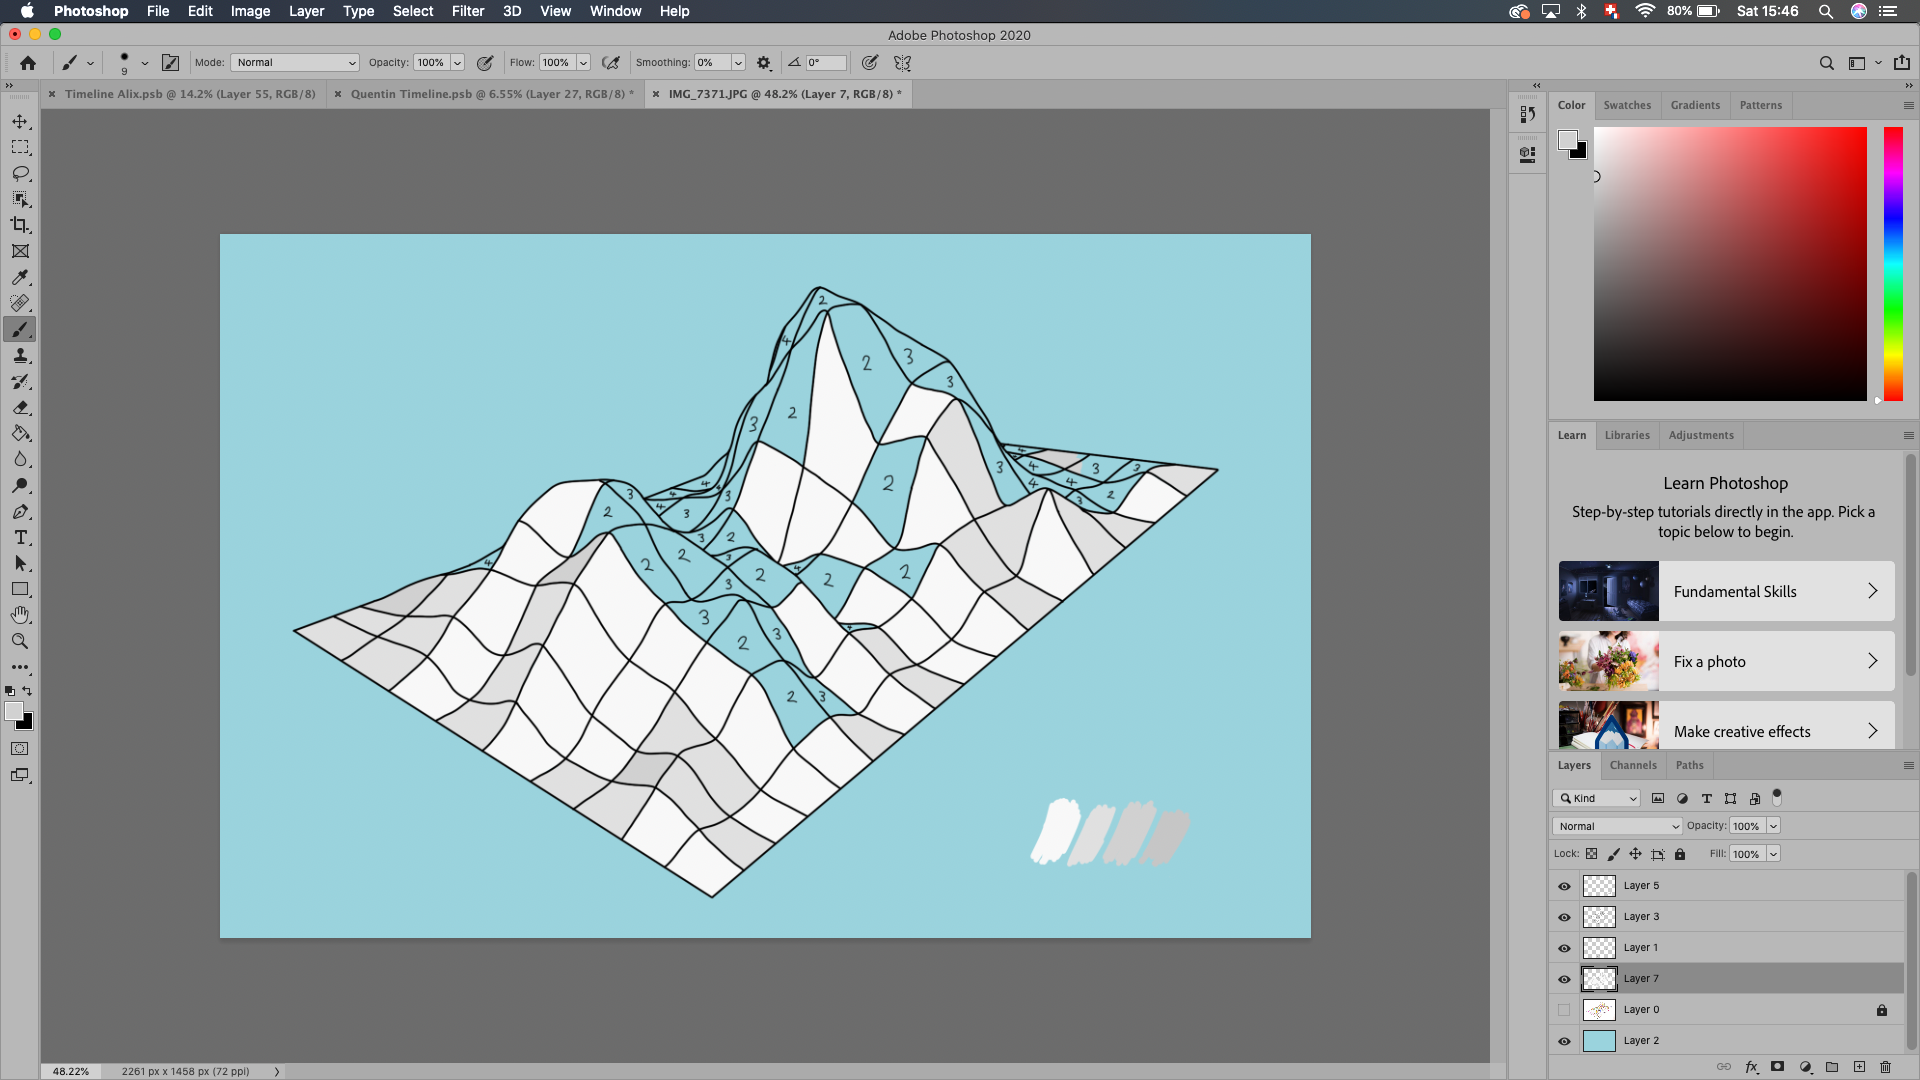
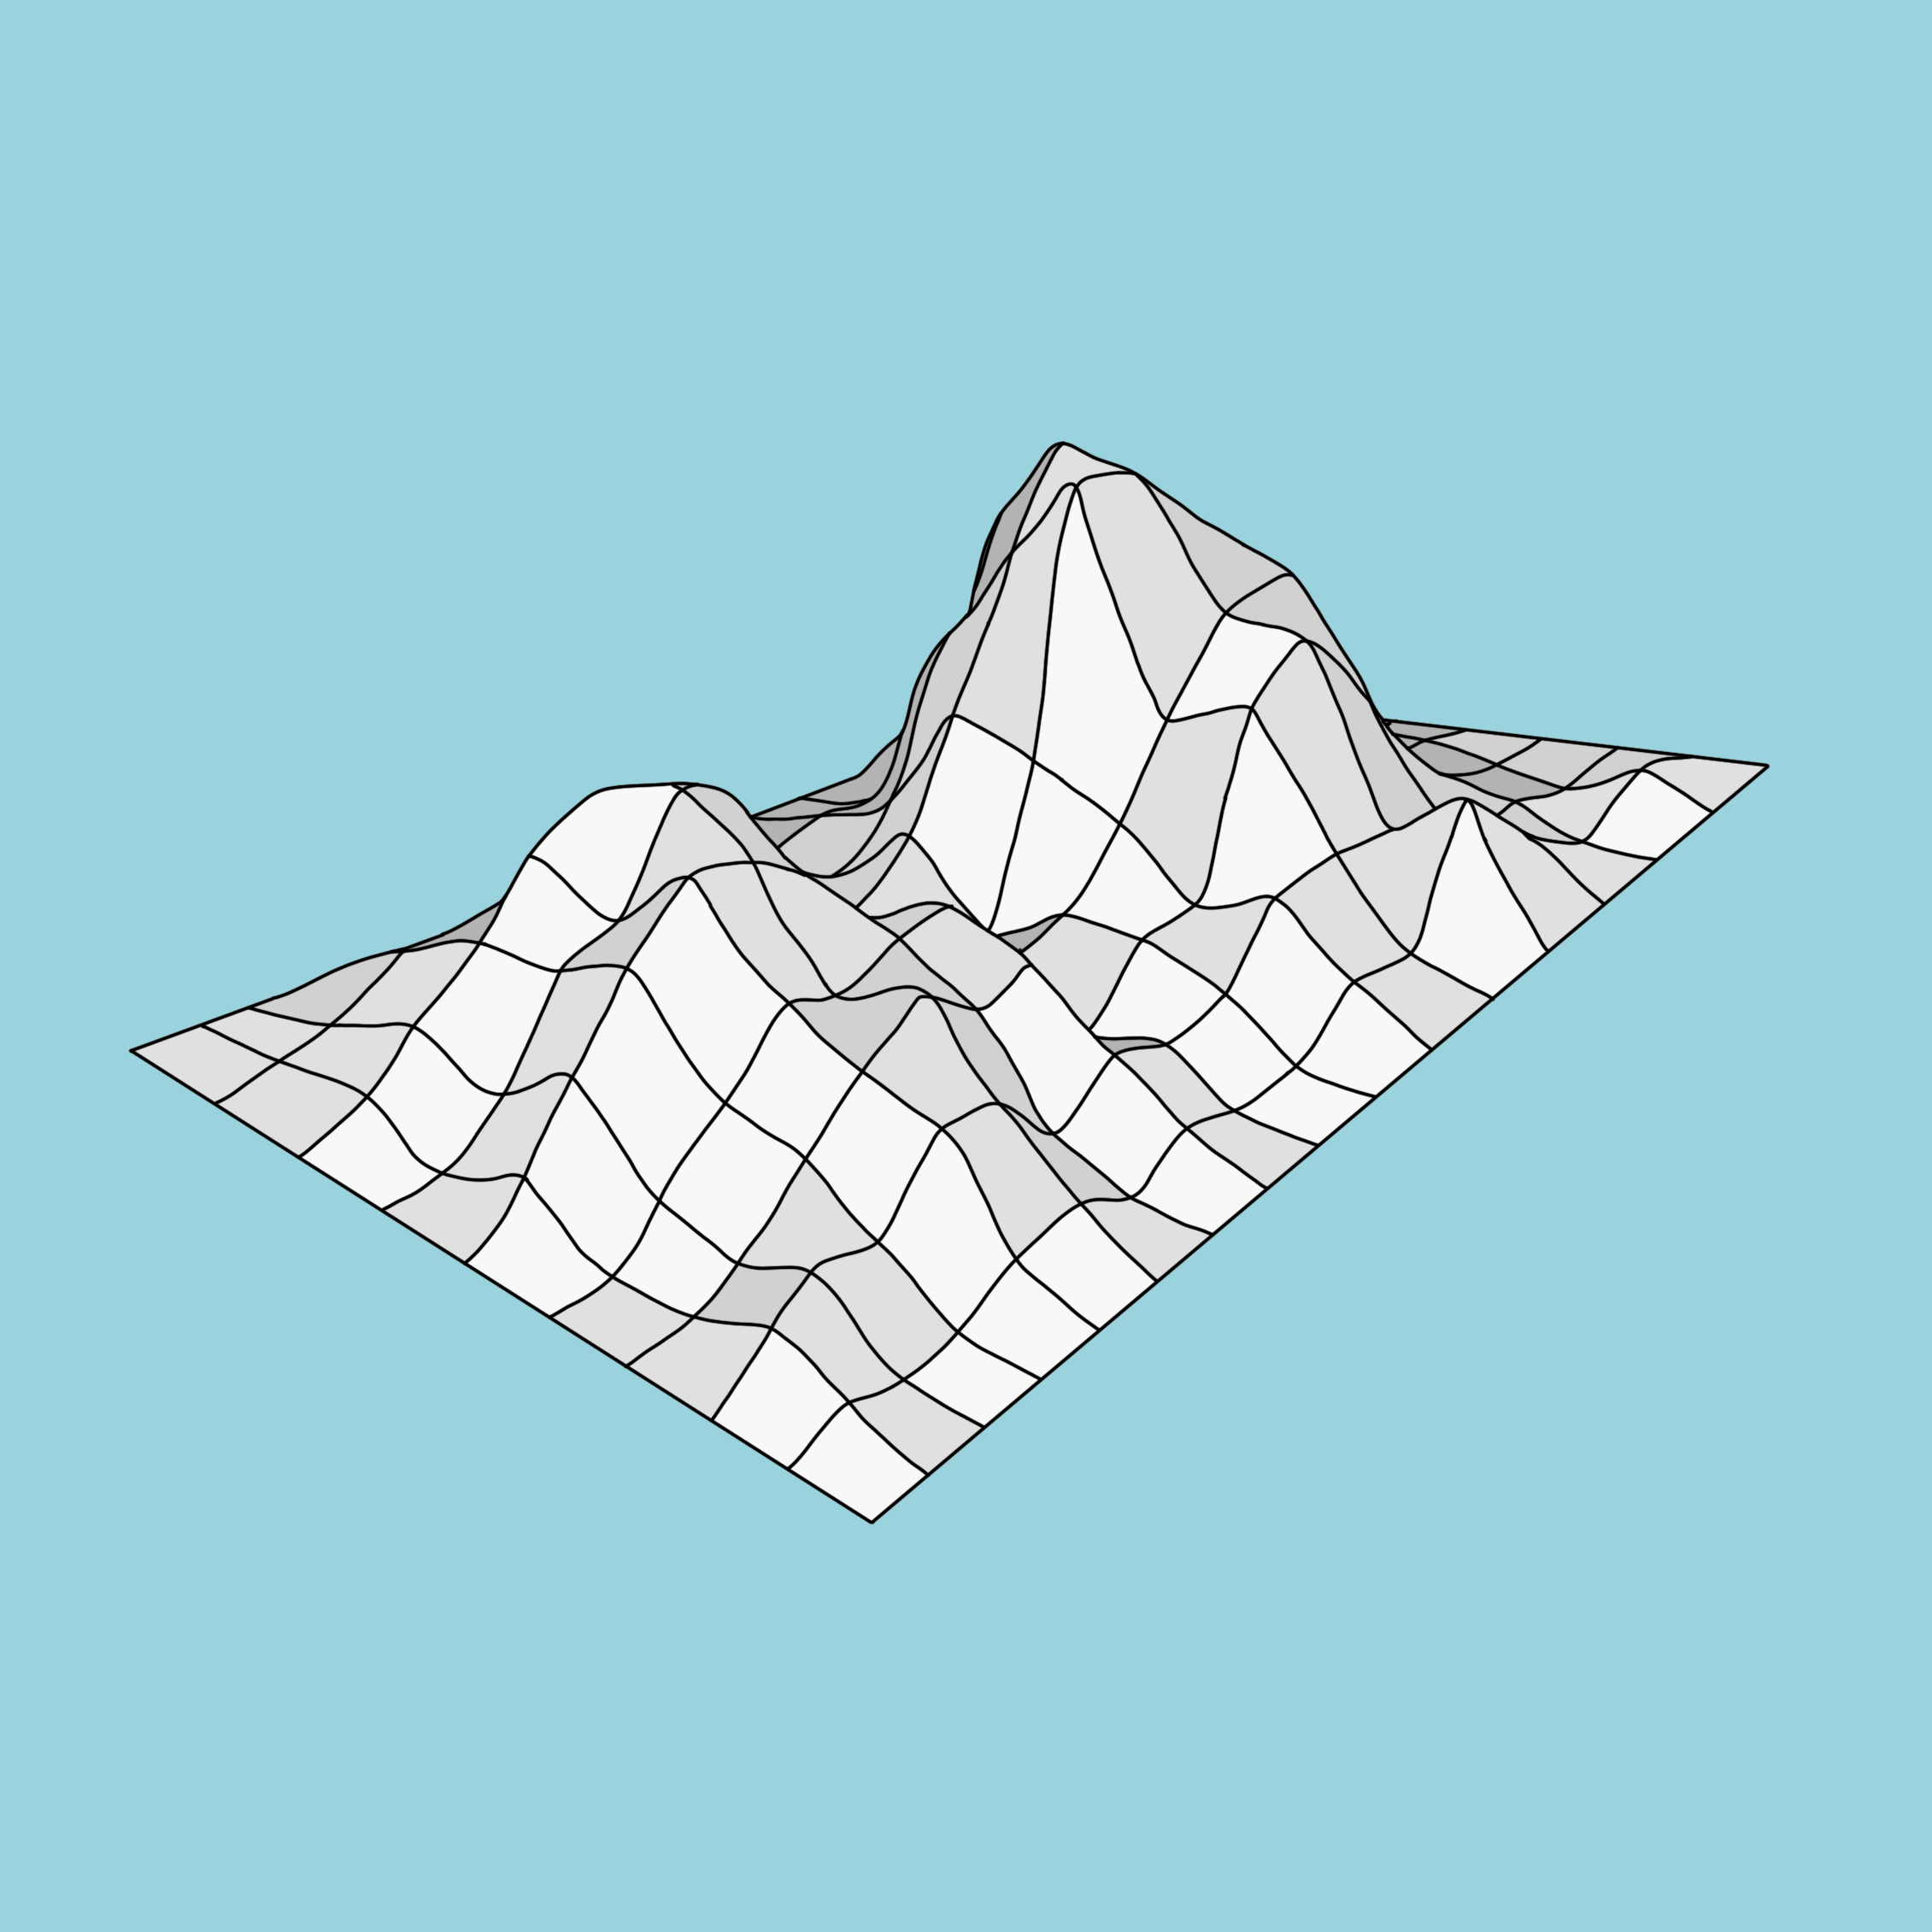
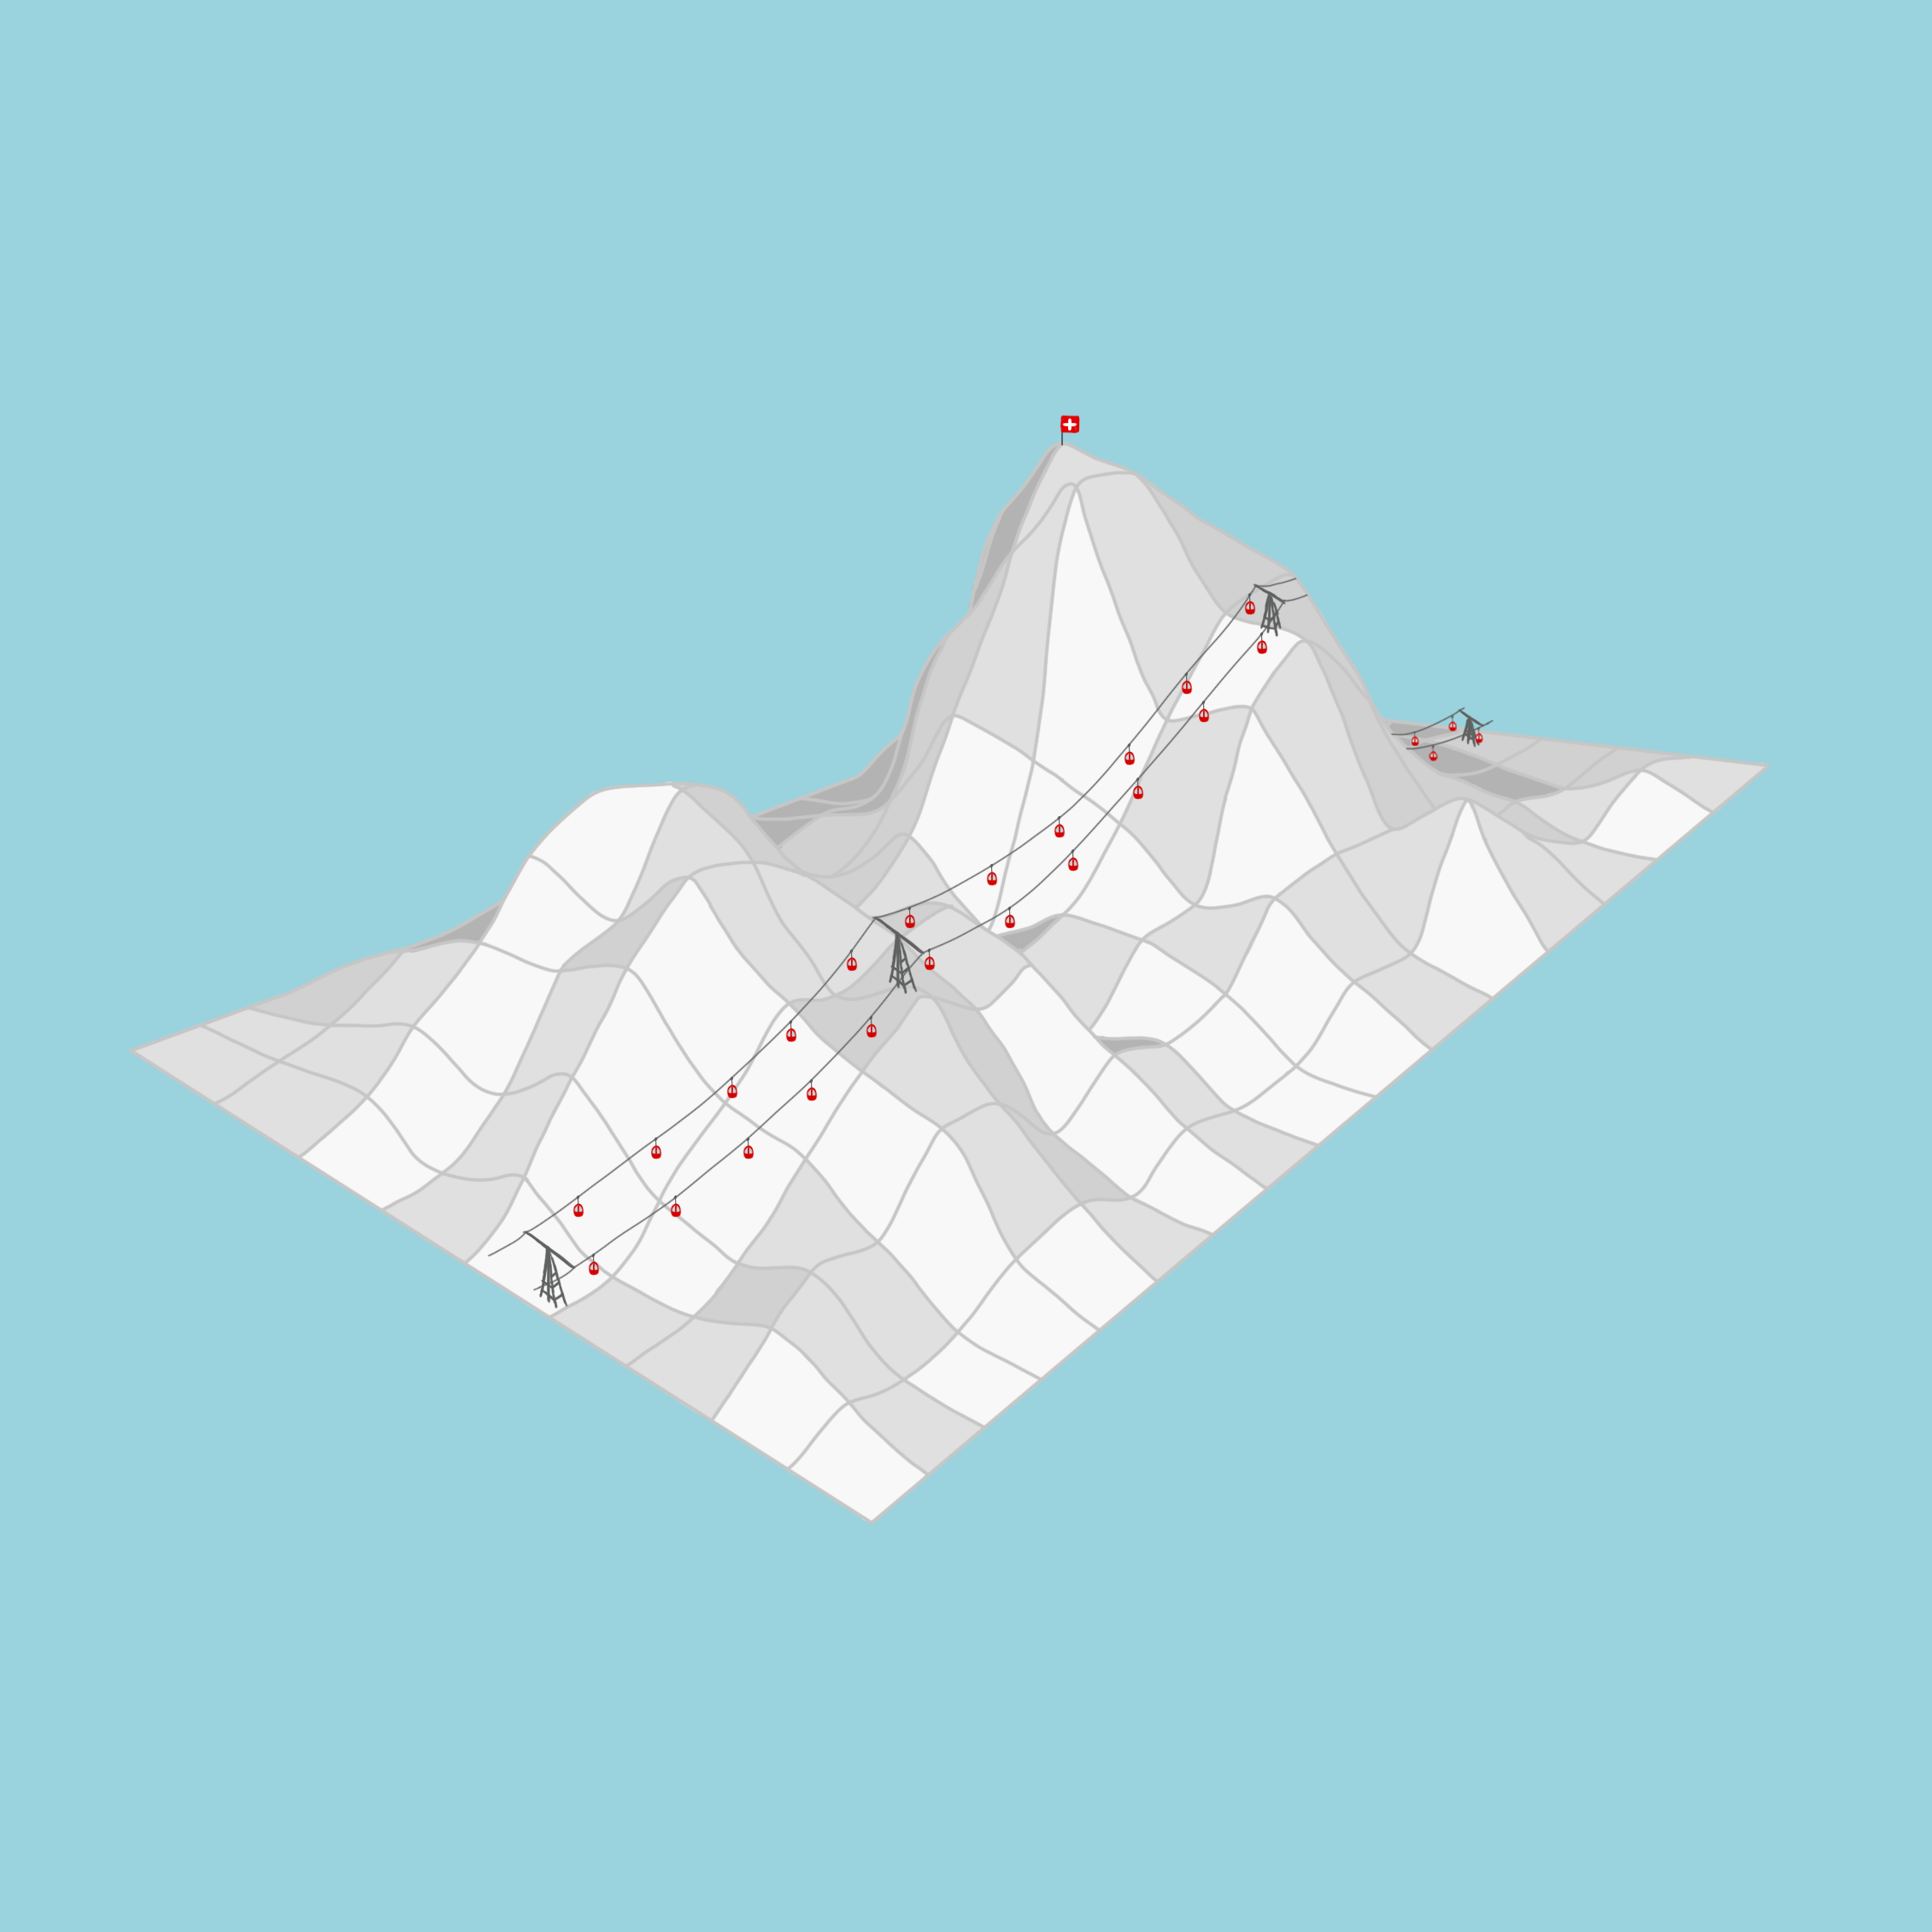
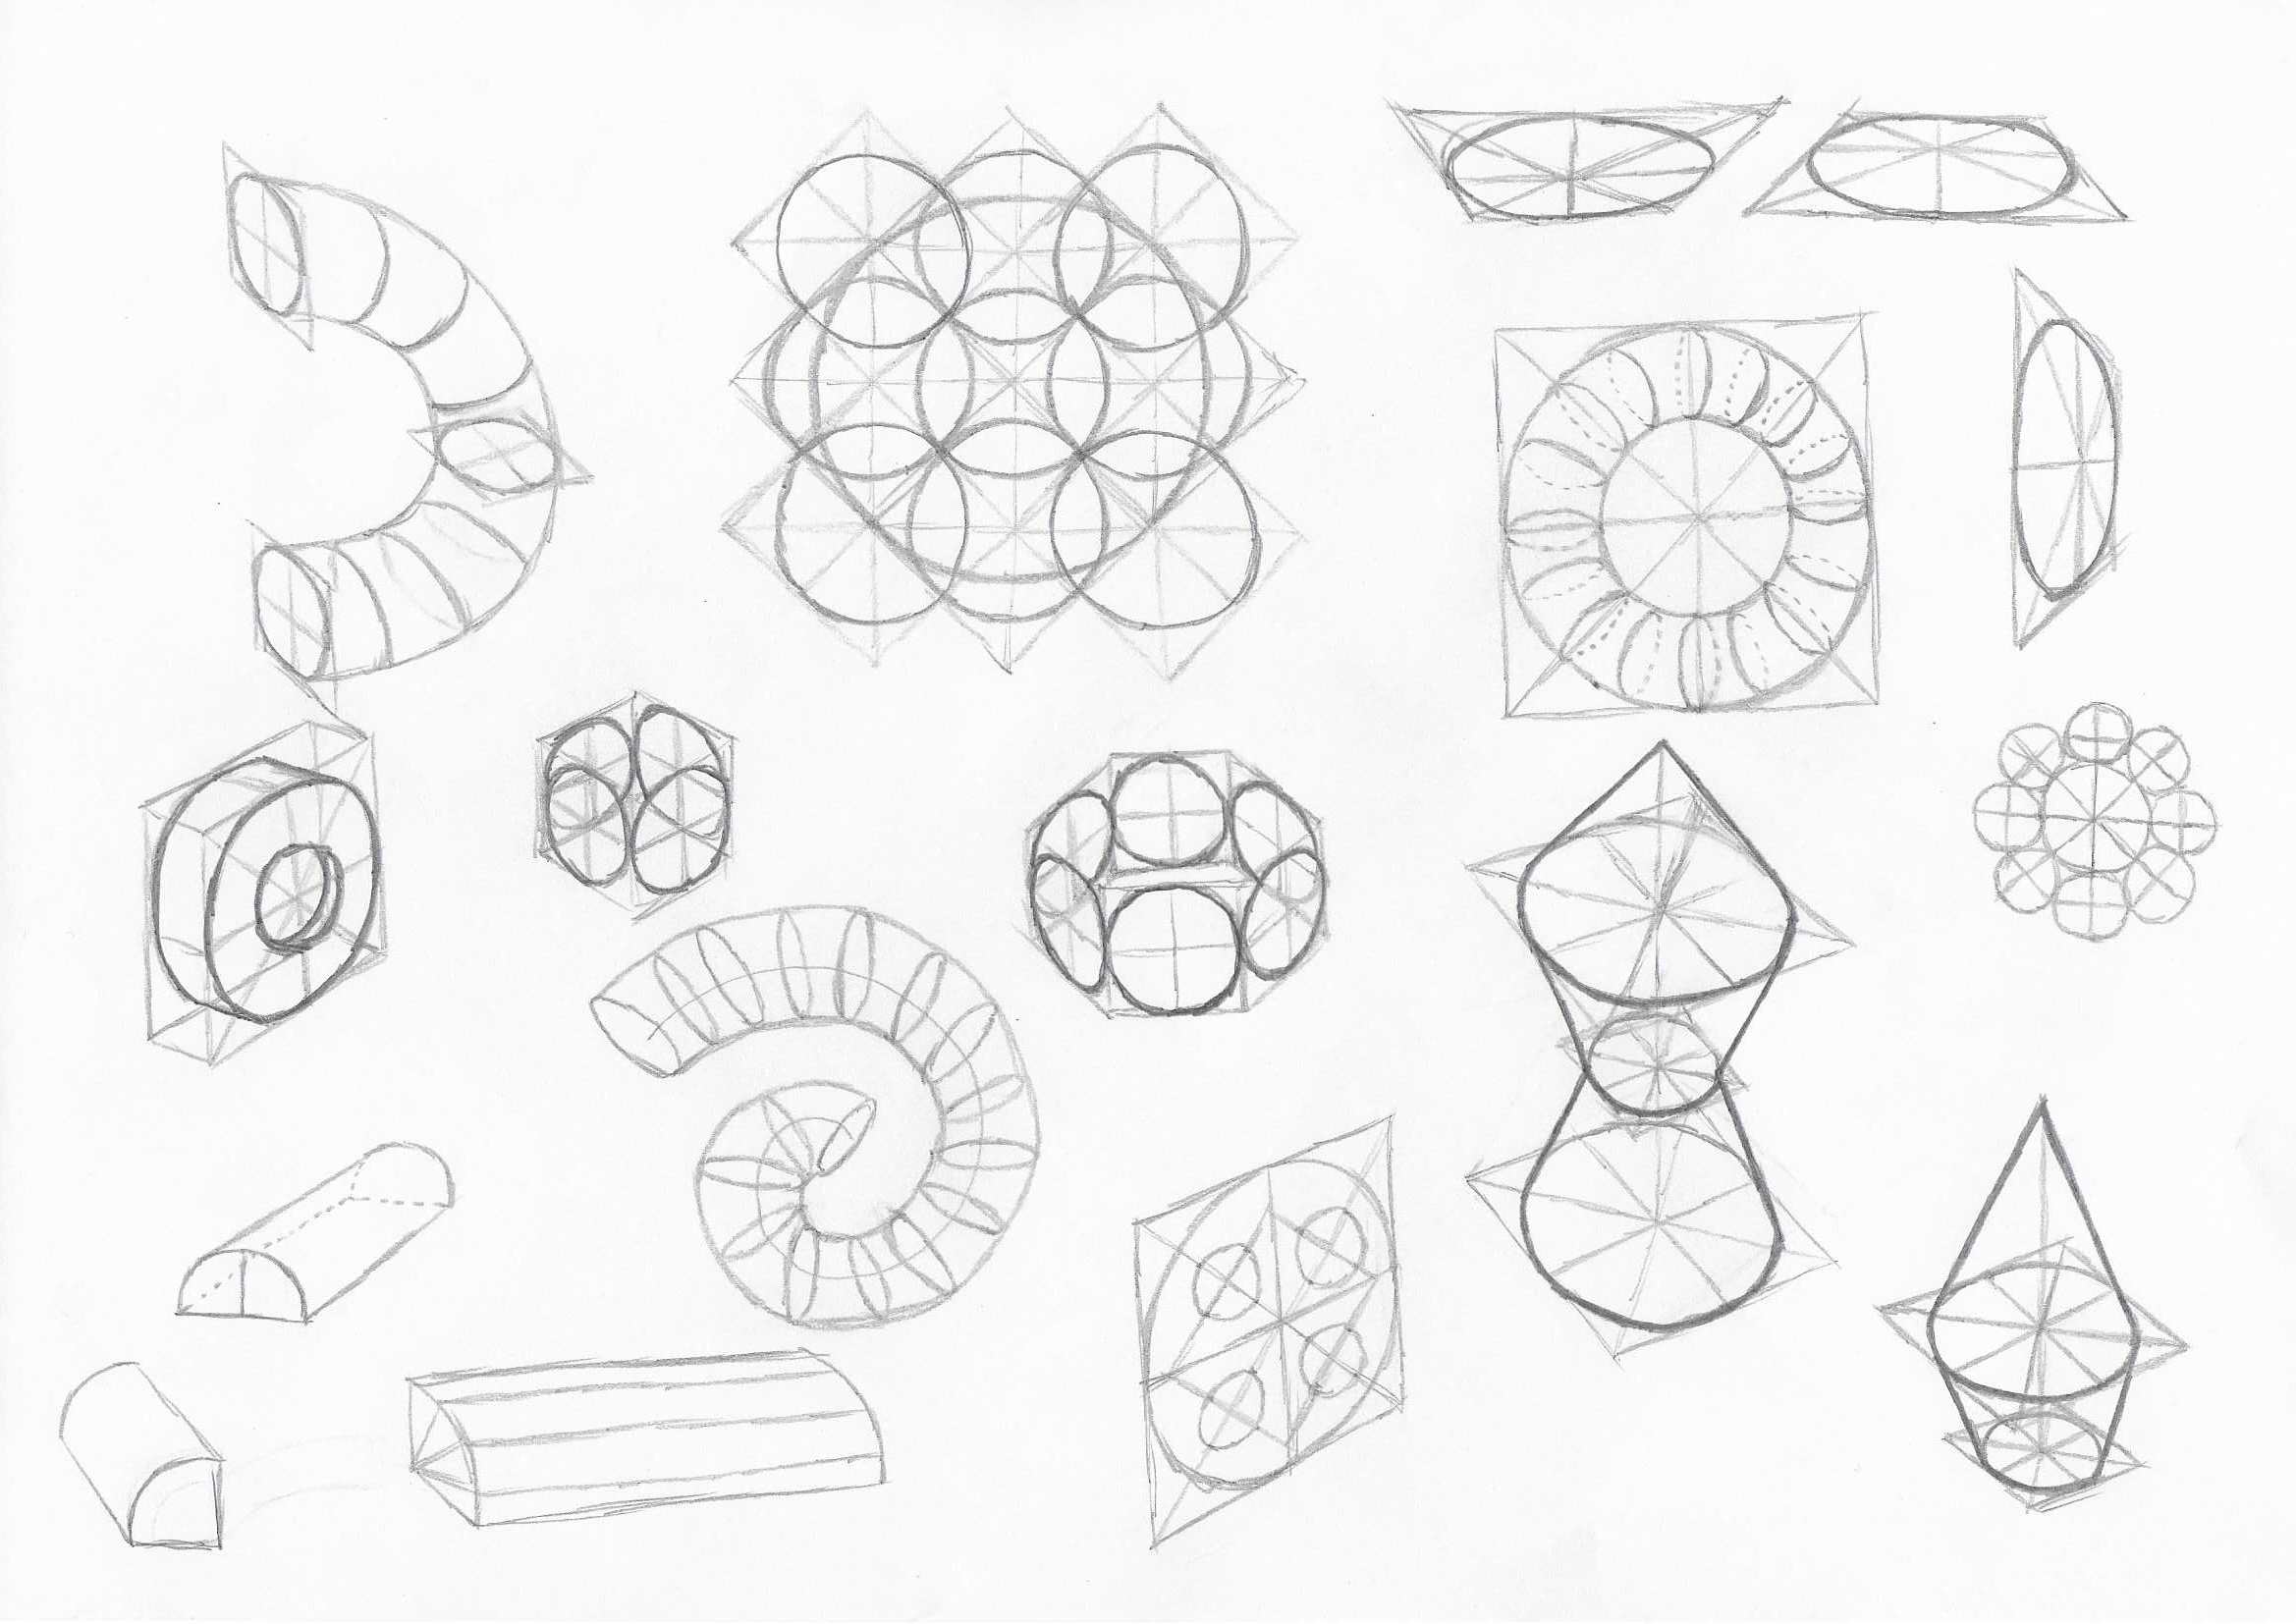
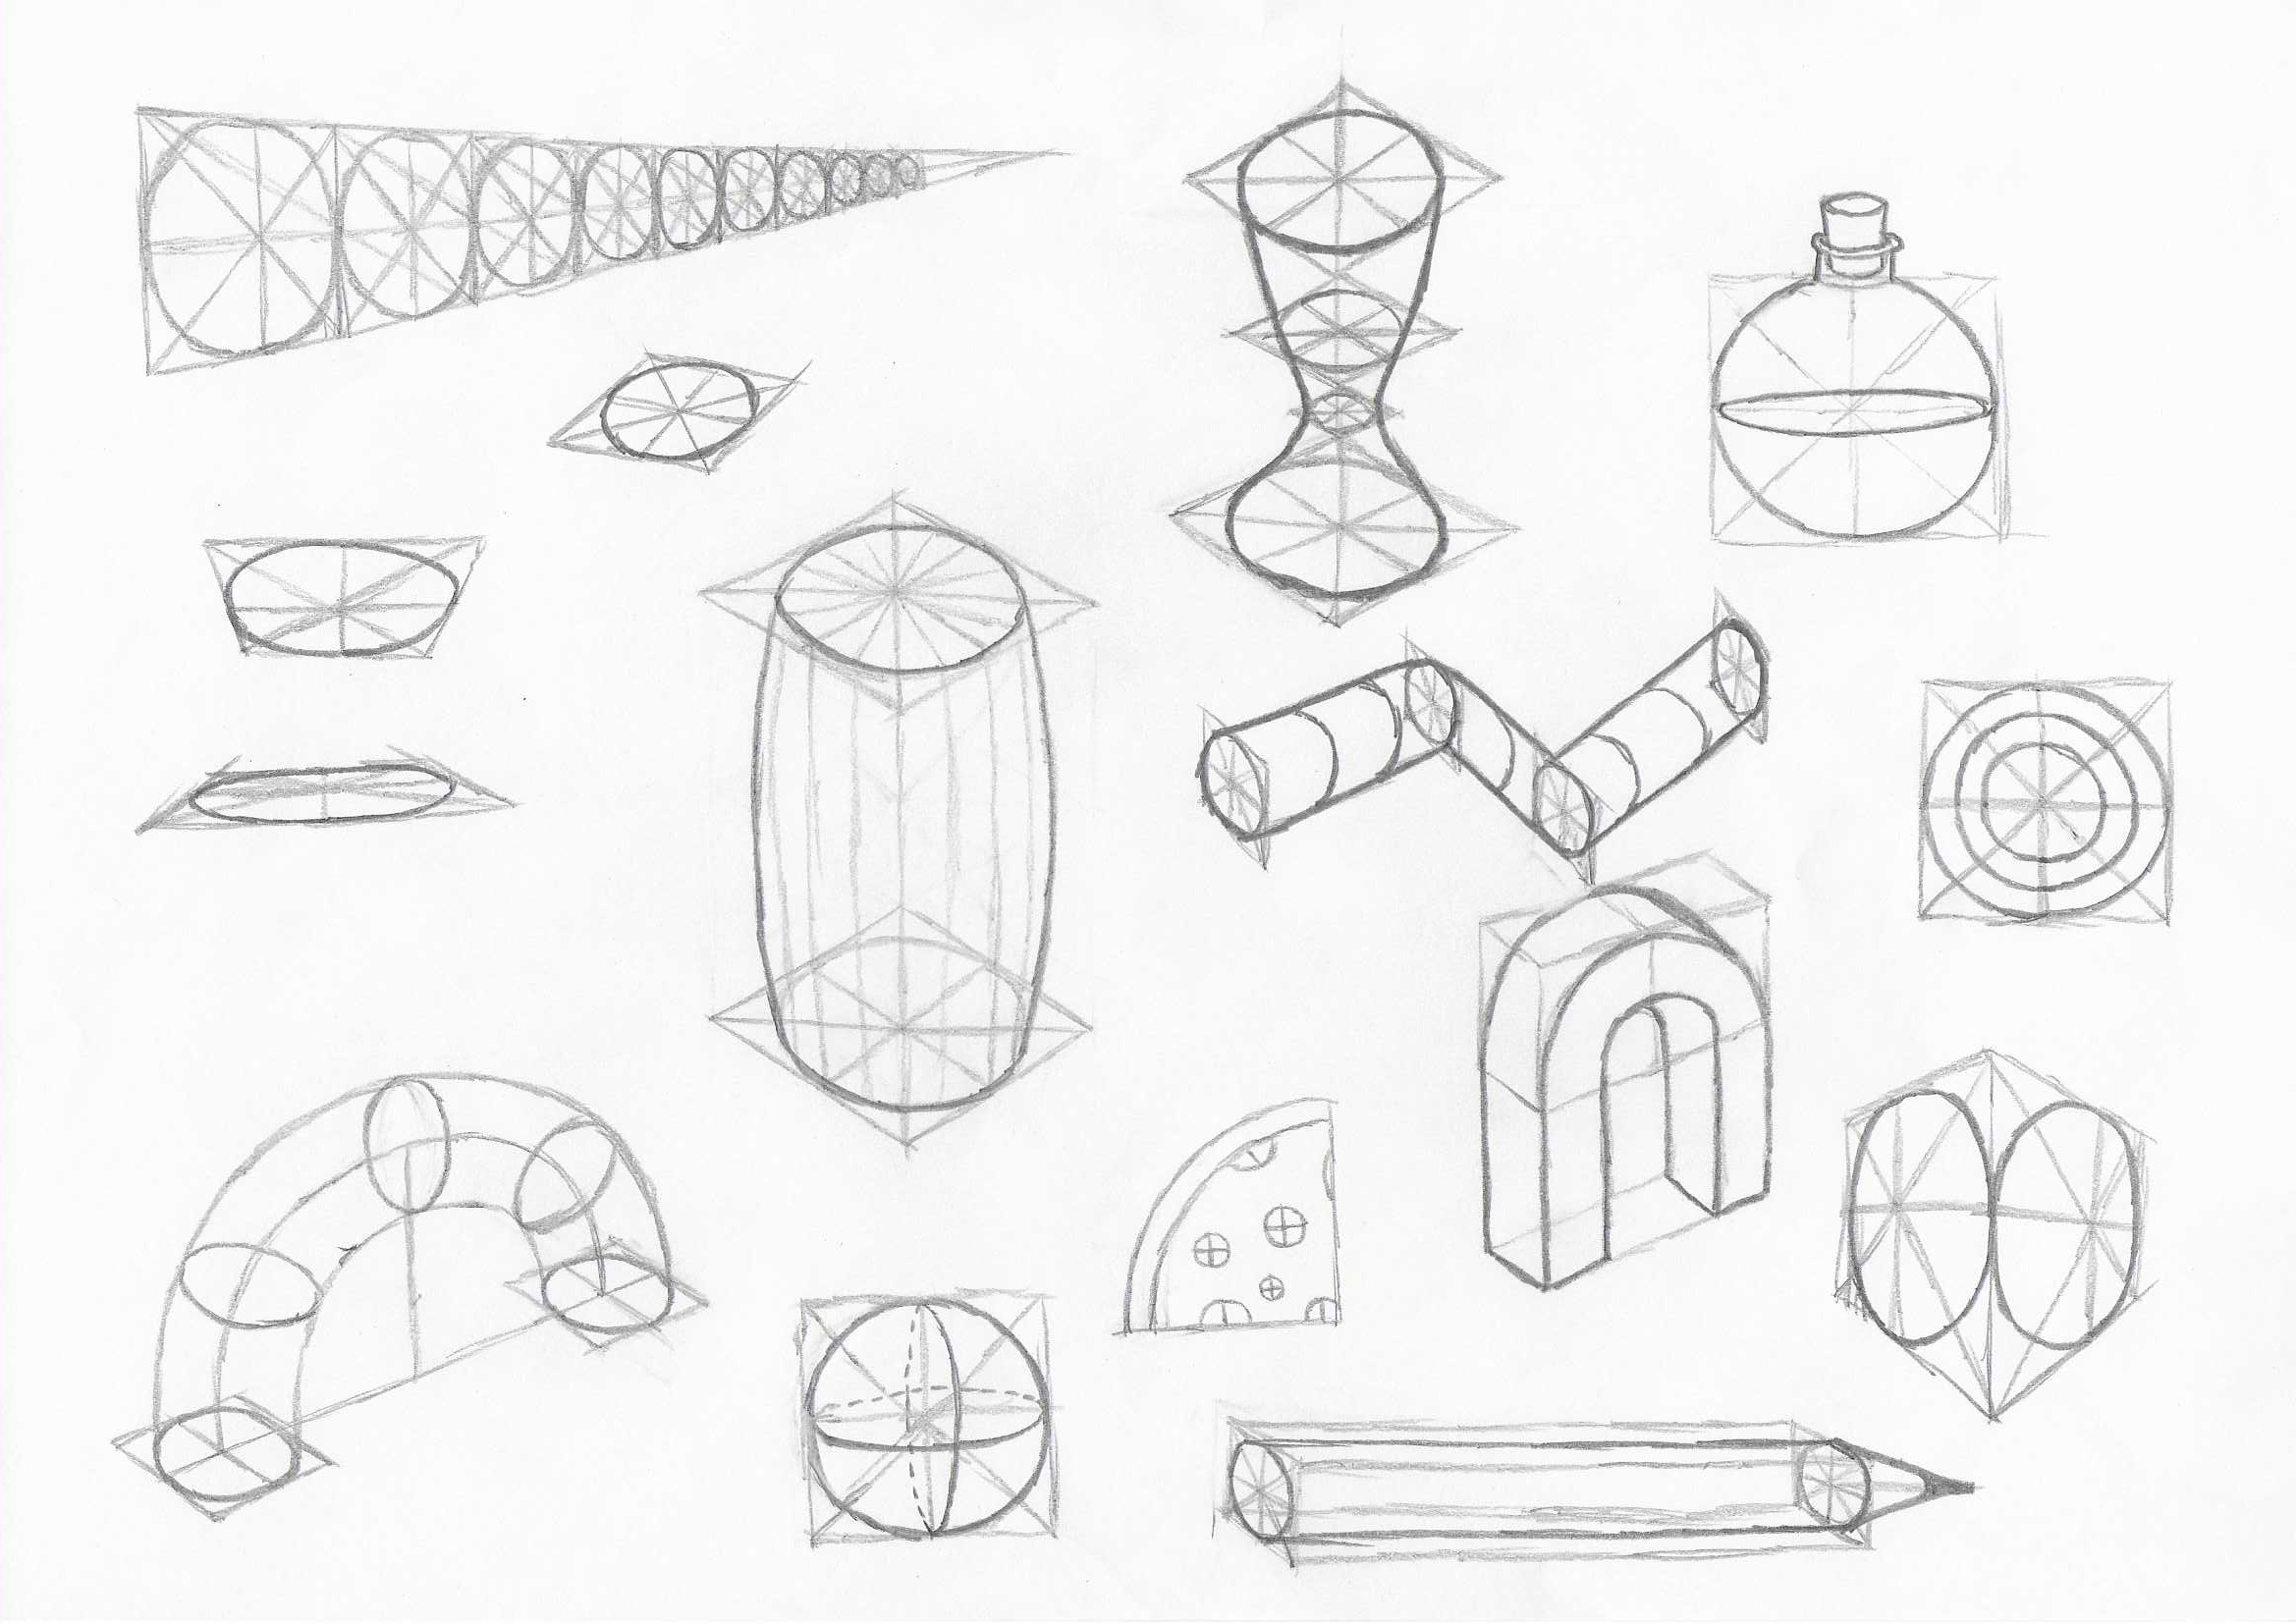
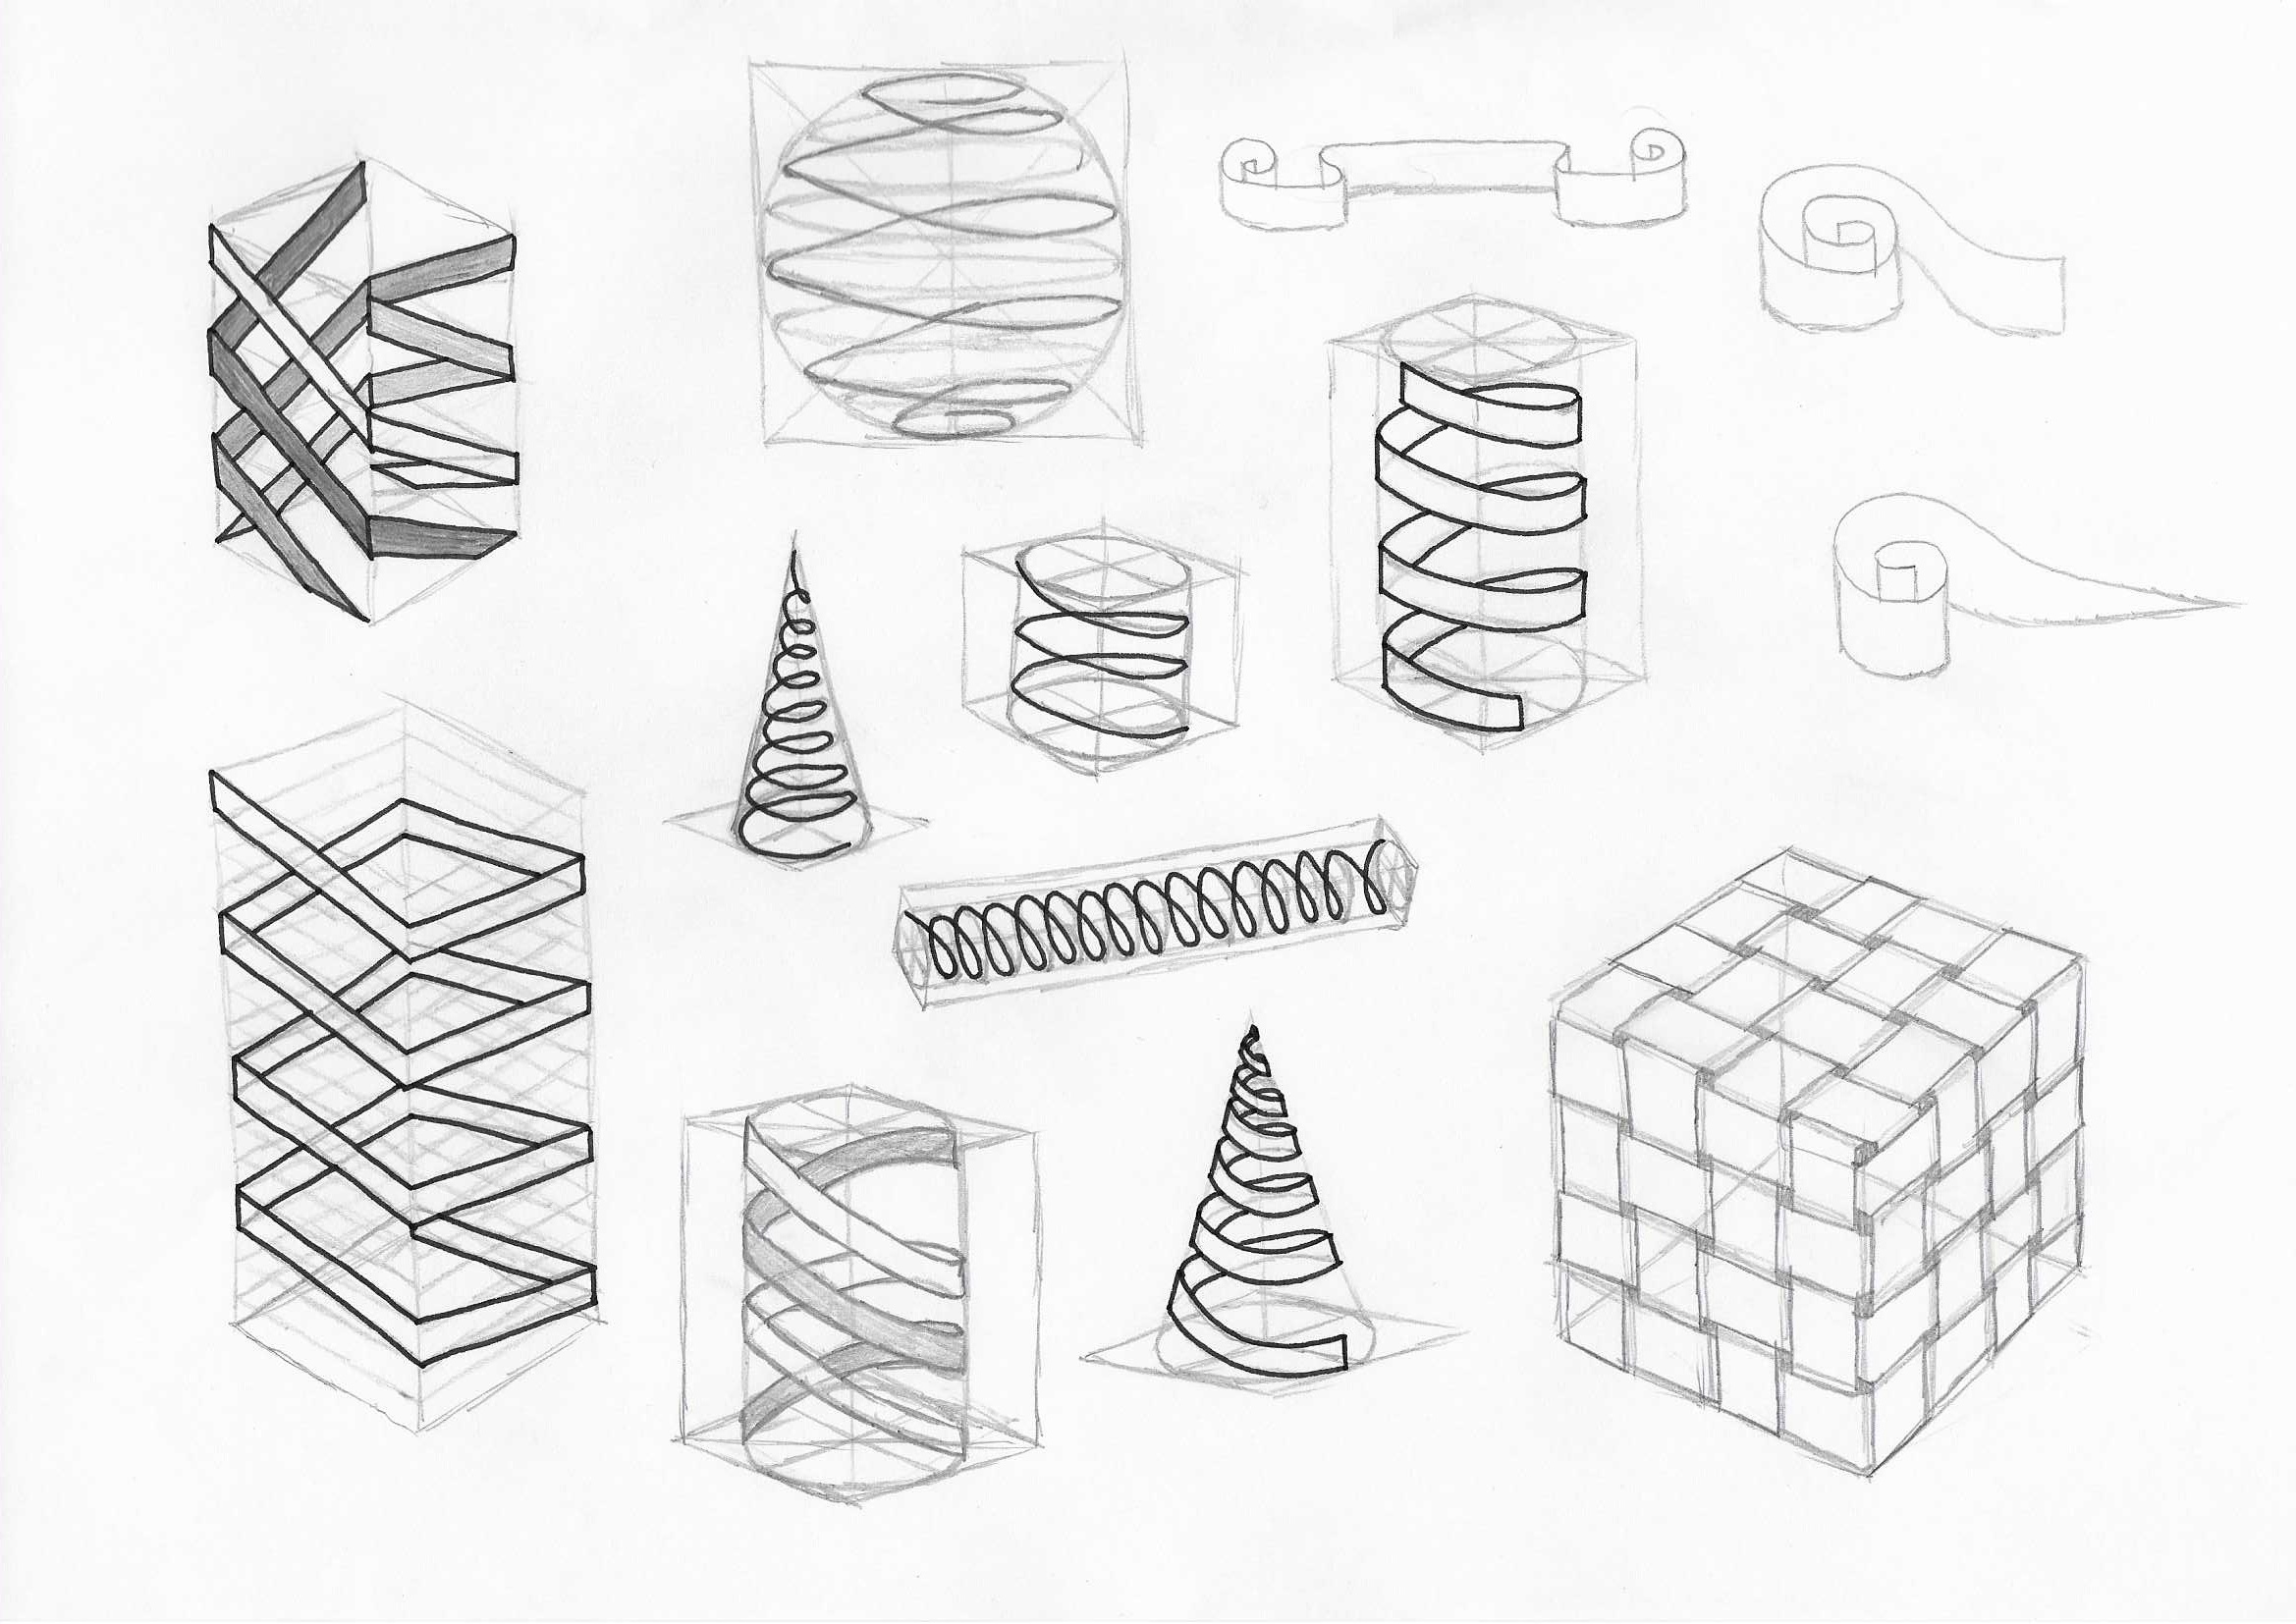
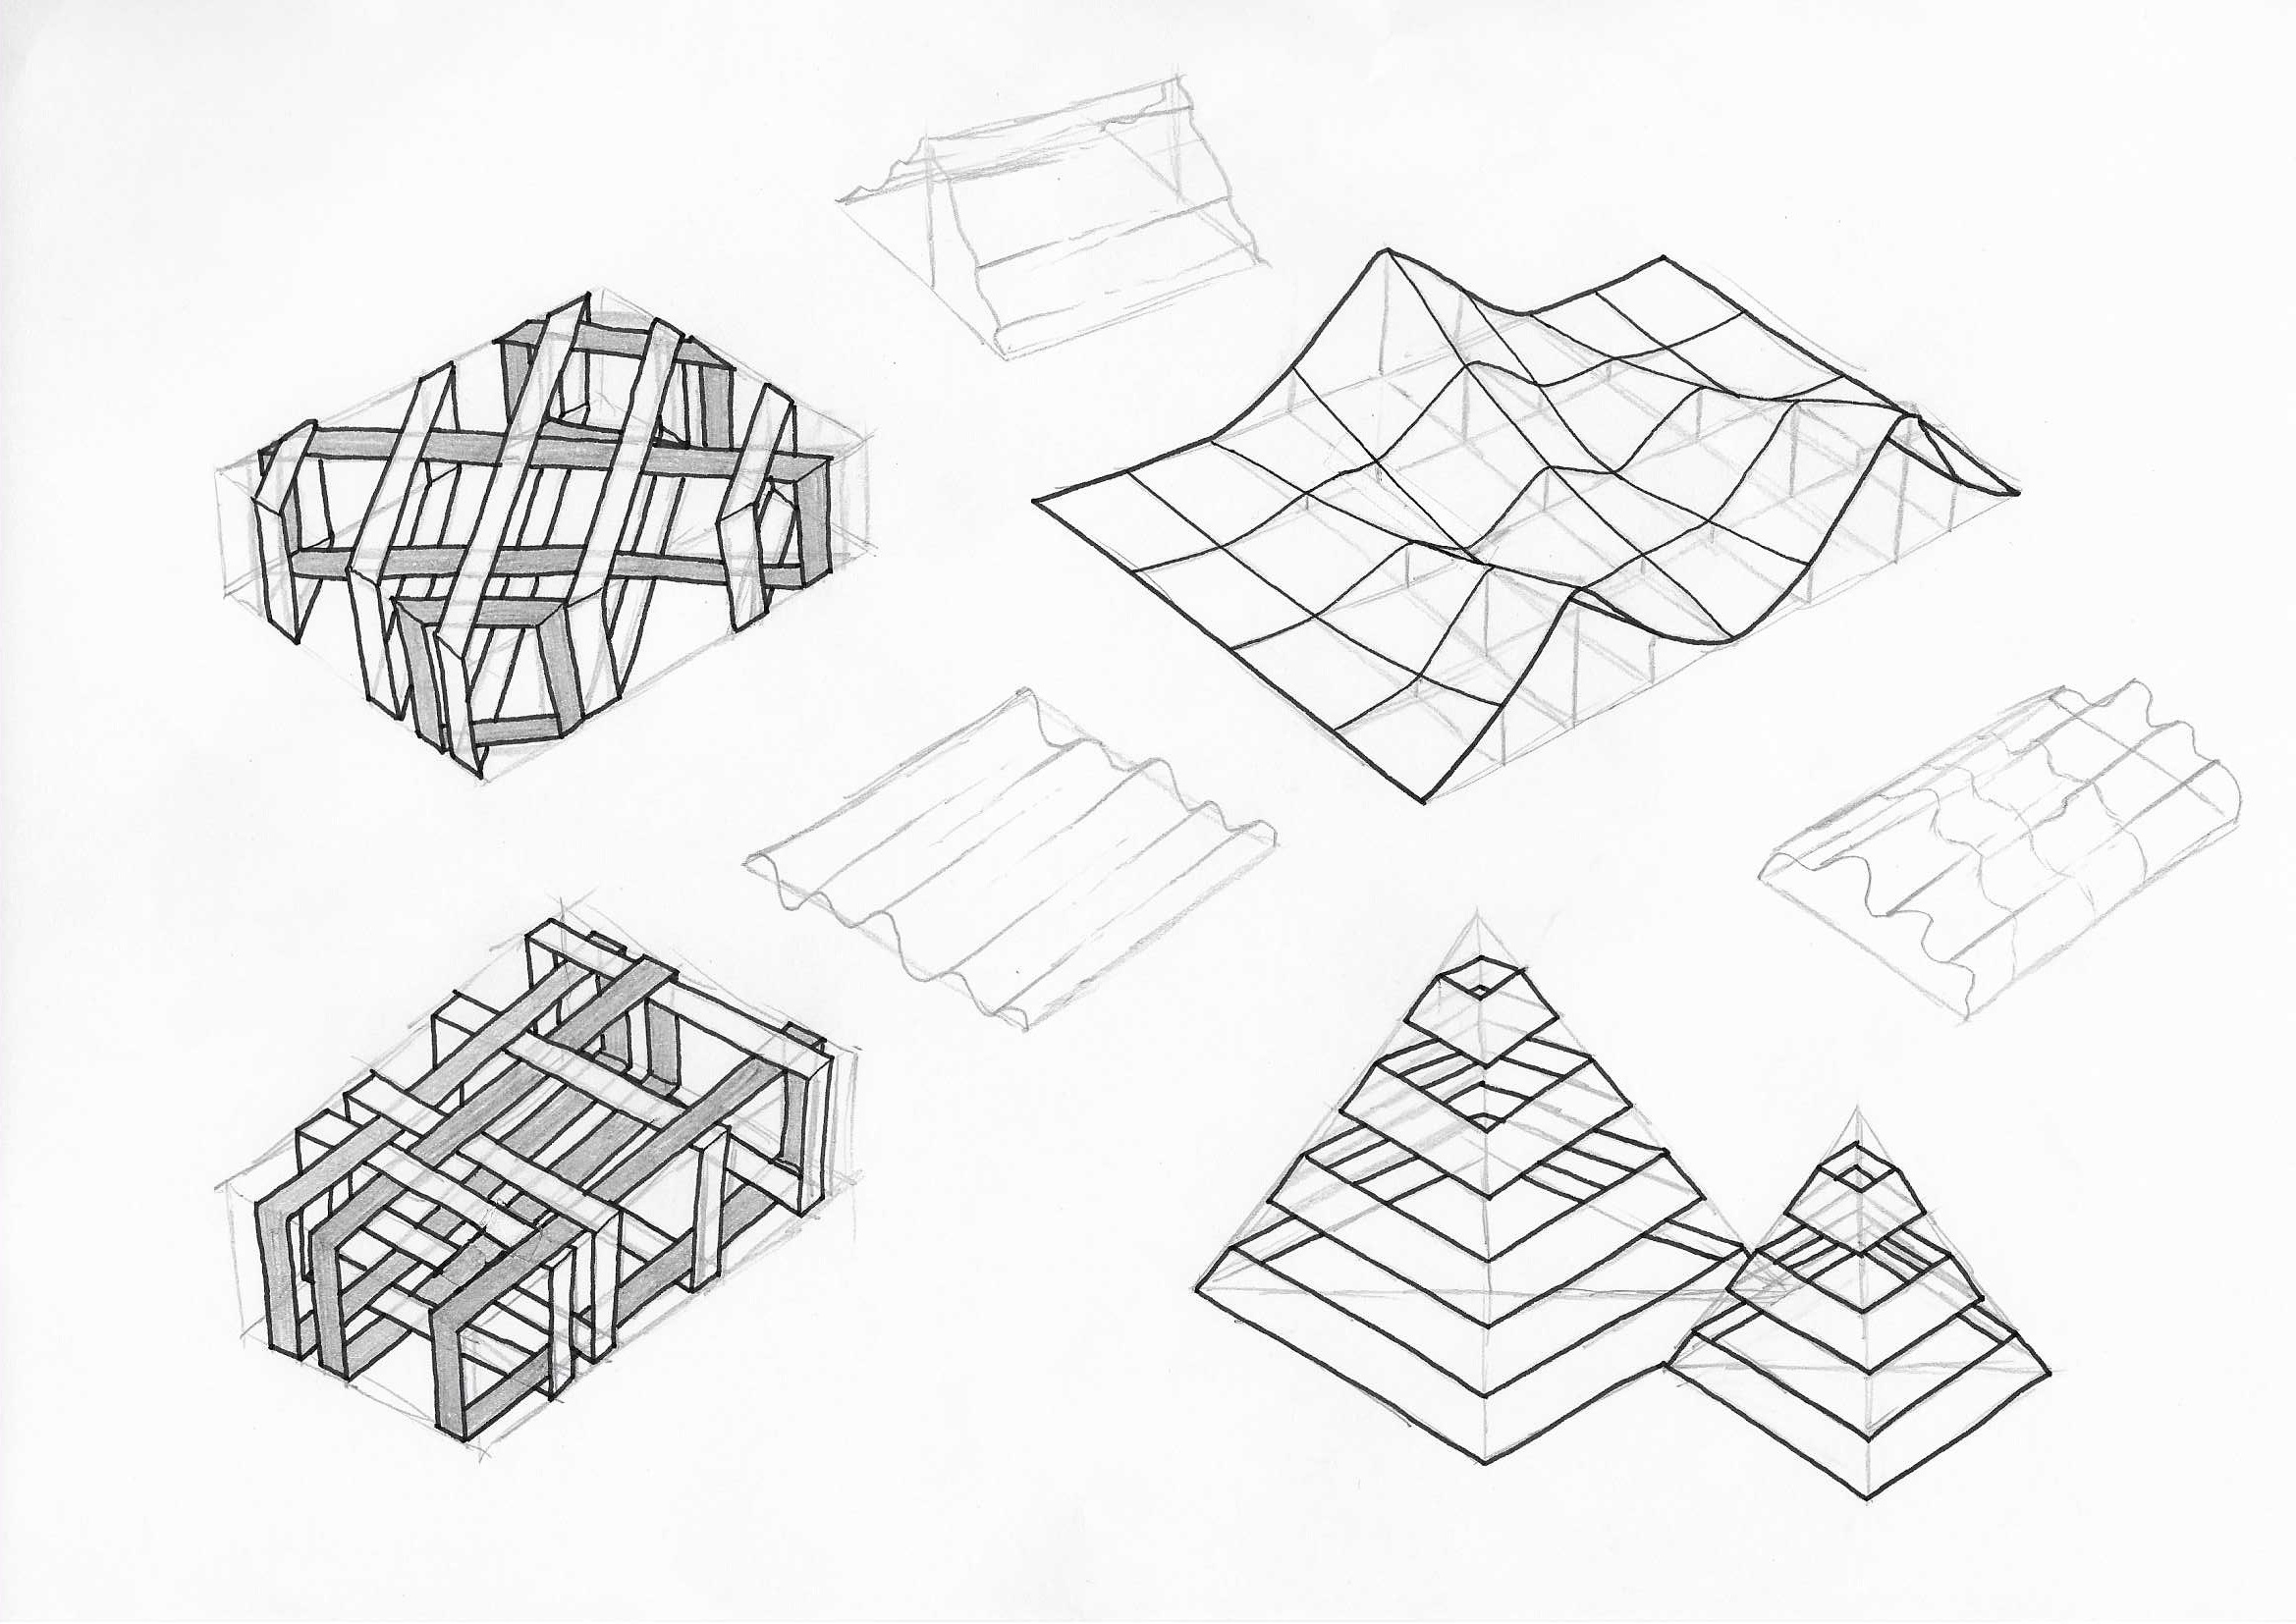
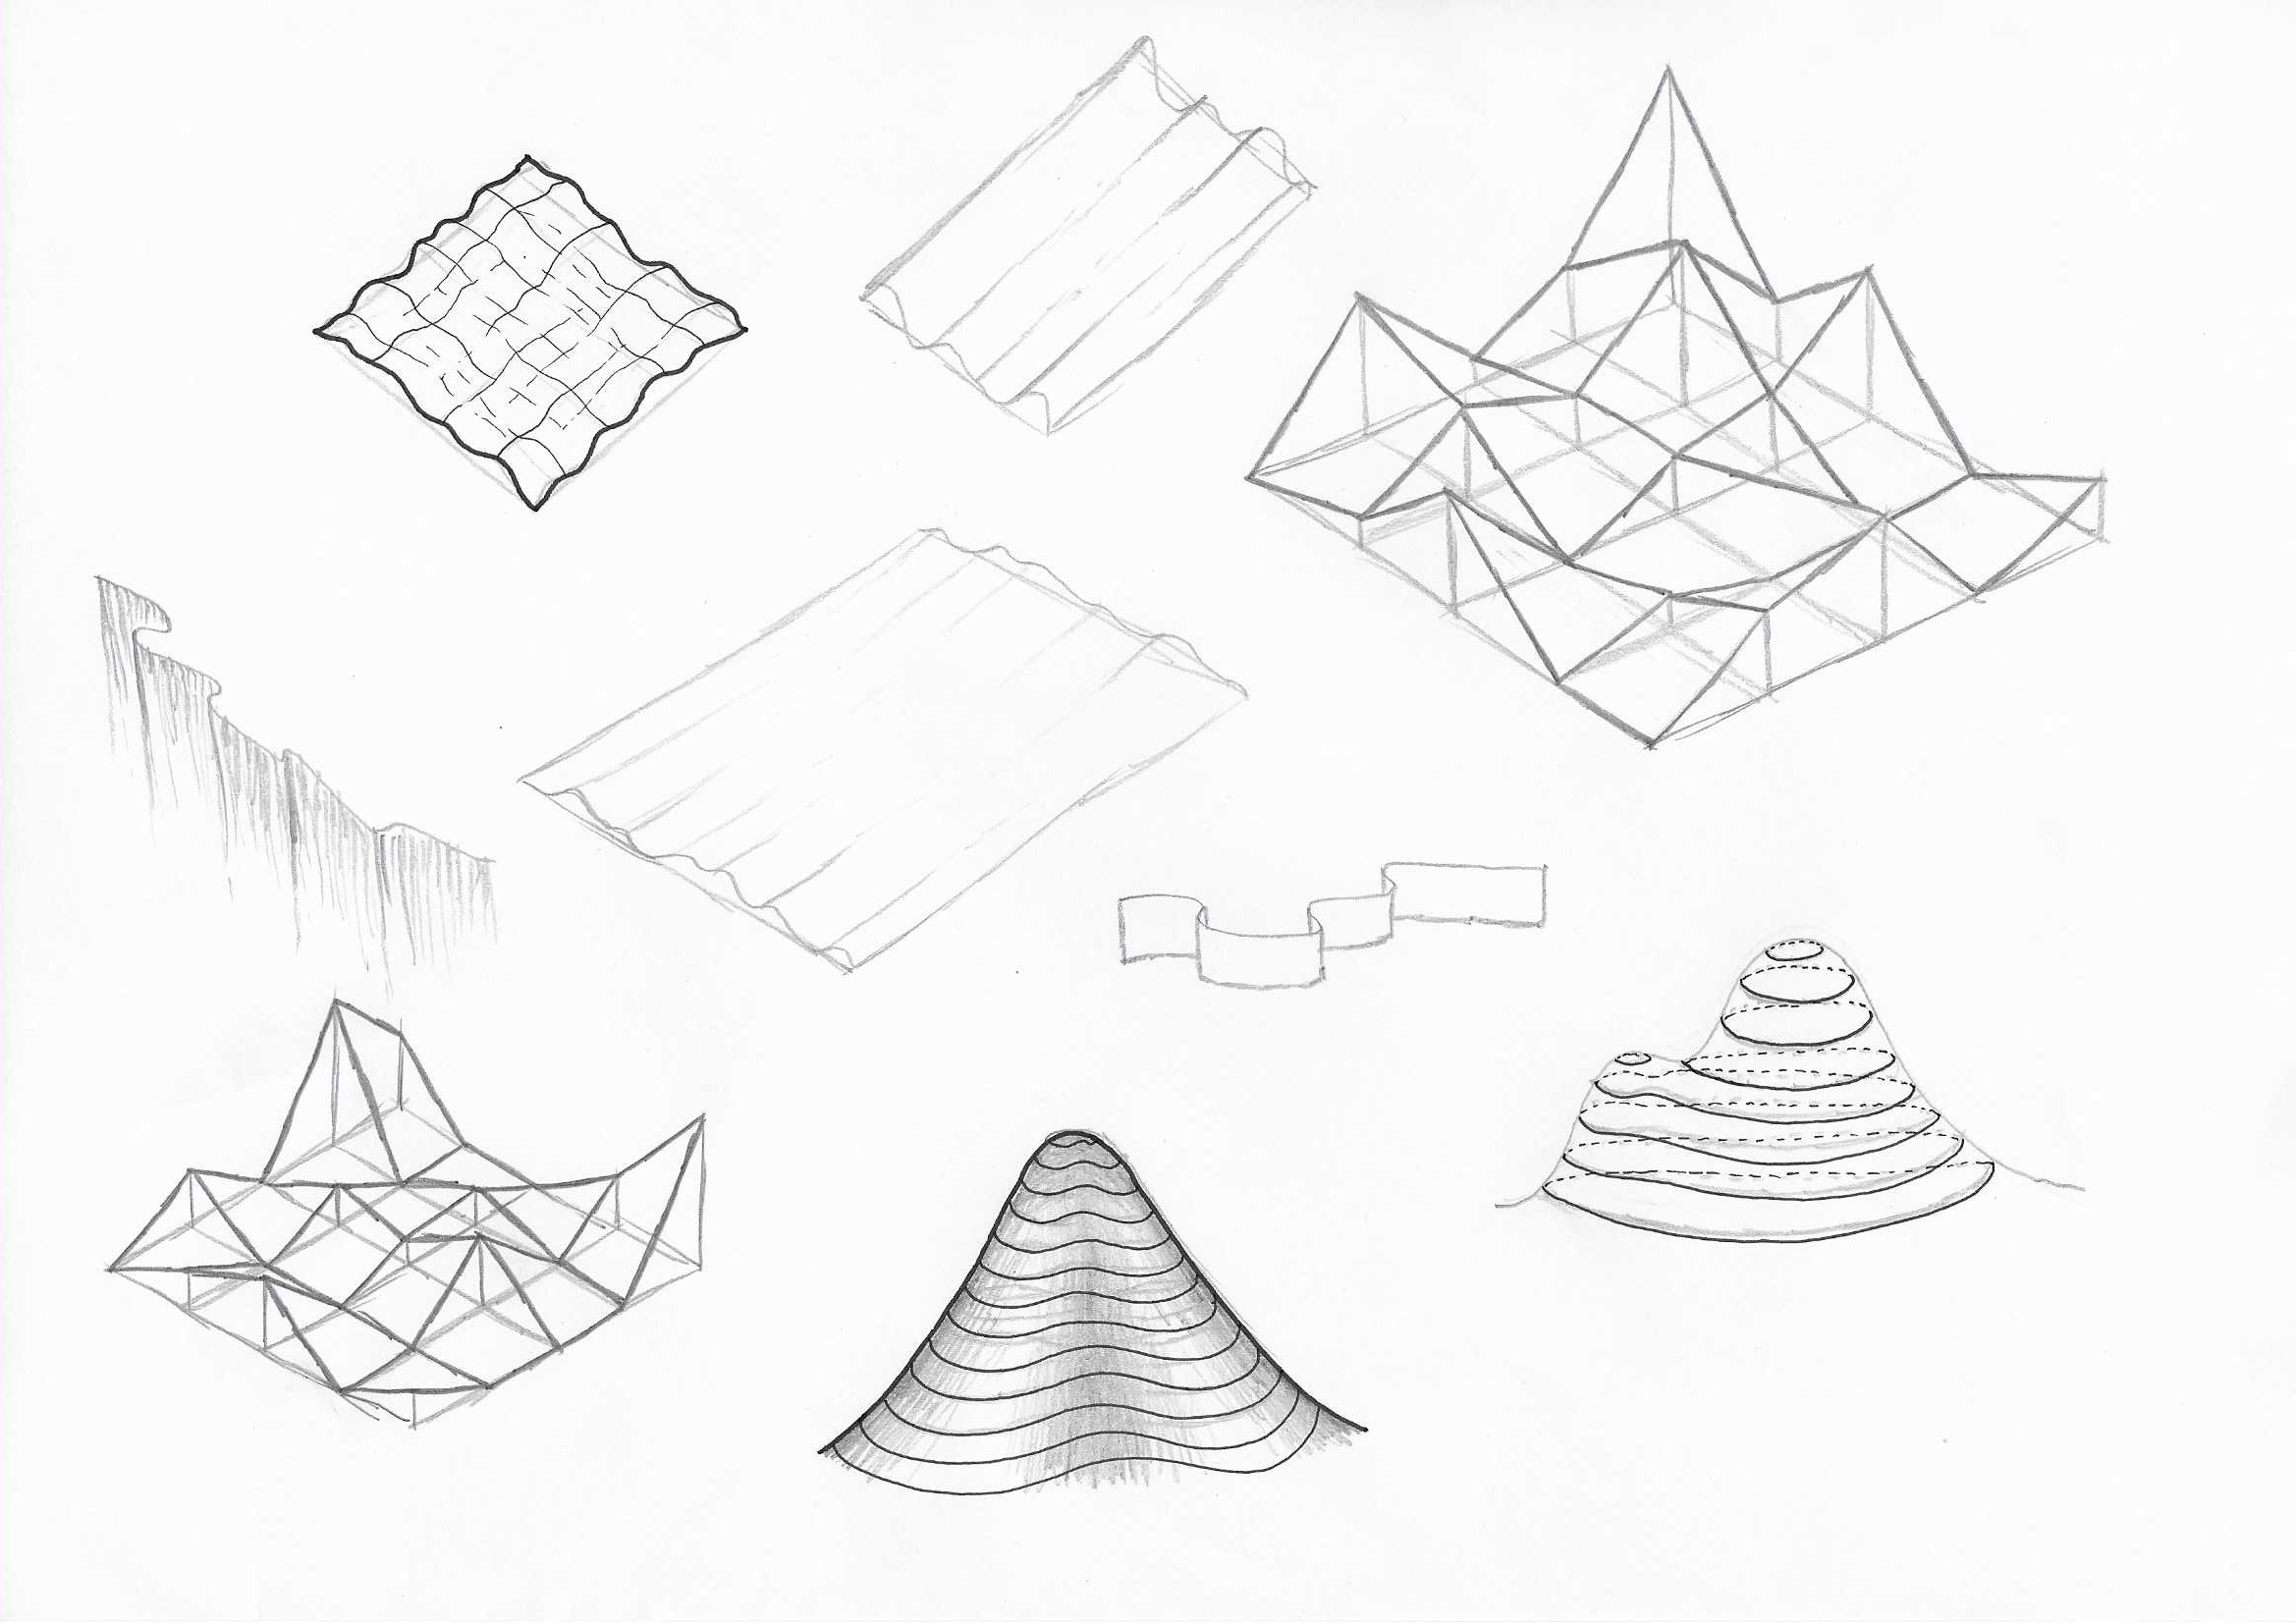
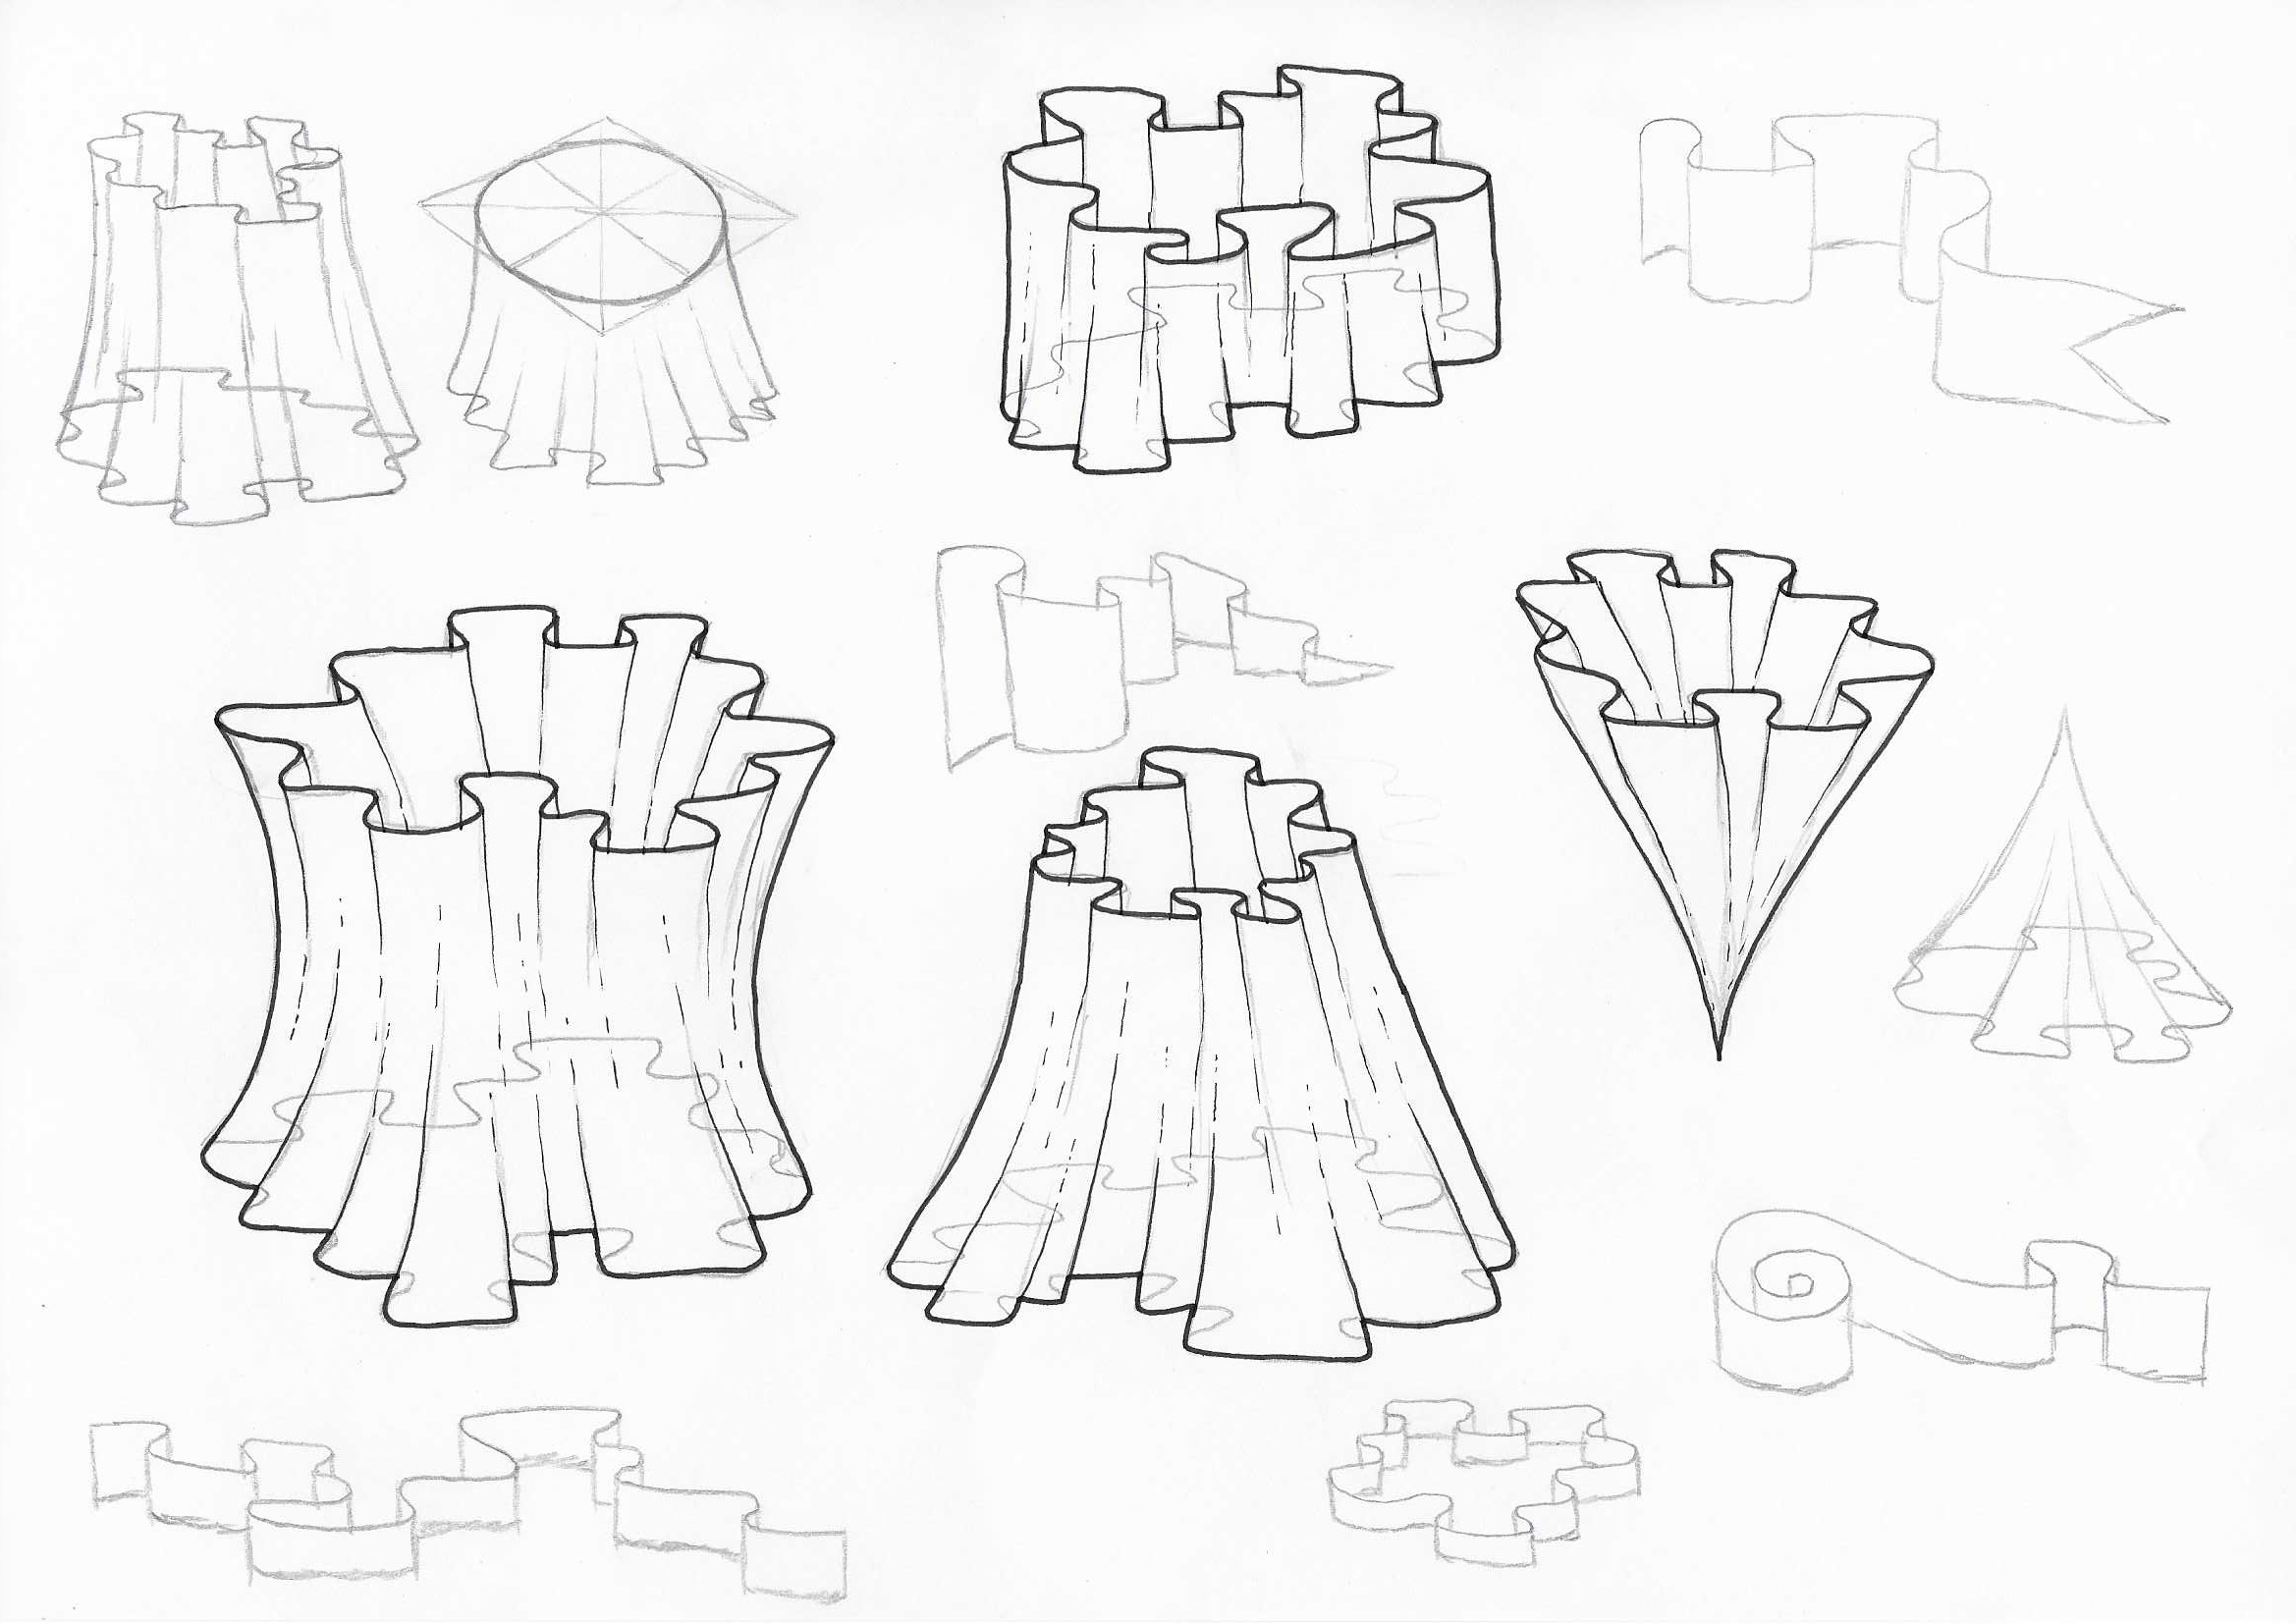
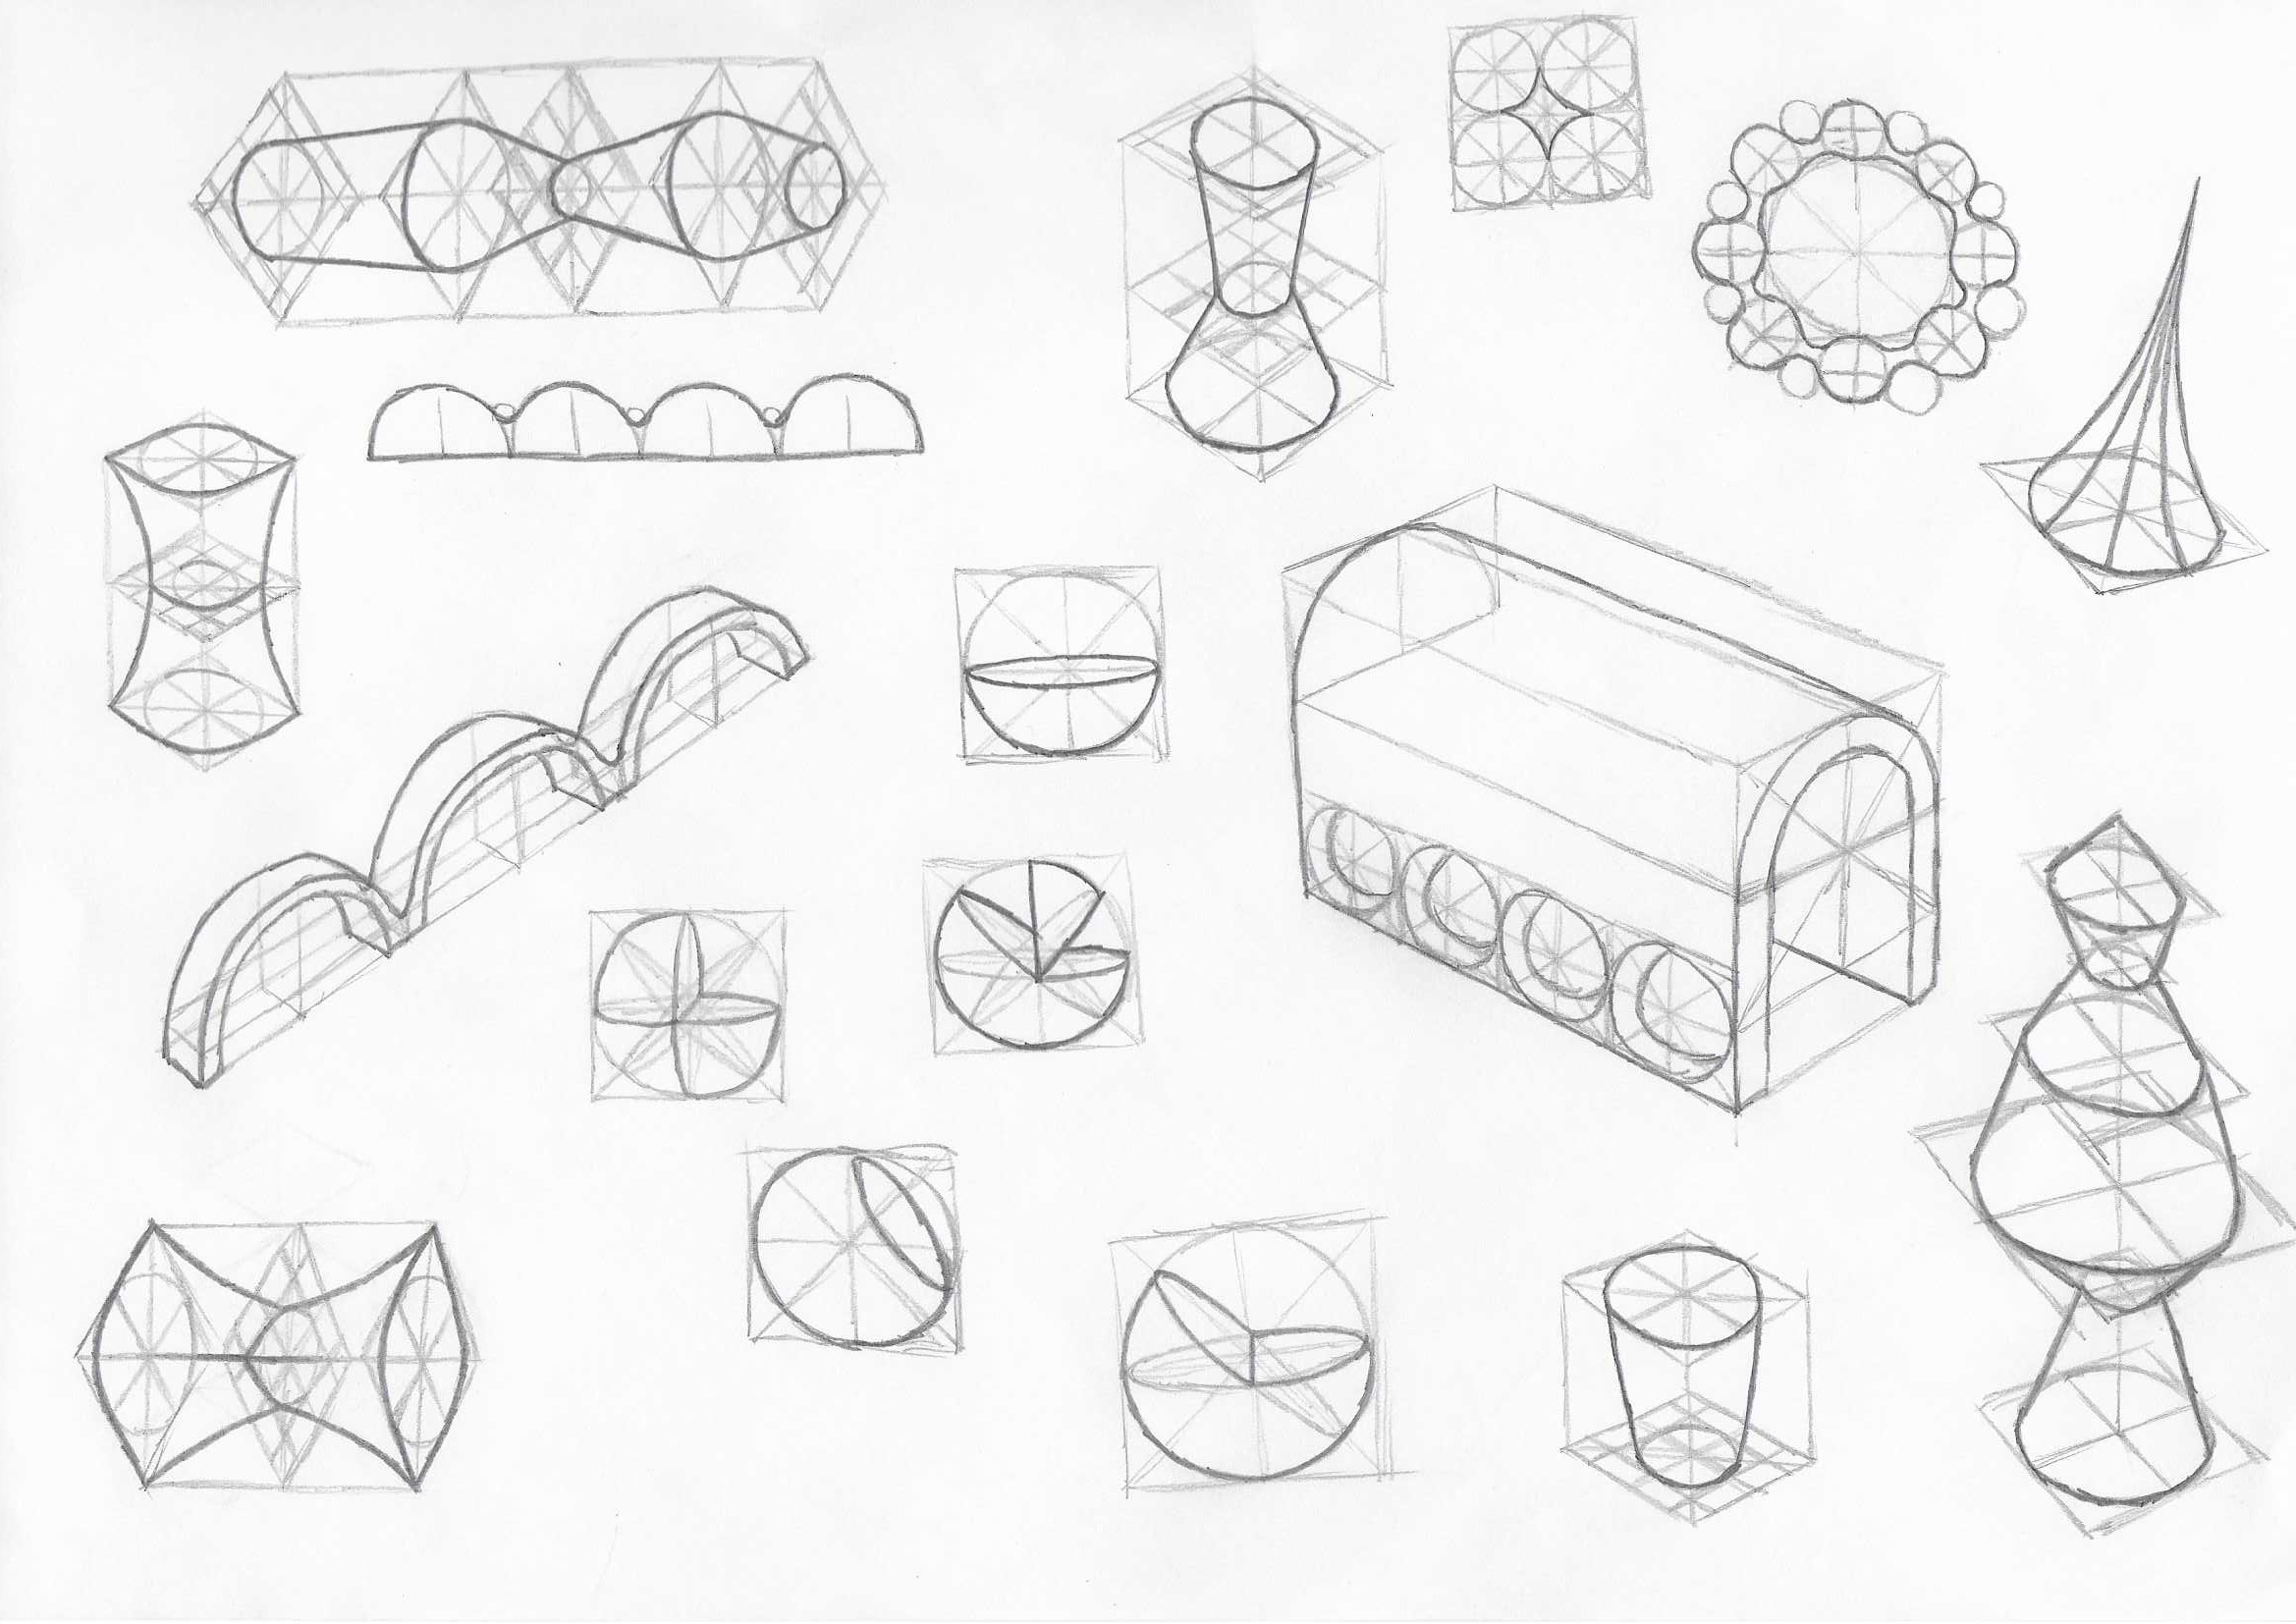
For the second ILA, I made pages sketching with spirals, and irregular surfaces.

The spirals type sketches were a bit challenging at first, but they were mainly really interesting in that they show how to create a shape without actually having the shape there in the end, which can be useful.

The irregular surfaces helped me start practicing with the grid method for the drawing challenge, which was good because I never had used this method.

I also used the fourth page as an opportunity to further explore one of the activities we did last class, where we had to start with a curved line, and transform it into a cone or cylindrical type shape. I find this technique really fun, and it might be very useful for example if having to draw something fabric related.

Improving Polymorph Object – ILA 7 : Focus Groups

To start this activity, my group and I decided we wouldn’t mean initially, to make sure we gave each other no additional information to what was given on the instruction sheets. We then sent each other our instructions, and I worked on recreating their objects.

I started with Iana’s. The instructions and drawings were mostly really clear, and I think I managed to recreate it relatively well.

I then did Maria’s, and similarly to Iana’s the instructions and drawings were clear enough that I think the result I got is as similar as I could get it to how it’s supposed to look.

These are the versions of my phone hook/ holder that Maria and Iana made, following the instruction page I gave them (See ILA 6 blog post).

They looked very similar to mine, which was to be expected as the design is ultimately really simple. However, they did have feedback about the instructions, and about the design itself.

The main thing about the instructions was that I showed how to form the piece, but didn’t specify how to do this using your phone and hand, so if followed literally this would make the instructions complicated to use. (Note I also didn’t make the initial ones as detailed as I would have if I knew someone would actually be using them, though I still thought they were clear). Additionally, the text in the instructions should be more detailed, and potentially include some basic measures, even though it can’t be exact as it depends on the persons phone and hand.

The main thing about the object was that I made it too narrow, meaning it made the phone less stable. And this wasn’t helped by the rounded pieces the phone rested on, meaning it could easily slide off, which I hadn’t realised. The two solutions we came up with were slightly flattening the bits where the bottom of the phone rests, and/ or adding another bar perpendicular that would hold around the sides of the phone.

Using this feedback, I remade the object, and made new instructions (including new drawings) to go with it.

This focus group activity was actually super interesting, because beyond confirming certain things I was not necessarily certain of, they brought up some problems I wouldn’t have thought about, even with an object this simple. That comes to show how important a focus group can be, especially with something potentially a lot more complex than this.

Primitives Blind Object Drawing : Week 7 Drawing Challenge

For this drawing challenge, I picked two objects to work with (A bottle of dish soap and a coffee cup) that I feel have an interesting mix of primitives, and in the case of the cup an interesting interaction between them (square base evolving into circle top).

Though I felt I could draw the cup directly, I really wanted to look at the primitives used in the bottle a bit more, as there are a lot more of them. So before I started the exercise, I started quickly sketching the different parts, to make sure I was doing this properly.

I then drew the objects without looking at them, making sure to focus on the primitives. And beyond the drawings themselves, this was the really interesting bit, like in the first ILA of this course, forcing me to be aware of how shapes are used in the world around us.