RoboAnt: Build your own Android robot
Nowadays smartphones are affordable, compact and capable computers. Mike had the ingenious idea that they can do a perfect robot brain. Packed with computing power and useful sensors, the one thing they can’t do (I think) is control external analog components – like motors. This is where the Arduino comes in. The hugely popular embedded platform has tons of accessories built by its restless community. One of them – Zumo Shield from Pololu, is the final ingredient we need. Stir… and RoboAnt is born.
Here is how to make your own.
Materials
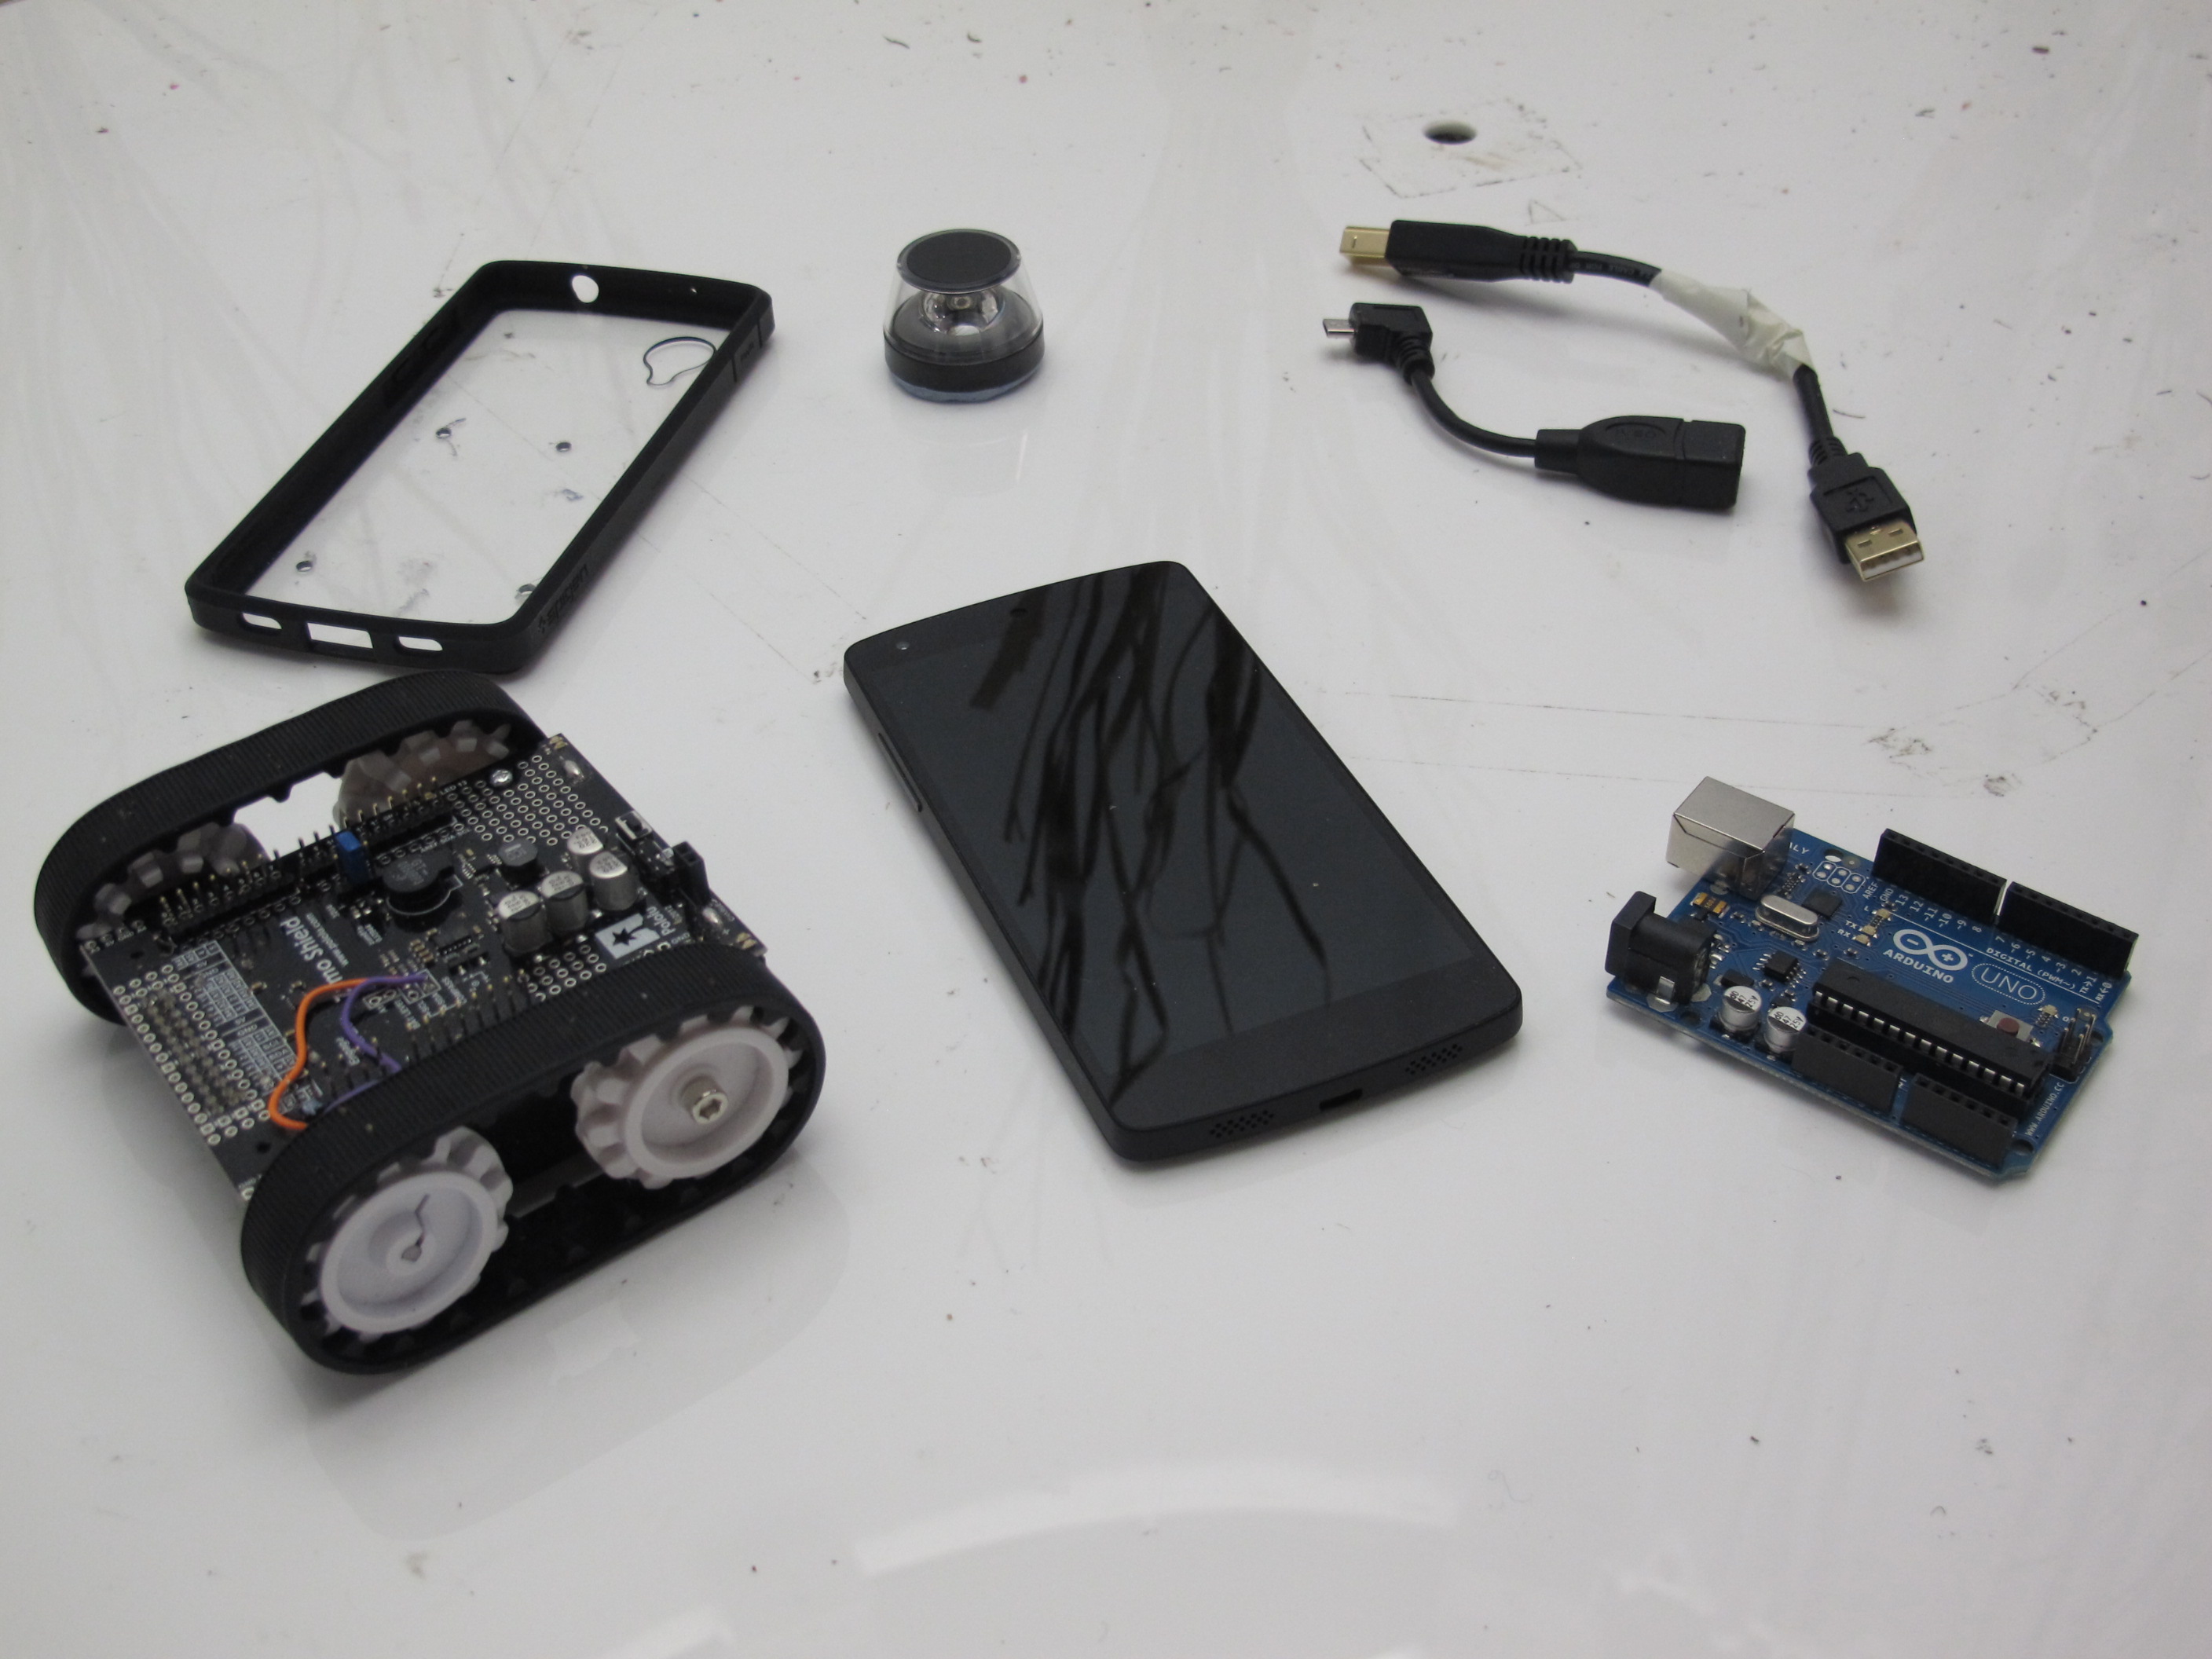
What we need is:
- Pololu Zumo Robot for Arduino
- Arduino Uno or Leonardo (others may work)
- Android phone with USB host support
- USB OTG cable
- Panoramic lens – like the Kogeto Dot
- (Optional) Smartphone case to attach to the Arduino
- (Optional) Blue tack
Assembly
Assembling RoboAnt is easy.
First, plug the Arduino in the Zumo Robot. There are several ways to mount the smartphone on the Arduino. As my work began as proof-of-concept, I used a lot of blue tack. It works. Another option is to make holes in the case and screw it on the Arduino. Just remember to use plastic screws – metal ones will make Zumo’s magnetometer useless.
Then, connect the Arduino with the Android phone using Arduino’s serial cable and the OTG cable . Finally, mount the panoramic lens. Once again, I use blue tack. I mount it on the front camera, because for my use case the panoramic images are further downsampled to match ant-eye resolution.
Here I use the stock Camera app to align the panoramic lens. Don’t worry about centering it, as the app can find and segment it.
Okay! Now we need three pieces of code – one for the server, one for the Arduino and one for the smartphone. Next, I will show you how to set up a remote control system, just like the video in the beginning.
Next part: RoboAnt – Remote Control