Overall View/Experience (Study Plan)
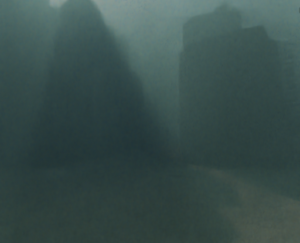
Using VR the viewer can experience a world where in the depth of the ocean a automated tour exists, unable to move in any direction but the predetermined track the viewer can only look all around them or take photos. An automated voice promises sights ocean life and for the user to relax and get their camera ready. The scene opens to a barren sand bed with some debris of metal shrapnel before the tracks follows around a corner to a rockier scene with various marine life forms but the forms while familiar exist warped. A blanket of fish eggs stretch across the rocks and while beautiful with shining hues also struggle within their own personal cocoons of plastic bottles as if that’s how they were always formed. Looming pillars too neat to be natural cast their obscured presence in the far distance. Organised by distance their crumbling bodies don’t seem to match the chaotic placement of rocks along the sea bed. As the ride continues the shapes gain clarity until the towering figures become too familiar, scaffolding twists mazes around the capsule as fallen walls encase every direction. By the end the automated voice announces that the tour has finished, prints a photo as a souvenir and thanks the user for joining the tour.
The project will be made with 3D digital modeling using Blender to create the main assets. Then using either Blender or Unreal Engine 5 the world will be made into a simple interactive program where the user can control which way the camera is facing and possibly have the ability to take photos to print off and keep. Ways the user interact directly with the project will vary depending on what is the most accessible/doable near the end of my project. This could be anything from the viewer using a VR headset to scanning a code on their phone and using their own device to look around in virtual space.
I am goin
g to approach this project with some planning but in a way that very malleable as well as partially on the fly. That is to say that while I am researching relevant topics such as ecosystem destruction and human made disasters I will largely decide placement and elements as i go so that I can easily control visual aesthetics and interpretation.
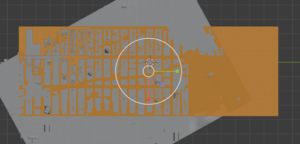
Scene Location: New York
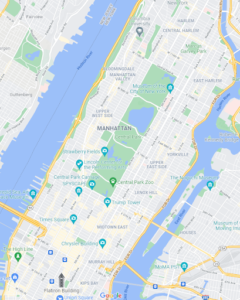
Basing the map in a real world location can help to build into a sense of ire and loss as well as making the experience more tip more towards being more immersive by playing of recognisable features.
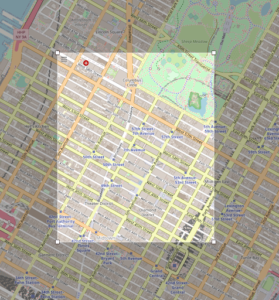
New York is chosen out of any other real world location because it is already facing immense floods which will help to make the map more plausible to the viewers as well having easily recognisable building structures such as skyscrapers due to a combination media exposure making these types of building more universally seen and in general skyscrapers existing across multiple countries to further add towards the viewers understanding this is a human dystopia.
Image on left is screen shot of possible location basis using google maps.
Viewer Interaction Format
The more ideal format for the viewer is to have the viewer experience the constructed digital world with a screen that can be moved in real space 360 degrees, which when moved would show a different part of the map like a magic window.
This could be a VR headset that the user wears so that they can just turn their head to look around the map, a booth/desk with a monitor and some very basic controls (joystick or trackpad) to look around or even a website/video link/scan for the user to enter onto their phone that then allows their own device to become the viewing tool.
Further ways to make the viewer feel immersed and in control is give them a button to take an image. These images could then ask to be saved on their device or if the booth experience sent and printed off to a printer.
If I am unable to make the experience have user controlled 360 degrees viewing rotation than the fall back is to make it a static controlled camera, meaning it will be like watching someone else’s’ recorded experience and less immersive.
While I do want the user to have some control to feel immersed much of these will be pseudo controls and choices as too many controls will make the project vulnerable to being broken. To lower the ways the experience could break the user will more or less only have two controls: look around by turning the camera and take a picture (maybe zoom in and out too).
Map Exploration Format
The way the virtual space is navigated will be a fixed track to ensure fewer ways the user can break the program as well as have absolute control over how long the experience lasts to ensure smooth usage as this will also mean auto resetting can easily put in.
The way this is expressed in the virtual space could be a set track similar to a rollercoaster but with the purpose of a tour. A voice could be overlaid to help explain the lore of the space as well be twisted/glitched to add to suspense and ire as well to play on advertisement standards to combine into the dystopia construct.
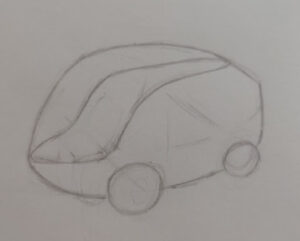
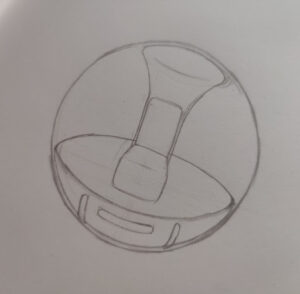
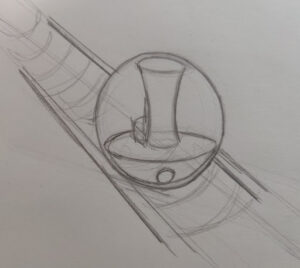
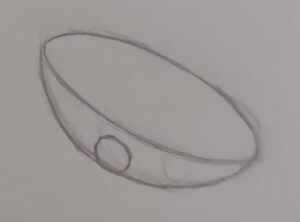
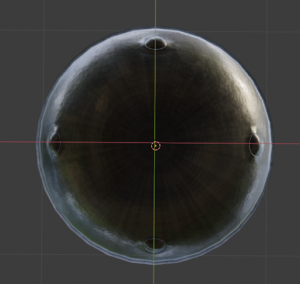
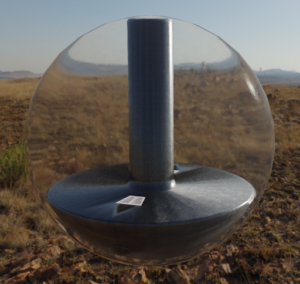
The capsule the viewer is sat in could either be a transparent ball that allows for high viewing range or a submarine like ball with lower viewing range but creepier immersion. A more transparent ball would be more ideal as it would allow better interaction with the map as well as a better fake front nothing looking strange.
Making the capsule realistically detailed on the outside is not largely important as the viewer will not directly seem them but could be important for immersion as parts may be seen in reflections.
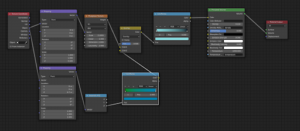
Selecting World Lighting
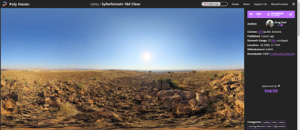
To start up realistic lighting to check how textures/shaders look I have set up a HDRI using resources from a free use library. The HDRI chosen is of an empty desert uploaded by Greg Zaal which should avoid any accidental shady areas.
The HDRI should later be replaced with a sun lighting setup to reflect the suns’ rays so that there is no risk of the HDRIs’ imaging being seen in reflections.
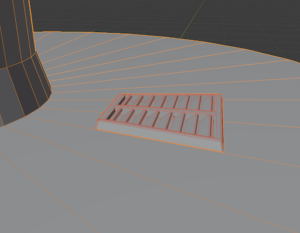
Creating Capsule
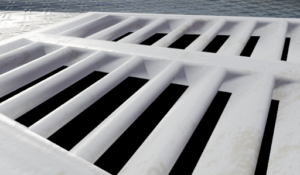
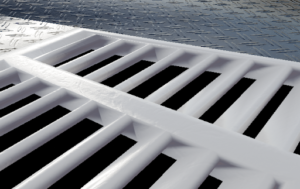
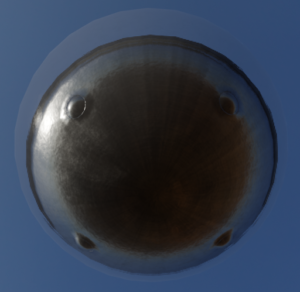
I decided to add two air vents to add to some immersion as some users may notice the lack of air supply and feel the world as less believable.
In order to save some polygons the vents will face away from the viewer so that the deeper inside parts can’t be easily seen.
Modelling this kind of vent was chosen as a balance between detail and lower a polygon count as some vents have the bars above the face of the vent and other just have some rectangular holes additionally this middle ground may be easier for viewers to recognise.
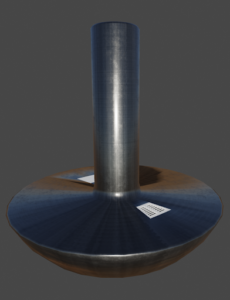
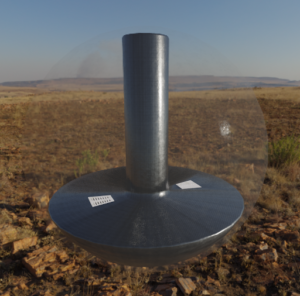
The material I made for the bell is brushed metal, this it to reflect how the ball would have to be a very engineered and tough object to be able to freely roll around on the sea bed without risk to the user (world building).
I had before made two materials to test the look of, one was a simple matted metal like that found on anchors or cannons balls and the other was a rusting painted metal, I found both did not fit the theme of the capsule being a hightech or maintained. I had intended these materials to be repurposed but for an unknown reason their files disappeared altogether instead of becoming orphaned data.
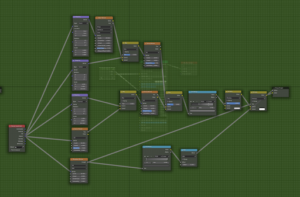
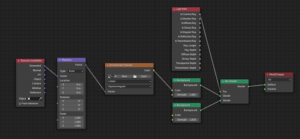
The texture on the modals are precaudal, while this may take more time to make than paint brush texturing a modal it means that is can be mathematically realistic and changed massively just by changing a value or two. It will also mean that a modal can be adjusted and changed without having to retexture it as there is no concern over creating/deleting/warping UVs.
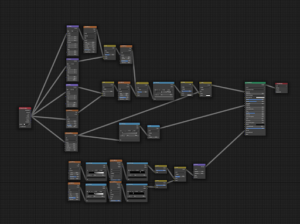
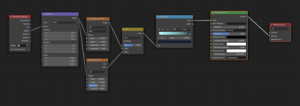
To get some idea of how to create a metallic quality I looked at various guides for Blender and amalgamated bits of information together with adjustments and changes. Sometimes It was the node set up I looked at of how to create something similar or just advice and concepts how how to replicate a material.
Viewed Guides:
Blender Tutorial – Creating Realistic Procedural Brushed Metal – YouTube
Using Procedural Textures in Blender – YouTube
How to make a procedural metal material in Blender 2.92 | Beginner Texturing Tutorial – YouTube
Procedural Rusty Metal (Blender Tutorial) – YouTube
Basic Metallic surface in Blender Tutorial – YouTube
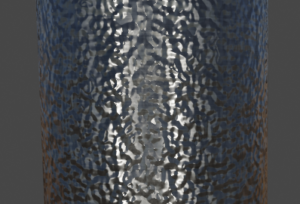
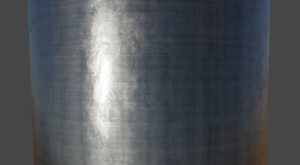
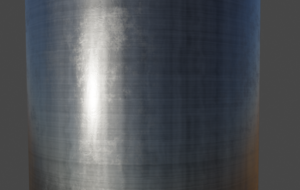
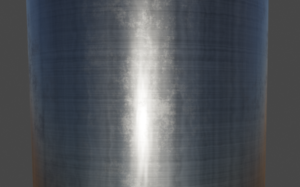
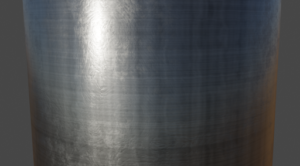
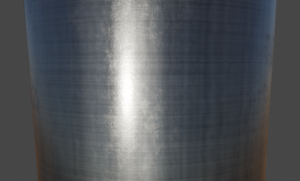
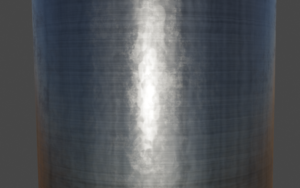
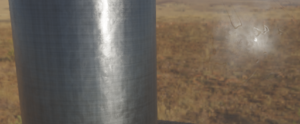
The capsule will have some micro details such as scratches and scuffs, not many of the material will have this as this will take up processing space but since this object will constantly be with the viewers and take up portion of their screen its imported to be the most detailed and accurate materials as the viewer will be stuck staring at any faults.


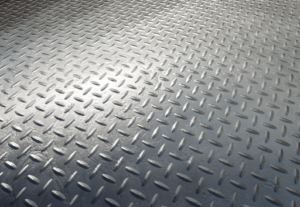
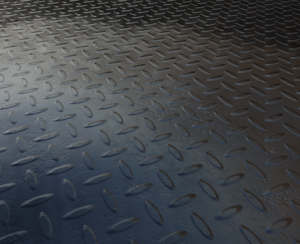
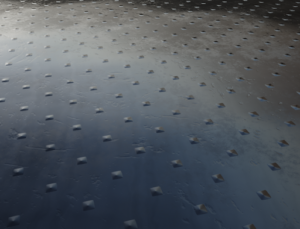
The floor of the bell has been made a surface grip pattern, this is to help the viewer identify themselves as in a location made for people to be in.
Viewed Guides: The METAL Tutorial (procedural, but not as cool as it sounds) – YouTube

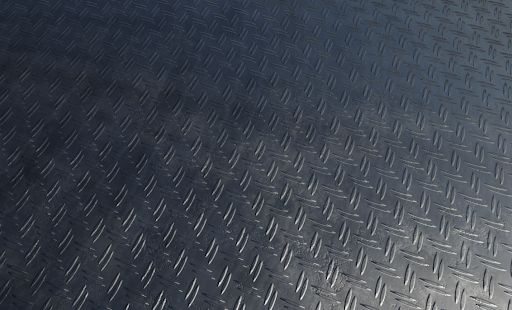
In order to low processing power needed at the end of the project these procedural shaders should be baked/flattened. The level of detail lost will be dependent of the resolution of the texture the shader is baked into, Low resolution will be too pixelated for a object right in front of the viewer but too high may be too taxing on devices. This will be done towards the end so that if the modal is adjusted the texture does not need to be fixed.
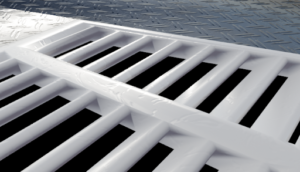
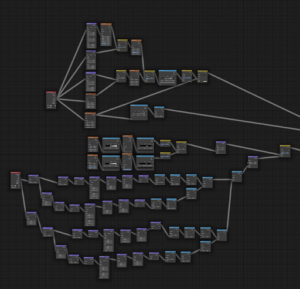
The details the vent will need are very similar to the metal, scratches, scuffs and grime. So the node set up was duplicated and adjusted. Metallic value was also turned down to make it look more like plastic/paint.
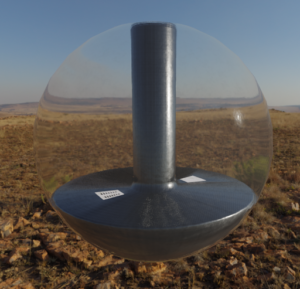
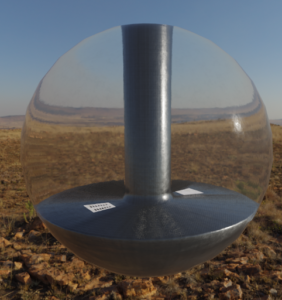
The IOR value of the glass shader can be adjusted to make it look more realistic by making light bend as it would in real life. It is more realistic to have this value be on the higher end which cause the light to warp much more, however, I found that from the viewer perspective this made looking around distorted which may cause viewing to be confusing to the viewer, for this reason the IOR will be lower than the real world value of glass but still have some value to have some properties of glass.
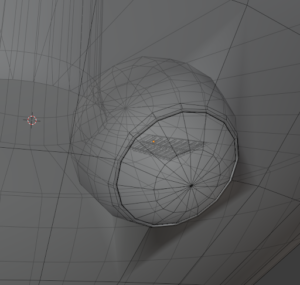
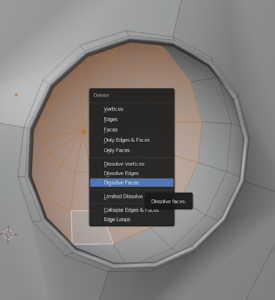
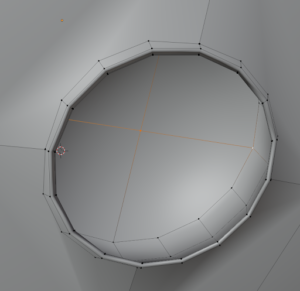

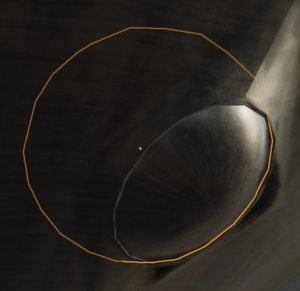
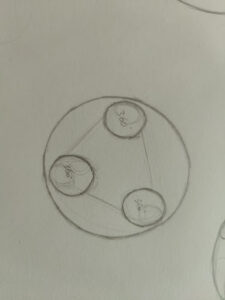
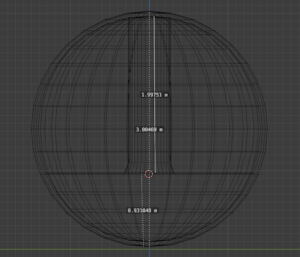
The wheels of the capsule we’re made by joining and dissecting spheres, then cleaning the mesh to lower polygons. Polygons on the inside were greatly lowered and will cause clipping to the wheel, however, the viewer will be unable to see this due to the faces angling inwards. Since the previous brushed metal material is procedural it can be applied to the wheels in seconds.
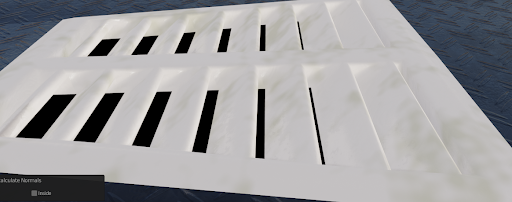

The faces of the vent were pointed inside the mesh rather than outwards, this causes the mesh to be shaded incorrectly as blenders’ poly faces only have one face. The issue was corrected by selecting the problem polygons and running a tool to recalculate the faces to be inside. Now the mesh is shaded correctly.
Building a City
In order to make the city recognisable even in a destroyed state, I need to make sure the basic layout and proportions are accurate. There were a few ways to do this, the first way was to manually block out and proportion the building which would have taken far too long especially considering that the building layout stencil would not be included in the final work. The second was to use an already made modal set, however, the file format was not compatible with Blender and the modals came in sets meaning that they would need to be sorted through for relevance.
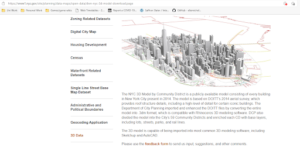
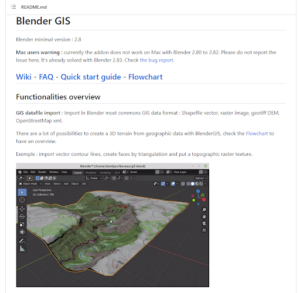
The third method was to use a add-on (mod) for Blender that allows you to input a location and then takes basic information such as building location and height to make the basic shapes of city building layouts. Blender GIS works well for terrain information but when used for city could not understand a lot of building slopes and curves which lead to building becoming blocks with slightly off heights as it mistook mast structures for roof tops.

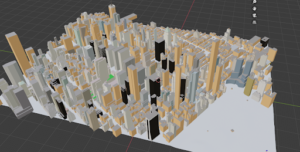
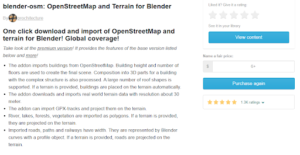
The add-on I chose in the end was Blender-osm, the free version gave the needed basic information such as building location/dimension and understood more complex roofing/structure which gave more accurate proportions. Using this mod saved a great deal of time mapping out the scene location for stencils that will eventually not be included in the final.
The building modals that have just been created I will refer to as building stencils because no original part of them will be transferred to modals I make, they will only be to guide the proportions and layout of the scene to ensure that the viewer can have some recognition of the location.
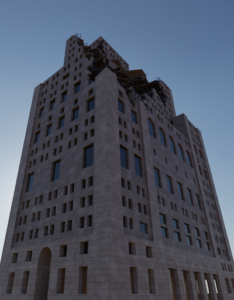
Building a City: Building by Building
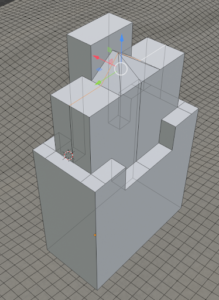

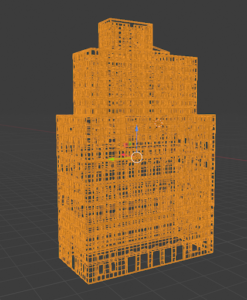
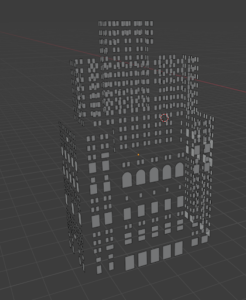
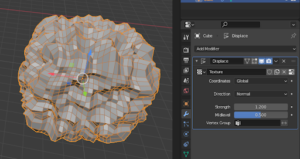
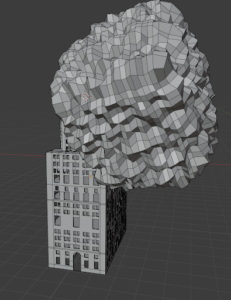
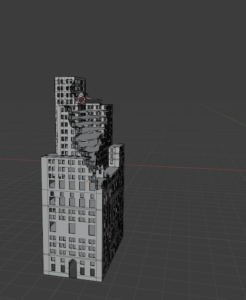
The building Will all roughly consist of three layered meshes: windows, scaffolding and solid structure. These three pieces will then be cut away by with an randomly decimated cube and then layered back together to create a ruined look.
Each cube used will be a different size for each part to make sure that the scaffolding can be seen.
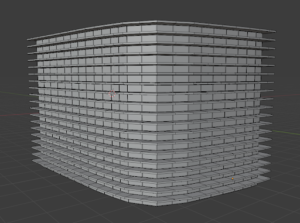

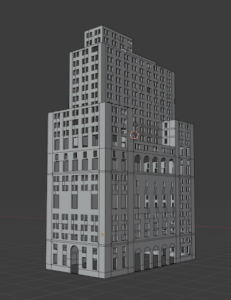
Some buildings Have very similar floors, at the sacrifice of absolute realism to the real life building I can simplify its structure by making one floor and repeating it which will save time and make it easier to make buildings with higher geometry.

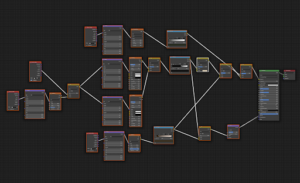
The texture is made procedurally using an inbuilt brick pattern, using procedural textures helps to make sure seem join correctly as well as allow for adjustments at any stage of project development. The detail can also be lowered or raised depending on how much the computer can handle during final rendering.
Lighting: Underwater
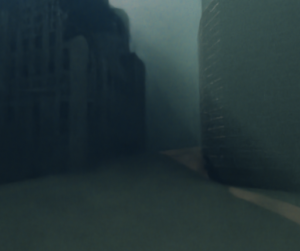
The Underwater lighting uses a box given volume properties, its basically a fog coloured green and blue. This fog will give effects very much like water such as absorbing light the lower down it gets as well as making objects further away appear darker and blurry. Making real water physics will be far intensive on the computer and will make rendering take far too long, the fog box will be able to create convincing effects with some help from adjusting light paths and adjusting its overall density properties.

Adding a colour gradient from low to high of green and blue makes the fog change colour slightly as the viewer looks up which helps make the water look more like sea water. Lowering the light paths makes the scene blurry and more foggy which builds more into the atmosphere of the scene as negative. making the scen blurry also helps to make it look more realistic as it hides the sharp angles of the buildings.
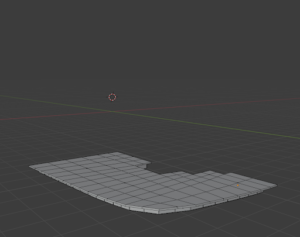
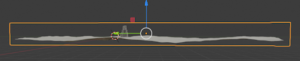
Sand Bed
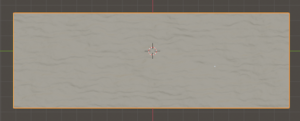
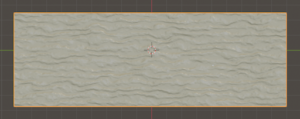

Making the procedural texture used just a noise texture and a wave texture combined with another noise texture. Super fine details such as micro fine pieces are not needed as the viewer will not be able to see these and it will would be lost in flattening the texture or would use more processing power than its worth.
Map Format
The Map could start as unassuming open sea sand bed with just some features to start building the scene as underwater.
Each time an abrupt scene change is needed the track could simply go round an enclosed corner but overall the scene will start as barren and unassuming where they will gradually become more chaotic and cramped with various objects and scene composition, this will guide the viewer’s emotions as starting off as blank and open where is gradually becomes more claustrophobic to build into build into an emotional journey of awe and estrangement.
Backdrop objects could include remnants of skyscrapers to frame the scene as a sunken apocalypse as well as make the viewer feel small. Some life forms could be directly depicted or just hinted to such as through overcast shadows to keep a sense of a dead environment and lack of information to make the viewer feel more worried.
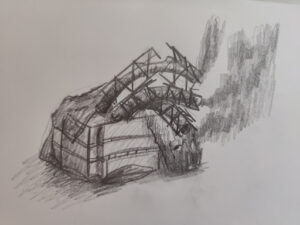
Oil Rig Bleeding Heart
To reflect how fossil fuel extraction damages ocean ecosystems a large scene object of an oil rig wreckage broken into the shape of a dying heart with oil rupters leaking into the ocean will be added.
The form will be hard to recognise but forcing it to be too unrealistically have the same shape as heart will break some reality immersion, to help make its meaning more possible to interpret the oil clouds will emit in the same pattern as a heart beat, this will also further add to morbid emotion building.

It’s only pressured oil leaks that form clouds and if I want to make the oil realistic this will effect how I depict it depending on if I choose to make it look extremely old and abandoned.
Making the oil more tendril like would be more realistic and create a better sense of abandonment but creating it as pressured clouds will be much easier to make match the rhythm of a human heart beat.
Bottled Fish Eggs Amalgamation
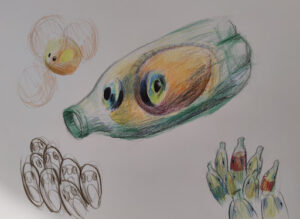
A way to reflect plastic pollution of single use objects can be to amalgamate developing fish with plastic bottles. This unnatural combination should land slightly in the uncanny valley to disturb the viewer but since in comparison to other pollution/damages such as fishing nets and cruise boats these object should be the least disturbing to reflect how they are just a smaller part of ocean damage.
To make sure these objects less disturbing a later stage in fish development will be used as well as pretty shiny colours to make them have a beauty in their own sense.
These objects will be near the start to help create a pattern of things gradually getting worse in the narration to help reflect what environmental impacts are worse as plastic bottles pale in comparison to cruise ships and fishing nets.