Any views expressed within media held on this service are those of the contributors, should not be taken as approved or endorsed by the University, and do not necessarily reflect the views of the University in respect of any particular issue.

Sound Design Process | Touch Designer Outputs into Max MSP (Ashley Loera)

Dates of Development | February 26th – February 27th 2025

Sound Design Director | Max MSP: Ashley Loera

Process of Development

Equipment

Software:

  • TouchDesigner Software
  • Max MSP Software
  • Wingman – IPhone Application (Name Sound Recorded Sound Files)

Hardware:

  • MacBook Air Laptop
  • DPA Stereo Microphone Kit
  • Sound Devices Mix Pre-6 Interface
  • XLR Cable
  • SanDisk Extreme Pro 64GB SD Card
Progress Notes
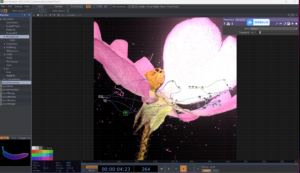
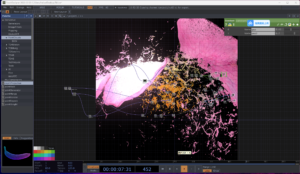
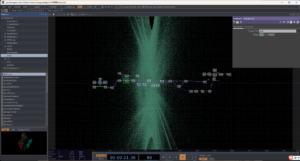
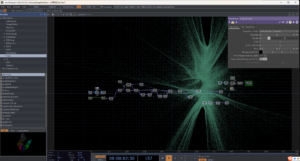
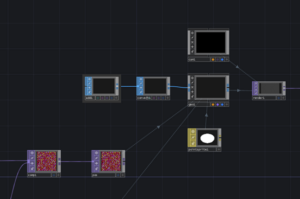
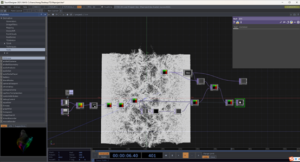
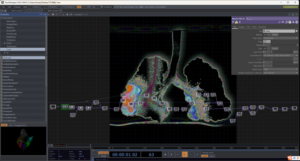
  • Successfully connected Touch Designer Output into Max MSP using OSC.  Please refer to the video below:

In order to achieve this step in the MaxPatch, I referred to the following Youtube video to assist me in creating a simple Touch Designer Patch to then route the Output information into Max MSP using OSC.

The Interactive & Immersive HQ | “Connect TouchDesigner & Max 8 with OSC – TouchDesigner Tutorial 072” 

Youtube Link: https://www.youtube.com/watch?v=AcqC5rRmu3M

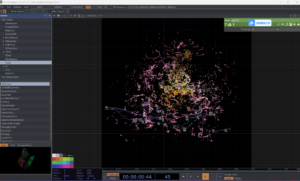
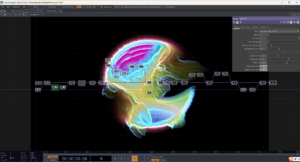
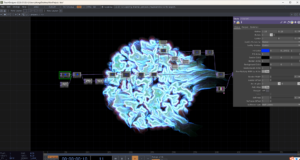
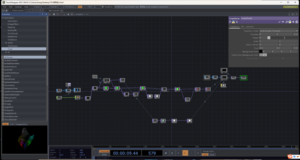
  • Successfully created delay effect in Max Patch to reflect sound by using Touch Designer Output information into Max & I successfully routed audio input data into a Delay Sound FX via Max MSP

Please refer to the video outlining the delay FX in Max MSP, below:

As shown in the Video above, the Audio Input (Laptop Microphone) is capturing my clapping and snapping movements (sonically) and as I change the rate of the delay (manually), the Claps & Snaps begin to playback at varying delay rates dependent on the delay input under the Touch Designer Max Patch Section.

To help me develop a delay effect, I did some research and found the following Youtube Video by creator “xlfph” that suggested the use of the “tapin~” and “tapout~” objects in Max MSP. I used this framework to create a delay effect in my Max Patch and connected data from the Audio Input and the Touch Designer Output to manipulate the Delay FX in the Max Patch shown above.

xlfph | MaxMSP tutorial: 4 easy delays with tapin~ & tapout~
  • Successfully connected DPA Mic into Interface.
DPA Microphone Setup with Interface

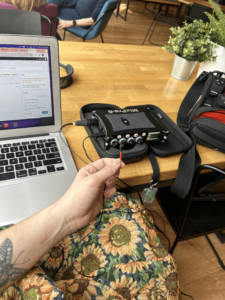
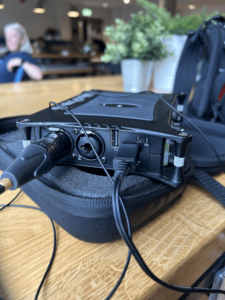
The following video shows that I was able to successfully connect the DPA Microphone to the Sound Devices Mix Pre-6 Interface. I chose this interface with the Intention to connect it to the Wingman phone application which allows me to name Recording Files and save them onto an SD chip inserted into the MixPre-6 Interface.

Trouble Shooting Hardware
    • Today I spent some time Connecting the DPA Microphone to the Sound Devices – MixPre-6 II – 34225. My aim was to troubleshoot the audio-input portion of my Max Patch (shown below). 
    • Positives: No issues faced in connecting the DPA Mic to the Sound Devices – MixPre-6 II – 34225
    • Issues: Unable to connect DPA Microphone & Interface: missing HDMI Cable. (Noted: Ensure that I have the right cables to connect Interface to Laptop for Max Audio Processing).

Bibliography:

The Interactive & Immersive HQ. “Connect TouchDesigner & Max 8 with OSC – TouchDesigner Tutorial 072.” YouTube, YouTube, 3 Jan. 2022, www.youtube.com/watch?v=AcqC5rRmu3M.

xlfph. “MaxMSP Tutorial: 4 Easy Delays with Tapin~ & Tapout~.” YouTube, YouTube, 20 Mar. 2020, www.youtube.com/watch?v=JoElwILrLKI&t=101s.

Specific attempts at breathing effects of TD

I want to make a touchdesigner connected with breathing data, which can be replaced by virtual data. The effect is that every time I breathe, flowers will bloom in the screen. The heavier the breath, the darker the color of the flowers, and the longer the breathing time, the more random flowers will be lost I can’t achieve the bloom for the moment, so I use flowers in a certain range of gradually larger to demonstrate the opening process, the model is imported.

I’m looking for flower forms and tutorials that can change size

Flower respiration reference

TD attempt


Flower movement experiment

I used Noise to generate irregular shapes, allowing the flower to have an organic, natural boundary as it dissipates, rather than shrinking or disappearing abruptly. Compose is connected to Feedback, creating a layered effect that gives continuity to the flower’s fading process, as if leaving behind dust particles suspended in space.

Threshold serves as the main controller. I used two different Thresholds to process the image: one controls brightness, while the other determines the visibility range of the particles, making the dissipation process more refined. In the code section, I used op(‘constant1’).par.value1 – op(‘constant1’).par.value0 to compute a positive and negative variation, allowing the particles to dissipate progressively over time rather than following a linear transformation. During parameter adjustments, I discovered that when Threshold is combined with Feedback, the edges of the flower produce a ripple-like effect, as if it is gradually disintegrating, resembling dust scattering in the wind.

By continuously adjusting the Noise amplitude and speed, I aimed to create a more layered dissipation effect rather than an instant disappearance, making it feel more like a slow dissolution rather than fragmentation. The current dissipation effect already exhibits a certain degree of natural behavior, but some areas still feel too linear. In the future, I may introduce Flow Noise or Shaders to make the effect more organic.

The process of inspiration gathering

At the initial stage of conception, we aimed to explore the fundamental life activity of ‘breathing.’ I envisioned using particle diffusion as a metaphor for breath, where each exhale disperses tiny particles into the air, just as the wind carries seeds or pollen. This dynamic interaction visually represents the invisible flow of energy between humans and nature, making the act of breathing more tangible and immersive. Breathing is not only an essential physiological process for human survival but also plays a crucial role in psychological regulation and meditation practices. As my thoughts expanded, I began to consider the connection between breathing and nature.

Plants release oxygen through photosynthesis, while humans absorb oxygen through breathing, forming a delicate symbiotic relationship within nature. This led me to wonder whether this invisible exchange could be visualized, allowing the audience to intuitively perceive the connection between humans and nature. From this idea, I developed the concept of creating an interactive art piece where ‘flowers’ bloom or wither in response to the viewer’s breath. Flowers, as symbols of vitality in nature, are both fragile and full of life, sharing a rhythmic quality with human existence. Through digital technology, the viewer’s breathing patterns can be captured and transformed into visual changes, directly influencing the shape of virtual flowers.

In psychology and meditation, breath regulation is a common relaxation technique that effectively influences the nervous system, helping individuals achieve a state of calmness. Thus, I hope this artwork is not only an artistic expression but also a meditation aid. By adjusting their breathing, viewers can observe the transformation of flowers, becoming more aware of their own breath and achieving deeper relaxation.

The core of this concept is to enhance the viewer’s awareness of their breathing through interactive experiences while visually providing a soothing and healing atmosphere. It is not just a fusion of art and technology but also an exploration of the relationship between humans and nature, as well as between body and mind.


Progress on Touch Designer Effects — Troubleshooting and New Discoveries

Since the last blog posting, my work has been mostly troubleshooting, experimenting, and making some interesting outcomes. Here are the details of my work:

Solving the Image Display Issue

As I mentioned in my last post, my initial attempt to create a visual effect using the Geometry COMP failed because no image was appearing. To address this, I first updated Touch Designer to the latest version, thinking that the issue might be related to software compatibility. After the update, I carefully reviewed my setup and discovered that some buttons in the Add SOP operator weren’t activated. Once I fixed this, the image finally appeared!

However, the shape of the image wasn’t what I had envisioned. Instead of a smooth, circular form, it appeared as a hyperbola-like shape. This was a bit unexpected, and I realized I need to adjust the parameters further to achieve the desired circular effect. I’ll continue tweaking the settings to align the visuals with our project’s theme.

Outcome: Dynamic Circle Effect

While troubleshooting the hyperbola issue, I decided to explore other approaches. I successfully created a dynamic circle effect that responds to parameter adjustments. By manipulating the Noise parameters, I was able to generate various transformations, such as pulsating and morphing shapes, which could beautifully represent the concept of breathing. Additionally, I experimented with the Ramp tool to introduce color transitions, adding another layer of visual interest to the effect.

This dynamic circle effect feels like a significant step forward, and I’m excited about its potential. It’s versatile and can be adapted to different datas or stages of our project, depending on the adjustments we make.

Next Steps

1. Discuss Visual Aesthetics with the Group: During our next class, I’ll share my experiments with the team and gather feedback on which visual effects best align with our project’s vision. It’s important that my work complements the overall design and narrative.

2. Coordinate with Hefan: I’ll have a detailed discussion with Hefan to clarify our roles and responsibilities moving forward. We’ll need to decide how to divide tasks effectively to ensure a cohesive final product.

3. Collaborate with the Arduino Team: I’ll also connect with the team members working on the Arduino sensors to explore how we can integrate their data into Touch Designer. This could involve using sensor inputs to drive visual changes, creating a more interactive and immersive experience.

Progress on Touch Designer Effects — Fist Attempt

Initial Research and Inspiration

To kick things off, I spent time researching references and case studies on YouTube and Pinterest. These platforms provided a wealth of inspiration, showcasing how others have used Touch Designer to create dynamic and fancy visuals. I found some fascinating examples of fluid simulations, organic animations, and particle systems that resonated with the concept of breathing. These references helped me conceptualize how we might translate the theme into a visual experience.

First Unsuccessful Attempt

My first attempts were based on a YouTube tutorial on creating dynamic visual effects with Touch Designer. However, I ran into an issue where the Geometry COMP wasn’t rendering any visuals, despite following the steps correctly. I’m still troubleshooting this problem, which might be related to the setup of the operators or the version of Touch Designer. I’ll continue to debug this and consult tutorials or forums to resolve the issue. While this was a setback, it was a valuable learning experience that highlighted the importance of understanding the intricacies of Touch Designer’s workflow.


Success: Particle Effect (life.tox)

Despite the initial hiccup, I managed to create a particle effect, which involves particles that continuously generate and disappear, creating a sense of movement. I named this file life. tox, as it felt like a fitting representation of the cyclical nature of breath and existence. This effect could be an addition or chop to our final project, perhaps as a background element or a transitional animation. I’ll refine it further to better align with our overall aesthetic.

Experimenting with Visual Distortion

In addition to the particle effect, I experimented with applying Touch Designer’s distortion and color manipulation tools to an image of a lung. I created a series of effects where the lung image shifts in color and warps in shape. But I haven’t figured out how to make it mimic the rhythmic expansion and contraction of breathing. While these experiments are still in their early stages, they’ve given me a clearer idea of how we can visually represent the theme. I’m particularly excited about the potential of combining these effects with audio or sensor data to create a more immersive experience.

Next Step
  1. Resolve the issue with the Geometry COMP to achieve the desired visual effect.

  2. Refine the life. tox particle effect and explore how it can integrate with other elements of the project.

  3. Expand on the lung image experiments and fine how it can mimic the rhythm of breathing expansion and contraction

  4. Collaborate with the team to ensure my visuals align with the overall direction of the project.

css.php

Report this page

To report inappropriate content on this page, please use the form below. Upon receiving your report, we will be in touch as per the Take Down Policy of the service.

Please note that personal data collected through this form is used and stored for the purposes of processing this report and communication with you.

If you are unable to report a concern about content via this form please contact the Service Owner.

Please enter an email address you wish to be contacted on. Please describe the unacceptable content in sufficient detail to allow us to locate it, and why you consider it to be unacceptable.
By submitting this report, you accept that it is accurate and that fraudulent or nuisance complaints may result in action by the University.

  Cancel