Reason for Decoration
In the Week 10 lecture, we received feedback from Jules and tutors on the effectiveness of our rehearsals: Since the sensor has many cables, it is not particularly beautiful when viewed on site, so it is best to make several boxes or covers for them, leaving only the sensor itself. We also agreed that this was a very meaningful suggestion and therefore designed the decoration for the hardware installation.
Inspiration
Thalassophobia is the chosen theme for our group. Thalassophobia, as the name suggests, is about the phobia of the deep sea. Therefore, the decoration should be related to the deep sea atmosphere.
In terms of color, we chose the dark blue of the sea. For objects that need to be decorated, in addition to the sensors with many cables there is also the MIDI controller that only need to have one button among many. And they are only allowed to expose the small part that can receive external information for interaction, which is very similar to the bright light seen by a person after falling to the bottom of the sea (see Figure 1, Figure 2 and Figure 3). So we prepared blue and white cardboard, and planned to make two boxes for the two Arduino Unos for vision and sound, and a cover for the MIDI controller that only displays one of the buttons.

Figure 1: Deep Sea Environment.

Figure 2: Deep Sea Environment.

Figure 3: Deep Sea Environment.
Handcrafting Process
Ruojing, Yuan and I concentrated on handcrafting during the weekend of Week 10 (see Video 1 and Video 2). At the same time, I also produced instructions for using the sensor and MIDI controller, which were displayed to users on two iPad screens on site (see Figure 4).
Video 1: A Video Showing the Sensor Decoration Production.
Video 2: A Video Showing the MIDI controller Decoration Production.

Figure 4: Instructions for Using Sensors and MIDI Controller.
On-site effect
All hardware equipment on site is placed on the table. During the formal presentation, we also received feedback from a tutor who suggested that we could attach the sensor usage instructions directly to the sensor boxes, so that users do not have to glance at the iPad next to them and then come back to interact with the sensor, which reduces some troublesome steps. Therefore, we wrote small notes with instructions for each sensor and posted it on the sensor boxes for the convenience of users (see Figure 5 and Figure 6).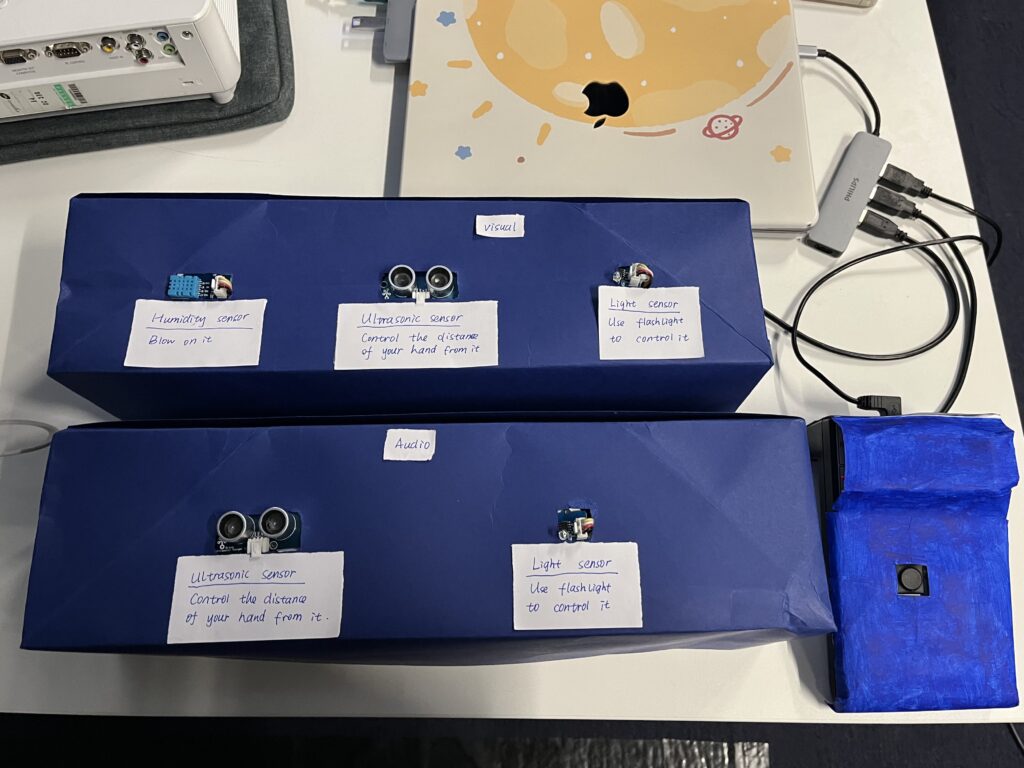
Figure 5: Decoration of Sensors and MIDI Controller.
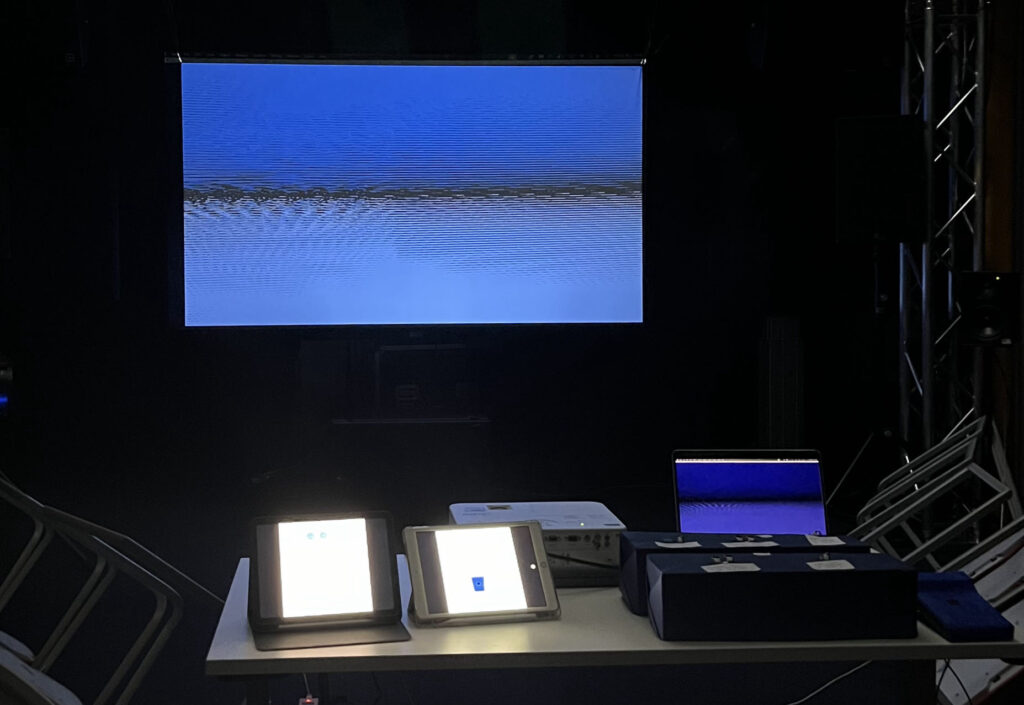
Figure 6: The Overall Effect of Decoration in the Installation.