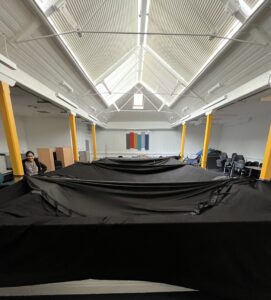
Time to develop the setup for this project! As stated previously, we will be presenting in the Atrium of Alison house. We had scoped this place out early on due to its adaptability and layout. One of the main concerns that we had was the light in the space coming from the overhead skylights. These skylights do have blinds on them, however no one knew how to close them.
One day, Molly went searching, following the wires on the ceiling and down the walls. And Molly found the switch for the blinds! This was very exciting as multiple groups needed this space to be darker for their projections to be visible.
So the plan was to present late in the evening for optimum darkness. However, as multiple other groups also need this space to be dark all day, Jules Rawlinson came up with the solution – draping blackout curtains to fill in the hole:
Large change: no more physical staircase for the interaction zone! As you will have read in previous posts – we decided that a distance sensor with select boxes to step into to represent forward, neutral and backwards, would be better for the interaction as well as for health and safety.
Group test day 29th March:
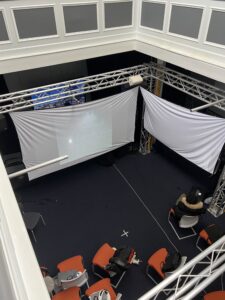
As we were unable to find the supposed projector screens that used to be in the loan store, we initially experimented with a shower curtain and were thinking of other solutions.
– Side note and a note to future groups!- on the day of testing the shower curtain, we were also up at 5am scanning the steps. In the afternoon Molly ran to ECA before the meeting in Alison house to pick up our first projector. Unbeknownst to her, it was very heavy and she had to walk from Lauriston loan store all the way to Alison house. From there on, we took taxis.
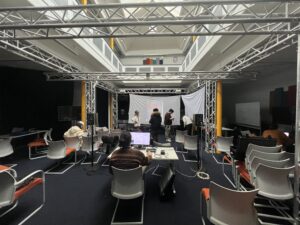
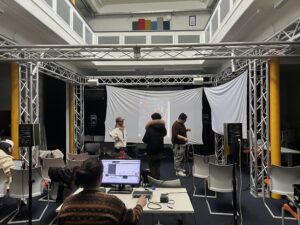
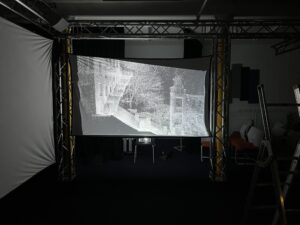
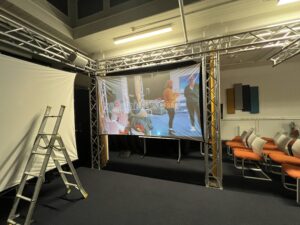
This was not feasible so we spoke to Jules and he bought some purpose projector screens for us that we were able to hang up on the truss in the space. The images below show when we first hung them up to test out the positioning and how the projectors would look on them when projecting from the back. On this day we were also able to test the positioning of the speakers in order to see how the surround 7.1 sound would feel and work.
All in all this was a very successful meeting where all areas of the project were able to be tested and feedback given by Asad to further develop and modify our ideas.
4th April: Finalising the Layout.
Since submission 1, and upon feedback and suggestions from tutors, we decided to add more elements to our project so that it felt like more of an exhibition that you might find in a museum. The exhibition can be decided into three areas:
- Middle: Main interaction and visual zone
- Right side: 3D model and behind the scenes video
- Left side: Sound project visualisation and promotional material.
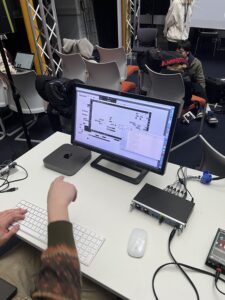
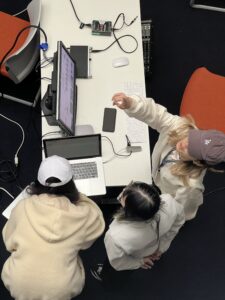
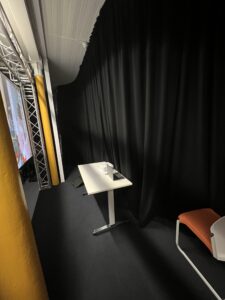
When designing the layout of the exhibition it was important to consider the flow of the audience. Myself and Daniela took the time to set up the projector screens, experimenting with their placement and method of securing them. We also walked around the room to see how we could use the space layout to our advantage. It was very much an iterative process throughout the weeks.
The space had to work and be aligned with the “interaction zone” as it was only one person at a time. We also had to be aware of how the speakers would be placed with the projectors as it was all situated behind the screens and we didn’t want to block the back projection with any shadows.
Integrating the other various multimedia elements, outside of the main interaction zone were placed to be mirrored in the space to keep a balance to the exhibition. This meant that the audience would not feel confined into one area that was empty, but instead invited to move about the room and explore the different items, centred around the main interaction.

 Creating a video walk-though of the space and narrating where exactly everything is going really helped on the day of exhibition to make the setup more efficient. Also visualising where the boxes for interactions would be in order to design the distance of tables and how we can block users from interfering with the sensors.
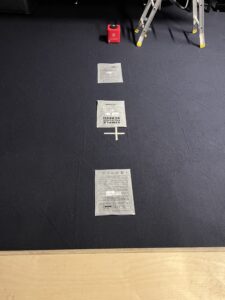
Trying to be resourceful and using what we could find in the atrium to our advantage. Finding tables, boxes, TV’s etc that are already in the room (or upstairs). Otherwise buying duck-tape for cables and drawing the interaction zone using our budget.
Altogether, this is our diagram for the day of exhibition:
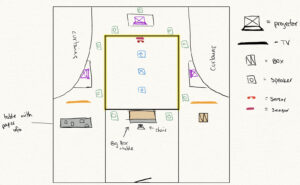
Let’s break this down.
- Speakers. // Boxes of interaction. // can be read about in the sound and interaction posts.
- Projector screens: Hung on three sides of the truss.
- Projectors: Three situated on tables at the right height and distance behind the screens.
- Sensors: Distance and Kinect
- TV screens
- Right = BTS video
- Left = Sound visualisation of MaxMSP
- Not seen: TV screen in front of the door – this was a last minute decision to add based on previous group setup. Worked to our advantage.
- Tables
- Left: for the promotional material
- Middle: For sound equipment computer
- Boxes
- Middle: Blocking and dividing the space of interaction
- Right: smaller and taller box for the 3D model.
- Not shown: Lighting.
Lighting
We knew that we needed lighting to show the 3D model and the promotional posters and postcards. Staying resourceful, we asked around our group to see who had a desk lamp that they could bring to the day of exhibition. Molly and David both had clamp-on desk lamps that worked perfectly for both. They were also a warm light, rather than cold as to not overpower the projections.
Equipment
Here is a list of the equipment used in the space (not including sound equipment).
| Projectors | 1 Optima Short throw projector and 2 Sony short throw |
| Screens | 2 small, 1 large fabric projector screen |
| Lighting | 2 clamp desk lamps |
| Cables | 6 HDMI cables, 5 Extension leads, 3 USB-c to HDMI adaptors |
| Computers | 3 MacBooks, 1 Windows desktop |
| Sensors | Arduino Ultrasonic Distance sensor; Kinect sensor. |
| TV | 2 smaller tv screens, 1 large. |
If you’re reading this in order, please proceed to the next post: ‘Sonfication #3 – Sonified Granular Synthesis’.