Overview:
The user’s decision-making interactions in the device can be broadly divided into four states:
Going up the steps from the preset position;
Returning from the upper position to the preset state position;
descending from the preset position to the next level;
Returning to the preset position from a lower level position.
In the final implementation of the device, we actually represent the user’s decision position during the above process by setting a distance threshold. On this basis, we can divide the results presented under the data extremes into realistic conceptual sound groups (ResultA) and surreal conceptual sound groups (ResultB).
ResultA: Based on a single layer of sound material prototypes, this conceptual sound set is based on the sound of all possible events in the decision making process in the installation, from which the auditory dimension of the connection between the person and the real event is evoked and the resonant similarity between the person and the installation is established. In terms of production, the single-layer sounds are edited within a reasonable range of the concept of reality in terms of the values of the time domain parameters (IR coefficients), at the basic sound distortion stage.
ResultB: An extreme surreal composite sound layer based on ResultA, the control sound group as opposed to ResultA. The material of the sound itself is identical to ResultA, but the aural effect is distinctly different in perception from the former; the sound processing technique no longer sets a reasonable range in terms of parameters, and the aural effect is presented as a completely conceptualised non-real-world sound. The aural purpose of this result is to construct an immersive narrative within the concept of this installation, which is completely different from the previous one, but essentially part of the same sound evolution.
The design concept of the installation aims to explore the different states and possibilities of people and systems, so in the production of this sound library I have focused on ‘people’, selecting samples of sound material from the diversity of human interactive behaviour. For example, different age groups – primary school students, university students, workers, etc., different actors – roadside beggars, tourists, etc., different amounts of human voice – two-person conversations, multiple people, etc. . In addition to the speech sound information described above, the human-centred sound body also includes non-semantic sounds, as well as the sounds of actions made by pedestrians recorded in the field, such as the sound made by a wheel when a person is walking. The sound of dragging a suitcase, the sound of a chain when carrying a bicycle, etc., are the focus of this sound bank. These are the main focal points of the sound library.
Classification of sounds:
Based on the above concepts, the objects sampled for this sample sound sampling can be broadly divided into the following categories:
1. footsteps
2. human
Speech: conversational and non-verbal sound symbols such as breathing, laughing, coughing, etc.
Action (all body sounds except footsteps)
Phantom (variants of human and animal sounds)
3. animals (dogs, birds …… )
4. objects (bicycles, trolleys, bells …… )
The Link of Trigger Sound Libraries:
https://drive.google.com/file/d/11IggVWbuaUf60oav9JVdlxHemTmLRgqy/view?usp=sharing
Sound production process and reflection:
During the sound editing process, I processed multiple versions of each individual sample sound, adjusting them to each other to varying degrees in multiple dimensions such as the time and frequency domains, varying from low to high frequencies to each other, as well as overlaying multiple layers of sound dimensions from single to composite. These different versions of sound in the scene represent the intermediate process of the user’s decision from ResultA to ResultB, a combination of multiple sound states (multiple small processes) and triggered transitions according to the data range.
During the pre-production field recording, I purposefully recorded many human-based sound samples using Sennheiser 416 microphones, including but not limited to human voices, group noise and footsteps, moreover, people unintentionally sneezing, coughing, bicycle chains and bells on backpacks, busy cell phones, etc. These sound samples provided me with a lot of creative inspiration for the post-production sound.
Throughout the post-production process, my goal was to be able to use the same realistic sound samples to create multiple, contrasting versions of the sounds. For example, a bent, grainy techno sound effect with an ethereal echo sound effect, or a sharp, transient, prominent tone effect with a thick, layered sound effect, etc. The main DAWs I use are Logic pro and Reaper, and the sound production process techniques are as follows:
Time stretching and pitch shifting:
changing the pitch and playback speed of audio can produce unusual and surreal sounds. Logic Pro has built-in time stretching and pitch shifting tools.

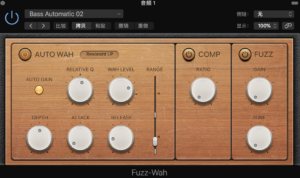
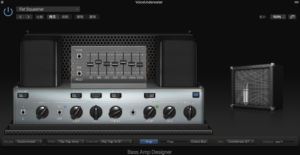
Distortion and Saturation:
Adding distortion or saturation to audio can produce a raspy, aggressive sound. I try to experiment with different types of distortion and saturation plug-ins to find the right amount of texture for each sound. (Overdrive/ Distortion/ Amp Designer)
Layering
Combine multiple layers of sounds with different textures and timbres to create a complex, transcendent atmosphere. It includes layered synthesized sounds, recordings of natural environments, and processed samples.
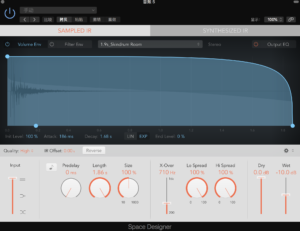
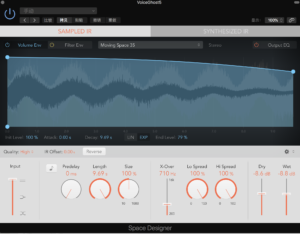
Reverb and Delay:
Use reverb and delay plug-ins to create a sense of space and depth in the sound. I try to make extreme settings, such as long decay times or high feedback levels, to produce weird, dreamlike atmospheres (Space Designer/ ChromaVerb/ Delay Designer).
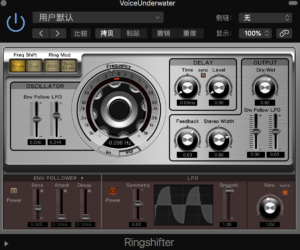
Frequency shifting:
Frequency shifting can produce metallic, dissonant sounds and can be used to add an element of unreality to your audio (Frequency Shifter in Logic Pro).
Resample:
Merge audio to a new track and further process it using any combination of the above techniques. This can lead to some unique and unexpected results (EXS24 in Logic Pro).
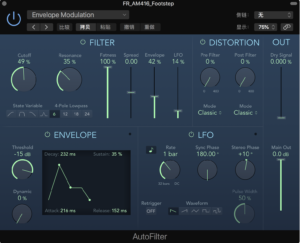
Automate Effects:
Automate effect parameters such as filter cutoff frequencies or reverb mix levels to create dynamic, ever-changing soundscapes.
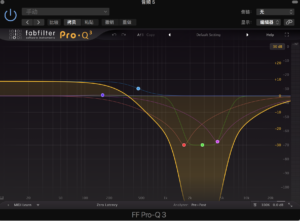
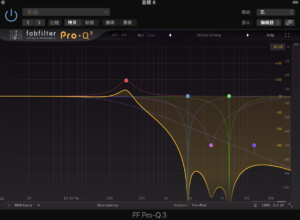
Experimental processing:
Use a spectrum processing plug-in like FabFilter Pro-Q3 to manipulate individual frequencies of the audio, removing, retaining or adding the parts of the frequencies I want to achieve some special spooky sounding effects.
Grain Synthesis:
Grain synthesis is a technique that involves manipulating small fragments of sound to create unique textures, such as Logic Pro’s Mangle.
Reverse:
Inverting sounds can create interesting textures and timbres that are not possible in traditional ways. Upside down vocals can often give a grotesque, ghostly feel. It can also be layered with its original, non-reversed counterpart to add depth and complexity to the mix. Often, the combination of forward and reverse sounds can create a sense of movement and space. For example, inverting certain elements of a mix may produce unexpected and interesting effects. For example, reversing the reverb tail can create a unique sucking sound that draws the listener in, while reversing the delay can create a disorienting bouncing effect.
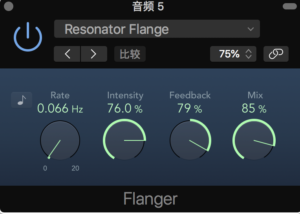
Flanger:
Creates a unique, wide, spacious sound by combining the original audio signal with a slightly delayed and modulated version of itself. It creates a comb filter effect that produces a series of notches in the spectrum that move over time, resulting in the characteristic hiss associated with flanging. It creates a lot of space and dimensionality for me in my mixes. But too much flanger can make a mix sound unnatural, so I experiment with different settings to find the most appropriate amount of flanger for the target sound.
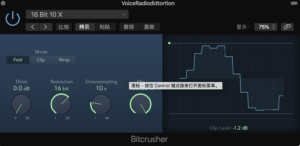
Bitcrusher:
This technique is mainly used for bit reduction and downsampling, but can also be used to add digital distortion and saturation to my sound. I control saturation mainly by adjusting the “drive” parameter.
Trigger sound design ideas and production process:https://blogs.ed.ac.uk/dmsp-place23/2023/03/23/interactive-trigger-sound/
If you’re reading this in order, please proceed to the next post: ‘Graphic Identity’.