Once we saw the 3d model of the stairs in Blender, with our predetermined shape in each point, making it look like something out of a pixel world dream, we asked ourselves how it would look if we created a physical model of this digitalized version of a physical place? A bit weird for sure, but what better than to try it ourselves.
Why do we want to do this?
The main reason behind 3d printing our scans is to show the representation and distortion of a place after it goes thru such a process.
From collecting our cloud points from the real physical place we are talking about to working the data in Cloud Compare to subdivide the amount of data we got, importing it to Blender, giving it a shape and a digital physical form again, finding a way to express this transformation the data has gone thru by printing it and showing it to the public.
Of course, we have our limitations with 3D printing as with any technology, but I find it extremely interesting the aesthetically pleasing way the 3D models came to be, as it is a physical representation of the process we put the data thru. One way to further show this is if we can print with a white filament (or we can spray paint the model) and place it on a black background. So it’s a representation of how we are working with our data digitally, white data on a black background, just like we worked most of the time in CloudCompare and TouchDesigner.
Choosing a cube as the form to use for this, using Blender I deleted most of the points that were floating in space and not really part of the primary stairs model. After delimitating the data that was gonna be part of the model, I created a simple structure to hold the model together “the bones of the earth the stairs are on.” Once the model was finished on Blender, I exported a .stl so I could import the model to PrusaSlicer, to slice the model and give it the determined setup needed for 3D printing.
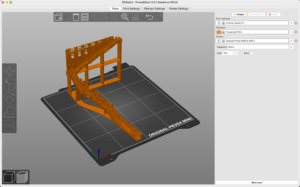
PursaSlicer software
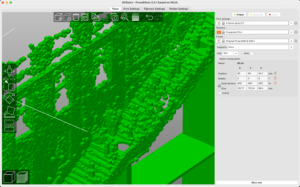
We purposely choose to leave some holes in the structure, as it’s an essential part that shows where our scanner was placed. For this version of the 3D model, we believe it will show up with many imperfections, but for us, that is part of its beauty of it.
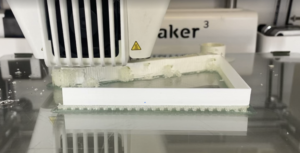
We will try to create a second 3D model using one of the Ultimaker 3 printers, which will allow us to print with two different filaments. Using a water-based filament for the parts that support the structure while printing, and those will be dissolved with water, creating a more detailed 3D model. For this print, we are using Ultimaker Cura software for the development of the printed model.
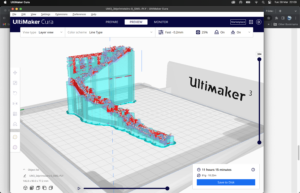
The Printing will be made on Thursday the 29 in the uCreate maker studios.
After getting all the files ready, I decided to go to uCreate before printing to ask them about my files and if they were viable for printing. In there the head of the 3D printing department looked at my model and told me that it was very likely to fail due to the complex geometry, another thing was that I was printing the model in one piece, and this created great waste of material.
After their feedback, I decided to change the model, creating a mesh and subdividing it to create a softer surface. After this, I decided to split the model into two pieces, this way I was able to print them horizontally and save material.
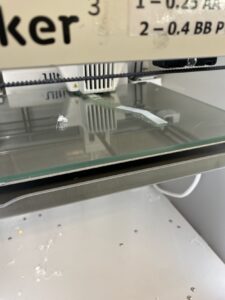
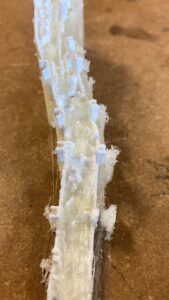
I printed the first part of the stairs without a problem, and it came out looking really interesting because you could also see all the supporting filament that gave it more character, so we decided to keep it. Printing the second part was a bit more difficult, I sent the files the first time, and while it did print, there was a corner of the stairs that was deformed. So I decided to print it again, only this time I stayed checking on the print, and after around an hour, it failed again. Feeling desperate as to why I was having trouble printing it, I asked for help and then learned that the reason it was not printing was that the machine was not calibrated correctly, once I learned how to do it, I started printing again. This print was supposed to be finished around midnight one day before the exhibition. So I went to pick it up and then found a Post-it not from someone in uCreate telling me that the print moved, and filed. I was not gonna give up, so I calibrated once again and sent the print once again, it was supposed to take around 8 hours to print. I had another submission the next day that I had to work on, so I stayed up all night working on that, and when 8am came, I went to check on the 3d printed model, and there it was, perfectly done.
Once back in Aslion house I simply joined both pieces together using superglue. And we exhibited the final model, as well as the previous failed attempts (and the post-it note) in a stand with a spotlight. During the exhibition, the audience took a great interest in the 3d model, as it was the physical representation of what they were seeing on the main screens.
If you’re reading this in order, please proceed to the next post: ‘Behind the Scenes’.
Daniela M