After discussing with Yijun and Allison, we decided to prepare two sets of camera animations for the two scenes respectively. In addition, we designed interaction for Scene 2 by using Kinect to recognize the user’s hands. To ensure that the content of Scene 2 does not affect Scene 1, the forest section also needs to be duplicated and correspond to Scene 1 and Scene 2 separately. This also allows for more freedom in interactive design, as we can individually control the changes, colors, and interactions of the staircase and forest sections in each scene.
Rendering structure
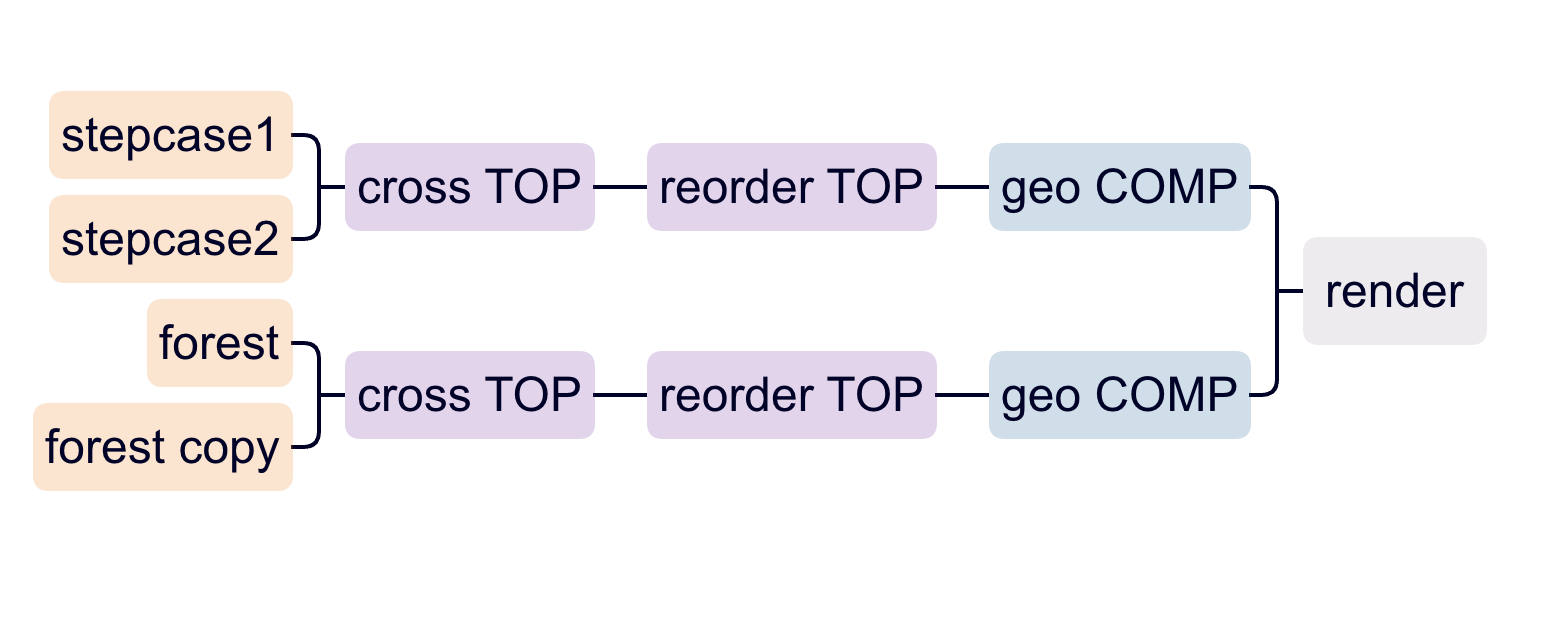
To implement the above ideas, we decided to redesign the rendering structure of the scene. We used two Geo TOP to display the staircase and forest sections separately and used Cross TOP and Reorder TOP to synchronize switching between the two staircase scenes and the two forest scenes. With this setup, when the values of the two Cross TOPs are both 0, the rendered content will be Scene 1. When both Cross TOPs receive a value of 1, the two sections switch simultaneously, and Scene 2 is rendered.
Camera switching
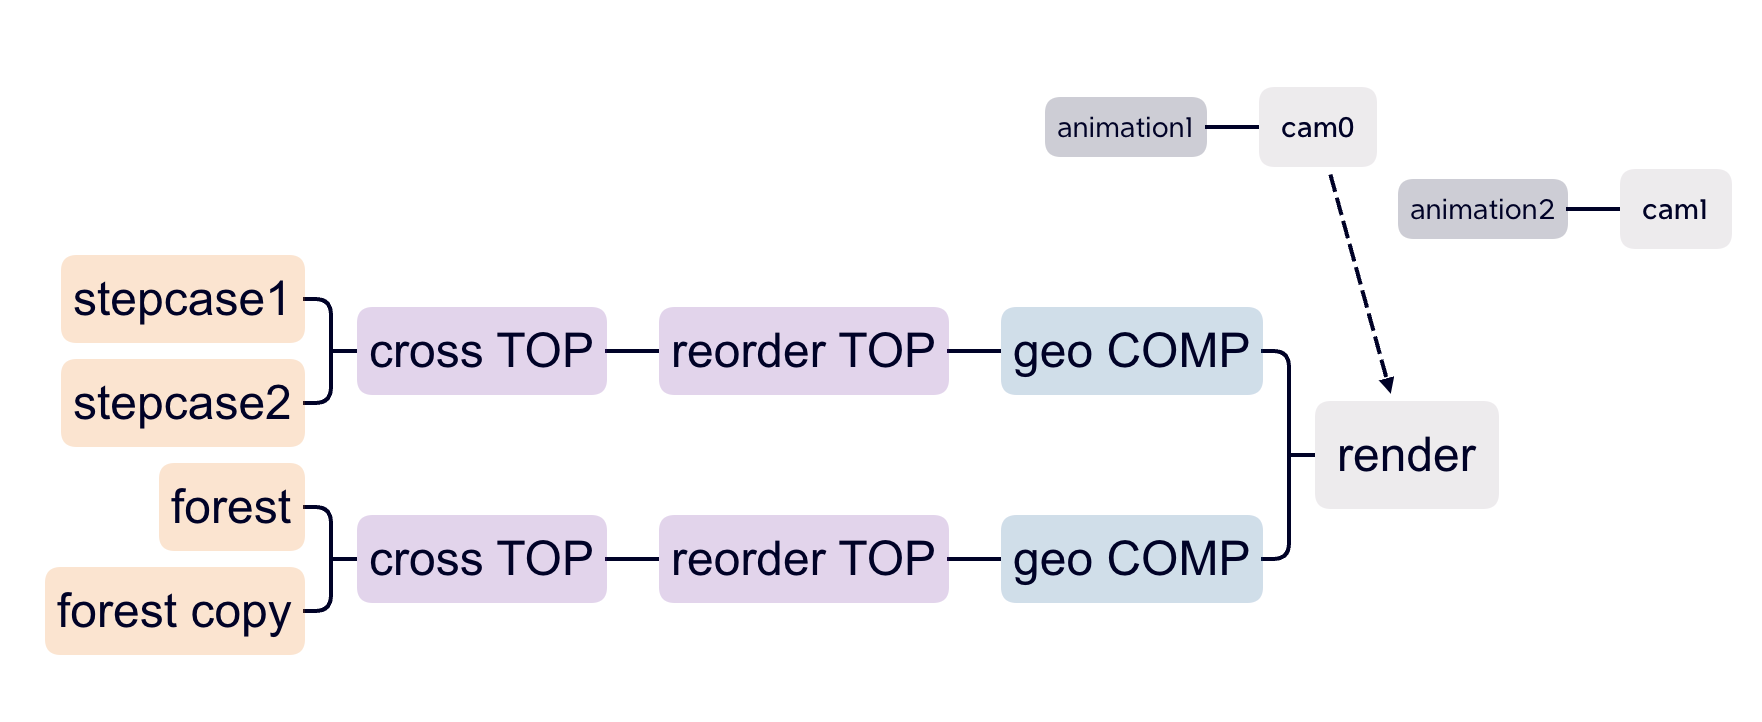
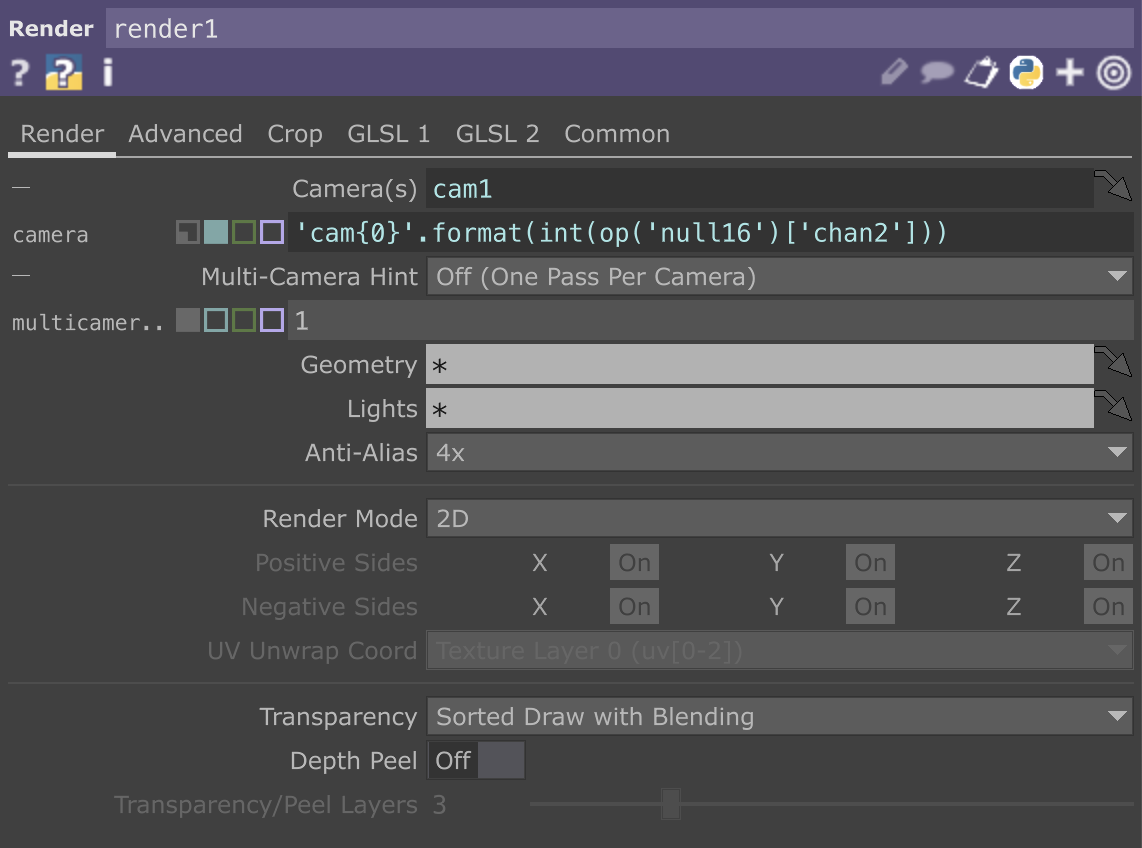
To synchronize the two different camera animations with the scene switching, I decided to use two cameras and create animations for them separately. I referred to Ruben(2021)’s tutorial on TouchDesigner multi-camera switching on YouTube. To switch between the cameras, an expression was set in the camera parameters in the Render TOP: ‘cam{0}’.format(int(op(‘null16’)[‘chan2’])). By receiving values of 0-1 similar to the Cross TOP, the floating point number is converted to an integer through int(), which switches the view between the two cameras cam0 and cam1.
If you’re reading this in order, please proceed to the next post: ‘TouchDesigner Point Cloud Camera Animation#1’.
Reference list
Papacci, R. (2021). [OUTDATED] Simple Way To Cycle Through Multiple Cameras in TouchDesigner. [online] www.youtube.com. Available at: https://www.youtube.com/watch?v=6wGYWXhZUFs [Accessed 27 Apr. 2023].
Yuxuan Guo