To transfer point cloud files to TouchDesigner for further editing, we referred to the videos uploaded by B2BK(2023) and Heckmann(2019) on YouTube as a reference.
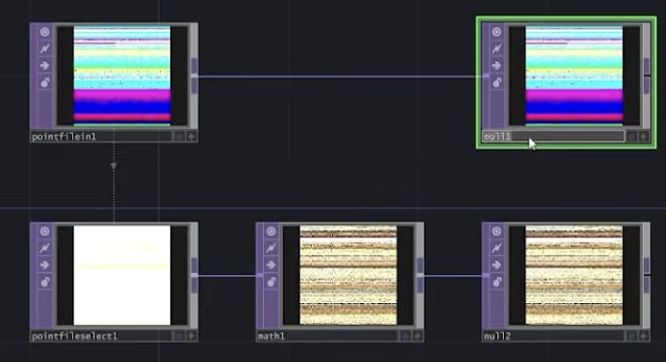
Separating coordinates and colors.
In TouchDesigner, we used the pointfilein TOP to import point cloud files in the PLY format that were previously exported. Afterward, we used the pointfileselect TOP to separate the corresponding color sections in the point cloud file. The colour values are encoded from 0 to 127 in the ply file. To get the right colours, it’s necessary to create a math TOP and divide by 127.
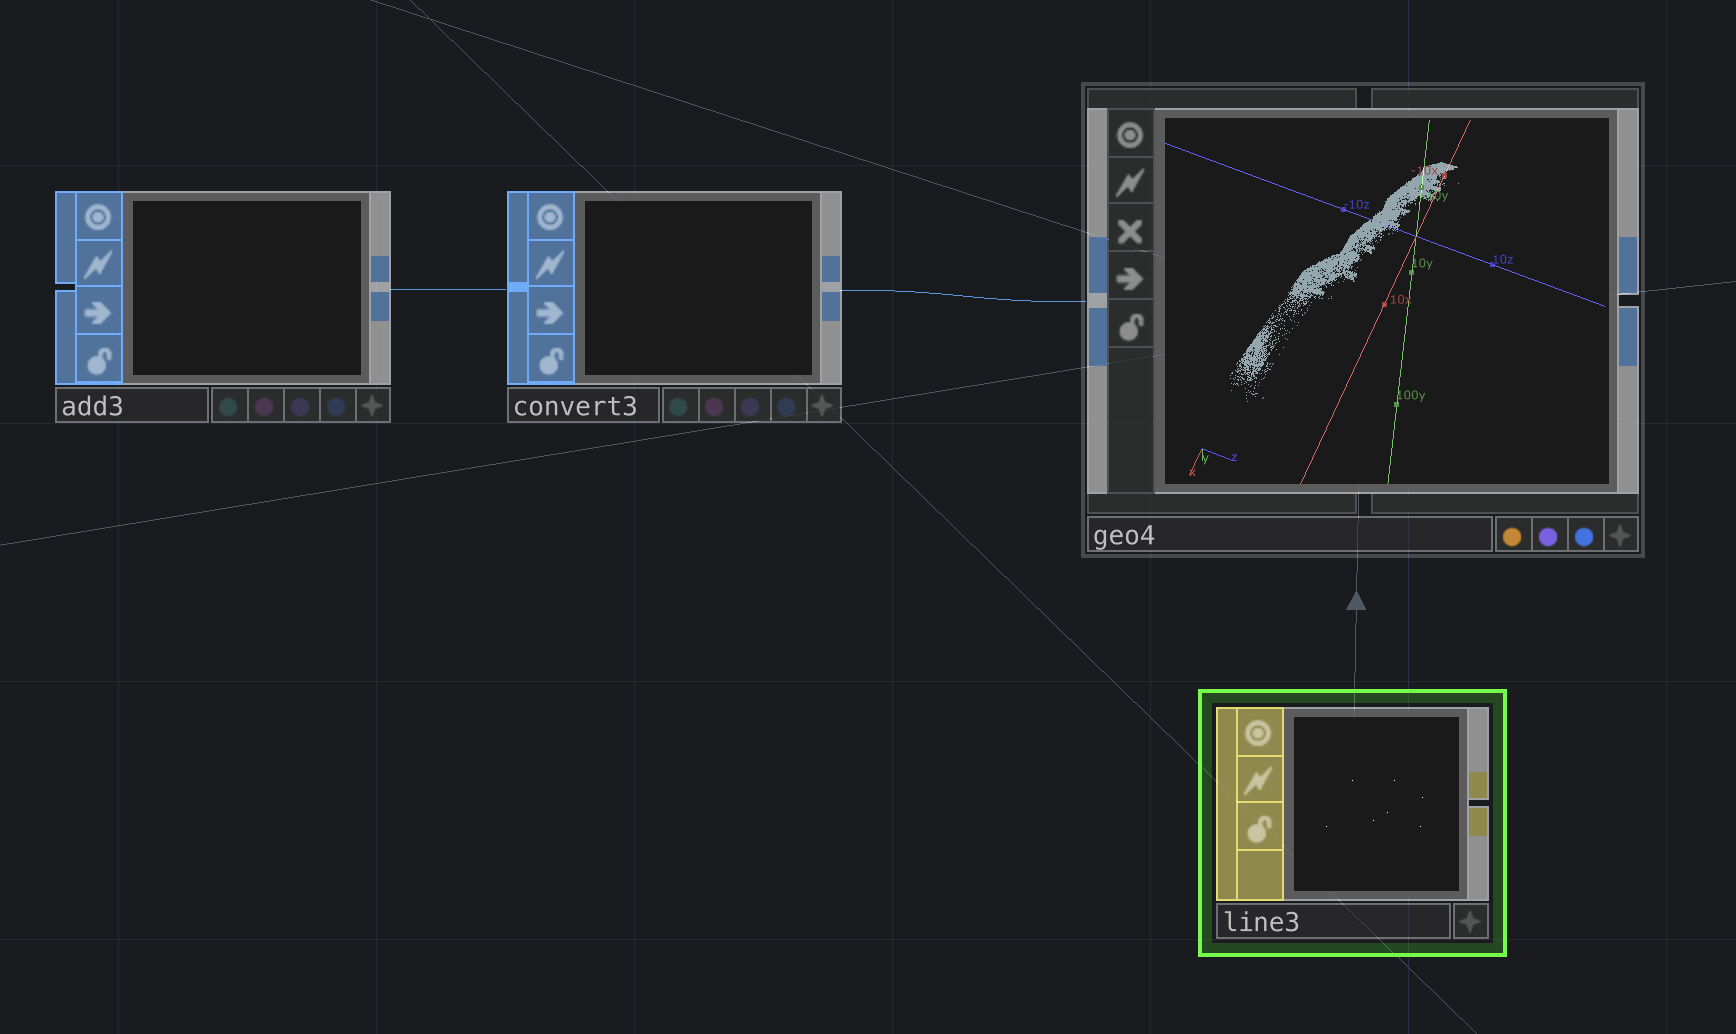
Adding materials.
Next, we created a Geometry COMP and added an Add SOP and Convert SOP to it. Then, we linked the point cloud coordinates and colors from the previous steps in the Geometry COMP. Then, we added a Line MAT as the material for the Geometry COMP, and the basic point cloud import operation was complete.
Rendering
Finally, to display the point cloud, we needed to add a Render TOP to render the contents of the Geometry COMP. The Render TOP also needs to be used in conjunction with a Camera COMP and a Light COMP for proper rendering.
In addition to these steps, we can also use the Point Transform TOP to adjust the position of the point cloud in 3D space, and use tools such as the Ramp TOP to adjust the color of the point cloud during the first step.
If you’re reading this in order, please proceed to the next post: ‘Touchdesigner visual part 1 – import point cloud file into touchdesigner #2’.
Reference list
B2BK (2023). Touchdesigner Tutorial – Advanced Pointclouds Manipulation. [online] www.youtube.com. Available at: https://www.youtube.com/watch?v=dF0sj_R7DJY&t=153s [Accessed 26 Apr. 2023].
Heckmann, M. (2019). Point Clouds in TouchDesigner099 Part2 – Using a Point Cloud File (Star Database). [online] www.youtube.com. Available at: https://www.youtube.com/watch?v=TAmflEv0LJA&t=1221s [Accessed 26 Apr. 2023].
Yuxuan Guo & Yijun Zhou