In our stage performance project, we originally planned to place an ice screen in front of the main screen to project the gantry image and the expression performance to express the emotions of the little fish. Actors could travel in front of and behind the ice screen during the performance, creating a before and after scene.

However, during the testing phase, we encountered some challenges:
- The superposition of the front and back stage structures did not meet our expectations in terms of visual effect. There was a lack of harmonious integration between them, which in turn appeared to be abrupt and distracted the audience’s attention.
- The size ratio of the ice screen is 1:2, which is quite different from the ratio of the projected image of the projector, causing difficulties in video production.
- The light source of the small projector would penetrate the translucent ice screen and shine on the main screen, which affected the picture effect of the main screen.
For these reasons, we decided to move the ice screen to the right side of the stage and adjust the content strategy. We dropped the originally planned gantry screen and small fish emoji performance and instead created an abstract screen that could interact with the performers in real time. I created a TouchDesigner file to achieve this, and chose a blue colour palette that echoed the theme of the stage to simulate the flowing aesthetic of liquid water. Driven by the live sound, the dots of light in the image would flicker and flicker in response to the intensity of the sound, resembling the light jumping off the surface of the water.
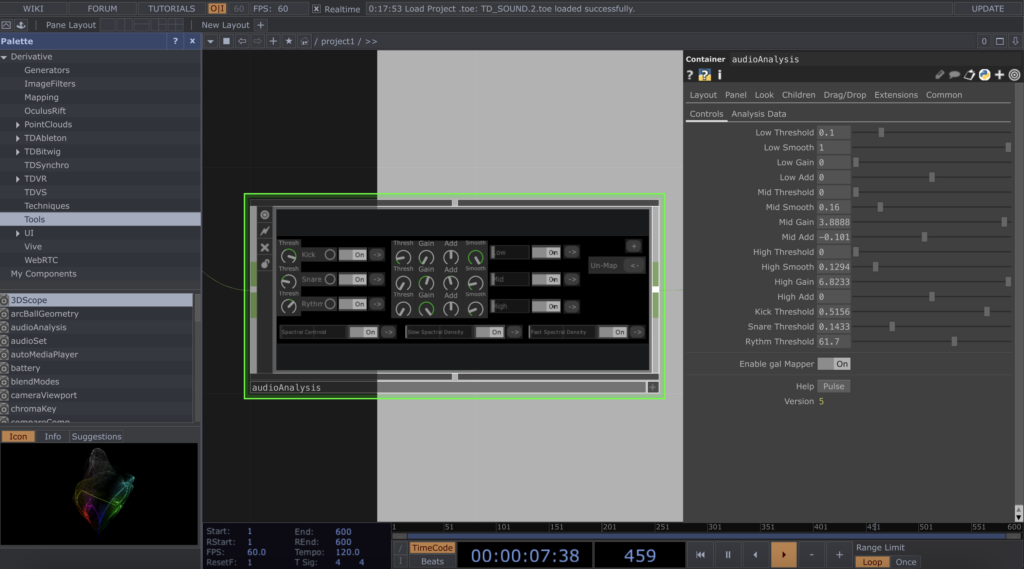
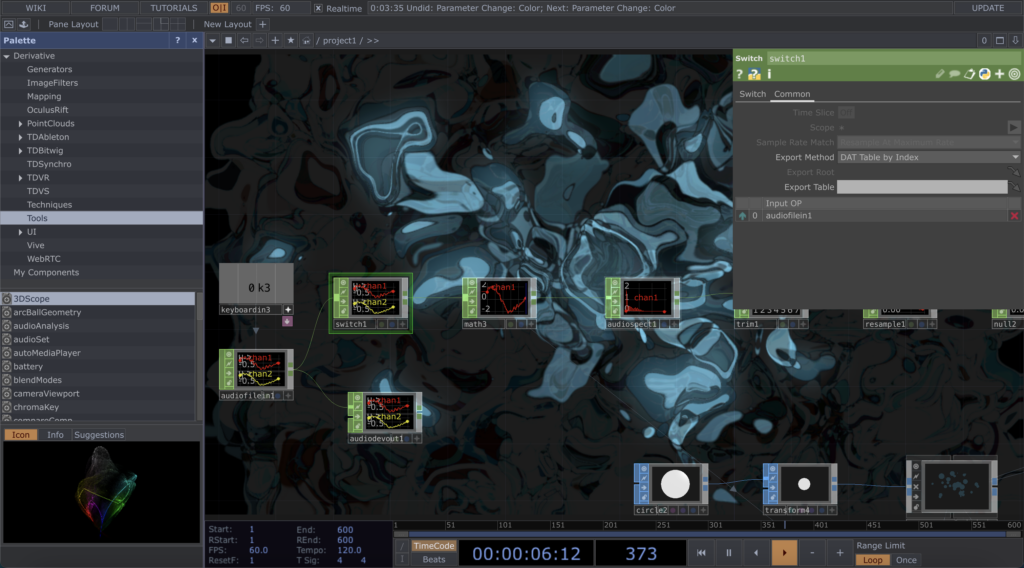
At first I tried to use the audioAnalysis block to capture the low, mid and high frequencies, spectrum, tempo and volume of the live sound, in order to generate a varied and layered visual effect. However, after a series of tests, I found that this approach did not work as well as I had hoped when combined with live sound. So I turned to the switch component. Although switch is not as sophisticated as audioAnalysis in terms of functionality, it shows a much better and more stable performance in the field.