
Details August 22
Advanced calculation for Overall Grade
Instructors have varying preferences about how they define the overall grade calculation. Now the Overall Grade supports an advanced calculation. This new calculation gives instructors greater flexibility and supports varied evaluation practices.
The instructor may use the ‘Set it up’ option to configure the Overall Grade.
Image 1. An instructor may select a points, weighted, or advanced calculation for the overall grade
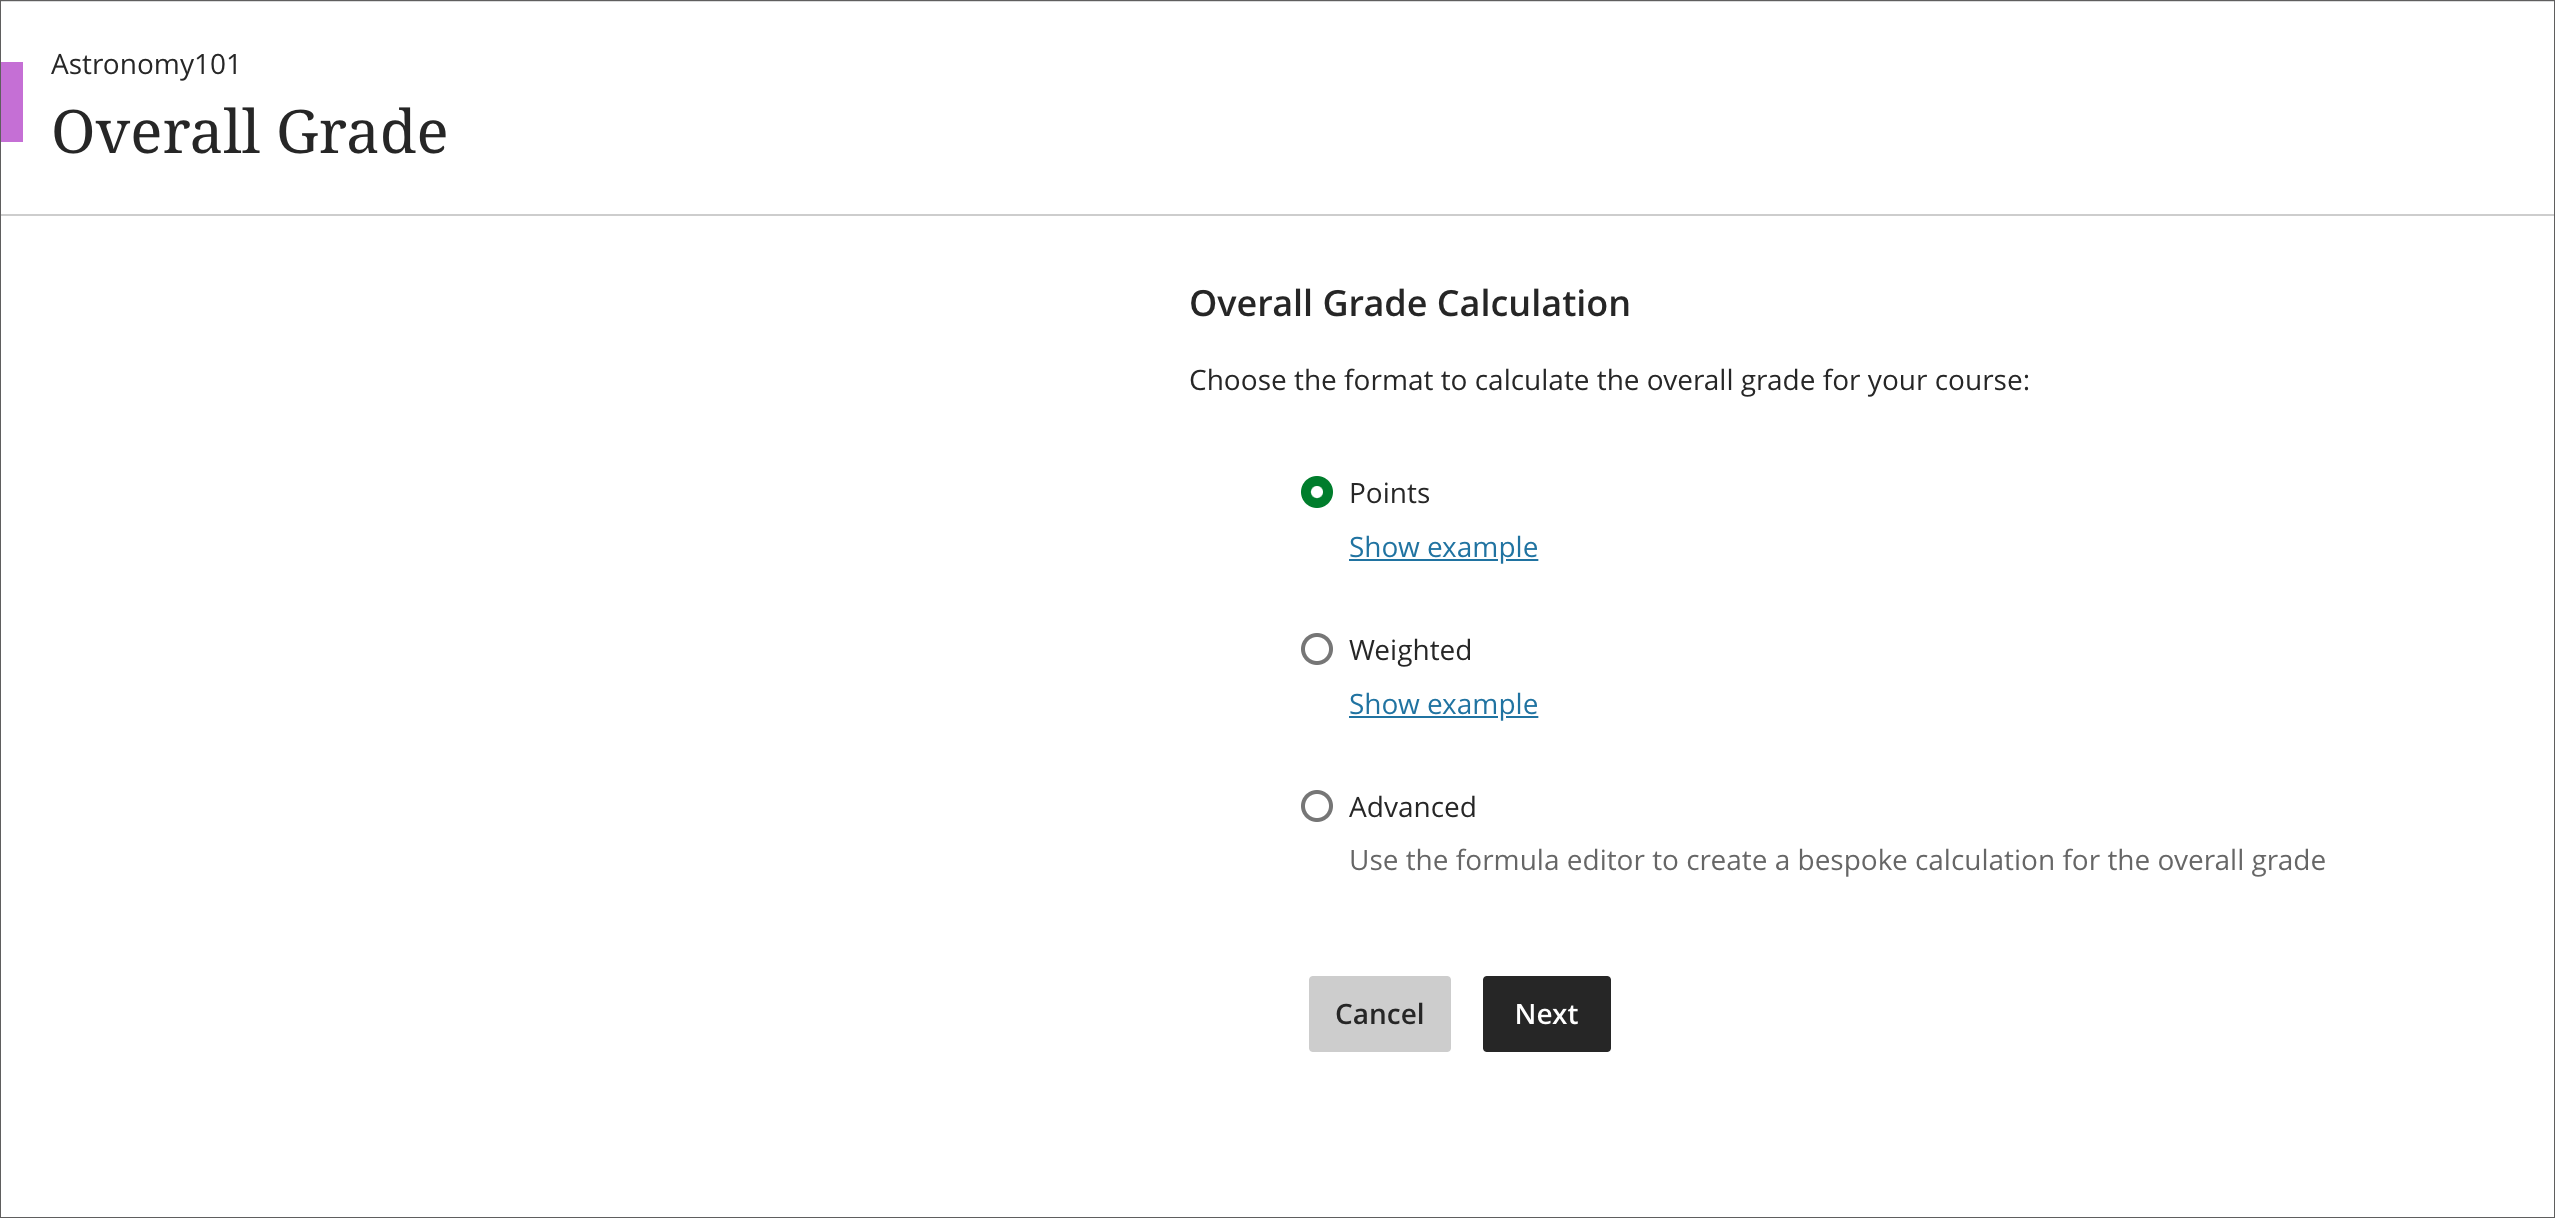
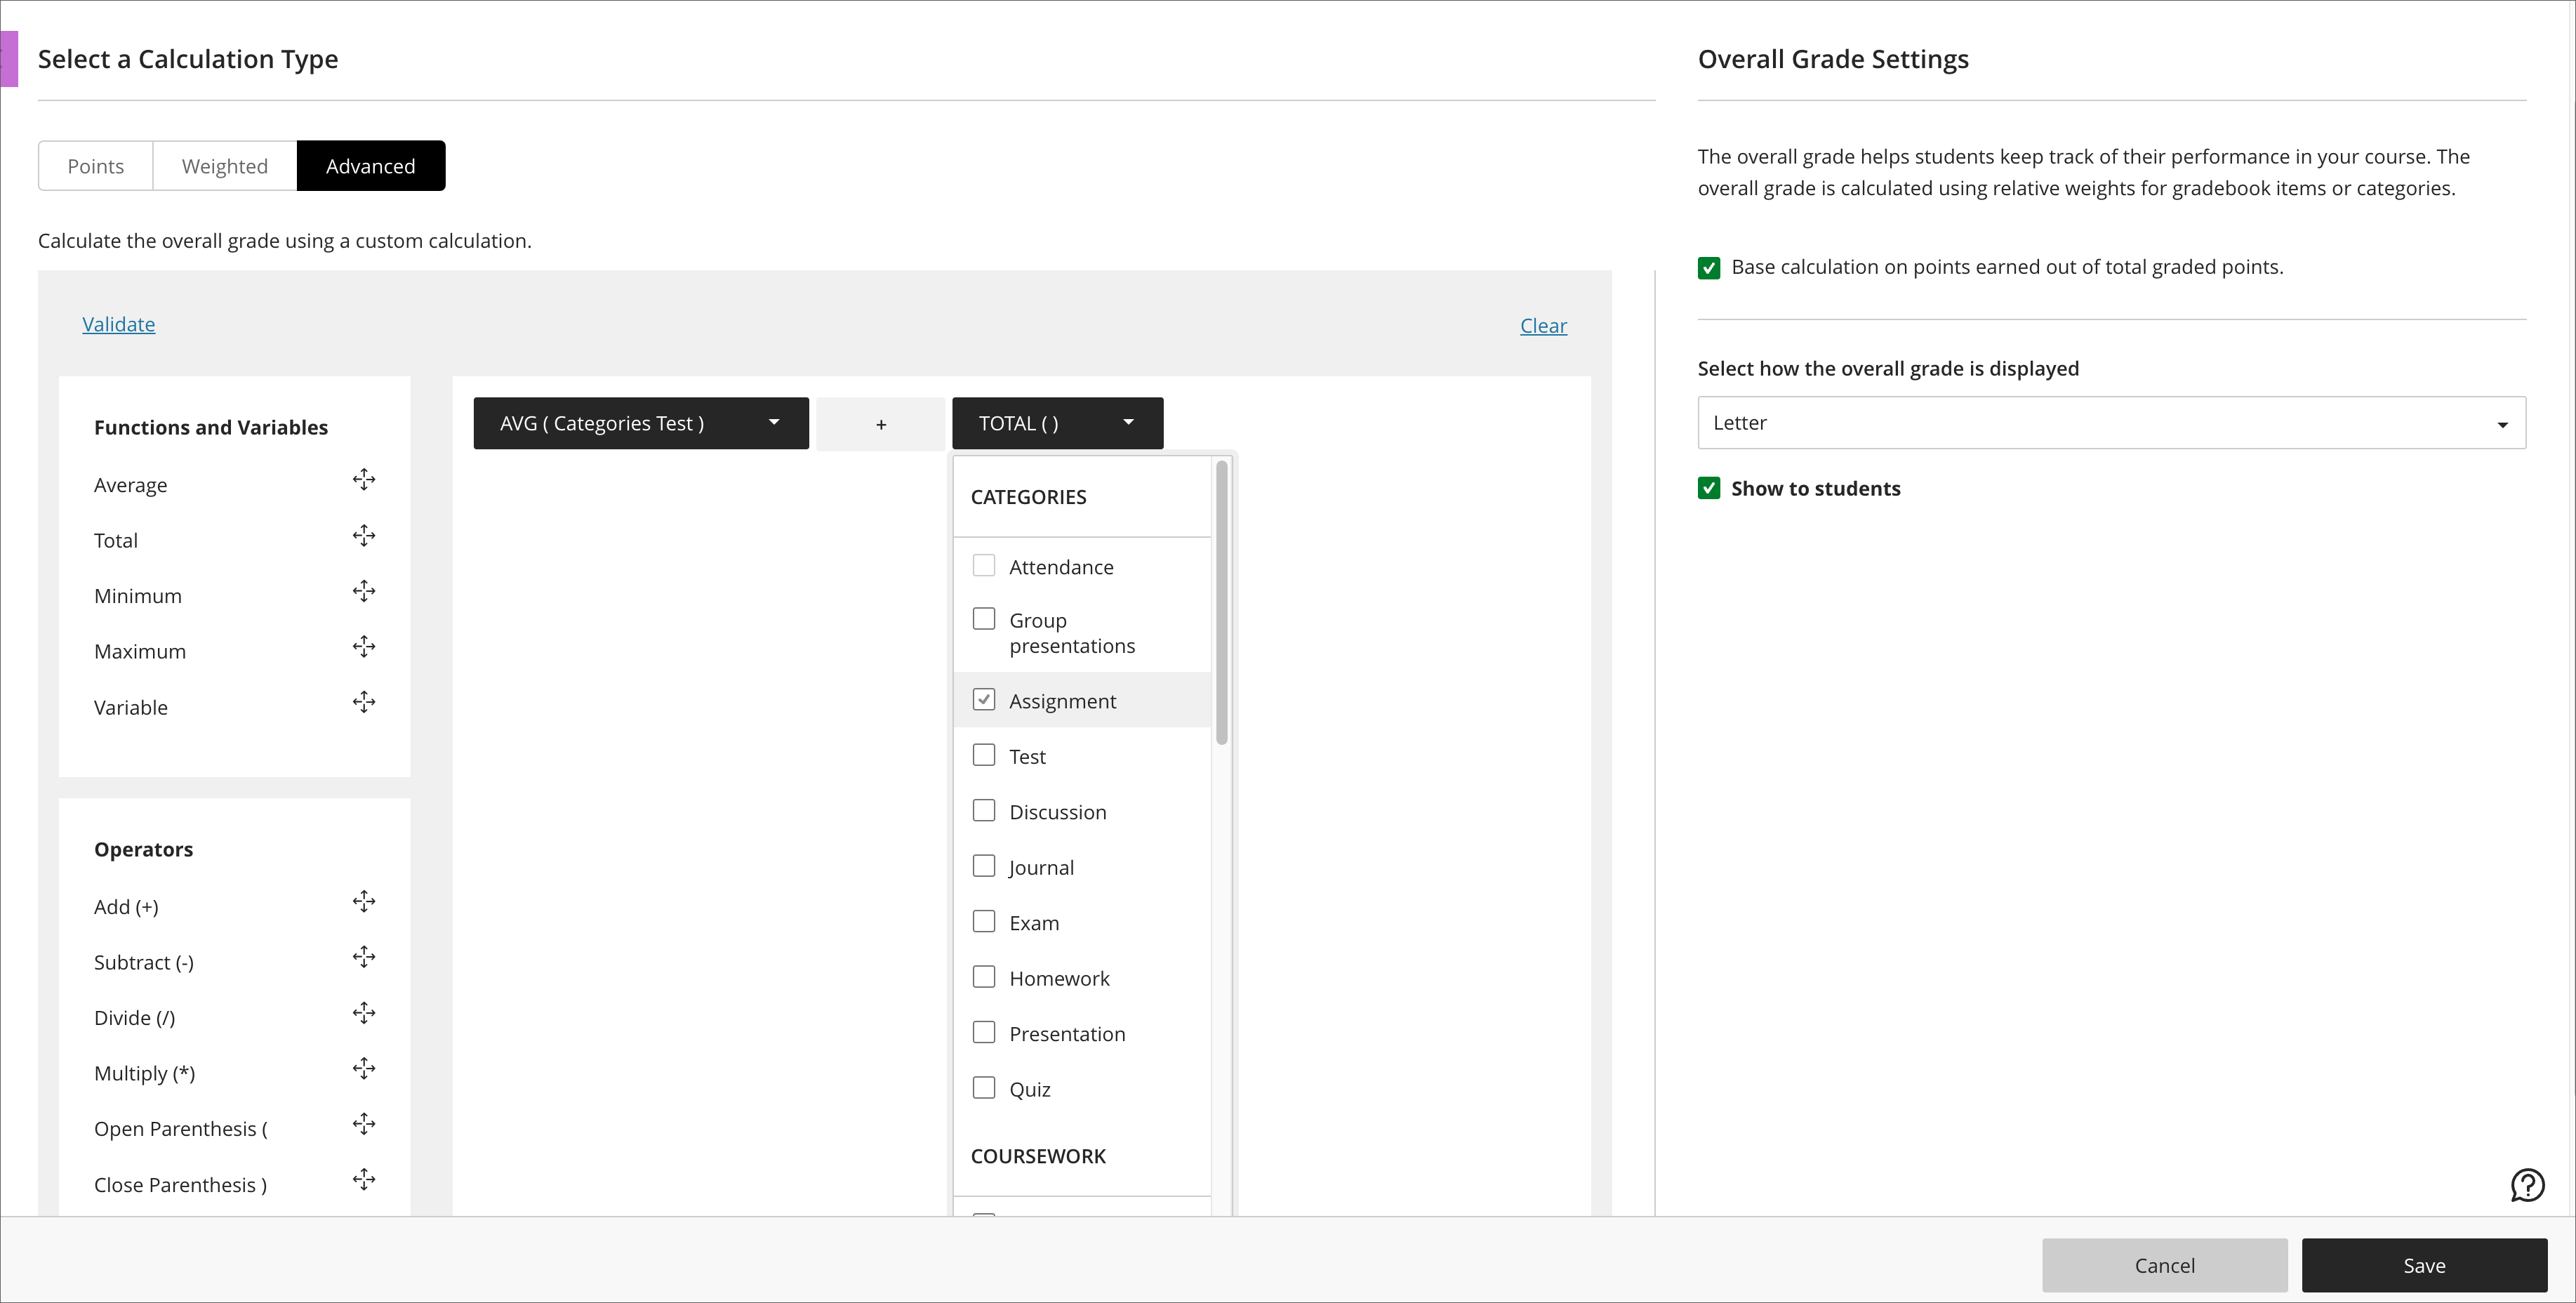
Image 2. An instructor may configure an advanced calculation for overall grade
Managing Question Banks
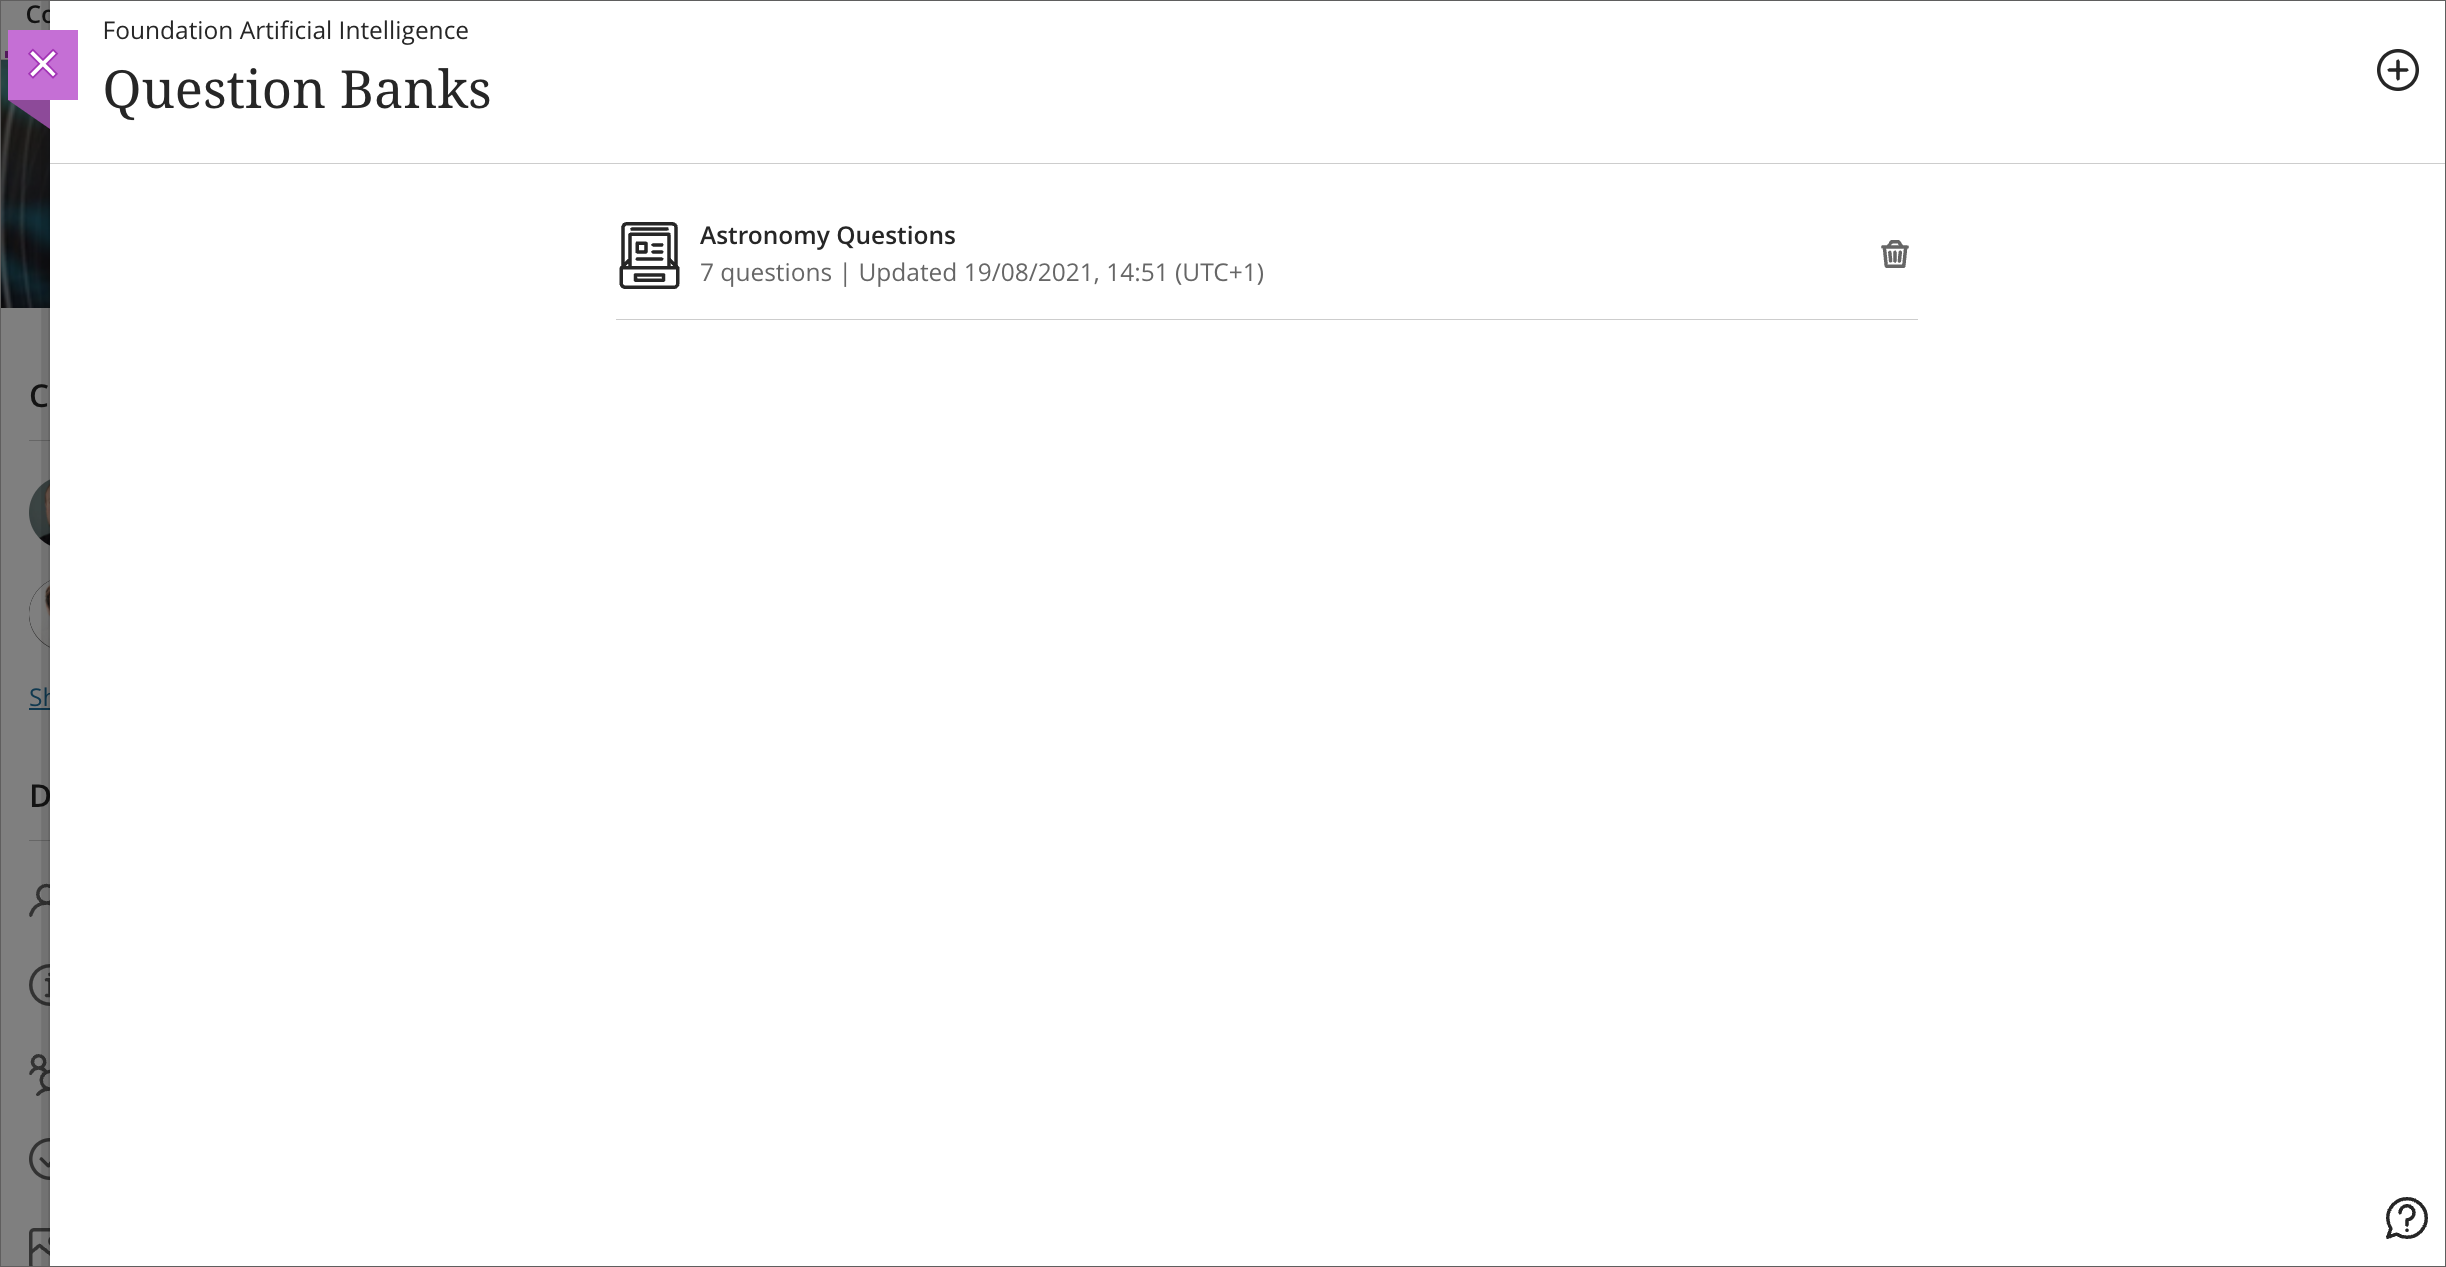
Up until now, instructors could only import existing banks into their Ultra courses. Instructors could use the questions in their assessments. But instructors could not create new question banks or manage questions in existing banks.
Image 1. Before – former Question Banks interface
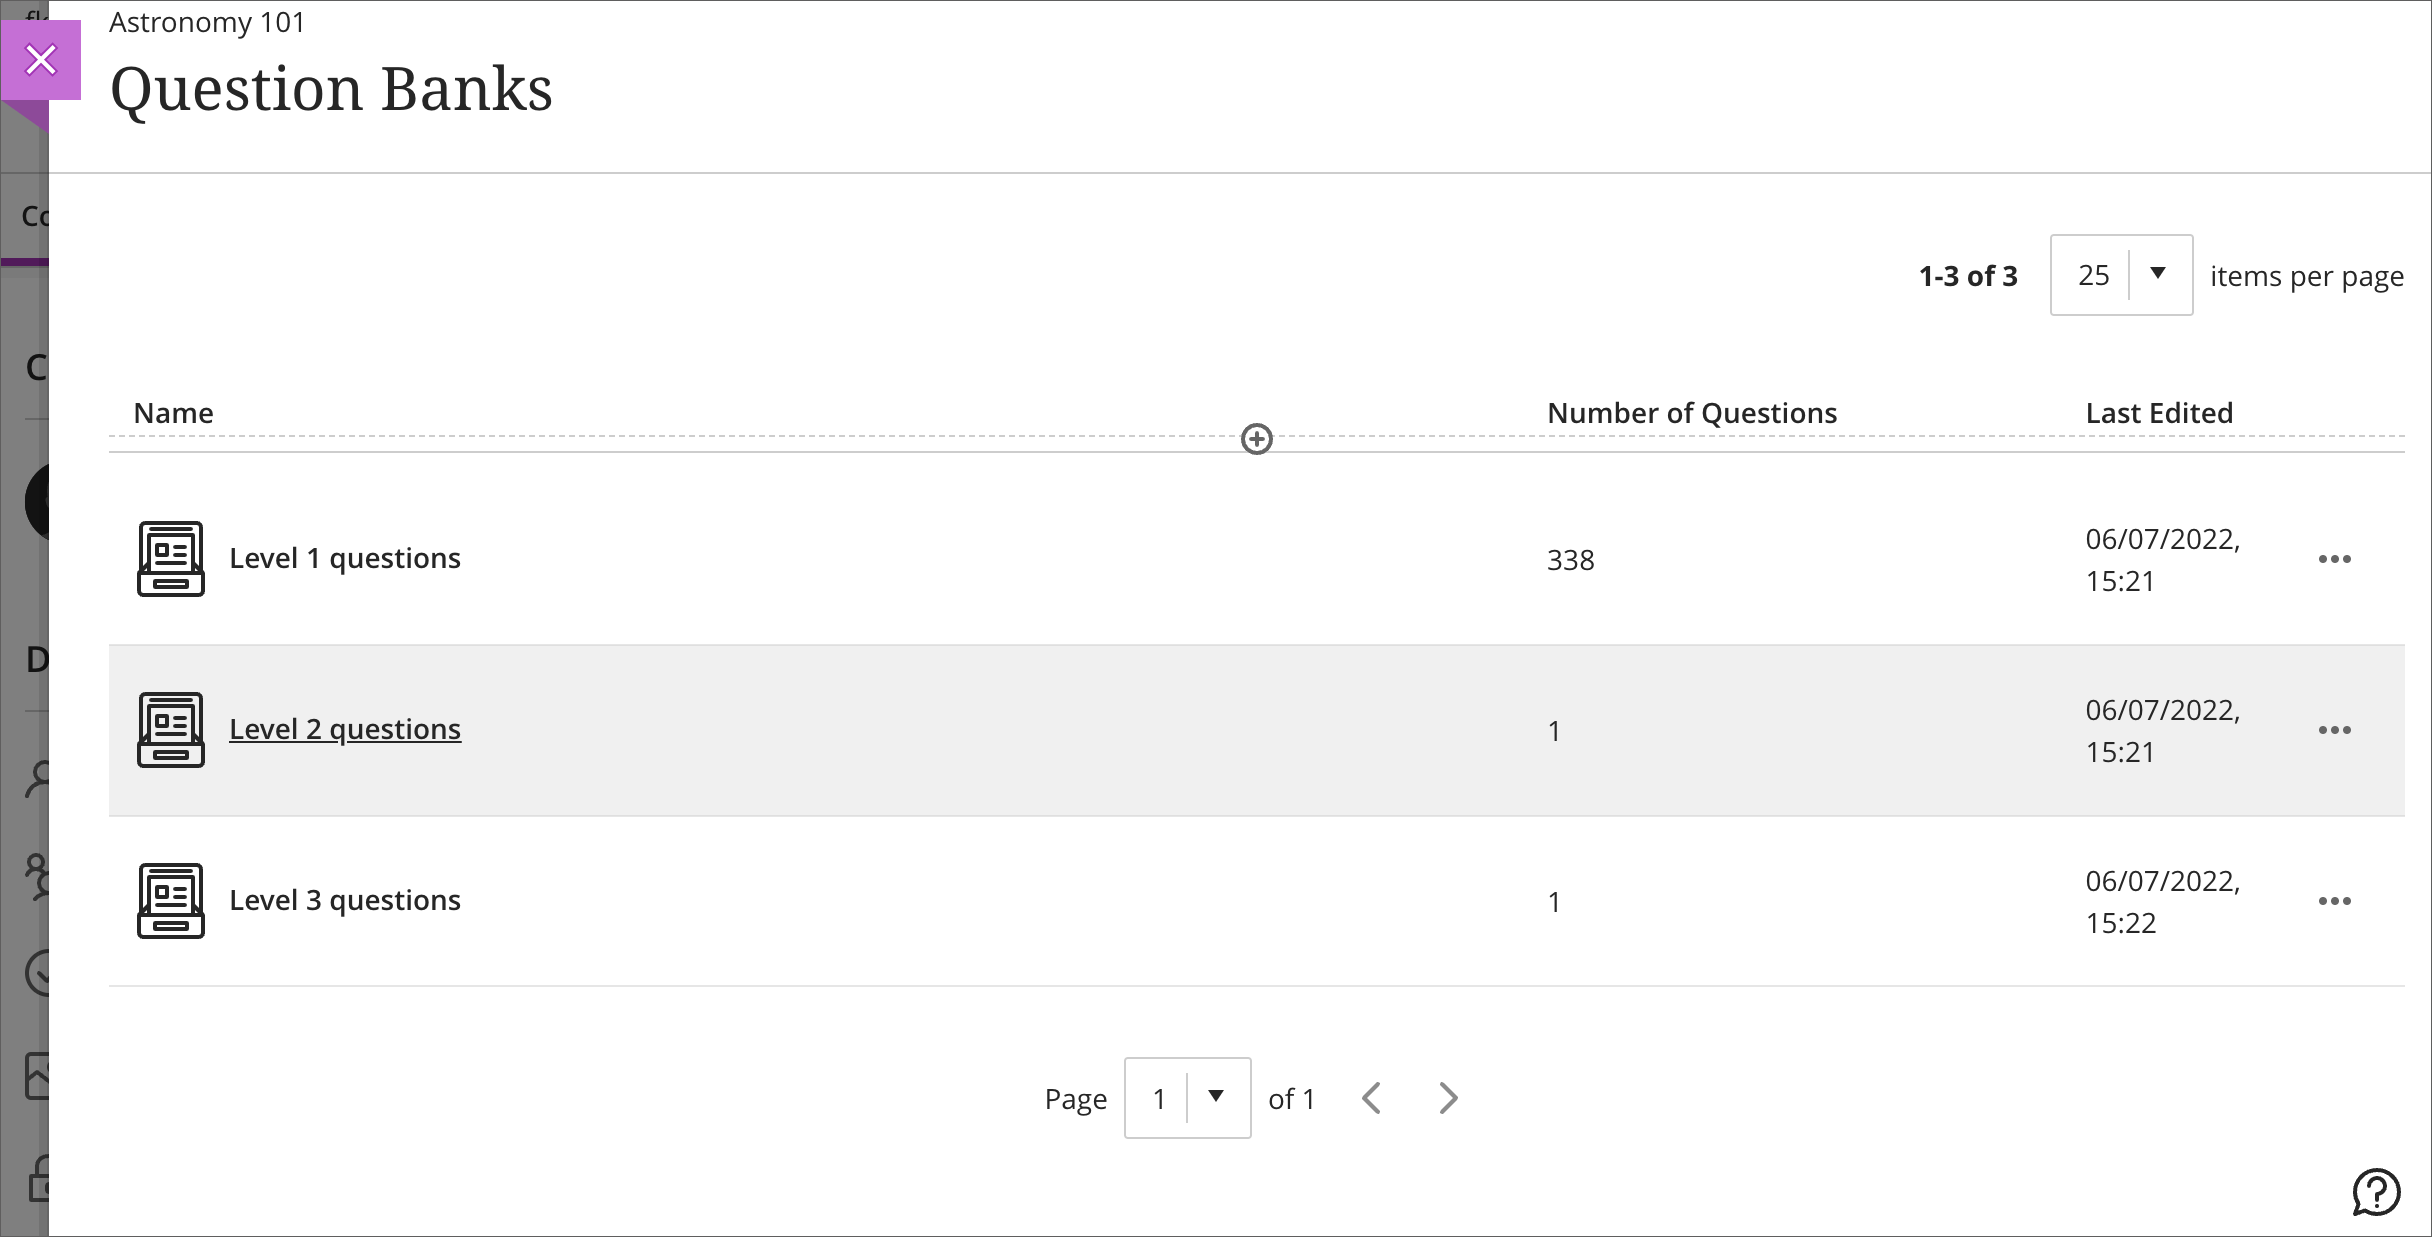
With this enhancement, instructors will be able to:
- Create new, empty question banks in their Ultra courses,
- View and search for questions within a question bank, and
- Add, edit, and delete all aspects of a question within new and existing question banks.
Image 2. After – new Question Banks interface
This functionality is available both on the desktop and in the mobile app. Instructors may access these options from Manage Banks in the Details and Actions.
Image 3. Add New or Import question banks from a file
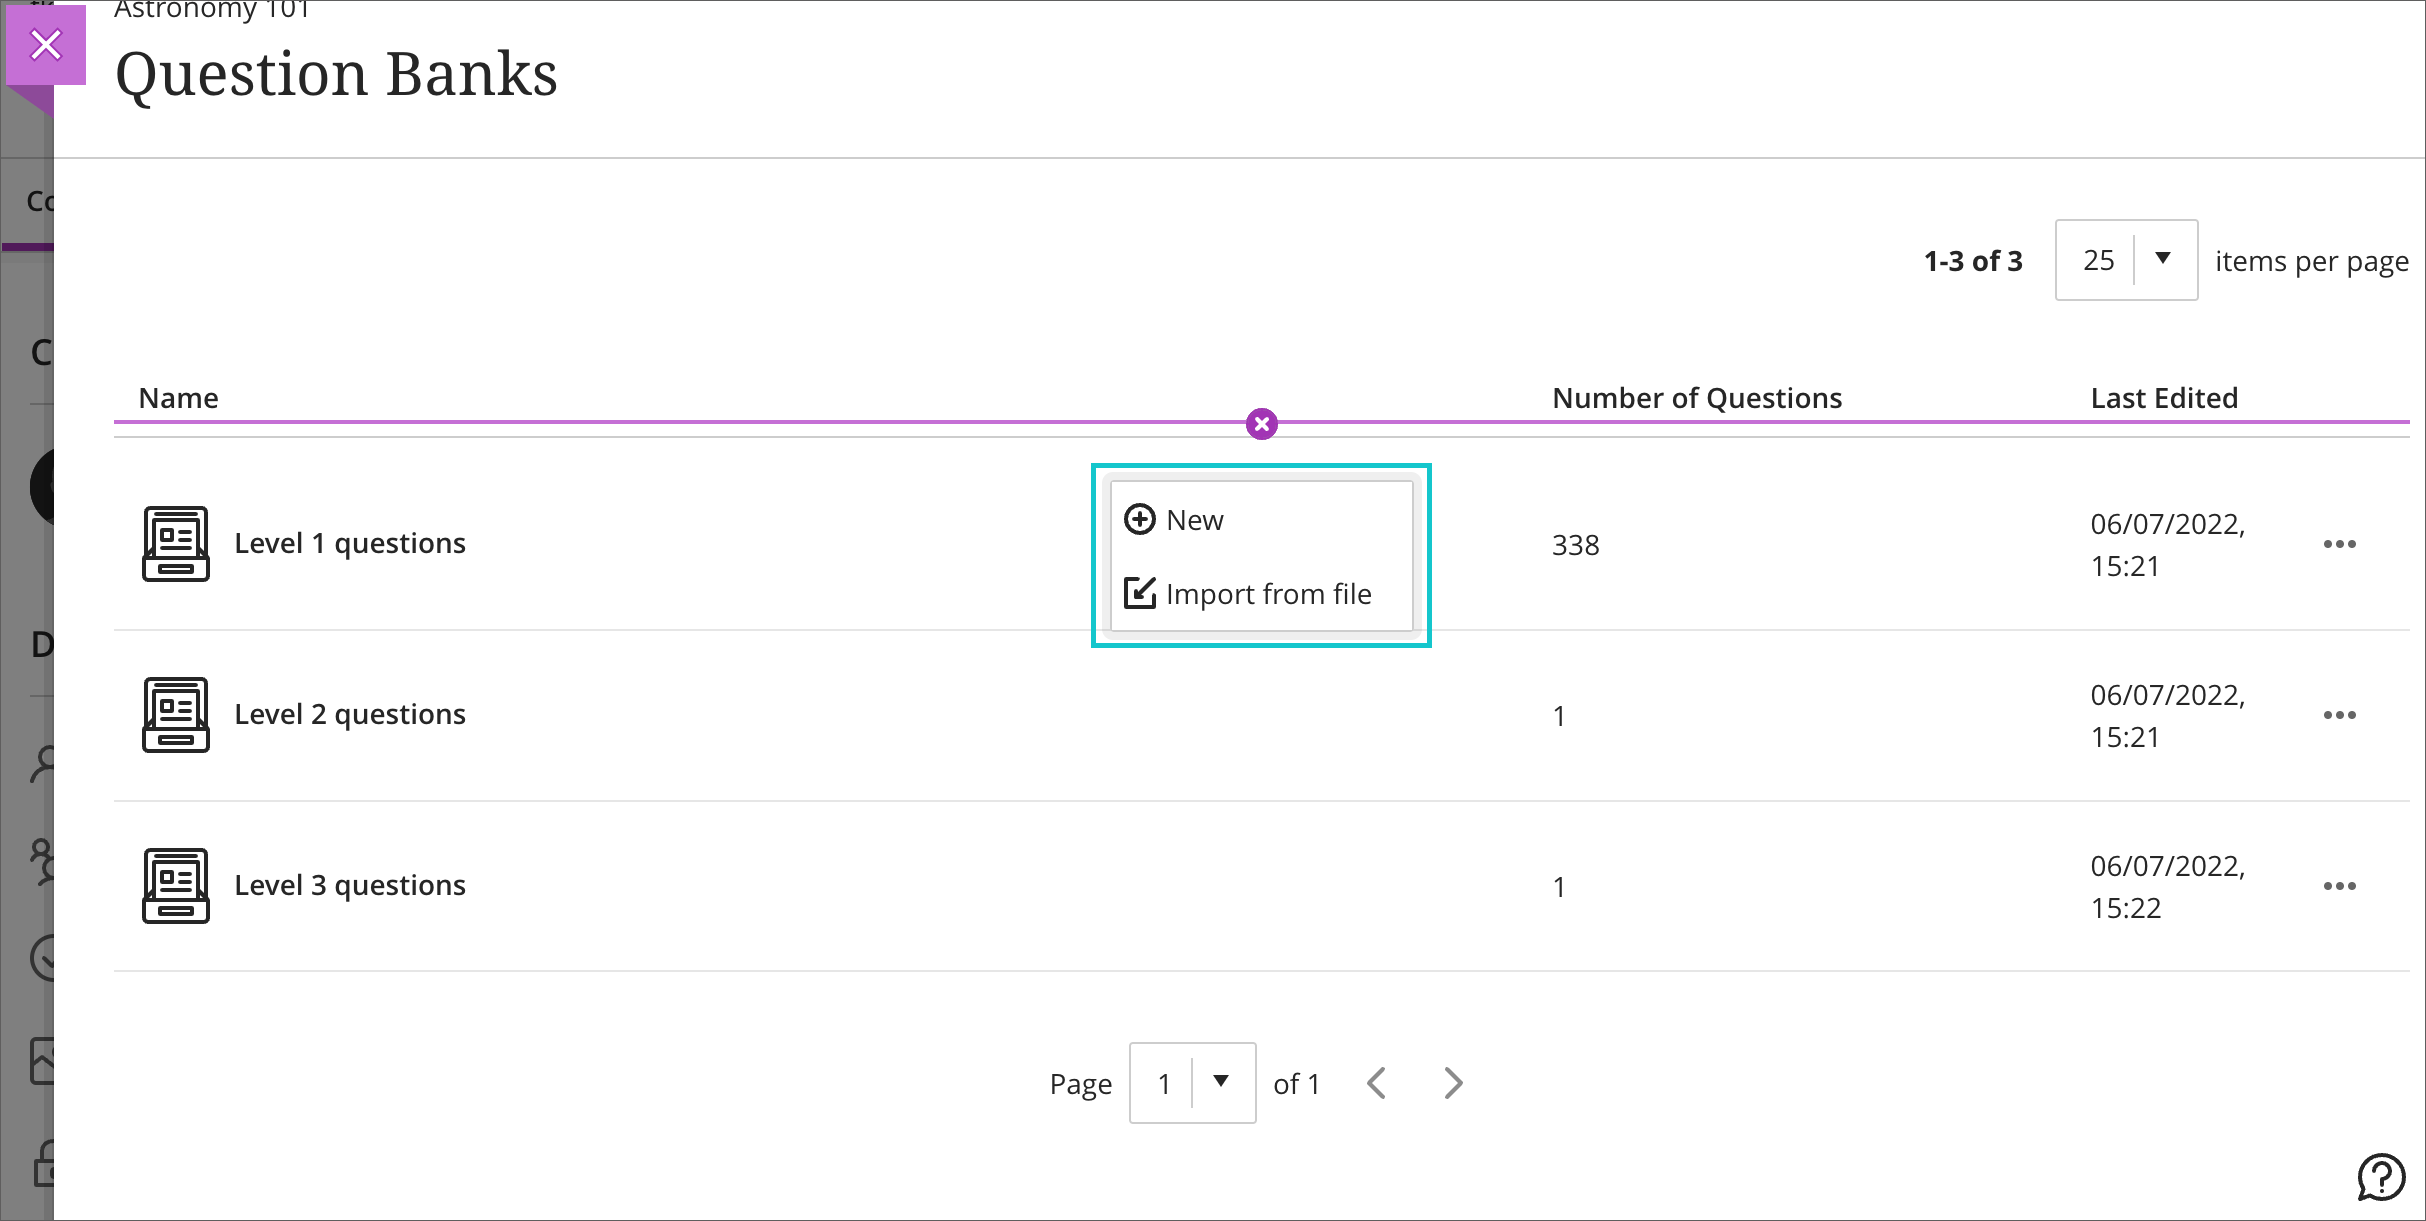
Image 4. Question bank interface – add questions
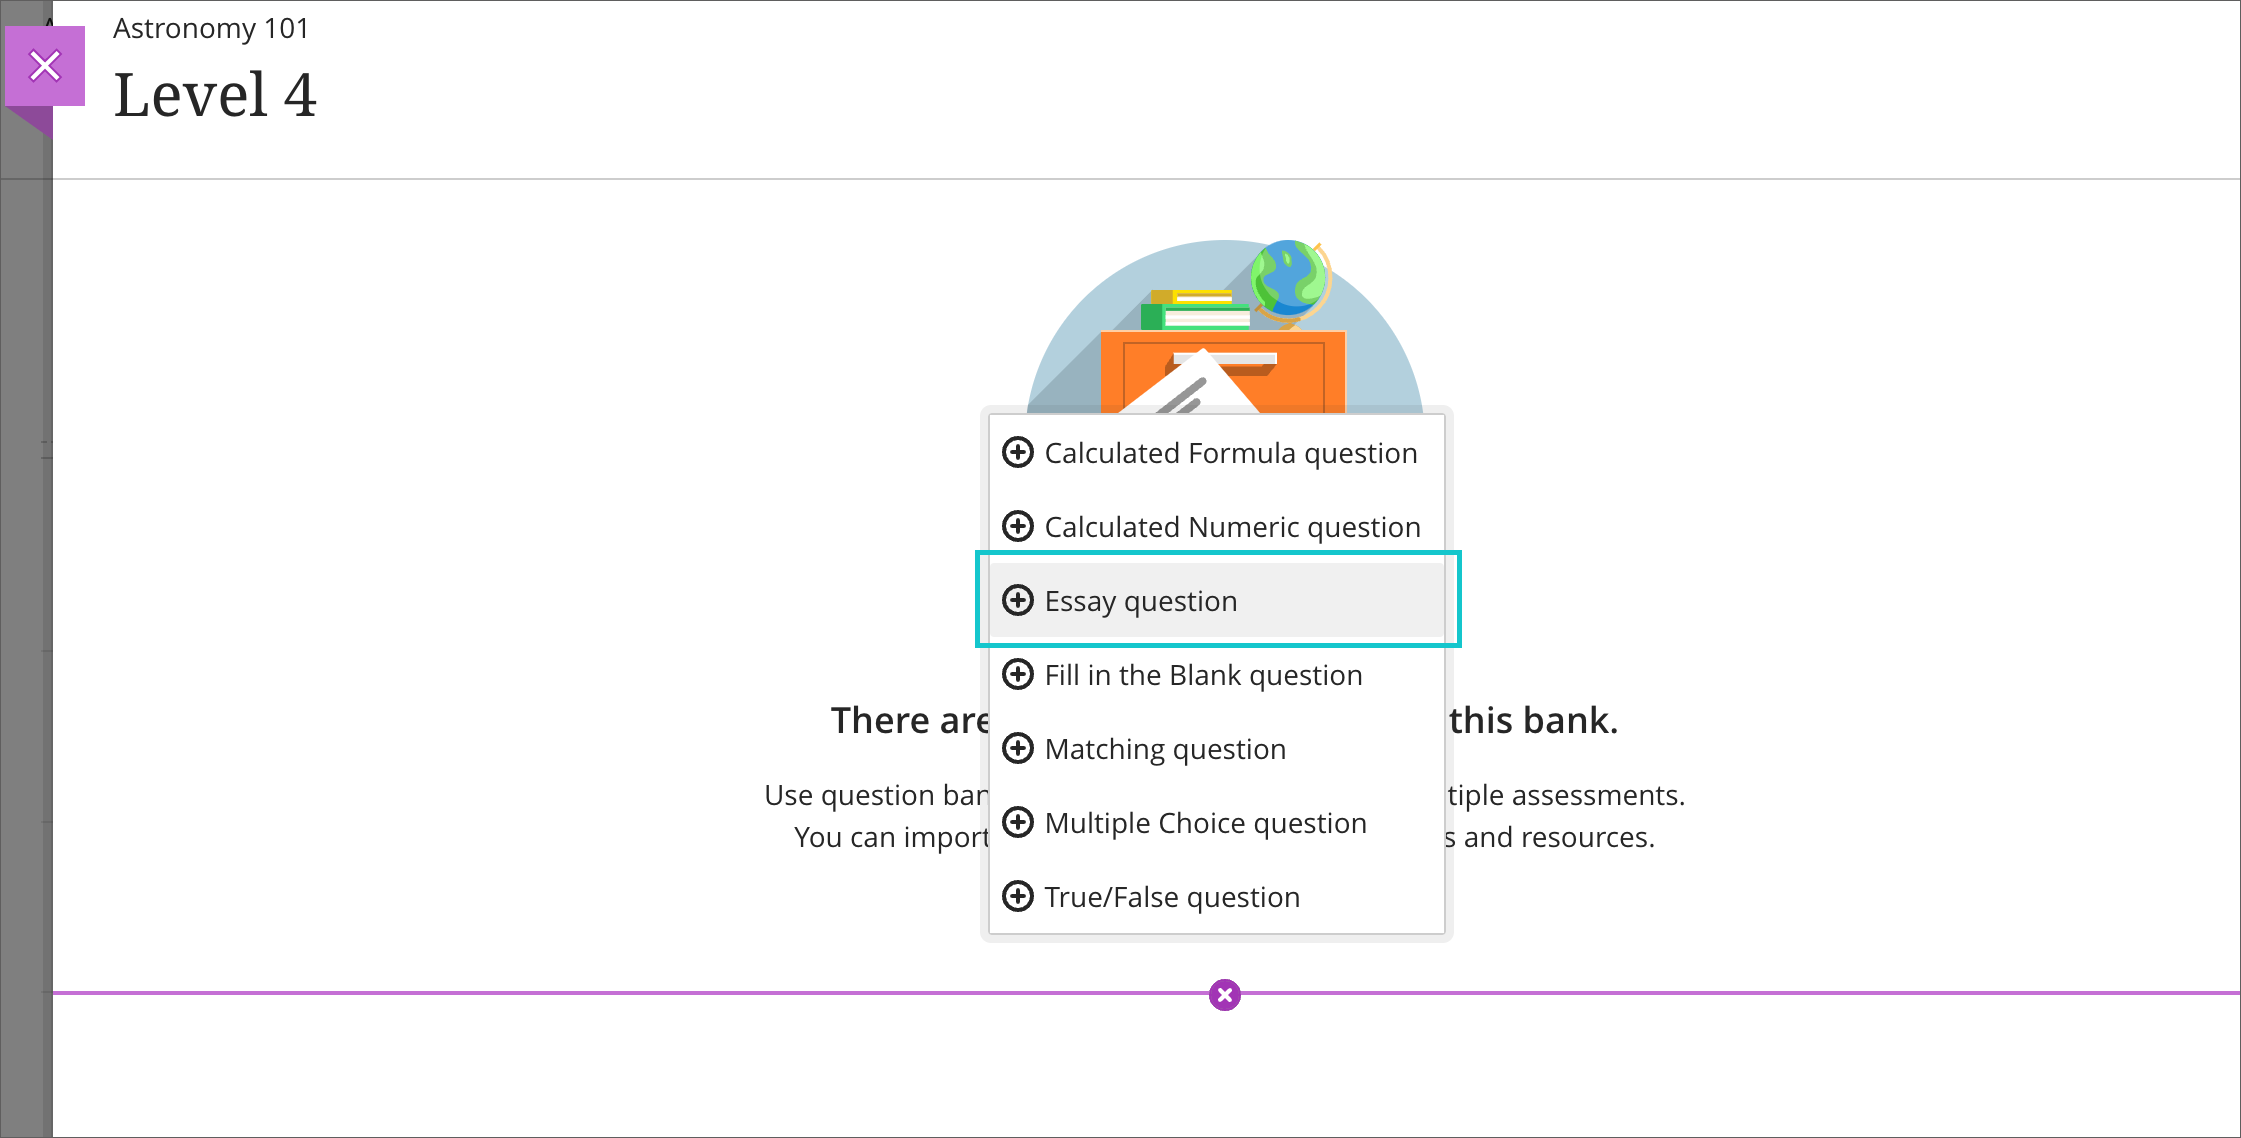
Image 5. Edit a question in a question bank

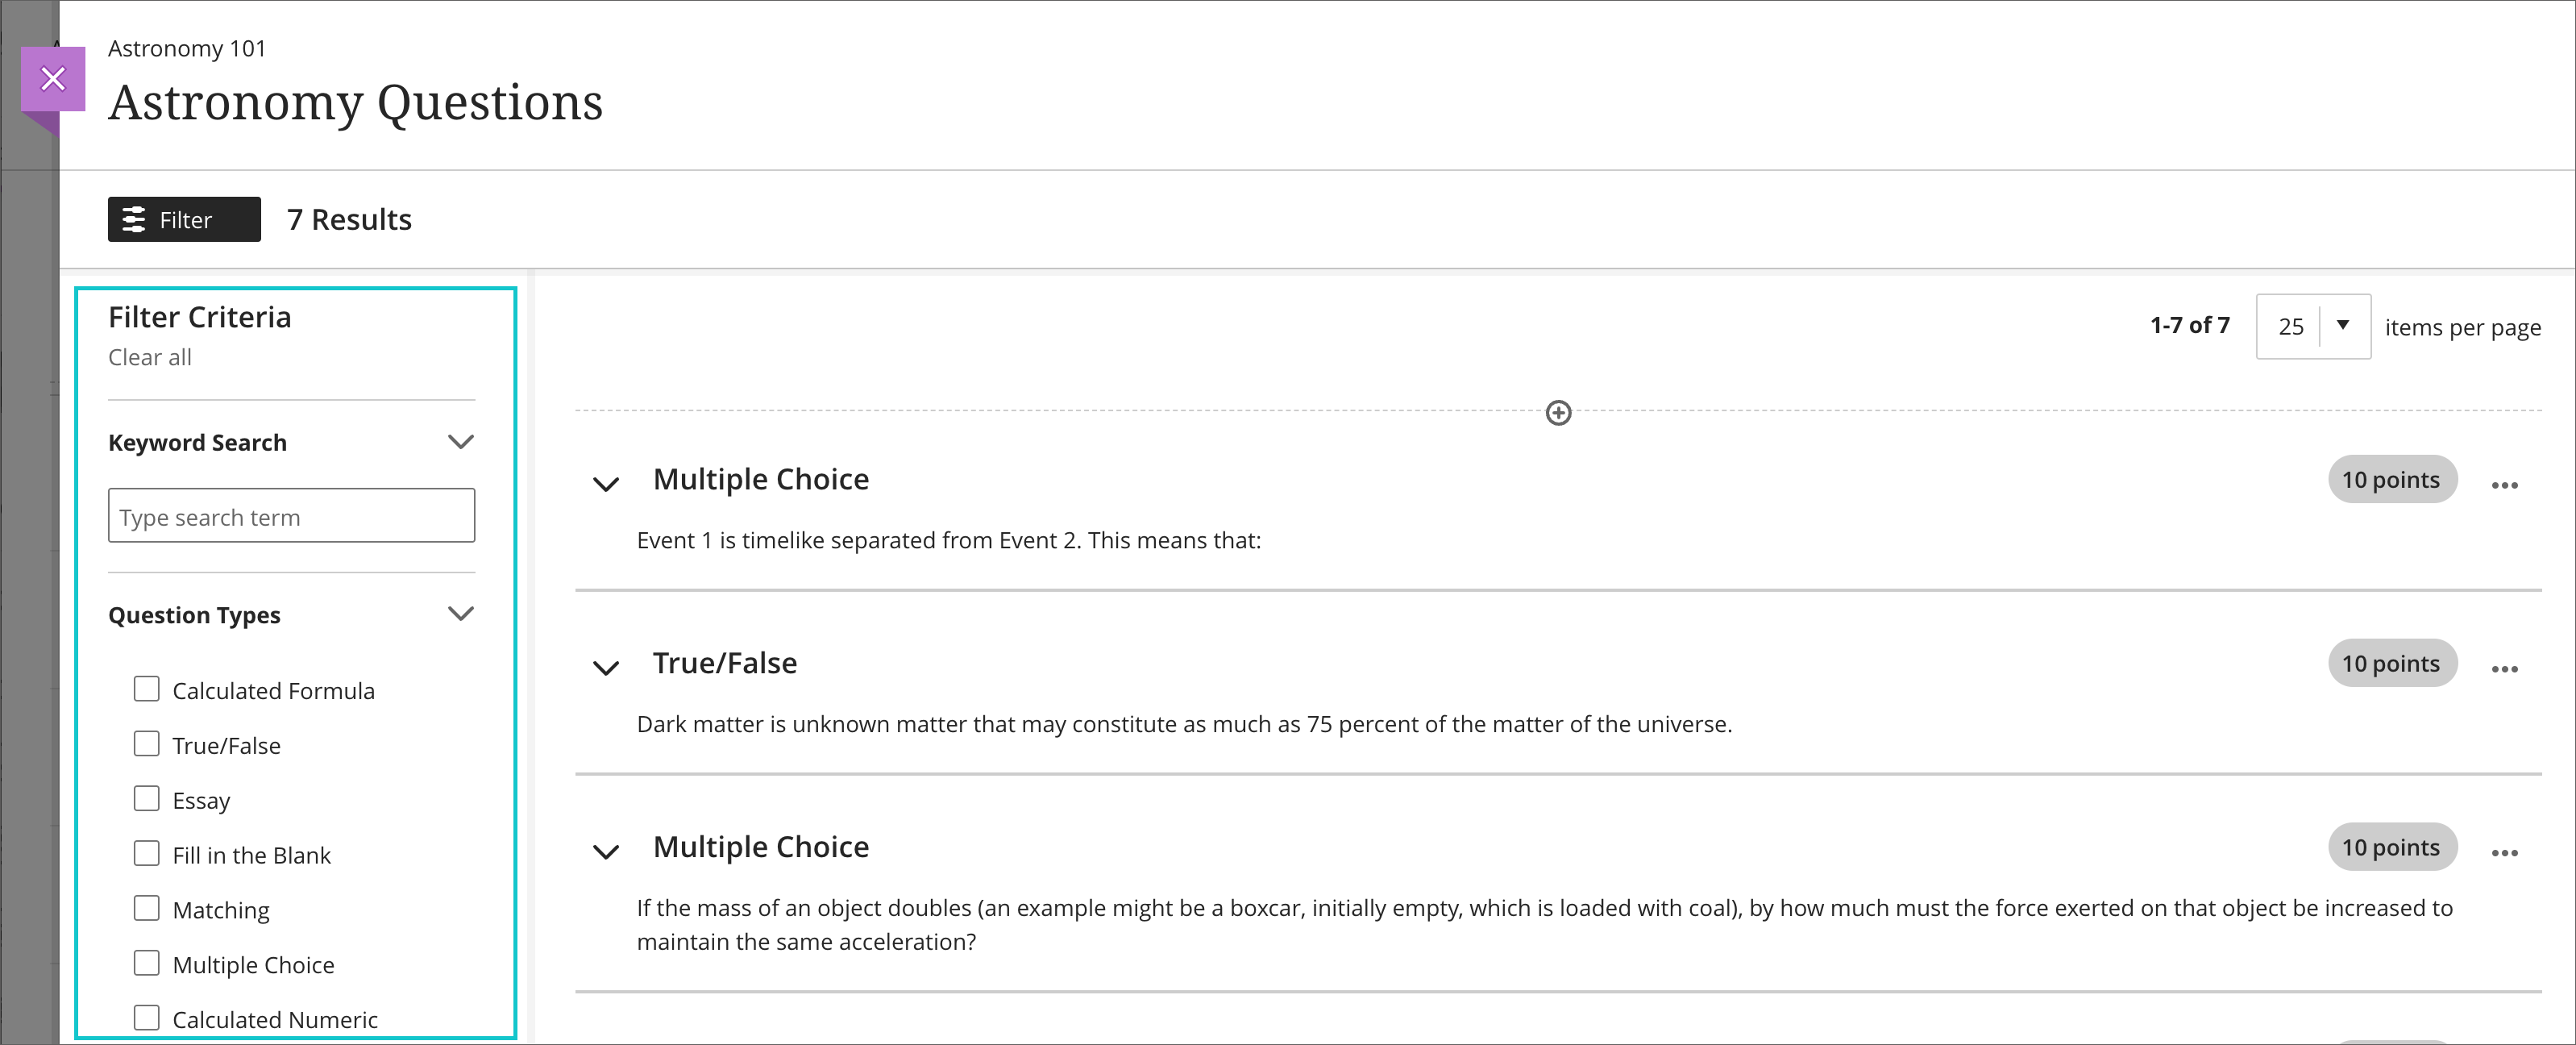
Image 6. View questions in a question bank with filter criteria
Due date exceptions
In the past, instructors could cater to specific student’s needs by:
- allowing additional attempts
- changing item visibility
Now instructors may accommodate special circumstances by also allowing due date exceptions. This exception has been added to the existing exceptions panel.
Image 1. Exceptions panel

Key considerations:
- Due date exceptions support is for individual tests and assignments only.
- If an assignment or test does not have a due date, an exception cannot be set.
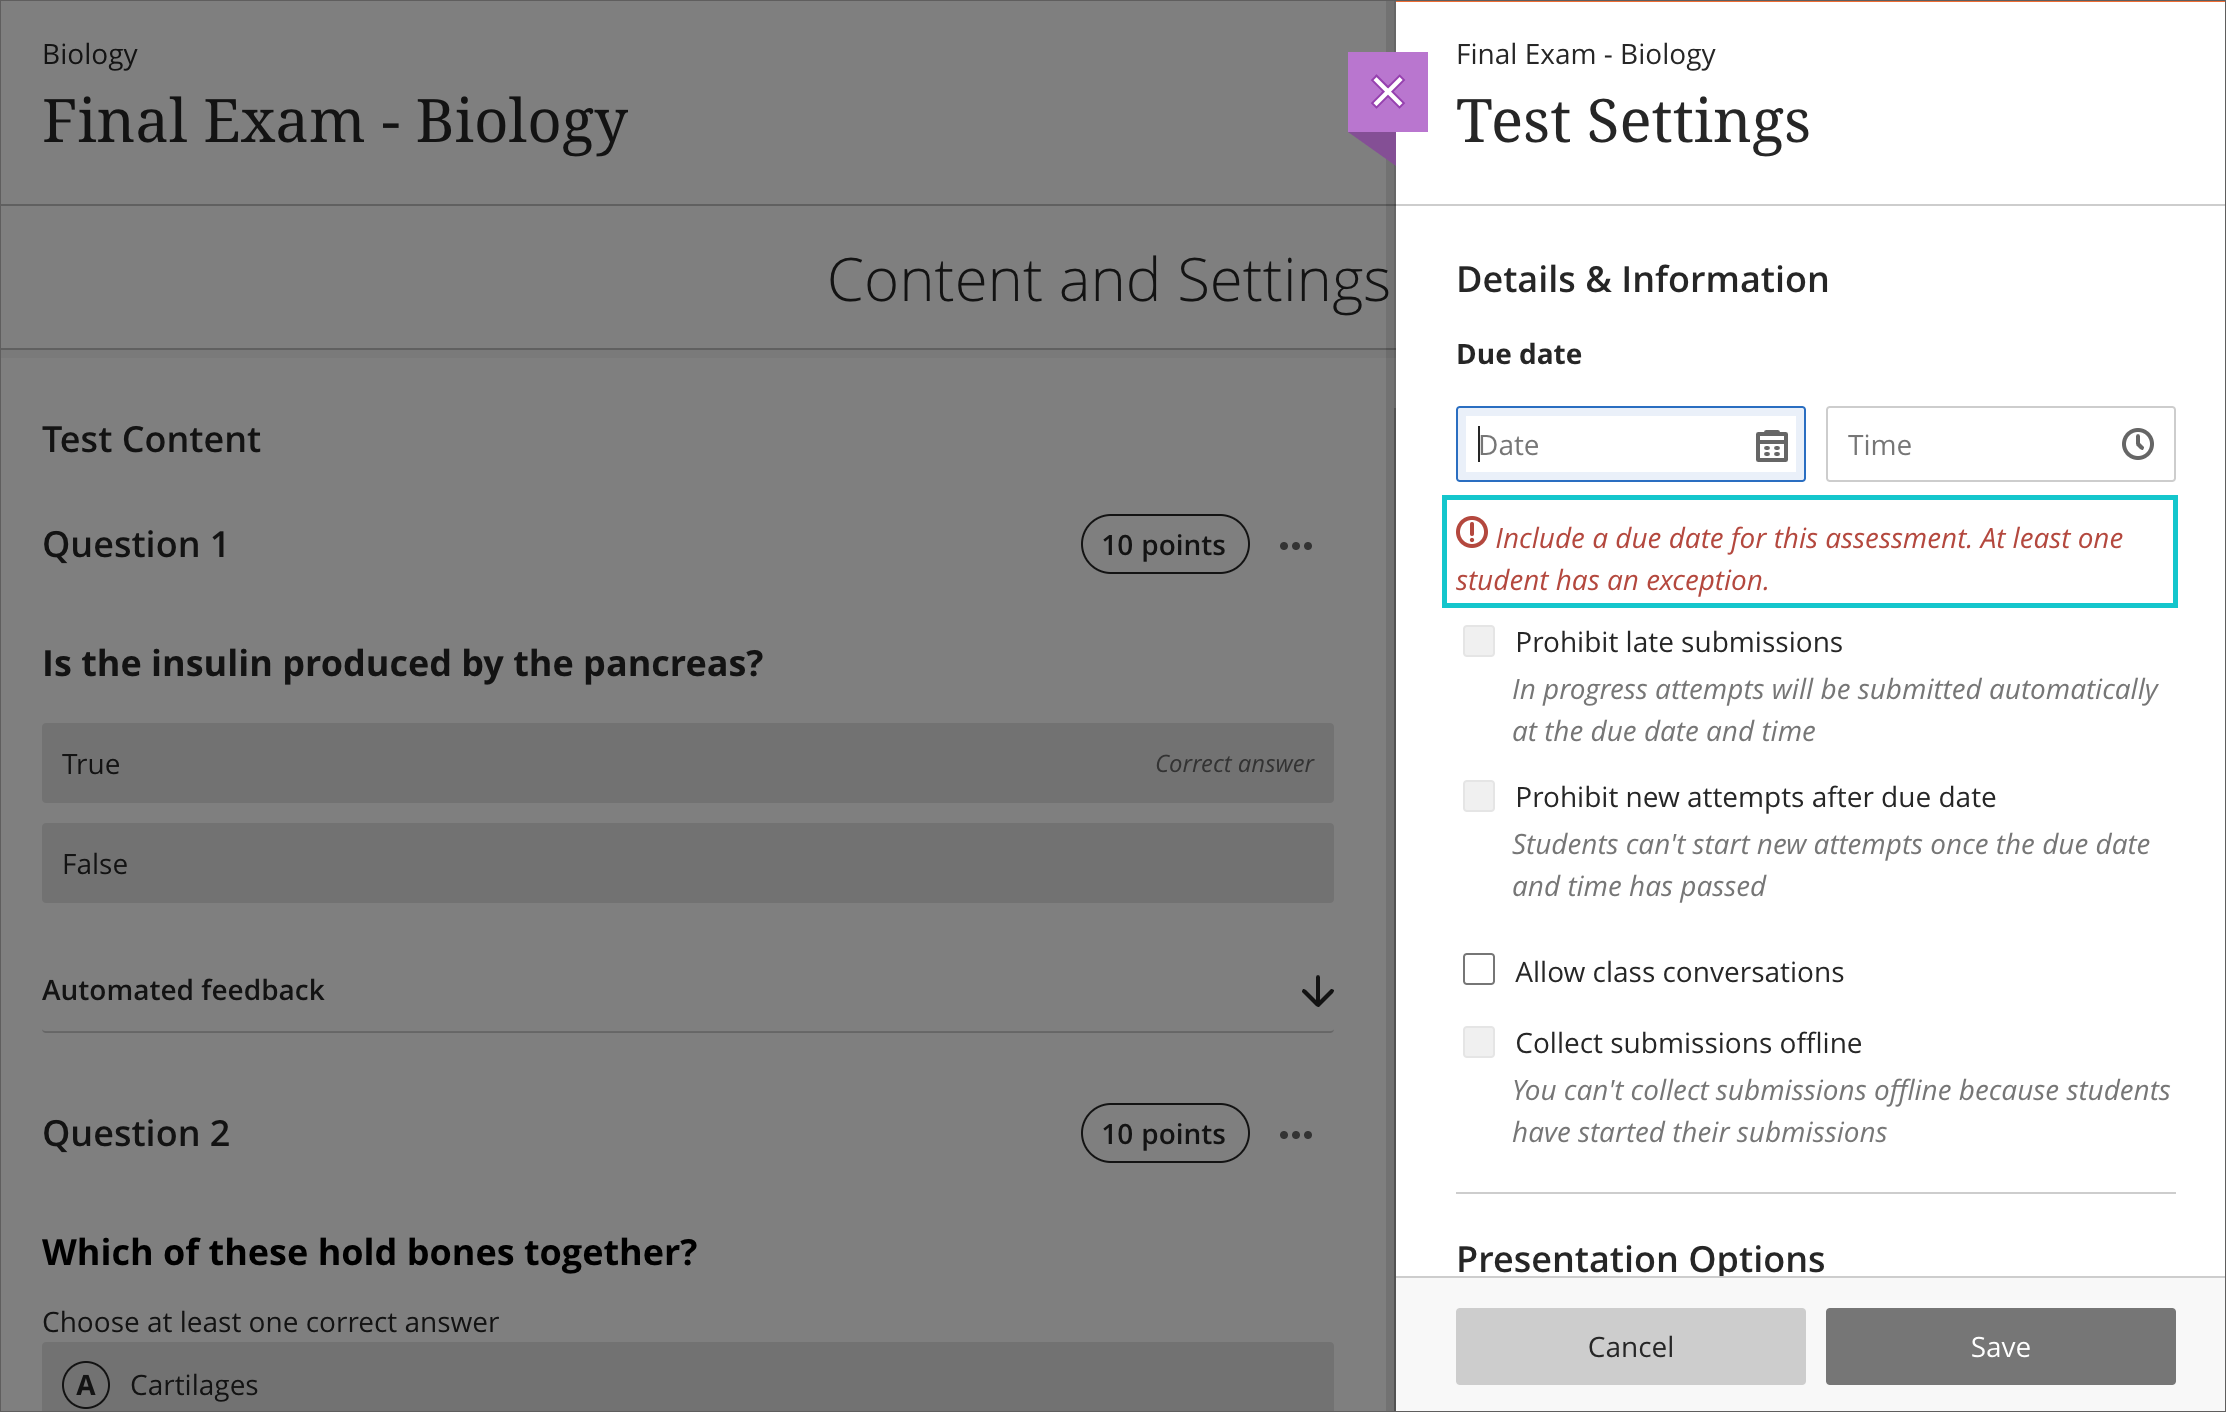
- If an instructor wishes to remove the due date on an assignment or test, the instructor must first remove all due date exceptions.
Image 2. Banner warning when instructor attempts to delete a due date on an assessment with due date exceptions
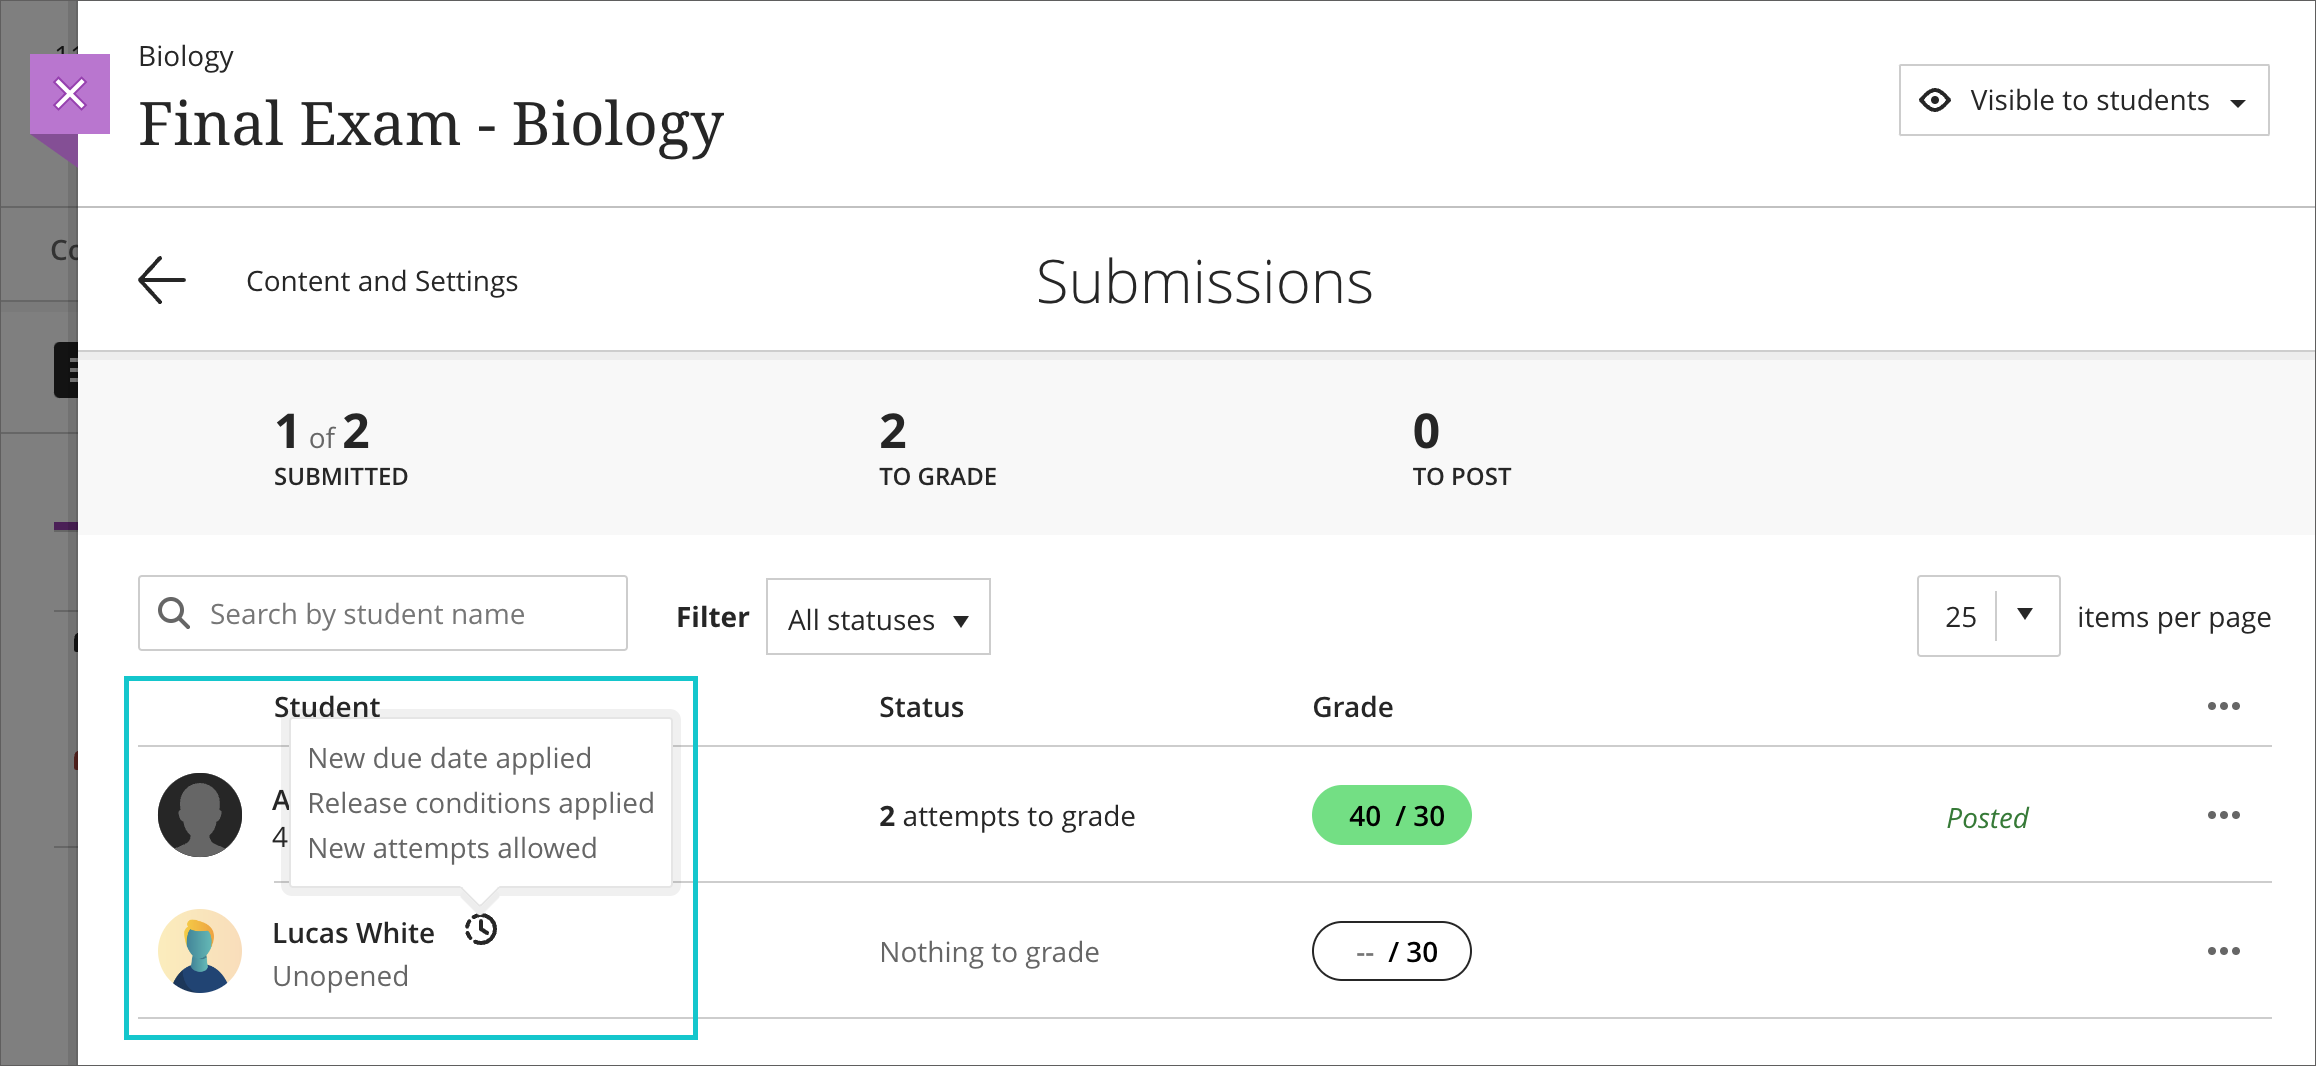
- To find students with the due date exception, instructors may access the submission list view page. Students with the clock icon next to their name have the due date exception.
Image 3. Submissions list view; clock icon for students with the due date exception.
- Instructors may grant due date exceptions in combination with other exception types.
- Automatic zeros respect due date exceptions. Automatic zeros are only applied if students with the due date exception do not submit on time.
- The “prohibit late submission” and “prohibit new attempts” options respect due date exceptions. These settings only apply if students with the due date exception do not submit on time.
- Students with a due date exception will see the excepted date in:
- Ultra Base Navigation
- Activity Stream
- Calendar
- Grades Page
- Email, depending on a user’s notification settings
- Ultra-Course
- Assignment or Test Details & Information
- Course Outline
- Calendar
- Grades
- Ultra Base Navigation
Delete Student Preview User
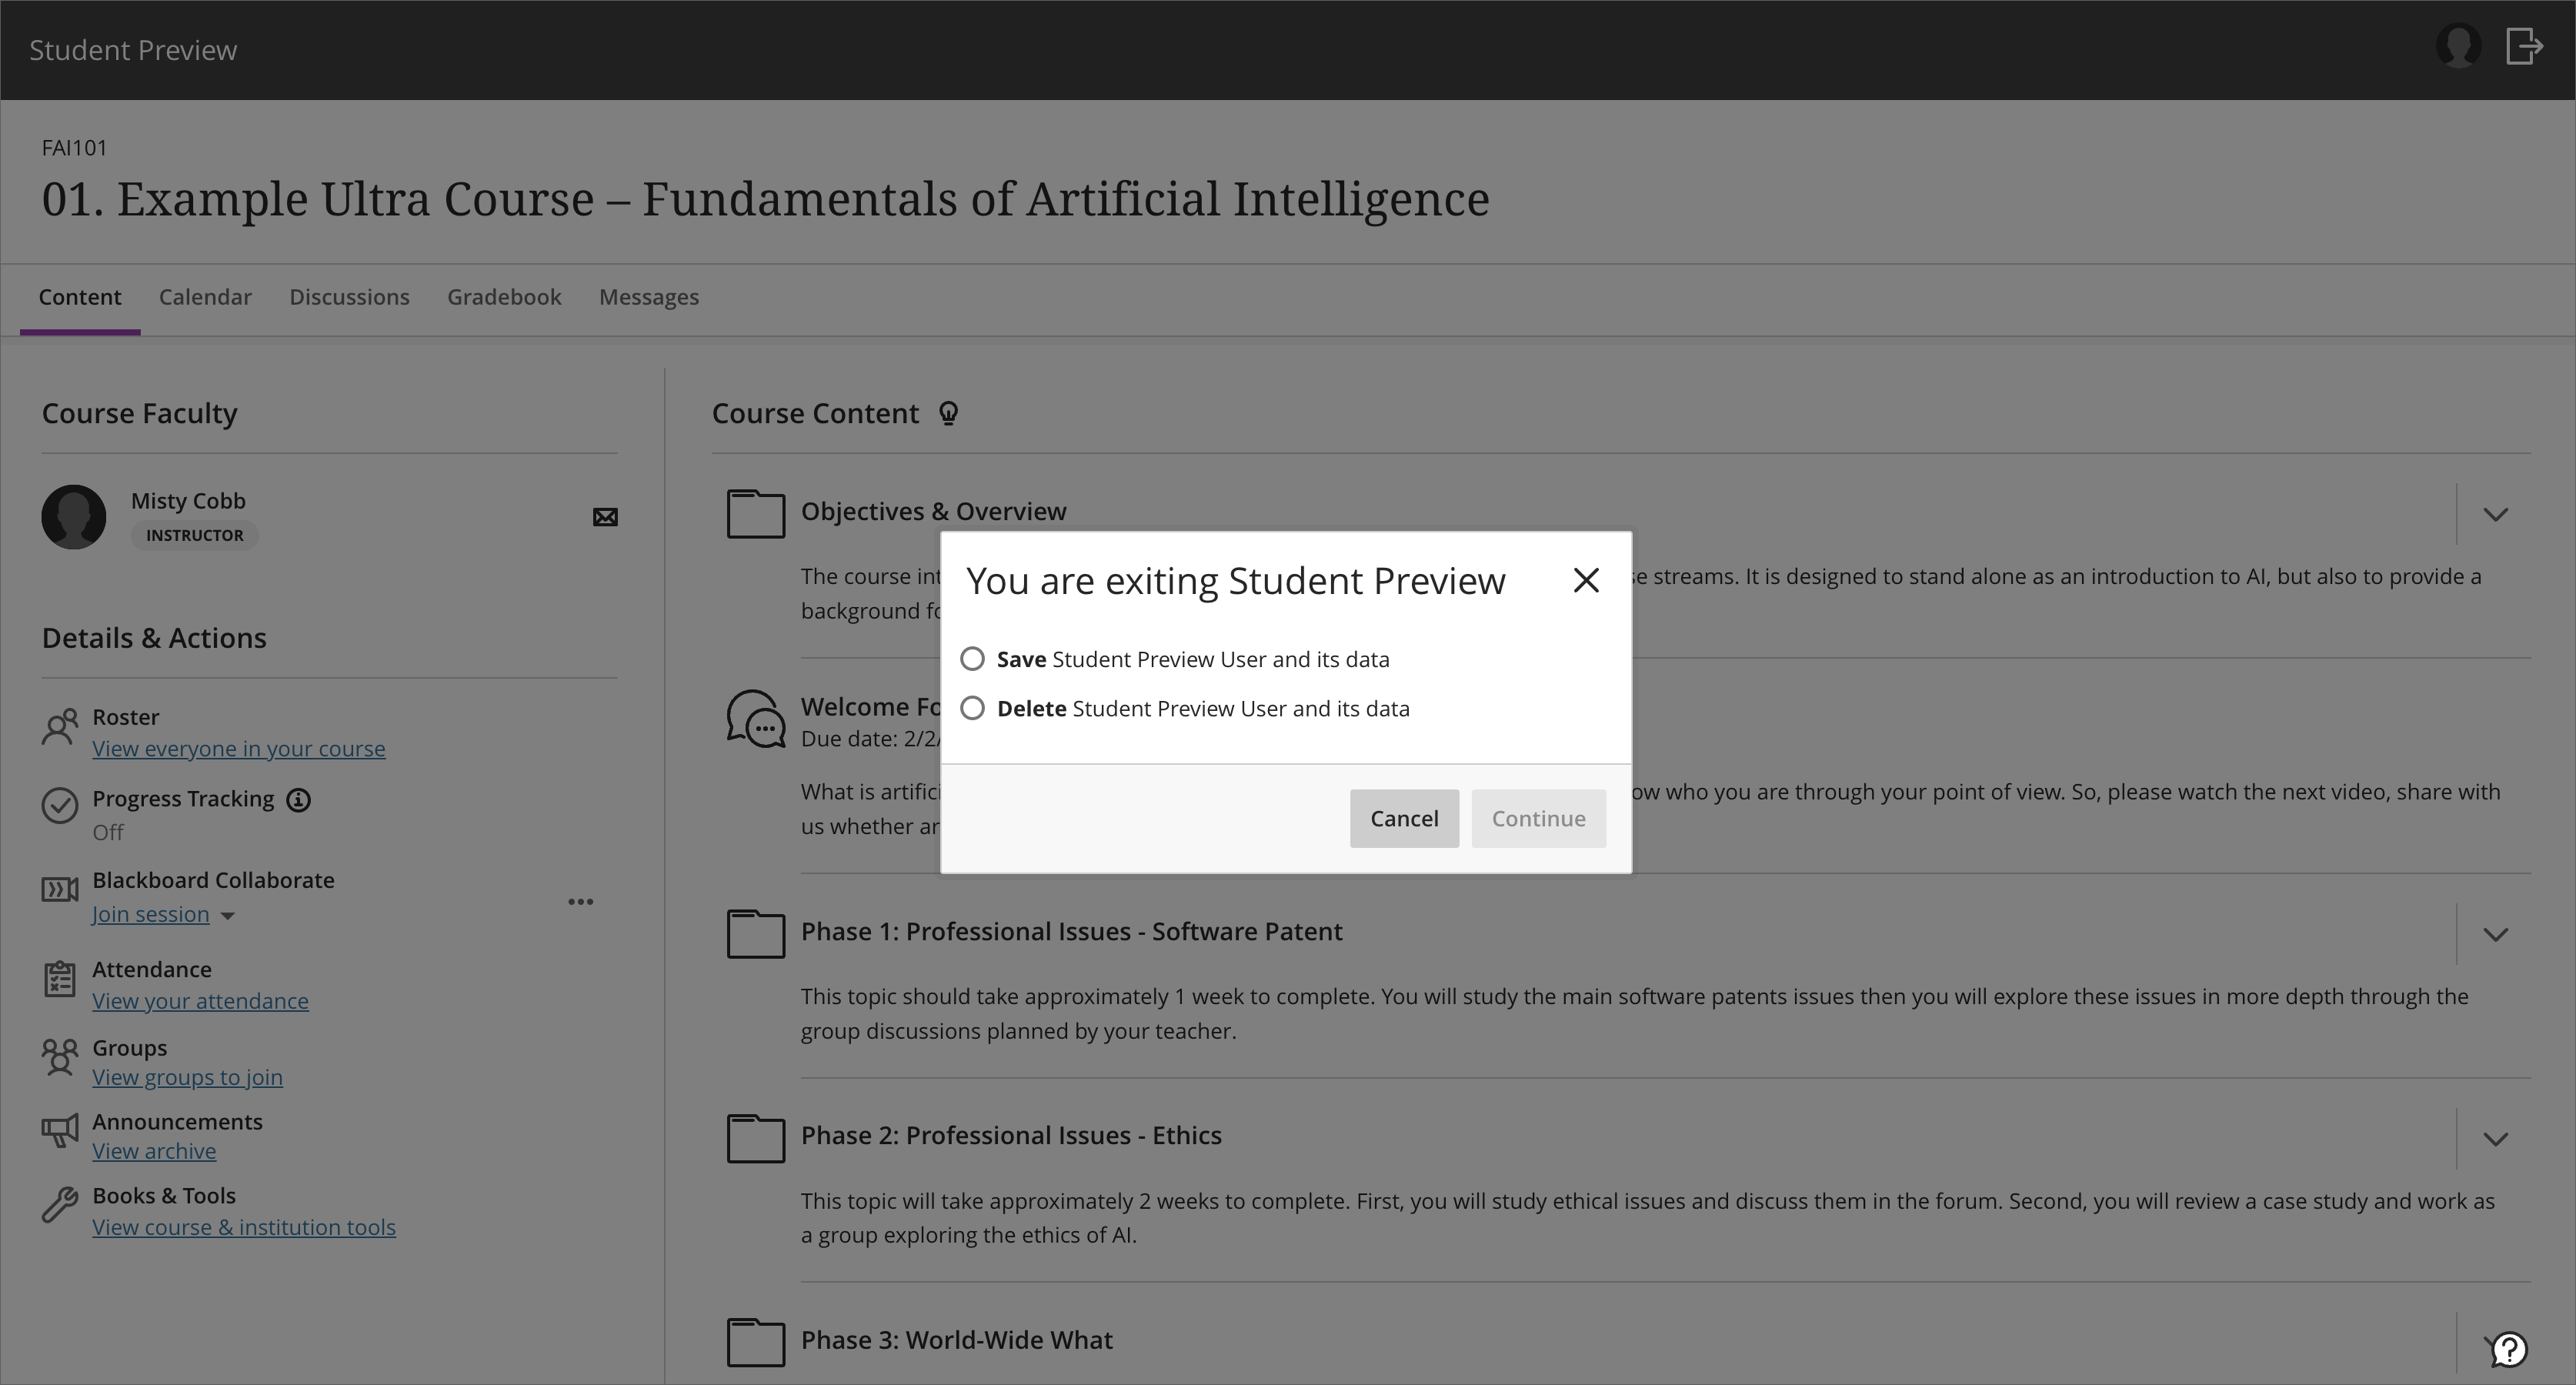
Instructors often need to preview their course as a student. Student preview helps instructors understand students’ experiences in all aspects of the course. In the past, when an instructor exited student preview there was no choice to remove the preview student and related data from the course. This was problematic as the preview user appeared in the course as a student to all course members. Now instructors have a choice when exiting student preview:
- save the preview student and data
- delete the preview student and data
Image 1. Save or delete the preview student and data
The delete option removes the preview user and data from these areas:
- roster
- gradebook
- gradebook filter
- messages
- messages recipient
- discussions
- journals
- conversations
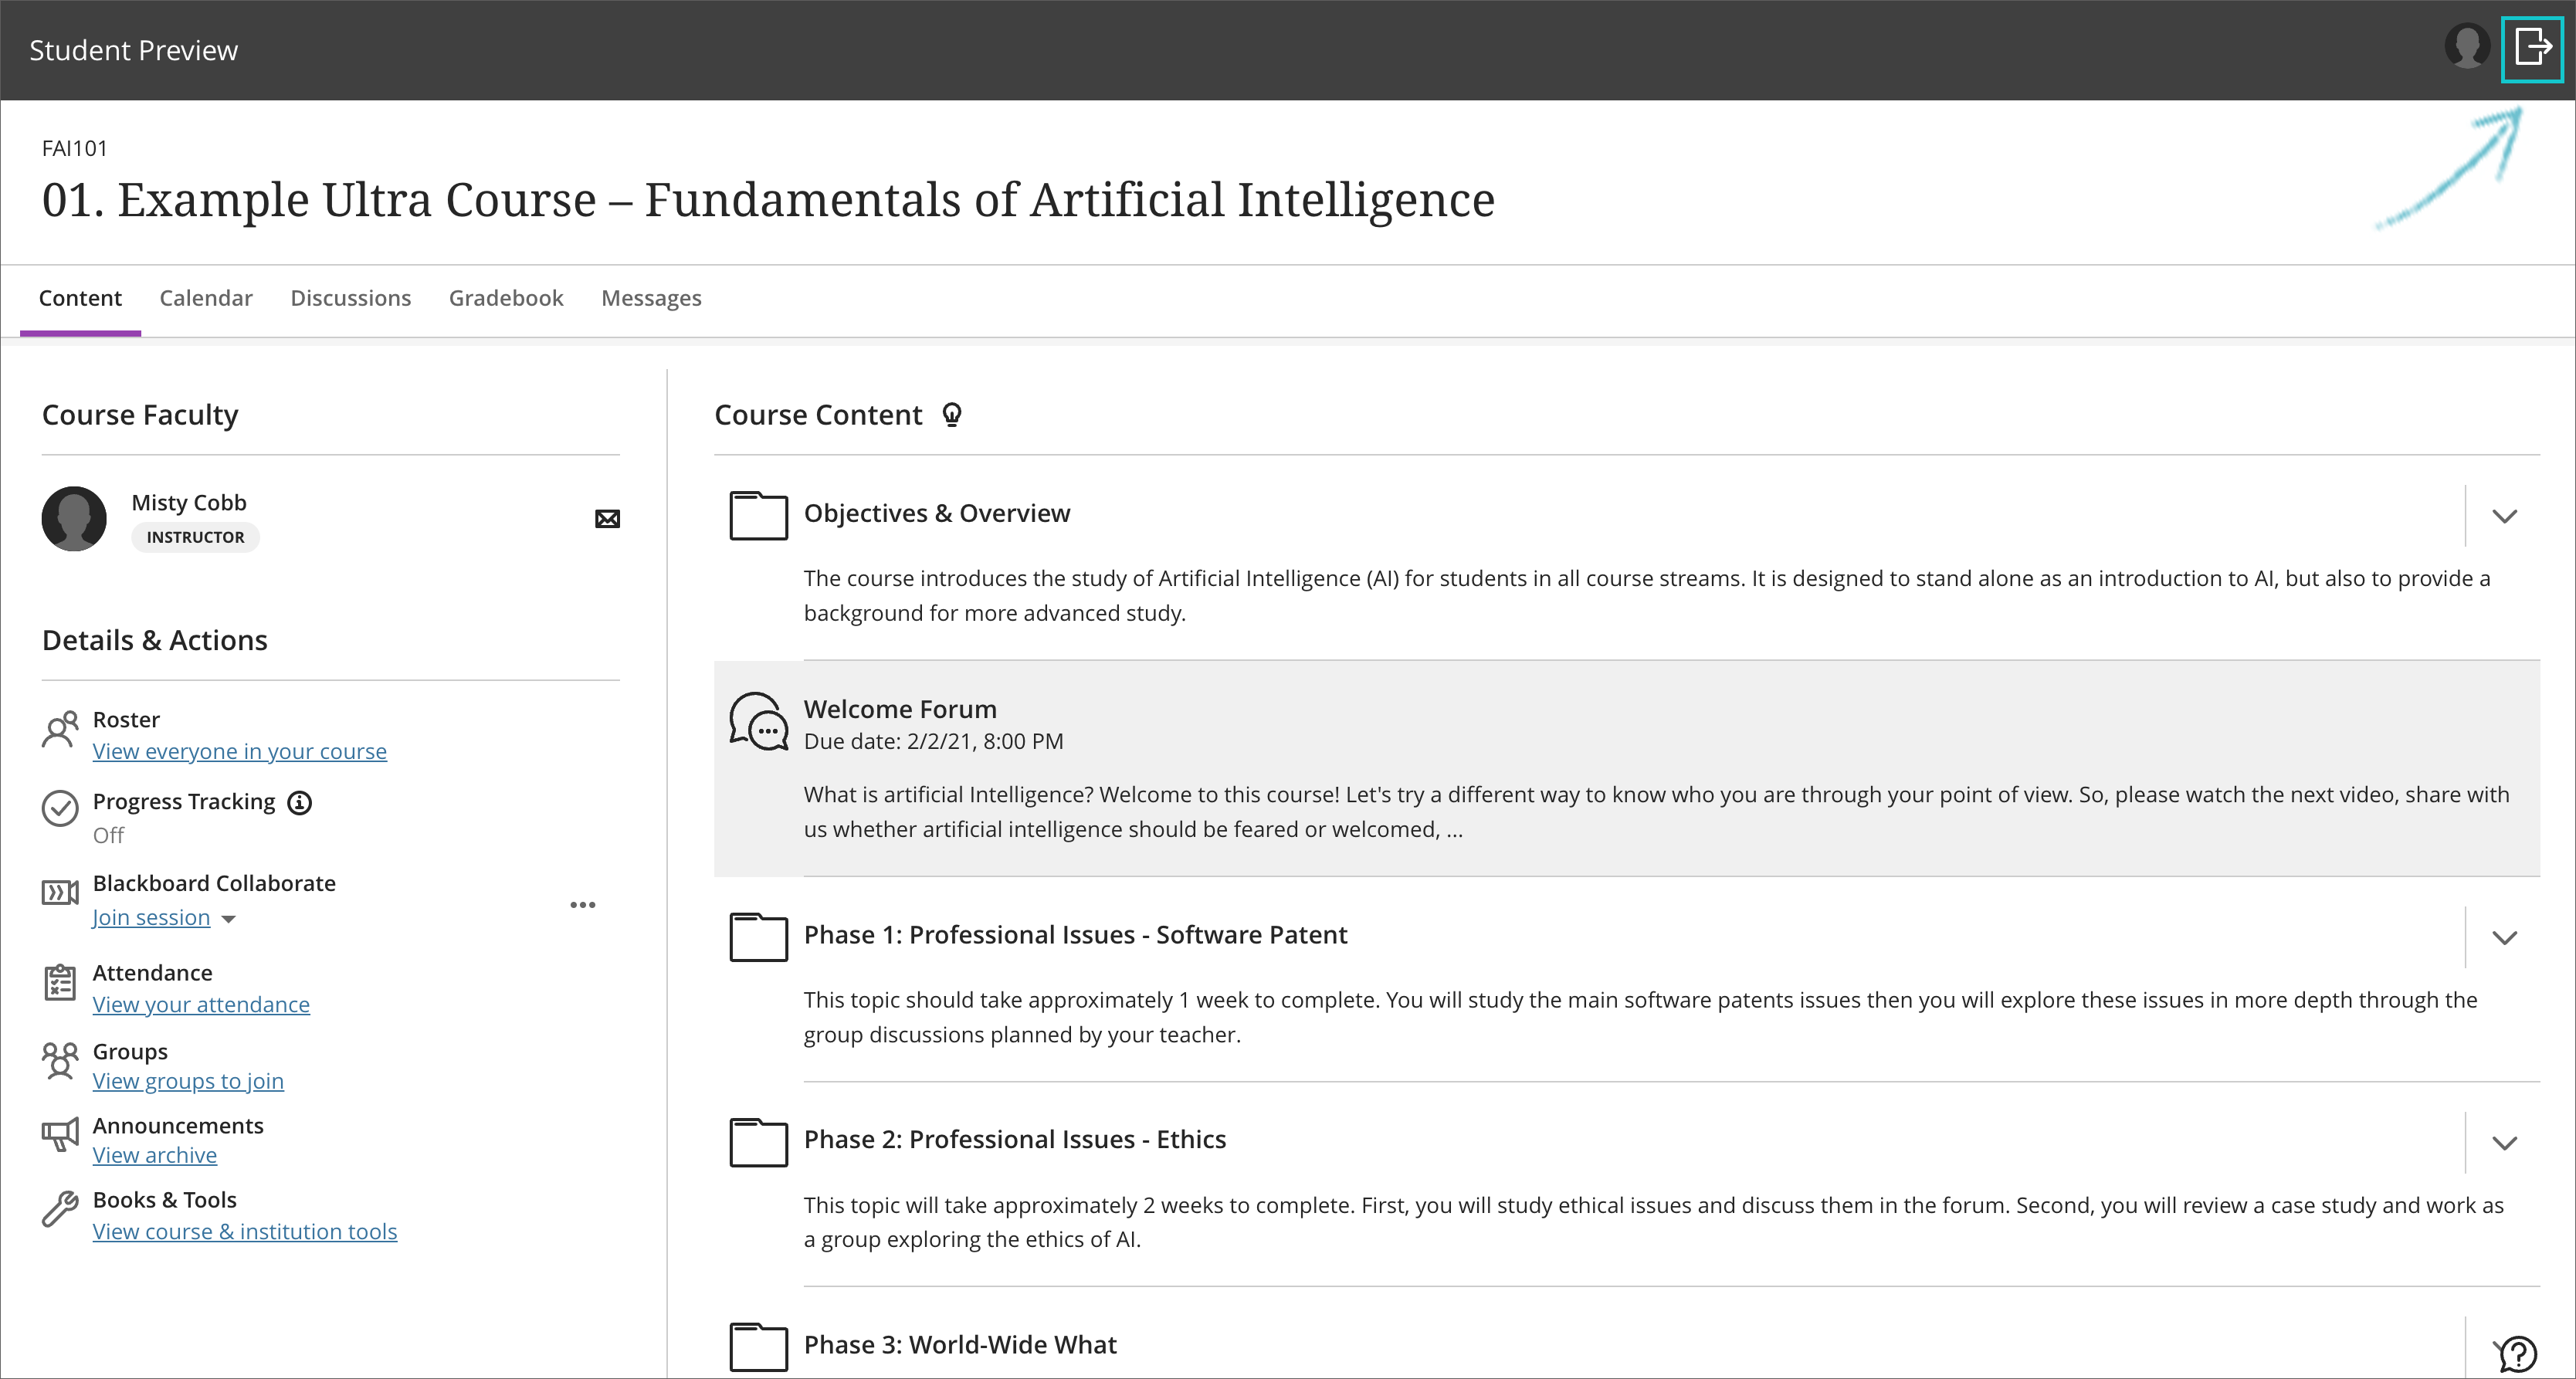
The method for exiting Student Preview also changed. We removed the three-dot menu and X option to close the Student Preview panel. Now to exit Student Preview, an instructor will choose the exit icon.
Image 2. Before – three dot menu and X options to close the student preview panel
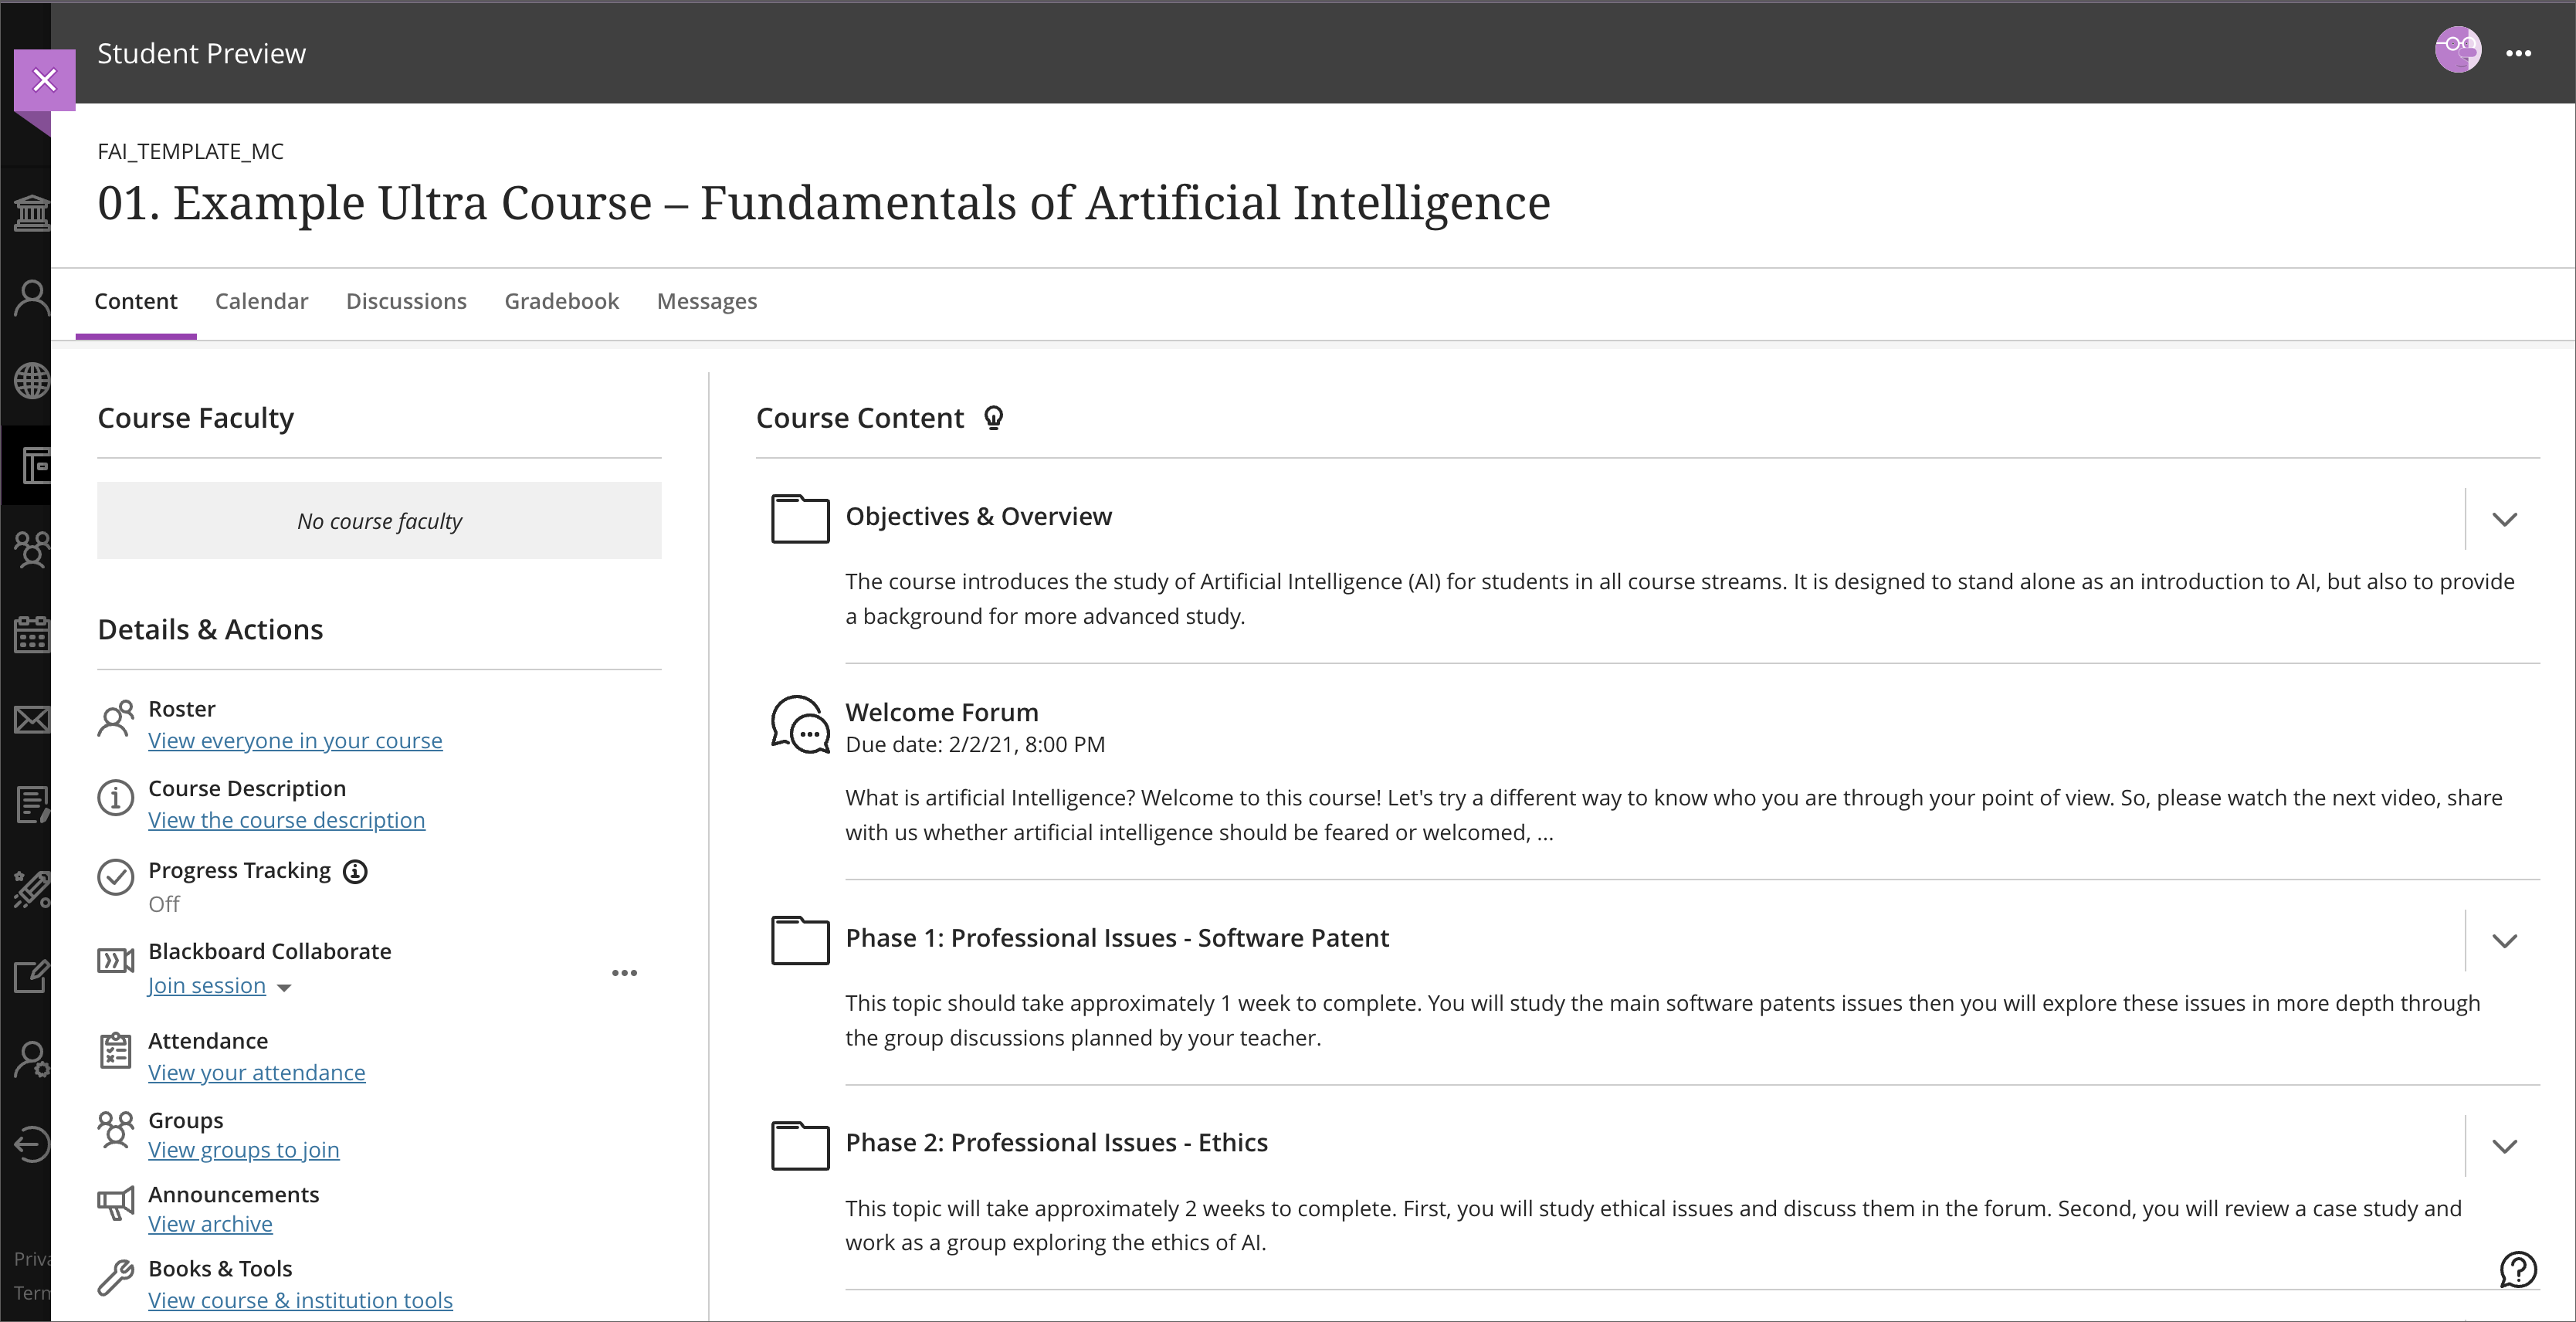
Image 3. After – exist student preview via the exit icon
Improvements to LaTeX question support
Instructors and students often use math formulas in science, technology, engineering, and math (STEM) courses. LaTeX is a descriptive markup language used to typeset technical or scientific documents. Now instructors and students can create LaTeX equations in the content editor.
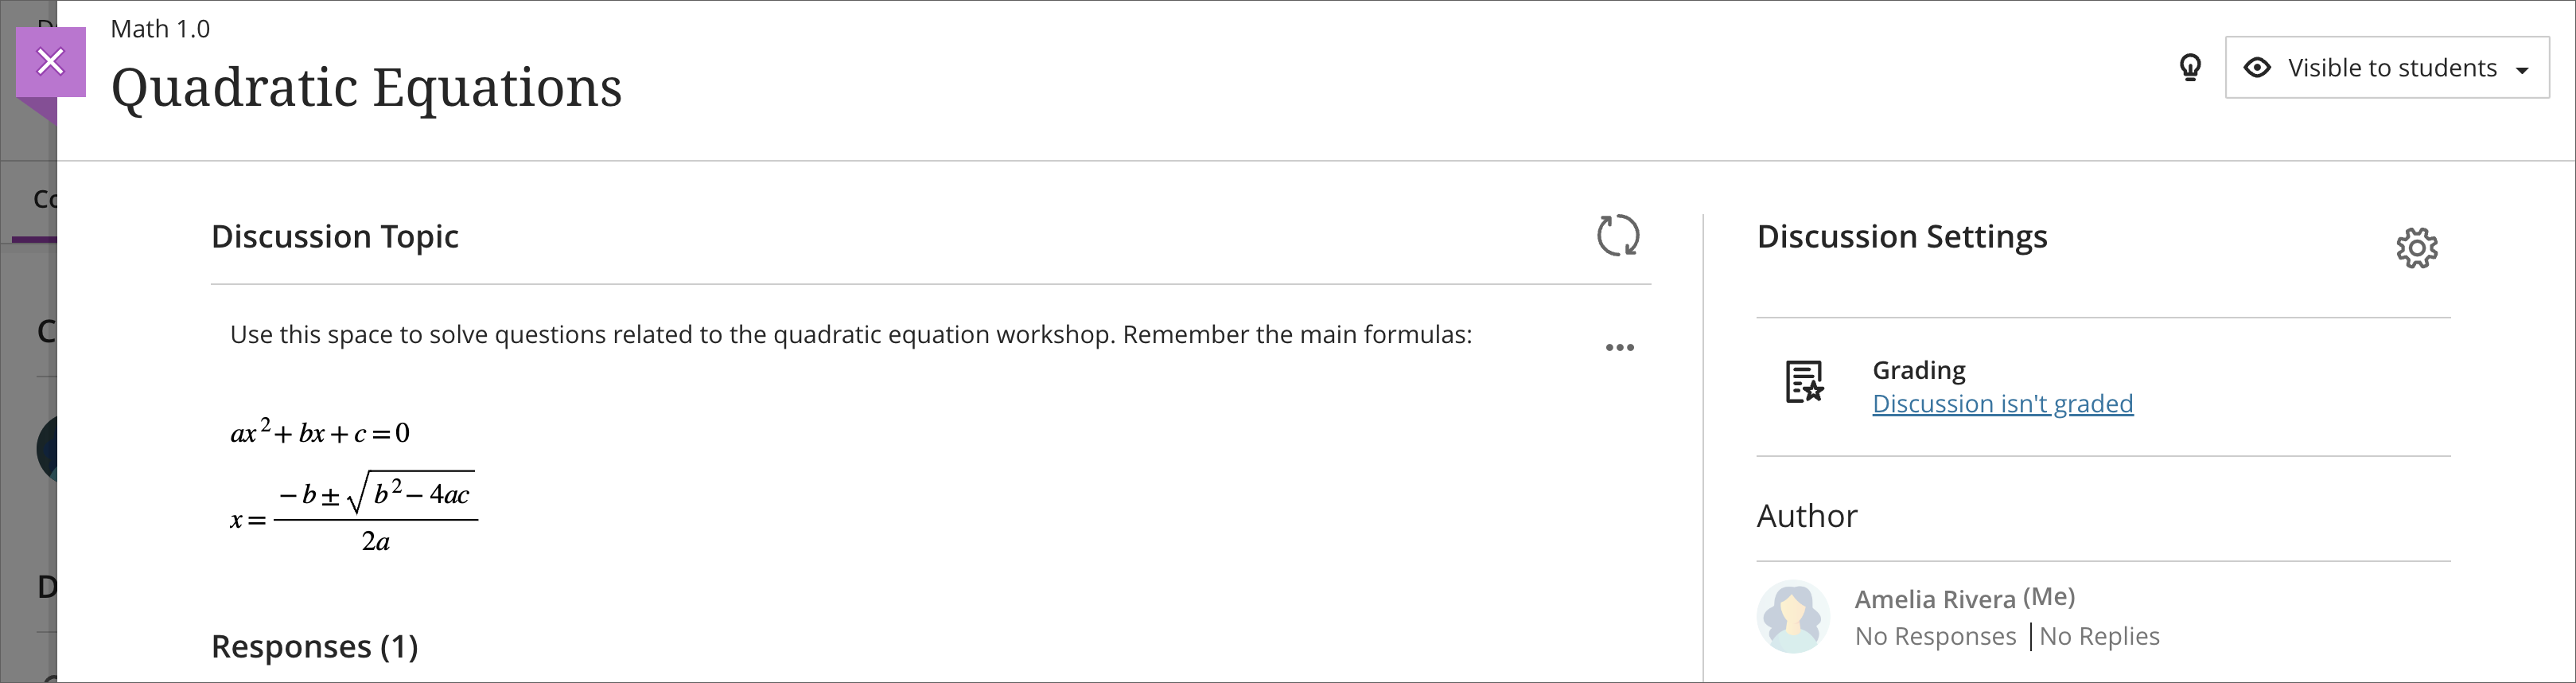
LaTeX equations display as text in the content editor. When users save the text, the LaTeX equations render as images.
Image 1. LaTeX equation as text in the content editor
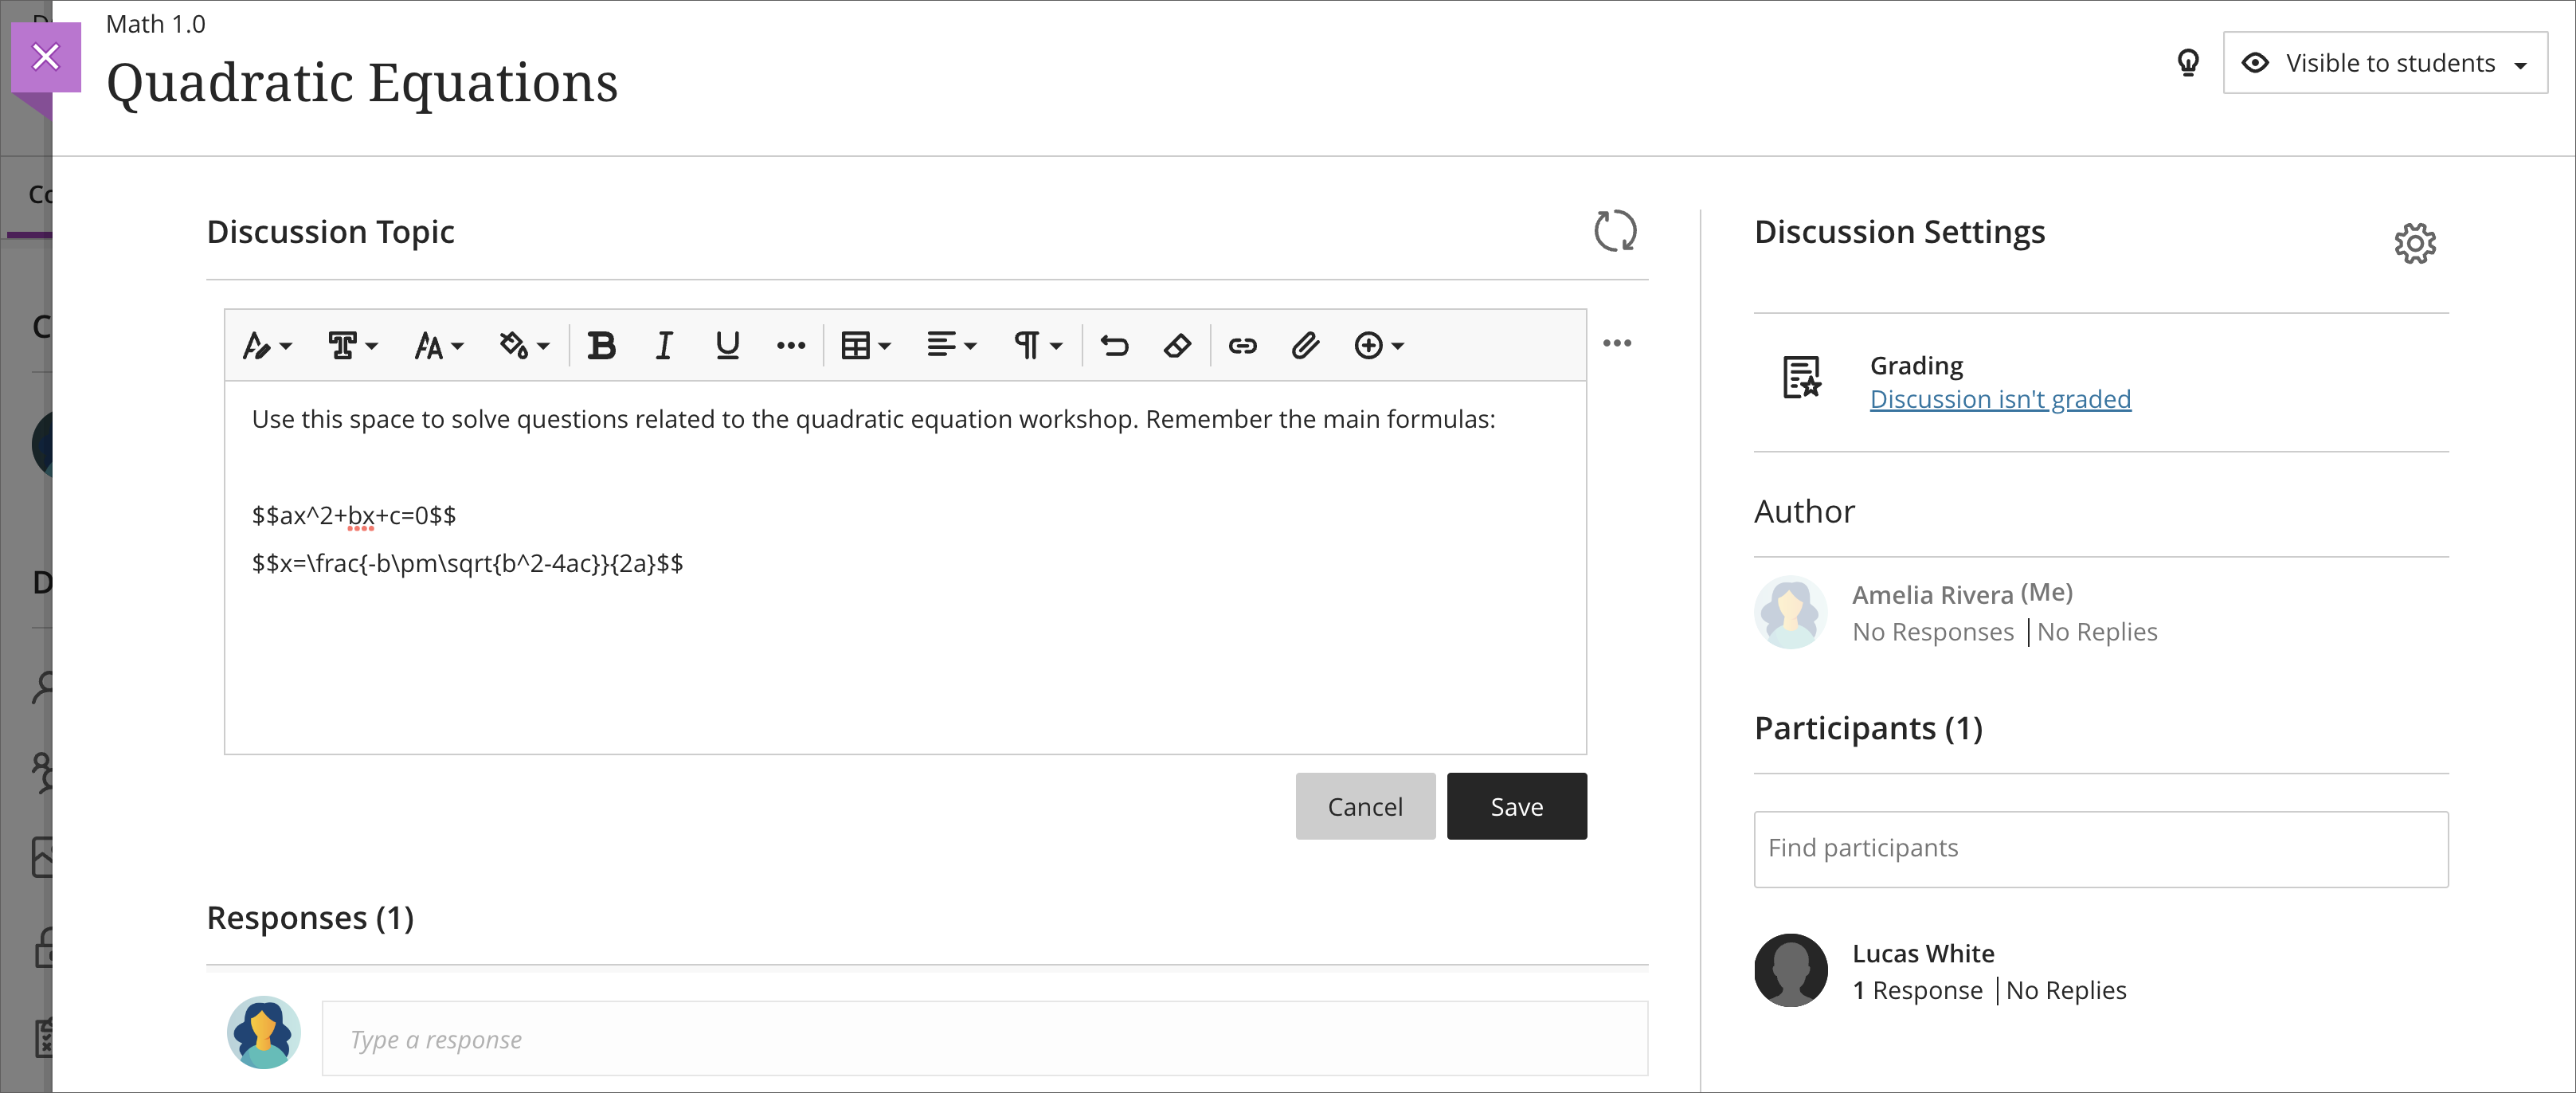
Image 2. LaTeX equation rendered as image after it is saved
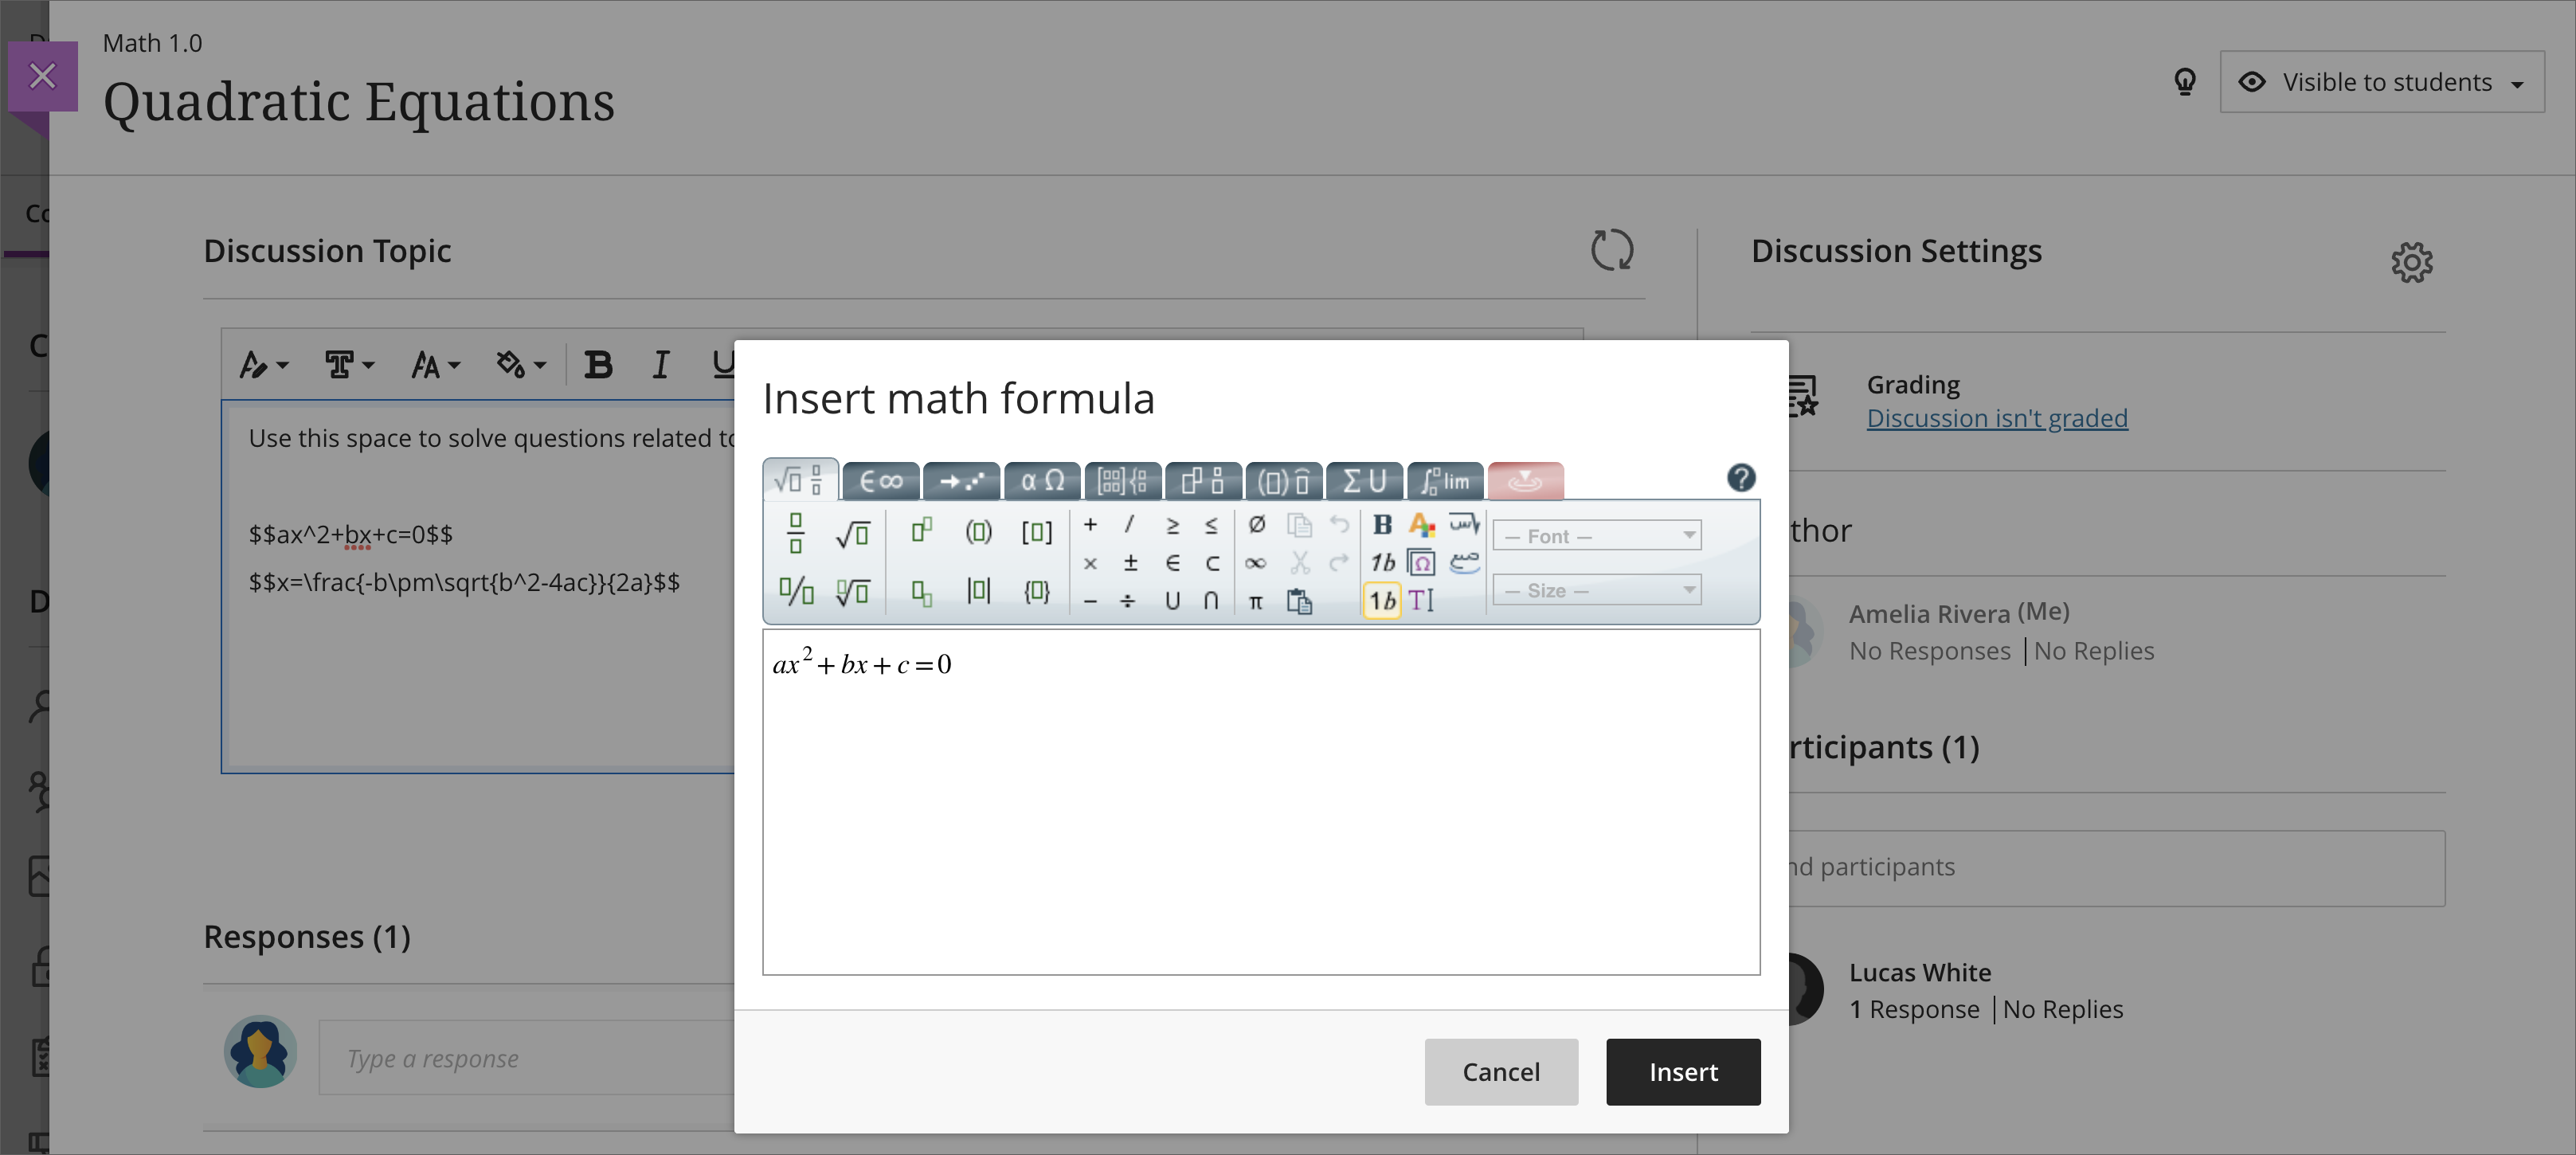
Users can edit the LaTeX equation in text format in the content editor. Also, users can edit the equation using the Math formula option.
Image 3. LaTeX equation edited as formula using math editor
Key considerations:
- Content editors that have math editor option render also Latex equations.
- Essay questions and the “Additional Content” section in Assessments do not have a save option in the text editor. In these areas, LaTeX equations will render as images after submission. Students can verify that the formula will render by opening the equation using the Math editor option.
- Formatting such as italics or bold must be in the LaTeX code. Users can add the code formats in text or when editing using the Math editor. If a user chooses the bold format in the content editor, the image will render without that format. Example:
- Code without format: $$axˆ2+bx+c=0$$
- Code with format: $$\style{font-size:72px}{axˆ2+bx+c=0}$$
- LaTeX equations are not rendered when they are inside code snippets. This is because LaTeX equations are treated as part of the code format.
- Upgrading from the Original to Ultra course experience: LaTeX equations convert and respect the size limit and options of the text editor in Ultra. If the text editor in Ultra does not support math formulas, the LaTeX equations will copy as plain text.
Import/Export Group Sets and Members
This functionality will become available in Test/Stage environments on Tuesday 26 July, 2022.
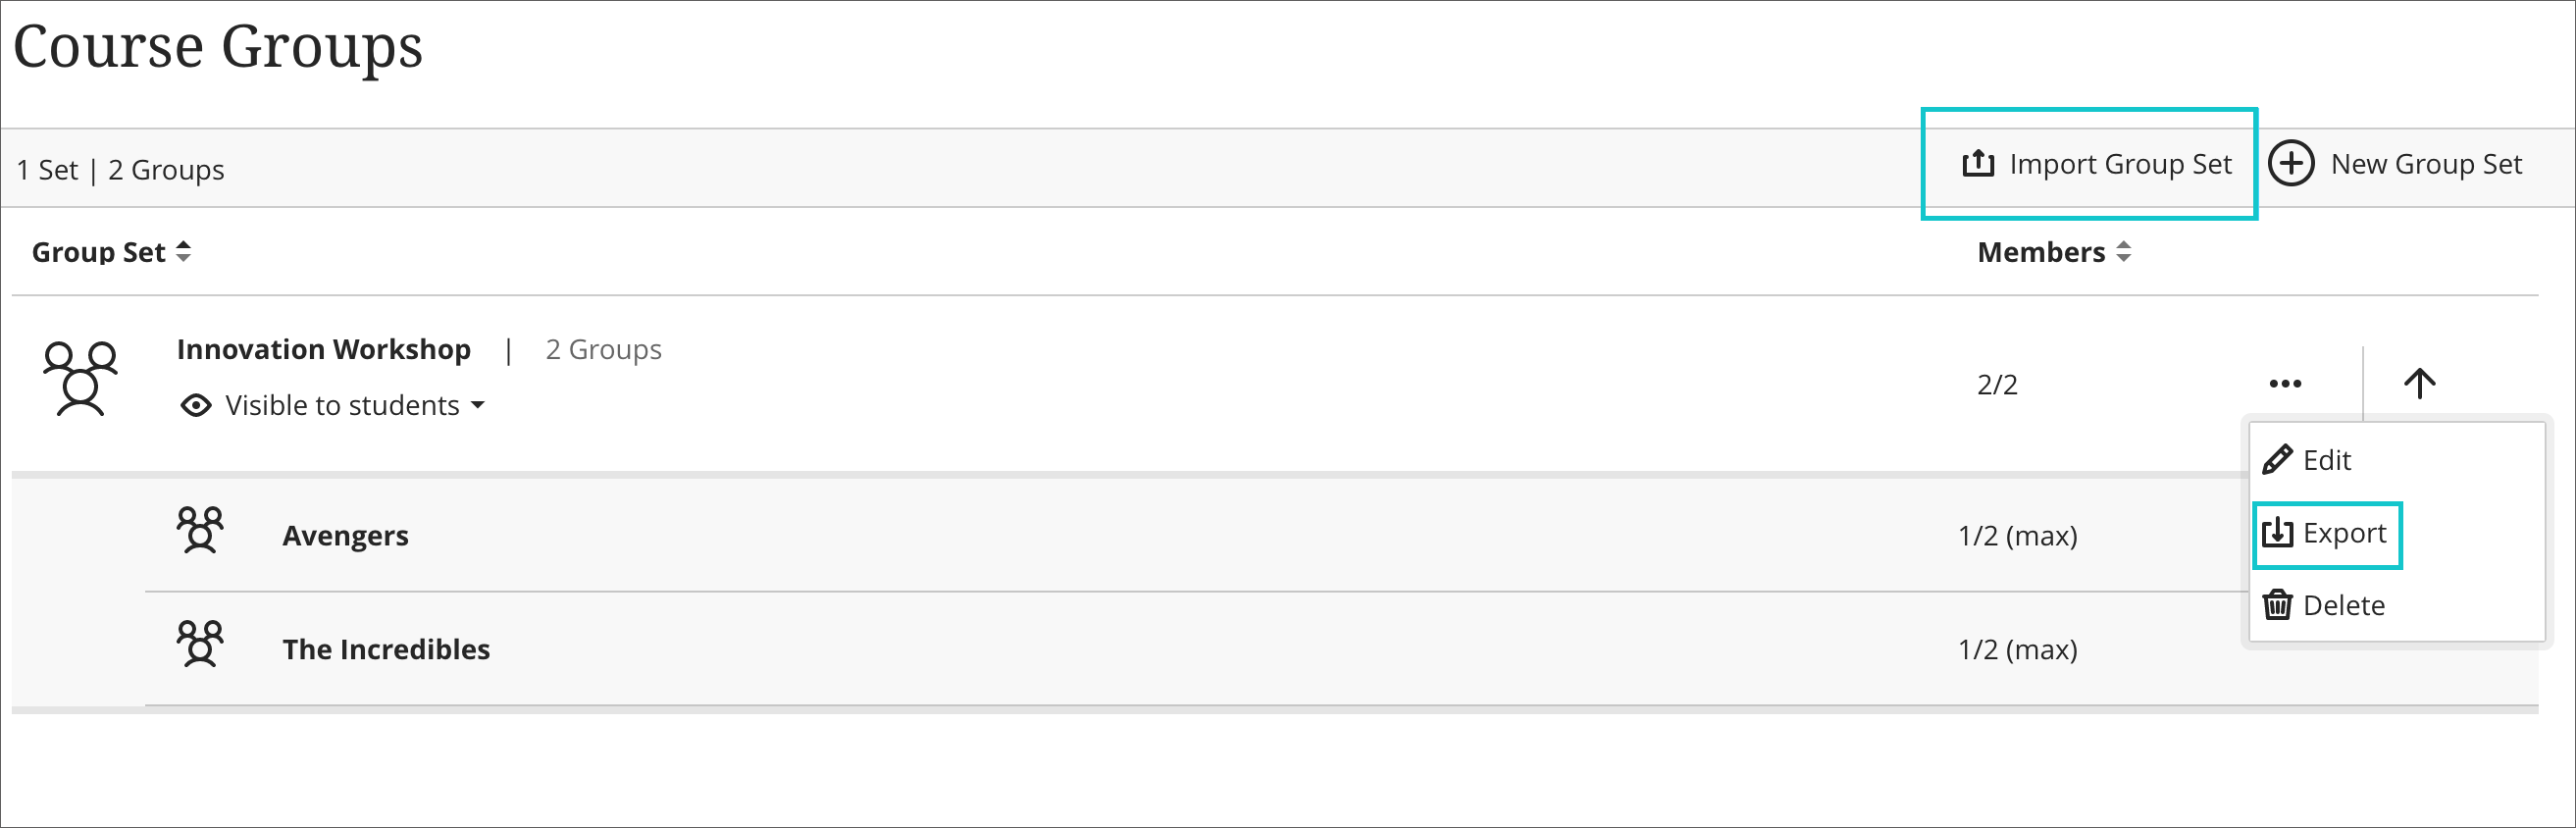
In the past, instructors did not have a way to bulk create group sets or add group members in Ultra courses. Creating group sets and adding students to groups one at a time was very inefficient. Now instructors can create group sets and add group members by importing a CSV (Comma Separated Value) file. This feature also supplies the ability to export group sets and members to a CSV file.
Image 1. Import Group Set
Instructors can create a group set by importing a CSV file from the course group set page or the groups view page. When assigning an assessment to a group set, instructors can import a CSV file. This allows the instructor to assign an existing group set or create a new one while creating an assessment.
Image 2. Upload file option; we recommend instructors use the provided templates
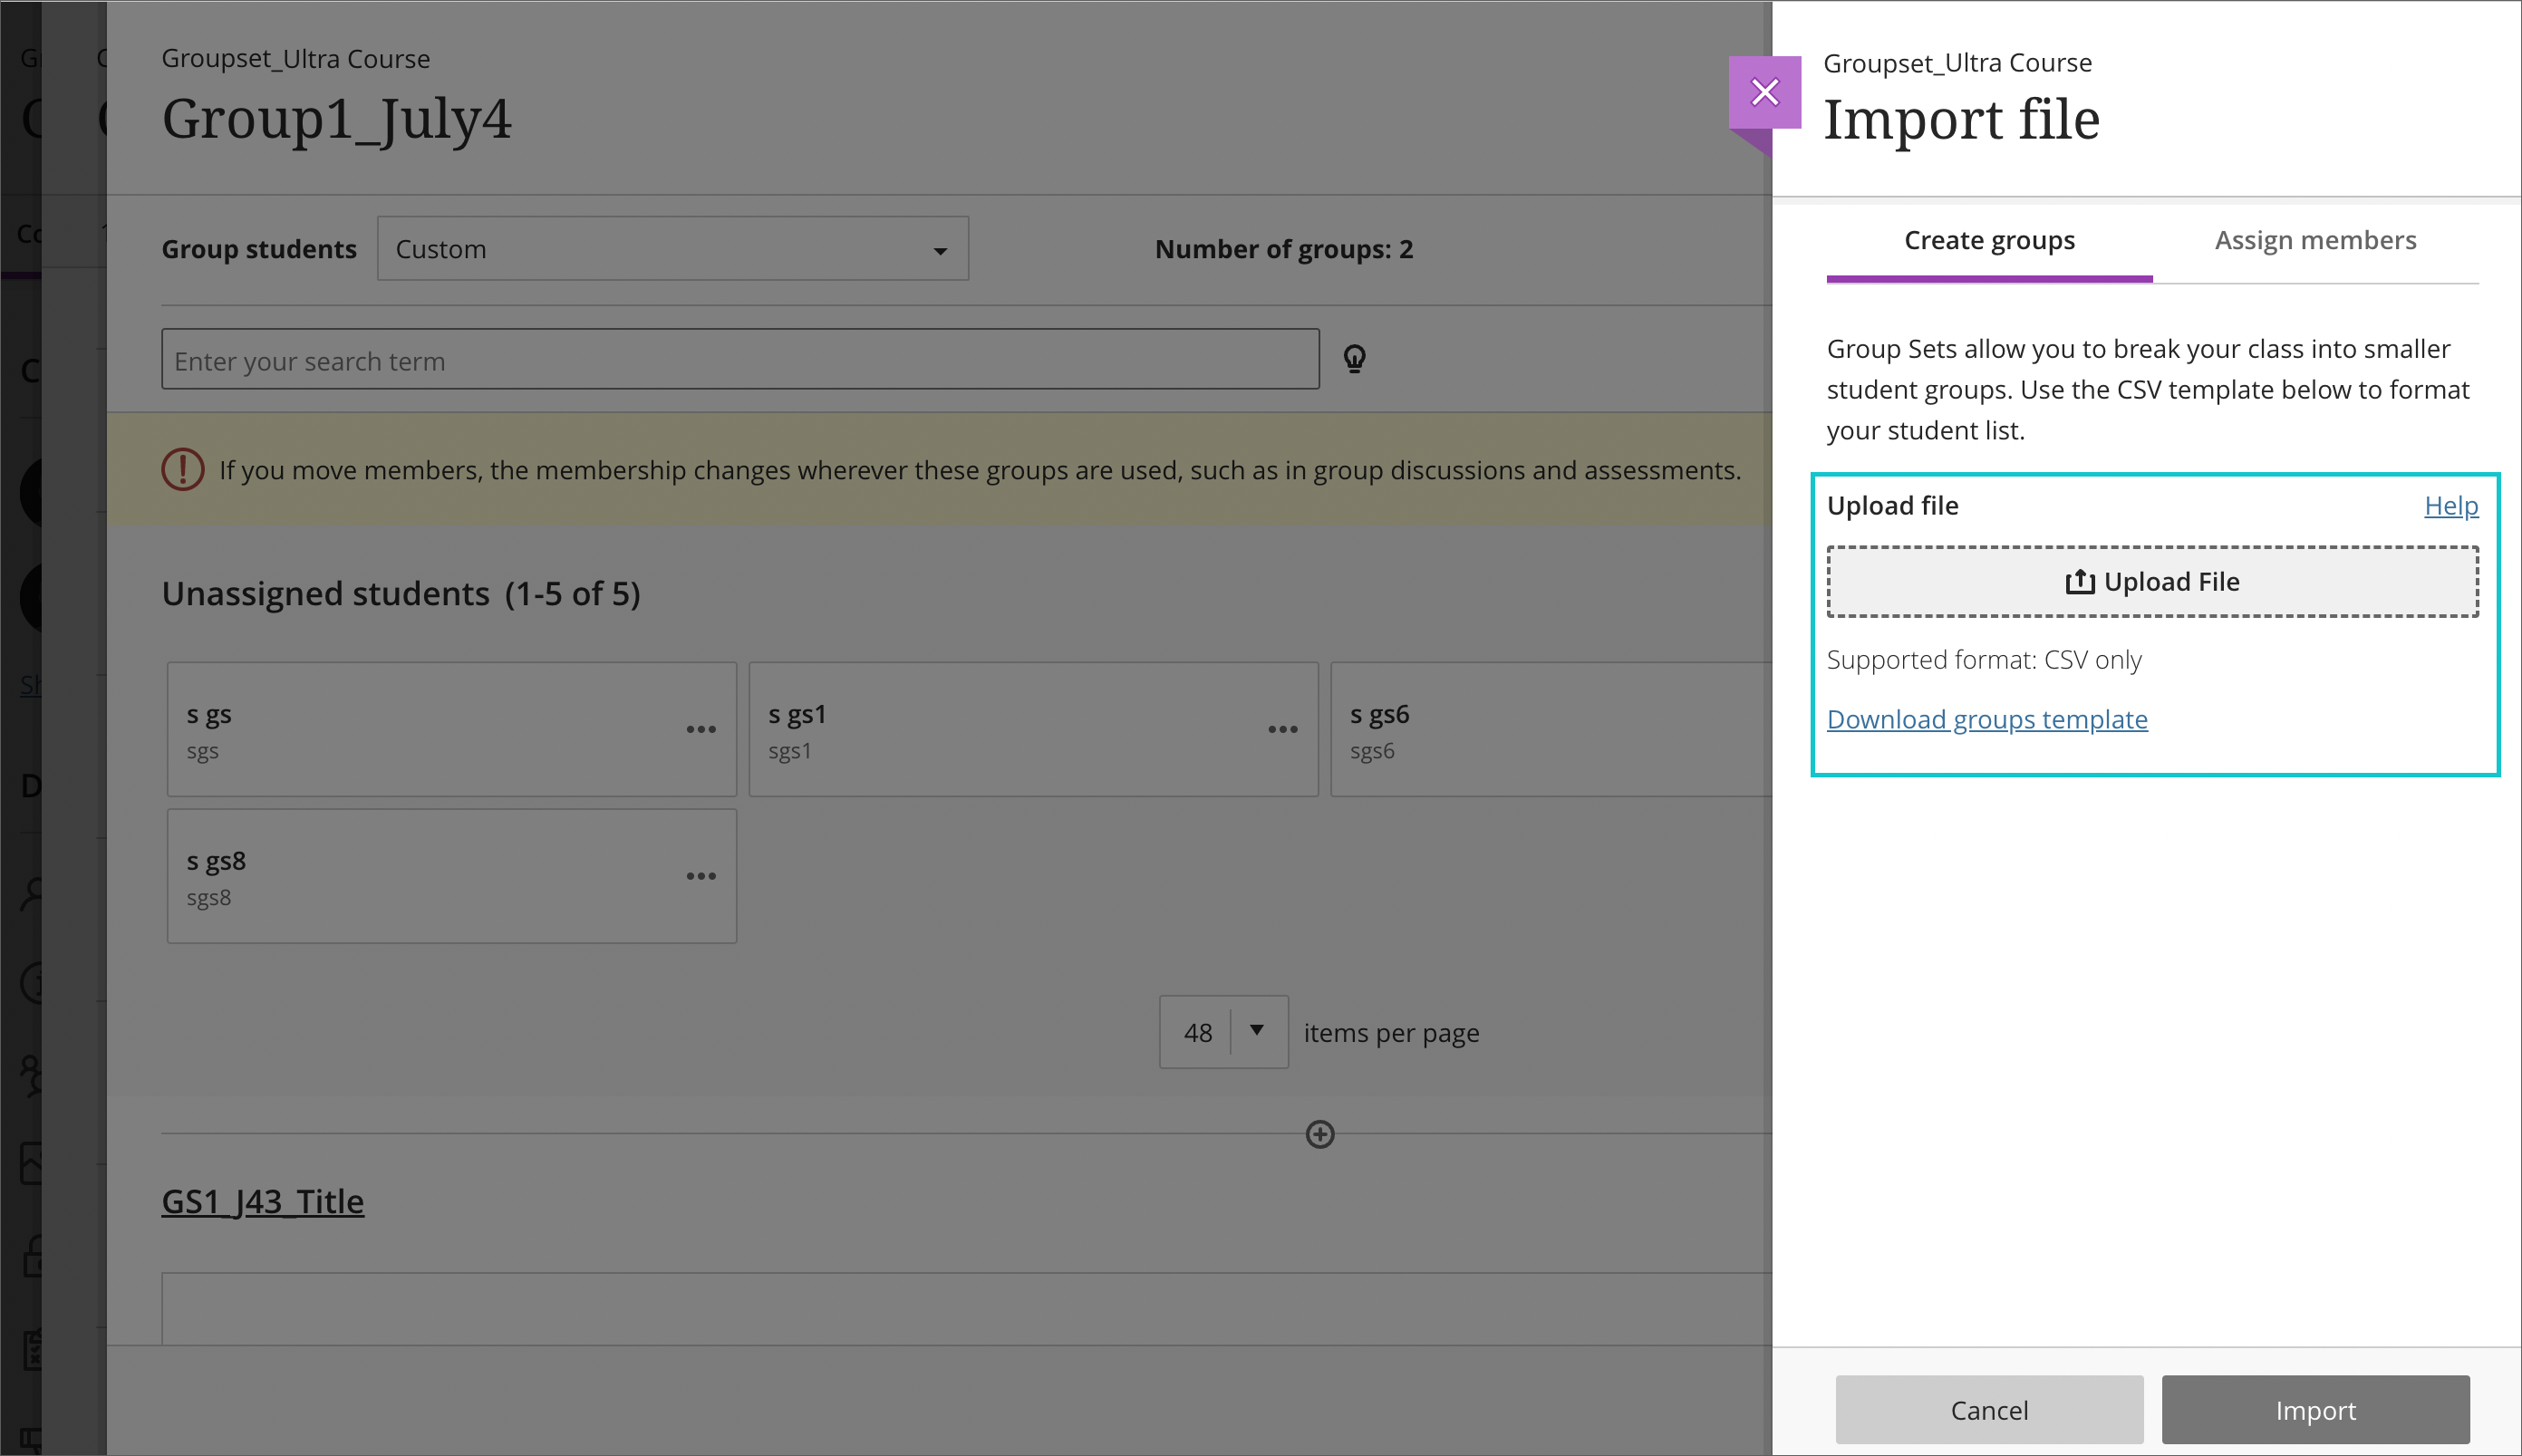
In the template, all mandatory cells are marked with an asterisk (*). There are two templates included in the download:
- one template for creating group sets
- one for importing members into the groups
After importing a file, the instructor will receive a confirmation email. The email will say that the file imported successfully or had errors. We recommend instructors use the template supplied to avoid errors.
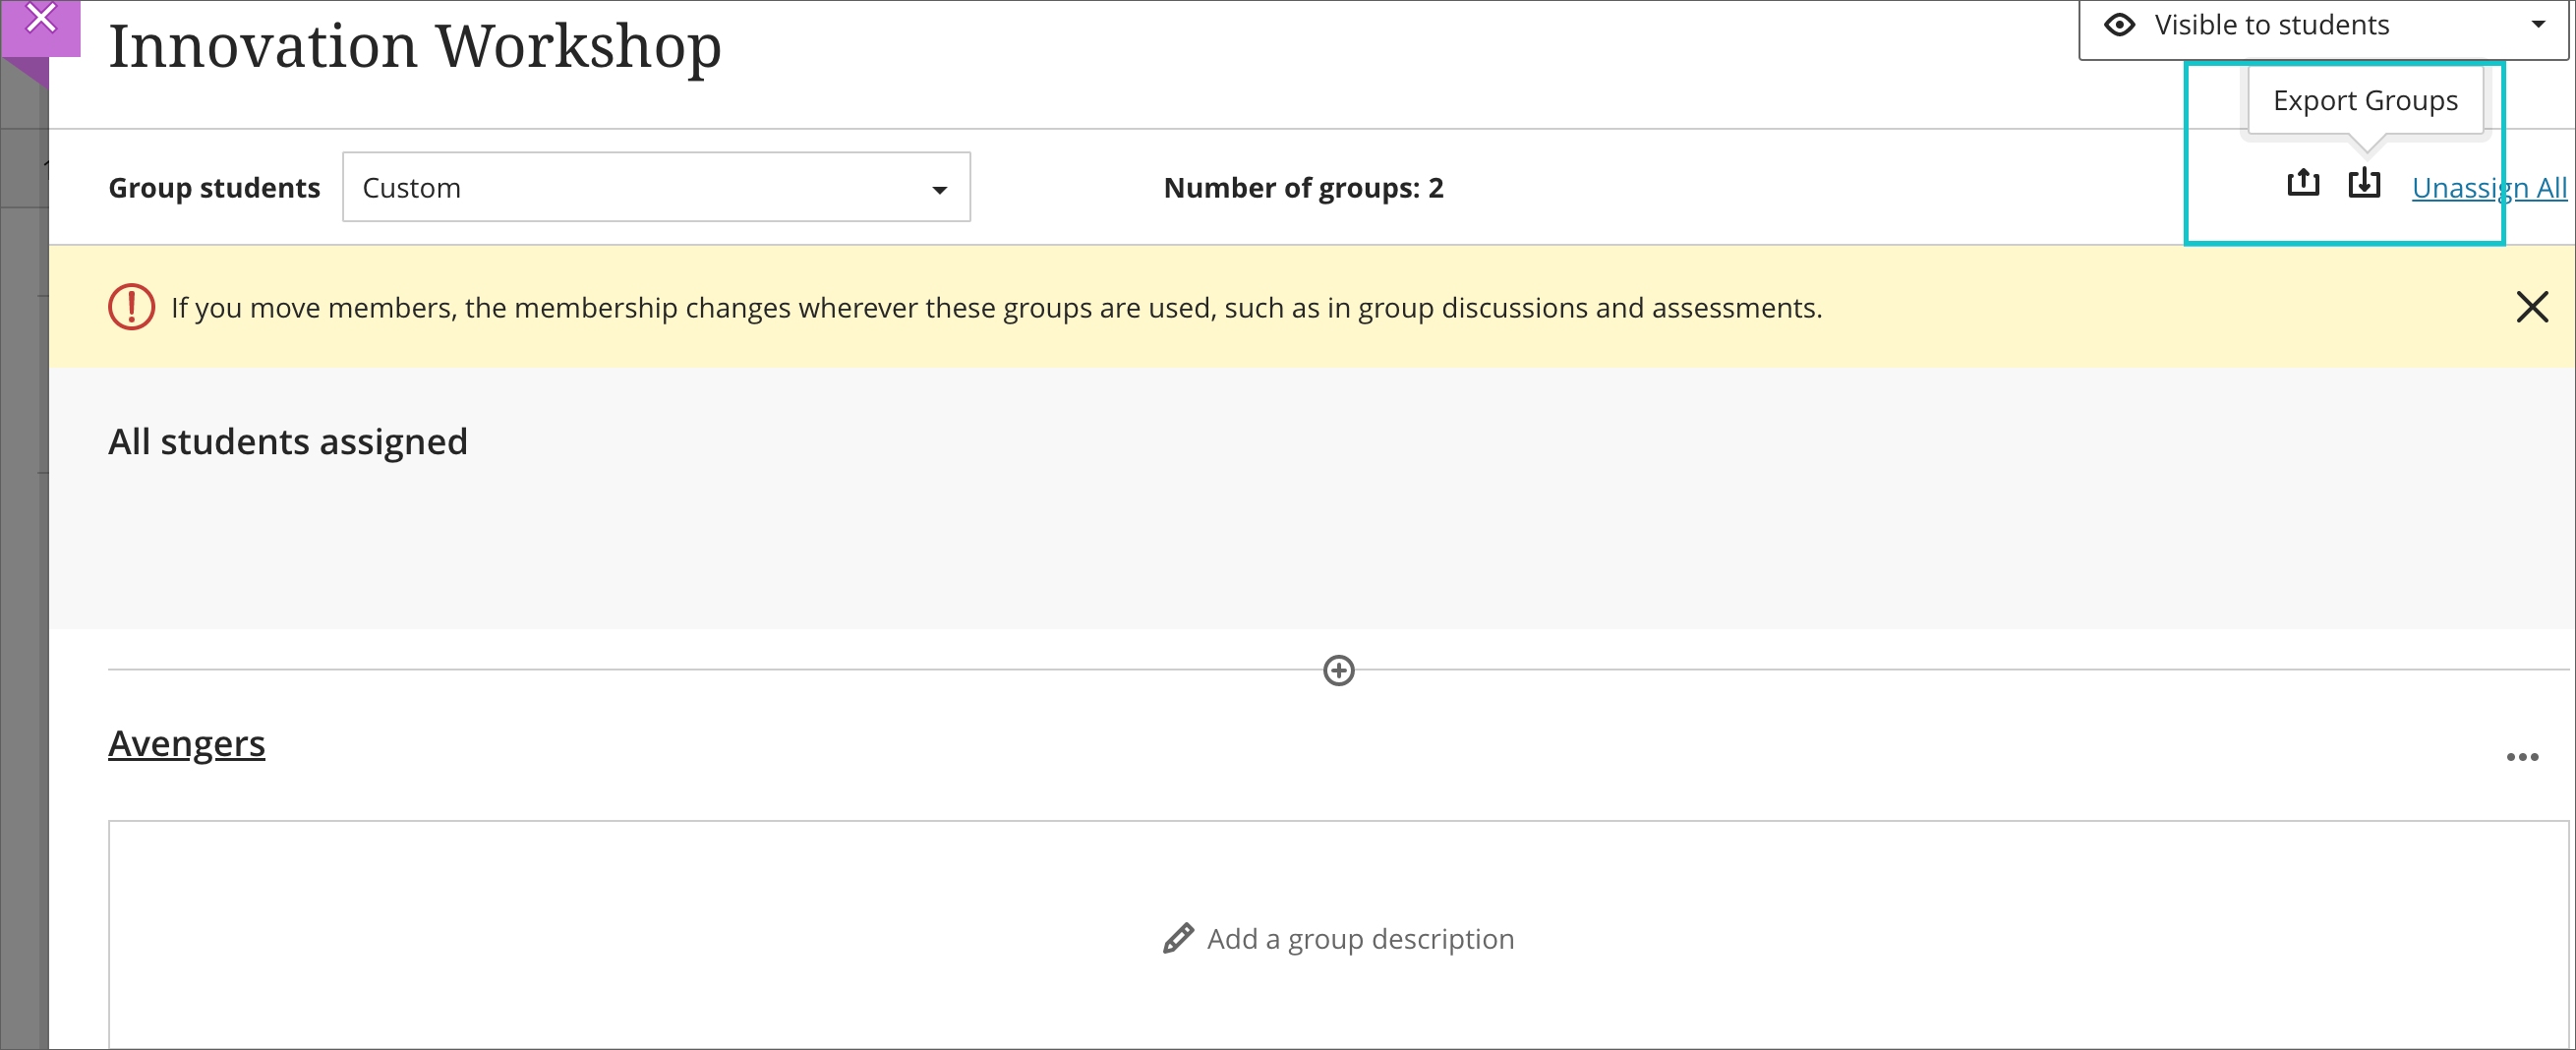
Instructors can export and download their Group Sets, Groups, and Group members as a CSV file.
Images 3 and 4. Import or Export Group Set & Groups

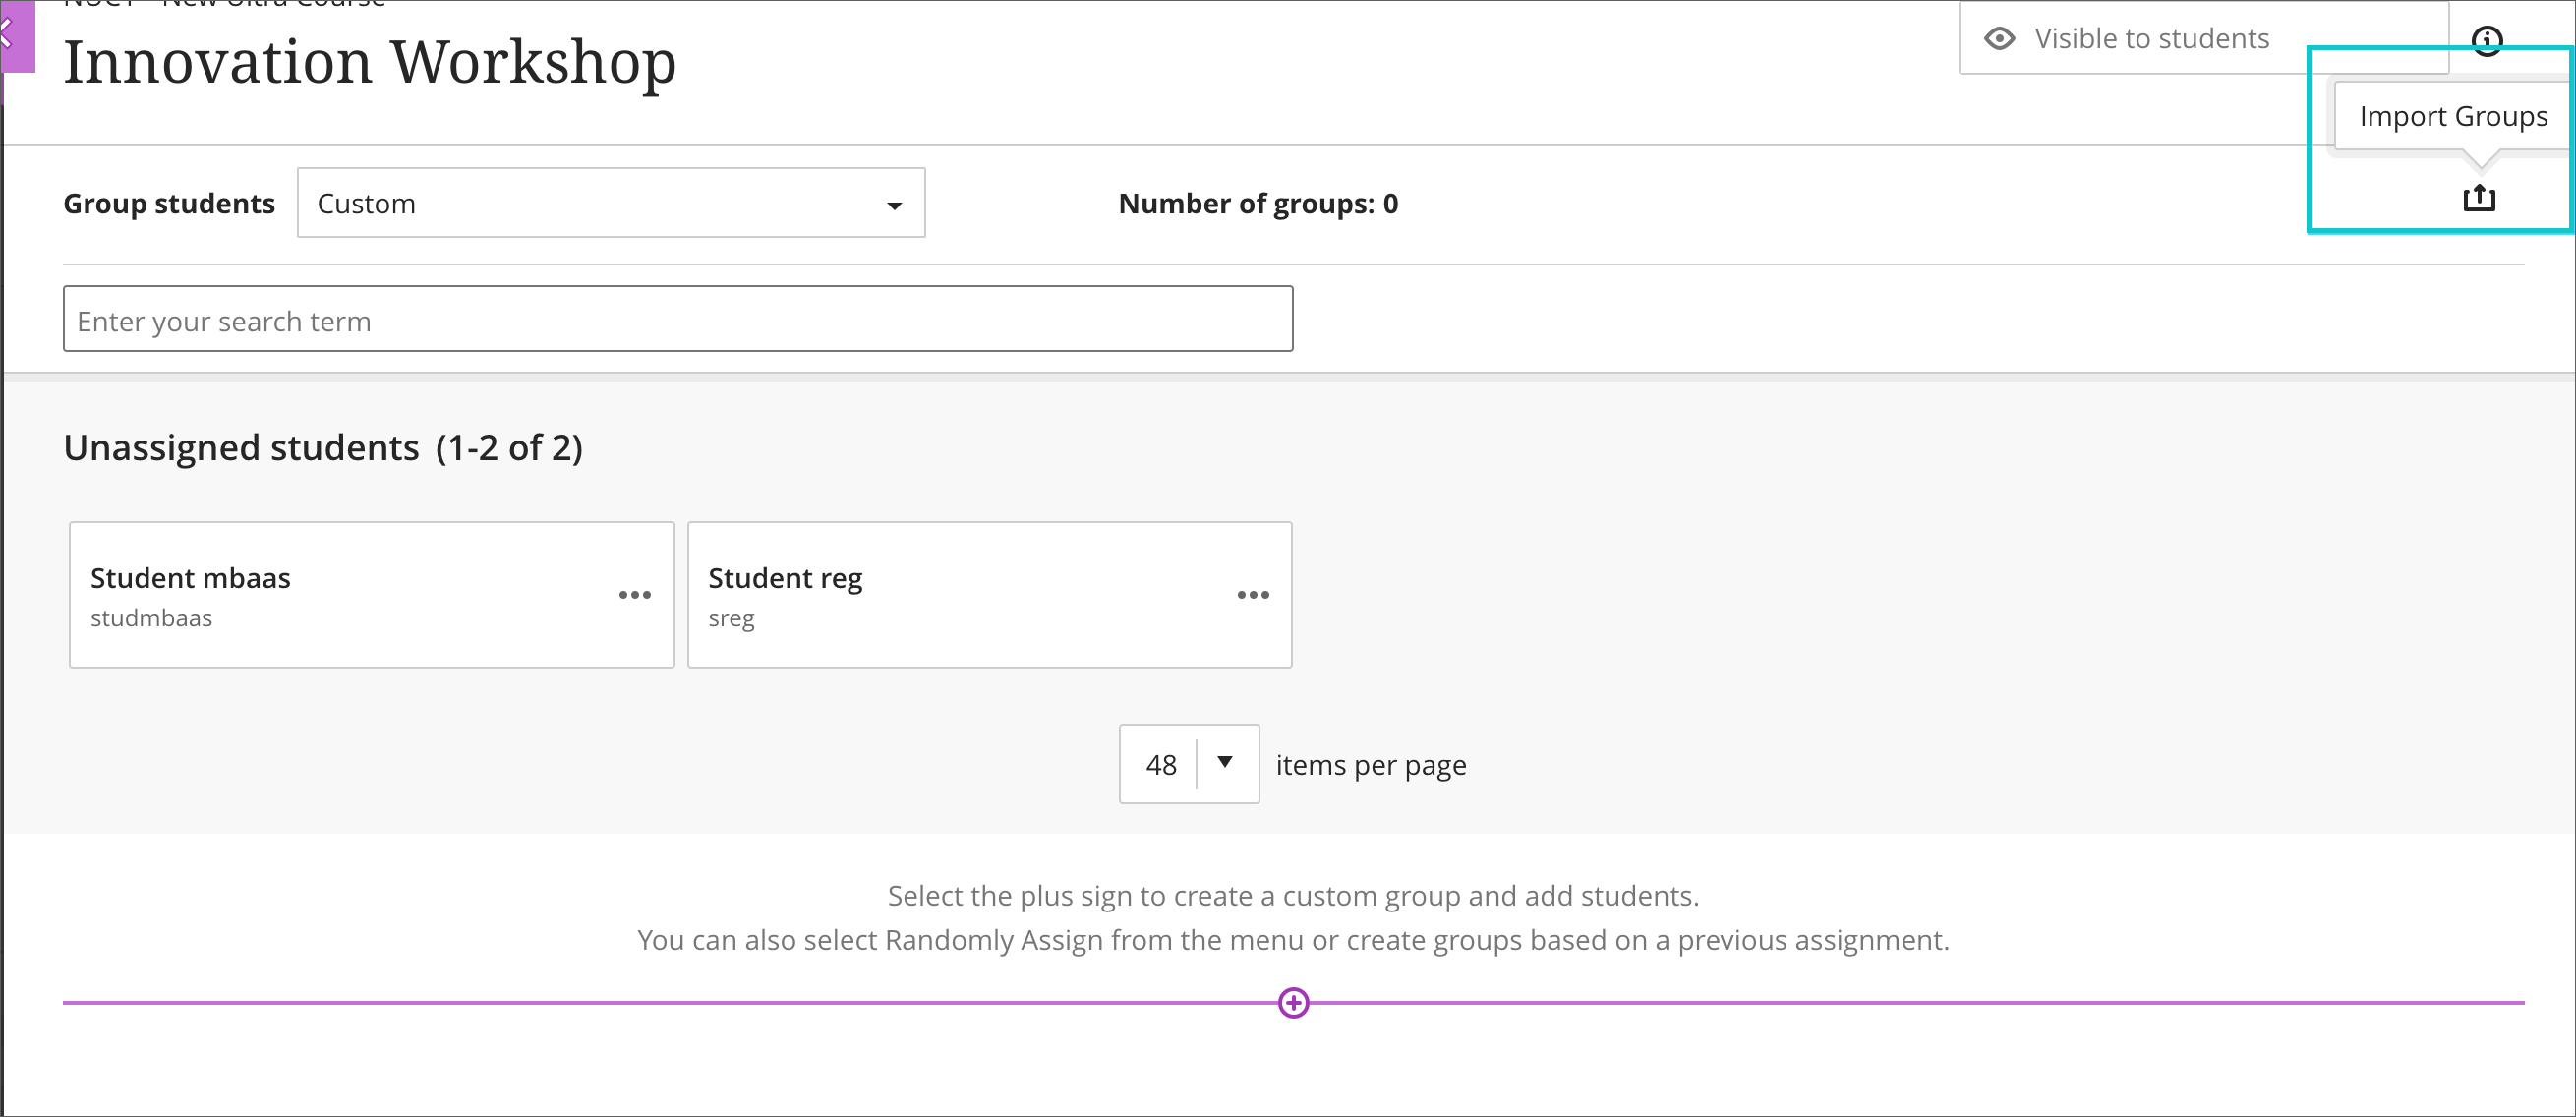
Image 5. Export Group Set
Messaging in Private Courses
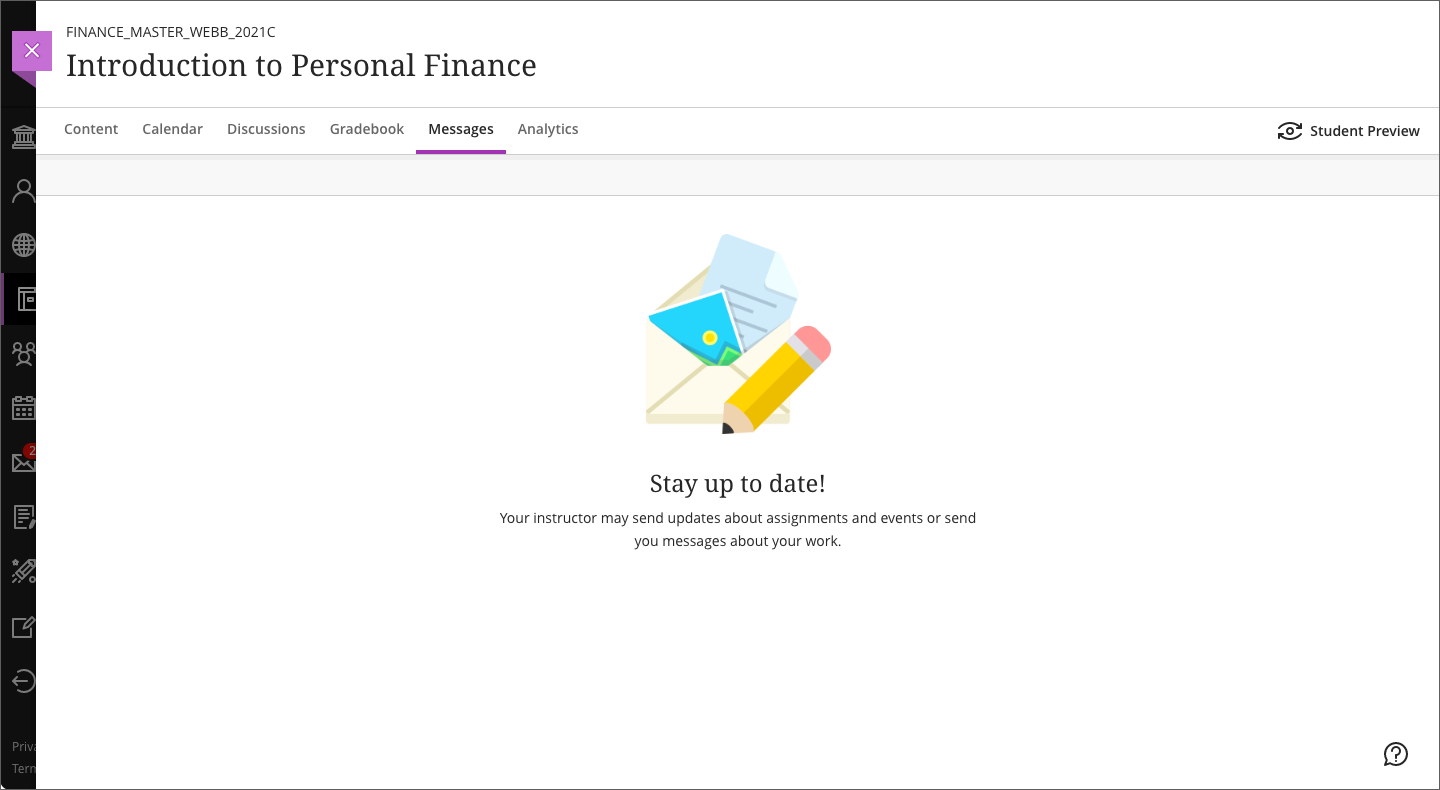
Some instructors need to communicate with students before a course is open to students. When a course is set to private, students cannot access the course. This means that students cannot access the course inbox to review messages. Because of this, we disabled the ability for instructors to send messages since there was no way for students to access those messages.
Image 1. Before – Instructors did not have a way to send messages when a course was private
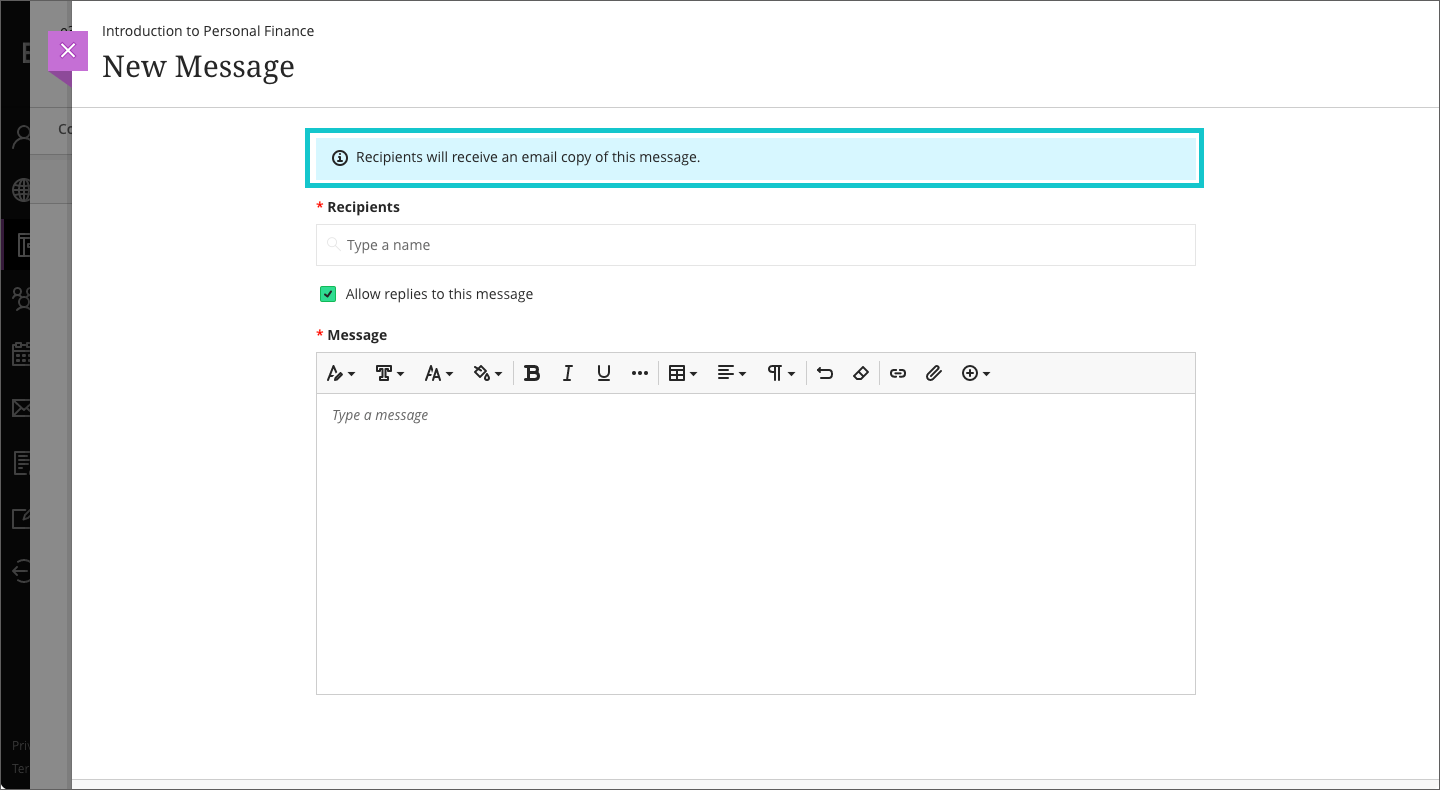
Now instructors can send messages from within the course. Students can access the messages from the email address associated with their Blackboard account. This change does not change the access to the course inbox when the course is private. This change allows students to receive messages from the instructor via email when the course is private.
Image 2. Upload file option; we recommend instructors use the provided templates
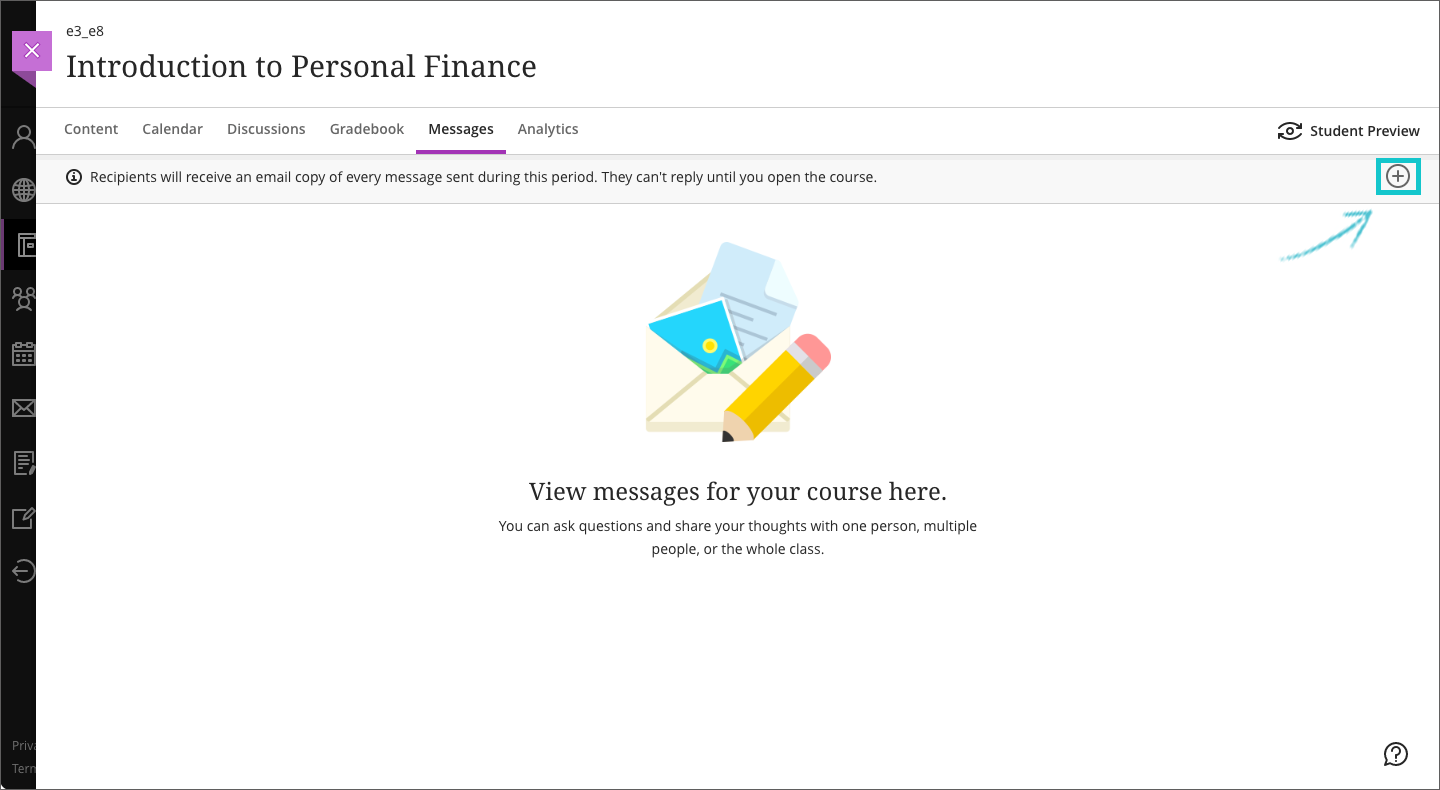
Image 3. After – When composing a new message in a private course, instructors are informed how students receive those messages
When a course is private, instructors will see a banner in the course inbox or when drafting a message. The banner states that students cannot access the messages in the course when the course is private but will receive an email copy instead. Students will receive an email copy of any message sent. They will be able to access the message from within their course once the instructor opens the course.
Force Email Copy for all Messages
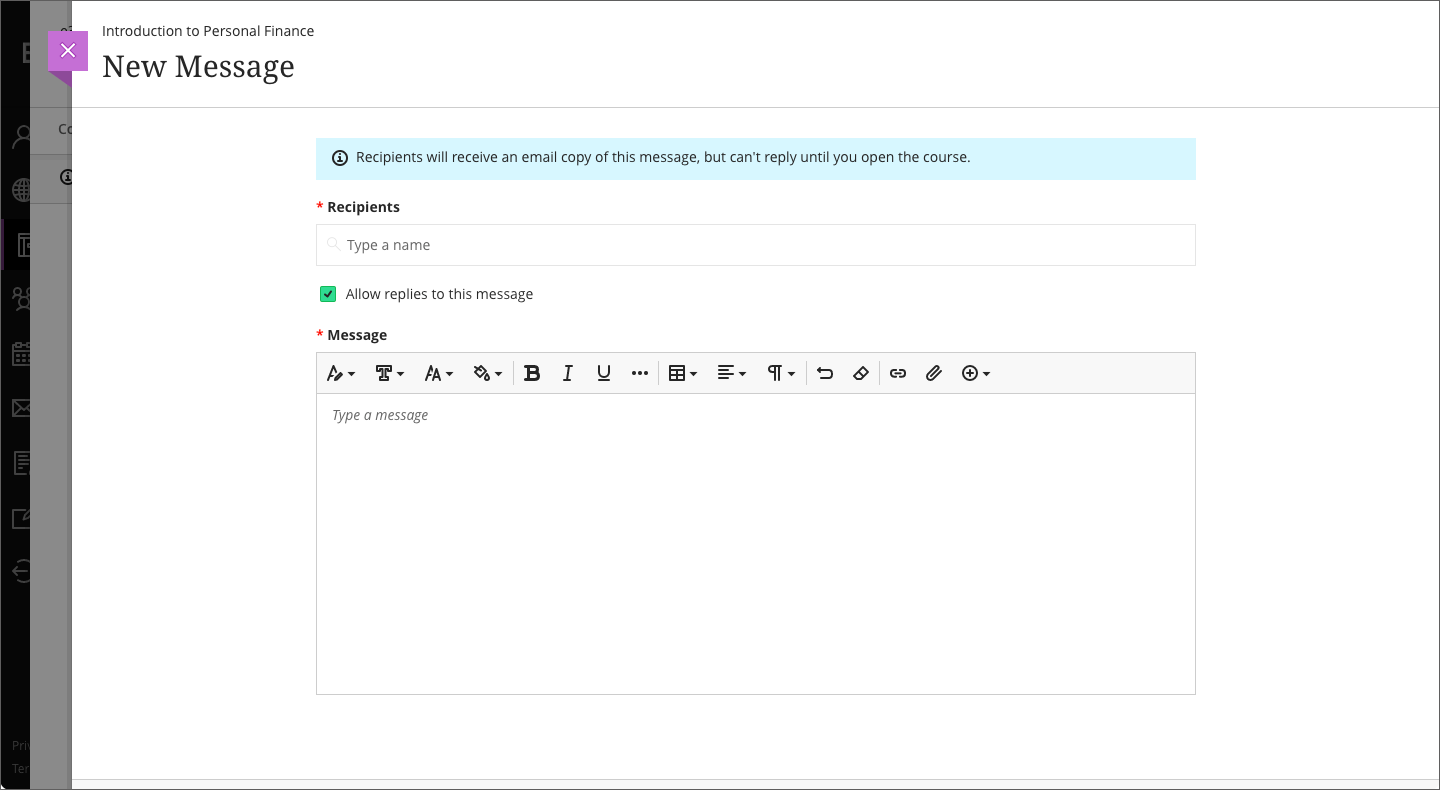
When drafting a message, users have had the option to choose “Send an email copy to recipients.” For policy reasons, some institutions may want this choice to always be on by default for all messages.
Image 1. Before – Users can choose to “Send an email copy to recipients” when composing a message
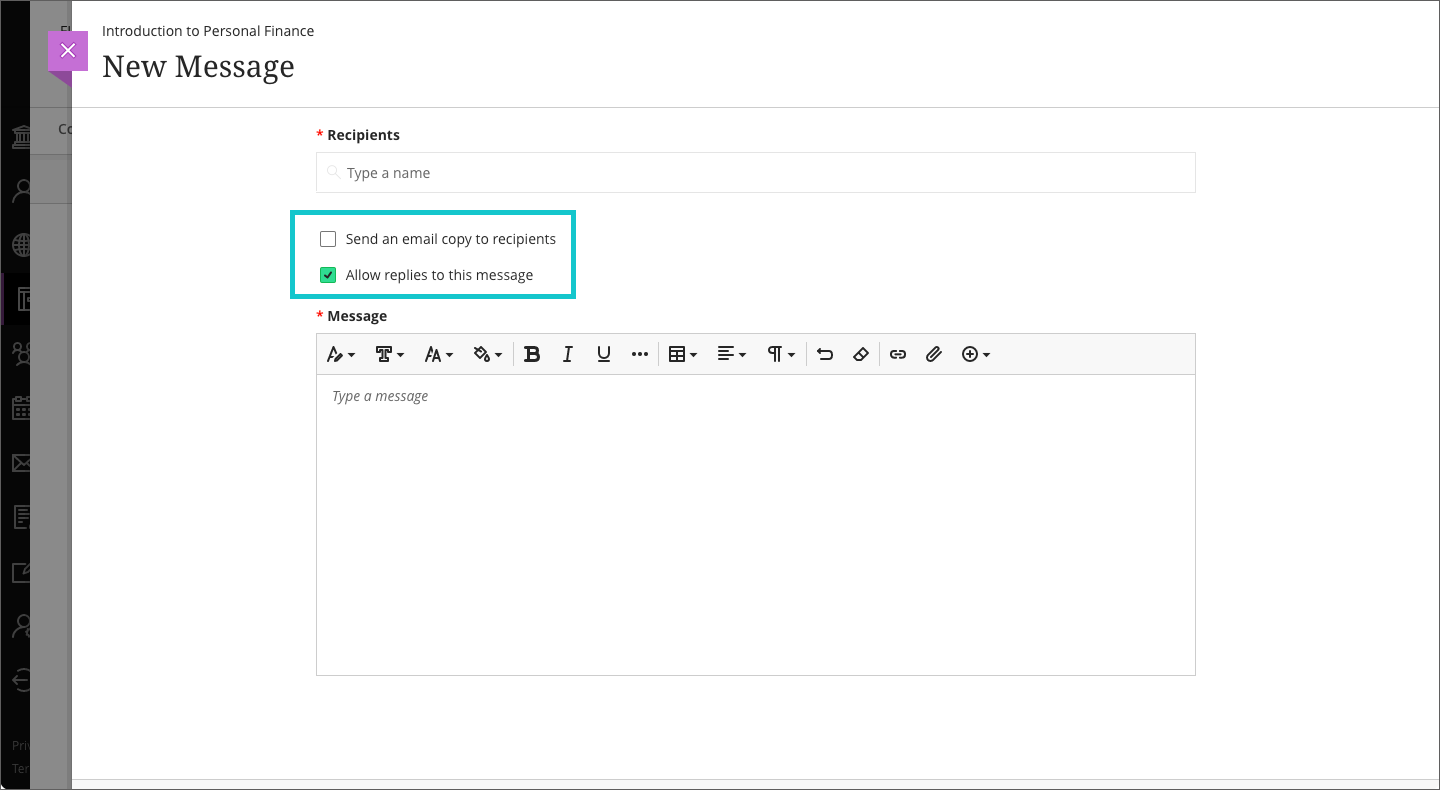
With this update, administrators now have the choice to force an email copy to recipients for all messages sent.
Image 2. After – “Send an email copy to recipients” is now the default behaviour for all messages; users are informed that recipients will receive an email copy
Explicit declaration of Messages handling
In the past, it was unclear how individual users received messages sent to more than one recipient. Some instructors expected that messages with multiple recipients would be sent as a group message. Others thought that messages with more than one recipient were private, like a blind carbon copy email.
Now when an instructor adds more than one recipient, the interface makes clear how the message is sent: group message or private message. This is a temporary solution. In a future release, instructors will be able to make this choice for themselves.
Image 1. Before – Users were not informed if the message was a group message or private message
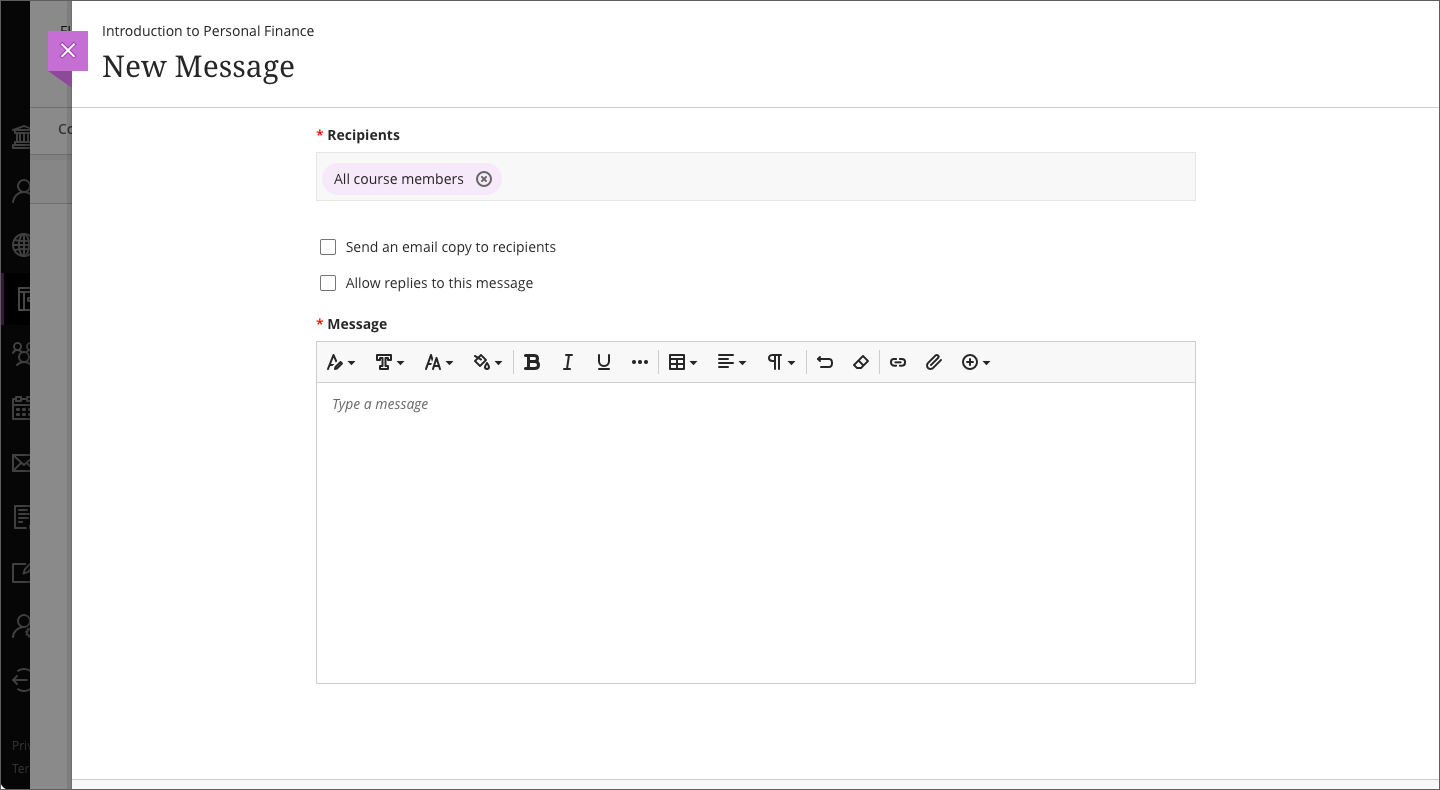
Image 2. After– Users are informed when a message is a group message
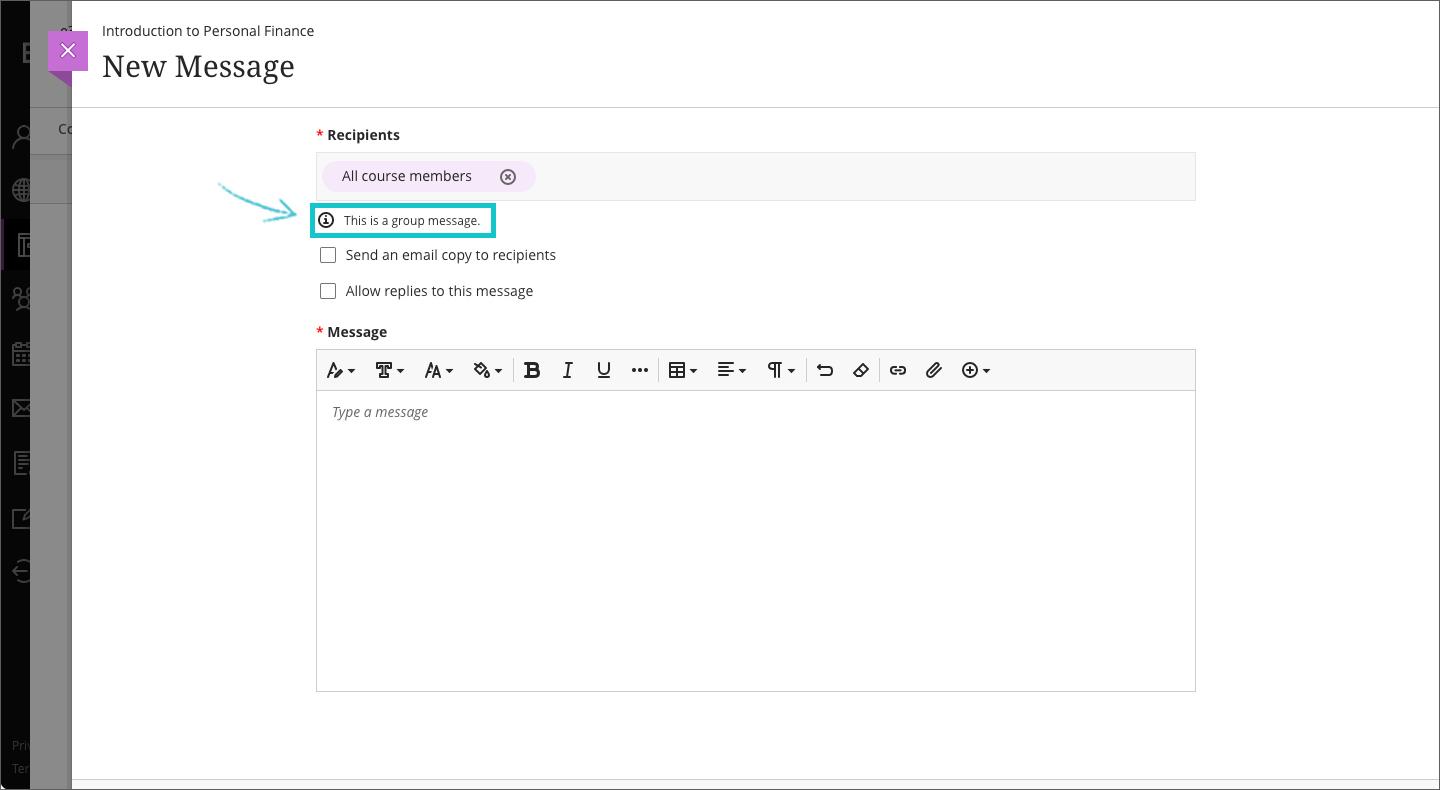
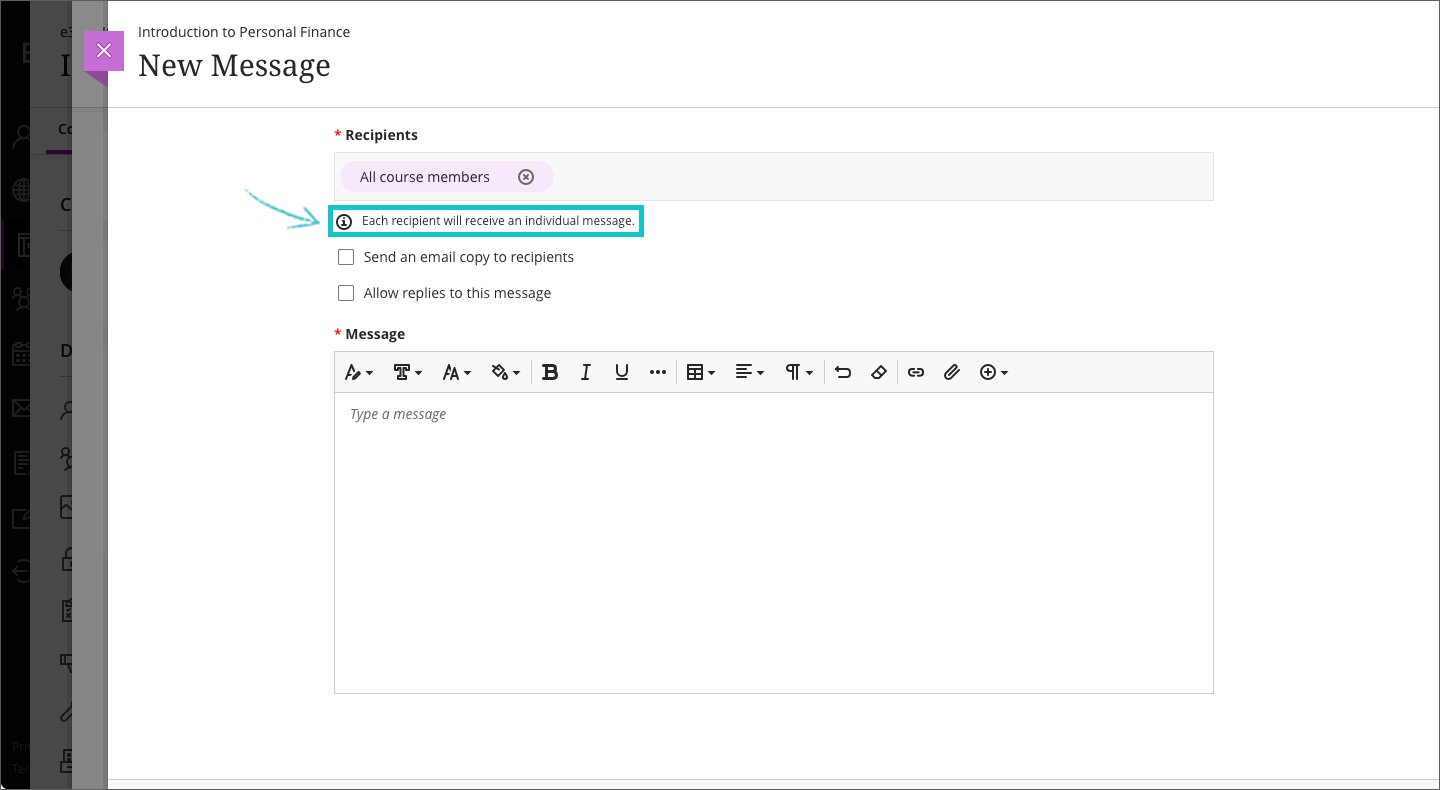
Image 3. After– Users are informed when each recipient receives their own private message
All Roles:
- With Multiple Recipients. The message is treated as a group message.
- Base Navigation > Messages > + Symbol
- Base Navigation > Courses > Course > Messages > + Symbol
- Base Navigation > Courses > Course > Messages > Message
- Base Navigation > Courses > Course > Roster > User Profile > Message
- Base Navigation > Courses > Course > Message Icon next to Course Faculty
Instructor Roles:
- With Multiple Recipients. The message is treated as a group message.
- Base Navigation > Courses > Course > Course Groups > Ellipsis next to Group Set > Edit > Ellipsis next to Group > Message group
- Base Navigation > Courses > Course > Assignment > Settings > Groups > Ellipsis next to Group > Message group
- Base Navigation > Courses > Course > Test > Settings > Groups > Ellipsis next to Group > Message group
- Base Navigation > Courses > Course > Discussion > Settings > Groups > Ellipsis next to Group > Message group
- Base Navigation > Courses > Course > Gradebook > Student List View > Ellipsis next to Student > Message Student
- Base Navigation > Courses > Course > Gradebook > Student List View > Student > Message
- Base Navigation > Courses > Course > Ellipsis associated with a Discussion > View Analytics > Ellipsis > Message Non-Participant
- With Multiple Recipients. Each Recipient receives an individual message/copy from the sender:
- Base Navigation > Courses > Course > Ellipsis associated with a Discussion > View Analytics > Ellipsis > Message # Non-Participants
- Base Navigation > Courses > Course > Gradebook > Settings > View Class Performance > Message Icon
- Base Navigation > Grades > Pie Chart > Messages Icon
Granular Content Copy – Copy Status in Course Tasks and Logs
Content reuse is an important aspect of building out and updating courses. In recent releases, we have made improvements in this area:
- copying content from Original Course View courses (March release)
- copying content within the same course (April release)
Instructors will now have access to the status of all the course tasks that they start. This includes:
- Copy
- Convert to Ultra
- Archive
- Export
- Import
- Restore
Image 1. Course Tasks and Logs Access Point
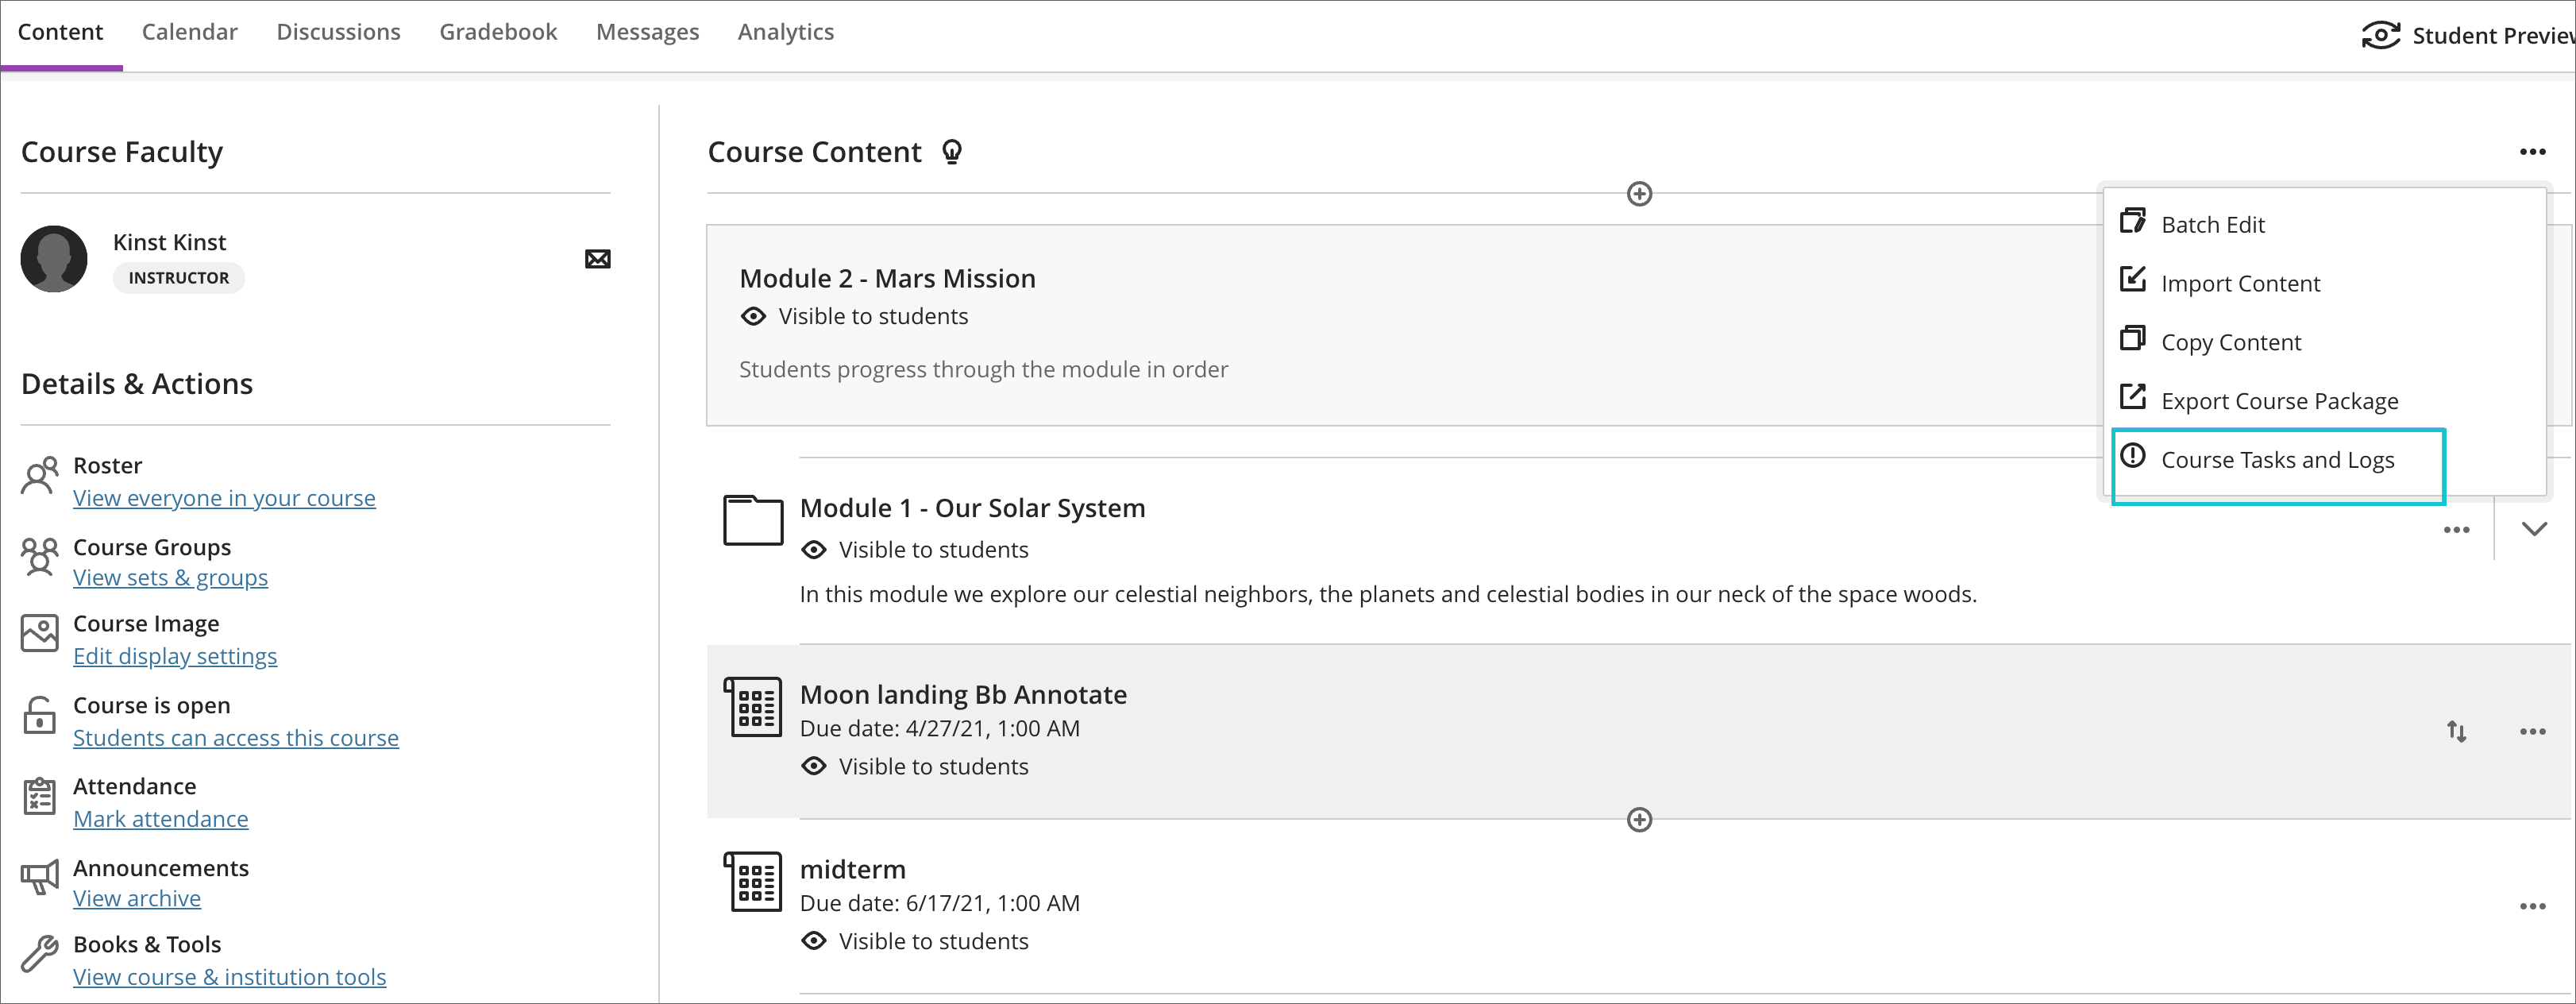
Image 2. Course Tasks and Logs – Tasks tab
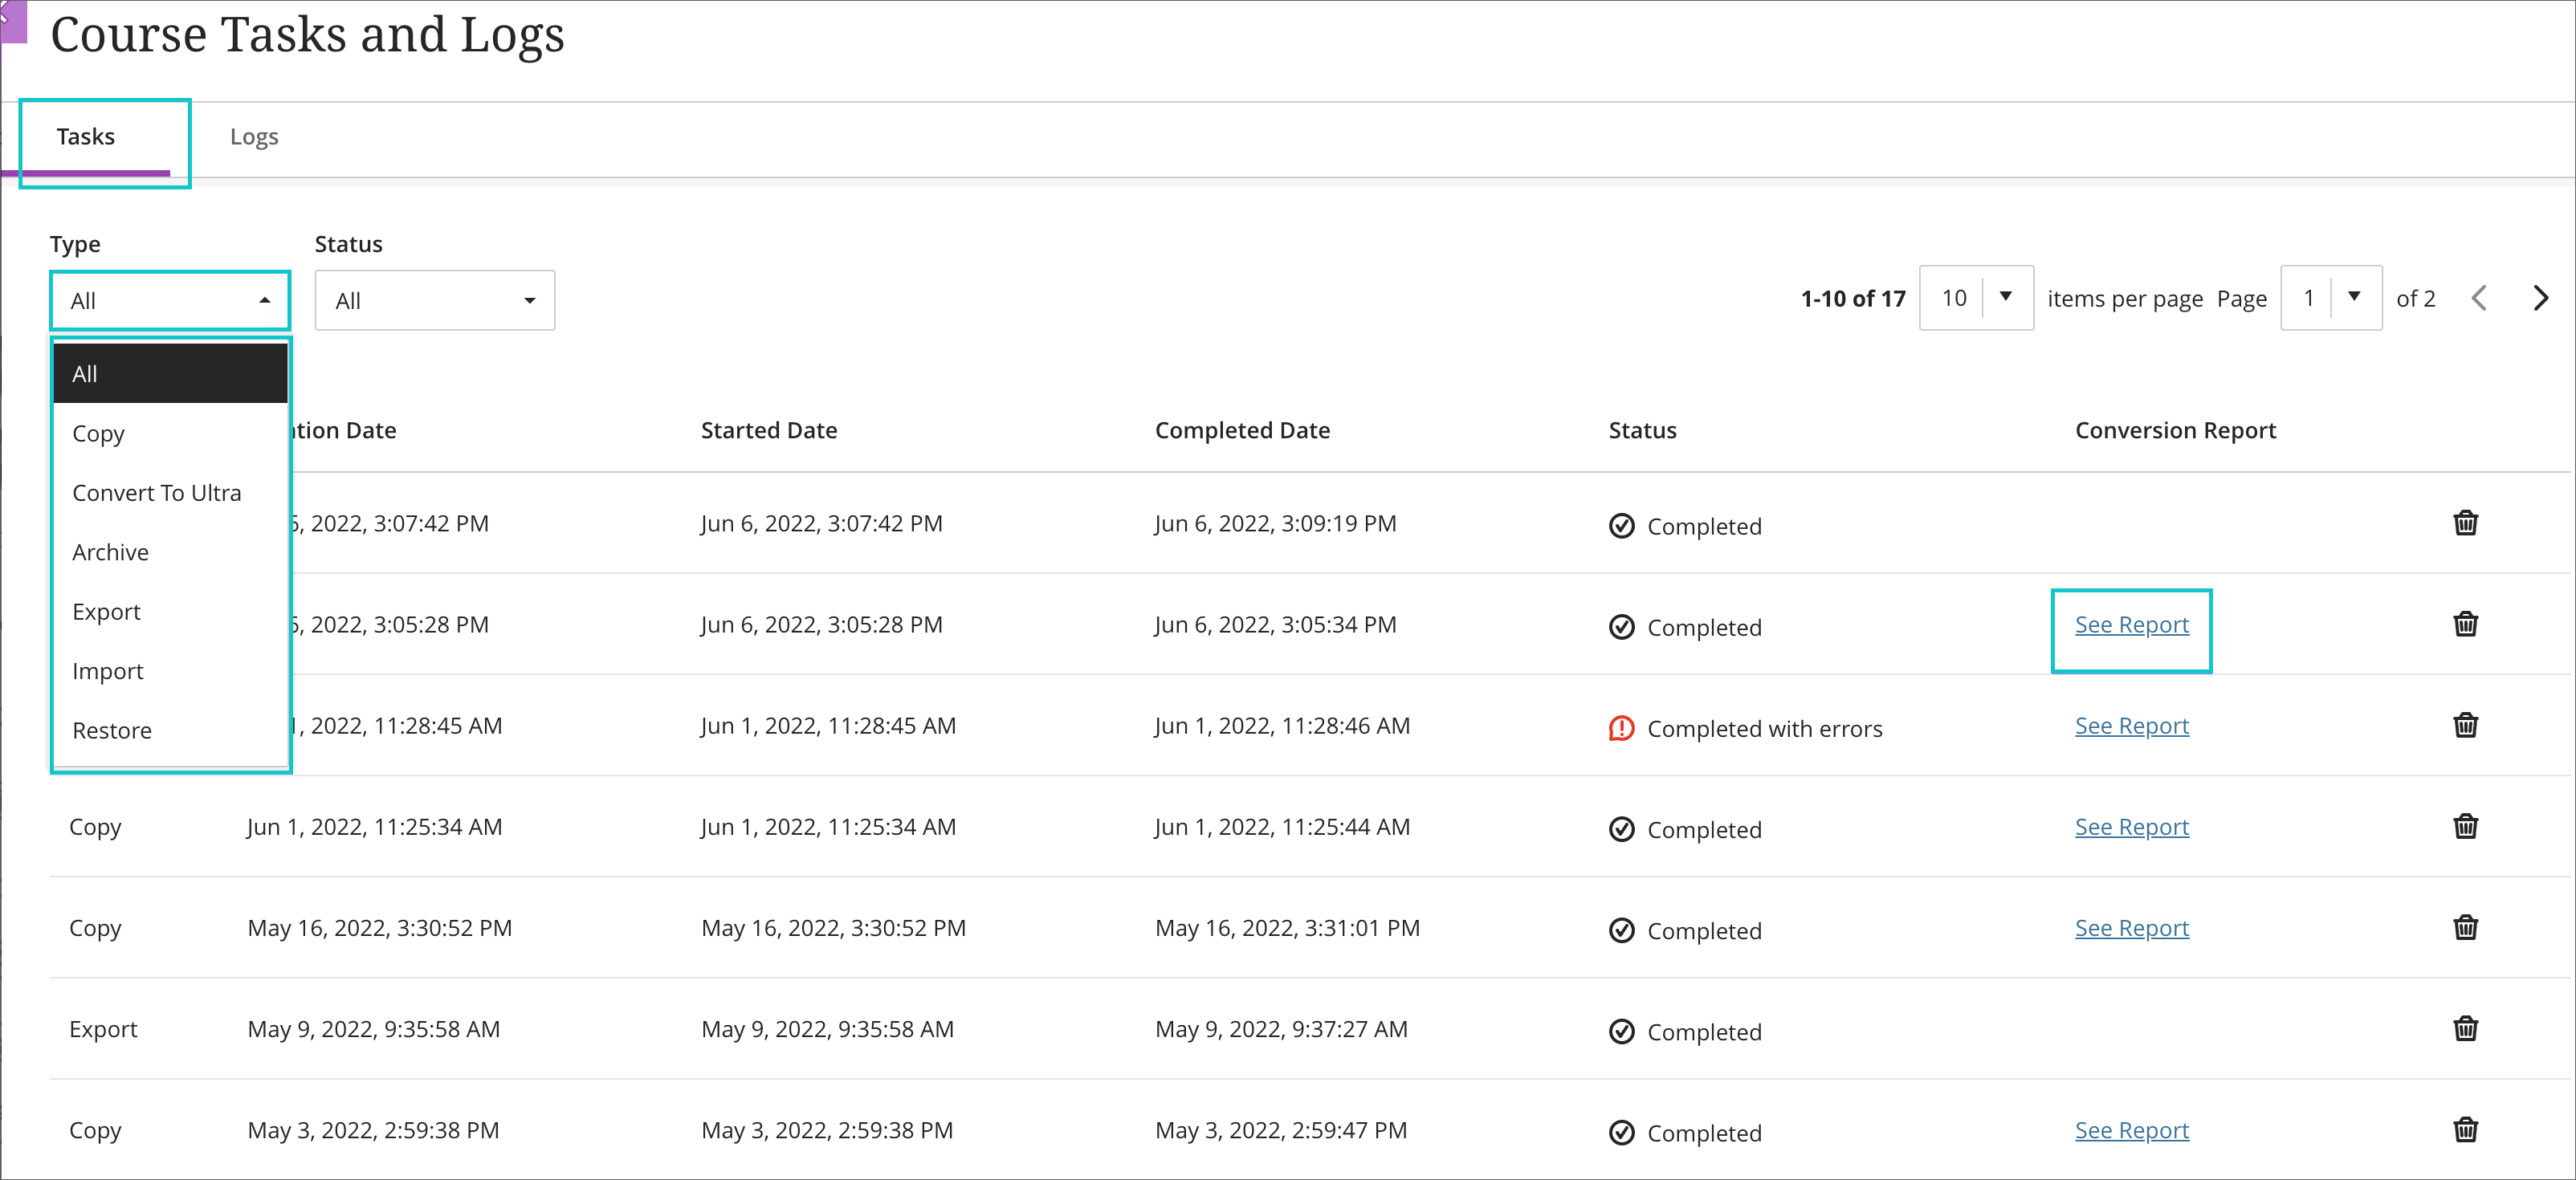
Image 3. Conversion Report – See Report
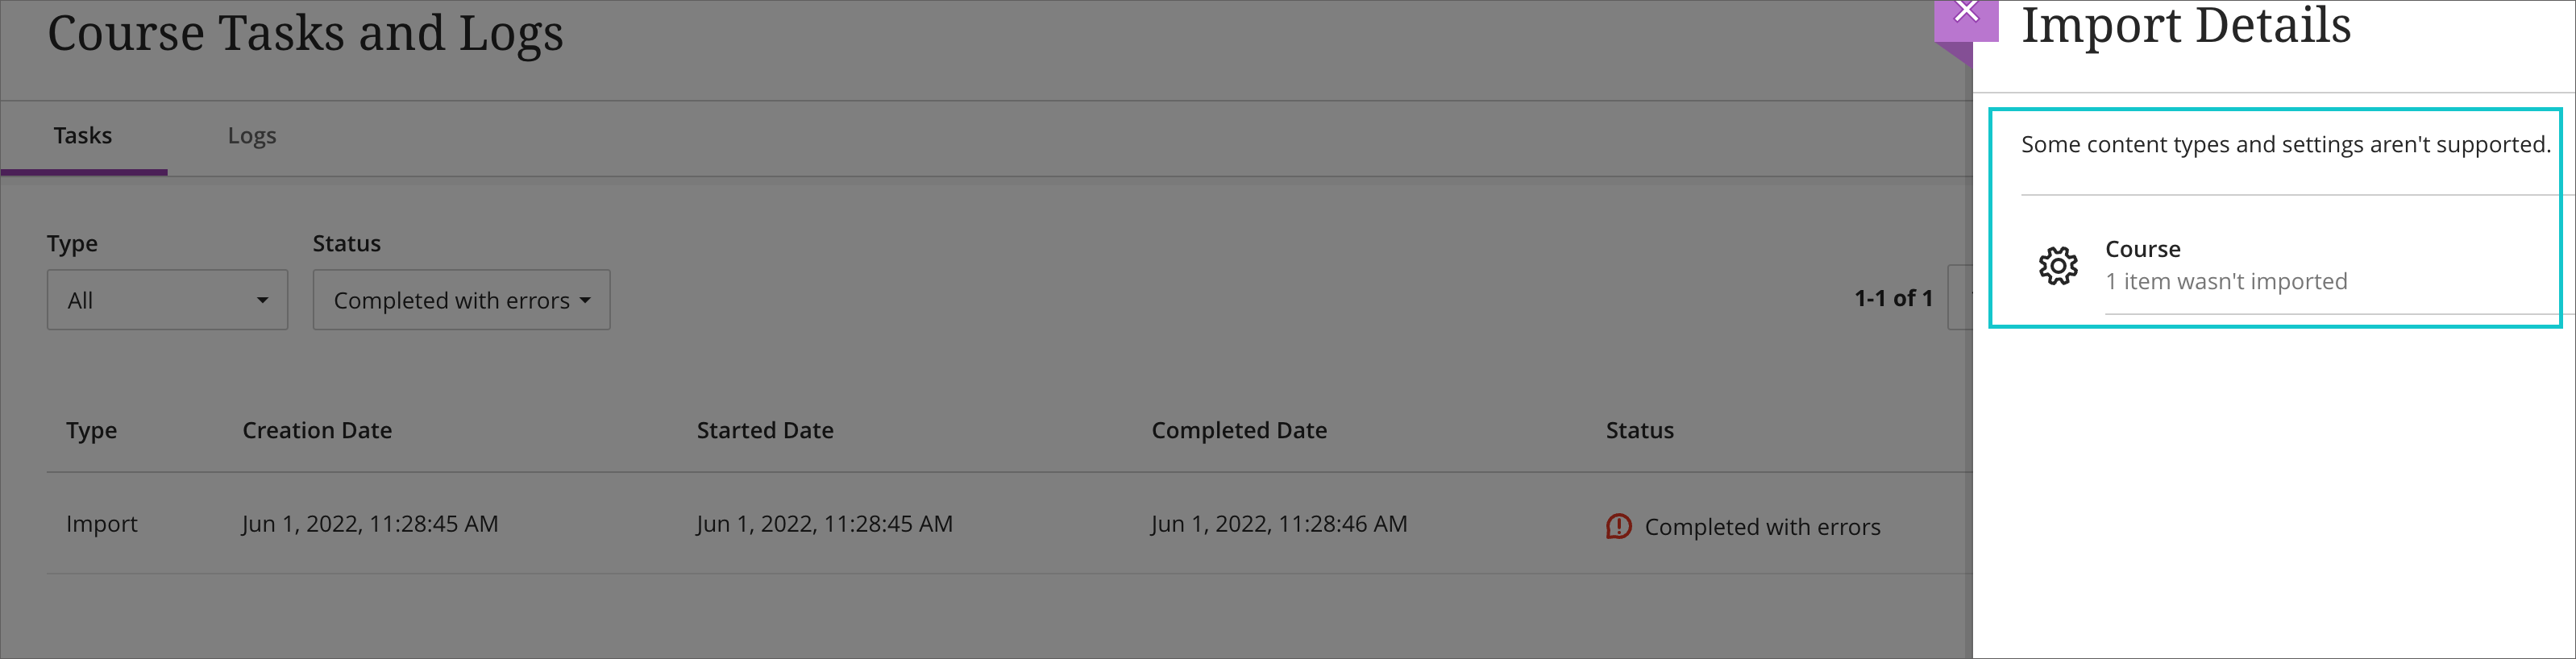
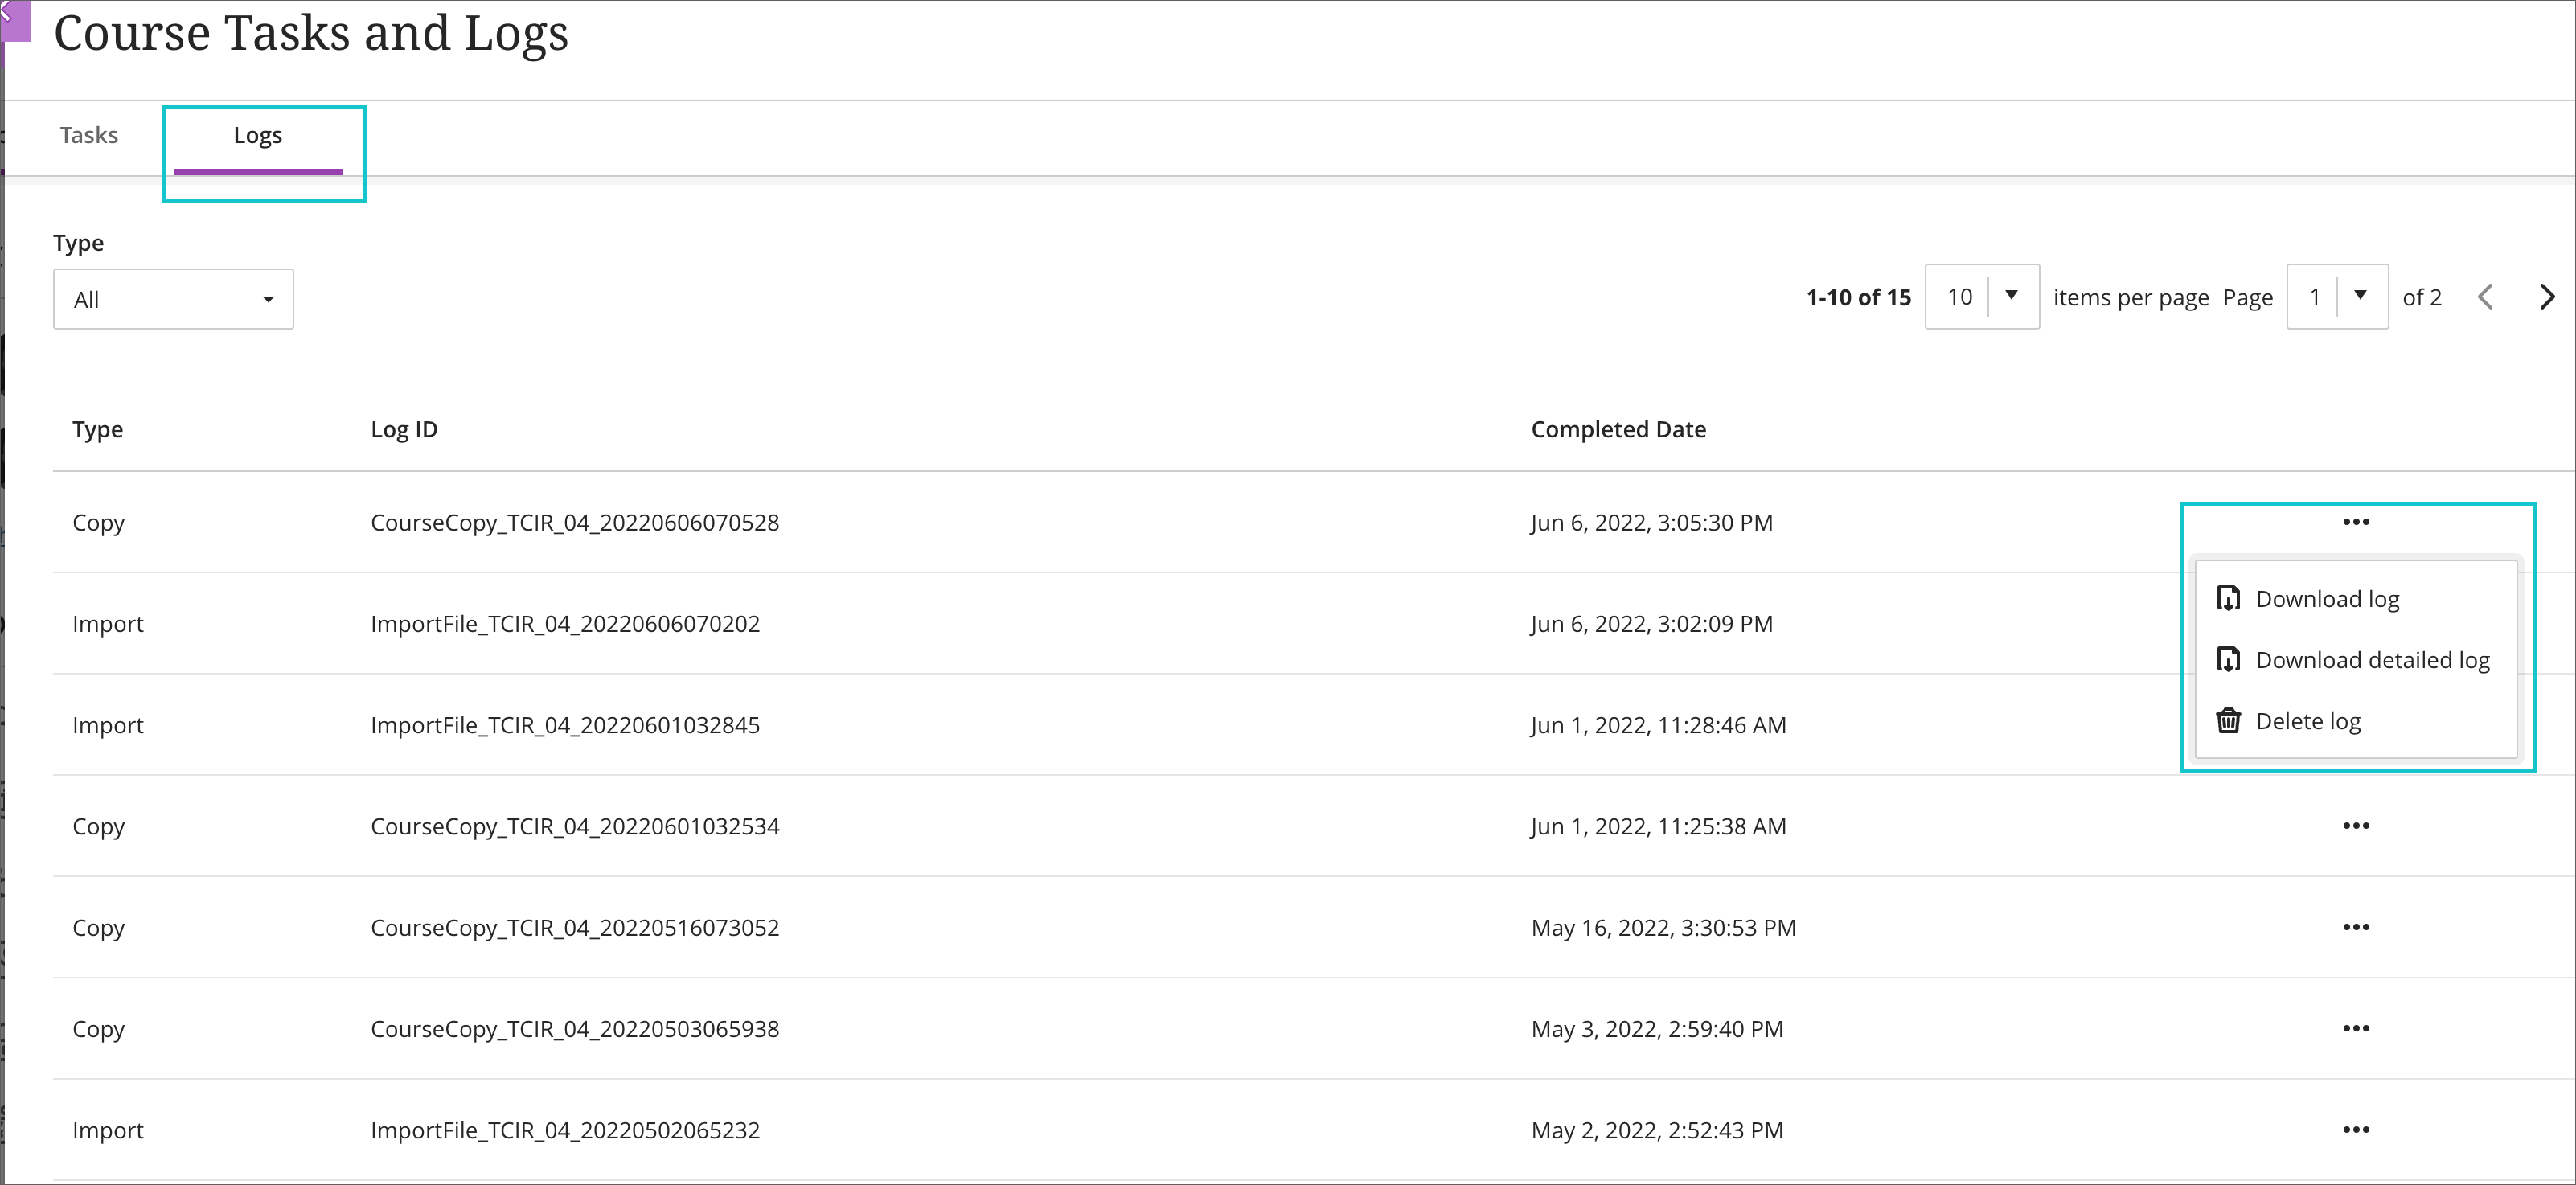
Logs are available for all course tasks. Instructors will be able to view the conversion report, view/filter, and download logs. These logs will help instructors triage any issues that may arise.
Image 4. Course Tasks and Logs – Logs tab
Granular Content Copy – Retain links to assessment questions
Content copying is an important feature. Instructors rely on content copy for easy reuse. Content copy is also helpful for quickly updating or building a course. In the past, there were instances when an assessment would be copied but the contents would not. This would happen in these cases:
- An assessment has a question set or random block that links to questions in another assessment
- An assessment has a question set or random block that links to questions in an assessment pool
When this happened, the copied test rendered incomplete. In some cases, the assessment was non-functional. Now all the linked questions stay intact after the copy process. Assessments now copy as expected.
Unified Blackboard App
In the past we had two separate mobile apps: the Blackboard App and the Blackboard Instructor App. The two apps caused confusion for many instructors. They did not realize that they needed to use a different app to manage their courses.
With this release, we are consolidating to a single app for both instructors and students. The user experience will change based on the user’s role within a course. Instructors can use the updated Blackboard app for both Original and Ultra courses.
Action needed: Support for the Blackboard Instructor iOS and Android apps ends in September 2022. Instructors, Assistants, and Graders should download the Blackboard app for iOS or Android.
Congruent Mobile App and Desktop Experiences for Ultra Course View
The user experience in the Ultra Course View is now the same between the Blackboard mobile app and a web browser. In the past, users had to make a choice because the features were different between the app and a web browser.
This new Blackboard mobile app will be available August 8, 2022, from the iOS and Android app stores. Students using the current Blackboard app should simply update. Instructors, assistants, and graders should remove the Blackboard Instructor app. These users should download the Blackboard app.
The Blackboard app update does not change the experience for Original Course View.
File Upload Indicator for Original Course View
Users sometimes upload large files or have slow upload speeds. In Original Course View, it may not be clear to users that anything is happening. Some pages in Original Course View will now display a file upload indicator after users submit. We added this upload animation to four course tools where large file uploads are most common. Other pages stay the same. The upload indicator will now appear on these pages:
- Assignment Submission
- Content Item
- Discussion Board Thread or Reply
- SCORM
Image 1. Before – no file upload indicator
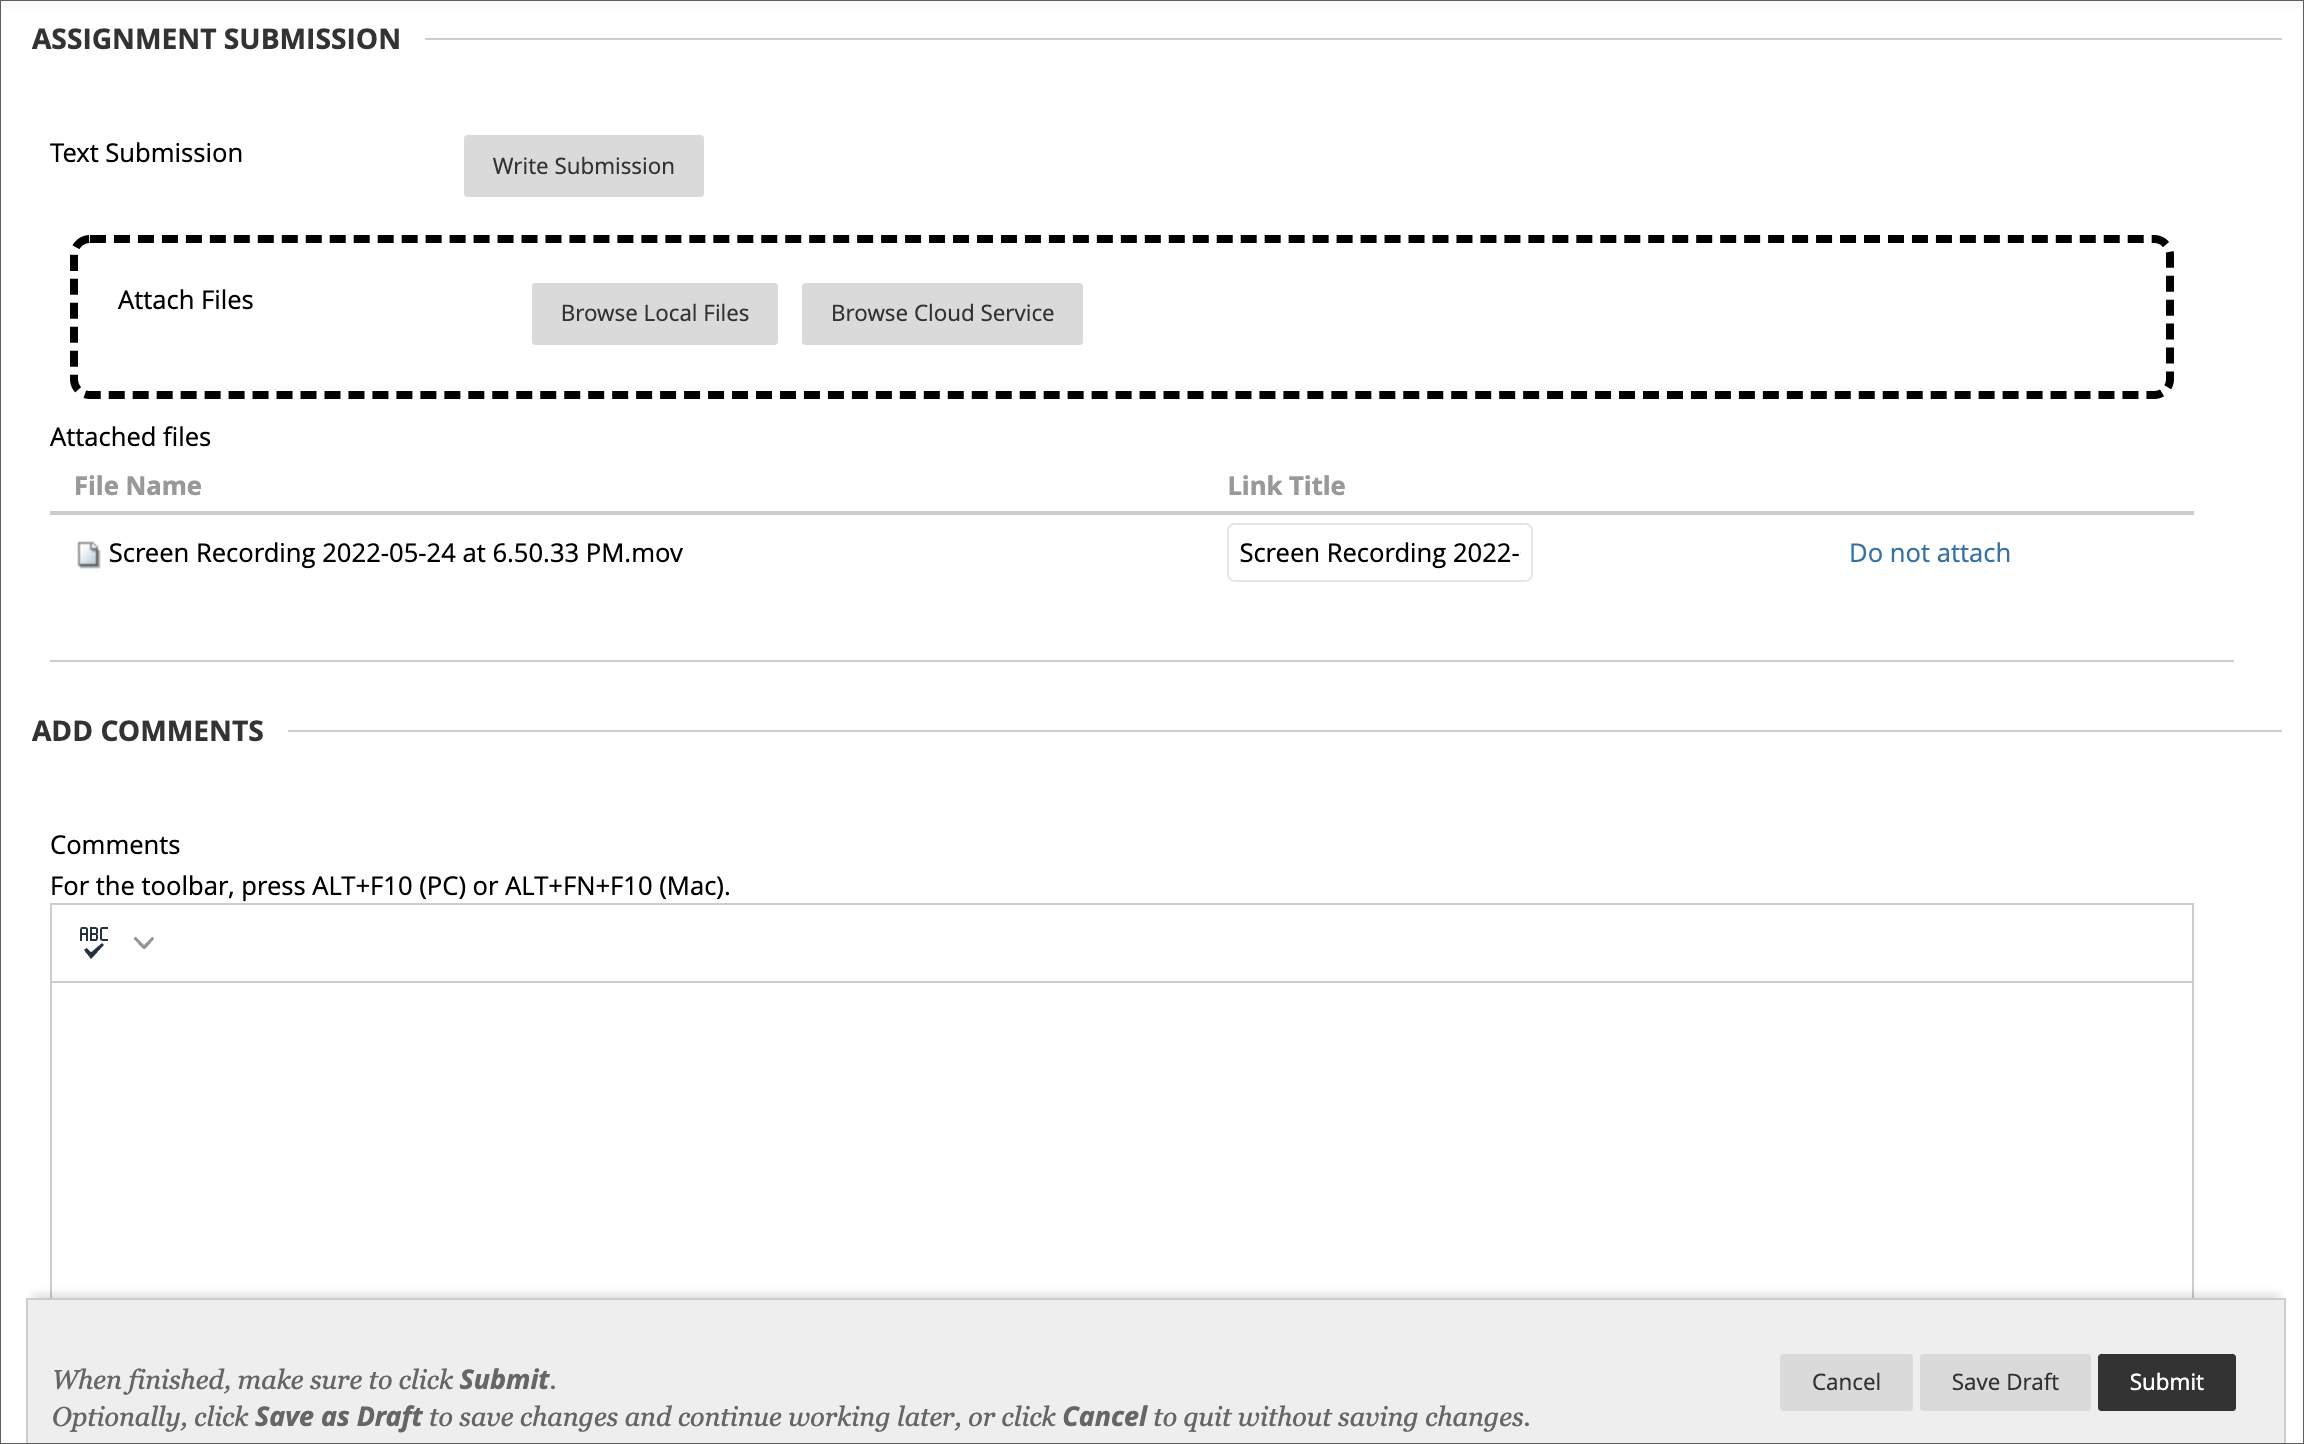
Image 2. After – new file upload indicator

Comments are closed
Comments to this thread have been closed by the post author or by an administrator.