Media Hopper Replay – Feature Updates June 2025

Please see below a list of some new features / UI changes in Media Hopper Replay that will be going love on 30 June 2025.

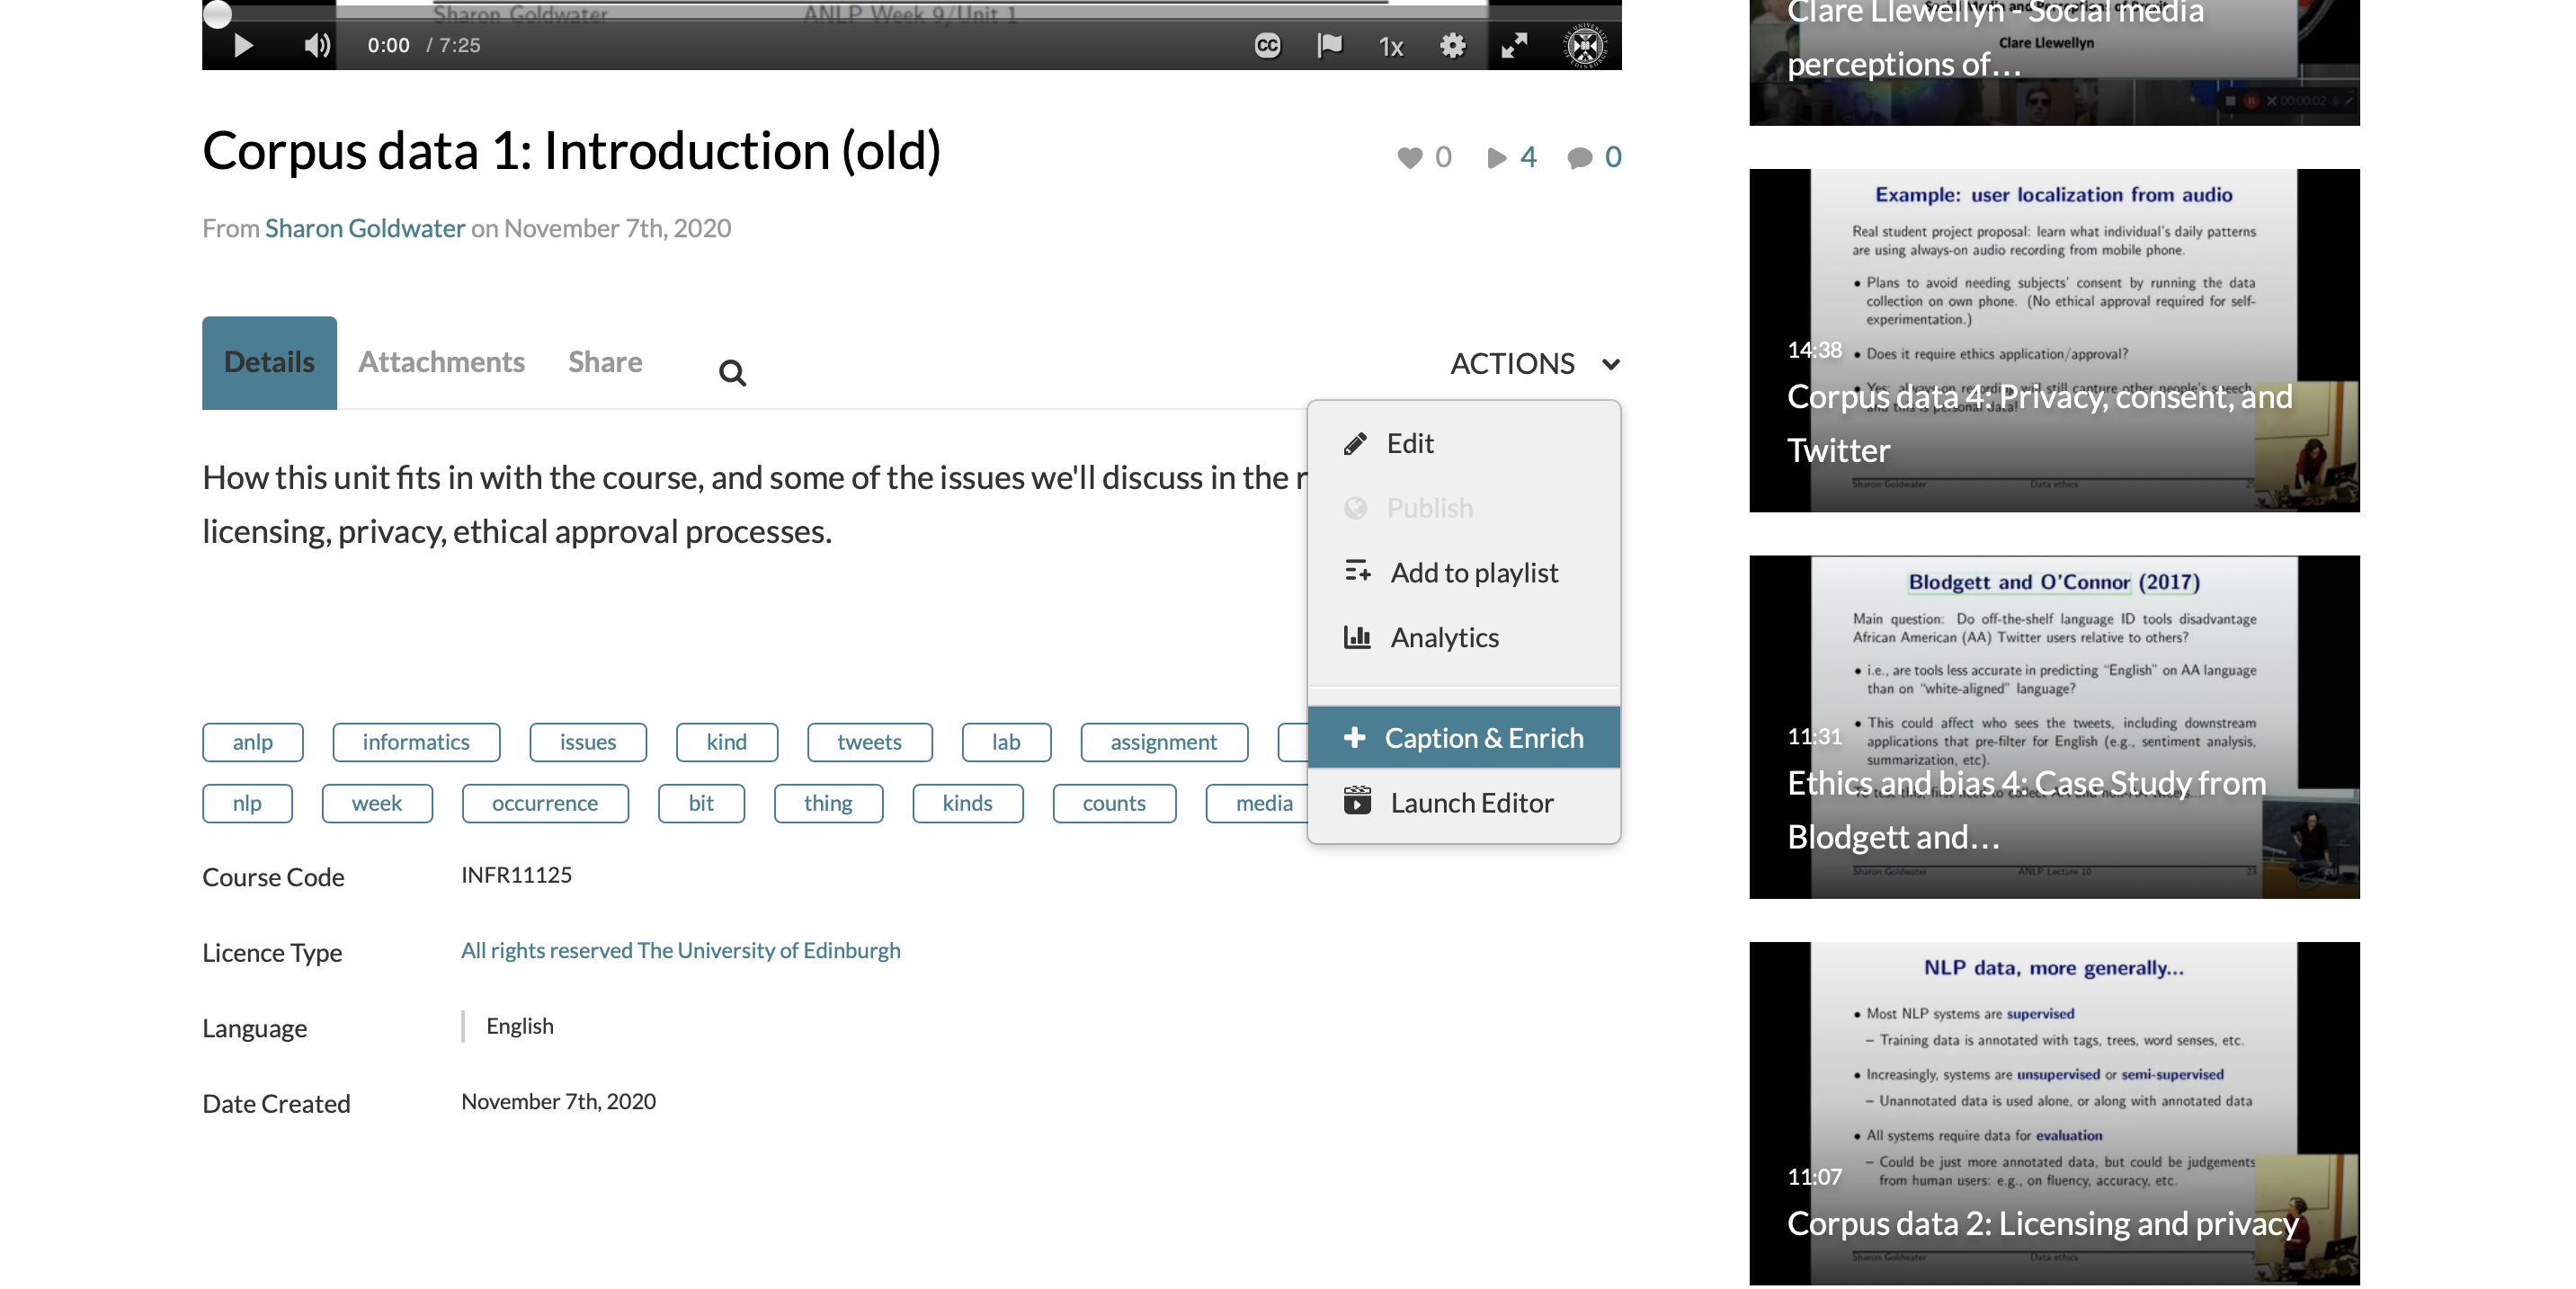
  • New Media Player – The new media player should consolidate all the different media player UI that was previously in the platform into one consistent interface across the platform. This interface will allows users easy access to auto-generated transcripts that accompanies videos as a sidebar in the player, more options to change the layout of video sources as well as easy access to Q&A functionality & confusion flags.
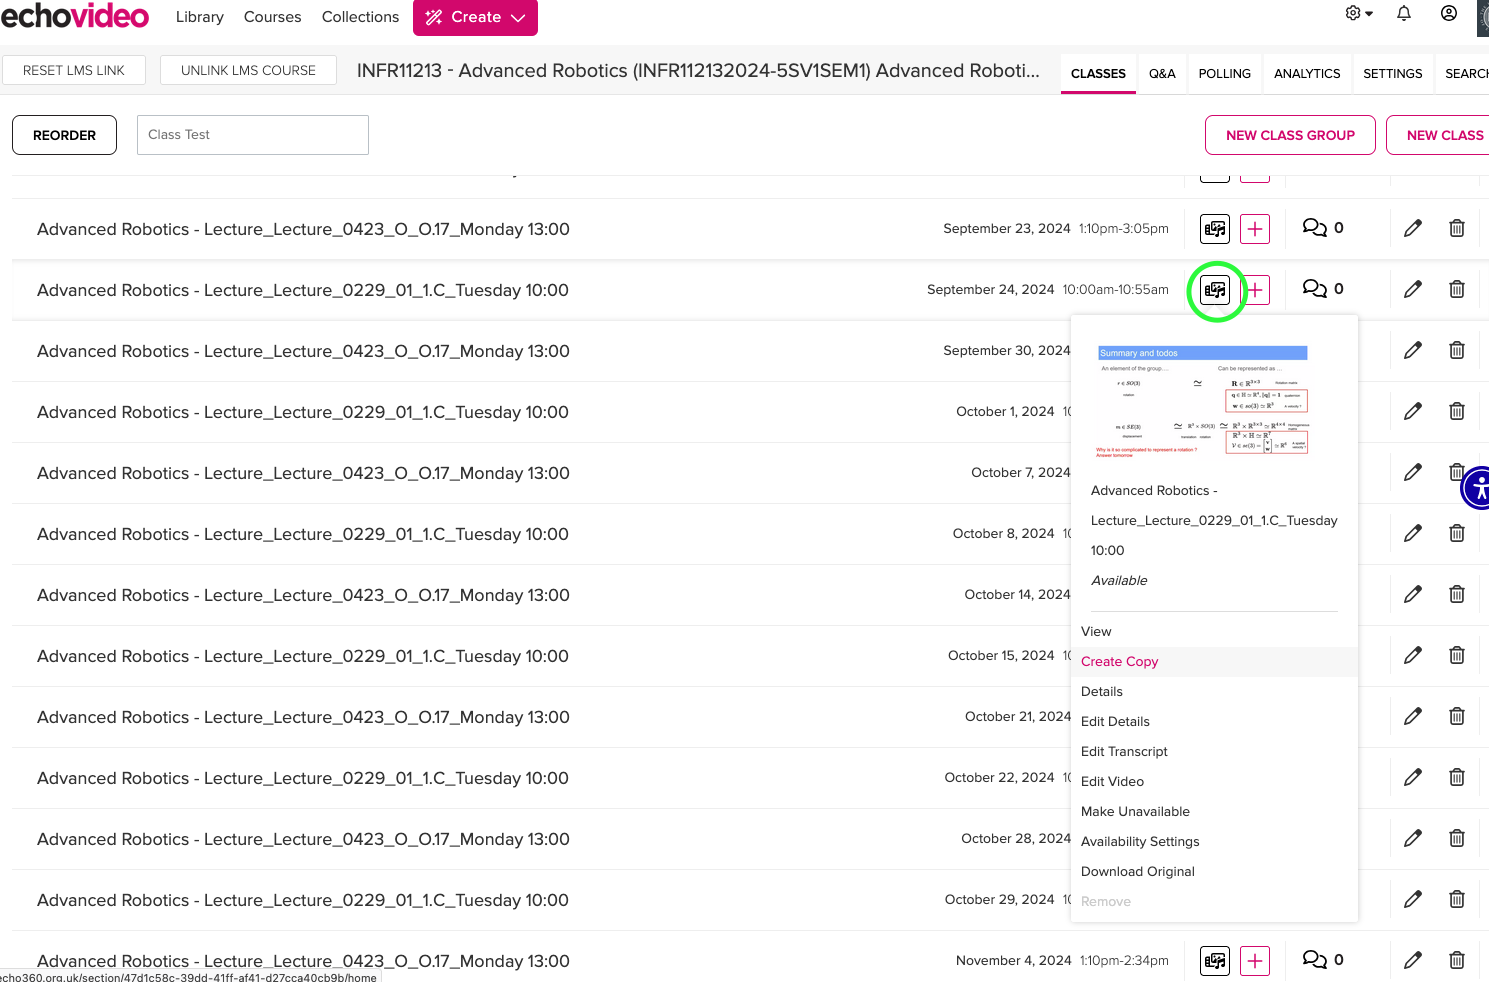
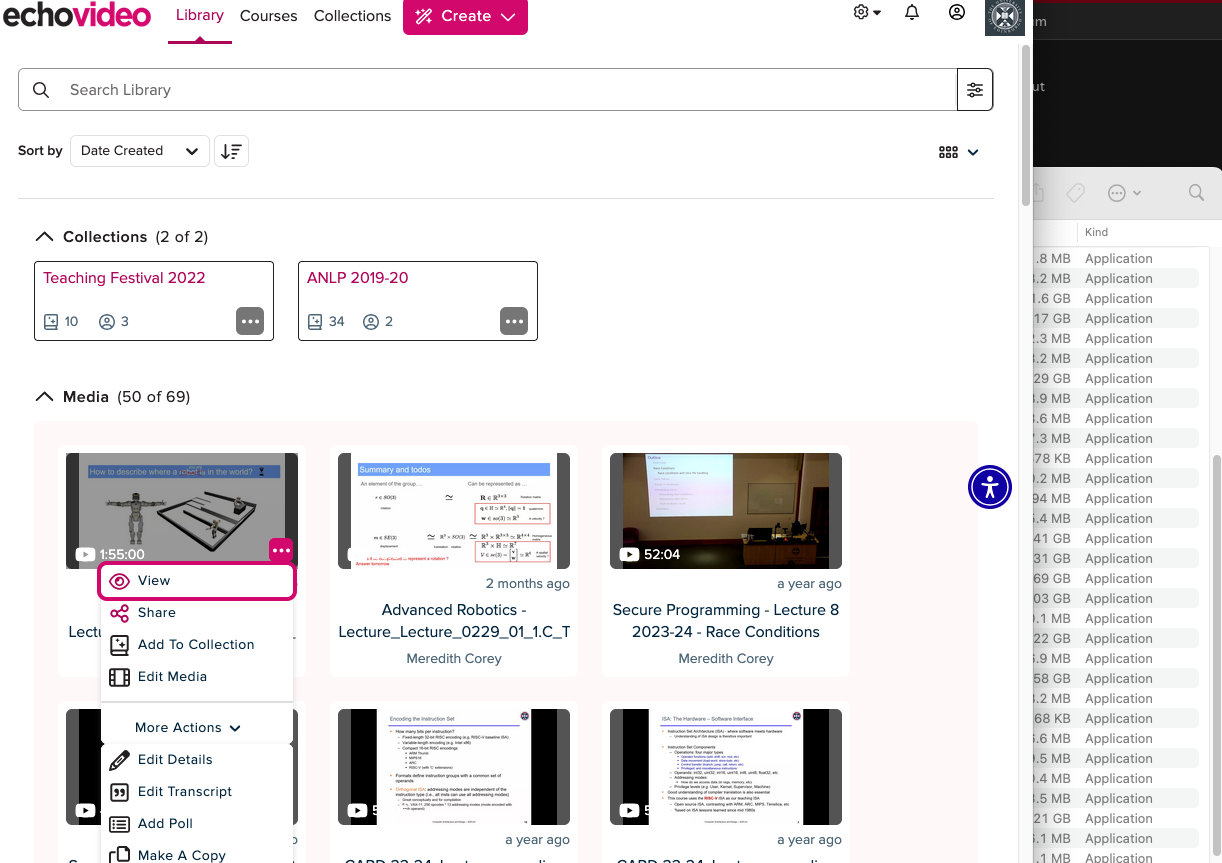
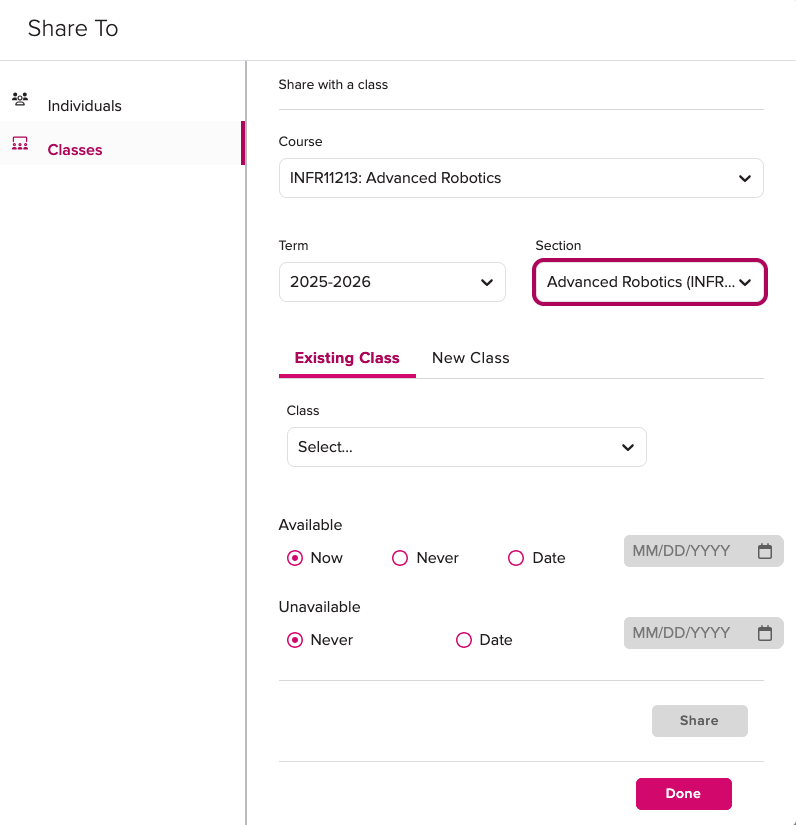
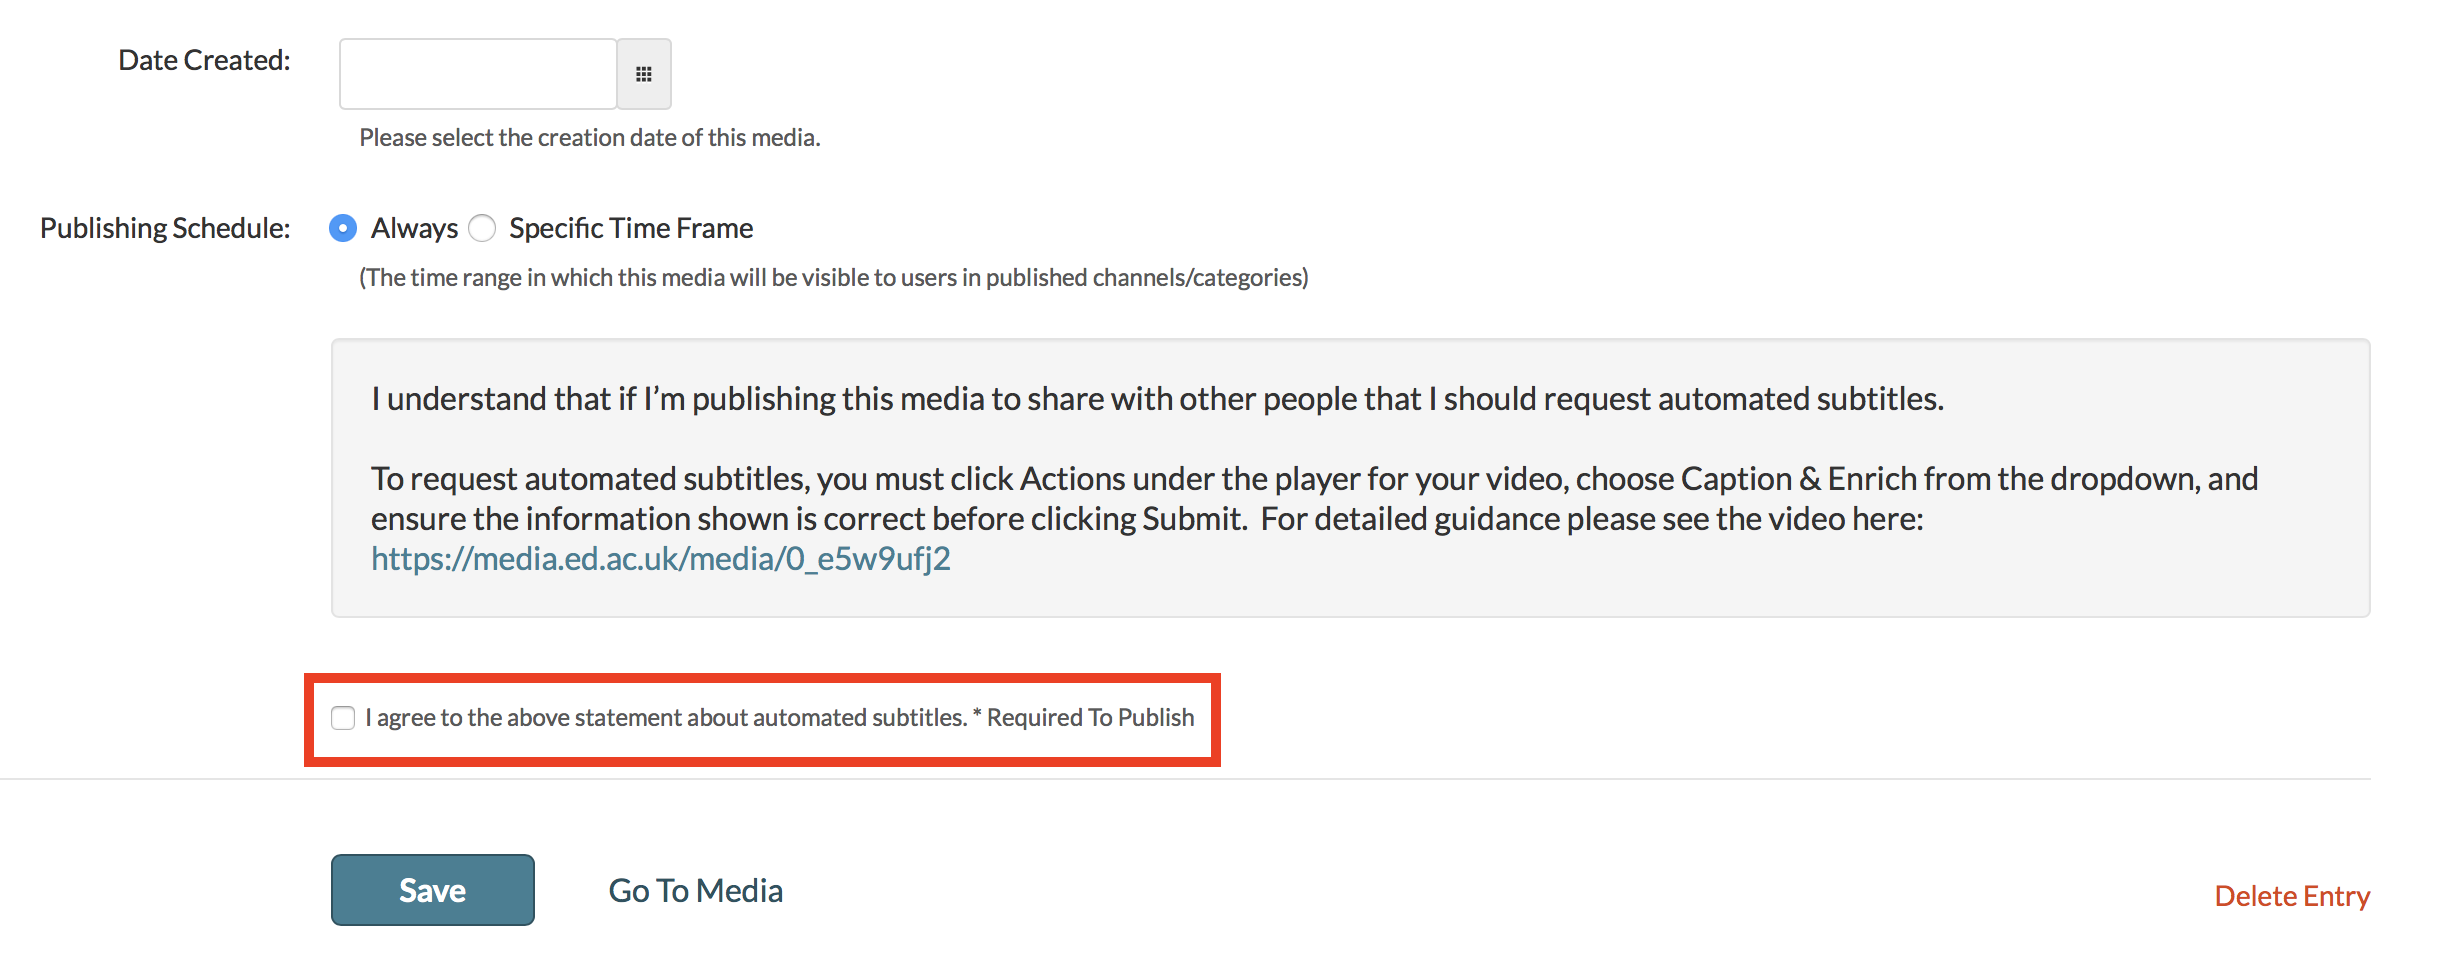
  • New Media Details Page – The new media details page change how the menus for viewing and making changes to media details will appear in Replay. All functionality in terms of changing titles & descriptions, sharing/publishing content, editing content & transcripts and adding polls to videos will remain but the UI has changed to make accessing these features simpler and more intuitive in the platform.
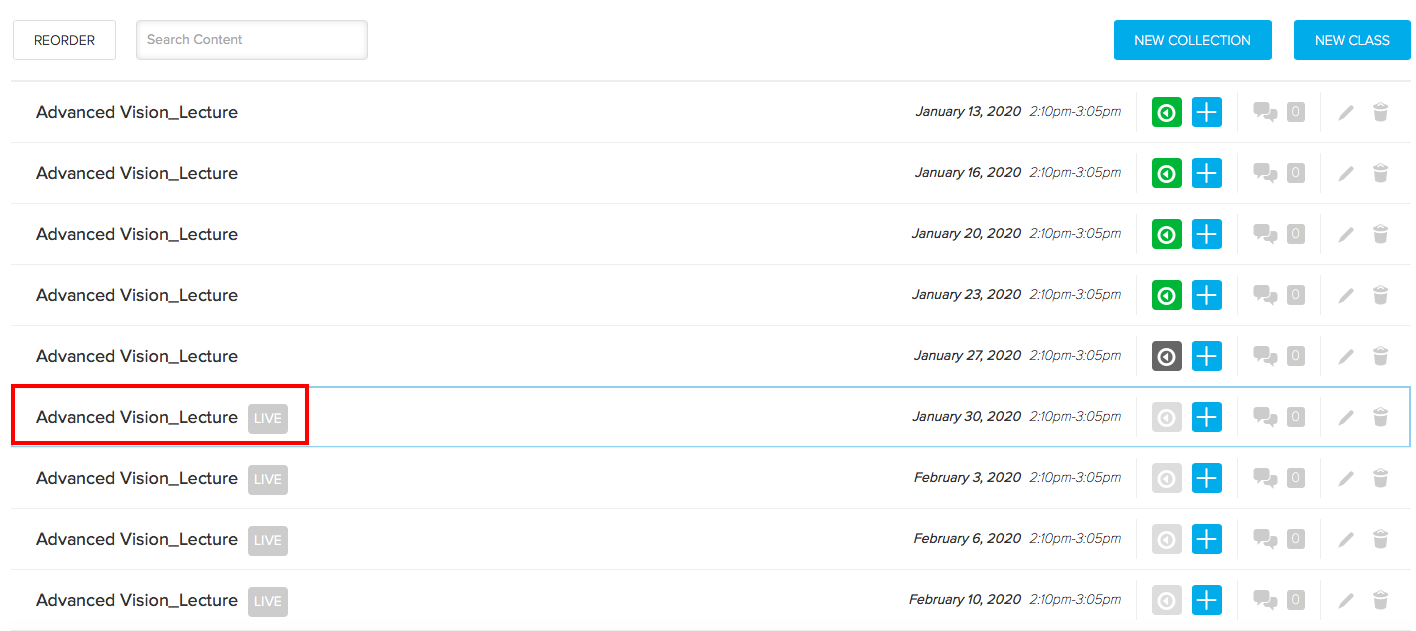
  • Live Player – A new Live player has been enabled that will change the UI for both instructors and students participating in Live Streamed sessions in Replay. Users joining the platform will now have the option to join a live stream In person which is designed for students attending & engaging a live session in person but who still want to view the live feed. The alternative is to join a session Remotely which is designed for users attending & engaging with live sessions off-campus

As always, if you have any questions, please get in touch.


Copying a previous lecture recording (Media Hopper Replay)

Our most common enquiry is about how to use a recording made in a previous year in Media Hopper Replay.

As an instructor, you can make a copy of a previous recording in Media Hopper Replay and then upload it to your personal library, thus allowing you to publish it to another linked course in Media Hopper Replay. This one page quick reference guide details the two step procedure to do this for each recording. View the PDF quick reference guide here.

This quick reference guide, along with many others, is available via the IS Media Hopper Replay quick reference guide website.

The IS Helpline supports Media Hopper Replay throughout the University. Contact details are listed here.


Publishing videos to a Media Hopper Create channel.

How to publish a video

To upload a video, e.g. from another university source such as Blackboard Collaborate, click Add New on media.ed.ac.uk, then click Media Upload to begin.


When uploading a piece of media to Media Hopper Create, certain fields must be filled in order for the video to be published to a course channel. The required fields to publish can be filled in while uploading the content, or after uploading the content by finding the video and clicking Actions>Edit>Details and filling in the fields below. In order to publish the media fill out:

Name (The title of the video that will be displayed)

Description (Will be displayed underneath the video)

Tags (at least one tag word is required for the video to be published and help people find it easier)

License Type (This is the copyright license to be applied to the content. I normally select All Rights Reserved The University of Edinburgh from the dropdown menu but this is at the content creator’s discretion.)

Course code, Publisher, Language and Date Created do not need to be filled in order to publish the video but can be useful to fill in to make the video easier to retrieve later on. A publishing schedule can also be set so the media can only be viewed for a certain period of time (useful for perhaps making a video only available during one semester).

– You now need to agree to request automatic subtitles before you can publish your content.

NOTE: Selecting this box does NOT enable auto-captioning, this is done in the next step.

screen shot showing where to agree to automatic subtitles

After the details are filled in, on the video uploading page (or on the video editing page under Publish instead of Details), set the Publishing Status to Published (if Published is not selectable, there are missing video details that still need to be filled in). A drop down menu will appear giving the option to Publish in Category or Publish in Channel. Select Publish in Channel and select a channel you manage to publish to the channel.


How to access a live stream of your lecture

In some circumstances, your course organiser may enable the live streaming of their lectures. This is most frequently the case when timetable clashes prevent a student from being able to get to the classroom in time.

If this has been enabled, you can access the live stream the same way you access the lecture recordings.

Go to the Learn course page and navigate to the Lecture Recordings link (this is usually under ‘Course Materials’).

Image of link to lecture recordings button

Locate the ‘live’ button next to the lecture you wish to access and select.

image of lecture recordings page with link to live button

If the recording has started, you will see a further ‘play button’ icon to select. Press this to access the live stream of the lecture.


Create an ad-hoc lecture recording

The scenario

You’re about to teach your class but there’s been a room change and you want to make sure the session will be recorded. What to do?

  • Firstly, check the light on the desk. It should change to RED at the time the class is scheduled to start (usually, 10 minutes past the hour).
Performing an ad-hoc recording
  • Log into your Learn course that you use for your course and open Replay using the Media Hopper Replay link (usually called “Lecture Recordings” in the list of course contents).
  • When Replay opens, click on the pink “Create” button at at the top of the screen and select “New Device Capture”.
  • From the Where? menu, select the room you are teaching in. You can type the name or location of the room into the search box to help narrow down the results.
  • Use the Hours and minutes options to define how long your recording will last.
  • From the Inputs menu, choose which of the available inputs you would like to record. The
    default selection is always as many inputs as possible for that particular room.
  • Leave the Quality setting as High Quality as this will produce a recording suitable for playback on most devices, and by users with slower internet connections.
  • If you wish to make your Ad Hoc recording a live session, then enable the Live Stream option. If you enable Live Streaming Your audience can view the live stream from within their course by logging into Media Hopper Replay and clicking on the class containing the stream, followed by the Show Live Stream button.
  • Use the Publish to… menu to select the location you want your recording to be saved to. The default will be the course you currently have open.
  • Click Start to begin your recording. Your ad hoc capture will either appear in your Library or as a new class within your course (depending on your choice) under the title ‘Ad Hoc Capture’. A green light will appear next to it to inform you that it is recording.
Myth Busting

The Delcom light in the rooms acts primarily as a visual clue as to whether a recording is in process.

RED=Recording

GREEN=Not Recording

Amber=Recording Paused.

You can press the light to pause / unpause an already scheduled recording. You can *not* start a recording by pressing the light in the room. Instead, follow the instructions above on how to perform an ad-hoc recording.

Related Links

User guide: Performing an ad hoc recording in Media Hopper Replay (PDF)

Video: View the short tutorial video on performing an ad hoc recording in Media Hopper Replay


Lecture recording scheduler

The Media Hopper Replay page for your course displays *when* recordings are scheduled, but not *where*. So, when you select the Lecture recordings link in Learn…

… you see something like this:

But what if you want to check *where* your classes are scheduled for recording?

You can visit the Media Hopper Replay scheduler*. Enter the course name or course code (be sure to select the correct instance) and you will see something like this:

  1. you can change your recording preference – and give a reason why. Please remember – this changes recording preference for all lectures within your course. If you want to change at a more granular level, please select the specific scheduled lecture (eg TU @ 5pm)
  2. you can change the availability of your recordings from the default 24 hour delay to ‘immediately’ or ‘manual release’
  3. you can enable live streaming of classes
  4. you can check the location of the scheduled recordings.

Further information on the Media Hopper Replay scheduler can be found here: https://www.ed.ac.uk/information-services/learning-technology/media-hopper-replay/help-and-support/staff-help-and-support/replay-scheduler

*By default, only Course Organisers and Course Secretaries are added to a course in the Replay Scheduler, so people can only see information on the site for a specific course where they have one of these two roles. Additional users can be added by the CO or CS, who will then be able to manage opt-outs and release timings.