Any views expressed within media held on this service are those of the contributors, should not be taken as approved or endorsed by the University, and do not necessarily reflect the views of the University in respect of any particular issue.

Reflection and Process | Plastic Flowers | What do Lilies Symbolize? (Ashley Loera)

Dates of Development | Friday, March 21st, 2025 & Friday, March 28th, 2025

Sound Design Director | Max MSP: Ashley Loera

Reflection and Process | Plastic Flowers 

What do Lilies Symbolize? 

Plastic Lilies

On Friday, March 21st and Friday, March 28th, our Process group crafted a beautiful sculpture of lungs and flowers with lights. I got to help create the plastic lilies with plastic water bottles and hot glue.

Process:
  • I cut oval shapes in the water bottles and bent/shaped the oval shapes into petal shapes with a candle flame. During this process, I had a wonderful time creating petals that felt natural and as though they were moving in the wind. Capturing the movement of lilies as a form of breath.
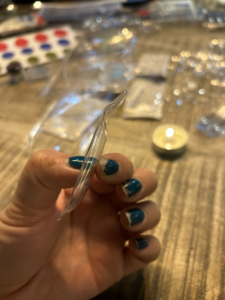
A. Depiction of oval plastic petal – with a curve melted on the petal to mimic movement in the flower.

B. We used candles to melt the plastic.
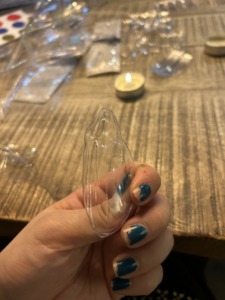
C. Example of a completed flower petal.
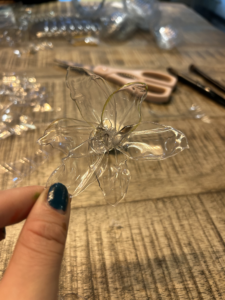
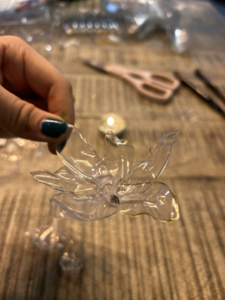
D. Glued 6 petals together to create the structure of a Lily.

Symbolism:
  • In various cultures, especially the western culture, Lilies represent forgiveness. Floral design is one of my most passionate hobbies, and in my journey as a florist, I have learned the symbolism behind many flowers.
  • Oftentimes, in spiritual practices, faiths and organizations, forgiveness is shared as a value that leads to peace and healing. For me, the symbolism behind the Lily and our use of it in this presentation holds a very special and powerful connection to the Process of breath.
How does this tie into our installation?:
  • Through the process of forgiveness, we learn to let go. Not just emotionally or mentally. We learn to let go in the body. My education background is in Psychology and Substance Abuse Treatment and Prevention. During my undergraduate education I took courses in Trauma Psychology. One important concept and truth I learned, was that the body hold’s onto Trauma, Resentment and Pain. Often-times through the healing process, people must learn to work in the body to release trauma because the body internalizes pain, which later results into higher levels of cortisol. Ultimately manifesting into of anxiety, depression, chronic pain and illnesses.  Meditation and Mindfulness has been used as a powerful therapeutic tool to help treat the body.
  • As forgiveness is a powerful step of letting go, this process spiritually, psychologically and physically relates to the process of inhaling and exhaling in meditation.

Final Max Patch | Presentation Notes & Feedback (Ashley Loera)

Dates of Development | April 1st -3rd, 2025

Sound Design Director | Max MSP: Ashley Loera

Final Max Patch | Presentation Notes & Feedback

Software:

  • Max MSP Software
  • Touch Designer

Hardware:

  • Xinyi’s Laptop
Final Patch:

Please refer to the video below, showcasing the final patch, and how it operates.

Presentation Process

We opted out of using the router, as Xinyi’s laptop had the ram space and efficiency to run both TD and Max MSP at the same time. Just in case, I made sure to bring my laptop and the Router. No issues on this front during the presentation.

During the presentation set-up, I ran into some issues with the Audio playback of the Max Project in the Atrium. Philly was able to assist us in adjusting the settings of the hardware and we were able to get the Meditation music playing. Once the Meditation music began to play, I noticed that the Microphone was not connecting to Max MSP.

During this time, a group of people entered the room before the installation presentation was set to begin (at 11:00AM) and one of our Process group members asked us to allow the group to try the installation with audio. After I had reflected that we were still setting up and were having issues with the microphone audio, our Process group member continued to ask if her friends could experience the presentation without the microphone as they were short on time.

Unfortunately, the absence of microphone playback did not present well to the group that came to experience the installation and I had to take the initiative to stop the presentation and finish the audio set-up. The group was understanding, however, I felt that it would have been better to finish setting up before allowing others to experience our presentation, especially as this interruption caused us to delay our installation by 30 minutes. I also believe that we may have needed more time to set up due to the unforeseen audio technical issues that arose last minute.

I was able to work with Philly to adjust Max MSP settings, restart the program and connect the Microphone to Max MSP. Once Audio Technical Issues were addressed we began the presentation of our installation at 11:30AM.

During the presentation, one of our group members asked us to turn down the audio input as it was too loud. I originally obliged, however, I noticed that TD was not able to process the audio information coming into the microphone because the audio input gain was decreased significantly. When I turned the gain up again, slightly, TD was able to process the audio input information directly impacting the color of the visual presentation of our installation. However, because the audio input gain needed to be increased further to make TD more sensitive to the audio input. I believe that by creating another gain buffer here, I would have been able to address the issue of volume control and Data sensitivity in TD.

Feedback:
  • Teaching fellow, Roderick Dunlop brought it to my attention that he felt that the installation didn’t have much of an interactive impact and could have been improved in this aspect.
  • When speaking with our audience, we received feedback that the space we developed was calm, well prepared and well executed. One gentleman suggested that the audio playback almost resonated with him as a thunderstorm, and he found it interesting when considering it as a comparison to the process of breath. I found this insight unique and creative.
  • We also received the following feedback to improve our installation from Jules and Philly:
      • The Meditation Music was clipping. Later I was able to address this by creating faders in the audio samples, to allow for clear transitions between the audio samples. It came to my attention after this, as clipping continued, that the additional splicing of the 6 audio samples caused clipping because it began playing during half the track.
      • The Audio Presentation and Visual Presentation was well prepared, however, still static.
      • Reiterated that the installation did not have much of an interactive impact.
      • Suggested diversifying the visual presentation.
      • Suggested removing the audio playback of the audio input complete. In its place, use the audio input to manipulate an audio sample of breath, that would give the illusion of breathing, by maintaining sample clarity and consistency.
      • Suggested including a synthesizer to the max patch to create a varied element in the arrangement that allowed the experiencer to experience a change in sound over time. Adding movement to the music and audio presentation.
  • During the Installation, Philly was able to assist me in creating a basic synthesizer, adding an additional element presenting movement and a unique perspective on the sound front. The following patch was added during the presentation.

Please refer to the snapshot below:

Final Max Patch Goals:
  • I will develop a sample envelop of a breath audio sample that is directly manipulated by the audio input and audio FX to allow for clarity and consistency in the max patch.
  • I will develop a fader chain for the spliced samples.

Audio Splicing | Meditation Arrangement (Ashley Loera)

Dates of Development | April 1st -3rd, 2025

Sound Design Director | Max MSP: Ashley Loera

Audio Splicing | Meditation Arrangement

Software:

  • Max MSP Software

Hardware:

  • MacBook Air Laptop
Progress Notes:
  • Last week during our Process Group Tutorial, Philly suggested developing an Audio Splicer for the Meditation Arrangement, to avoid a static and repetitive playback of the 6-minute meditation arrangement created by Composing Director, Ruolin. By creating a Sample Splicer chain, we will be implementing an arrangement that changes over time and adds movement and variety to the overall soundscape of the installation.
  • During my one-on-one meeting with Philly and Xinyi, we developed a Fader Chain and Audio Sample Chain that would fade out of one sample into the other at a delayed rate to create a smooth transition between the arrangement samples.
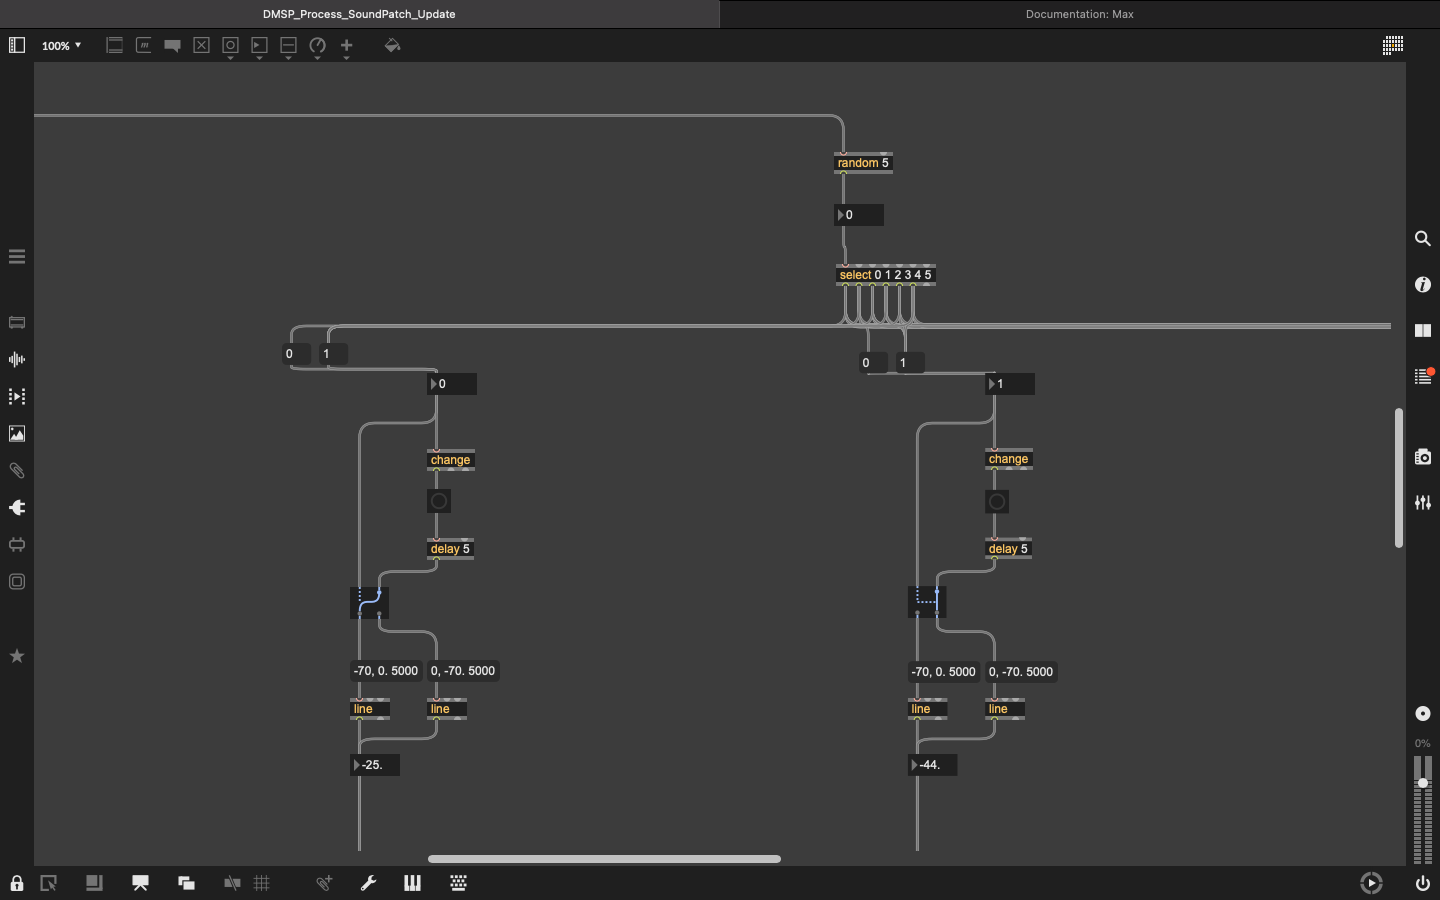
  • Over the weekend, following this meeting, I spliced the Meditation arrangement into 6 different audio samples for the max patch. The Arrangement is generated by the 30 second transition (metro) which begins as soon as the max patch is opened. This then triggers a random sample from the 6 samples, to playback. We developed on/off triggers for each sample.
  • Please refer to the snapshots below:


This is the final Arrangement Splicer patch, prior to presentation, labeled as the “Music Playback” patch.

As you can see in the photo below, I developed the sample splicer to then cut the current 6 audio samples by 2, creating 12 samples total to alternate as the max patch progresses.

The Delay Chain triggers each sample to alternate between the halves every 30 seconds, ensuring that each half of each arrangement sample will be played back during the installation presentation. Adding movement, variety and generation to the Meditation Arrangement.

Upcoming Goals:
  • Present the Installation!

TD Data Flow | Router Set-Up (Ashley Loera)

Dates of Development | March 14, 2025

Sound Design Director | Max MSP: Ashley Loera

TD Data Flow | Router Set-Up

Equipment

Software:

  • Max MSP Software
  • Touch Designer

Hardware:

  • MacBook Air Laptop
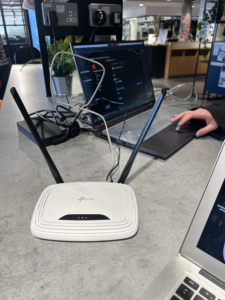
  • TP-Link TL-WR841N 300 Mbps Wireless N Cable Router
Router Set Up – Process

Approach:

To begin the process, I set up the hardware and was able to successfully connect the Router to Xinyi’s Laptop using the ethernet cable and I was able to connect to the TP-Link Router on my laptop under the Wi-Fi tab. After further review, we were able to confirm that Xinyi was able to use TP-Link without the ethernet cable as she was also able to connect to it under her Wi-Fi tab.


TP-Link | Hardware Set-Up               TP-Link | Connection | Wi-Fi

Troubleshooting:

Used the following video (as provided by Philly during the DMSP Process Tutorial) to help connect Touch Designer to Max Msp with OSC.

Successfully connected both computers to TP-Link using LFO Object. As referenced in the video below:

Once we were able to connect TD to Max MSP using the TP-Link Router, we ran into more trouble shooting issues:

  • LFO was adding additional information not related to the audio input to the Data Output in Max MSP.
  • After further review, we were able to smooth the data flow in TD to Max MSP by updating the scale of the data coming into Max to the data output in TD.
  • Further review needs to be done regarding the additional information coming into TD using the LFO object in TD.
Upcoming Goals:
  • Discuss Max Patch options with Philly about how to further smooth TD Data Output in Max MSP to increase delay/latency for a smoother audio effect.
Bibliography:

The Interactive & Immersive HQ. “Connect TouchDesigner & Max 8 with OSC – TouchDesigner Tutorial 072.” YouTube, YouTube, 3 Jan. 2022, www.youtube.com/watch?v=AcqC5rRmu3M.

2nd Intergration & Trouble Shooting

Overview: Successfully connected TouchDesigner and Max, and optimized visual parameters in TouchDesigner.

Dates of Development | March 26, 2025

Process Group | Xinyi Qian, Ashley Loera,Hefan Zhang


Part 1:

Ashley and I went to Alison House this afternoon to meet with Philly. While Ashley consulted Philly about audio processing issues in Max, I prepared for the connection test. After resolving her problem, we successfully connected Max and TD.

However, when I later returned to test the setup with the DPA microphone, I encountered a new issue: the airflow was too concentrated, resulting in a harsh, noisy sound. Ashley is currently working on refining this by adjusting the audio input processing to reduce the rough airflow noise.


Part 2:
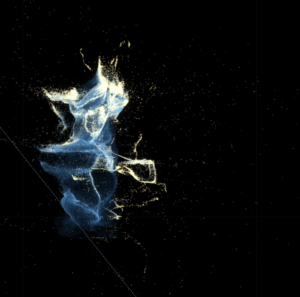
In parallel, Hefan optimized the visuals in TD based on feedback from Philly and Jules, adding richer and more detailed effects. I conducted breathing tests with the new visuals and collaborated with Hefan to debug and refine the following aspects:

  1. Math Mapping: We adjusted the mapping so that the airflow data captured by the microphone results in smoother and more continuous visual transitions.

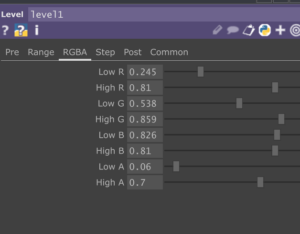
  1. Color Saturation & Noise: The previous version of the visuals was overly saturated. We adjusted the Levels and Noise parameters to create a more subtle, natural effect.


1st Intergration & Trouble Shooting

Overview: Integrate the existing visuals and audio to review the effect, and troubleshoot any unresolved issues

Dates of Development | March 15, 2025

Process Group | Touch Designer & Max

  1. This integration began by incorporating the cyclic breathing-inspired visuals created by Yixuan into Hefan’s breathing-responsive visuals. The combined visuals served as a background to guide the breathing rhythm. We also tested how well it aligned with Roulin’s background music.

    Issues Identified:

    • The breathing-responsive visuals felt somewhat monotonous, as they only involved scaling.
    • The cyclic background visuals lacked variation.
  2. I brought the borrowed DPA microphone and RME audio interface, and the team conducted a breathing test to observe how airflow influenced the visual changes. We found that the visuals were highly unstable, sometimes fluctuating excessively. Yixuan adjusted the range settings, making the visual transitions smoother.

    Meanwhile, Ashley brought a router to attempt transferring TD data from my computer to her Max setup. Yixuan and Ashley worked on resolving the connection. They were successfully able to connect the Router to my computer  which allowed Ashley’s to receive data directly from TD from my computer. 

  3. On the other side, we discussed Li’s installation design. We explored two potential plans:

    • Plan 1: Creating a non-contact breathing mask with a hidden microphone. This design would better capture the exhaled airflow and create a recirculation effect.
    • Plan 2: Designing a potted plant installation, where the microphone would be embedded as a branch of the plant.

    The final decision is still pending.


Continue reading “1st Intergration & Trouble Shooting”

Touchdesigner breath detection testing

Overview: This test is based on Hefan’s TD testing, focusing on refining the interaction between breath detection and visual output. The goal was to optimize microphone placement, enhance the sensitivity of airflow detection, and improve the overall experience of guided breathing. Key areas of experimentation included adjusting audio analysis parameters, refining the response to different breathing intensities, and ensuring smooth visual transitions.

Findings & Adjustments

Breath Sensitivity & Microphone Positioning

  • Issue: When blowing gently, the system did not detect sufficient airflow, resulting in weak visual feedback.
  • Solution: The microphone was found to be most sensitive when placed horizontally, 3-4 cm below the mouth. This position maximized airflow detection while minimizing background noise.
  • Next Steps: Implement a fixed microphone stand or position guide to ensure all participants use the optimal placement without manual adjustments.


Breath Decay & Visual Transition

  • Issue: During guided breathing (5s inhale, 5s exhale), the airflow naturally decreases over time. This caused a sudden drop in visual output, making the transition feel abrupt.
  • Solution: Adjust audio smoothing settings and refine the visual decay curve to create a more natural fade-out effect as breath weakens.
  • Next Steps: Experiment with lag filters and dynamic scaling to create a gradual transition when airflow weakens.

High-Frequency Sensitivity & Detection Consistency

  • Observation: The system responded to breath but not to spoken words, confirming that it effectively isolates airflow instead of voice.
  • Adjustment: The high-frequency range was the most responsive, while the low-frequency range was unnecessary for detecting breath.
  • Next Steps: Fine-tune gain and threshold settings to ensure consistent response across different breath intensities.

Next Steps & Refinements

  • Implement a fixed microphone position to avoid user adjustments.(Maybe put it within Installation)
  • Optimize audio analysis parameters to ensure smooth transitions when breath intensity decreases.
  • Conduct further tests to validate sensitivity across different users and refine visual-matching dynamics.

Development Blog – March 12th, 2025

IMG_4282

Location – Alison House Music Store

Participants – Xinyi Qian,Roulin Liu

Microphone and TouchDesigner Troubleshooting
Equipment
Microphones:
Rode smartLav+ Lavalier Mic
DPA 4061 Lavalier Mic
Audio Interface:
RME FireFace UCX
Software:
TouchDesigner
RME FireFace UCX Driver
Process of Development

Issue Identification
On Tuesday, we attempted to connect the Rode smartLav+ Lavalier Mic to the computer, but it failed to capture audio.
It was unclear whether the issue was due to hardware failure, software incompatibility, or another technical limitation.

Equipment Borrowing & Alternative Testing
Xinyi re-borrowed the Rode smartLav+ Lavalier Mic for further testing.
Additionally, we borrowed the DPA 4061 Lavalier Mic, as research suggested it offers superior audio quality.
Connection Issue with DPA 4061
The DPA 4061 uses an XLR adapter, which cannot be directly connected to a computer.
To resolve this, we borrowed the RME FireFace UCX audio interface.

Setup & Software Installation
With the help of the Music Store staff, we successfully connected the microphones to the computer using the RME FireFace UCX.
We installed the necessary drivers for the FireFace UCX to ensure proper functionality.

Testing & Results
Both microphones were able to function properly after the setup.
After conducting audio tests, we found: The DPA 4061 captured more subtle details, such as breathing sounds.
It was more sensitive and had lower latency than the Rode smartLav+.
Based on these results, we decided to proceed with the DPA 4061 for our project.

Upcoming Goals
We will fine-tune parameters in RME and TouchDesigner to achieve the best audio quality.

Exploring Audio-Driven Visuals in TouchDesigner: From Shape Transformations to Microphone Interaction

TouchDesigner Audio-Driven Graphics Experiment: From Shape Transformations to Microphone Input Control

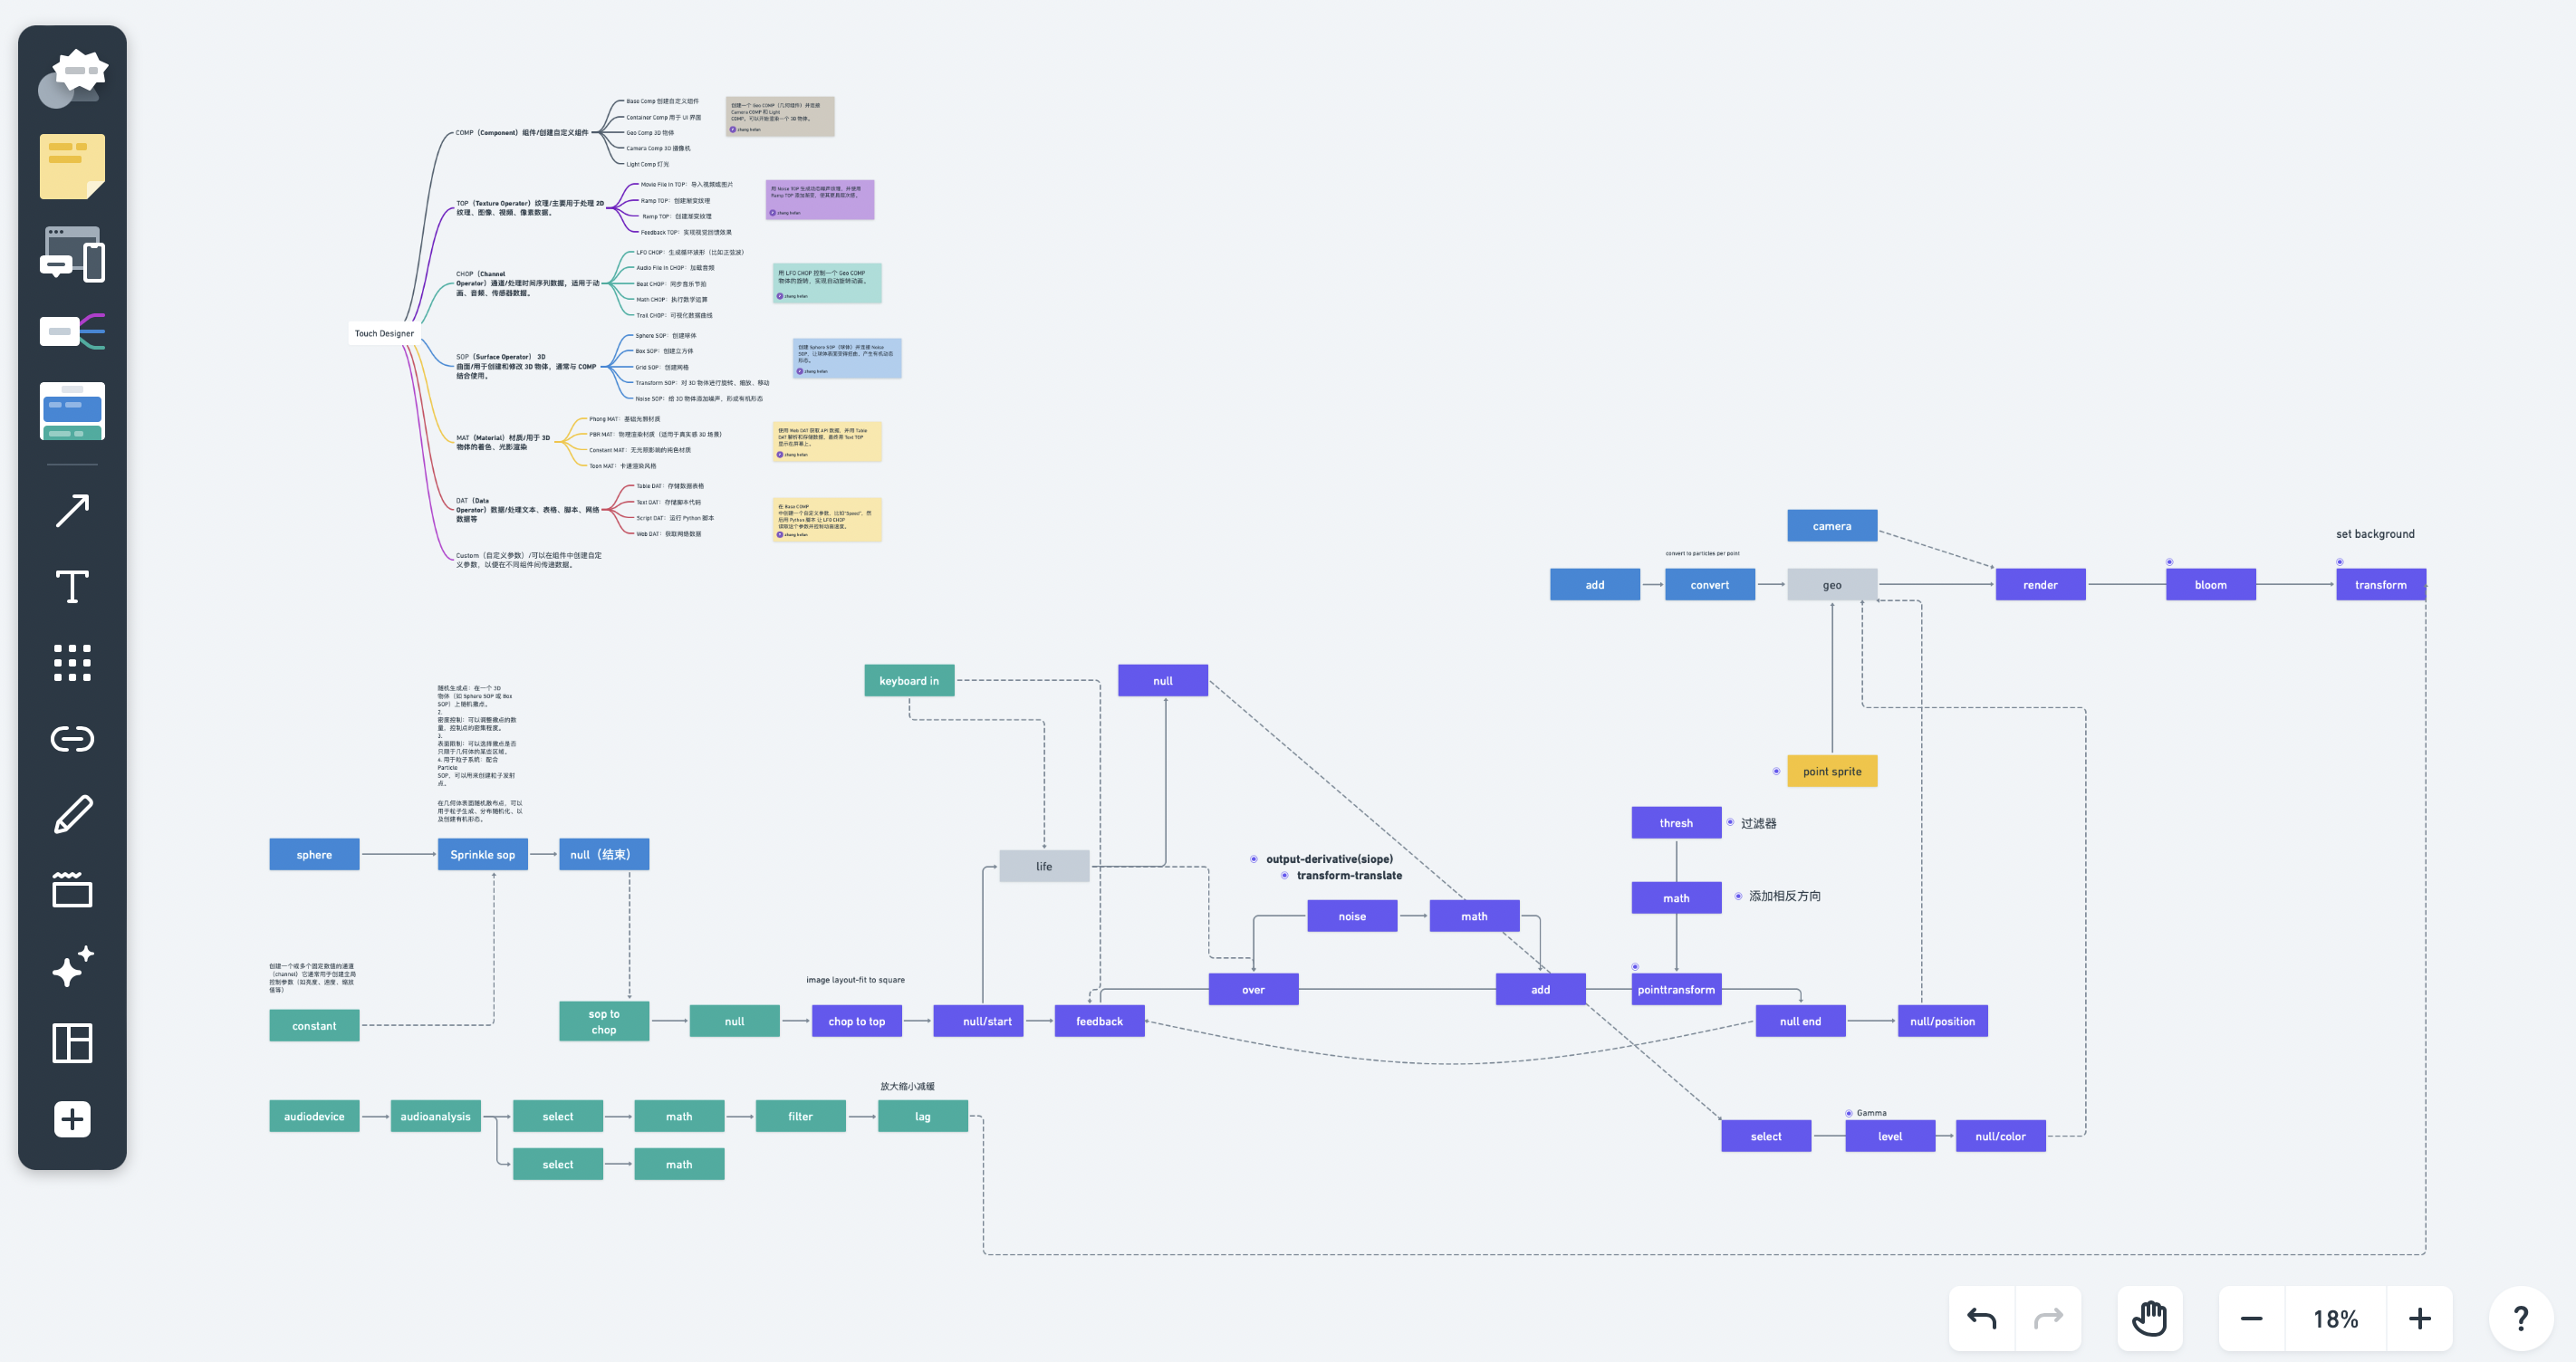
Recently, I have been experimenting with TouchDesigner to explore dynamic shape transformations and audio-driven visual effects. Initially, I focused on modifying basic geometric forms using Noise, Output-Derivative (Slope), Threshold, Level (Gamma Adjustment), and Bloom Effects. Later, I integrated microphone input to control shape size and color, using Transform SOP for scaling and translation, with two Null CHOPs managing position and color separately.Touchdesigner learns note-taking and analysis

test


1. Initial Shape Transformations and Visual Experiments

① Noise + Output-Derivative (Slope) I started by applying Noise CHOP to introduce organic movement into the shape.To enhance the natural transitions, I used Output-Derivative (Slope CHOP) to smooth out the rate of change, preventing sudden spikes in movement.

② Threshold + Level (Gamma Adjustment) Threshold CHOP was used to create high-contrast effects, transforming smooth gradients into distinct binary patterns. Level CHOP (Gamma Adjustment) helped fine-tune the brightness curve, making the visuals either softer or more dramatic.

③ Bloom Effect Finally, I applied a Bloom effect, enhancing the highlights and adding a glowing aura to the shape, making it more visually engaging.


2. Using Transform SOP for Background, Scaling, and Positioning

To better organize the visuals, I utilized Transform SOP to: Add a background (either static or gradient-based). Control scaling dynamically. Apply translation effects to move the shape across the screen.Link transformations to audio input, so that sound influences both size and position. Additionally, I created two Null CHOPs: One for Position (to control movement based on audio input). One for Color (to change the color dynamically according to the audio intensity).


3. Integrating Microphone Input with Audio Device In CHOP

After experimenting with basic shape transformations, I moved on to controlling these parameters with real-time audio input.

① Capturing Microphone Input Using Audio Device In CHOP, I connected my microphone to feed real-time audio data into TouchDesigner. The raw audio data fluctuates too quickly, so direct mapping would result in erratic visual behavior. To ensure a smooth transformation, I applied additional processing.

② Smoothing Audio Input: Filter CHOP + Lag CHOP .Filter CHOP: Set Filter Width = 2.0 to smooth out the fluctuations, reducing rapid jumps. Lag CHOP: Applied a gradual transition effect: Lag Up = 1.2 (slower increase when the volume rises)Lag Down = 3.0 (even slower decrease when the volume drops)

③ Mapping Audio Data to Shape Scale with Math CHOP Mapped the volume range (0.01 ~ 0.3) to shape scale (0.5 ~ 2.0).This ensures that louder sounds gradually enlarge the shape, while softer sounds slowly shrink it, avoiding sudden jumps.


4. Connecting Audio Data to Transform SOP Mapped the output of Math CHOP to Transform SOP’s Uniform Scale, enabling shape size changes based on audio intensity. Connected Null CHOP (Position) to Translate parameters so that the shape moves dynamically with the sound. Linked Null CHOP (Color) to the color channels, allowing the shape’s color to shift depending on volume levels.


Arduino and Touchdesigner connection

Arduino and Touch designer connection

Test One
Test time: 02/03/2025
Tester: Can
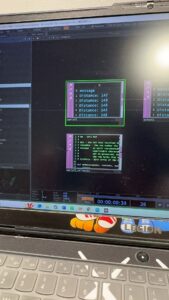
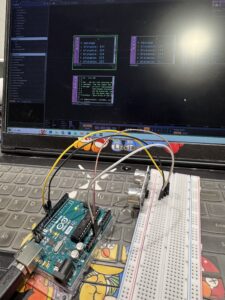
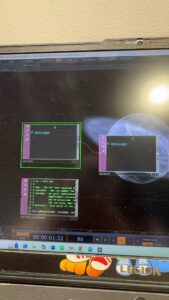
Test content: Touch designer and Arduino connection
Components used: ultrasonic sensor, Arduino, breadboard, cable.
Test Result: Successful connection and the value on the touch designer has feedback changes.

Test 2
Test time: 04/03/2025
Tester: Can& Li
Test content: Touch designer and Arduino connection
Components used: temperature and humidity sensor, breadboard, cable
Test Result: The connection is successful, but the value of Arduino does not form the value change feedback on TD successfully.

Test 3
Test time: 05/03/2025
Tester: Can& Li
Test content: Touch designer and Arduino connection
Components used: temperature and humidity sensor, breadboard, cable
Test Result: Connection was successful, but the value of Arduino didn’t form the feedback of value change on TD.

To sum up, the result of the whole test phase is unstable, we need to keep debugging the device and form stable and reliable numerical feedback in order to guarantee the normal progress of the project, although we are looking for an alternative plan b, Li and I both hope that we can find out the reason in the continuous trial and error, and successfully achieve the connection.

External help: Joe
Refer to the tutorial:

https://wiki.seeedstudio.com/Grove-TemperatureAndHumidity_Sensor/

https://www.youtube.com/watch?v=4dO7Q5oQbRg

https://www.youtube.com/watch?v=6bT3G4Mep7E


css.php

Report this page

To report inappropriate content on this page, please use the form below. Upon receiving your report, we will be in touch as per the Take Down Policy of the service.

Please note that personal data collected through this form is used and stored for the purposes of processing this report and communication with you.

If you are unable to report a concern about content via this form please contact the Service Owner.

Please enter an email address you wish to be contacted on. Please describe the unacceptable content in sufficient detail to allow us to locate it, and why you consider it to be unacceptable.
By submitting this report, you accept that it is accurate and that fraudulent or nuisance complaints may result in action by the University.

  Cancel