Any views expressed within media held on this service are those of the contributors, should not be taken as approved or endorsed by the University, and do not necessarily reflect the views of the University in respect of any particular issue.
Based on our meeting on April 19, we decided to make the installation more interactive and playable. I find some video tutorials of Touch Designer with Kinect and Leap Motion on Youtube. Since the Leap Motion is not available from the university, I booked the Kinect camera from the music store.
From my perspective, the theme or style needs to keep consistent with our project, which means it is expected to be related to water and water-ish stuff. Therefore, I prefer creating water painting effects through the feedback function and the slope TOP.
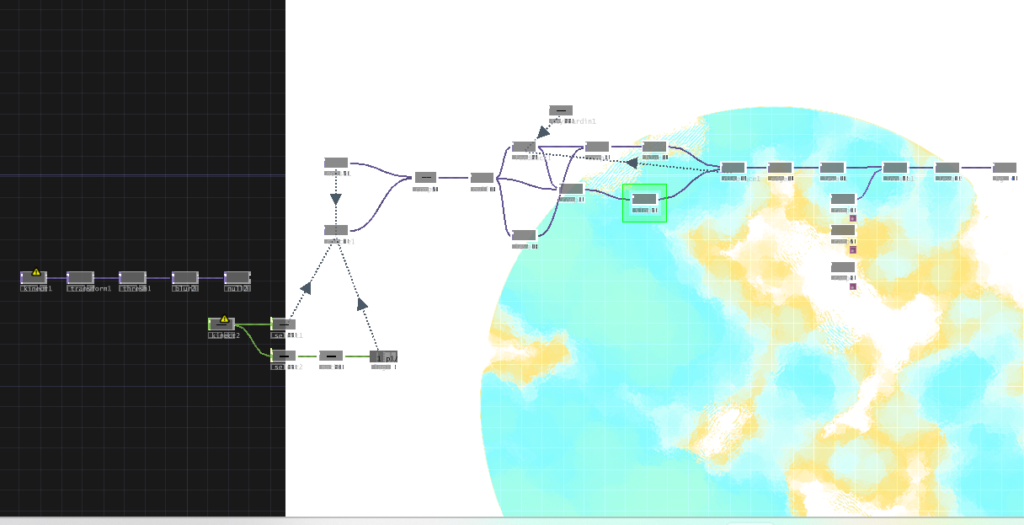
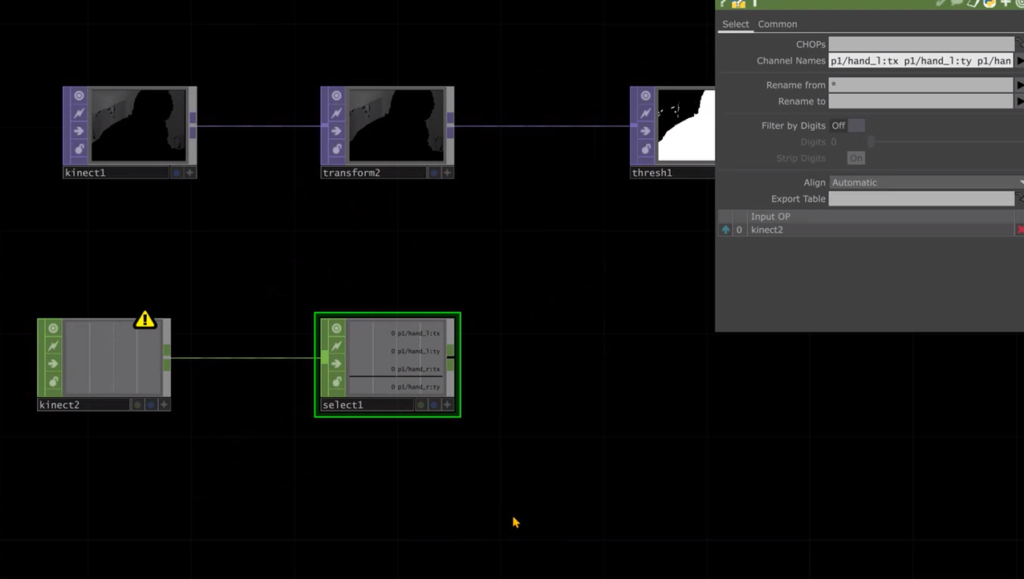
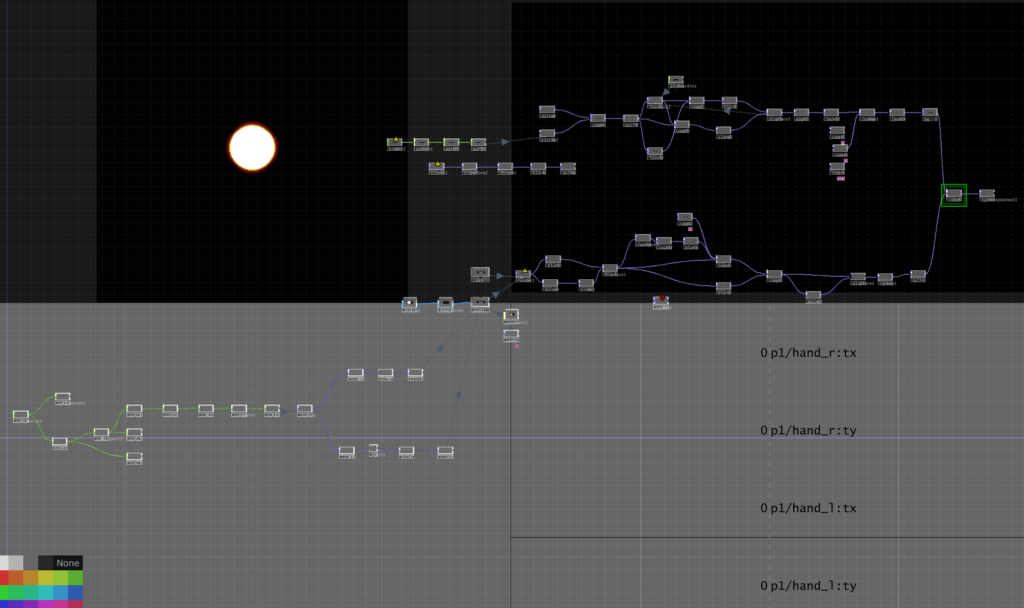
I use kinect v1 TOP and kinect CHOP of panel and selector to get the left and right hand data from camera. In addition, I drag the data as a chop reference to the position of the water painting circle.
And then I combine this part with the sound visualization. Now the sound visualization part would appear when the part is covered by the circle.
The content of this blog consists of the work of Rudan, Jin, Yuan and Jaela.
Preparation
Selection of rooms and booking of equipment:
Jin booked some rooms in ECA and evolution house to test the effect. For example, ECA C02, E15A, E15B, B55, Photography Studio G09 (Evolution House) and so on. Taking into account factors such as shading, the effect of room size on sound, projection and so on, we finally chose E15A as our final exhibition room.
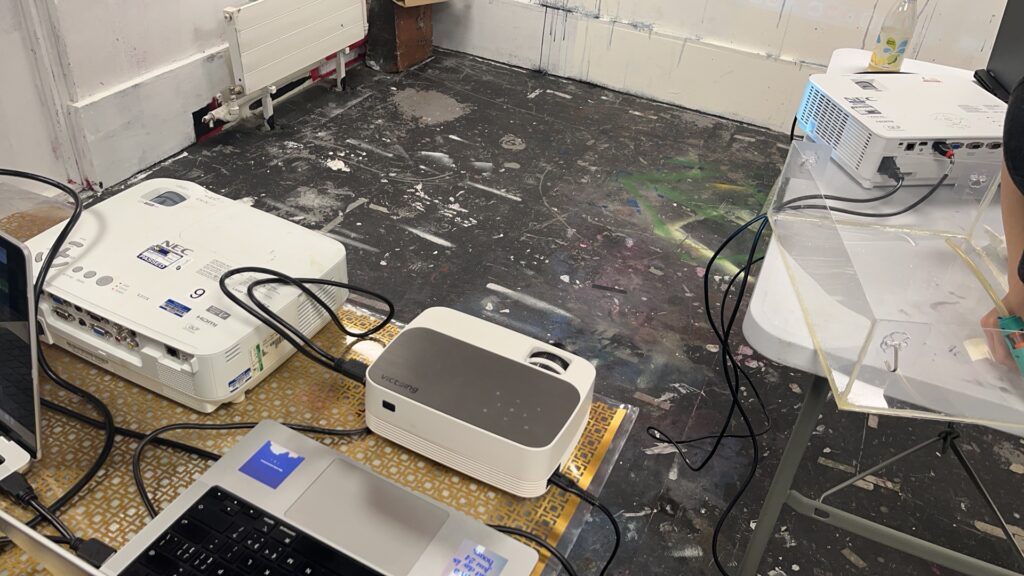
In the meantime, we hired and tested some projectors. We wanted the image to fill the whole wall, so we used a short throw projector for the main image.
Step 1:
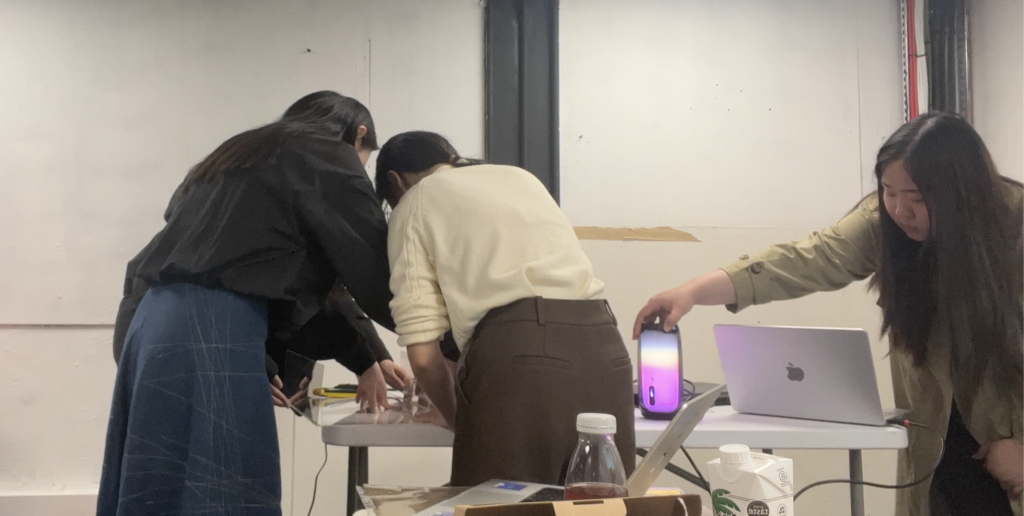
Debug the software and change the details. For example, the intensity in Touch Designer is connected to the visual audio cable, the order of the music in Max is adjusted, etc.
Step 2:
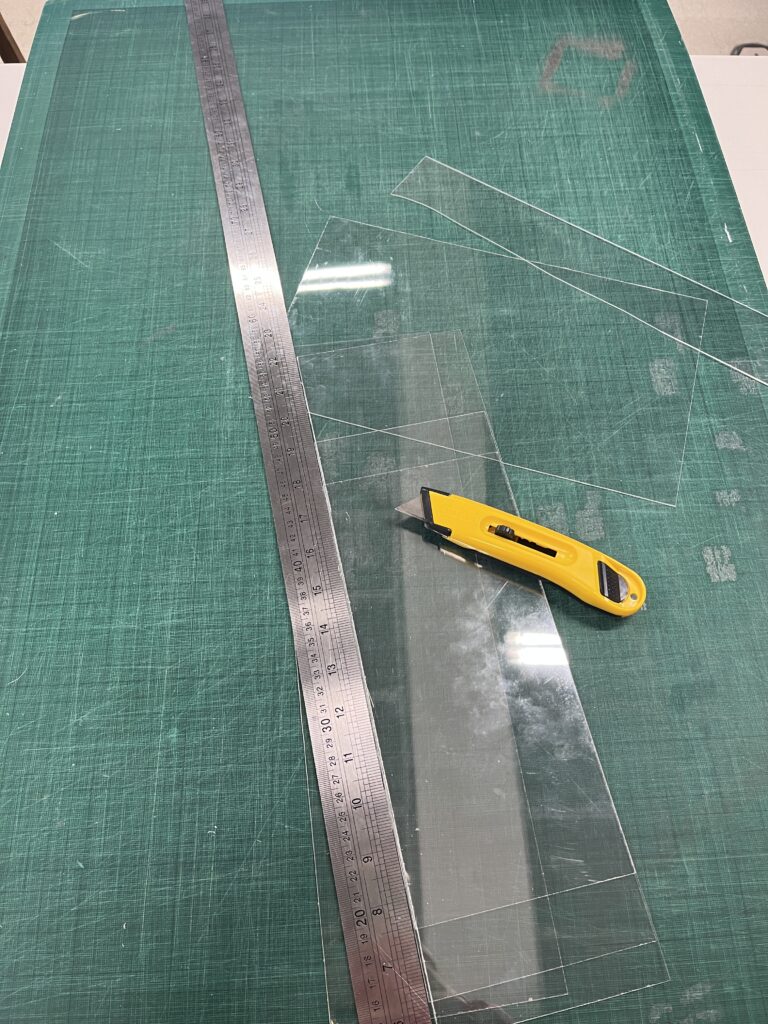
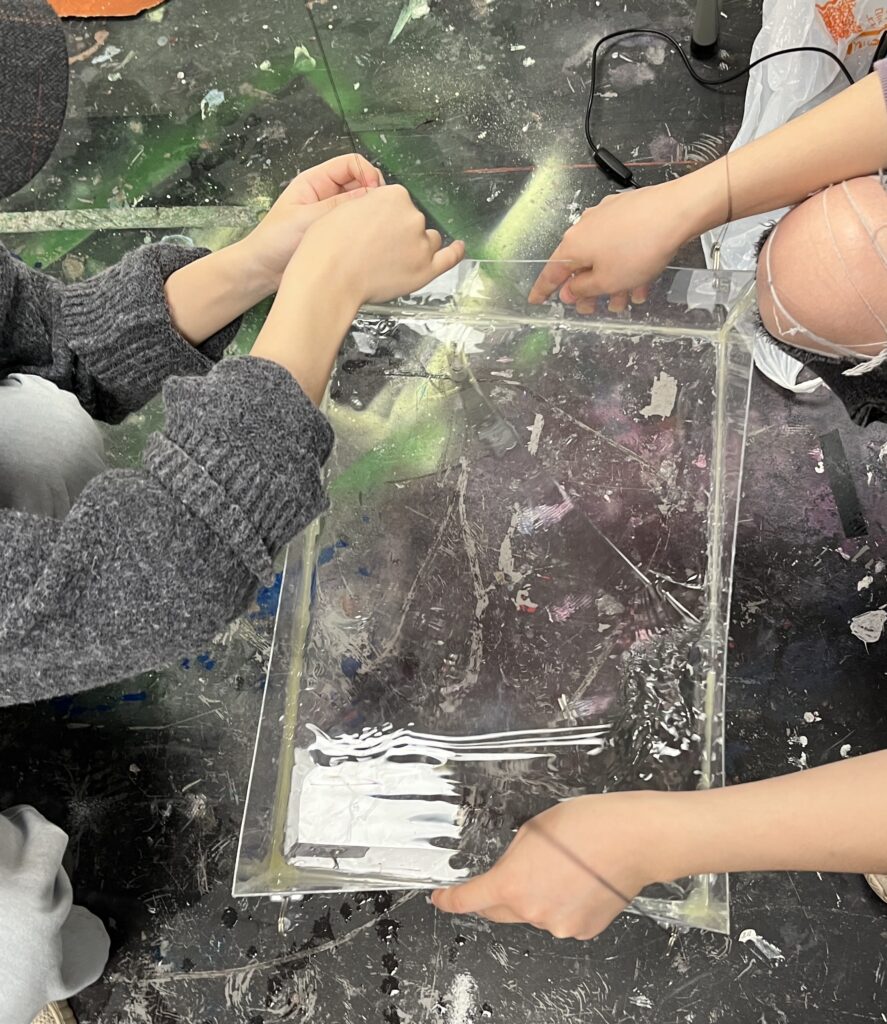
Make the water tank, cut the PVC sheets and glue the PVC sheets with a glue gun.
Step 3:
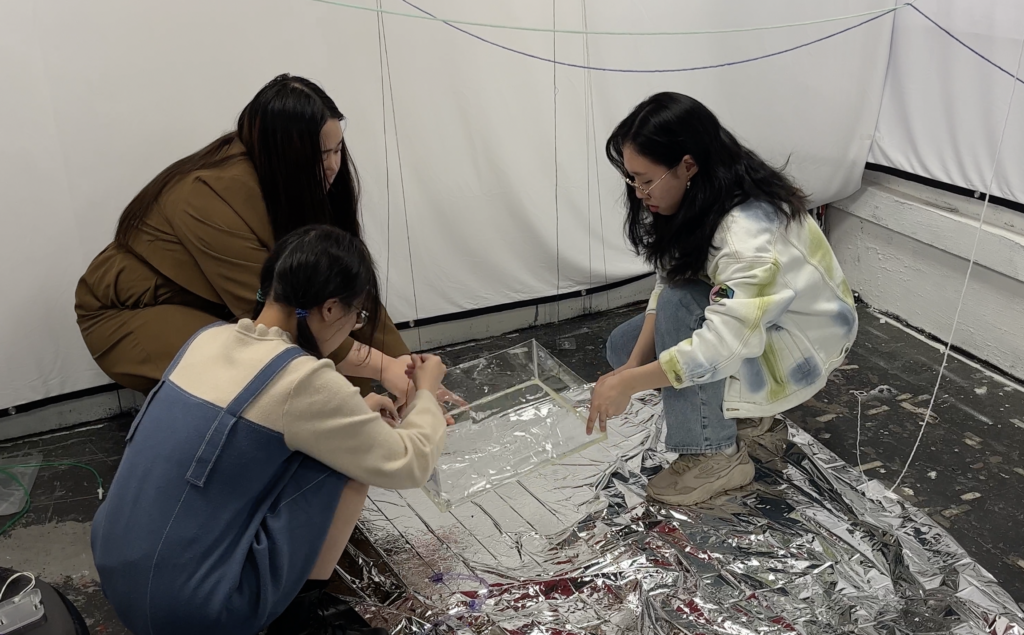
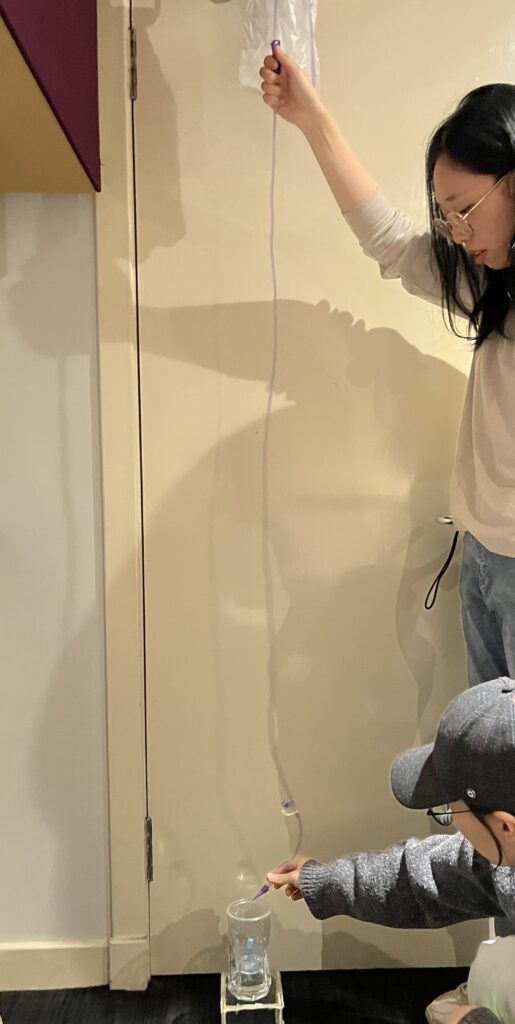
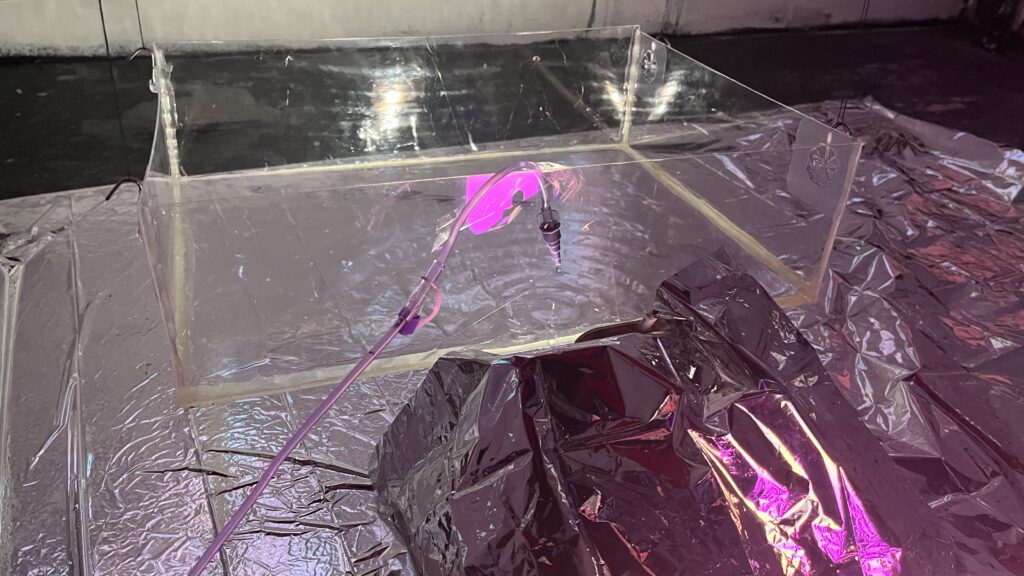
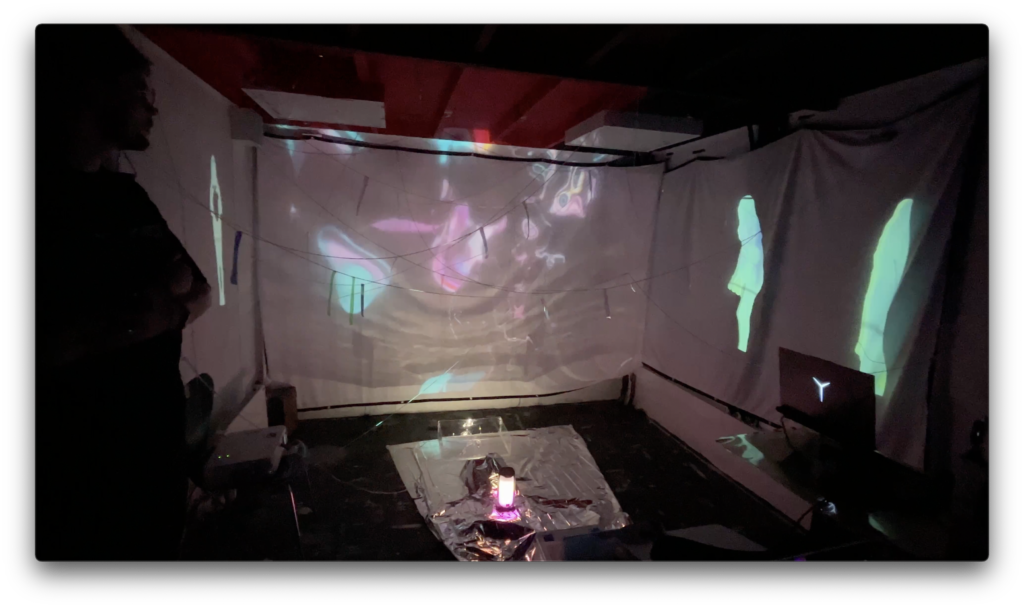
Place the water tank. As we needed to light the tank at a 45 degree angle downwards, we needed to elevate the tank. We wanted the tank to wobble slightly to add more water wave pattern, so we decided to attach hooks to the ceiling and to the corners of the tank, using four wires to suspend the tank. We then tested the height of the tank to see if it could support the light, and the speed of the drip unit, and the weighing of the tank. Finally, we fixed the drip unit to the tank.
Step 4:
Test the projection and adjust the projection position. Our project consisted of three projection walls. In our original plan, there were four sections to be projected, so Jin used madmapper to achieve a split screen and to solve the problem of distortion in the angled projection. However, we ended up eliminating a duplicate screen. As TD can hide components after zooming in, the software border is still present and affects the final visual effect. So we still intend to use Madmapper to solve this problem. Finally, we used syphonspoutout TOP to solve the connection problem between madmapper and touch designer.
Step 5:
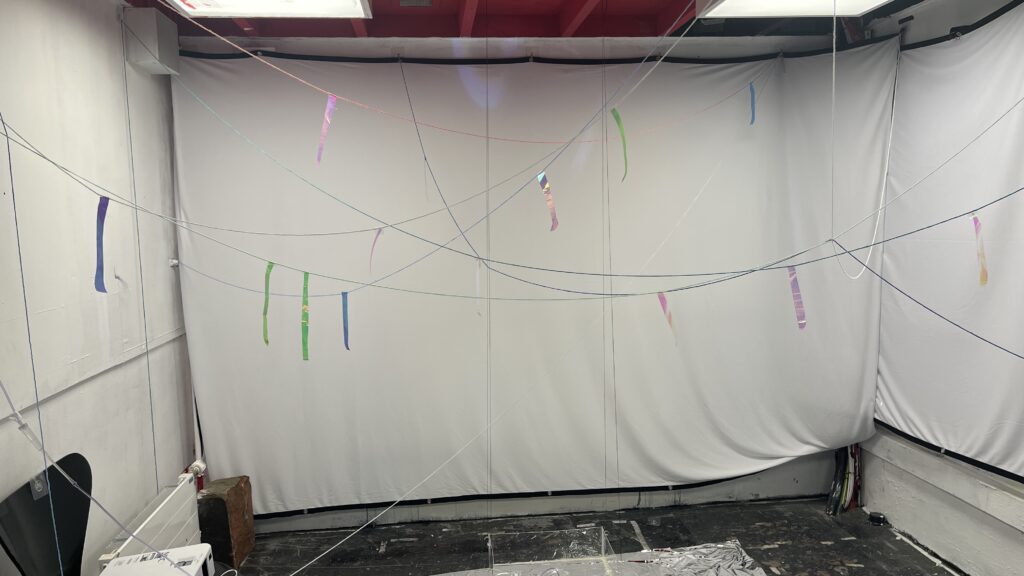
As the walls in the room were rather messy, we hung curtains on the walls to ensure that the projection would be effective, making the walls clean. We wound various coloured threads, and these twisted colourful threads represent the influence of the outside world on people. They are like the various rules and potential deep impressions that bind us and will always be projected on our lives at some point.
At the same time, we have laid tinfoil underneath the water tank. We hope to create a richer light and visual effect through its reflective effect.
Step 6:
Adjust the angle of the light and test the water wave effect.
Step 7:
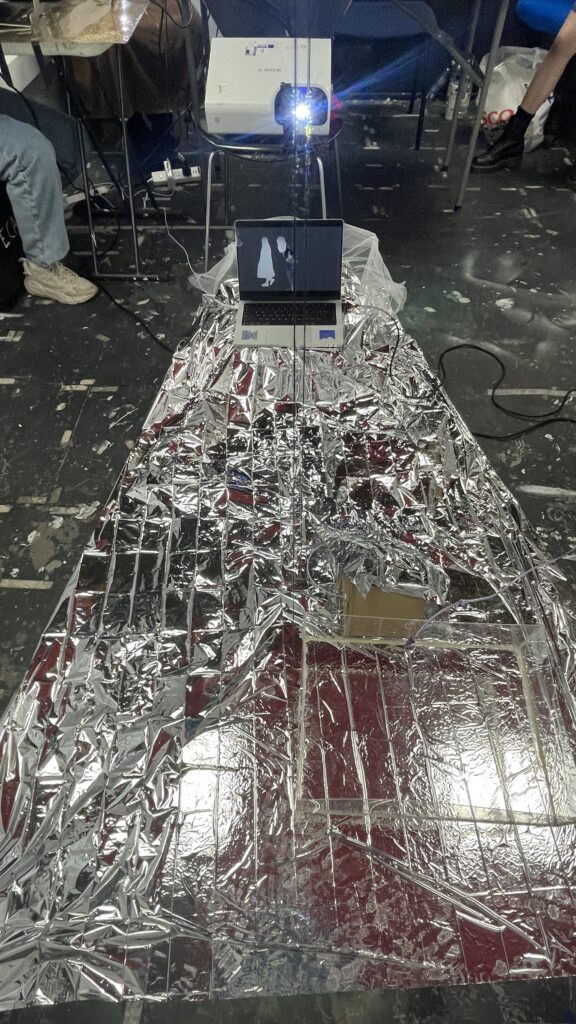
Adjust the position of the computer so that Max recognises the projected image in real time.
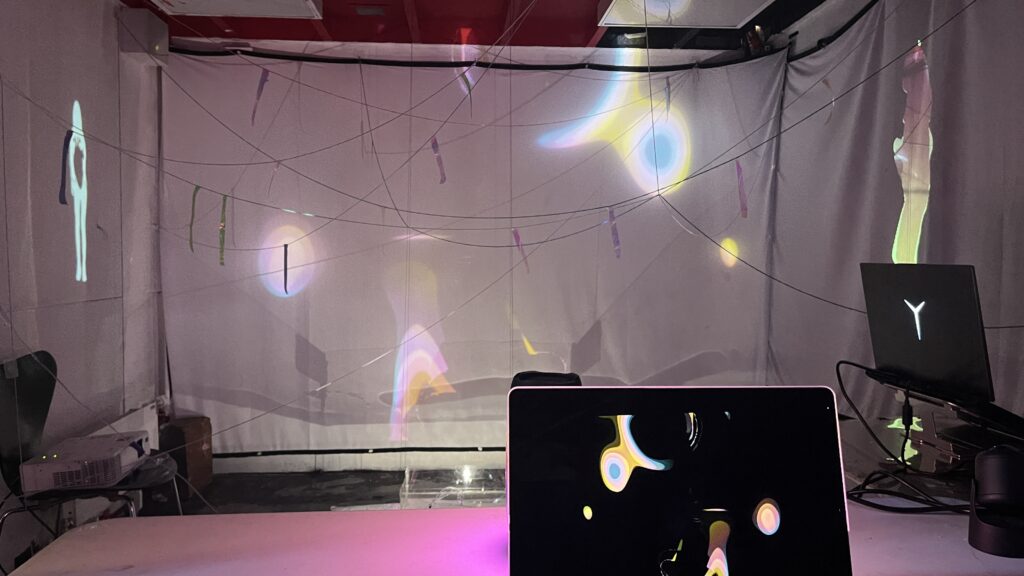
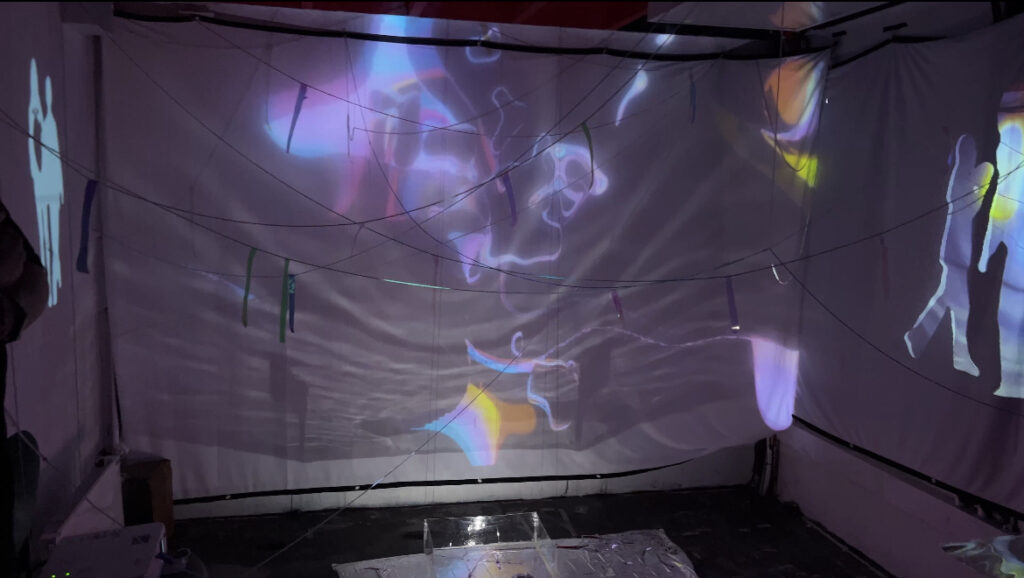
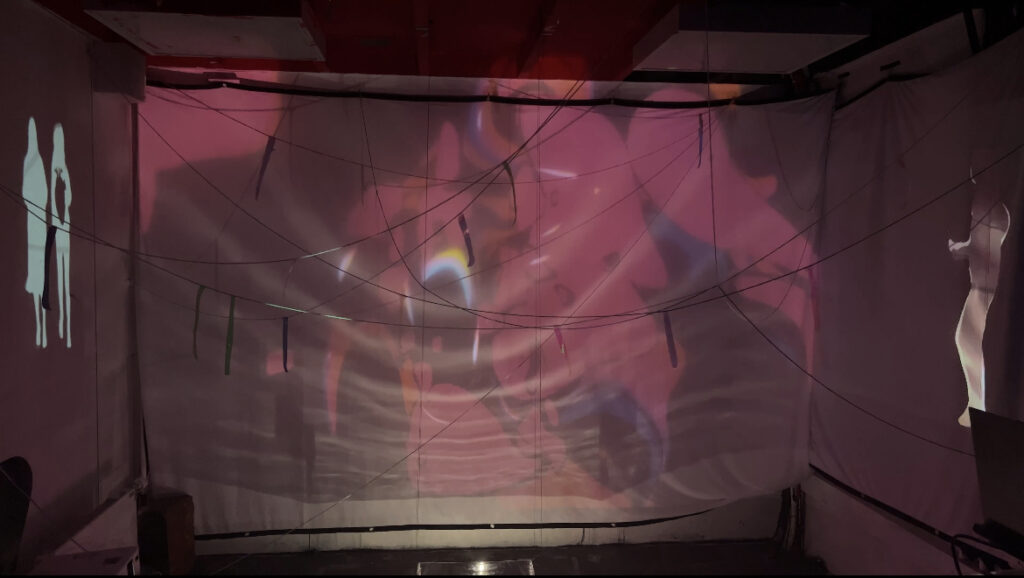
Final display effect:
Interpretation of the images on the three walls (software used):
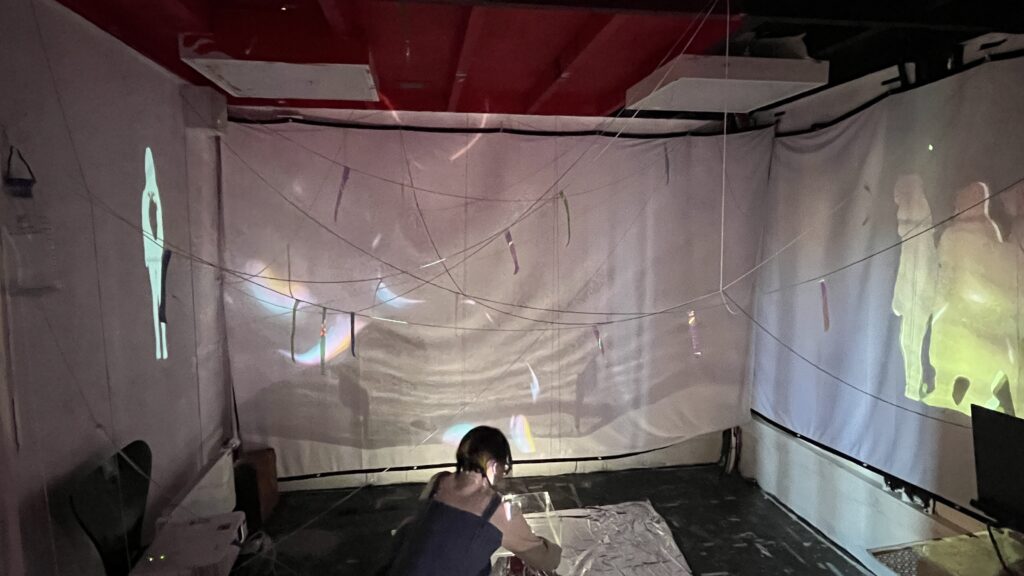
Aqual Ripple consists of three projection walls and an installation. The three projection walls are: projection of the inner world, life from the front perspective and life from the side perspective.
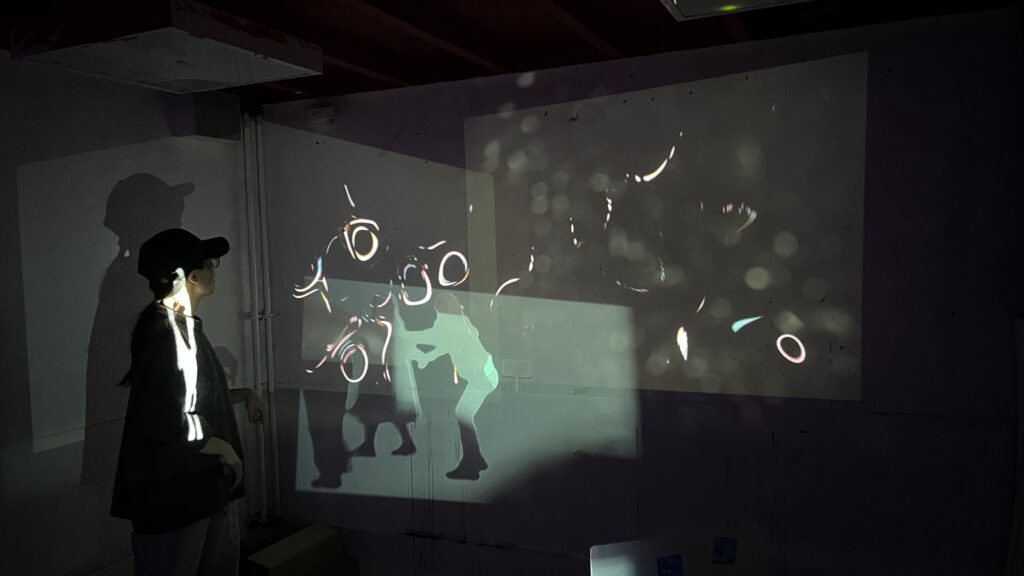
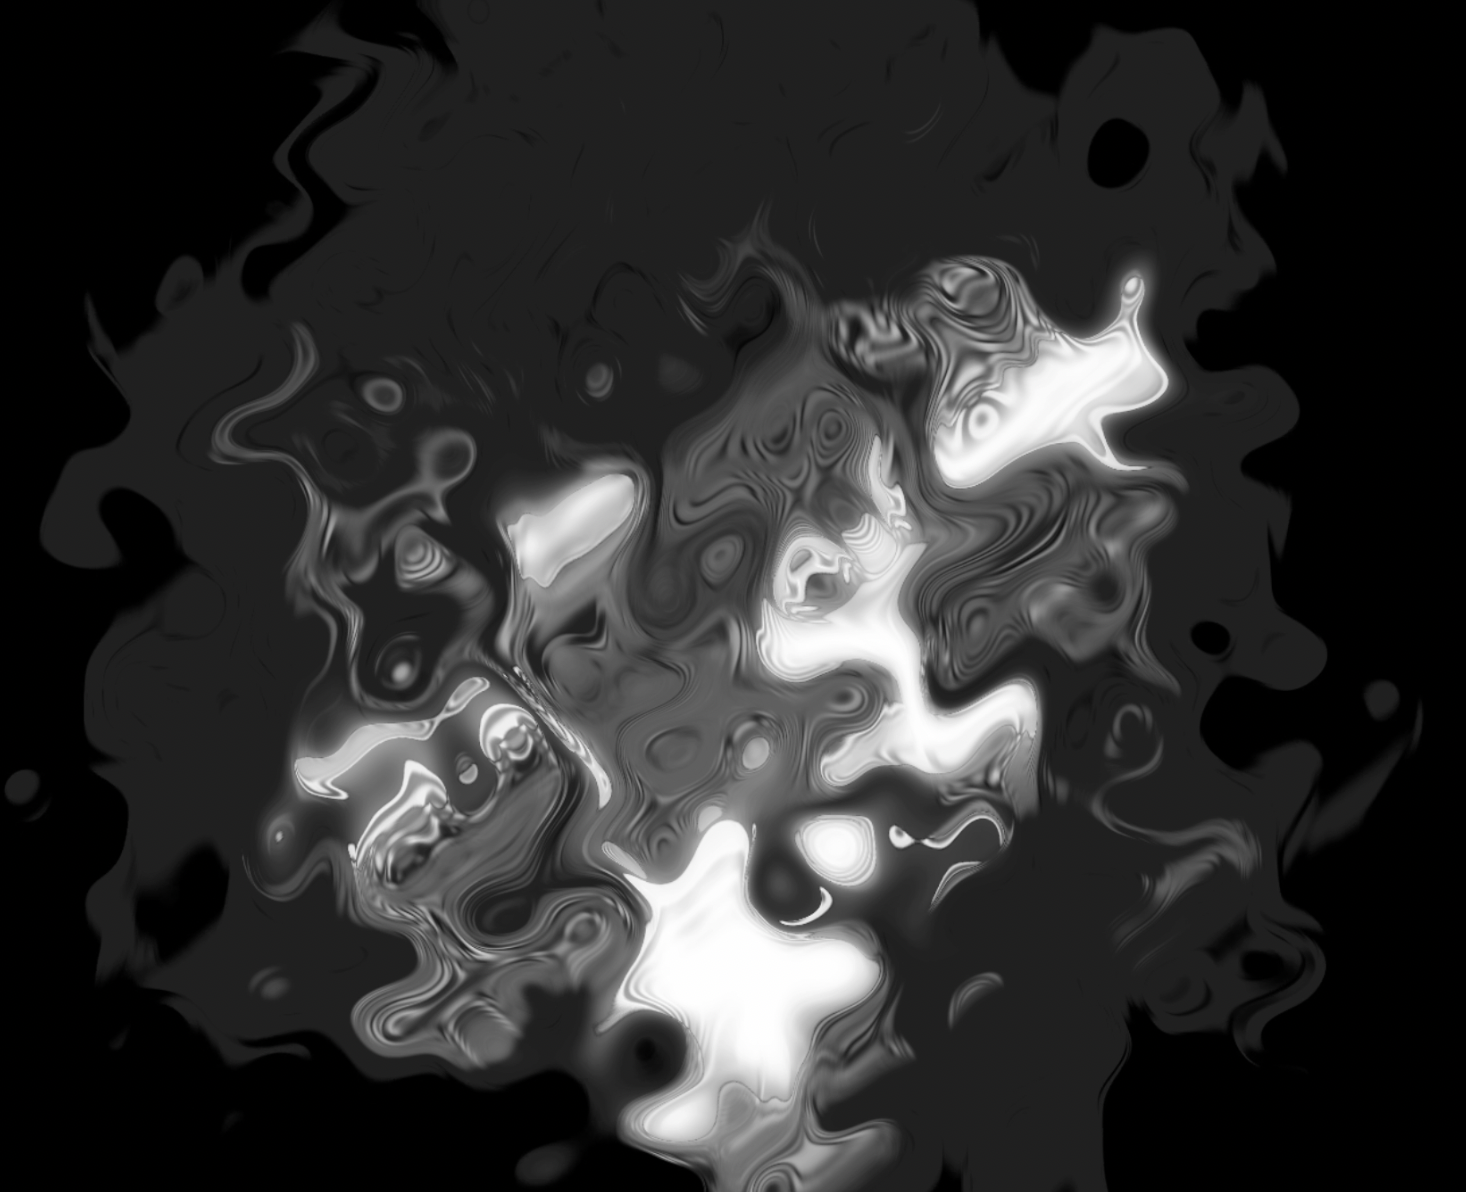
The projection of the inner world is a sound visualisation created by the feedback function of TouchDesigner, which is based on audio generated by the microphone received by microphone and audio generated by MAX received by Visual Audio The audio generated by MAX received by Cable shows the corresponding frequency of sound and intensity through the shape of ripple.
The audience can stand in the room and interact by creating sounds, including singing, clapping, stomping, etc., and observing the corresponding changes produced by the digital ripple.
Front Life and Side Life are created by shooting two videos with the same content but at different angles, which are processed by MAX and received through the camera as content-filled inner projection content. The footage shows a fragment of a person’s life, from walking alone, rising up after being provoked, falling down, getting frustrated, being helped by a stranger, having a friend who spends time together…
The protagonist of the frontal life has a heart-shaped mask, and projections of the inner world are filled in as content in real time via the madmapper. Meanwhile, the entire character of the side life acts as a mask presenting a more pronounced inner world.
Show experience
The images are not only created by the vibrations and intensity of the music, but also by the microphone radios that change according to the sounds made by the audience. The whole experience is fun as the audience shouts, jumps, snaps their fingers, claps, sings and other interactive ways to make the images change even more.
Based on the content of this week's Jules tutorial and Jules' advice to us, we have made further improvements to our design solution. By using Touch Designer and Max, we have increased the interactivity of the design and improved the visual effect of the design. Rudan and Jin were responsible for the part of Touch Designer, and Jeala and Yuan for the part of Max.
Design Development
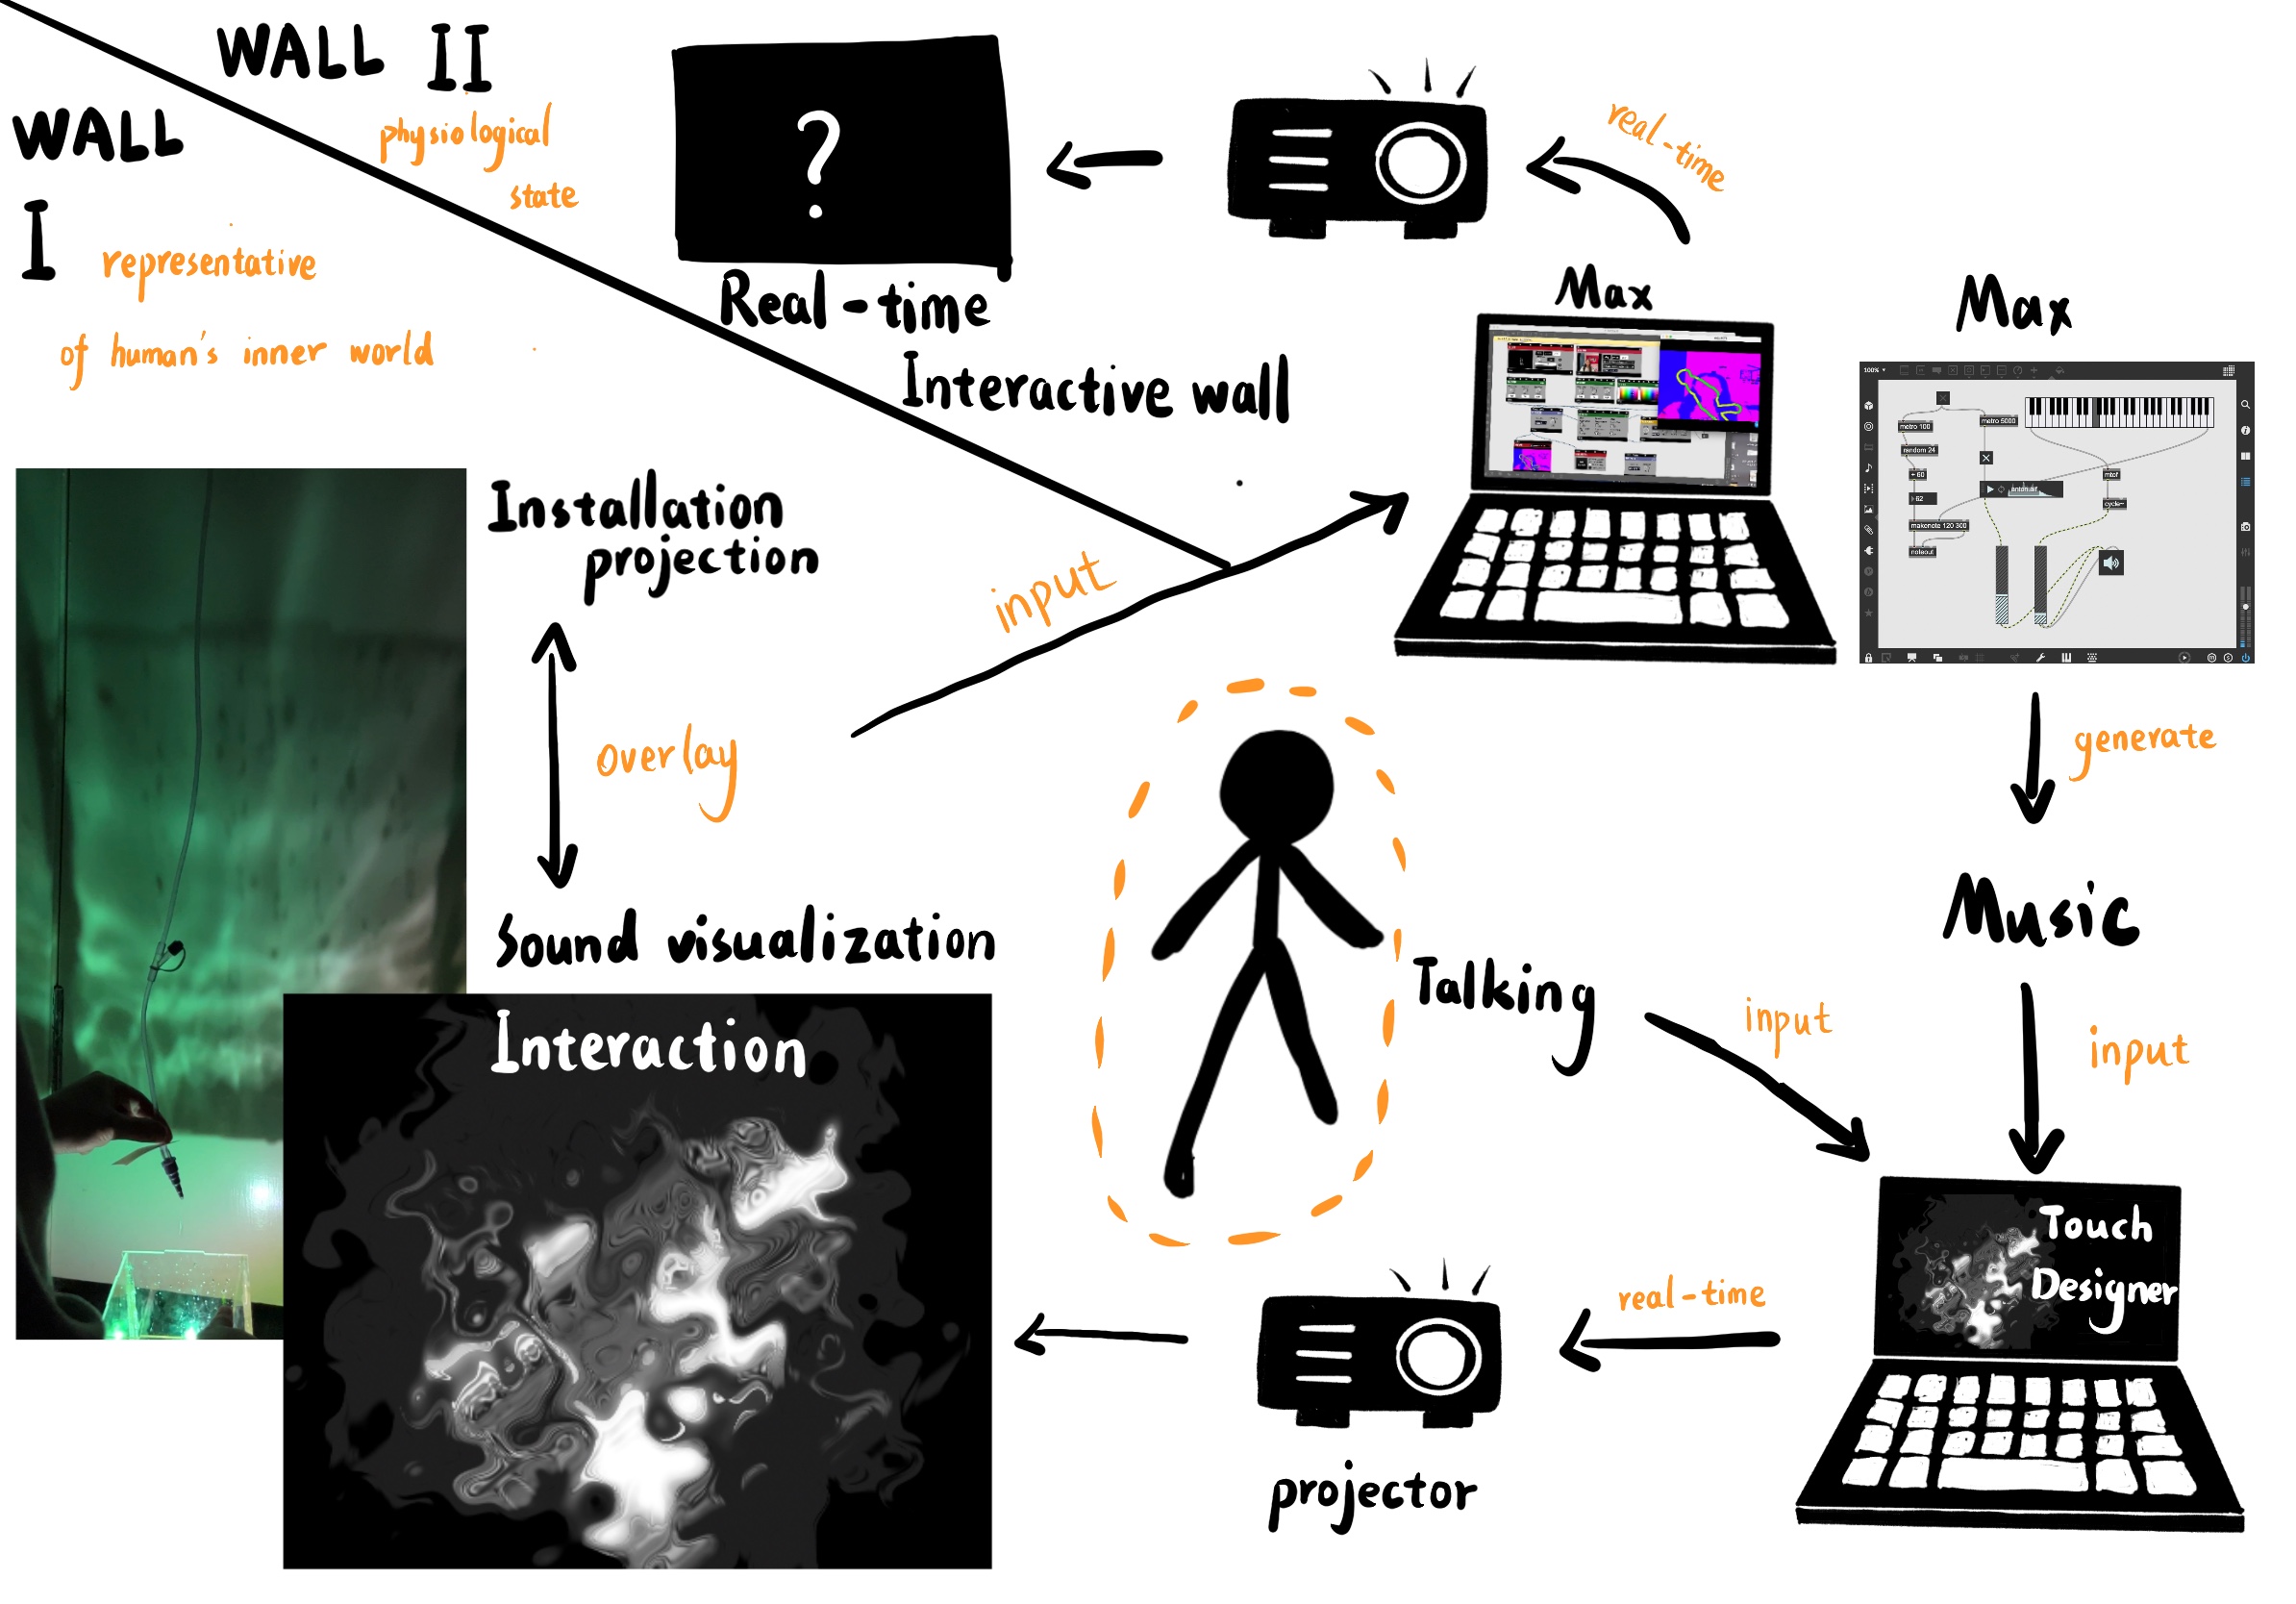
Our design concept is a ‘human lifetime’ and the implementation is still water, sound and installation. But we wanted to achieve the effect of ‘audience-action/sound-installation-visuals’ interacting with each other and changing in real-time with the audience’s movement/sound, so we introduced Touch Designer and Max. The interaction flow is shown in the diagram below:
(This image was drawn by Rudan Zheng)
We plan to show different effects on the two walls, one wall shows people’s inner world, and the other wall shows people’s behavior and actions. These two walls are displayed together with the installation and the projector screen, which can interact with the audience in real-time.
It can be understood that we are showing a “person”, and the voice and behavior of every audience who comes to watch this “person” can have an impact on this person, and this influence will change the shape of the projection on the wall.
Through learning some TD tutorials on Youtube and testing, we achieved the visualisation of sound in real-time. The input can be translated into flowing water, and changed based on the rhythm and strength.
Rudan’s First Test
Jin’s Second Version①
Jin’s Second Version②
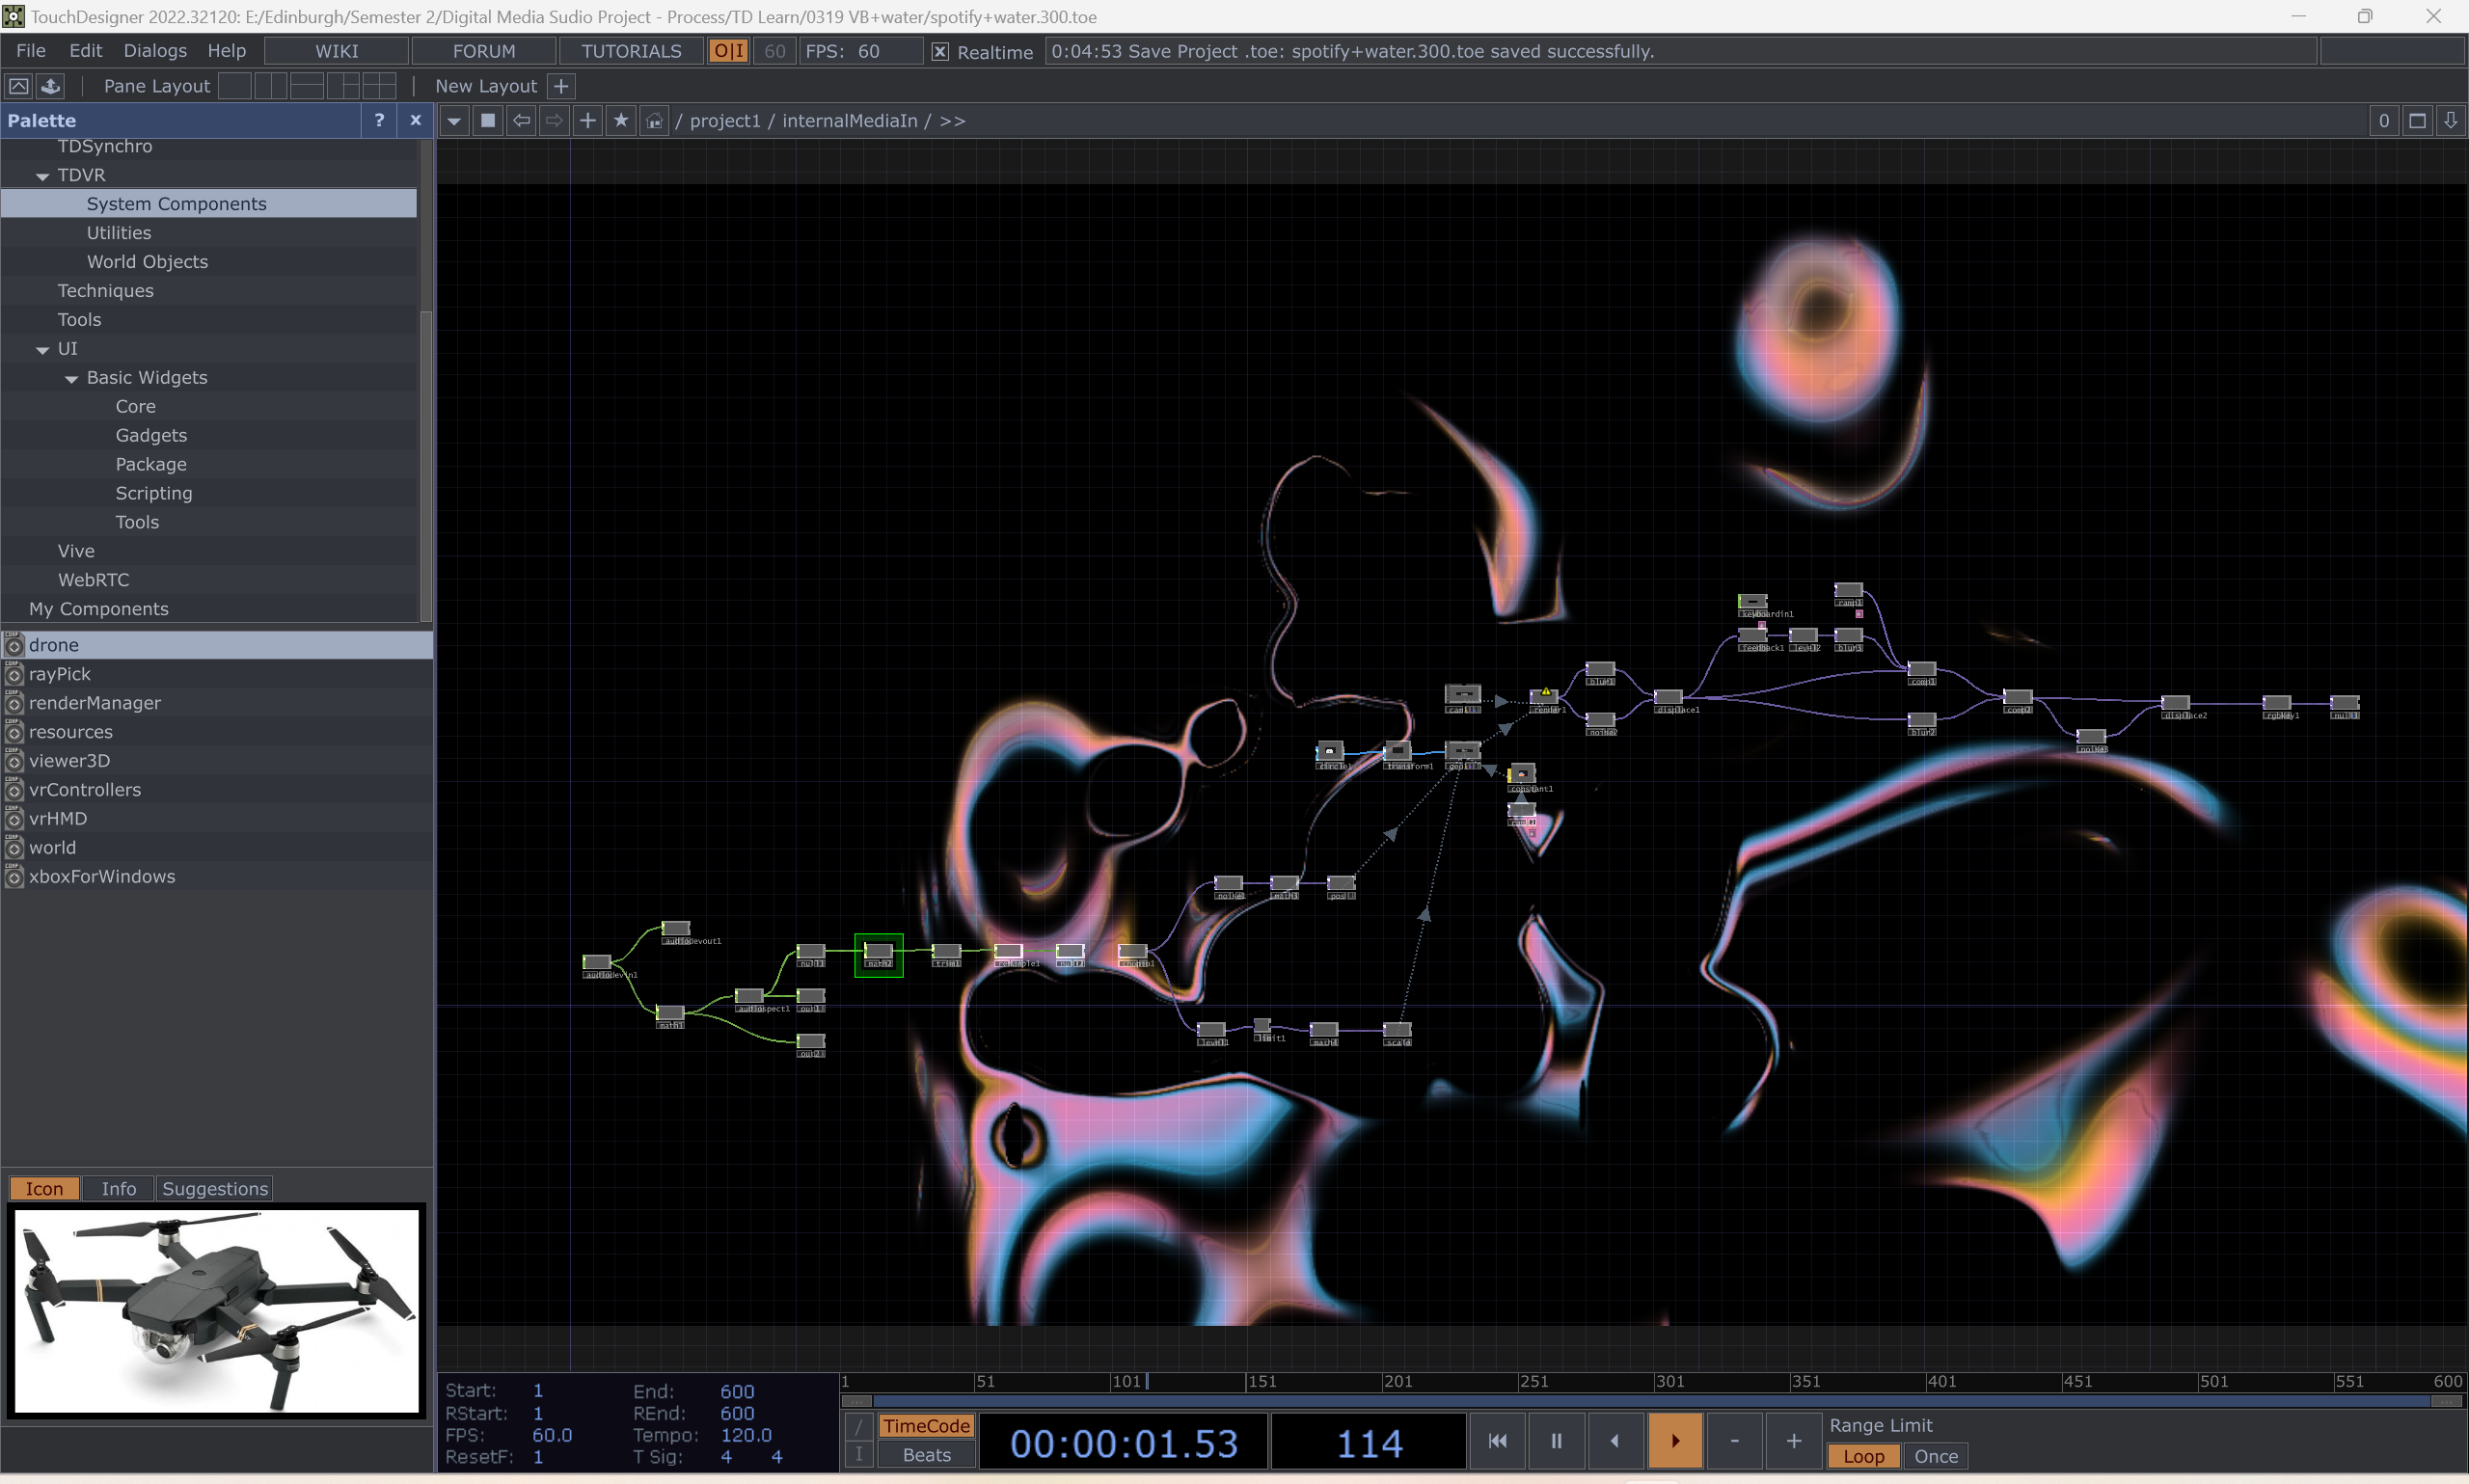
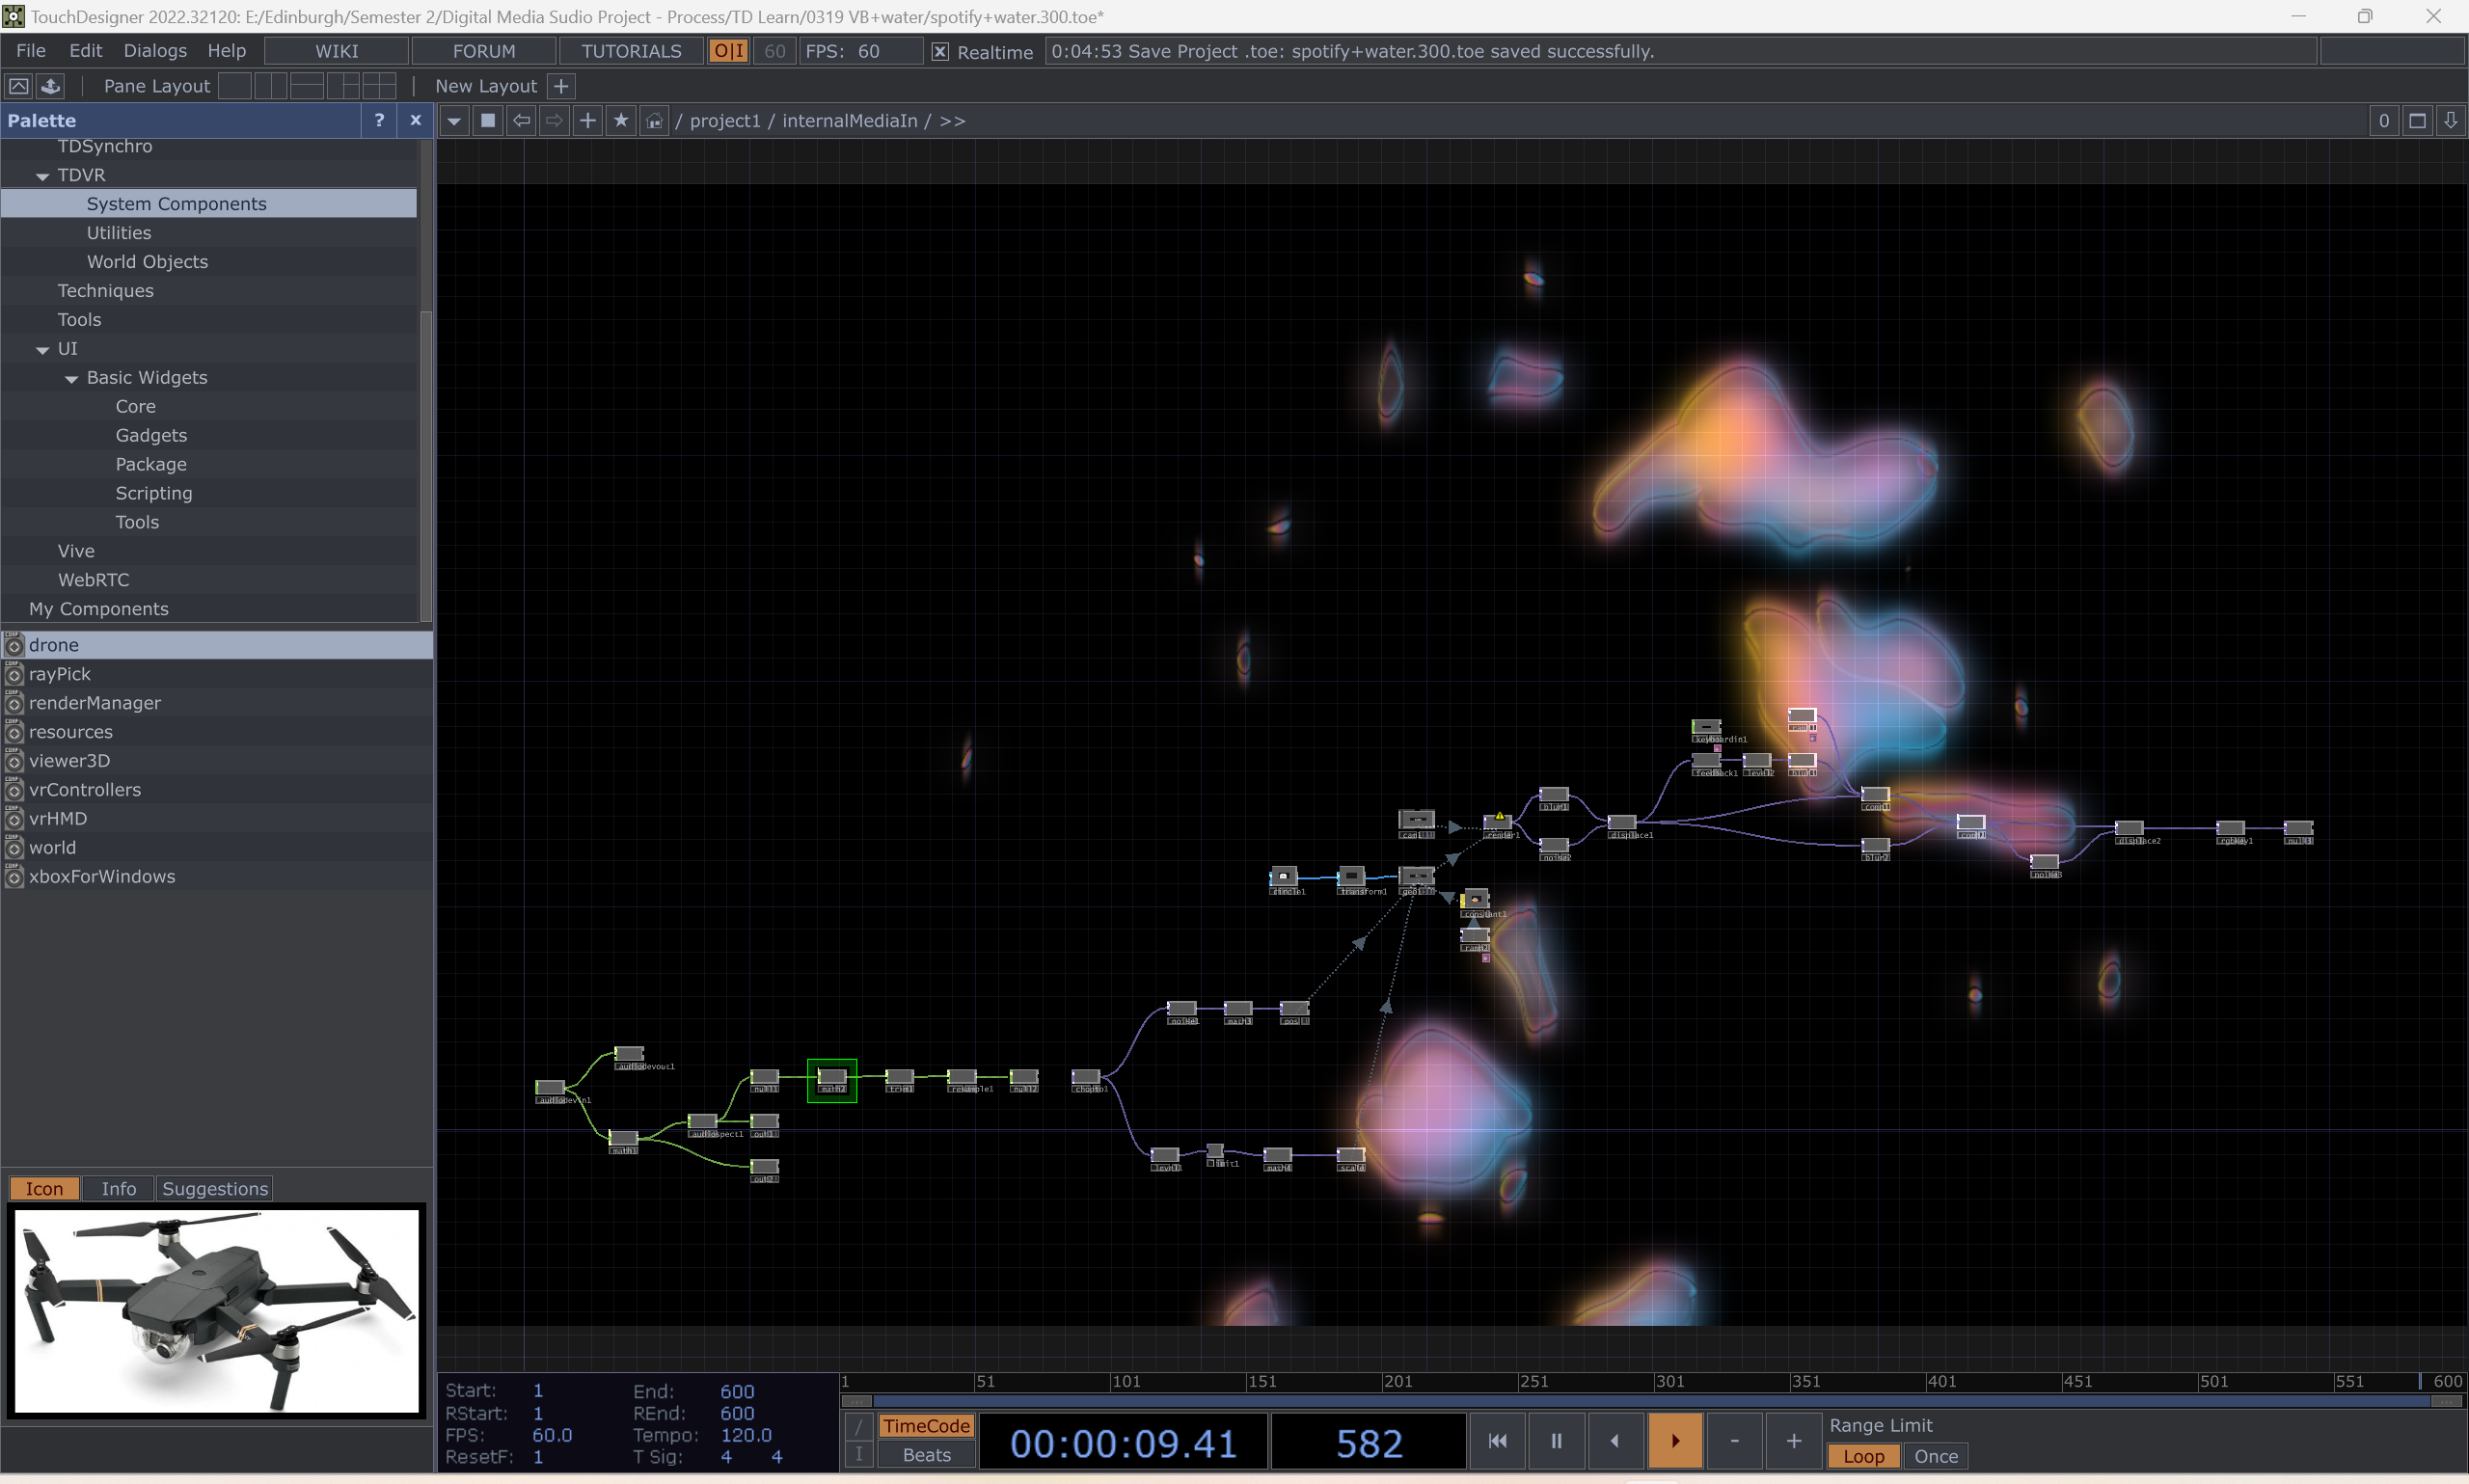
I used VB-audio Virtual Cable as the input and output of sounds. Therefore we can change the music at any time, just change the music in spotify or youtube, without inputing music files into Touch Designer and use switch to change. Also, it can deal with sound from microphone, environment sounds and music in place and generate animations, which we would like to project on the water ripples created by our installation.
Besides, the colors and shapes of the water ripples in TD can be changed through ramp and displace components respectively (details can be found in video and pictures①②). The size of ripples can be changed by paramater multiply in maths component. The volume of music can also be flexible to adjust.
One obvious problem is the quality of sound, and until now I have no idea about how to improve this.