https://blogs.ed.ac.uk/dmsp-process23/2023/04/26/group1-exploring-and-using-the-touch-designer/
https://blogs.ed.ac.uk/dmsp-process23/2023/04/26/group1-leapmotion-and-looking-glass/
Steps
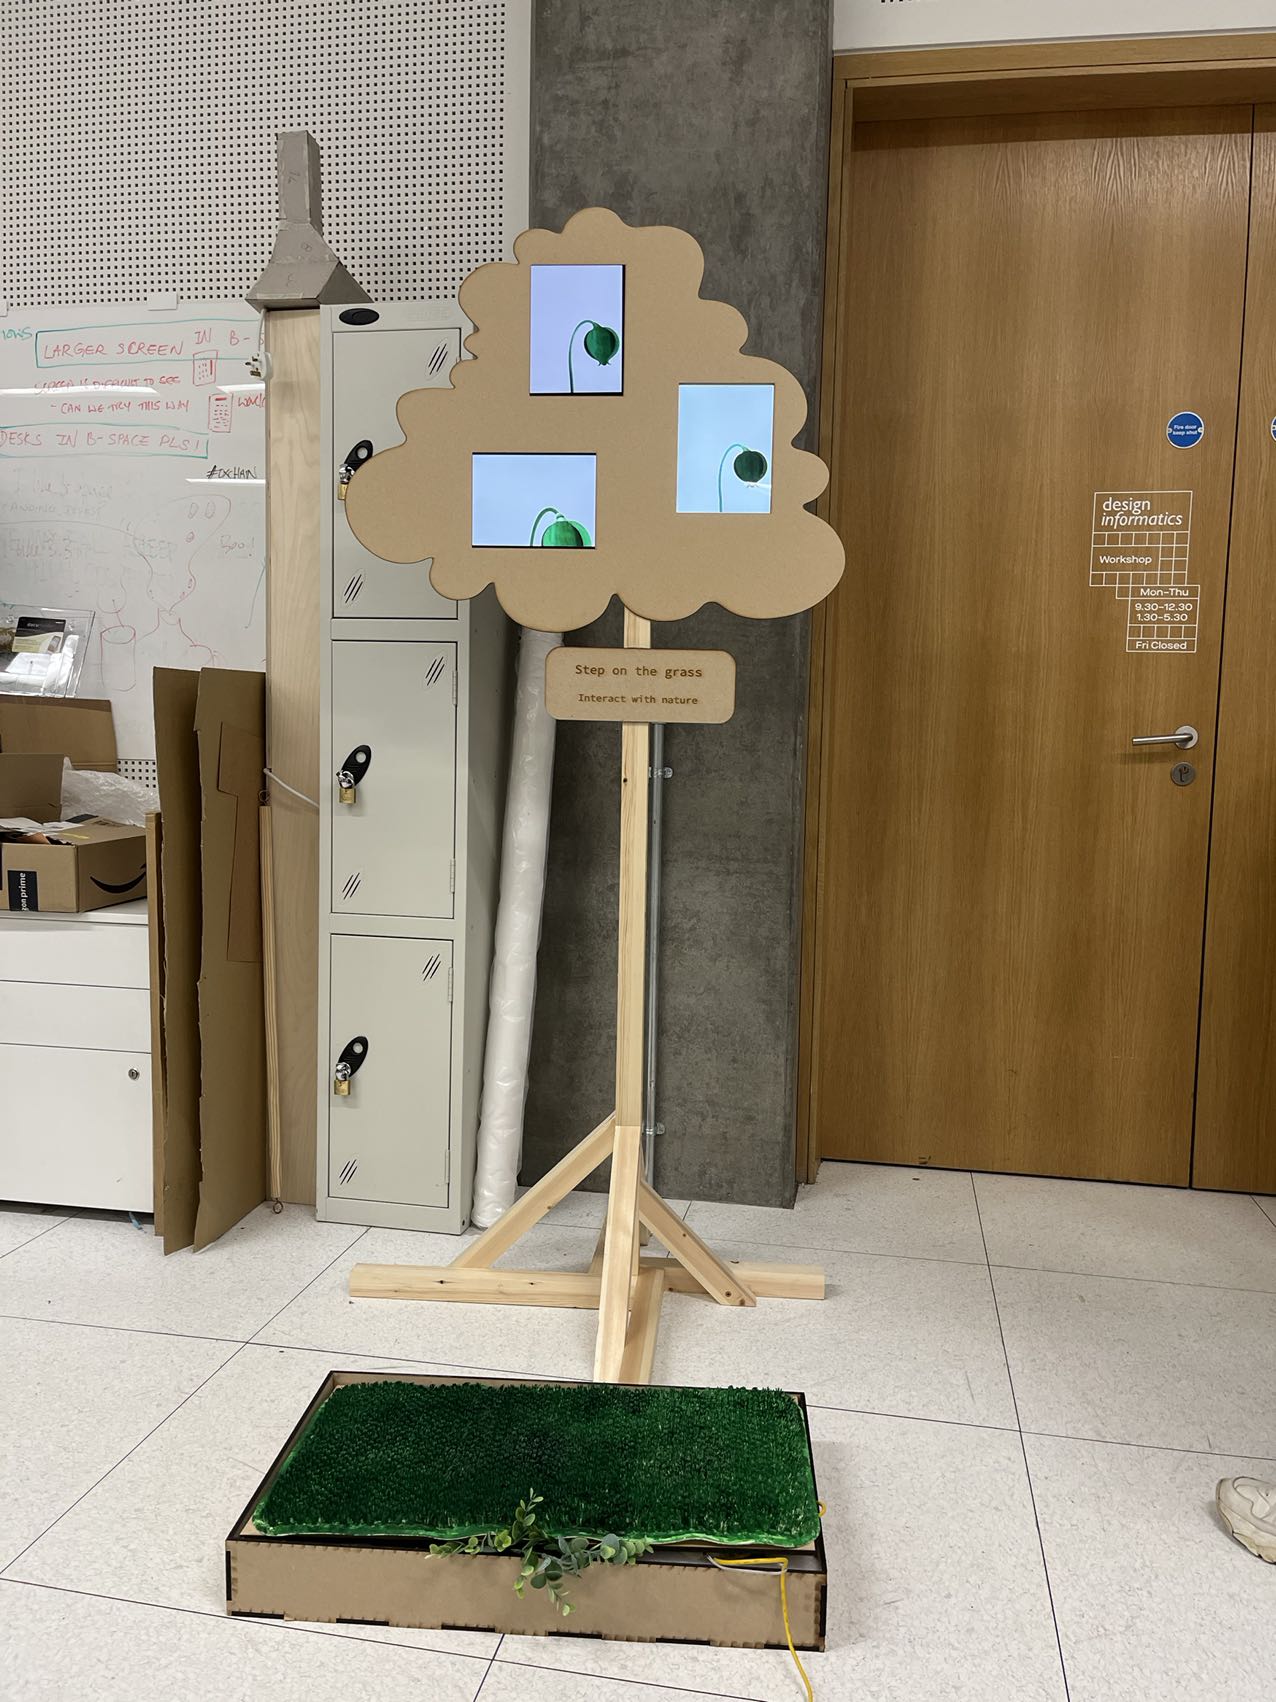
After the exhibition we revised our design in the light of the suggestions we received.
We have integrated the overall exhibition route more clearly and have unified the botanical themes to make the whole exhibition more clear.
We wanted to connect the interactive device to a video player and audio, and after exploring this we found that we could use touch designer to connect the arduino to the video and audio and control the audio and video playback through the interactive device.
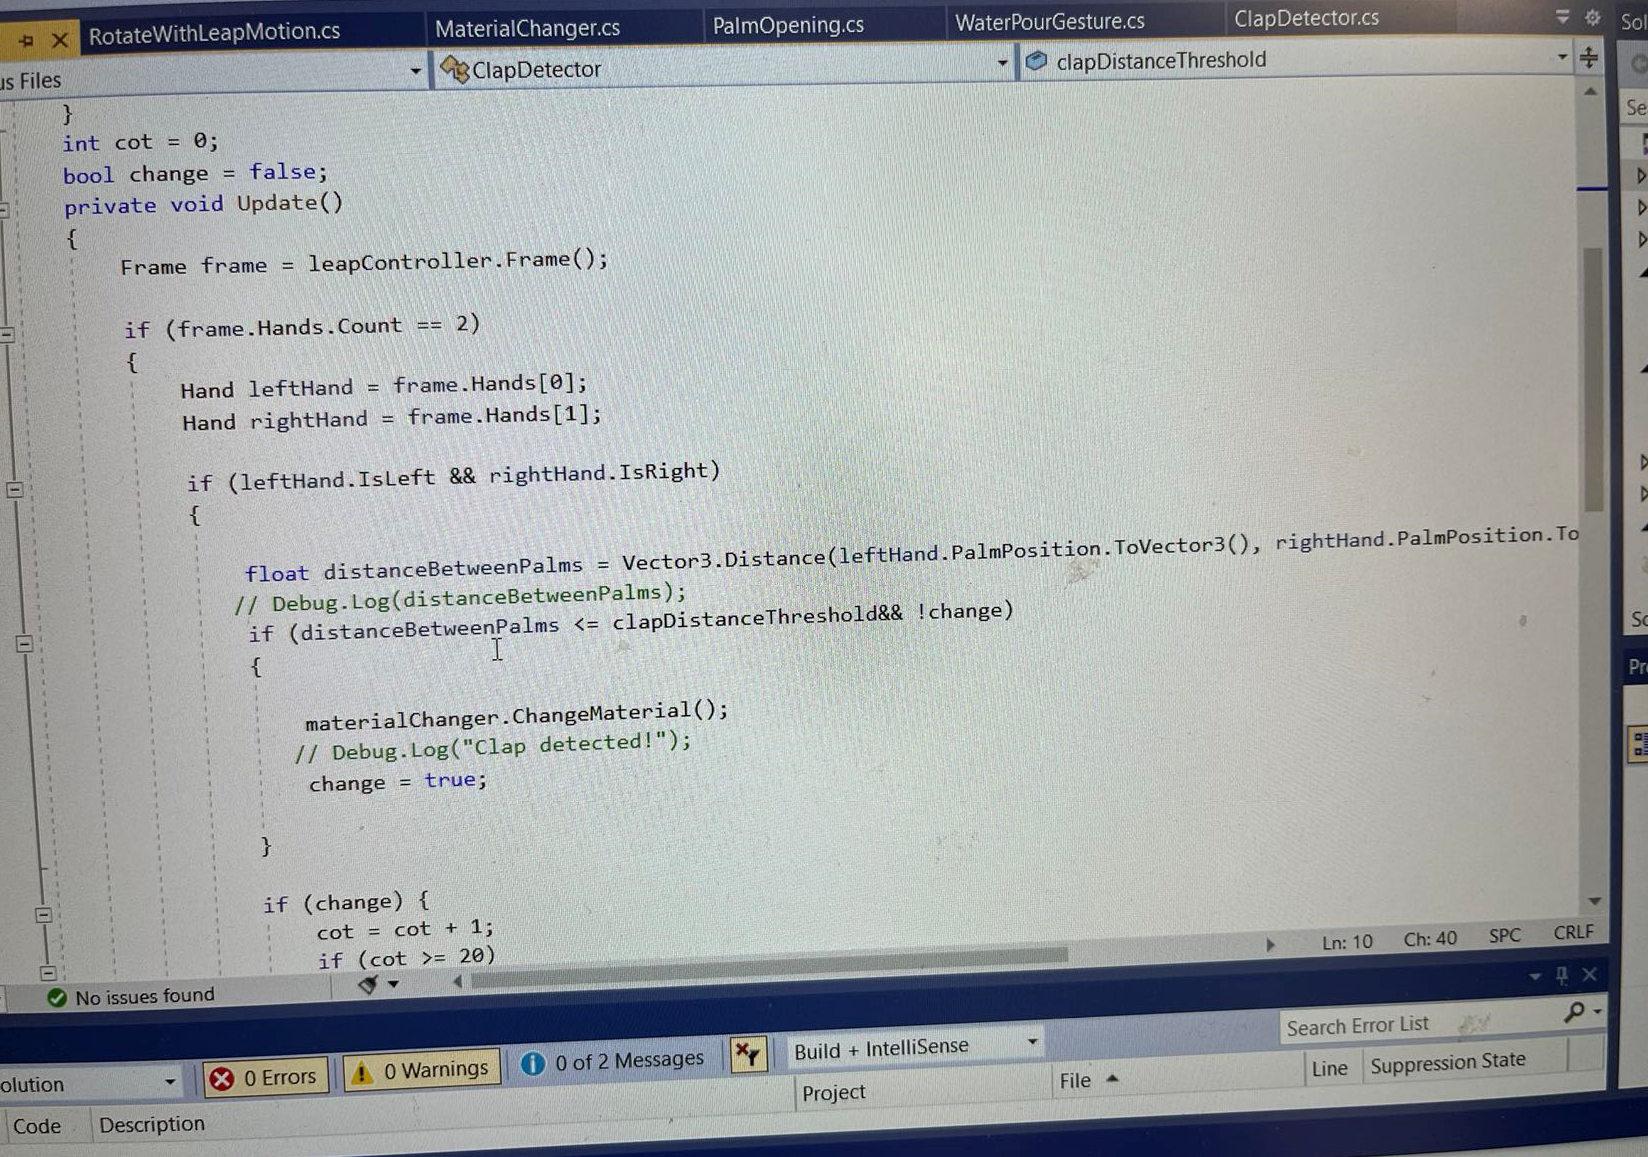
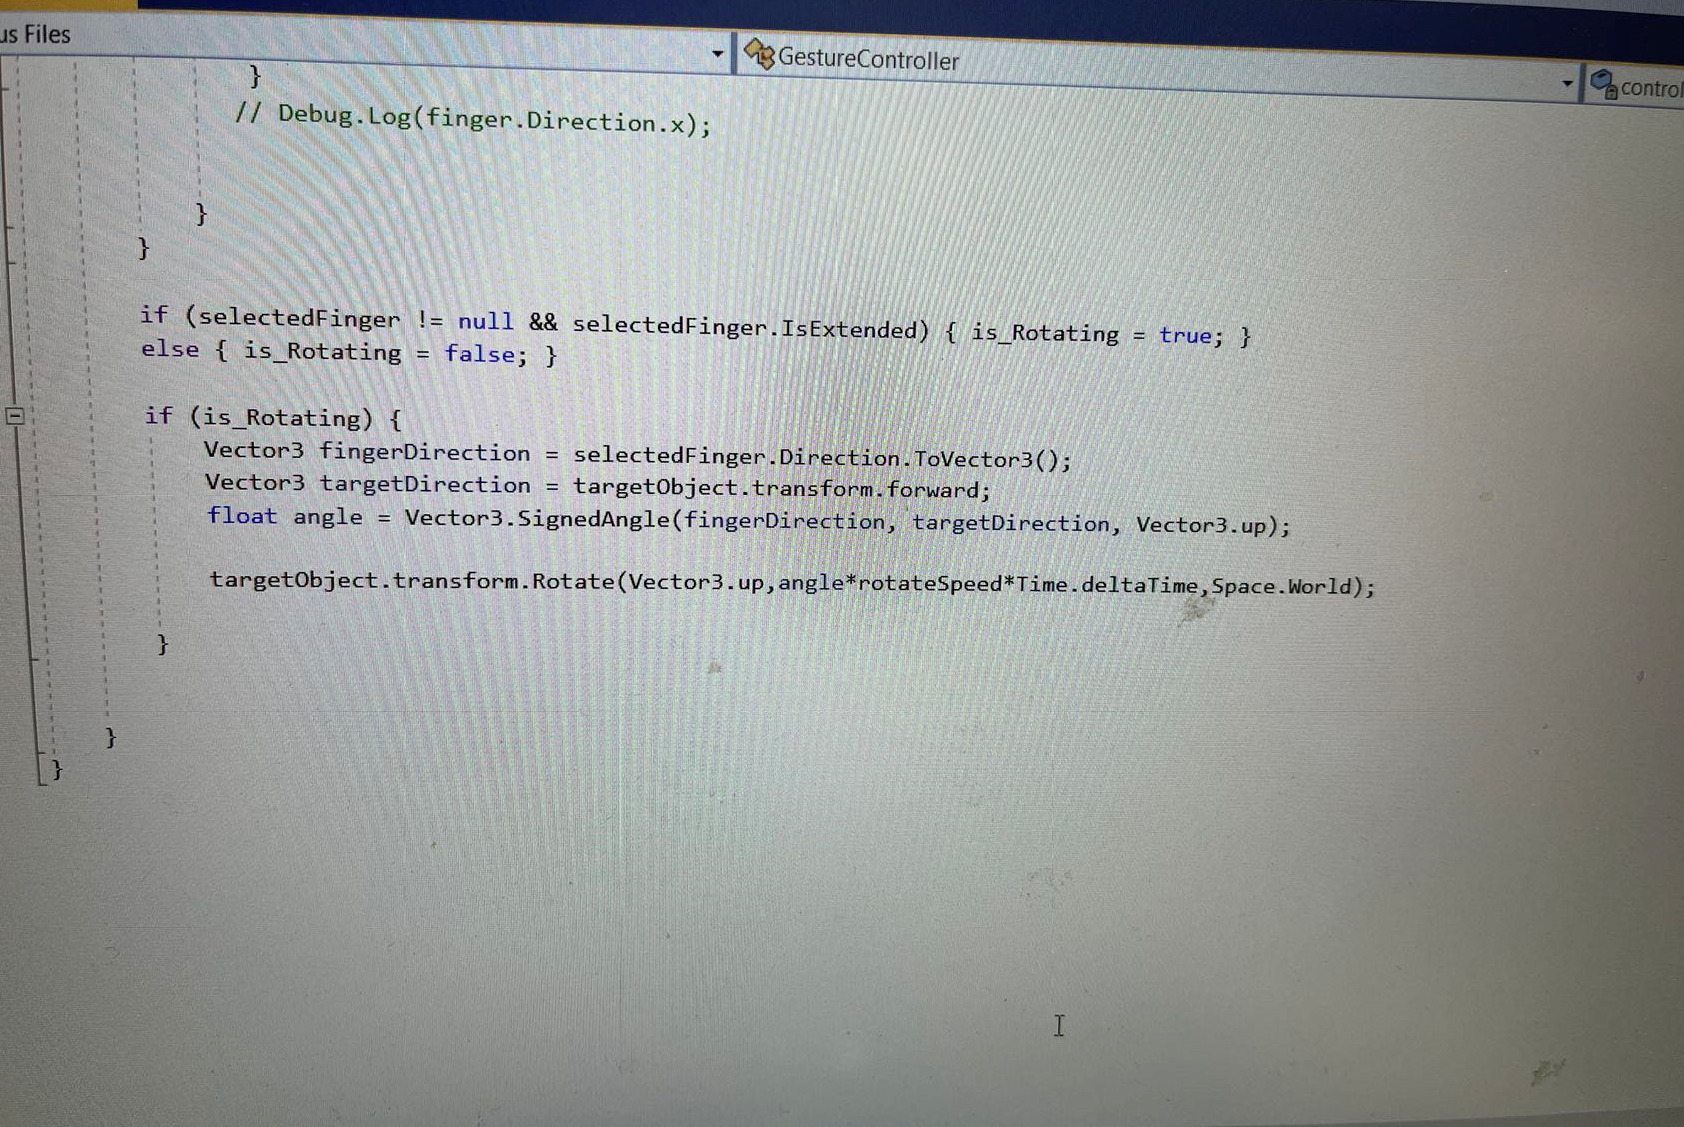
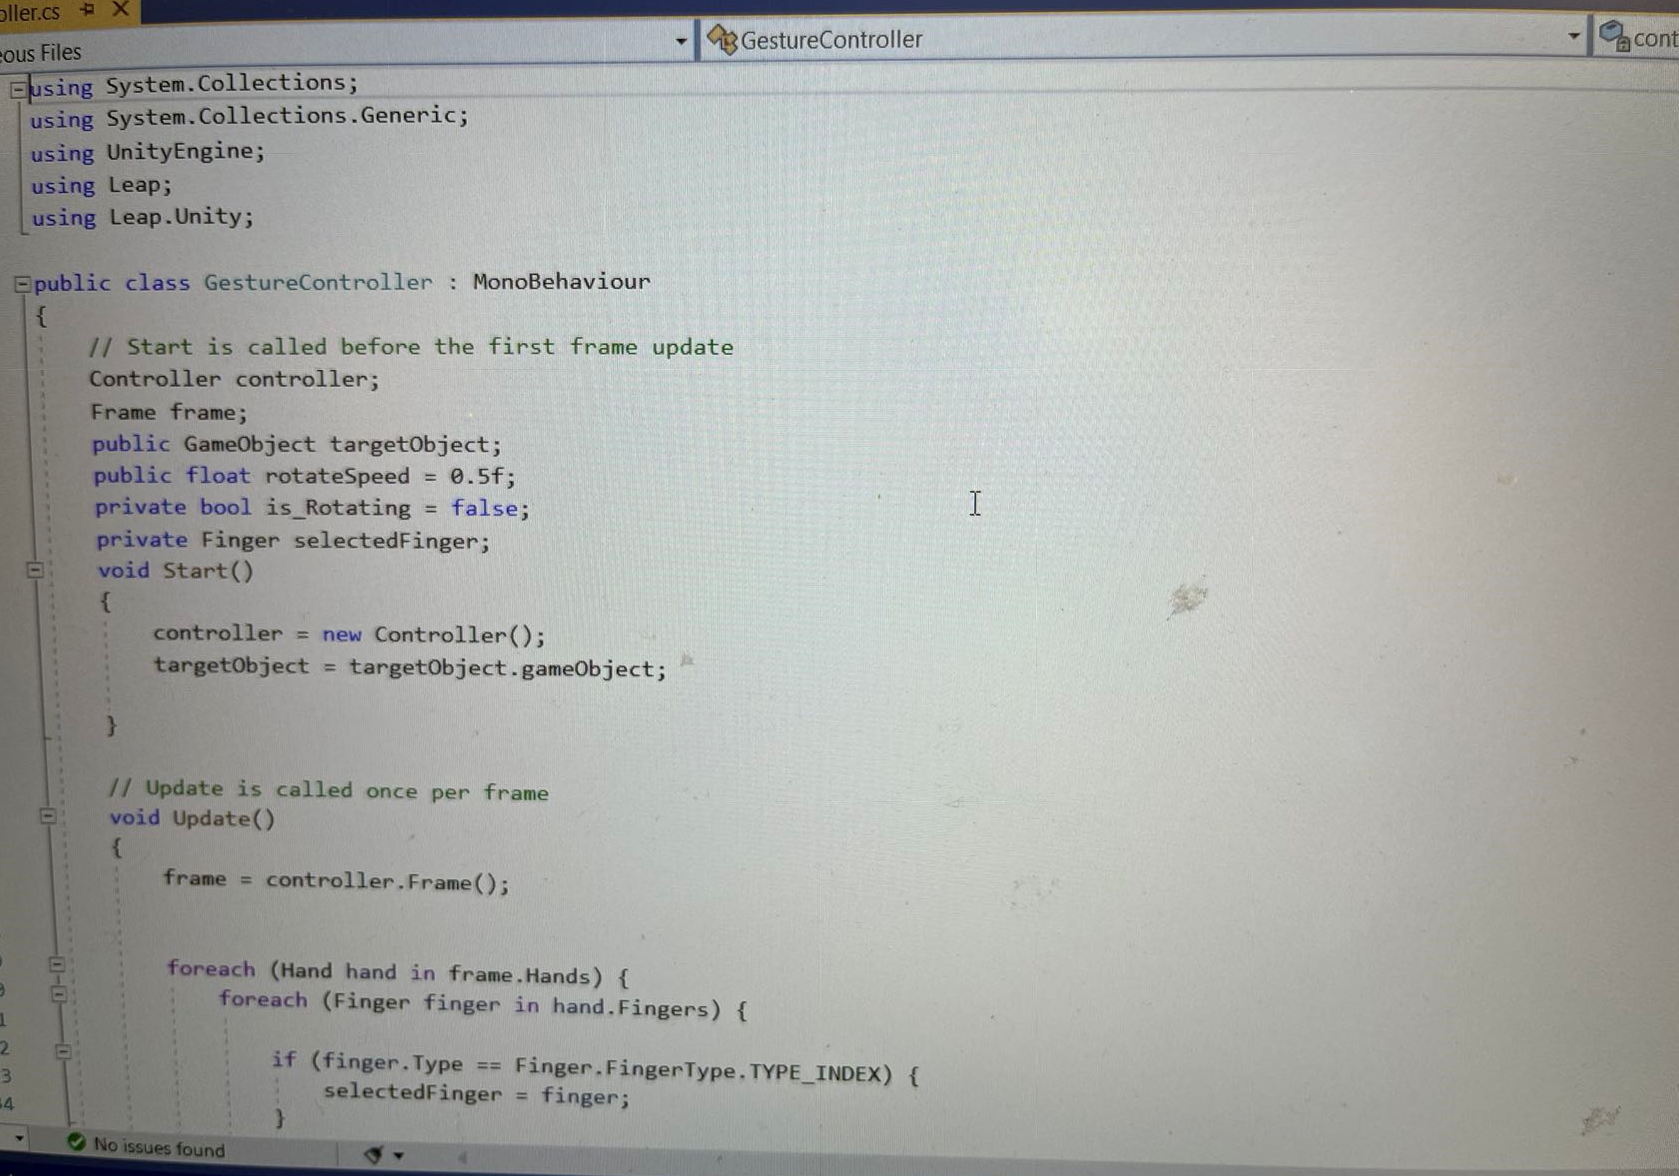
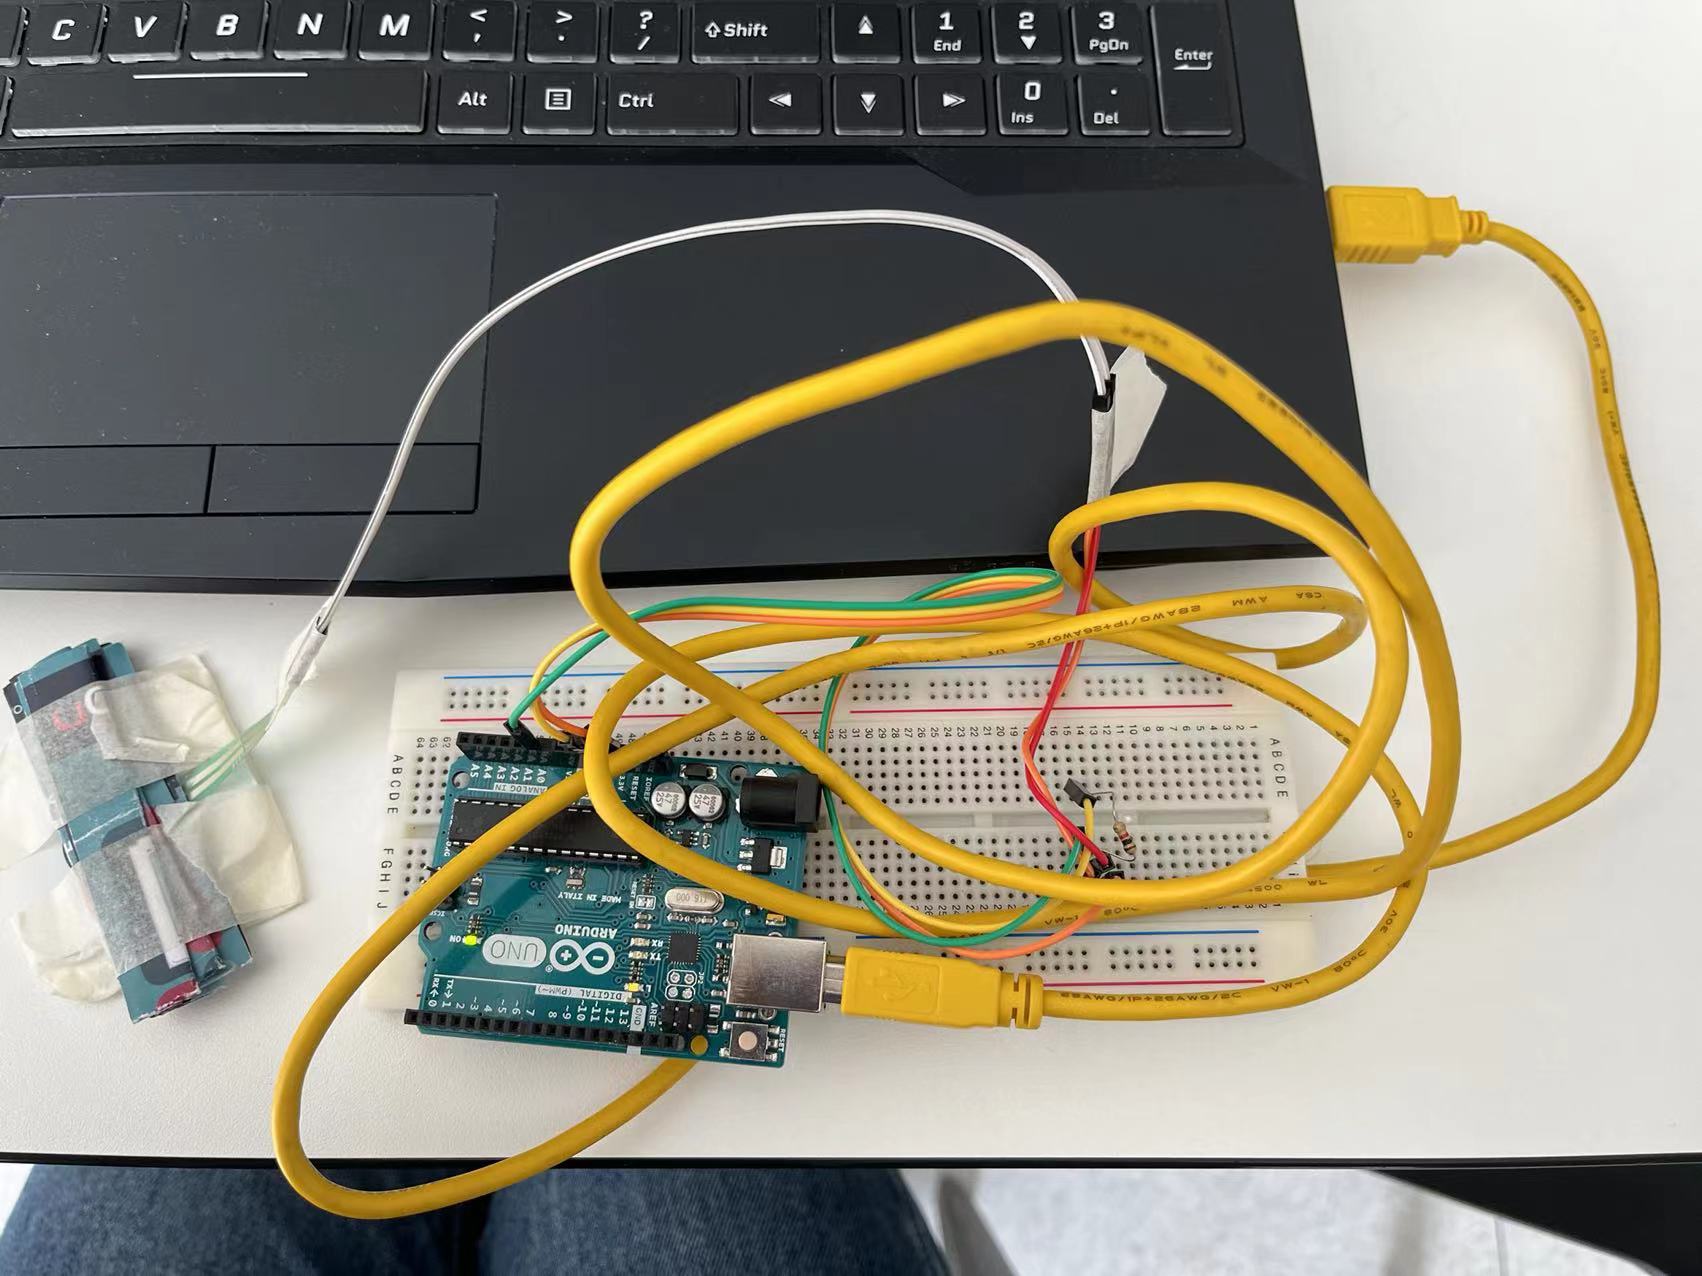
STEP
1.Connect the Arduino board and pressure sensor: Connect the pressure sensor to the Arduino board, and then connect the Arduino board to the computer.
2.Write an Arduino program: Use the Arduino development tool to write a program that reads data from the pressure sensor and transmits the data to the computer.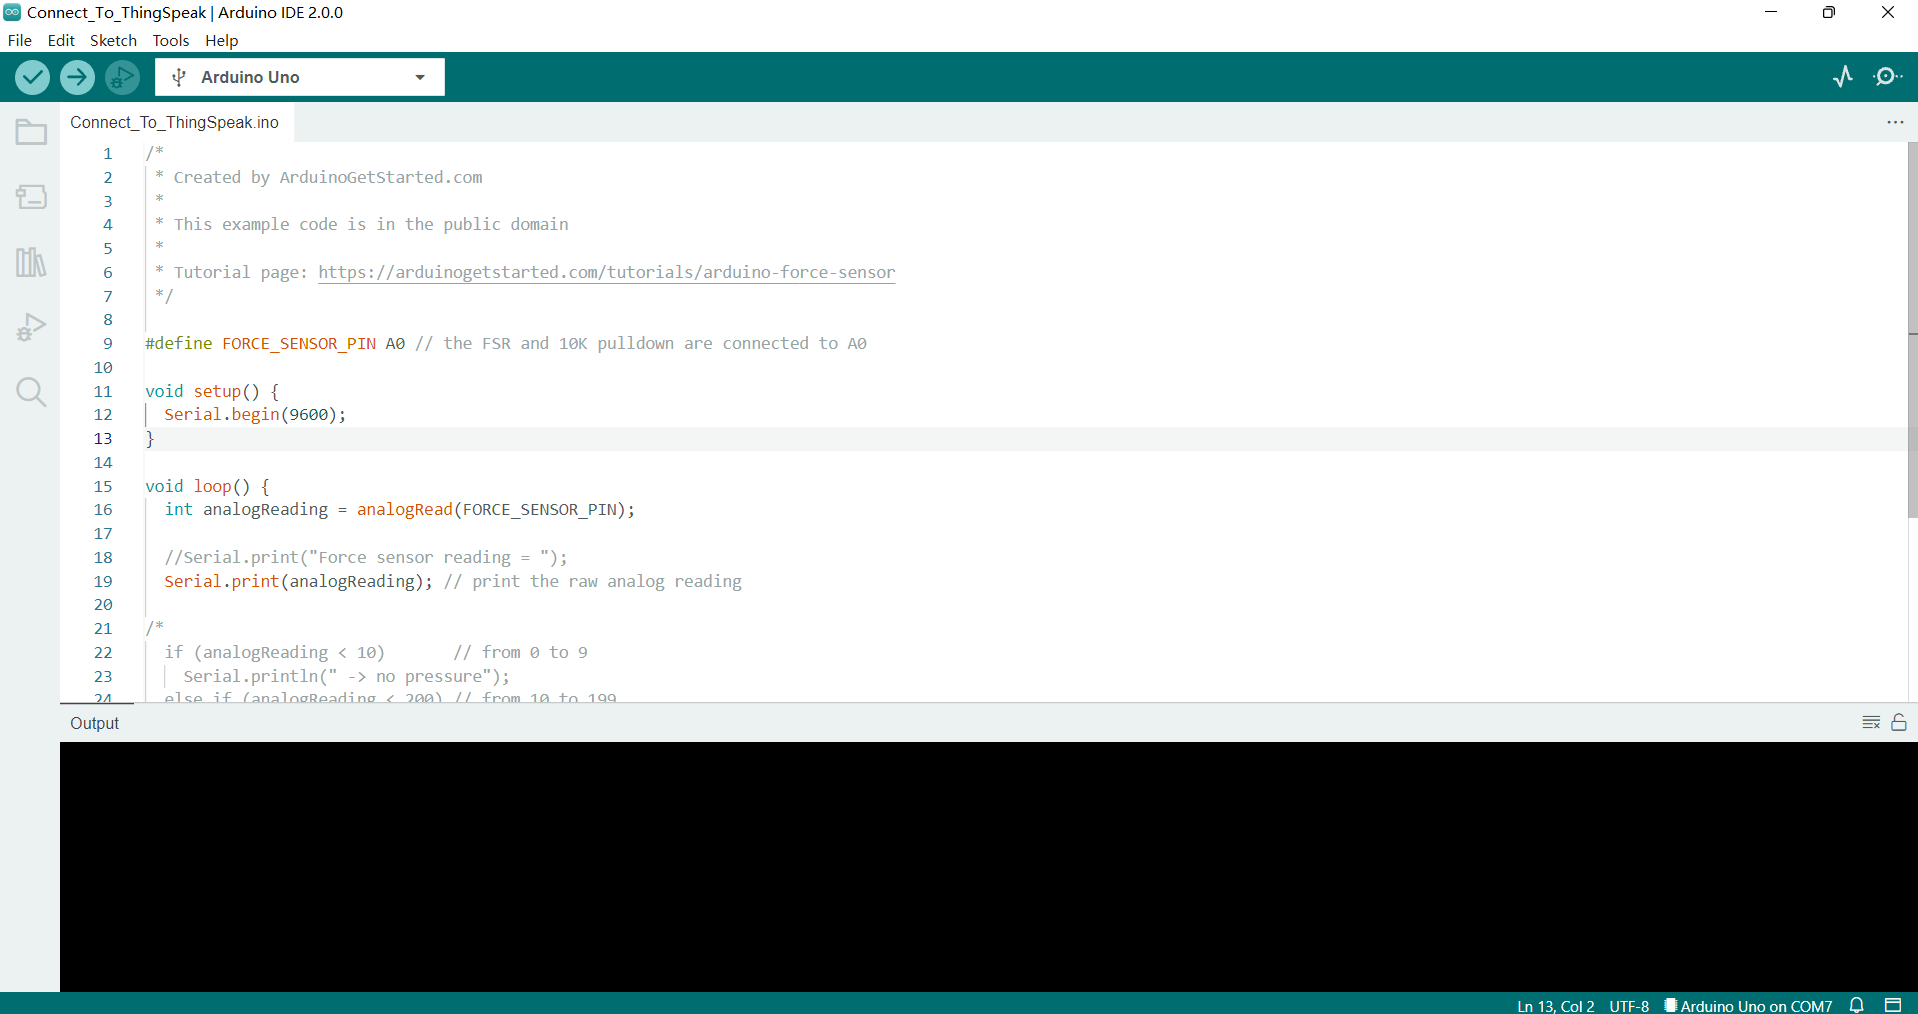
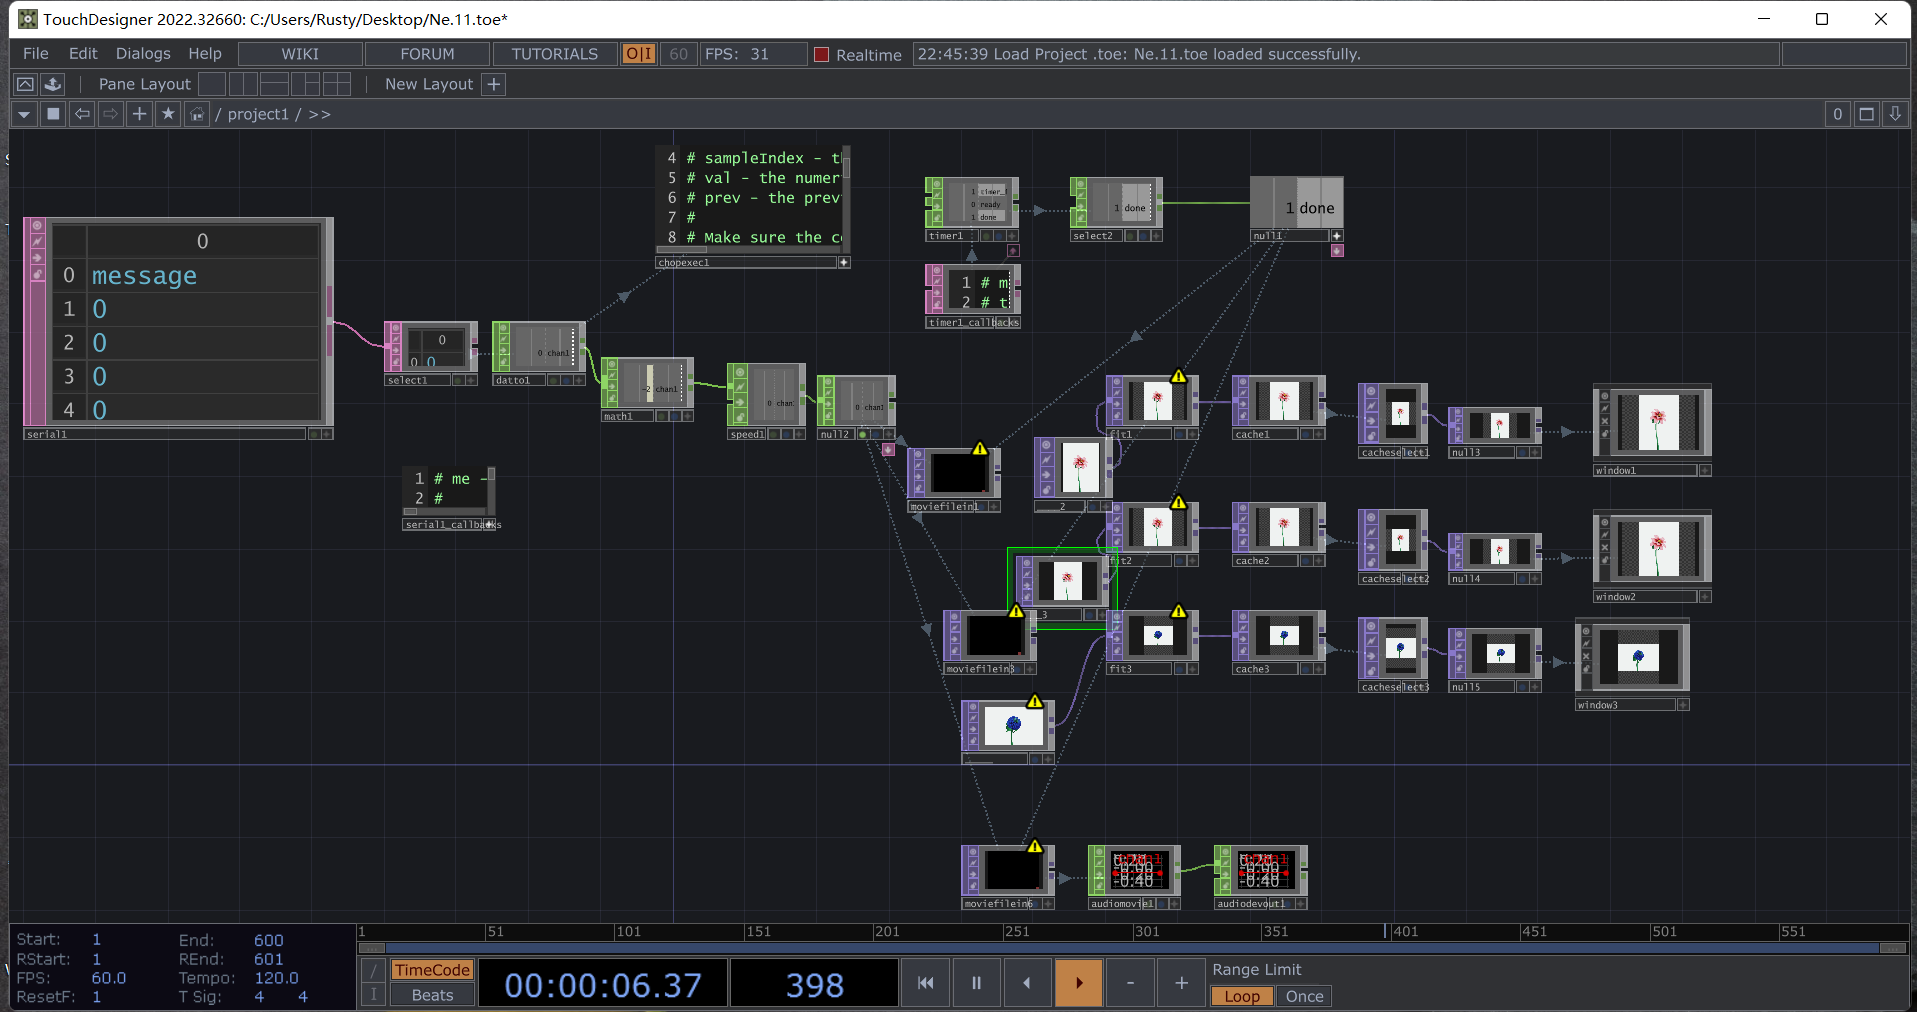
3.Install Serial DAT: In TouchDesigner, install the Serial DAT component, which can receive data sent by the Arduino board.
4.Configure Serial DAT: In TouchDesigner, configure the Serial DAT component to communicate with the Arduino board. The serial port and baud rate parameters need to be specified.
5.Create a trigger: Use the CHOP component in TouchDesigner to create a trigger that can receive data sent by the Serial DAT component and convert the data into a signal that can be used to control the speed of video playback.
6.Control the speed of video playback: Use the Movie File In component in TouchDesigner to import a video file, and use the trigger to control the speed of video playback based on the data received from the pressure sensor.
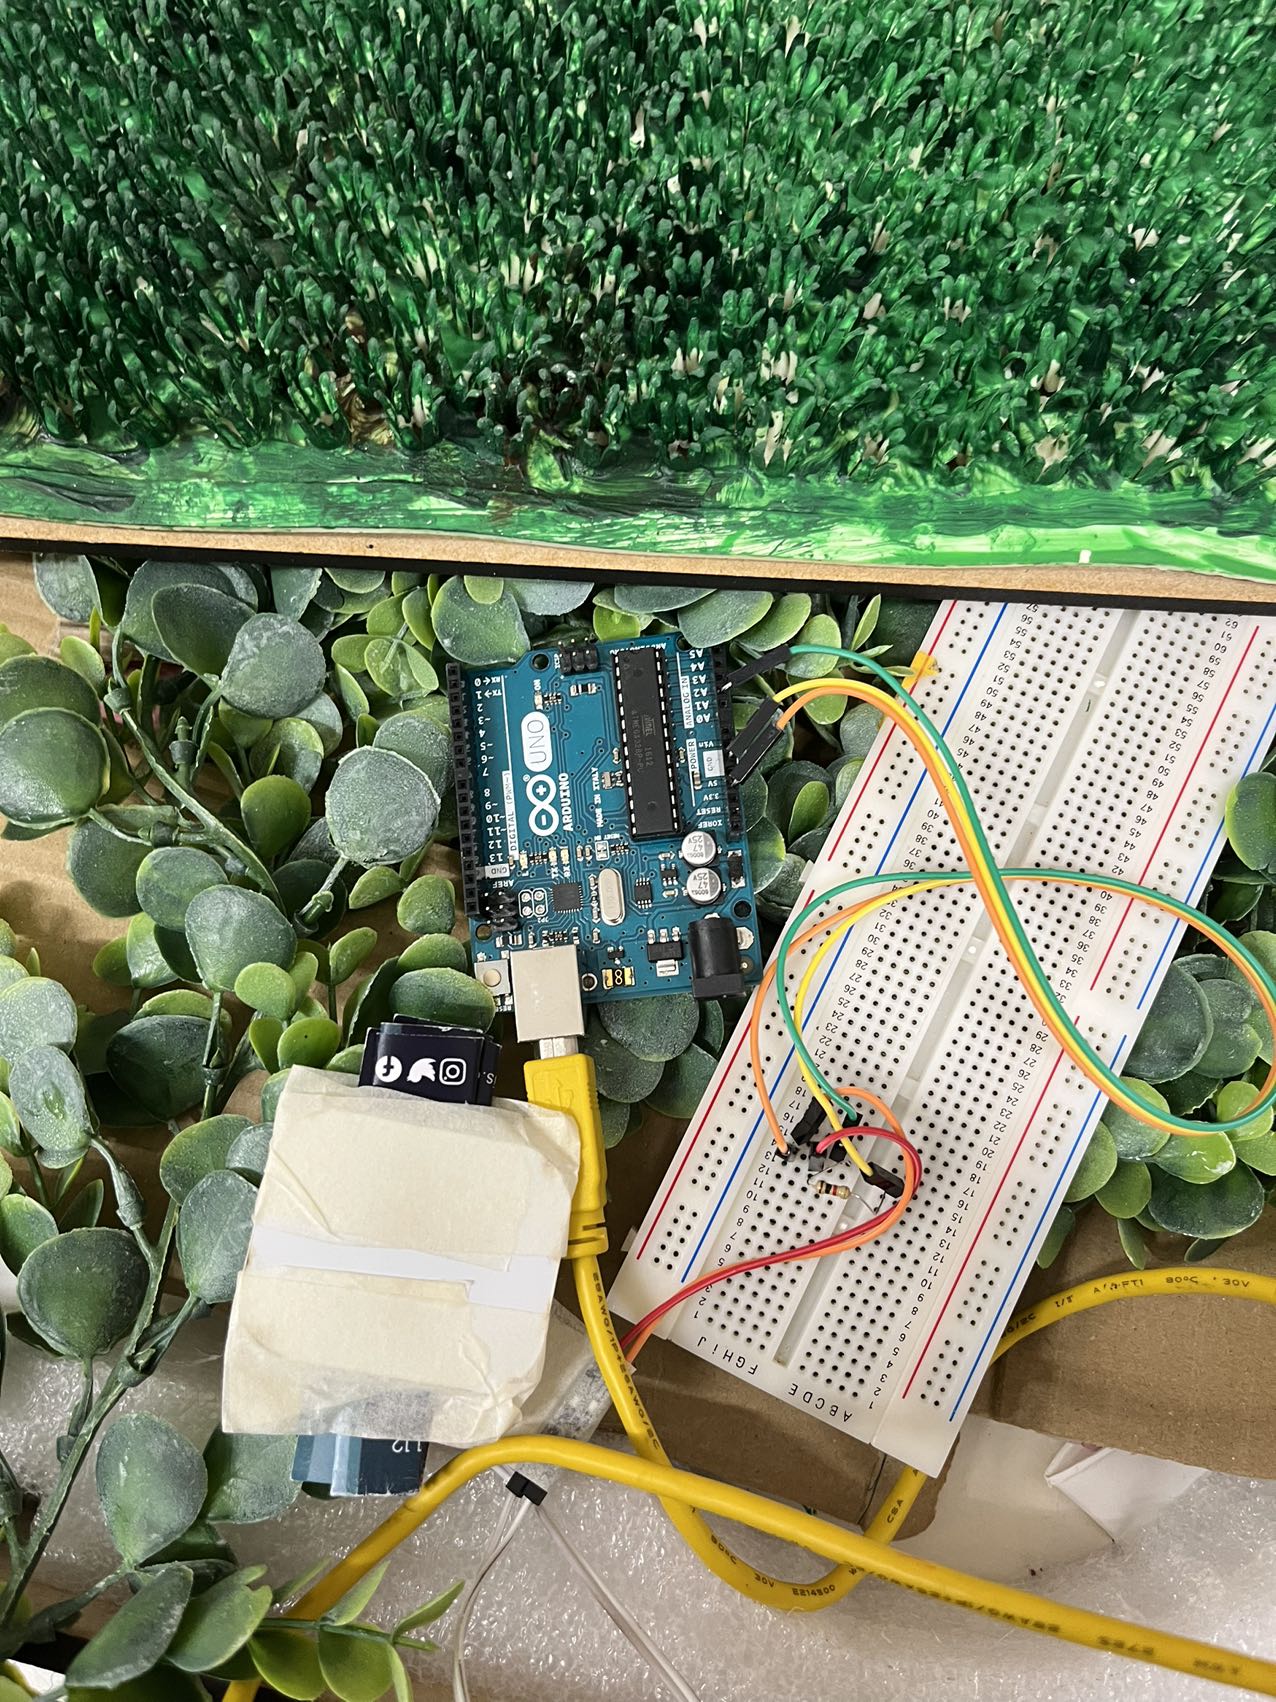
7.Connecting device
Reference