Any views expressed within media held on this service are those of the contributors, should not be taken as approved or endorsed by the University, and do not necessarily reflect the views of the University in respect of any particular issue.

sound design

Contributions and participation during the project’s progress-xiaole liu

1. Early Recording and Sound Library Construction

After defining the sound style and expressive goals for the five emotional stages, I moved on to developing the preliminary recording plan and took charge of collecting and initially organizing the sound materials.

This phase was not just about gathering sounds — it was a process of conceptual sound creation and design, centered around the project’s emotional framework.
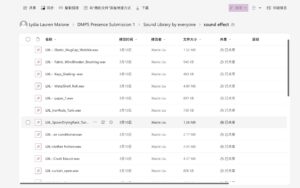
The goal of this task was to build a comprehensive sound library that would provide a rich and diverse selection of sounds for other teammates handling the final sound design, significantly boosting their efficiency and creative flexibility.

Categorization and Recording Planning

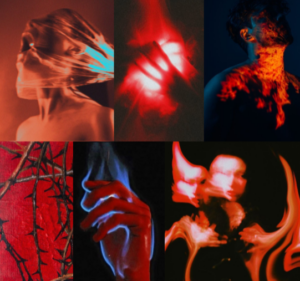
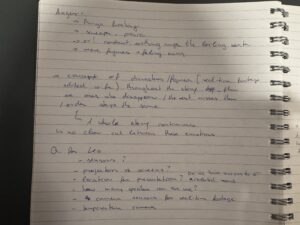
I first classified the five emotional stages and extracted their core sound characteristics. Combining my previous research and team discussions, I drafted dedicated recording lists and foley plans for each emotion. Here are a few examples:

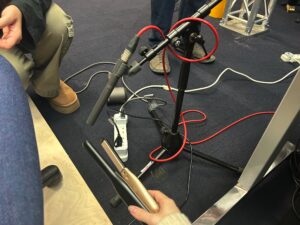
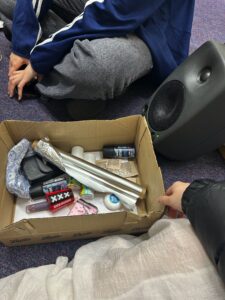
  • Anger: Focused on high-frequency, sharp, and explosive sounds. I prepared metal rods, glassware, chains, and recorded creative foley through collisions, friction, and dragging to capture tension and confrontation.

  • Denial: Aimed to evoke blurriness, disorientation, and undefined spatiality. I recorded blurred voices, fabric friction, and reversed water sounds to express psychological avoidance and confusion.

  • Bargaining: Simulated psychological tug-of-war and indecision. I used paper tearing, cyclic breaking syllables, and unstable rhythmic vibrations to create the texture of psychological uncertainty.

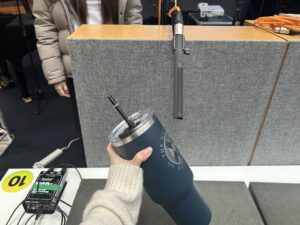
  • Depression: Used low-frequency, slow, continuous sounds to convey oppression. Recordings included deep echoes from buckets, ambient noise, and breathing sounds to create a closed, silent space.

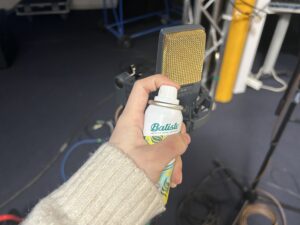
  • Acceptance: Represented gentleness, release, and continuity. I used soft metal friction, wind chimes, bells, and faint melodic fragments to simulate the smooth transition of emotions.

All recordings were independently completed by me.
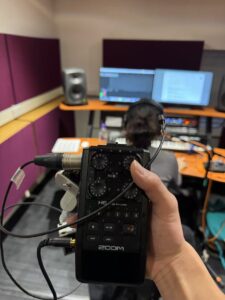
Each week, I rented professional recording equipment and secured sampling locations, striving to ensure high-quality and diversified materials. I also experimented with various techniques (different gestures, force variations, and medium changes) to capture more expressive raw sounds.

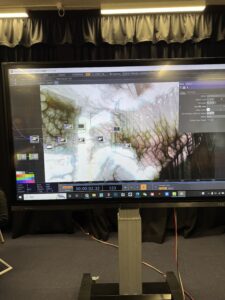
Post-Processing and Sound Design

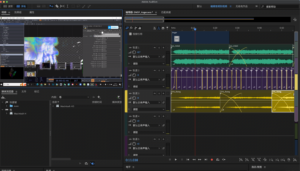
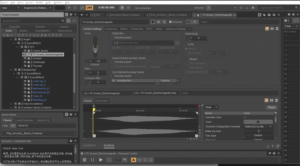
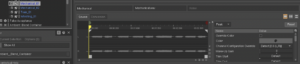
After recording, I imported the raw audio into ProTools for detailed post-production. To tailor the materials to each emotional stage, I applied various acoustic and stylistic transformations, including:

  • Reverb: Simulating spatial extension to evoke impressions of echo, loneliness, vastness, or relief.

  • Pitch Shifting: Lowering pitch for heavier emotions or raising it to induce unease and tension.

  • EQ (Equalization): Enhancing or attenuating specific frequency bands to sharpen, deepen, clarify, or blur the sound textures.

  • Delay and Time Stretching: Extending audio length, creating echoes, and simulating auditory time suspension.

  • Filtering: Applying high-pass or low-pass filters to make sounds feel distant, muffled, or veiled.

  • Reverse and Reconstruction: Reversing and rearranging audio clips to break naturalness and create surreal psychological effects.

  • Compression: Controlling dynamic range differences to enhance the emotional cohesion and impact.

Processing Examples

  • Denial (Denial):
    When editing fabric friction sounds, I applied a low-pass filter to reduce high frequencies, making the sound blurrier. Then, I added slight reverb and reversed segments to enhance the feeling of spatial confusion and psychological escape.

  • Anger (Anger):
    For metal collision sounds, I pitch-shifted the recordings up by half an octave to sharpen the harshness, applied saturation to introduce distortion, and added light delay to create chaotic spatial echoes, enhancing the tension.

Through these techniques, I not only boosted the expressive power of the recordings but also made them highly adaptable for real-time triggering and transformation within the interactive system.

The outcome of this phase was a well-organized Foundational Emotional Sound Library, allowing teammates to quickly and efficiently select materials based on the emotional scene they were designing.

2. Sound Design for Specific Emotional Stages

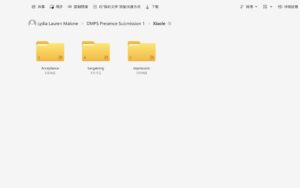
After completing the foundational sound library and preliminary editing, I took further responsibility for building the complete sound design for three emotional stages: Bargaining, Depression, and Acceptance.

At this stage, the work was no longer simply about recording or editing sounds.
It became a systematic design practice — exploring how sound and emotion interact and express together.

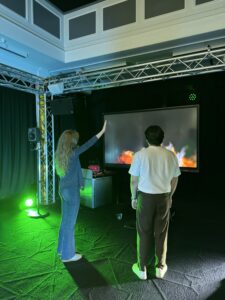
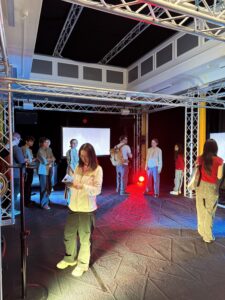
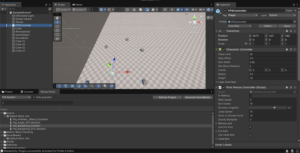
I needed to not only imagine sound reactions that would match the visual animations but also design dynamic sound scenes triggered by various sensors, ensuring that all sound elements fit together harmoniously, immersing the audience in a powerful emotional atmosphere.
This was not just sound creation — it was a process of translating sound into emotional language.

My Workflow

  • Refining sound style definitions: For each emotional stage, I clarified the desired sound characteristics, rhythmic logic, and spatial expressions.

  • Targeted recording and secondary creation: Based on sensor trigger types, I re-recorded critical materials and selected the best-fitting fragments from the sound library for deep processing.

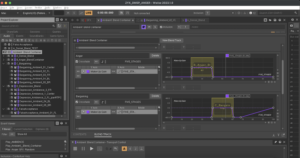
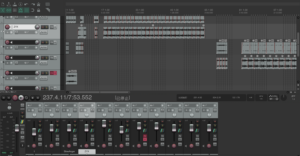
  • Sound construction in ProTools: I completed multitrack mixing, rhythm deconstruction, sound field design, and dynamic layering to ensure adjustability and stability within the system.

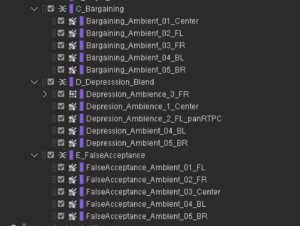
  • Organized sound assets by functionality: Grouped materials by “background ambiance,” “behavioral triggers,” and “emotional transition responses” for easy system integration.

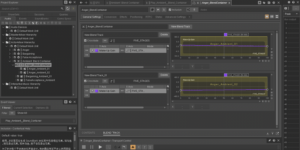
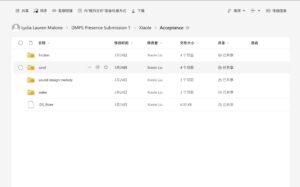
  • Established structured interactive sound libraries: Created clearly named and uniformly organized folders for each emotion, with usage notes (scenario, trigger method, dynamic range) to allow seamless integration by teammates working on Wwise, Unity, and Max/MSP.

Through this phase, I pushed the project from “sound materials” toward “systematic emotional sound expression,” ensuring cohesion, functionality, and artistic integrity within the interactive framework.


🎧 Sound Design Examples

Bargaining (Bargaining)

To express the inner wavering and repetitive struggle, I designed multiple loopable sound units simulating hesitant and anxious emotional flows.

Example 1: The struggle between tearing and re-coiling

  • Foley materials: Paper tearing, fabric crumpling, wood scraping

  • Design techniques:
    Cut tearing sounds into rapid fragments, time-stretch selected parts, overlay slight reversed audio and high-frequency filtering to simulate psychological “fracture and repetition.”
    Layered with background friction sounds to create a tactile tension.

  • Emotional intent: Express the constant push-and-pull between hope and denial.

Depression (Depression)

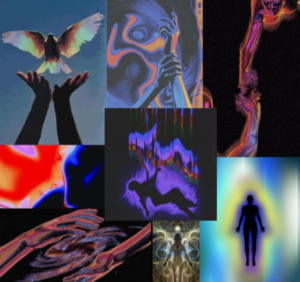
For this stage, I aimed to convey deep emotional downpour, loss, immersion, and self-isolation, avoiding strong rhythms to create a “slow-time” and “emotional stagnation” atmosphere.

Example 1: Damp, Oppressive Interior Space

  • Foley materials: Water echoing inside metal buckets, slow palm movements across wood flooring, low-frequency ambient noise

  • Design techniques:
    Pitch-down metal water echoes by about 5 semitones; add long-tail reverb and room simulation; overlay low-frequency brown noise to create pressure.
    Palm sliding sound filtered to preserve only the low-mid range, maintaining subtle motion tension.

Emotional intent: Build a psychological space that’s damp, heavy, and hard to escape, reflecting the chaotic silence of depression.

Acceptance (Acceptance)

As the most peaceful and open stage, the sound design for Acceptance needed to create a gentle, transparent, spatially flowing atmosphere — while maintaining emotional richness and avoiding flatness.

Example 1: Clear Ambiance of Wind Chimes and Metal Friction

  • Foley materials: Light metal taps, wind chimes, copper wire friction, glass resonances

  • Design techniques:
    Overlay wind chime sounds with fine metallic friction; EQ to emphasize the high-frequency clarity; set glass resonance as the background layer with long reverb; add subtle modulation to copper friction for liveliness.
    Control overall volume dynamics to maintain a slow, flowing texture.

Emotional intent: Create a “clear, peaceful, continuous but not hollow” emotional atmosphere, expressing release and inner stability.

Example 2: Fragmented Melodies and Shifting Harmonies

  • Foley materials: Finger-plucked music box, toy piano, breath sounds, small chime bells

  • Design techniques:
    Cut piano notes into fragments and reassemble into irregular melodic lines; add unstable synthetic harmonies and low-frequency fluctuations; convert breath sounds into airy resonances for delicate spatial textures.

Emotional intent: Express the idea that even under a calm surface, traces of emotional echoes persist.

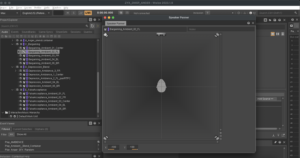
These sounds were set to trigger dynamically based on audience proximity and movement, enhancing the feeling of flowing emotions across space.

Conclusion

By the end of this phase, all sound assets were meticulously categorized by emotional type, functionality, and acoustic features, ensuring that teammates could directly integrate them into the interactive system without further editing.

This work greatly improved the team’s sound integration efficiency while preserving the emotional consistency, controllability, and artistic completeness of the final installation experience.

Research for project

Project Overview

Name: Liu Xiaole
Project Title: Five Stages of Grief – Immersive Interactive Audiovisual Installation

THE DAY LEFT FIELD is an immersive interactive audiovisual installation inspired by Kübler-Ross’s model of the five stages of grief (Denial, Anger, Bargaining, Depression, Acceptance). Through the seamless integration of sound, visuals, and sensor systems, audiences interact with the installation in real-time within a 144-square-meter space, experiencing the flow and transformation of emotions across the environment.

The project team was divided into three main modules: Sound, Visual, and Engineering. My primary responsibilities were centered on the research and development of the sound system, building the sound library, and filming and editing the project documentary. My work spanned the entire process—from concept development to final presentation.

Initial Phase|Establishing the Theoretical and Practical Foundation for the Sound System

At the start of the project, how the sound system would express abstract emotional stages remained an open question. I actively participated in the initial brainstorming for the sound system design and took the initiative to undertake theoretical research on the relationship between sound and emotional perception, aiming to build a solid perceptual foundation for later creative work.

During this phase, I consulted a large volume of psychoacoustic studies on how sound influences the experience of negative emotions, reaching key insights such as:

Low-frequency, continuous sound waves often evoke feelings of oppression and heaviness;

High-frequency, sharp sound effects easily trigger tension or anger;

Noise or irregular rhythms are commonly used to simulate internal conflict and chaos.

These theories provided critical direction for the later sound design of emotional stages such as “Denial,” “Anger,” and “Depression.” For example, the “Depression” stage was constructed as a space filled with low frequencies and blurred echoes, while the “Anger” stage heavily utilized fractured rhythms and sudden, sharp sound effects.

At the same time, I researched and analyzed multiple cases related to interactive emotional installations, including:

TeamLab’s interactive multi-channel art exhibitions

THE DAY LEFT FIELD’s immersive audiovisual projects

These cases not only inspired our technical strategies for linking sound and visuals but also pushed the team to reconsider how sound in a space could dynamically respond to audience behavior.

Building on this research, I worked with the team to establish an Emotion-to-Sound Mapping Chart that served as a consistent guide throughout the design process:

Emotional Stage Sound Characteristics
Denial Blurred, unstable, low-directionality ambient sounds
Anger Sudden, sharp, high-energy fractured rhythms
Bargaining Psychological tension created using nontraditional sound sources like paper, liquids, and water ripples
Depression Low-frequency, blurred, echo-rich spatial ambiance
Acceptance Gentle, progressive, spatially layered soundscapes

In addition, I continually proposed new ideas for sound expression, such as:

Using wind chimes or soft metallic sounds to convey the gentleness of “Acceptance”;

Introducing “silence” or extreme low-frequency elements at certain stages to create emotional contrast;

Exploring the idea of expressing presence through absence.

These discussions and reflections helped the team establish a clear and in-depth sound design methodology:

“Using psychological models as a framework, combined with the physical properties of sound and audience interaction mechanisms, to construct dynamic emotional soundscapes.”

Although this phase belonged to the early stage of the project, it was undoubtedly one of the periods where I had the deepest involvement and the strongest impact. It laid the theoretical foundation and directional alignment for all subsequent sound collection, editing, and system integration efforts.


Personal Blog-Sound Work-Week 10&11 And Project Critical Reflection

In the last two weeks, I finished all the sound work in the tenth week, so the main work in the last two weeks was to integrate all the work parts and test with other team members. We scheduled three tests, two in Atrium and one in Studio 4. We also found some problems in the Wwise project, for example, the sound playback distance was not set correctly, the attenuation distance was different, etc., but they were all solved smoothly in the end.

In the first test

We successfully connected four distance sensors. When participants put their palms close to the distance sensors, they can control the sound volume to attenuate as their palms move. However, when they are completely covered by their palms or other objects, the sound disappears completely. When all four distance sensors are covered for a few seconds, our emotions and vision will automatically jump to the next stage. In each stage, the four speakers will play the same ambience of that stage, and the four sensors also control different ambiences in four directions.

In the second test

Since my computer was not compatible with Red’s sound card, I spent a lot of time transferring the entire project to Lidia’s laptop. On the same day, I tested it on the speakers in the Atrium room, placed the ambiences in all four directions on the corresponding speakers, and connected the visual and sound parts.

Project Critical Reflection

I personally did half of the sound work in this project and encountered many difficult problems, such as how to record the original audio? How to make these original audios into suitable ambience? How to cooperate with other students in the project? But these questions were well answered on the day of the exhibition on April 2, 2025. As a sound design student, I gained very valuable experience in this project. I have mastered the two softwares Wwise and Unity proficiently and understood the working principles. I believe this will be of great help to my future work. If I have more time, I will improve the quality and relevance of all sounds, and add some transition sounds when the emotions are excessive, so that the audience’s auditory immersion and perception of emotions will be enhanced.

Personal Blog-Sound Work-Week 9

The five-stage sound work was basically completed in the ninth week. Lidia and I completed the integration of the two projects on Wwise, and with the help of Leo, I created a Unity project to test our sound part. This was a very important progress, which meant that our sound could work.

In Wwise, a blend container is set up to control the five stages of sound, and they are staged, with a value of 20 for each stage, and connected to the FIVE_STAGES RTPC.

On Wwise

At this week’s meeting, Leo suggested changing the design mode of one ambient sound and five sound effects on each speaker to setting a “Center sound” on four speakers at a certain stage, which is our Main ambience, and adding five Ambiences to the speakers in the four directions of FL, FR, BL, and BR to connect touch designer for interaction, and changing from triggering SFX with distance sensors to triggering Ambience. I think this is a very good suggestion, because for Ambience, it can better reflect the sense of distance and the weakening of sound, which makes our project more playable. In terms of the sound work, Lidia and I shared this work, and I was responsible for “Bargaining”, “Acceptance” and half of “Depression”.

This is one of the Bargaining Ambience

On Unity

We built a project file with four speakers to simulate the Atrium room in Alison house and used it to test our audio, which was successful. In the next two weeks, we will complete all the sound work and conduct live testing in the Atrium.


Personal Blog-Sound Work-Week 7&8

During these two weeks, with the guidance of Leo and the help of Lidia, I completed all the work on “Anger” and “Bargaining” and the ambient work of “False Acceptance” in Wwise, and created Blend container events to gradually control these ambient sounds. I also created triggers in Unity to test these sounds. After testing, these sounds can run correctly, which is a good preparation for the next stage of assembly work!

ZYX_ChangedFalseAcceptance_Ambient

Leo gave me a very useful suggestion on the Anger ambient. He asked me to create a blend container under the blend container to control my two anger ambients. This suggestion made my ambient effect even stronger.

This week I have created a test model in Unity and am preparing to assemble Lidia’s Wwise project files and test them. Next week we will conduct the first test of the entire project in Atrium.


Personal Blog-Sound Work-Week 5&6

In the fifth and sixth weeks, my main responsibility is to record the sound, create the sound for the second time, and create the Wwise project.

In the five stages of the wwise project, my work at this stage is to complete all the ambient and SFX work of “Anger” and “Bargaining”. It is expected to complete the ambient construction of “False Acceptance” in week 7-8. This part of the SFX is produced by Lidia.

1.Anger Stage

According to Chunyu’s video, I first use the original audio file I recorded on AU to produce ambient sound, and then make sound effects after making ambient sound, and add them to Wwise.

In the ambient construction of Anger, I added the warning sound and the metal tearing sound recorded with an electromagnetic microphone, and added pitch converter, low-pass filter, and smaller reverberation to create a feeling of unease and anger.

In the sound effect part, I chose some high-frequency sounds to enhance the feeling of anger.

2.Bargaining Stage

At this stage, I mixed the sound of rain recorded at submission1 and the sound of knocking on the piano lid to make environmental sounds, and made them standardised and added some effects.

In terms of sound design, I have combined most of the sound effects on Reaper to create a feeling of “bargaining”.

Meeting and Recording on 25 FEB

In terms of sound design, Lidia and I have confirmed the audio materials for our first sound design today. We borrowed several different microphones from the music store to record ambient sound and sound effects, and included them in the first stage of sound design. During the recording process, Kyra assisted me in recording a lot of sound materials at Alison House. And Leo gave a lot of useful and valuable advice before recording, which made our recording process very easy. Lyida also worked with Leo in the afternoon to study sensor and technology issues, and Lidia and I also took her advice on sound.

Visual Research and Inspiration: Visualization Mood boards

In conceptualizing this installation, we developed storyboards to explore how visual elements can convey the five stages of grief. Our focus was on creating immersive, evocative visual experiences that capture the essence of each emotional stage by curating images, colour palettes, textures, and abstract representations.

For each stage of grief – denial, anger, bargaining, depression, and acceptance – we created individual mood boards. These compilations serve as visual anchors for the future to ensure a cohesive yet distinct representation of each emotional phase. The mood boards incorporate a range of visual elements including:

  • Color schemes to reflect emotional tone of each stage
  • Textures and patterns that evoke specific sensations or feelings
  • Abstract and representational imagery that symbolizes key concepts

(https://miro.com/app/board/uXjVLixa9bM=/)

1. Denial: A thin veil shielding from harsh reality.

Colour scheme: Muted greys and whites for numbness and disbelief.

Textures: Fabric-like patterns, semi-transparent cloth or veil texture.

Imagery: A scene viewed through a textured veil, blurred shapes suggesting an obscured view, or someone partially hidden behind a cloth. The veil could symbolize a ‘preferable reality’

image sources:
1.https://pin.it/6tKUtohzu
2.https://pin.it/7bgzGUoXV
3.https://pin.it/5sVXEn7fF
4.https://pin.it/4Ng3FQue6
5.https://pin.it/5c1swarlw
6.https://pin.it/2908WJ3Ln


2. Anger

Color Scheme: Vibrant reds, oranges, and deep browns; a sense of burning and intensity.

Textures: Turbulent smoke, distorted glass or warped metal, creating a sense of chaos.

Imagery: Swirling smoke obscuring objects, jagged edges piercing the air, or distorted views through broken mirrors, symbolizing frustration and rage.

image sources:
1.https://pin.it/2wanXLXzE
2.https://pin.it/6KplPdwCK
3.https://pin.it/4bEmssVxS
4.https://pin.it/5pPvOTJjV
5.https://pin.it/Jh4HzCkEQ
6.https://pin.it/Krae5xifo


3. Bargaining: A futile grasp, everything slips away.

Colour Scheme: Pale yellows and soft blues, symbolizing fleeting hope and fragility.

Textures: Flowing, liquid-like patterns; smooth but uncontrollable surfaces.

Imagery: Liquid dripping or running through open hands, symbolic of time or opportunities slipping away, reinforcing the sense of helplessness and loss of control.

image sources:
1.https://pin.it/1wfk5fLBu
2.https://pin.it/2zZSOpM6i
3.https://pin.it/2wanXLXzE
4.https://pin.it/7gBz254kQ
5.https://pin.it/28BFFqNOK
6.https://pin.it/1i5oIvl9a

4. Depression: A spiral of thoughts bending into unbearable shapes.

Colour Scheme: Primarily blacks, dark grays, and deep blues, with minimal light and desaturated colors, heavy shadows.

Textures: Distorted gouache texture, thick and uneven layers, rough and clotted surfaces, symbolizing emotional stagnation.

Imagery: Abstract shapes submerged in darkness, distorted figures struggling against the weight in heavy, dark pigments, reflecting despair and hopelessness.


image sources:
1.https://pin.it/1o4N3Dfh1
2.https://pin.it/7uljdZqUp
3.https://pin.it/7my5pn7jV
5.https://pin.it/6a8p2261a
6.https://pin.it/4WIGVj0Sp
7.https://pin.it/5eUzBKMc1

Acceptance: From shadow to light

Colour Scheme: Soft purples transitioning to lighter hues, symbolizing transformation.

Textures: Smooth gradients, gentle curves.

Imagery: Sunrise, open spaces, balanced compositions.


image sources:
1.https://pin.it/6CW58fcqH
2.https://pin.it/3YWkJy4Yj
3.https://pin.it/745npWwI9
4.https://pin.it/79KAq3H8E
5.https://pin.it/1cYJpkZeF
6.https://pin.it/6I1afqwSd

Personal Blog: Arduino Integration with Touch Designer

For our project, we wanted to create a fully immersive experience by integrating user interactions as much as possible. To achieve this, we chose Arduino to connect a variety of sensors and bring real-time interaction to the installation. Our goal is to make users feel present in the scene, with data influencing both the audio and visual elements dynamically.

We plan to use several sensors, including pulse, proximity, humidity, and light sensors. But before diving into those, we decided to start with a simple task: getting button input to work on an Arduino Uno board. This allowed us to familiarize ourselves with the hardware, wiring, and code framework before scaling up.


Day 1: Installing Arduino and Wiring the Button Circuit

We started by installing the Arduino IDE, writing basic code, and wiring a simple button circuit. Here’s a picture of that setup:

Unfortunately, we didn’t get it working on the first day. However, I went back later, referenced a wiring diagram from Arduino’s official tutorials, and got it running.


Wiring and Code

Here’s the wiring diagram I followed:


This circuit diagram is sourced from Arduino’s official documentation on wiring and programming a button (Arduino, 2024).


And here’s the simple code I wrote to print the button state from pin 2 in the Arduino IDE:


With this setup, I was able to successfully read button input. Here’s a quick demo video:


Exploring OSC Integration and Data Broadcasting

Initially, I explored the idea of using Open Sound Control (OSC) to broadcast sensor data over a network via Wi-Fi or Ethernet. The plan was for the audio and visual teams to pick up the input data from other computers. To test this, I installed Unity and worked on some integration options.

However, our team decided to simplify the setup by using Touch Designer as the central hub to handle all data, visuals, and sound. With this approach, a single computer could run the Touch Designer project and read sensor data directly from the Arduino’s serial port.


Connecting Arduino to Touch Designer

I updated my Arduino code to print button data to the serial port. In Touch Designer, I added a Serial DAT to the template and connected it to the Arduino. This allowed me to read the button state in real time within the project.

Here’s a demo of the button input working in Touch Designer:


Next Steps

My next steps involve adding multiple sensors to the circuit, printing the data in a structured format, and interpreting it in Touch Designer to control various parameters. For now, we’re simulating the data to keep the creative design process moving.

Here’s a look at the simulated button input set up to control a black-and-white filter in Touch Designer—and me smiling because it’s all working!


This progress has been a solid foundation for integrating real-time sensor data with our immersive project. More updates to come as we expand the system!

Progress of meetings

The First meeting

Rough Idea 1 :

We wanted to create an immersive VR museum tour experience that combines sight, sound, and interaction to allow visitors to explore the exhibits in a more intuitive and sensory way, breaking down the physical limitations of traditional museums. Incorporate interactive exhibits: 360° views of artifacts, even disassembling and zooming in to understand internal structures. Narrative design with sound: Dynamic ambient sound and spatialized audio are used to make the content of the exhibition not only visible, but also “heard”.

Rough Idea 2 :

We wanted to make an immersive urban wanderlust experience about Edinburgh, giving participants the freedom to explore the city from a first person perspective. Enhance their perception of the city space through real-time soundscapes, interactive visual elements and dynamic data. Take a guided tour with AR/VR: use AR glasses or your phone to see hidden stories and historical layers of the city. Sound roaming can be added: put on a headset and ambient sounds and AI narration will change depending on the location to enhance immersion. We want to let people experience the city in new ways, not just pass by it.

The Second meeting

The concept of VR and AR use was changed to audio-visual installation due to the lack of technical skills we have for implementation. Moreover,  since the visuals were dominating  in those project ideas and our group has more sound designers/ audio technicians, we wanted to create something which would be more suitable for our skills.

About First concept draft :

Adapting the 5 stages of grief to create an audio-visual multisensory experience. [https://en.wikipedia.org/wiki/Five_stages_of_grief]

Ideally, the project would use 5 separate and isolated rooms to present each emotion, [denial, anger, bargaining, depression, acceptance]. The emotions are presented in this order, but since the artwork is generative, the visitors can freely move to the next room anytime.
(version B: the visitors need to achieve/find/complete something to be able to progress to the next room)

Preferably the sound would be presented with multiple monitors (around the sides, and at random locations within the space), each equipped with a proximity sensor. Some monitors would play an ambience audio track providing the base of the mood, while the monitors equipped with sensors would trigger an impact, sfx, …

At the same time, these sensors would trigger visual effects, filters, and pre-sets, which would be added to the main visual

Main Visual:

Media display with projectors/ screens, lights, brightening up the otherwise dark space. The image would evolve around the theme of humanoid characters, faces,.. It would be a mixture of real-time footage (perhaps heavily edited) taken from the exhibition rooms with cameras, plus additional digital characters/ drawings/effects … We are also considering using thermal cameras.

(reference project for visuals: Professor Jules’ A Requiem for Edward Snowden)

Questions for Leo:

–     Is it possible to have 5 rooms next to each other which we can fully soundproof/isolate? (but they should still be quite connected to allow smooth transitions across the rooms) If not possible, we have alternative ideas for solutions: such as using headphones instead and create binaural mix

–     How many speakers can we possibly get? If we are planning to build the installation across 5 rooms, we would need quite a lot (minimum 25?)

–     How many sensors can we get/buy?

–     For the visuals, projectors or screens would be better (in terms of quality and sense of immersion). Ideally we would love to do surround visuals, but that might require a lot more projectors

Quick mood board pictures for desired visuals/ setup:

Meeting picture:

The Third meeting:

About Second concept draft:

Introduction

Emotions are intangible, and everyone defines them differently. For some, sadness flows like water, while for others, the feeling of flow brings joy. Since emotions are difficult to define, we chose not to restrict them but instead to create an emotional garden that can change infinitely, allowing everyone who enters to shape their own emotional garden through the control panel.

Inspiration

In modern society, emotional labor refers to individuals regulating their emotional performance in order to meet social expectations, especially in social and workplace Settings. Our daily facial expressions and emotional responses are often regulated to conform to external expectations, and behind this is often the suppression of personal emotions.

Goal

Reflect  and  discuss  the  phenomenon  of  emotional labor  and  its  influence  on individuals.

How to express the theme

Emotion Garden plan A

Using heart rate to monitor people’s real emotions and facial recognition to detect fake emotions  on  people’s  faces,  the  greater  the  difference,  the  more  withered  the visualized plants, and the smaller the difference, the more robust the plants.

(Ps: Visualizing with plants is just an idea I have, not fully researched yet, maybe there is a better way to express it)

Emotion Garden plan B

Through  facial  recognition plus AR in  different  emotions  on  the  face  to  present different visual effects, so that people can “really” see the emotions and feel that.

(Ps: The idea was rejected because of the sensitivity of facial information)


The Presence workshop

Refined concept:

Due to the limitations of available equipment, we reduced the scale of the project into one room, to somehow express the 5 stages together. This proved to be a better solution anyways, since the 5 emotions are not separated with a straight line and one might experience more, or a mixture of several at the same time.

Therefore the new project summary is:

1 room – 5-8 speakers – visual projection. Creating an interactive space where the collective emotions and active presence (of the people in the room) are artistically expressed by audio-visual representation. This is generated by the visitors themselves, with the use of interactive devices around the room.

[Multiple sensors will be available to play with, which would trigger audio content, and would affect the visual presentation].

Sensors:

[Have to be compatible with ARDUINO]

Audio:
Heart rate sensor(s) = influences the low-frequency content
Light sensor(s) = influences the high-frequency content
Proximity sensor(s) = triggers random sound effects
Humidity sensor = influences the base, the ambience of the audio track (?) (it changes slower over time. The density of the crowd will influence the air)
(Temperature sensor = extra visual display (only if we can find one for a low price)) These sensors would individually have various value parameters assigned to them, therefore once a specific value is triggered, the system would employ real-time audio processing to modify the sound.

Visuals:

Perhaps it features a big mass of shape, and the data would control colours (like temperature in Thermal cameras), shapes, particles …
(We could also use MaxMSP jitter to manipulate video output with sound.

What will be the interactive visual system?
– How will the data be processed into abstract visual representation?
– Which parameters trigger what visual? – …?

For both audio and visual content, we have to think about the two extreme ends: How does it look/ sound with no people in the room [no interactions with sensors], and at full capacity [with many people interacting with the sensors]?

TO DO LIST:

Since the assignment is due next Thursday, we decided to divide the tasks up:
Kyra = visuals: basic design in Unity or Touch Designer Xiaole = time management, project planning& strategy
Evan = sound: at least 30 seconds of audio, ambience and/ or additional sound effects
Isha & Lydia = technical components: get OSC to work with Arduino, how to connect these systems triggering sound & visuals, what other tools we need,…
Lidia = writing the project introduction, concept, and aim. References to other similar artworks

Workshop picture:

Handwritten Notes:

By Lidia Huiber

The Fourth Meeting

At this meeting we finalized the final concept.

The project explores the theme of presence and grief through a multi-sensory audio-visual installation that presents the “five stages of grief” (denial, anger, negotiation, depression, acceptance). The five stages of grief (denial, anger, negotiation, depression, acceptance) are presented. The installation combines real-time image processing and digital design with chaotic, distorted visuals and a subdued soundscape that expresses the flow of emotions. Viewers interact with devices such as heart rate sensors, light sensors and knobs to experience a non-linear emotional journey from chaos to calm, revealing the randomness and complexity of grief. The project aims to engage the audience in reflecting on their own emotional state and that of those around them, encouraging deeper emotional connection and a focus on “authentic being”.

At the end of the day we had a detailed division of labor for the project.


css.php

Report this page

To report inappropriate content on this page, please use the form below. Upon receiving your report, we will be in touch as per the Take Down Policy of the service.

Please note that personal data collected through this form is used and stored for the purposes of processing this report and communication with you.

If you are unable to report a concern about content via this form please contact the Service Owner.

Please enter an email address you wish to be contacted on. Please describe the unacceptable content in sufficient detail to allow us to locate it, and why you consider it to be unacceptable.
By submitting this report, you accept that it is accurate and that fraudulent or nuisance complaints may result in action by the University.

  Cancel