Any views expressed within media held on this service are those of the contributors, should not be taken as approved or endorsed by the University, and do not necessarily reflect the views of the University in respect of any particular issue.

documentary filming and production

1. My Role and Vision

As the sole documentary creator for this project, I was independently responsible for every stage—from initial concept development and content planning to filming and editing.

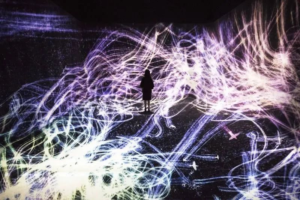
My goal was not simply to “document” the process, but to present a complete and emotionally resonant journey—from the early ideation of our installation to its final realization—while authentically highlighting the efforts of each team member and capturing the audience’s real-time interaction with the work.

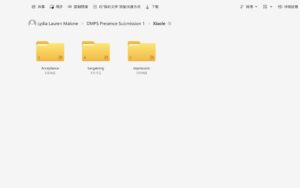
The documentary structure deliberately avoids a linear narrative. Instead, it revolves around three thematic pillars: project concept, team contributions, and audience engagement. Each section is carefully designed to balance information delivery with emotional rhythm, aiming to evoke a deeper viewer connection with the installation.

2. Documentary Structure Overview

Part 1: Project Concept & Creation Process

The first section introduces the inspiration and objectives behind our project through a narrated voiceover. It explains how we translated the Kübler-Ross model of the “Five Stages of Grief” into emotional, visual, and auditory forms, ultimately creating an interactive installation.

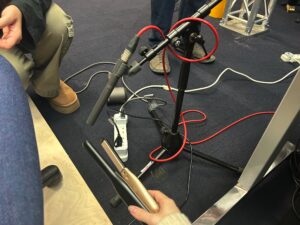
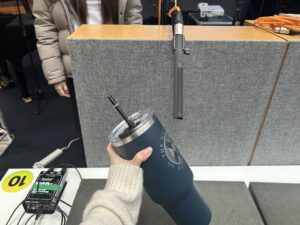
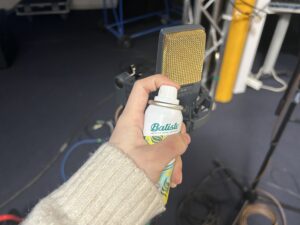
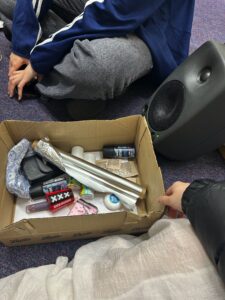
The visuals match this narration with real work footage, from our initial research and emotional analysis to the preparation and testing of the sound, visual, and technical modules. Through this material, I wanted the audience to not only understand our creative and technical paths but also feel the team’s focus, experimentation, and iterative process.

 Part 2: Team Member Interviews & Contributions

For the second section, I conducted concise yet in-depth interviews with each team member. They discussed their specific roles, challenges faced, problem-solving approaches, and personal reflections.

To enhance viewer understanding, each interview is seamlessly integrated with real footage of the members working—whether calibrating sensors, designing visuals, or assembling components. This pairing not only improves information clarity but also vividly portrays the team’s collaborative efforts and dedication.

Part 3: Exhibition Day & Audience Interaction

The final part captures the live exhibition, from setup to operation and real-time audience engagement. I filmed audience reactions—their surprise, curiosity, and feedback from peers and instructors alike.

Compared to the first two sections, this part adopts a more open and emotional visual rhythm. I preserved many moments of “body-emotion” interaction between visitors and the installation, ending the documentary on a natural, uplifting note that highlights the genuine resonance our work created.

3. Filming Process & Real-World Challenges

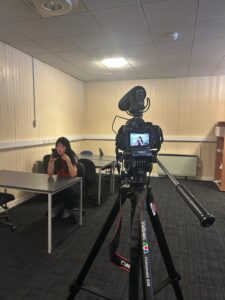
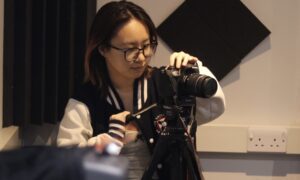
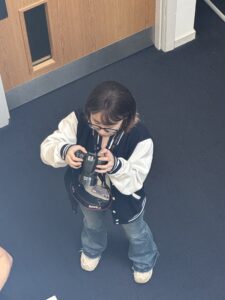
Throughout the filming phase, I independently captured all video materials needed for the documentary. To ensure consistency in quality and style, I made weekly trips to the university’s equipment library, renting cameras and tripods as needed. I carefully selected lenses and gear based on the specific shooting tasks, striving to maximize visual outcomes within the limits of available resources.

Shooting Strategies & Camera Planning

Following the documentary’s three-act structure, I wrote a detailed editing script and pre-planned the shooting content and camera strategies:

  • During Production & Preparation:
    I used lenses with medium depth of field to authentically capture team members working on device operation, sensor calibration, and audiovisual testing over three weeks. To highlight fine details, I switched to macro lenses when necessary.

  • During Interviews:
    I used prime lenses with deep focus settings, ensuring the interviewee’s face was crisp while backgrounds remained soft and understated, creating an atmosphere of focus and calm. Lighting and composition were carefully adjusted for each interview to maintain a consistent, professional look.

  • During the Exhibition:
    I set up a stationary camera to shoot wide-angle footage, capturing the full spatial setup and operation of the installation. For dynamic audience interactions, I used handheld lightweight equipment, allowing me to move flexibly through the crowd and catch real-time reactions and expressions.

On-Site Challenges & Adaptive Solutions

Filming within the active work environment posed challenges such as time constraints, limited space, and difficulty coordinating repeat shots. I adopted the following strategies:

  • Quick Setup and Silent Filming:
    To avoid disrupting the team’s work, I adapted quickly and kept filming as unobtrusive as possible.

  • Interview Guidance and Emotional Engagement:
    I briefed interviewees beforehand to encourage natural, genuine responses.

  • Dynamic Shooting Adjustments on Exhibition Day:
    Given the noisy, crowded environment, I frequently shifted angles, used stabilization gear, and captured ambient sounds to maintain audio-visual quality.

  • Supplementary Detail Shots:
    I filmed close-ups of screens, device components, and the operation of Kinect sensors for later use as visual transitions during editing.

Additionally, I manually adjusted exposure and white balance on-site to ensure a unified, layered look across different shooting conditions.

4. Post-Production: Editing & Fine-Tuning

In the editing phase, I went beyond technical assembly—I curated the content structure, controlled the pacing, and refined the visual storytelling. Multiple key sections underwent repeated revisions to ensure smooth rhythm and emotional coherence.

 Editing Techniques & Highlights

  • Interview Editing:
    Many interviews included pauses, repeated phrases, or inconsistent speech rhythms. I used seamless editing techniques to splice together complete sentences while overlaying B-roll footage (members at work) to naturally hide cuts and enrich visual storytelling.

  • Precise Audio-Visual Synchronization:
    For narrated explanations, I matched every line of voiceover with exact visual counterparts. For instance, during the line “We use four ultrasonic sensors to control emotional transitions,” the footage cuts to a close-up of the sensors’ wiring and live feedback. Fine-tuning these alignments helped maintain clarity and controlled pacing.

  • Pacing and Dynamic Energy:
    While documenting exhibition setup, I fixed a camera to capture the team’s real-time workflow. I later accelerated this footage during editing to energize the rhythm, creating a vivid sense of efficient collaboration and adding a sense of time progression to the documentary opening.

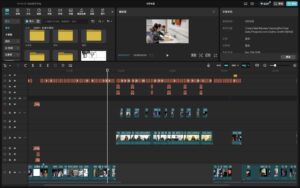
Key Challenges & Solutions

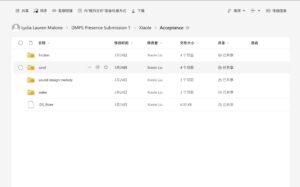
  • Massive Footage & Narrative Overload:
    The large volume and diversity of footage initially caused an overloaded rough cut. To solve this, I restructured the material into three clear categories: Process, Concepts, and Outcomes. I rebuilt the timeline at least three times until achieving logical clarity and natural flow.

  • Voiceover Script Refinement:
    Balancing technical accuracy and accessible storytelling was difficult. I wrote three versions of the script, repeatedly recorded and reviewed them, ultimately settling on a clear, professional, and engaging narration.

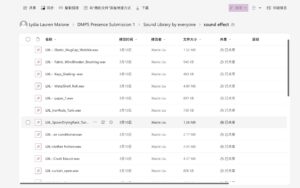
  • Authentic Sound Presentation:
    Following feedback from instructors, I removed background music in certain scenes to highlight the installation’s natural ambient sounds. I also included an independent segment showcasing our sound design achievements.

Final Reflection

The documentary’s creation process—marked by iterative revisions and frame-by-frame refinements—tested my patience and precision to the fullest. I never settled for mere completion; my aim was always to deliver a visual narrative that powerfully, honestly, and emotionally conveyed our team’s creativity and collaborative spirit.

Through this film, I hope viewers can not only understand our technical achievements but also feel the passion and emotion that brought our interactive installation to life.

sound design

Contributions and participation during the project’s progress-xiaole liu

1. Early Recording and Sound Library Construction

After defining the sound style and expressive goals for the five emotional stages, I moved on to developing the preliminary recording plan and took charge of collecting and initially organizing the sound materials.

This phase was not just about gathering sounds — it was a process of conceptual sound creation and design, centered around the project’s emotional framework.
The goal of this task was to build a comprehensive sound library that would provide a rich and diverse selection of sounds for other teammates handling the final sound design, significantly boosting their efficiency and creative flexibility.

Categorization and Recording Planning

I first classified the five emotional stages and extracted their core sound characteristics. Combining my previous research and team discussions, I drafted dedicated recording lists and foley plans for each emotion. Here are a few examples:

  • Anger: Focused on high-frequency, sharp, and explosive sounds. I prepared metal rods, glassware, chains, and recorded creative foley through collisions, friction, and dragging to capture tension and confrontation.

  • Denial: Aimed to evoke blurriness, disorientation, and undefined spatiality. I recorded blurred voices, fabric friction, and reversed water sounds to express psychological avoidance and confusion.

  • Bargaining: Simulated psychological tug-of-war and indecision. I used paper tearing, cyclic breaking syllables, and unstable rhythmic vibrations to create the texture of psychological uncertainty.

  • Depression: Used low-frequency, slow, continuous sounds to convey oppression. Recordings included deep echoes from buckets, ambient noise, and breathing sounds to create a closed, silent space.

  • Acceptance: Represented gentleness, release, and continuity. I used soft metal friction, wind chimes, bells, and faint melodic fragments to simulate the smooth transition of emotions.

All recordings were independently completed by me.
Each week, I rented professional recording equipment and secured sampling locations, striving to ensure high-quality and diversified materials. I also experimented with various techniques (different gestures, force variations, and medium changes) to capture more expressive raw sounds.

Post-Processing and Sound Design

After recording, I imported the raw audio into ProTools for detailed post-production. To tailor the materials to each emotional stage, I applied various acoustic and stylistic transformations, including:

  • Reverb: Simulating spatial extension to evoke impressions of echo, loneliness, vastness, or relief.

  • Pitch Shifting: Lowering pitch for heavier emotions or raising it to induce unease and tension.

  • EQ (Equalization): Enhancing or attenuating specific frequency bands to sharpen, deepen, clarify, or blur the sound textures.

  • Delay and Time Stretching: Extending audio length, creating echoes, and simulating auditory time suspension.

  • Filtering: Applying high-pass or low-pass filters to make sounds feel distant, muffled, or veiled.

  • Reverse and Reconstruction: Reversing and rearranging audio clips to break naturalness and create surreal psychological effects.

  • Compression: Controlling dynamic range differences to enhance the emotional cohesion and impact.

Processing Examples

  • Denial (Denial):
    When editing fabric friction sounds, I applied a low-pass filter to reduce high frequencies, making the sound blurrier. Then, I added slight reverb and reversed segments to enhance the feeling of spatial confusion and psychological escape.

  • Anger (Anger):
    For metal collision sounds, I pitch-shifted the recordings up by half an octave to sharpen the harshness, applied saturation to introduce distortion, and added light delay to create chaotic spatial echoes, enhancing the tension.

Through these techniques, I not only boosted the expressive power of the recordings but also made them highly adaptable for real-time triggering and transformation within the interactive system.

The outcome of this phase was a well-organized Foundational Emotional Sound Library, allowing teammates to quickly and efficiently select materials based on the emotional scene they were designing.

2. Sound Design for Specific Emotional Stages

After completing the foundational sound library and preliminary editing, I took further responsibility for building the complete sound design for three emotional stages: Bargaining, Depression, and Acceptance.

At this stage, the work was no longer simply about recording or editing sounds.
It became a systematic design practice — exploring how sound and emotion interact and express together.

I needed to not only imagine sound reactions that would match the visual animations but also design dynamic sound scenes triggered by various sensors, ensuring that all sound elements fit together harmoniously, immersing the audience in a powerful emotional atmosphere.
This was not just sound creation — it was a process of translating sound into emotional language.

My Workflow

  • Refining sound style definitions: For each emotional stage, I clarified the desired sound characteristics, rhythmic logic, and spatial expressions.

  • Targeted recording and secondary creation: Based on sensor trigger types, I re-recorded critical materials and selected the best-fitting fragments from the sound library for deep processing.

  • Sound construction in ProTools: I completed multitrack mixing, rhythm deconstruction, sound field design, and dynamic layering to ensure adjustability and stability within the system.

  • Organized sound assets by functionality: Grouped materials by “background ambiance,” “behavioral triggers,” and “emotional transition responses” for easy system integration.

  • Established structured interactive sound libraries: Created clearly named and uniformly organized folders for each emotion, with usage notes (scenario, trigger method, dynamic range) to allow seamless integration by teammates working on Wwise, Unity, and Max/MSP.

Through this phase, I pushed the project from “sound materials” toward “systematic emotional sound expression,” ensuring cohesion, functionality, and artistic integrity within the interactive framework.


🎧 Sound Design Examples

Bargaining (Bargaining)

To express the inner wavering and repetitive struggle, I designed multiple loopable sound units simulating hesitant and anxious emotional flows.

Example 1: The struggle between tearing and re-coiling

  • Foley materials: Paper tearing, fabric crumpling, wood scraping

  • Design techniques:
    Cut tearing sounds into rapid fragments, time-stretch selected parts, overlay slight reversed audio and high-frequency filtering to simulate psychological “fracture and repetition.”
    Layered with background friction sounds to create a tactile tension.

  • Emotional intent: Express the constant push-and-pull between hope and denial.

Depression (Depression)

For this stage, I aimed to convey deep emotional downpour, loss, immersion, and self-isolation, avoiding strong rhythms to create a “slow-time” and “emotional stagnation” atmosphere.

Example 1: Damp, Oppressive Interior Space

  • Foley materials: Water echoing inside metal buckets, slow palm movements across wood flooring, low-frequency ambient noise

  • Design techniques:
    Pitch-down metal water echoes by about 5 semitones; add long-tail reverb and room simulation; overlay low-frequency brown noise to create pressure.
    Palm sliding sound filtered to preserve only the low-mid range, maintaining subtle motion tension.

Emotional intent: Build a psychological space that’s damp, heavy, and hard to escape, reflecting the chaotic silence of depression.

Acceptance (Acceptance)

As the most peaceful and open stage, the sound design for Acceptance needed to create a gentle, transparent, spatially flowing atmosphere — while maintaining emotional richness and avoiding flatness.

Example 1: Clear Ambiance of Wind Chimes and Metal Friction

  • Foley materials: Light metal taps, wind chimes, copper wire friction, glass resonances

  • Design techniques:
    Overlay wind chime sounds with fine metallic friction; EQ to emphasize the high-frequency clarity; set glass resonance as the background layer with long reverb; add subtle modulation to copper friction for liveliness.
    Control overall volume dynamics to maintain a slow, flowing texture.

Emotional intent: Create a “clear, peaceful, continuous but not hollow” emotional atmosphere, expressing release and inner stability.

Example 2: Fragmented Melodies and Shifting Harmonies

  • Foley materials: Finger-plucked music box, toy piano, breath sounds, small chime bells

  • Design techniques:
    Cut piano notes into fragments and reassemble into irregular melodic lines; add unstable synthetic harmonies and low-frequency fluctuations; convert breath sounds into airy resonances for delicate spatial textures.

Emotional intent: Express the idea that even under a calm surface, traces of emotional echoes persist.

These sounds were set to trigger dynamically based on audience proximity and movement, enhancing the feeling of flowing emotions across space.

Conclusion

By the end of this phase, all sound assets were meticulously categorized by emotional type, functionality, and acoustic features, ensuring that teammates could directly integrate them into the interactive system without further editing.

This work greatly improved the team’s sound integration efficiency while preserving the emotional consistency, controllability, and artistic completeness of the final installation experience.

Research for project

Project Overview

Name: Liu Xiaole
Project Title: Five Stages of Grief – Immersive Interactive Audiovisual Installation

THE DAY LEFT FIELD is an immersive interactive audiovisual installation inspired by Kübler-Ross’s model of the five stages of grief (Denial, Anger, Bargaining, Depression, Acceptance). Through the seamless integration of sound, visuals, and sensor systems, audiences interact with the installation in real-time within a 144-square-meter space, experiencing the flow and transformation of emotions across the environment.

The project team was divided into three main modules: Sound, Visual, and Engineering. My primary responsibilities were centered on the research and development of the sound system, building the sound library, and filming and editing the project documentary. My work spanned the entire process—from concept development to final presentation.

Initial Phase|Establishing the Theoretical and Practical Foundation for the Sound System

At the start of the project, how the sound system would express abstract emotional stages remained an open question. I actively participated in the initial brainstorming for the sound system design and took the initiative to undertake theoretical research on the relationship between sound and emotional perception, aiming to build a solid perceptual foundation for later creative work.

During this phase, I consulted a large volume of psychoacoustic studies on how sound influences the experience of negative emotions, reaching key insights such as:

Low-frequency, continuous sound waves often evoke feelings of oppression and heaviness;

High-frequency, sharp sound effects easily trigger tension or anger;

Noise or irregular rhythms are commonly used to simulate internal conflict and chaos.

These theories provided critical direction for the later sound design of emotional stages such as “Denial,” “Anger,” and “Depression.” For example, the “Depression” stage was constructed as a space filled with low frequencies and blurred echoes, while the “Anger” stage heavily utilized fractured rhythms and sudden, sharp sound effects.

At the same time, I researched and analyzed multiple cases related to interactive emotional installations, including:

TeamLab’s interactive multi-channel art exhibitions

THE DAY LEFT FIELD’s immersive audiovisual projects

These cases not only inspired our technical strategies for linking sound and visuals but also pushed the team to reconsider how sound in a space could dynamically respond to audience behavior.

Building on this research, I worked with the team to establish an Emotion-to-Sound Mapping Chart that served as a consistent guide throughout the design process:

Emotional Stage Sound Characteristics
Denial Blurred, unstable, low-directionality ambient sounds
Anger Sudden, sharp, high-energy fractured rhythms
Bargaining Psychological tension created using nontraditional sound sources like paper, liquids, and water ripples
Depression Low-frequency, blurred, echo-rich spatial ambiance
Acceptance Gentle, progressive, spatially layered soundscapes

In addition, I continually proposed new ideas for sound expression, such as:

Using wind chimes or soft metallic sounds to convey the gentleness of “Acceptance”;

Introducing “silence” or extreme low-frequency elements at certain stages to create emotional contrast;

Exploring the idea of expressing presence through absence.

These discussions and reflections helped the team establish a clear and in-depth sound design methodology:

“Using psychological models as a framework, combined with the physical properties of sound and audience interaction mechanisms, to construct dynamic emotional soundscapes.”

Although this phase belonged to the early stage of the project, it was undoubtedly one of the periods where I had the deepest involvement and the strongest impact. It laid the theoretical foundation and directional alignment for all subsequent sound collection, editing, and system integration efforts.


css.php

Report this page

To report inappropriate content on this page, please use the form below. Upon receiving your report, we will be in touch as per the Take Down Policy of the service.

Please note that personal data collected through this form is used and stored for the purposes of processing this report and communication with you.

If you are unable to report a concern about content via this form please contact the Service Owner.

Please enter an email address you wish to be contacted on. Please describe the unacceptable content in sufficient detail to allow us to locate it, and why you consider it to be unacceptable.
By submitting this report, you accept that it is accurate and that fraudulent or nuisance complaints may result in action by the University.

  Cancel