Any views expressed within media held on this service are those of the contributors, should not be taken as approved or endorsed by the University, and do not necessarily reflect the views of the University in respect of any particular issue.

Personal Blog: Final Integration with M5Sticks, OSC, and MAX

For the final phase of the project, I focused on refining and scaling our distance sensing setup. The goal was to clean up noisy sensor data, set a distance cap, connect everything to a shared network, and build a centralized system for routing and processing OSC messages in real time.

Hardware Refinement

I tested several M5StickC-Plus boards and HC-SR04 sensors, comparing consistency across units. Some sensors fluctuated too much or lost accuracy at mid-range distances. I ended up choosing the four most stable ones.

Each M5Stick was flashed with the same code, but I updated the OSC address string at the top so each sensor would send data to a different address:

String address = "/M55/distance";

Network Setup: Leo’s Router

Instead of using Joe’s mobile hotspot, I switched over to Leo’s router, which provided a more reliable connection. This was important for minimizing packet drops and keeping multiple sensors running smoothly.

const char *ssid = "LeoWiFi";
const char *password = "Presence";

The M5Sticks all send their messages to:

const IPAddress outIp(192, 168, 0, 255);
const unsigned int outPort = 8000;

Distance Measurement and Capping

The sensor code still uses the familiar trigPin/echoPin setup. After triggering and timing the ultrasonic pulse, I added a cap to prevent noisy long-range readings:

float cm = (duration * 0.034) / 2.0;

if (cm > MAX_DISTANCE) {
  cm = MAX_DISTANCE;
}

Averaging the Distance Values

To smooth out the data, I used a rolling average over the last 10 readings. Each new value is added to a buffer, and the average is recalculated every loop.

#define NUM_SAMPLES 10

float distanceBuffer[NUM_SAMPLES] = {0};

distanceBuffer[bufferIndex] = cm;
bufferIndex = (bufferIndex + 1) % NUM_SAMPLES;

float sum = 0.0;
for (int i = 0; i < NUM_SAMPLES; i++) {
  sum += distanceBuffer[i];
}

float avgDistance = sum / NUM_SAMPLES;

Normalization for OSC Output

The averaged distance is normalized to a 0–100% scale so it’s easier to use for modulating audio or visual parameters:

float normalizedDistance = (avgDistance / MAX_DISTANCE) * 100.0;

This gives us a value like “23.4” instead of “78 cm”—much easier to use directly in Unity or TouchDesigner.

Sending the OSC Message

Once the data is ready, the M5Stick sends it as an OSC message using the CNMAT OSC library:

OSCMessage msg(address.c_str());
msg.add(normalizedDistance);

udp.beginPacket(outIp, outPort);
msg.send(udp);
udp.endPacket();
msg.empty();

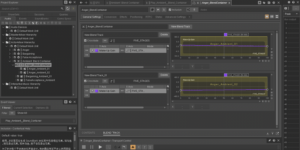
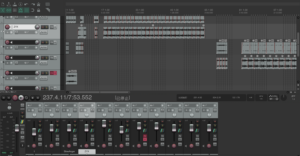
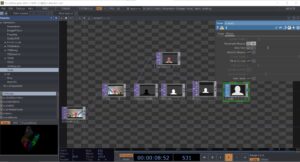
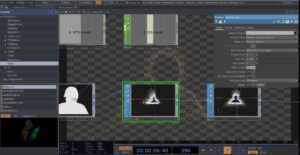
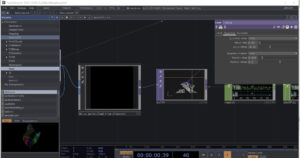
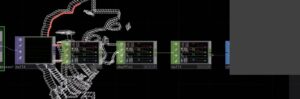
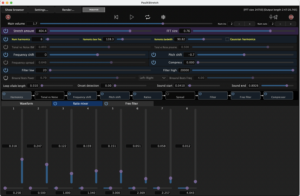
Centralized Processing in Max

Rather than having each sensor talk directly to Unity or TouchDesigner, we built a central Max patch to receive and clean all OSC data.

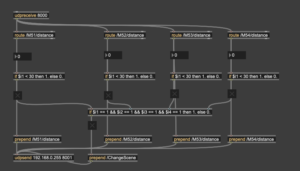
Here’s what the patch does:

  • Uses udpreceive to listen for all messages on port 8000 
  • Routes each message by OSC address (/M51/distance, /M52/distance, etc.) 
  • Compares each value to a threshold (e.g., < 30) using if objects 
  • Sends a 1 or 0 depending on whether someone is near that sensor 
  • If all sensors are triggered at once, it sends a /ChangeScene message to both Unity and TouchDesigner on port 8001 

This setup keeps the sensor logic modular and centralized—easy to debug, scale, and modify. We only need to change one patch to update the interaction logic for the entire system.
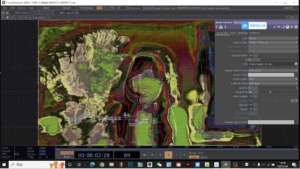
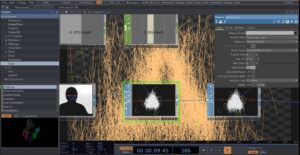
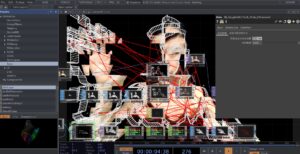
Final Testing

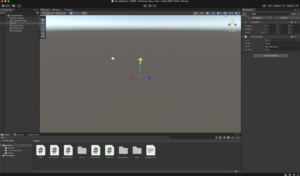
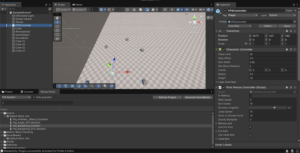
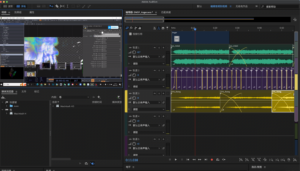
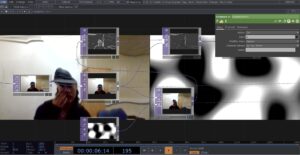
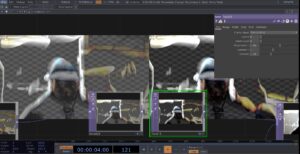
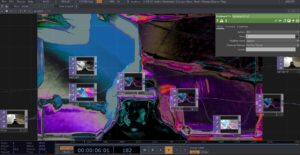
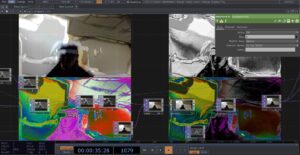
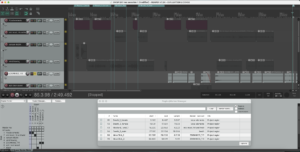
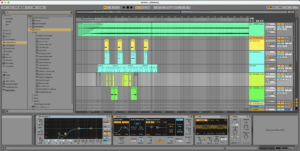
We tested everything together, and it worked: scene and audio changes were successfully triggered in Unity, responding to movement in front of the sensors. I also captured a video of the audio modulating based on proximity.

This system is now:

  • Scalable (thanks to Wi-Fi and OSC) 
  • Cleanly routed (through MAX) 
  • Responsive (with smoothed, normalized data) 

It’s exciting to see everything running reliably after so many small iterations.

Personal Blog- Week 9

The task on building the audio components have progressed, we combined our ambiences with Evan and built the system for the interactive environment change.

A master Blend container displays the individual stage blend containers, in the scale of 0-100, each stage [emotion] will have a value of 20. The RTPC is a Game Sync Parameter called FIVE_STAGES.

Screen video of the Five stages RTPC in action

https://media.ed.ac.uk/media/DMSP%20week%209%205stages%20RTPC/1_jrzrfuxs


Changes:

Up until now we designed maximum 1-2 ambiences for each state, however, Leo suggested we could have an ambience for each speaker (each equipped with a Proximity sensor), so the audience could mix the atmo themselves.

This required us to build a new logic system in Wwise, and create further 3-4 ambiences for each scene. Due to the nature of the Speaker setup in Atrium which we will be using [4 speaker surround], –  for each stage we will have a ‘Center’, non-directional atmo playing from all speakers, and 4 directional atmos, panned Front-left, Front-right, Back-left, Back-right.

Once again, we shared the work with Evan, I agreed to do Denial, Anger, and half of Depression.

In Wwise, we created a Game Sync Parameter for each Speaker Proximity sensor, we will assign the corresponding ambiences here individually, in each stage.

We had a successful session of connecting one sensor to a Wwise ambience, where the distance was controlling a High-pass filter RTPC.  Next week Tuesday we are planning to test more at the same time:))

Here’s a short video of us testing:

dfb2af39-1f82-4075-983e-0f301c8bacdb

(More about this in our project blog)


On Wednesday (26th March) we will have a big testing in Atrium, to practice how the sound will be moving between the stages!!


Personal Blog – week 7 -8

As planned, during these weeks I focused on sound implementation in Wwise, and  creating new sound effects.

The progress of our sound team has been slower than planned because we had to solve some issues of communication about the sound scapes’ concept. However Evan kindly offered to help with the Wwise session build, which drastically speeded up the process.

I agreed to do the first and fourth stage (Denial and Depression), and will do the sound effects for Acceptance.

Denial:

Since I already had some  sound effects crafted for this stage, I grouped  them into folders. Next I had to build a logic system in Wwise:

  1. One stereo ambience, in which a low-pass filter is controlled by an RTPC (which will be a proximity sensor).
  2. Random containers of breath_female, breath_male and breath_reversed, these are triggered by a Play event, with some delay and probability variations
  3. Electro-magnetic sound, LFO speed controlled by RTPC (Proxi sensor)
  4. High ticks sfx sequence container
  5. Music section of drum loops and percussion ticks (60 bpm)

link for Wwise Denial soundcaster:

https://media.ed.ac.uk/media/t/1_kod3nzx7

Depression:

For depression I wanted to create a quite dark atmosphere as a base layer, and use lots of human voices to evoke the memories of shared moments with friends, family, social times.

Since the provided visual design sample looked like a person behind an wall that separates them from the present, I wanted to replicate this in the audio by filtering out high frequencies:

The base atmo layer therefore gets a heavy high cut filtering after trigger start (this was applied in Ableton, before implementing to Wwise), and a second layer of  filtered storm ambience is occasionally triggered to add weight and a “clouded” emotion to the scene’s soundscape.

Apart from the unmodified “Vox_x” files (only have reverb to place them away in distance) an additional random container of transposed voices are used to enhace the dark sensory of passing time, and bittersweet memories.

The footsteps, personally represent a sort-of  hallucination for me, like someone else was still around us, watching from close.

Link for Wwise Depression soundcaster:

https://media.ed.ac.uk/media/t/1_8el8h85o


Technical Development:

We created a Unity project and successfully received OSC data via Lydia’s Proximity sensor.


Next week we aim to successfully crossfade  and move between the five stages triggered by data. However, we are stil having difficulties about how can we approach that switch between the stages, and how to specify/ limit the data to receive smooth transition.

Personal Blog-Sound Work-Week 7&8

During these two weeks, with the guidance of Leo and the help of Lidia, I completed all the work on “Anger” and “Bargaining” and the ambient work of “False Acceptance” in Wwise, and created Blend container events to gradually control these ambient sounds. I also created triggers in Unity to test these sounds. After testing, these sounds can run correctly, which is a good preparation for the next stage of assembly work!

ZYX_ChangedFalseAcceptance_Ambient

Leo gave me a very useful suggestion on the Anger ambient. He asked me to create a blend container under the blend container to control my two anger ambients. This suggestion made my ambient effect even stronger.

This week I have created a test model in Unity and am preparing to assemble Lidia’s Wwise project files and test them. Next week we will conduct the first test of the entire project in Atrium.


Personal Blog-Sound Work-Week 5&6

In the fifth and sixth weeks, my main responsibility is to record the sound, create the sound for the second time, and create the Wwise project.

In the five stages of the wwise project, my work at this stage is to complete all the ambient and SFX work of “Anger” and “Bargaining”. It is expected to complete the ambient construction of “False Acceptance” in week 7-8. This part of the SFX is produced by Lidia.

1.Anger Stage

According to Chunyu’s video, I first use the original audio file I recorded on AU to produce ambient sound, and then make sound effects after making ambient sound, and add them to Wwise.

In the ambient construction of Anger, I added the warning sound and the metal tearing sound recorded with an electromagnetic microphone, and added pitch converter, low-pass filter, and smaller reverberation to create a feeling of unease and anger.

In the sound effect part, I chose some high-frequency sounds to enhance the feeling of anger.

2.Bargaining Stage

At this stage, I mixed the sound of rain recorded at submission1 and the sound of knocking on the piano lid to make environmental sounds, and made them standardised and added some effects.

In terms of sound design, I have combined most of the sound effects on Reaper to create a feeling of “bargaining”.

Personal Blog 4-7 weeks: Visualization on the five stages of grief

The first stage: Denial

Denial is an individual’s first line of psychological defense in the face of significant loss or trauma. Core features of this emotion include:

Unwillingness to accept reality: the individual may subconsciously avoid or refuse to acknowledge painful facts.

Rational-emotional disconnect: The individual may be rationally aware of the facts, but emotionally unable to accept them, displaying a “this can’t be happening to me” state of psychological collapse.

Step 1 : Brainstorming

I don’t want to speak of the first stage of emotions acting calmly; denial is not a cold stillness, it is an intense collapse of the inner world, a high-speed chaos, an extreme self-defense. Beneath the seemingly calm surface, emotions have been in violent turmoil for the first time. The individual tries to suppress the sudden onslaught with reason, but the inner core is splitting, struggling between reality and illusion.

Step 2 : Touch Designer experimental stage

1. Character tracking and input
blur1 (for blurring)
track1 (for tracking character outlines)

Obtains information about the character’s silhouette from the camera and blurs it to reduce detail and enhance the softness of the particle effect.

PS: We are supposed to be using Kinect for tracking the characters, but due to the limited equipment on bookit, I can’t have kinect at all times, so the experimental phase was replaced with a computerized camera, which is also used for the emotions in the following phase, so I won’t go into that again


2. Particle Type

Render as point sprites

Render as Lines

Lines are more outwardly directional and sharp in space

2. Particle Time Inc

speed 0


After testing, the frame rate of particles is more suitable at 0.01-0.02

The second stage: Anger

The stage of ANGER has been experimented with in submission 1 and decided to apply it in the final presentation, here is the link

Emotion Visualization: Visual Exploration of the “Angry” Stage – dmsp-presence25

The third stage: Bargaining

Step 1 : Brainstorming

The emotion of bargaining strikes me as vulnerable and humanizing. It’s not explosive like anger or heavy like depression, but rather a struggle between sanity and despair. Humans innately want to be in control of their lives, so when things get out of control, we desperately grasp at any possible hope, even if it’s illusory. Bargaining isn’t entirely negative, though.

I think it is in a way a transition, a way of letting go slowly. Though it is full of uncertainty, at least it proves that we are still searching for answers, still trying to make sense of the pain.

I wanted to use distortion, fragmentation, and data glitches to convey the sense of bargaining’s instability, struggle, and attempts to reconfigure reality, and these characteristics fit the psychological state of the bargaining stage – trying to control or change an irreversible reality that has begun to crumble or disintegrate.

Step 2 : Touch Designer experimental stage

1. Displace

I tried using the Displace node to create image dislocation or distortion effects, representing the sense of instability in Bargaining.

2.Extrude

Instead of a flat rendering, I tried to use extrude in the TOP component to stretch the figure, through the 3D dimensionality of the image to make it look more sculptural and data-driven, making the image less thin

3.Creating Stretching Lines with a Point Cloud

Used a point cloud map plugin from artist Alexxxxxi

Use the chopto component to connect the points on the point cloud map in real time to form intersecting lines in space

The effect is not very good, it stays around the character wireframe and the visual effect is not very strong.

Later I made more lines in the frame by trying to manually increase the number of point clouds in the plugin.

The final effect.

The third stage: Depression

Depression in grief is like sinking into deep water and feeling like the upper world is out of reach. A silent sense of absence, a numbness that settles in your bones. Everything is in slow motion; it’s heavy, constant, and crushing. There is no resistance, no bargaining, only silent acceptance; nothing can undo what has happened. The world goes on, but you fall into a stillness that no one seems to notice.

Step 1 : Brainstorming


The thermal imaging effect looks great, with strong color shifts and blurring around the edges. The human figure is fragmented and loses its stable contours.

Step 2 : Touch Designer experimental stage

1. Noise&Displace

Try to use NOISE as a displacement map to distort the camera feed, creating a flowing effect.

2.Color contrast

Use the Level element to adjust contrast and brightness to make the picture more three-dimensional or highlight certain colors. Try HSVADJ to adjust hue, saturation, and brightness. Adding false-color effects to the thermal imaging style makes it less in line with natural tones and more experimental.

3. Try adding different effects together

The fifth stage: acceptance

Acceptance feels like a gentle letting go after a long struggle, the first quiet, honest acknowledgement in the midst of heartbreak that, “Yes, this is really happening.” At this stage, the person stops trying to change the unchangeable reality, and stops asking “why me”, and starts to find the shape of life again in the remaining fragments.

Step 1 : Brainstorming

Step 2 : Touch Designer experimental stage

1.particle&dispalce

Initially, I just wanted to keep the image relatively calm while having a slight sense of ebb and flow, so I used noise. With the addition of color and dynamics, the image began to become fluid and unstable. Eventually a slight but constant disturbance was created by displace.

2.color : RAMP

I tried to do some color gradients using the ramp component, and chose different levels of green based on the brainstorming in the first session phase. Green is somewhere between calm and vibrant, like a slow repair process, and the combination of this color and the particle effect has the appearance of a state where the emotions are slowly calming down and then starting to breathe again.

3. Material:PHONG

I tried to add some soft reflections and warm texture to the material

Personal Blog: Switching to M5Sticks, OSC, and Unity

In our team meeting this week, we discussed the technical direction of our project. Up until now, I had been oversimplifying things by using a single Arduino Uno board, physically connected to my computer and sending distance data over the serial port into TouchDesigner. This worked for early tests, but it wasn’t going to scale.

We needed a setup that could support multiple sensors sending data to multiple computers: one machine running TouchDesigner for visuals, and another running Unity, integrated with Wwise, to handle spatial audio. The two systems would be kept in sync using Open Sound Control (OSC)—a protocol built for fast, real-time communication between creative applications.

After that, I had a meeting with Joe Hathaway, who pointed out that the Arduino Uno doesn’t support Wi-Fi. He recommended switching to M5StickC-Plus boards, which have built-in Wi-Fi and are well-suited for sending OSC messages wirelessly over a local network. We worked together to adapt my existing Arduino code to the M5Stick. Rather than printing values to the serial monitor, the device now connects to a personal hotspot and sends real-time OSC messages over UDP.

Code Walkthrough: M5Stick + OSC

Here’s a breakdown of the changes and additions we made in code.

1. Include Libraries and Setup Pins

We import the required libraries for the M5Stick hardware, Wi-Fi, UDP, and OSC. Then we define the trigger and echo pins for the HC-SR04 distance sensor.

#include <M5StickCPlus.h>
#include <WiFi.h>
#include <WiFiUdp.h>
#include <OSCMessage.h>

int trigPin = G0;
int echoPin = G26;

2. Wi-Fi and OSC Setup

We define the OSC address, SSID and password of the Wi-Fi network, the IP address of the receiving machine (e.g. a laptop running Unity), and the port number.

String address = "/M121/distance";

const char *ssid = "JoesPhone";
const char *password = "12345678";

const IPAddress outIp(10, 42, 218, 255);  // Receiving computer IP
const unsigned int outPort = 8000;        // OSC port

3. Setup Function

The setup() function initializes the M5Stick screen, connects to Wi-Fi, and begins listening on the network.

void setup() {
  M5.begin();
  Serial.begin(115200);
  pinMode(trigPin, OUTPUT);
  pinMode(echoPin, INPUT);

  while (!connectToWiFi()) {}
  udp.begin(outPort);

  M5.Lcd.println("Ready\n");
  M5.Lcd.println("Sending to:");
  M5.Lcd.print("IP: ");
  M5.Lcd.println(outIp);
  M5.Lcd.print("Port: ");
  M5.Lcd.println(outPort);
}

4. Loop: Distance Measurement + OSC Sending

This is the main loop that measures distance and sends it as an OSC message.

void loop() {
  // Trigger the ultrasonic pulse
  digitalWrite(trigPin, LOW);
  delayMicroseconds(2);
  digitalWrite(trigPin, HIGH);
  delayMicroseconds(10);
  digitalWrite(trigPin, LOW);

  // Measure echo time
  float duration = pulseIn(echoPin, HIGH);
  float inches = (duration * 0.0135) / 2.0;

  // Send as OSC message
  OSCMessage msg(address.c_str());
  msg.add(inches);
  udp.beginPacket(outIp, outPort);
  msg.send(udp);
  udp.endPacket();
  msg.empty();

  delay(50);  // Small pause to prevent flooding
}

5. Wi-Fi Connection Helper

This function connects the M5Stick to the defined Wi-Fi network and prints status updates to the screen.

bool connectToWiFi() {
  M5.Lcd.print("Connecting");
  WiFi.mode(WIFI_STA);
  WiFi.begin(ssid, password);

  unsigned long startAttemptTime = millis();
  while (WiFi.status() != WL_CONNECTED && millis() - startAttemptTime < 30000) {
    M5.Lcd.print(".");
    delay(400);
  }

  if (WiFi.status() != WL_CONNECTED) {
    M5.Lcd.println("\nErr: Failed to connect");
    delay(2000);
    return false;
  } else {
    M5.Lcd.println("\nConnected to:");
    M5.Lcd.println(ssid);
    M5.Lcd.println(WiFi.localIP());
    delay(2000);
    return true;
  }
}

Next Steps

Now that the M5Stick is sending OSC messages over the network, I plan to test this with my team and work through how to receive those messages in both Unity (for Wwise audio control) and TouchDesigner (for visuals). We’ll also explore setting up multiple M5Sticks on the same network and assigning each one a unique OSC address to keep things organized.

Code and diagrams adapted from Joe Hathaway, Edinburgh College of Art, 2024, used under the MIT License.

Personal Blog – progress on week 5 & 6

After the first assignment, which was mostly about pre-planning, conceptualization and research, in week 5 we moved to phase two, the technical realization.

In the next couple of weeks, my primary role will be to plan the sound engine logic, therefore to build the Wwise session, and implement Xiaole and Evan’s sounds. Furthermore, I will build the Unity project with the help of Leo and other team members: this will be controlling our phone sensors, and triggering the sound from Wwise.

Weekly Plan:

We have about 4 weeks until we have to present the installation which is an extremely tight deadline considering how many assets we need to build, but if we follow the plan we agreed on it should be all manageable! :))

Until 18th March:

  • Finish all audio and visual assets for all 5 stages of grief (briefly about 1.5 stage per week) –> [sound+audio team members]
  • Write exact plan for what sensors trigger what audio components/ what is being modulated –> [Xiaole, Evan, me]
  • Start building Wwise session –> [me]

Until 25th March:

  • 1 week for finalising audio components if needed [Xiaole, Evan, me]
  • Finishing all Wwise setup, building Unity project [me]

Until 1st April:

  • The last week we will be finalising the setup, building the visual and audio systems on location. Final days to troubleshoot if needed.

Audio Progress:

To have some materials to put into Wwise next week, I created some ambience tracks which will serve as a base ‘music’ layer providing some emotional setting to the room.

As recommended by Sound designer Andrew Lackey, I used PaulXStretch to create infinite ambient loops. The software allows users to control the harmonic components and ratios, so while recording, I constantly moved those to create ever-changing, but still atmosphere.

Then , following Xiaole’s research about the recommended elements, I have used breath sounds to represent emotions such as: inner suffering, choking on air and feeling empty while suffering from loss. A dark Japanese anime, Devilman Crybaby’s soundtrack by Kensuke Ushio served as a great inspiration to use traditional Eastern percussions and voices as sound effects to enrich the ambience with horror/darkness. (A great example is ‘The Genesis” :https://www.youtube.com/watch?v=s2tk1gzE8eo&list=PLRW80bBvVD3VzTdVNE_pjMC4S-PJefbxb

I used recordings I made with Evan this week:

Occasional hits adds the weight and a sense of darkness to the setting, while ticking clock represents the passing of time in this dark, empty state.

Of course, this is a structured short piece, in the project all of these sounds, and lots of others, will be separate events which we can trigger in Wwise, resulting a more random sonic outcome.


I have also created sketch ambiences for stage 2:

Personally I think anger is a lot more intense, and energetic scene from the grieving person’s perspective. The aggressive and harsh rhythmic ambience I made help to evokes some sort of irritation and (naturally, anger) in the listener. (additional layers will be provided by others)

Next week I will start implementing these into a Wwise session and start to figure out the events and trigger layout system:))

css.php

Report this page

To report inappropriate content on this page, please use the form below. Upon receiving your report, we will be in touch as per the Take Down Policy of the service.

Please note that personal data collected through this form is used and stored for the purposes of processing this report and communication with you.

If you are unable to report a concern about content via this form please contact the Service Owner.

Please enter an email address you wish to be contacted on. Please describe the unacceptable content in sufficient detail to allow us to locate it, and why you consider it to be unacceptable.
By submitting this report, you accept that it is accurate and that fraudulent or nuisance complaints may result in action by the University.

  Cancel