Any views expressed within media held on this service are those of the contributors, should not be taken as approved or endorsed by the University, and do not necessarily reflect the views of the University in respect of any particular issue.

Week8_Technical Matters_Ruojing Chen

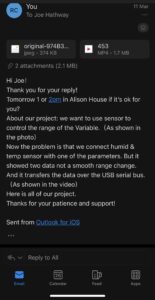
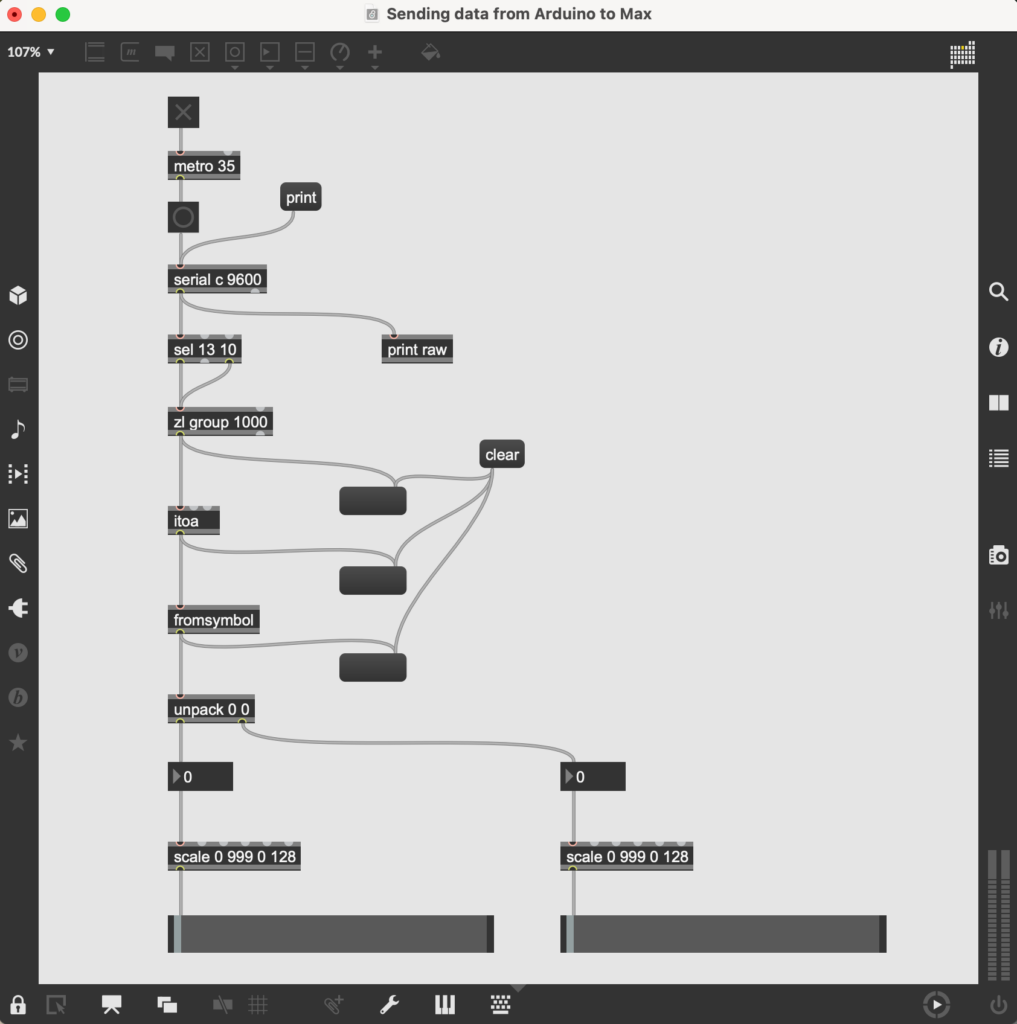
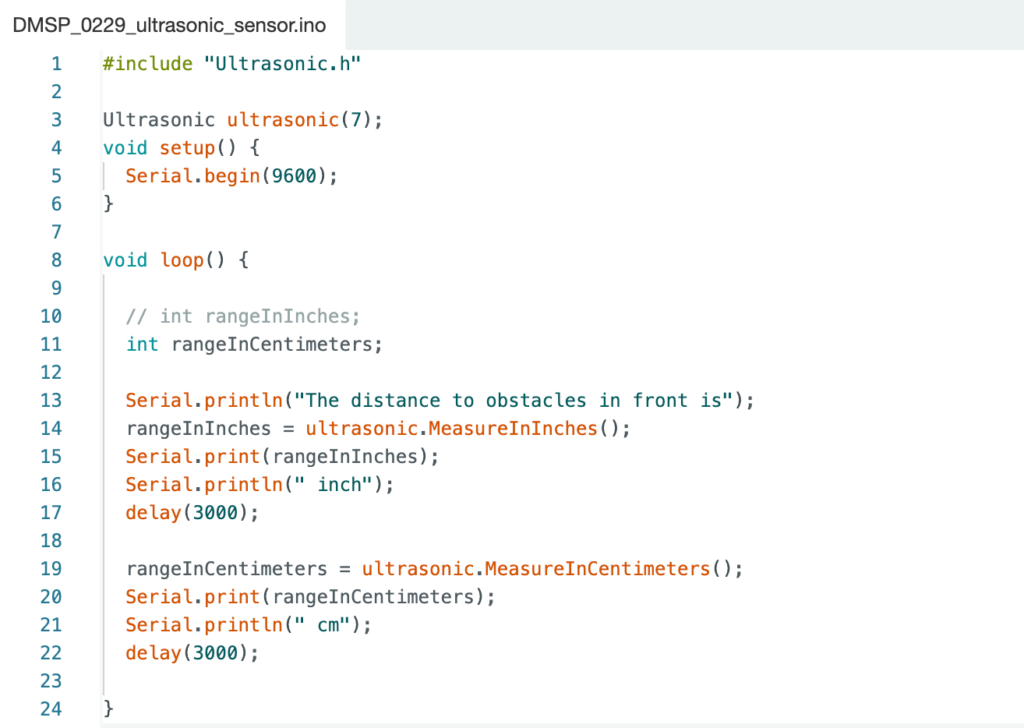
On Tuesday, we asked joe to help us solve the problems encountered in the code when max connected to the sensor. We need to adjust some codes to ensure the rationality of max’s operation.

On Wednesday and Thursday, we had a meeting with Leo to solve some problems about max.
The technical problems we mainly solve are as follows:
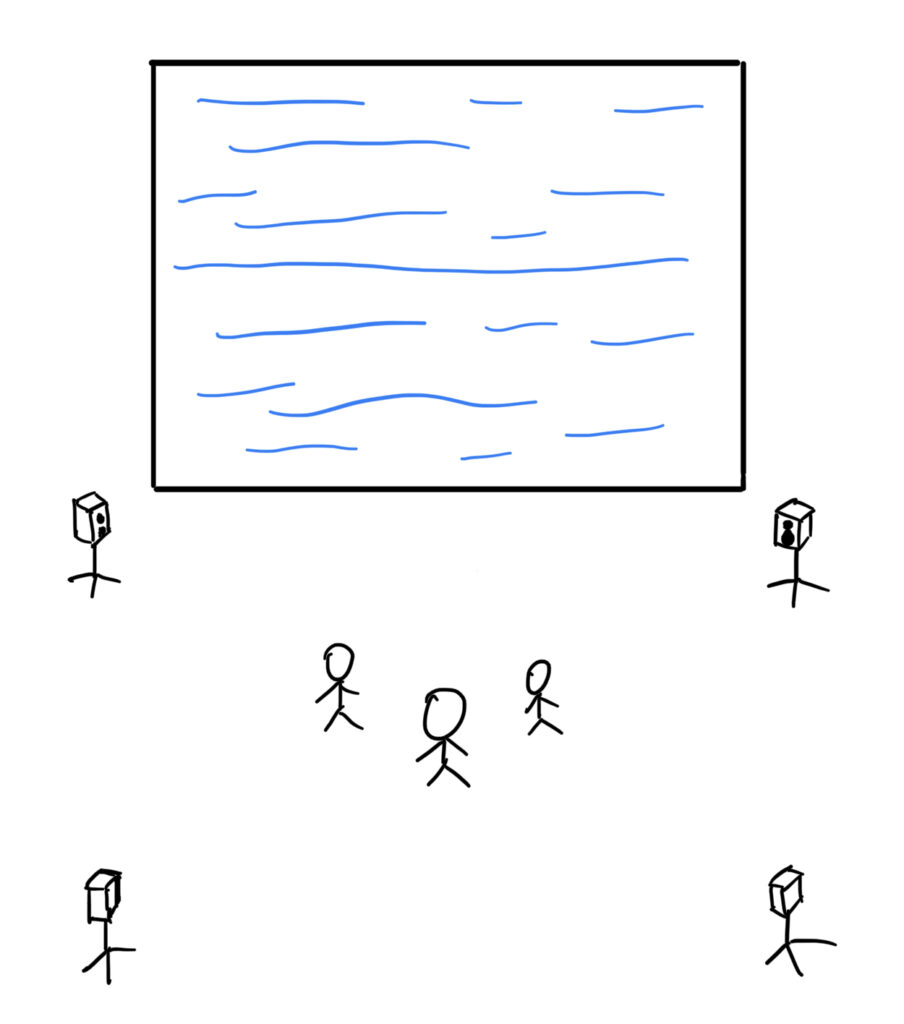
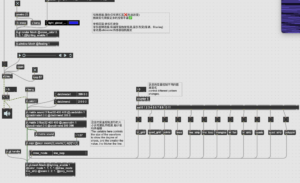
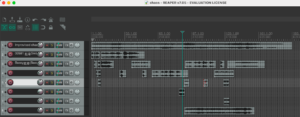
On Wednesday, my patch only did the sound effect part. Our sound effects have four levels. I classified them well, but I didn’t know how to transition from the first level to the second level. I thought of using preset object, but I encountered some problems. Leo suggested that I use buffer to store all the sound effects and change the levels at any time, but the final solution was to use pattrstorage object to control the appearance and changes of each level through the storage of the level meter data. Another technical problem is that max involves the on-site display. Because we use multiple speakers, we need to create an effect in max that can output different sound effects to multiple speakers. But we haven’t decided whether we want surround sound effect or multi-channel effect. Leo suggested that I use ICST ambisonics tools to output surround sound.
On Thursday,We took class so we asked Jules a lot and he showed us the use of panner.
I have to think about how to make the panner function into our patch.

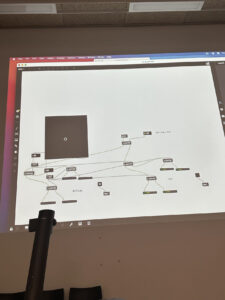
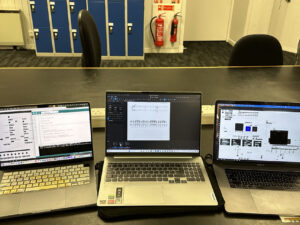
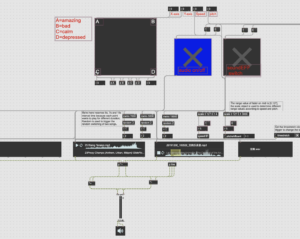
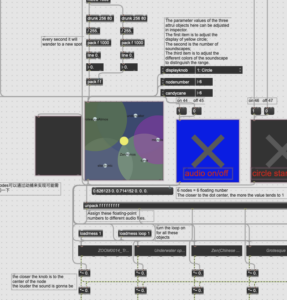
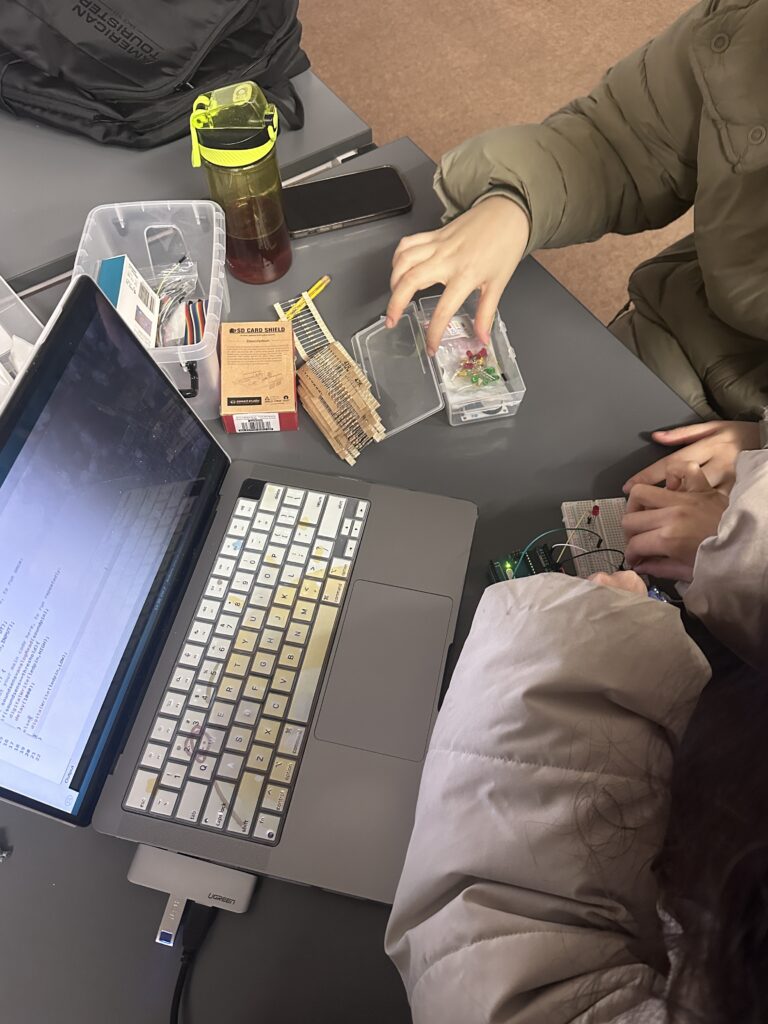
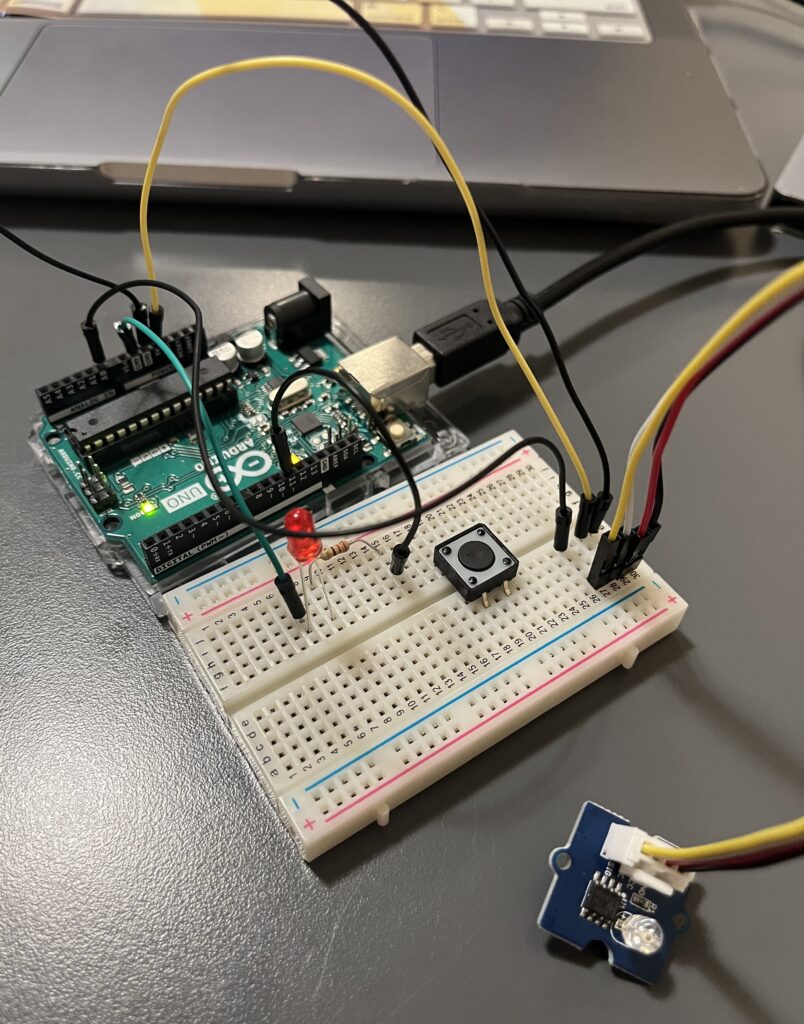
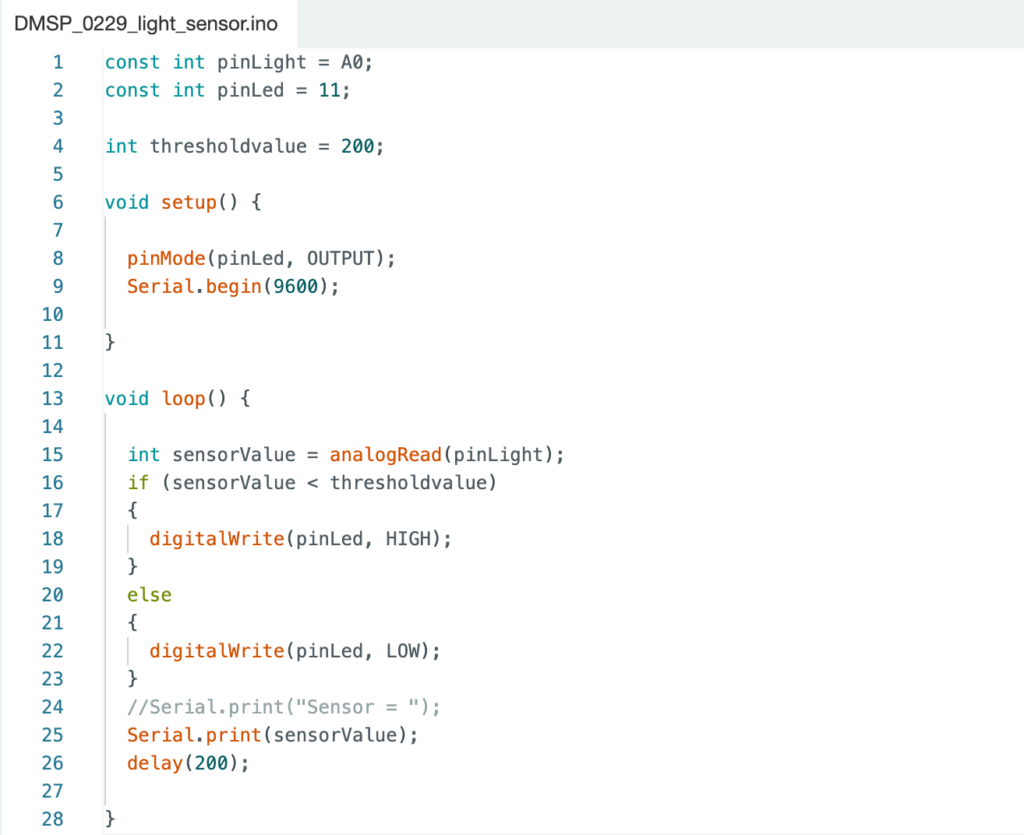
Here is three different parts of our project !

Week8_Sound_Creation3_Yuan_Mei

This week, I focused more on creating sound effects for the final peaceful level. I created some relaxing sound effects, including sounds like wind, chimes, water, ice, etc.. The ice cube, page-turning, and rice-dropping sounds are recorded in the studio using Neumann km 184 and the XY stereo recording technique. The necklace sound is recorded in my home studio using Rode NT1 and Focusrite audio interface in mono. The twinkling, water-dropping, and windchime sounds are manipulated using Mconvolution, integrating sounds together to create a new sound effect. All these sounds focus on the high frequency, whereas the sounds for the previous level focus on the low-mid frequency. These soft, high-frequency sounds help build a sense of chill, relaxation and comfort.

Week7_Project_List_Yuan_Mei

This week, I provided a list for our final presentation and thought about what we haven’t done.

Location: Atrium

Setting: 8 speakers (4 on top and 4 on the ground); 1 projector; 1 projection screen

Sensors: 2 light sensors (control colours and patterns); 2 ultrasonic sensors (control sound effects and chords);  1 sound sensor (controls the eq).

Level controller: MIDI keyboard

Arduino: connect to sensors; connect with Max

Max Patch: Jitter (visual); Sound (play random sounds and send the sounds to the speakers)


What we haven’t done:

  • Check the equipment availability.
  • Check the location availability.
  • Sound effects for the final peaceful layer. Add more sound effects if necessary.
  • Trim chords and the composition for the rest of the layers.
  • Solving the issue of data running.
  • Play random sounds in Max.
  • Send the sounds to the speakers through Max.
  • Set up a main controller to enter different levels.
  • Design a head-like shape object to place sensors on it.


Week7_ProjectImprovement_Ruojing Chen

This week, we have encountered many technical problems, besides max, there is also the sensor part. For example, although the sensor is connected to the parameters that max needs to control, the data of the parameters controlled are very limited, and only jump between two numbers, so I wrote an email to Joe to make an appointment for next week, hoping to get some help. In addition, my work also includes building the sound effect part and music part of max.
The meeting with the tutor Leo this week also mentioned that we would concentrate on two days next week to solve the technical problems we encountered.

Week7_Project_Improvement_Jingqi Chen

This week I mainly discussed with Joe and Leo the problem of equipment delay that I encountered last week and solved it. Currently, the signal received by the sensor can be sent to Max through Arduino normally. In addition to solving technical problems, this week I also focused on thinking about what sensors to use to control which parameters, and the conditions that trigger entry to the next layer.

After testing the temperature and humidity sensor, light sensor and ultrasonic sensor, it can be seen that the value of the temperature and humidity sensor changes relatively slowly, so it can be used to control some changes in the environment. For example, the more people enter the room, the higher the temperature and humidity will be, thereby changing the ambient sound level or other interesting parameters. The light sensor and ultrasonic sensor change values ​​relatively quickly and are suitable for controlling some parameters that require significant changes. Therefore, changes in sound effects, music and visual patterns are mainly controlled by these two sensors (see Video 1 and Video 2).

Video 1: A Video Showing the Value in the Max Patch Controlled by Light Sensor.

Video 2: A Video Showing the Value in the Max Patch Controlled by Ultrasonic Sensor.

In addition to this, I also briefly designed a placement diagram for the final installation. This will be improved as appropriate in subsequent rehearsals (see Figure 1).

Figure 1: A diagram showing a brief arrangement of the installation.

Week6_Sound_Design_Creation2_Yuan_Mei

This week, I focused on crafting an immersive soundscape by designing unknown sea creatures’ sounds and hollow sound effects. Employing Mconvolution, I generated animal-like low-frequency sounds for the sea creatures. Some other sounds are from existing sound libruary, which can be used for non-commercial purpose.

I also manipulated violin timbres to emulate the ethereal singing of Sirens. Large reverbs are applied to sea creatures’ voices, delivering an authentic experience of being in a deep-sea environment.

In addition, I incorporated ambient sounds with reverb to heighten the sense of mystery and fear in the third level, emphasizing hollow spaces’ eerie emptiness and darkness. Experimentation with spatial effects further enhanced the immersion, creating a vivid and evocative soundscape that captures the imagination and transports the listener to the fear of the unknown.

Week6_MaxJitter_soundeffectsPart_Ruojing Chen

After talking to our tutor Leo this week, we made the following things clear:
1. list all controllable variables on Max and select some variables object that can be controlled by sensor.
2. Connect the sensor to Max to see if it can be controlled.
3. The connection between the sound effects and the Max can be used (the Pictslider object adjusts the parameters of the xy axis). I need to build it, and still choose the controllable variable to connect the sensor.


This is a technical problem that was solved last week:
How to control color change
How to control pattern change


This is a defined variable that needs to be controlled by sensors:
The control of color is not in line with the theme and is not technically realized, so it is ruled out.
The visual part can adjust the pattern, including draw mode and size of the waveform changes.
I set the range values of the two:[0,11] and [-120,2]

It has got the sound effect package made by the team members, as shown in the figure below, which are the implementations of the sound effect part I built.
Problems encountered:

The four corners of the pictslider object only support the transmission of four sound effects, and there are many transmission media that need larger volume for sound effects.


The nodes object can hold enough sound effects, but how to control the yellow controller ball is a key problem. If the sensor can be connected with the ball, the audience can control it in real time to feel the trigger of different sound effects caused by their actions.

Week6_Arduino_Max_Connection_Jingqi Chen

The main work I am doing this week is the second subsection of the Interaction Part, which is the connection between Arduino and Max. By communicating with Leo and searching for relevant information on the Internet, I compiled a main patch for sending data from Arduino to Max (see Figure 1).

Figure 1: A Screenshot of Max Patch that Runs the Operation of Sending Data from Arduino to Max.

After the port in the serial object corresponds to the connected USB, it means that the serial object has received the data sent from Arduino, so the “print raw” object will cause the value to be printed out in the console according to the delay time interval set in Arduino, and the corresponding data groups will also be displayed in the following three message objects.

I tried to send the Arduino data of the ultrasonic sensor directly to the Max patch in the visual part made by Ruojing to change some parameters (see Video 1).

Video 1: A Video Showing the Ultrasonic Sensor Arduino Project Sending Data to the Visual Max Patch.

It ran successfully, but at the beginning I found that when the delay value was too small, that is, when the time interval between the two data generation was too short, Max could not work properly, and there was a very large lag. However, after increasing the delay value, although it can run normally, the data changes too slowly and is not suitable for the actual operation of our final installation. So the bigger problem I am currently encountering is how to balance and coordinate the actual operating rate of the equipment and the required operating rate of the installation. This is also what I will mainly need to work on over the next few weeks.

Week5_Sensors_Connection_Jingqi Chen

This week I mainly explored the sensor connection part a bit more (see Figure 1). Based on the previous successful connection and operation of the sound sensor and temperature and humidity sensor, I also successfully connected and operated the light sensor and ultrasonic sensor. Variables that affect changes in each sensor will be mapped to triggering conditions for user interaction in the final installation, which is interesting for users to deepen their actual experience of “Presence”. After testing a variety of sensors, I found that these two sensors are relatively easier to implement in terms of layout and simplicity. Their interaction conditions are more suitable for our final installation. Users only need to perform some simple interactions to complete interesting operations.

The first is the light sensor (see Figure 2 and Figure 3). When the brightness received by the sensor changes, the value generated by the sensor will also change accordingly. Corresponding to the final installation, the interaction form is roughly that users cover the corresponding position of the sensor with their hands to change sound effects, music or images, etc.

Figure 2: A Photo of Light Sensor Connecting.

Figure 3: A Screenshot of the Light Sensor from Arduino.

Next is the ultrasonic sensor (see Video 1 and Figure 4). It works by identifying the distance between the sensor and the nearest object in front of it and changing the generated value accordingly. Currently, this is the sensor with the simplest form of interaction. As the user walks past the sensor, the corresponding audio or video will undergo some changes. It excels in its sense of interactivity and immediacy.

Video 1: A Video Showing Ultrasonic Sensor Connecting.

Figure 4: A Screenshot of the Ultrasonic Sensor from Arduino.

This week comes to an end on the connection between the sensors and Arduino. Next week’s tasks will focus on how to connect the Arduino to the Max and send data to the Max.

Week5_Sound_Design_Creation_Yuan_Mei

This week, I mainly focused on creating chaotic sound effects for the second level of Thalassophobia. The inspiration for designing the chaotic sounds came from my research on the physical influence of experiencing Thalassophobia. The symptoms include dizziness, increased heart rate, out of breath, etc. According to these symptoms, I used high-frequency buzzing and swoosh sound effects to represent dizziness, comprising the chaotic sound design.

I also used low-frequency sounds to represent difficulty breathing, emphasizing a hard-to-breathe deep-sea environment.

Heartbeat with reverb helps to demonstrate the heavy, increased and unbalanced heart rate in the final mix.

To collaborate with ambient music, sound effects are mainly short audio, rather than continuous ambient sounds. Below is the file of the improvised music and sound effects, presenting how the soundtrack might sound through sound installation and participant interaction in our project.

chaos sound effects+music


css.php

Report this page

To report inappropriate content on this page, please use the form below. Upon receiving your report, we will be in touch as per the Take Down Policy of the service.

Please note that personal data collected through this form is used and stored for the purposes of processing this report and communication with you.

If you are unable to report a concern about content via this form please contact the Service Owner.

Please enter an email address you wish to be contacted on. Please describe the unacceptable content in sufficient detail to allow us to locate it, and why you consider it to be unacceptable.
By submitting this report, you accept that it is accurate and that fraudulent or nuisance complaints may result in action by the University.

  Cancel