Any views expressed within media held on this service are those of the contributors, should not be taken as approved or endorsed by the University, and do not necessarily reflect the views of the University in respect of any particular issue.
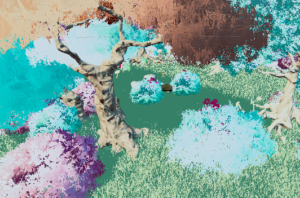
In our VR game, players embody a tree and experience its life cycle, from a seedling to a mature tree, while observing day/night and seasonal changes until death. The Wood Wide Web concept represents the exchange and cycle of life. When a tree dies, it becomes a source of nutrition for other organisms, injecting new vitality into the ecosystem. Physical interaction for players outside the field includes using water sprays instead of rain, electric fans instead of wind, and tapping players to simulate interactions with small animals.
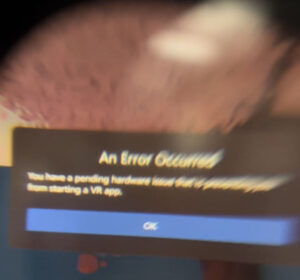
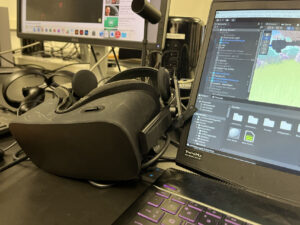
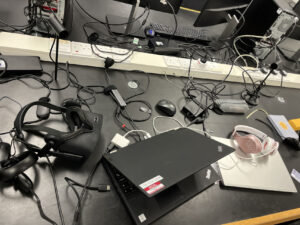
Our device is Oculus Rift, and players control the game through controllers and headsets. Connecting the device with Unity is time-consuming due to configuration and connection issues.
Our team divided the work according to the storyboard and carried out scene modeling, animal animation, nutrition transfer animation, day and night change, change of seasons, and sound design collection and import.
Cooperating as a group, we faced problems, modified the plan, and solved the issues together. This process was valuable and laid the foundation for the output of our final project.
After our presentation, we received positive feedback. Most players found the experience immersive and interesting. However, we need to add transitions between different scenes to avoid abrupt changes. We will continue improving the game experience to engage players better.
As part of the Unity VR team project, I had the opportunity to work with a talented group of individuals, each with their unique skills and strengths. Throughout the project, we faced various challenges and obstacles that required effective collaboration and communication to overcome. Reflecting on our team project, I have to say that we encountered several challenges in terms of collaboration. I regret that we were not able to fully utilize the potential of each team member. In addition, our communication efficiency could have been better, which led to some delays and misunderstandings during the project. I learned the importance of clear communication, active listening, and constructive feedback in creating a cohesive and efficient team.
From a technical perspective, I was able to expand my knowledge and skills in Unity and VR development. I learned how to implement interactive features such as grabbing and interacting with objects in VR and how to optimize performance for VR applications. I also had the chance to work with various VR devices, including the Oculus. In this project, I learned a lot about Unity VR development and acquired various technical skills. I am grateful to our kind mentor Leo for his careful guidance and leading me to solve problems step by step. I learned how to use VR devices and Unity to implement interactive functions, how to use Unity’s API and tools to create scenes and objects, and how to use coroutines to manage scene and object switching, etc. When connecting the VR devices, I encountered countless problems such as headset latency, unconnected controllers, HDMI disconnections, camera blackout, etc. These issues involved some version matching problems with SDK and OpenXR, which I solved one by one. Now, I can proudly say that I am a VR connection master, and I will never have trouble connecting again. In addition, I also learned how to organize code better, making it more maintainable and extensible. These technical skills and knowledge will have a positive impact on my future learning and career development. I am very happy to participate in this project. Although it was challenging and required a lot of work, I also gained much more in return.
Looking back on this project, I do have some regrets about areas where I feel we could have done better. One area that comes to mind is the overall interactivity of the project, which could have been more robust and engaging. Additionally, the transitions between different parts of the experience could have been smoother and more seamless. Specifically, I think it would have been great if we could have added more functionality to the controller buttons to enhance the interactive experience. While I’m proud of what we accomplished, I believe there is always room for improvement and I hope to incorporate these lessons into future projects.
Looking towards the future, I believe this experience has equipped me with valuable skills and knowledge that I can apply to future projects and career opportunities. I feel more confident in my ability to collaborate with a team and tackle complex technical challenges. Additionally, I am excited to continue learning and exploring the possibilities of VR development and how it can be applied in various industries and fields.
Overall, I am grateful for this experience and the opportunity to work with such a talented and dedicated team. It has been a valuable learning experience that I will carry with me as I continue to grow and develop in my career.
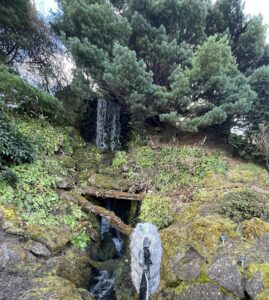
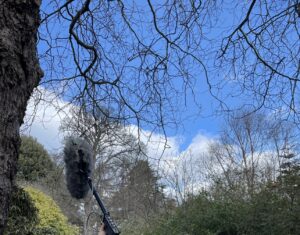
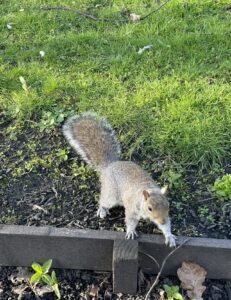
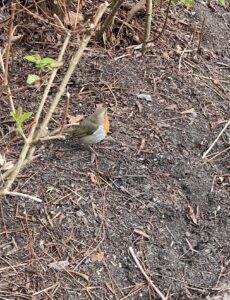
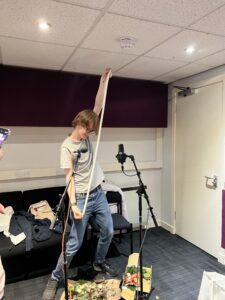
The recording took place at the Royal Botanic Garden Edinburgh using a Sennheiser MKH 416 short shotgun microphone. This type of microphone has strong directional properties, allowing for clearer and more precise capture of the ambient sounds. A location deep within the botanical garden was chosen to minimize background noise pollution. The team recorded a variety of sounds, including bird calls, the sound of flowing water, the scurrying of squirrels, and the rustling of leaves in the wind. The recorded audio was then imported into Reaper for editing and ultimately became sound effects in the game.
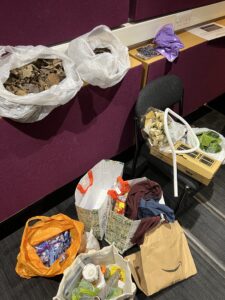
Dead leaves, dead flowers, ivy, soil, pipe, rice, tissue, crushed chili, tin foil, celery, bubble wrap, cornflakes, pill tin packaging, effervescent tablets, paper and paper box, electric toothbrush.
We used two kinds of microphones to compare the different recording effects, one is a dynamic microphone Beyer M201 and the other is a condenser microphone AKG C414B.
Plant growing sound: for the tree growing from soil to ground sound, we used some fibers and twisting them. The sound of snapping celery is used as the seed crackling and drilling out of the soil.
Leave sound: We used some sounds of rubbing plastic as the sound effect of leaves shaking.
Fire sound: To simulate the big fire, I use a combination of the sound of rubbing tin foil, crushing crisps, twisting bubble wrap, breaking off celery and small size impact and whistling wind sound to create more layers of a fire. By adjusting their frequencies and proportion to achieve a balance.
Birds fly:We used clothing and tissues to quickly wave and simulate the sound of bird wings flapping.
Rain:Each of us held a handful of rice and sprinkled it onto a cardboard from above while controlling the frequency to simulate different levels of rainfall.
Flames:We used the sound of squeezing plastic foam to simulate the sound of flames burning.
Collaborators: David Mainland, Runyao Li, Kunkun Wang, Yiran Wang
Many sound events follow the events in the unity scene, such as the sound of burning fire, raining , so most of the functions of playing sound are through “AkSoundEngine. PostEvent(“Event name”, gameObject) in C# inside the unity project.
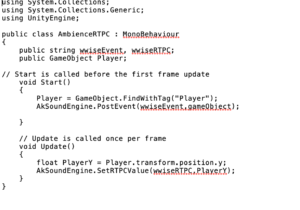
RTPC in C#:
Because the change of our unity scene is not achieved by the timeline code, when using RTPC to change the ambient sound day and night, I cannot directly correspond the RTPC to time, so with the help of our tutor, we use “0” and “1 ” to correspond to “day” and “night” events.
VRController button sound:
We want to play the sound of the tree growing when the VR controller button is pressed, because pressing the button is the player’s own control of the growing process.
The code we used(But not worked, still not to debug):
void Update()
{
if (Input.GetButtonDown(“ButtonName”))
{
AkSoundEngine.PostEvent(“Play_Growth”, gameObject);
}
}
void Update()
{
if (Input.GetButtonUp(“ButtonName”))
{
AkSoundEngine.PostEvent(“Stop_Growth”, gameObject);
}
}
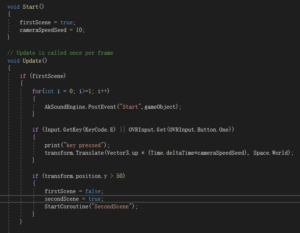
To make the camera move up by clicking the A button on the controller, I use the OVRInput class to detect button presses on the Oculus Touch controller. Specifically,use the OVRInput.GetDown(OVRInput.Button.One) method to check if the A button has been pressed.
To move the object, I check for user input using either the KeyCode.E or OVRInput.Button.One keys being pressed, and then use the transform.Translate method to move the object upward using the Vector3.up direction multiplied by a speed factor (cameraSpeedSeed) and Time.deltaTime. Once the object has reached a certain height (50), the code sets the firstScene boolean to false and the secondScene boolean to true, then starts a coroutine called “SecondScene”. In the second scene, the player’s position, direction, and rotation are stored in their respective variables for later use.
Day and night changes:
Two scripts were set up for day and night changes.
One controls the movement of the sun to create changes in the shadows. The CalculateTimeDifference(sunriseTime, sunsetTime) method is used to set the sunrise and sunset times. However, it was observed that the changes in the shadows were not very noticeable.
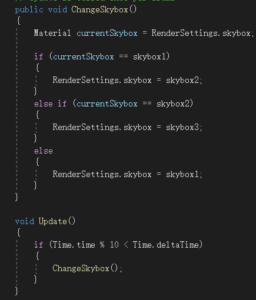
Another script was written to switch between three different skyboxes for morning, noon, and evening. The time was set to automatically switch every 15 seconds using the if (Time.time % 10 < Time.deltaTime) statement in the Update function.
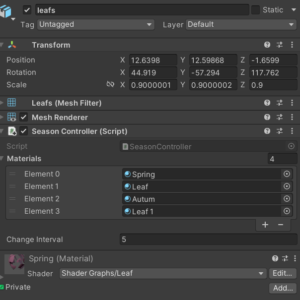
Seasonal Changes:
Implemented seasonal changes for tree materials using Unity’s URP. I used color variations in the material to represent the four seasons. Smooth automatic switching between four material textures was achieved by setting a timer to control the interval between season changes. In each Update function, the timer was incremented by the time of the last frame, and the time elapsed since the last season change was checked against the set interval. If the time elapsed exceeded the interval, a season change was triggered. To smoothly transition between materials, the Lerp function was used. However, a problem occurred where the shader material for the tree trunk and leaves changed together. This was resolved by separating the material textures for the trunk and leaves in separate nodes.
Animal Interaction:
Controlling animal animation. Two methods have been attempted, one using scripts and the other using animation clips.
There were some difficulties with the Animator at the beginning because the imported animal model came with bone animations, such as a bird flapping its wings. However, I needed to add a movement clip to the bird and play both animations simultaneously in the Animator. To achieve this, I created an empty Animation Clip as a parent and dragged the two child Animation Clips into the empty Animation Clip. Then, I used a Blend Tree to control the bird playing both animations at the same time in the Animator Controller.
The other method involved triggering movement through coding, by setting a target point with “targetPosition = new Vector3(Random.Range(-5f, 5f), Random.Range(-3f, 3f), 0f);” and calculating the distance from the animal to the target point with “distance = Vector3.Distance(transform.position, targetPosition);”. This allowed for automatic animation control.
Timeline Events
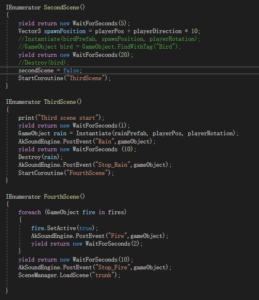
Under the guidance of the professor, we attempted to implement the multitasking switching function using coroutines. Three coroutine functions were defined: SecondScene, ThirdScene, and FourthScene, which were used to switch between different scenes at different time intervals.
The first coroutine function, SecondScene, waits for 5 seconds, calculates a new position spawnPosition, and instantiates a game object birdPrefab at this position. It then waits for another 20 seconds, sets the variable secondScene to false, and ends the bird animation. Finally, it starts another coroutine function, ThirdScene.
The second coroutine function, ThirdScene, waits for 1 second, then instantiates a game object rainPrefab, enables the particle system for rain, and plays a sound effect. It then waits for 10 seconds, destroys the rain object, stops the sound effect, and starts another coroutine function, FourthScene.
The third coroutine function, FourthScene, is the scene for finding fire. It sets multiple fire particles and activates each game object in the fires array sequentially using a script, while playing a sound effect. Each fire object waits for 2 seconds, and then they are destroyed. Finally, the sound effect is stopped, and another scene, trunk, is loaded.
I am mainly responsible for the setup and operation of Unity VR.
Device Selection
We chose to use the Oculus Rift for our project. Initially, we used the Oculus Quest, but during the first Unity test, we found that the Quest’s rendering speed was slow, the resolution was low, and there was significant lag that severely affected the gameplay experience. Because our project uses Unity shaders, rendering transfer speed is critical. Therefore, we resolved this issue by using Unity post-processing rendering and utilizing the low-latency head tracking and visual optimization capabilities of the Oculus Rift, which yielded better results.
Connecting the Headset:
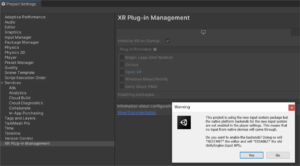
To connect the Oculus Rift headset to Unity, I needed to ensure that the Unity and Oculus SDK versions matched. Then, I set up the Unity environment by enabling Oculus support in the XR Plugin Management, importing the Oculus Integration package, and setting up the OVRCameraRig. This required removing all other cameras in the scene to avoid conflicts that could prevent the display from working correctly.
Next, I added the OculusInteractionSampleRig to the scene and used the OVR Manager component in the OculusInteractionSampleRig > OVRCameraRig to adjust the Tracking Origin Type to Floor Level. By following these steps, we were able to successfully connect and use the Oculus Rift headset in Unity for our project.
Connecting VR Controllers:
To connect VR controllers in Unity, we needed to first ensure that the controllers were compatible with the Rift headset we were using.
Next, I mported the Oculus Integration package into Unity and added the OVRCameraRig to the scene. Then, i added the OVRInput component to the scene’s controllers to enable input functionality.
To map controller inputs to game actions, I used the Unity Input System, which allowed us to define custom input actions and map them to specific controller buttons. We then used these actions to control various elements of the VR experience, such as player movement and interaction with objects in the environment.
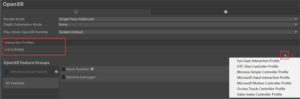
Sometimes, I encountered issues where only the headset was working, but the VR controllers were not responding. In the Oculus Store, it showed that the controllers were connected, but we could not control anything with them. I suspected that the controllers were not connected to Unity. To resolve this issue, I used OpenXR as a replacement and selected Oculus under Play Mode OpenXR Runtime. Then, in the Interaction Profiles, I clicked the “+” button to add the Rift Controller option, which enabled us to connect the controllers. Finally, I imported the XR Interaction Toolkit, which allowed me to use the controllers in our VR project.
At the beginning, the XR Interaction Toolkit was not running, and I discovered that it was due to an outdated version. However, the latest version was not displayed in the package list within Unity. To solve this, I selected the “+” button under the Package Manager and chose “Add Package by name.” Then, I entered “com.unity.xr.interaction.toolkit” and imported the latest version.
By following these steps, I was able to resolve the issue of the VR controllers not connecting in Unity and use them effectively in our project.
Grab Function:
To implement grabbing functionality in Unity VR, I use a prefab file that includes a ControllerGrabInteractor component and make it a child of the ControllerInteractors object.I add the Grab Interactor script to the controller object and use the HandGrabInteractor script for gesture tracking.
To make an object grabbable, I add the following necessary components: Collider, Rigidbody, Grabbable, and Grab Interactable. These components allow the object to have physical properties such as collision detection, mass, and gravity, and enable it to interact with the grab interactor script for grabbing and releasing.
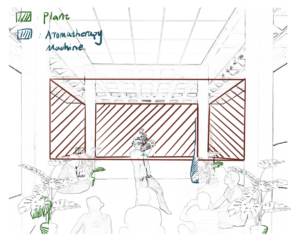
Based on feedback, we have redesigned the exhibition layout. With only one device available, audiences experience long wait times. To alleviate potential boredom during this wait, we have decided to use four-sided screens to surround the entire exhibition space and play game scenes or animations for the audience to watch. This not only stimulates audience interest, but also provides entertainment during the wait.
To immerse audiences into the game environment from the moment they step into the exhibition space, we will place greenery around the exhibition area to create a natural atmosphere. Additionally, we will use aroma diffusers to add forest scents and play forest ambient sounds, allowing audiences to experience the game environment from a visual, auditory, and olfactory perspective. Through these designs, we aim to enhance audience game experiences and immersion.
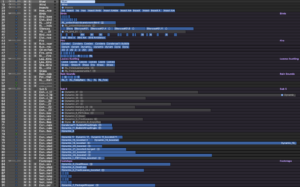
Most of the sounds that went into the final Wwise project were first placed into a Logic project file, where they were edited and processed. By the end of the project, the Logic file contained around 150 tracks.
Because the approach in Wwise used mainly random containers set to continuous, the editing process mainly consisted of finding the parts of the raw audio that I wanted to use, slicing it up into sections, adding crossfades and then bouncing those individual sections as separate audio files.
For processing, Logic’s stock gain plugin, DMG Audio’s Equillibrium EQ plugin and Waves’ NS1 noise reduction plugin were the main tools I used – and almost every sound was processed using these three plugins. Some sounds however, needed a bit more. In addition to these plugins, I also used Logic’s stock pitch shifter and stock distortion, Aberrant DSP’s Digitalis and Shapeshifter, and Xfer Records’ LFOTool.
The pitch shifter and LFOTool were used for the animal footstep sounds. For the main piece of audio, I used a recording from the foley session of someone crushing the petals of a month-old bouquet of roses. This then went through LFOTool to create the dynamic contour of a footstep. I did this several times, varying the envelope interval to get some longer and shorter footstep sounds. The pitch shifter, in combination with some EQ, was used to create footstep sounds for small, medium and large-sized animals.
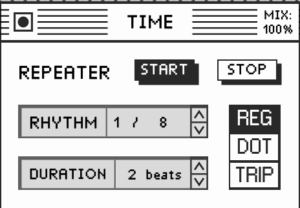
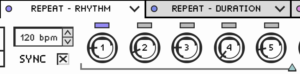
Digitalis was used for its repeater, which repeats the audio sent in at set intervals, and for a set number of beats. This was used when I wanted particular pieces of audio to sound busier, such as the bee sounds. The mix control would be set to around 50% so that the dry audio could still be heard clearly. To add some variety I took advantage of Digitalis’ feature that allows you to sequence the value of parameters. I sequenced the repeater rhythm and duration.
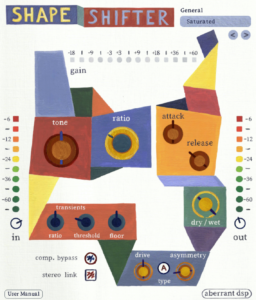
The distortion and Shapeshifter were used to add a bit more bite and impact to more intense sounds, namely some of the fire sounds. In these instances, Shapeshifter was used less as a compressor, but instead to saturate the sounds a little. I did however, use Shapeshifter on some of the rain sounds, as along with making it sound a bit more intense, it had the added benefit of giving the transients a longer tail – which I thought better suited a rain sound.
Wwise Implementation
Creative Approach
Upon seeing the environment that the other group members had created for the first time, I was very impressed. With the world that had been created being as beautiful as it was, I felt as though the soundscape had to achieve the same level of detail and richness.
I also wanted the soundscape to extend beyond the player’s view, giving the player context for the environment and really selling the idea that this forest was teeming with life, both seen and unseen – but always heard. Examples of this in the final build are things like the grass and leaves rustling in the wind, and the distant sounds of animal footsteps.
Events
Events are the main method used to control sound in the project, and thus the Wwise project contains quite a lot of them. Based on the storyboard created by another group member, we had a pretty good idea of what sounds would be present during the various stages of the experience. Furthermore, the main C# script used coroutines to represent each ‘scene’ of the experience, which worked very well with the Wwise implementation, as we could trigger stop and start events and adjust RTPCS in these coroutines.
RTPCs
RTPCs were used when sounds still needed to be present when moving from one scene to another, but an aspect of said sounds needed to be changed. The most notable example of this relates to the player’s elevation. Sounds that are closer to the ground become quieter and have filtering applied as the player moves up, and conversely sounds that are higher up or further in the distance become louder, as the player’s view encompasses more of the forest.
Containers
The Wwise hierarchy makes heavy use of blend and random containers. Blend containers are used both for organisation of different parts of the soundscape into sections (environmental sounds, weather etc), and for more complex sounds, which are made using random containers nested inside the blend container. This allows for more control over of individual parts that make up the sound as a whole. Random containers are used in three different ways: Longer sounds play continuously with an xfade transition, incidental sounds use a trigger rate transition, and some sounds use an xfade transition, but have silent audio files included in the container, to help break things up and to add some variety to how long the sound will be heard for each time.
Container Example
The blend container for the bird sounds serves as an effective example of how these different applications of random containers work in context. Within the “Birds” blend container are four random containers: “Ambience”, “Close”, “Distant Ambience and “Distant Baby”. “Ambience” just uses a simple xfade transition. “Close” also uses an xfade transition is made up of shorter sounds, along with several silent audio files ranging from 2-10 seconds. “Distant Ambience” is made up of longer sounds than also use an xfade transition. In this track, I deliberately left in some of the non-bird sounds to give the birdsong some context in terms of distance, and to add to the overall soundscape. “Distant Baby” uses a random container with a trigger rate that varies by a few seconds each time. In combination, these different techniques come together to make a very full and vibrant part of the soundscape.
Reflections on Wwise Implementation
Because of the lack of player movement, when initially creating the hierarchy for the Wwise project, I focused heavily on creating a rich soundscape that would surround the player. Because of this, I perhaps did not give enough consideration to the spacialisation of sounds. The one strong example of spacialisation is the bird that flies around the player’s head throughout the experience.
The project became more linear and cinematic as it progressed. Given my previous experience working in Wwise, and the ideas during the earlier stages of the project, the implementation was created in a way that may have suited something more interactive. In retrospect, perhaps more work on RTPCs and more attention to detail regarding certain narrative set pieces could have gone a long way.
Gathering Foley Materials
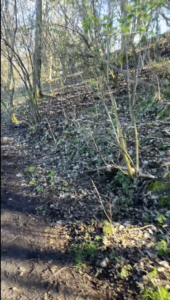
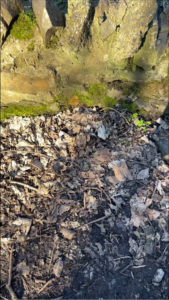
Ahead of our foley session, I decided to go and gather some things. During a meeting with our tutor, he said that sometimes the real thing is best when it comes to recording foley sounds. With this in mind, I decided to travel to the forest near Blackford Hill. In some small bin liners, I collected some mulch, soil, dry dead leaves, and fresh ivy leaves. These proved to be very useful during the foley session.
Collaboration and Organisation
Since I had the job of putting together the Wwise project and creating the hierarchy, I was put in a unique position. When making the hierarchy, I was consistently referring back to the storyboard and making notes as to what sounds would be needed during each scene, and how audible they would be. This meant that when the time came to start recording and creating audio assets, I had a very clear idea of what we already had, and what else we still needed to do. This meant that at several points, I was able to take the initiative; making checklists and written summaries of the planned sound content in each scene and sharing these with the rest of the sound team. This allowed for work to be delegated and divided equally among members, and I believe this helped to facilitate collaboration between group members.
After I made the demonstration via the timeline function of Unity, I tried to set the cameras’ animation on the timeline firstly to guide the players’ experiences with fixed view angles and specified time triggers. Then, I summarised the three modes and realised the learning from the three different modes:
The three modes of participation:
1.1 setting the fixed cameras to offer fixed perspectives for players
1.2 first-person perspective, but the triggers were made by the fixed animations and visual effects and guiding the players’ attention by music. However, the players could not control the view angle and these triggers; they could participate via the fixed settings and triggers.
1.3 Virtual reality. The scripts should be considered the ideal idea to recall the triggers via player scripts. Players are the main characters and participate in their visual experiences. They could create their participation path to identify the animations and interactions in Unity. The VR’s remote buttons could evoke all the interactions, and the decisions are made by players rather than solid settings.
The thinking and learning from the three interactive ways
I reviewed the project’s goal, which I learned at the beginning of the semester(dmsppresence23,2023), which is to build the embodiment of the concept of presence by digital media, and I re-evaluated how the presence could be. After I completed the demonstration of the enhancement of the project, I realised the three modes of participation might lead to different impacts on players to explore the entire project. Virtual reality could offer more visual effects to players for the visual sense perspective. Also, virtual reality and remote controllers and work with the scripts might contain an obviously positive way to assist in achieving the goal of presence for the interactions and individual experiences because players could decide what they would encounter in the virtual forest and how their experiences would be.
Sense of vision
I think virtual reality (VR) could be a positive way to enhance virtual world participation, which could assist with interactions, explorations, and a sense of vision. Paes et al. (2021) discussed immersive environments with non-immersive environments, which mentioned VR experience. They discussed the hypothesis of IVR (immersive virtual reality) with users’ perception of the concept of presence. And the results expressed that the exam results are the IVR presents the better realistic perception experiences. Meanwhile, the IVR could offer better outcomes for users to sense the virtual space more accurately(Paes et al. 2021). And after participants wore the VR devices to join the project on the presentation day, I noticed that VR technology could offer more cognition and interactions for players to explore even if the same digital environments.
Technology learning
Oculus rift
The difference between these two VR device versions might lead to different user experiences for the project due to the multiple rendering way and sensor adjustment. Even if this project might consider mainly using the Oculus Rift as the primary VR device, and the sensors were required to adjust and reinstall the package in Unity if a switch laptop was necessary.
Future Improvements
The interactions in Unity
I think it might be considered to improve this project to add more interactions in the future. Based on the concept of presence, what I learned from this course: how to improve interactions and engagement might be necessary for presence. It would be better if I could guide and lead participators to engage and involve more.
The personal virtual exploration in Unity
I think the current version might not offer options for the participants’ own explorations. The two versions, the one before the presentation and the improvement one after the feedback, might not achieve the individual exploration goal. The players’ virtual role might be thought of as one primary reason that the perspective might be solid from a tree view. However, just like the feedback, the tree branch might also move back. Being a virtual tree to explore a tree view might be explicit, and there are also various possibilities to explore.
The virtual reality(VR)
I think it is potential that adding more advantages to virtual reality’s functions might bring immersive environments experiences. Virtual reality is an advanced technology that brings people to join the virtual world with more visual sense. Meanwhile, it could get remote to guide players to choose and interact inside the virtual world with more immersion. This project now uses a VR device that could indicate players to better immerse in the forest and storyline. However, I think it might be better if this project used more virtual reality advantages than now; there are no interactive functions from the remote. It might be potential to add more remote options to let players select a tree or interact with animals.
References:
Paes, D., Irizarry, J. and Pujoni, D. (2021) “An evidence of cognitive benefits from immersive design review: Comparing three-dimensional perception and presence between immersive and non-immersive virtual environments,” Automation in Construction, 130, p. 103849. Available at: https://doi.org/10.1016/j.autcon.2021.103849.
Background (2023) dmsppresence23. Available at: https://blogs.ed.ac.uk/dmsp-presence23/ (Accessed: April 26, 2023).