Any views expressed within media held on this service are those of the contributors, should not be taken as approved or endorsed by the University, and do not necessarily reflect the views of the University in respect of any particular issue.
As the story creator of MM&NN, I’ve always believed that the world around the player should not merely serve as a backdrop—it should feel like part of the narrative, as alive and emotional as the characters themselves.
This week, I focused on redesigning the game’s environmental atmosphere to further blur the line between reality and dream, illusion and memory.
Painting the Sky: From Void to Dream
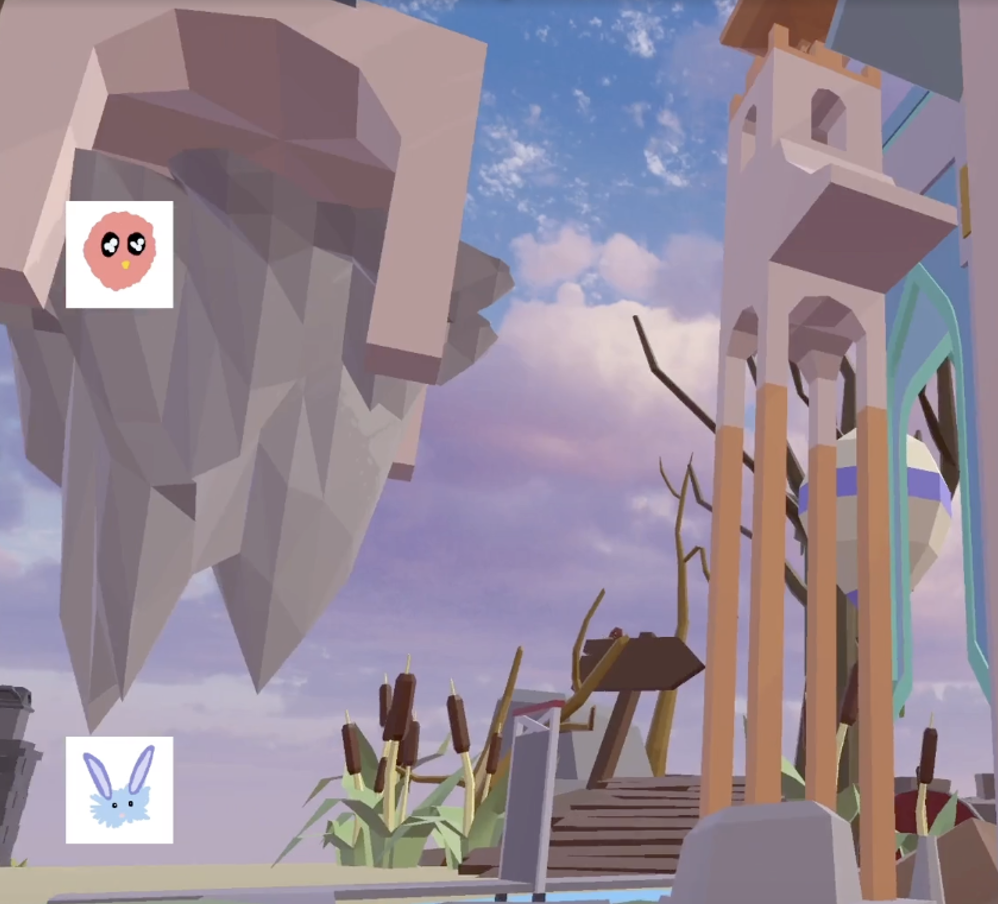
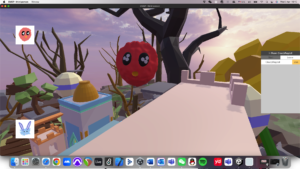
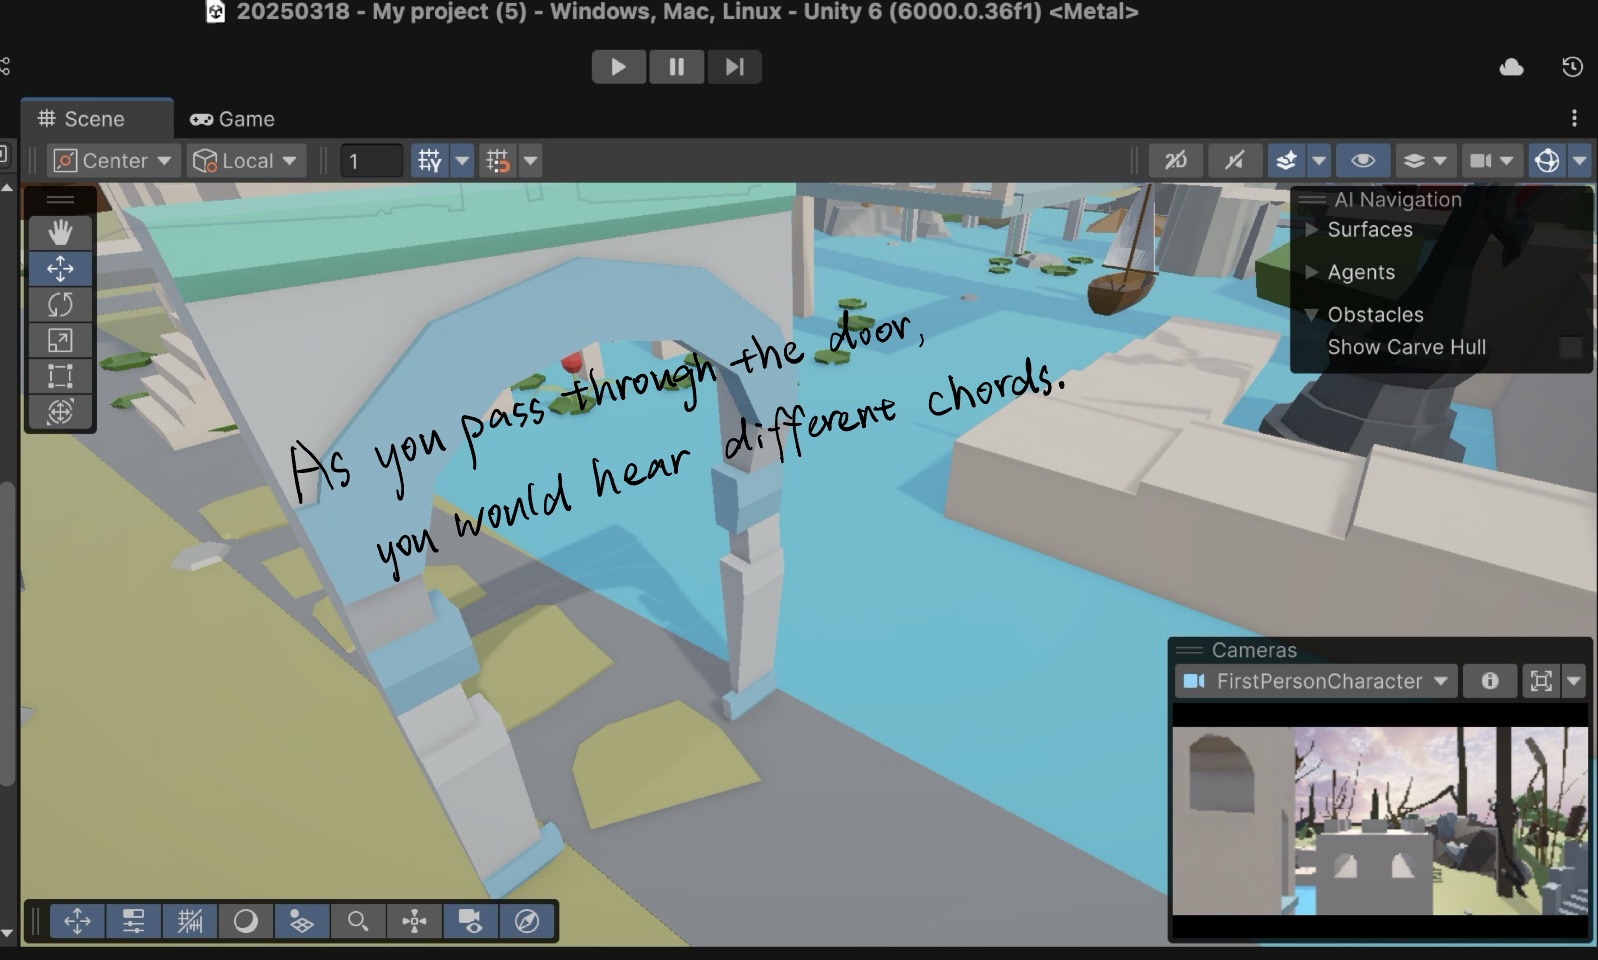
One of the most impactful changes was a complete replacement of the default skybox. I chose a soft, pink-toned sky, gently glowing with romantic hues—meant to suggest warmth, distance, and a kind of surreal comfort. This subtle shift changes the mood of the entire world: the maze no longer floats in a void; it now floats in a dream.
The pink sky, while beautiful, also feels slightly melancholic—mirroring the emotional tone of MM&NN, where beauty is often tinged with uncertainty.
Bringing Nature to the Edge of the Unknown
To support the narrative that MM and NN live inside a garden-like dream world, I expanded the natural environment both inside and outside the maze. While the maze itself is architectural and puzzle-like, I wanted to soften its edges and build a deeper feeling of immersion.
Newly added environmental details include:
Soft clouds drifting near the boundaries of the world
Scattered wildflowers breaking through cracks in the paths
Moss-covered stones that gently frame key turning points
A distant horizon of trees and floating earth, suggesting a world that continues beyond the player’s view
These are more than decorative—they are narrative cues. They suggest that this world has grown, not been built—that it once was alive, or still might be.
Figure 1. Modified Skybox Design
A Maze That’s Worth Wandering
The maze in MM&NN has always been about more than just finding the key. It’s about what you see, what you hear, what you feel while searching. That’s why I’ve put special attention into ensuring that both the inside and the outside of the maze offer something worth lingering for.
Whether you’re walking across floating lotus leaves, standing at the base of a blue tower, or pausing just outside a locked door, I want the player to feel like they are surrounded by a soft, surreal peace—a world that wants to be remembered.
Final Thoughts
With every environmental update, my goal is to make MM&NN feel more like a living dream—a place where exploration is not just a mechanical task, but a gentle experience of beauty, mystery, and reflection.
Players may come for the puzzles.
But I hope they stay for the dream.
I have tried to build an online system based on Unity Netcode for GameObjects (NGO) + Unity Relay / Lobby with the following flow:
– Player A creates a room → generates and displays the room code.
– Player B enters the code → connects to the same game room.
– After successful connection, the game starts.
In practice, the following difficulties were encountered:
– The controller generation logic needs to be adjusted, and the first-person controller cannot be placed in advance.
– After the host creates a room and generates a code in the console, the slave cannot enter the game after entering the code.
Despite this lack of success, I was able to gain a deeper understanding of Unity’s multiplayer networking framework through this process. In the end, our group used Alteruna Multiplayer SDK to successfully implement the online function and solve the technical obstacles.
Since I am responsible for the multiplayer system part of the project MM&NN, this blog is about sharing some basic information and common techniques and logic about multiplayer system implementation.
Implementation
This section is detail about multiplayer system implementation in MM&NN. The scripts and functionalities related to the multiplayer system can be divided into two main parts:
Core Multiplayer Features
These include synchronization between players (ensuring both game instances remain in sync across two computers), avoiding duplicated input across clients, creating and joining rooms. These core systems and scripts are provided by the Alteruna package. I directly implemented these by dragging the appropriate components into the scene or applying them to the relevant prefabs.
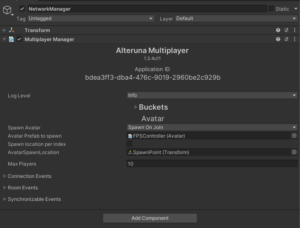
Multiplayer Manager: A network manager from Alteruna’s prefab script. Responsible for network connection between devices.
Multiplayer Manager
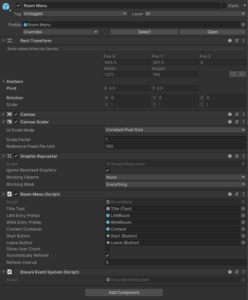
RoomMenu: A lobby-like menu from Alterunas’ prefab script for players to create, join and leave game rooms. This object is in the scene and can be customized depend on project’s needs.
RoomMenu
Avatar: A script for Alteruna multiplayer system to locate the player prefab and spawn.
Avatar
Transform Synchronizable: A script to enable information synchronization between devices.
Transform Synchronisation
Player-Specific Settings
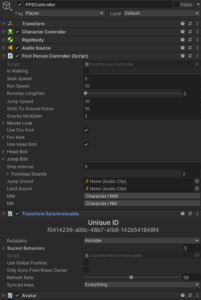
This part is my customization to meet project’s needs mainly in First Person Controller prefab. The differentiation between host and client, as well as between “is me” and “not me,” plays a crucial role in separating character logic and visuals (camera) for MM and NN. I added identification logic within the First Person Controller script (see screenshots below).
First Person Controller Prefab
First Person Controller Prefab Overview
All character models and post-processing settings are stored under the single prefab of first person controller. The multiplayer system “enable” or “disable” different elements depending on whether the current player is the host or client, and whether the character being controlled is “me” or “not me,” before spawning it in the game scene.
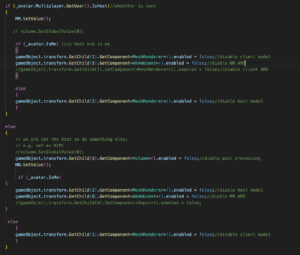
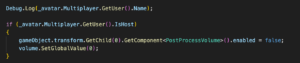
Below is an enabling/disabling logic using “if” within the script.
Big if Logic
This part is basically two small “if” of self-identification under one big “if” host and client identification. Because character MM and NN ‘s settings are activated based on player’s identity to the server, which is host and client. MM’s settings are bind with host while NN’s settings are bind with client. After clarifying player’s identity, program can allocate different character settings to different devices. However, that’s not enough. Two small “if” is responsible for identifying whether the player “is me” in order to enable the correct model to the right player. Without this layer, the player will have wrong model for the other partner player.
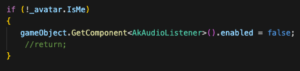
In terms of the game audio, since we are using Wwise implemented into Unity and there are two Ak Audio Listeners present in the same scene (one per player), I disabled the listener on the not “is me” player’s object to avoid audio conflicts. Besides, there are two different play events of ambient sound in the Wwise project for two characters, I have the GetChild() to enable/disable two events in the big “if” script.
Audio Enable/Disable
With this setup, the basic individual character settings are successfully implemented.
Multiplayer in Two Perspectives
MM (Host) ViewNN (Client) View
Basic Structure
During the research and hands on experience, I found a basic structure and rules for online multiplayer system implementation which works for both packages I have experienced:
A manager which in charge of the network connection
Online multiplayer system needs scripts to let the device gets access to the sever / host in order to connect with other devices.
A player prefab (avatar) in Asset for the system to spawn players
Player prefab has all the information of the player controller. When a new device comes in, it will spawn a new player to the scene.
To get other players’ movement, location and other information precisely and lively, system need scripts to transform other player’s information to the device through network.
Input collision avoiding script
A script to ensure the input commands from a device are only controlling the local player instead of all the players.
Multiple listeners avoiding script
If the game is implemented with Wwise, it has to make sure the local device only has one listener.
Although there are a lot of methods for online multiplayer system, they all follow this basic structure in some way.
Multiplayer vs Single player
When implementing multiplayer into the project, it’s better to previously consider what content in the project may change when there is more than one player in the game scene.
Players:
Firstly, multiplayer system always needs a player prefab to spawn players. Besides, if the game has different settings to players, an extra player identification and functionalities switches have to be aligned with the player prefab. (Examples in implementation of MM&NN)
Audio:
As we introduce multiplayer system to the project, every player has a listener. However, a running game cannot hold more than one listener except special circumstances. We have to disable all other listener except the local one.
Game Objects:
Some game objects may include interactions with players which means they have to be synchronized in multiplayer system too.
The purpose of post-processing in the MM&NN project is to create a unique visual experience for the character MM, who sees the world through a blurred and color-shifted perspective, distinct from the normal view of NN. Because post-processing in Unity can provide an aesthetic style to the game by adding filters to the camera, its functionality aligns with our objectives on character MM’s visual. This effect is enabled when the player is the MM, and disabled for the NN, as technical detailed in the Multiplayer System section.
Implementation
I made a mistake when implementing this functionality for the first time, which is directly adding Post-processing Layer and Post-processing Volume under the camera object. Since the project is built using Unity’s Universal Render Pipeline (URP), post-processing cannot be applied directly to the camera using the traditional Post-processing Layer and Volume components. Instead, it must follow the URP approach, which involves two key components:
Volume Profile: A data asset that defines post-processing effects and their parameters.
Global Volume: A component that applies the selected Volume Profile across the scene globally.
First Person Controller Prefab setting
These two components are integrated into the First Person Controller prefab. To simplify enabling and disabling the effect through scripting, the Global Volume is placed as a child under the FPS Controller object, allowing easy access via GetChild() in the First Person Controller script.
The Volume Profile used here is called “FPS Volume Profile”, which contains:
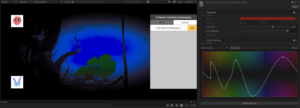
Vignette: Adds a soft blur around the edges of the camera view. Intensity controls how much the effect applies to the camera. Smoothness blurred the effect’s edge. These two effects create a blurred and limited visual for the player.
Color Curves: Applies a blue color tone to match MM’s unique visual perception. In the Color Curves settings, I used the Hue vs Saturation curve to increase the saturation of the blue and purple areas, while lowering the saturation of the green area. This made the blue in the scene more intense and harsher, creating an unsettling atmosphere.
Profile settings and final outcome
The “Global Volume FPS” object uses the “FPS Volume Profile” and applies it globally when MM is the active player. Finally, MM character’s player will have a different aesthetic style from NN character’s player, building players’ difference to increase gameplay.
Over the past few weeks, the Unity team has discussed and planned the game’s narrative, gameplay, mechanisms, as well as the start and end game UI.
In the game, I have implemented mechanisms such as triggering elevator movement when the player interacts and requiring a key with the same sound as the door to unlock it. Additionally, I have created a simple version of the exit game UI. Below are my related videos and screenshots.
1.1 Elevator video
1.2 How the Elevator Mechanism is Implemented
I used a combination of object animation and scripting to make the elevator move when the player jumps onto it. The elevator follows the parameters set in the animation, moving to the designated position within the specified time.
1.2.1 Animation Part
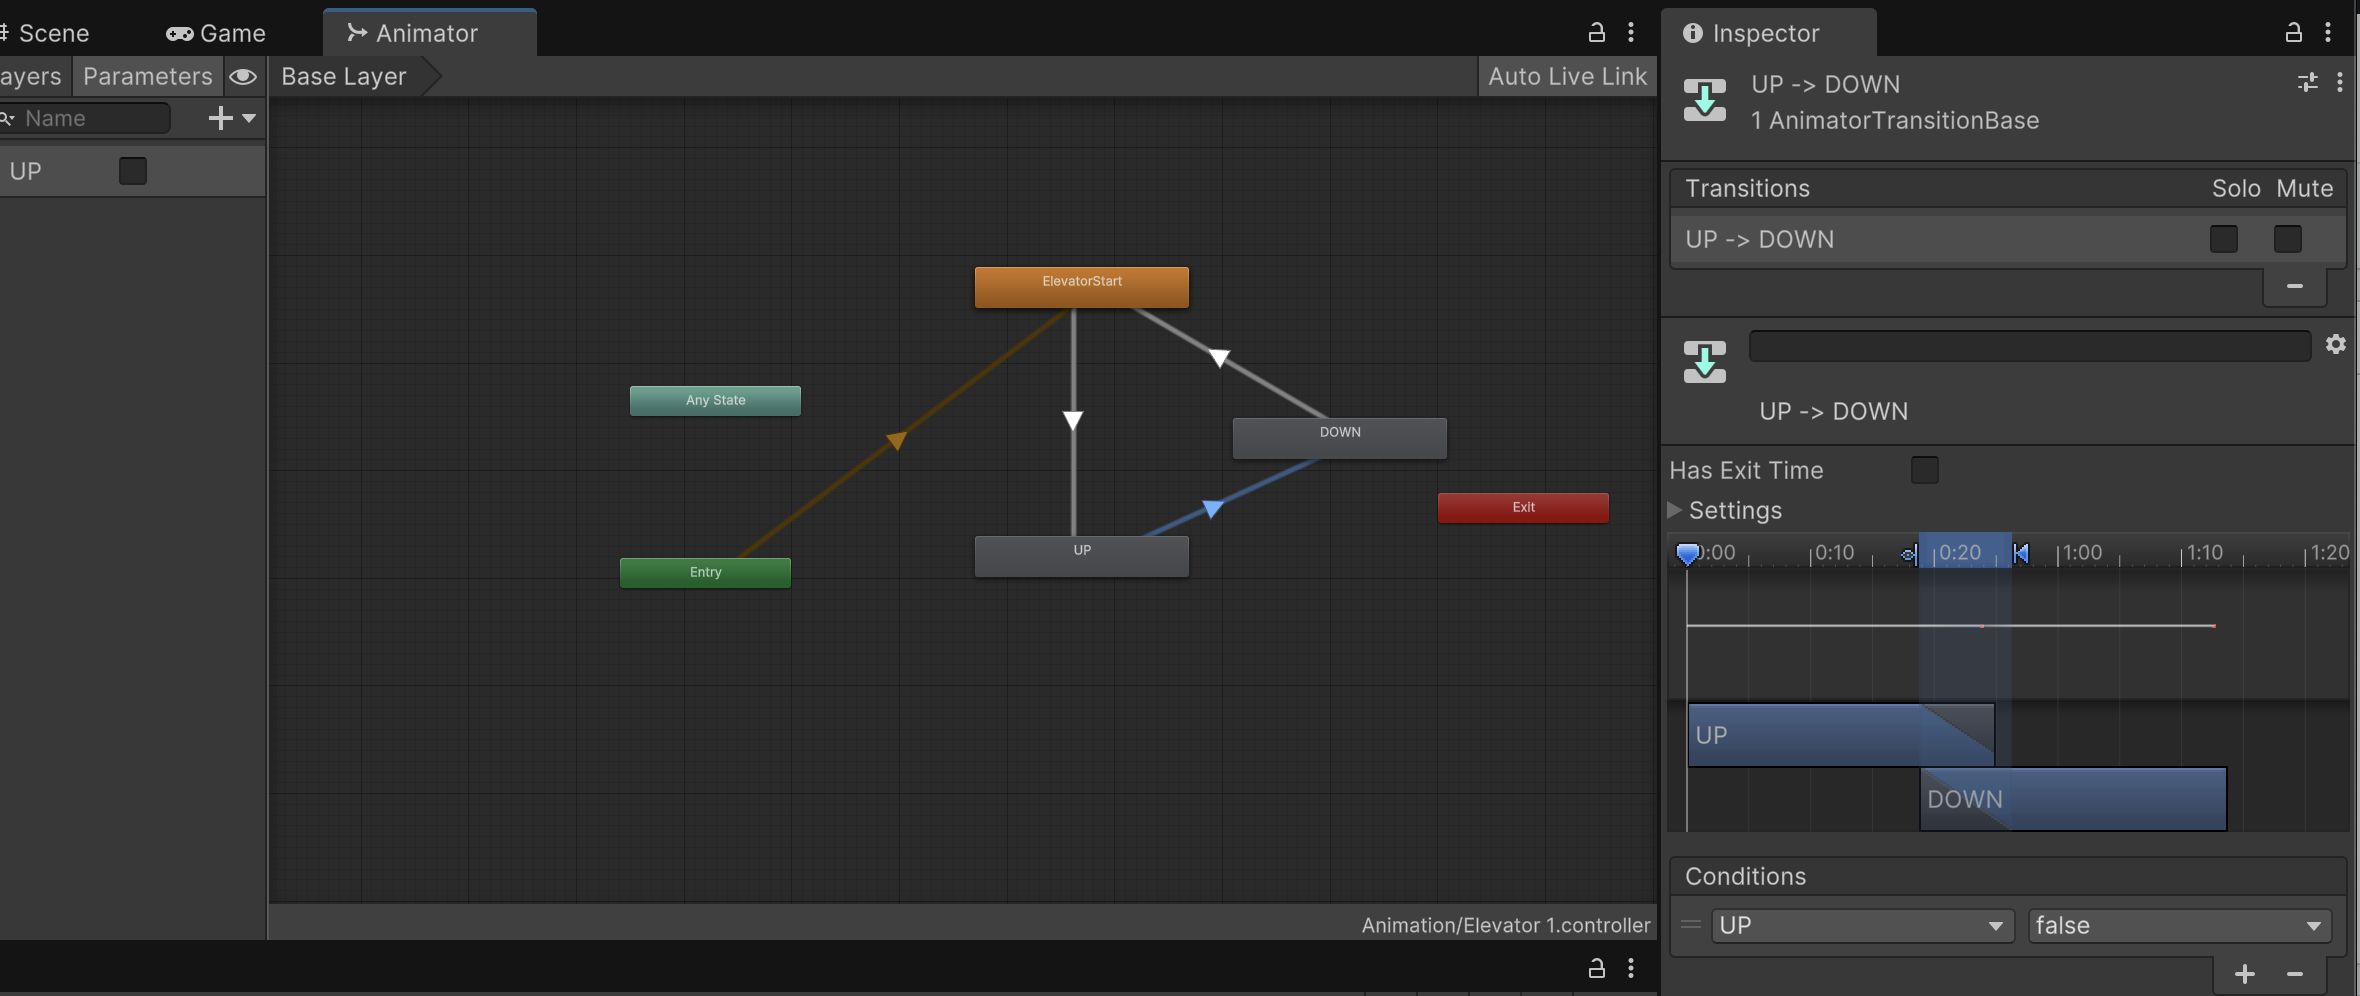
First, I created an Animator on the object that needs to move, allowing it to follow my designed movement. Then, I set up an Animator Controller to manage how the animations transition between each other.
Figure 1
Figure 1 shows a screenshot of the State Machine and Animator parameters in the Controller. However, not all specific parameters are fully displayed in this screenshot.
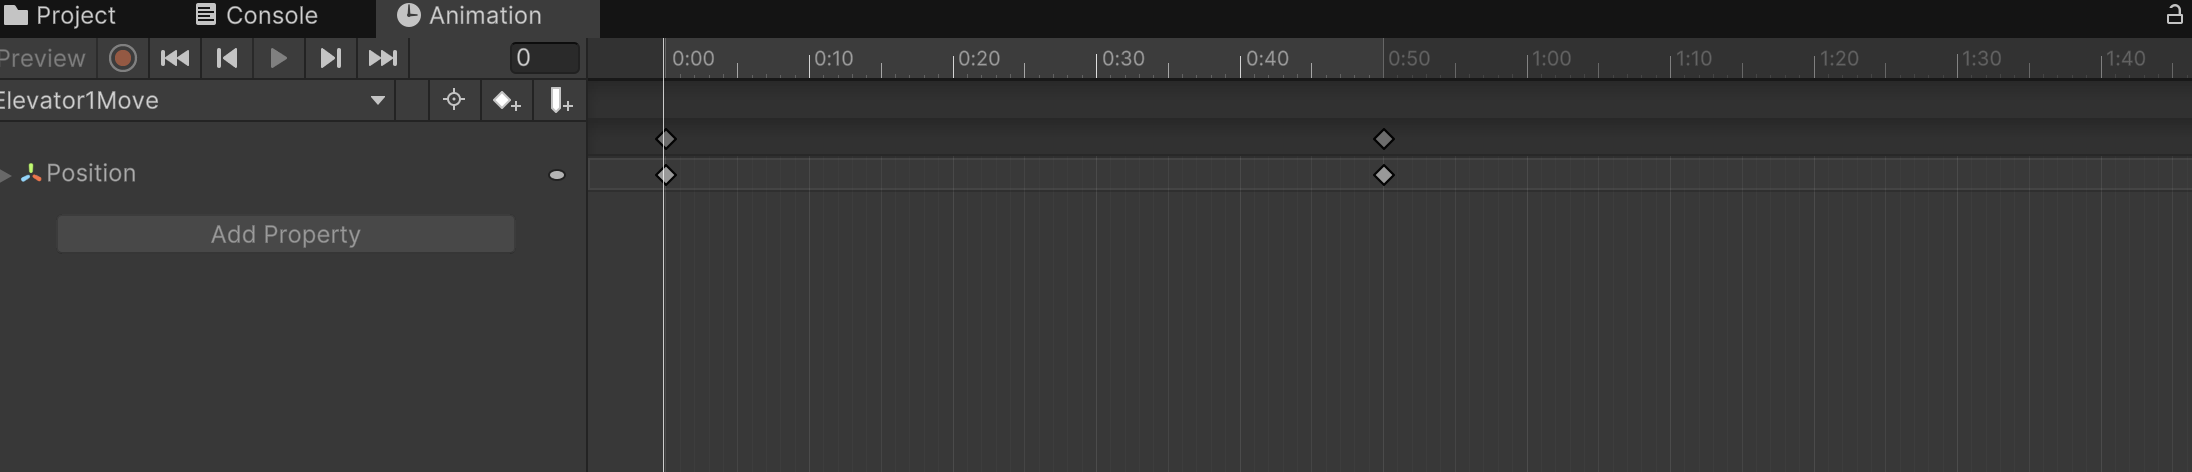
Figure 2
Image 2 shows the Animator I set up for the elevator, moving it from its original position to the designated position within 0.5 seconds.
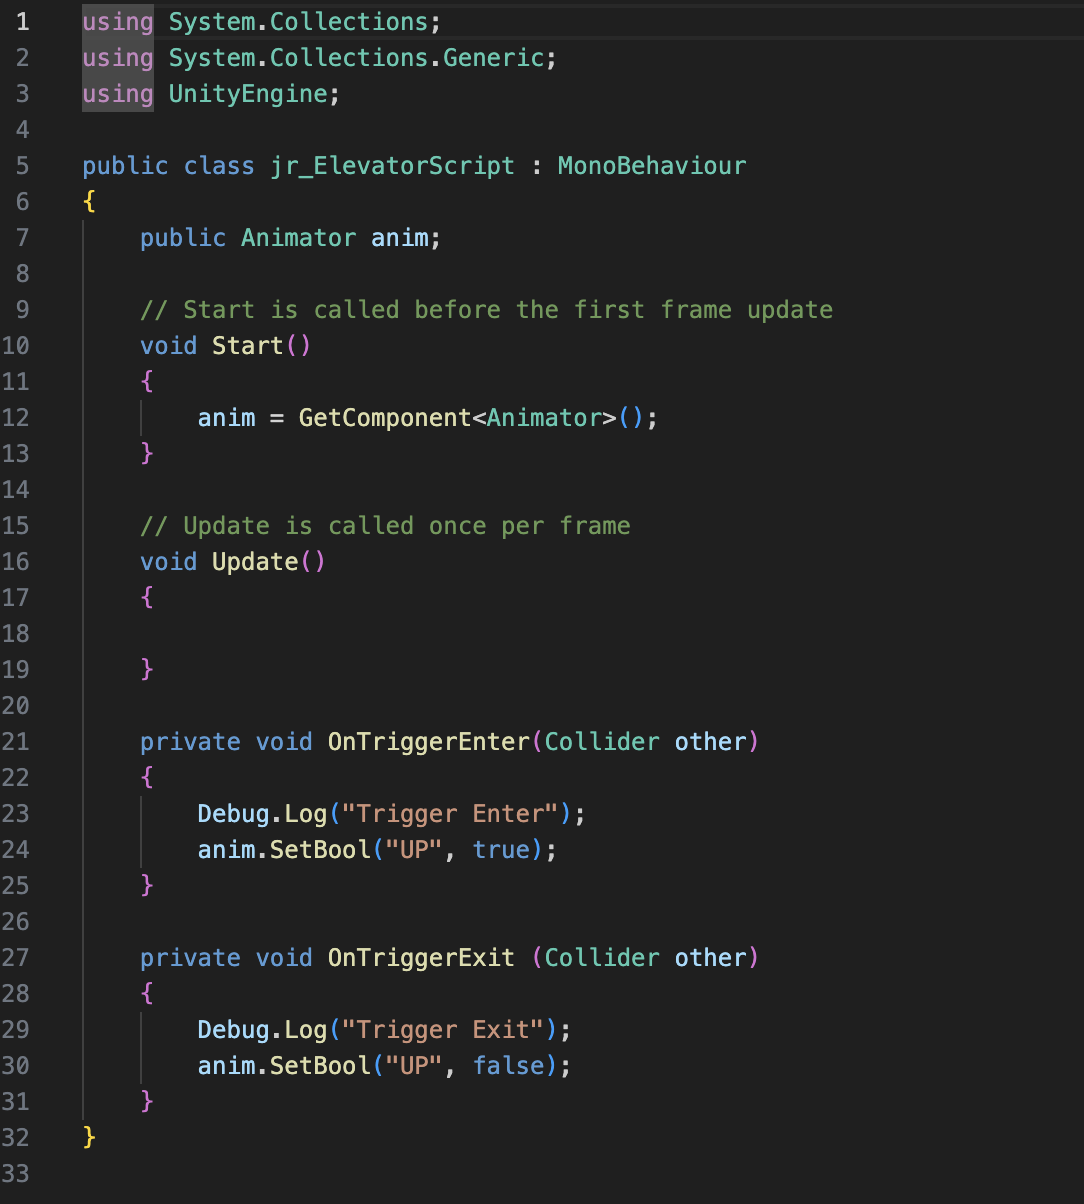
1.2.2 scripts
Figure 3
Image 3 was completed by referencing Jules’ game script.
2.1 Correct Key unlock door Video
2.2 How the Key Unlock door Mechanism is Implemented
In the design of the mechanism for unlocking the door with the correct key, the approach is similar to that of the elevator. The key difference is that each object requires a sound, which I implemented through scripting, allowing the necessary sound to be directly imported. The second difference is that I needed to add a Pickup Key script to the player controller, enabling the player to trigger the door to open after obtaining the correct key.
3.1 Exit Game UI Video
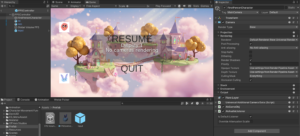
3.2 How Exit UI is Implemented
I initially designed a simple and clear exit game UI, allowing players to press the ESC key at any time to bring up options to either return to the game or exit. The Unity team discussed implementing different end-game screens based on the player’s ending. I will continue to follow up on this part of the UI design.
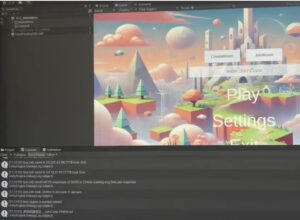
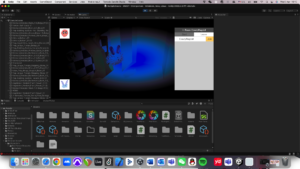
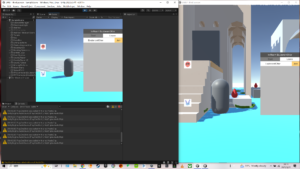
With the suggestion from Mr. Jules Rawlinson, I go through another Multiplayer package called Alteruna. It’s easy to implement into our group’s project and I ran it successfully.
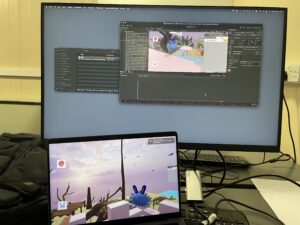
Two projects running in my computer in one game room
Just like Netcode for Game Objects, it spawns a player object from prefab when a new player enter the game. But I run Alteruna successfully so I moved my focus to it as frame for multiplayer system. The problem for me still is how to vary setting from two players.
Discussions
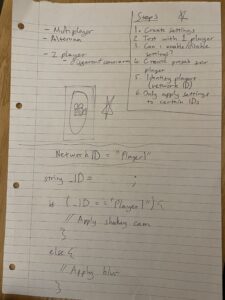
Plan
Later I had a meeting with Mr. Joe Hathway who gave me valuable advice on integration and game mechanism realisation. As we have successfully created settings of blurred camera in single player project and ran it, next step is figuring out how to enable/disable these settings in multiplayer Prefab. Our plan is to find out a way to identify certain player by IDs(network ID). There are a complete document about Alteruna namespaces: https://alteruna.github.io/au-multiplayer-api-docs/html/G_Alteruna.htm
Fortunately, we found the one called UserID and GetID which may be used in our realisation of ID identify.
Structure and Progress Steps Draft by Joe
Realisation
Next day I had a meeting with Mr. Jules and we successfully implement both multiplayer and different camera settings through Alteruna in a test scene. Because there are only two players in our project, we use “IsHost” to identify whether the player is Host or not in order to identify certain player and enable / disable post processing volume added to the First Person Controller’s script in Prefab. https://alteruna.github.io/au-multiplayer-api-docs/html/P_Alteruna_User_IsHost.htm
GetUser + IsHost to identify host & client players
Thanks for Mr. Jules, this meeting helps me to decide using Alteruna as Multiplayer package instead of Netcode.
Implemetation
Finally, I implemented Alteruna multiplayer into our game project and it works well.
Testing project in one computer
But there are some problems happening.
When playing through two computers, two players can only see each other’s flashing shape when they are moving. It works well when playing in one computer, may because of some network refresh settings.
The players now have one module on their FPS controller. How to allocate different modules is the next step. My idea is enable / disable module added in FPS controller depends on the host and client identity.
I haven’t add the post processing camera because our final project is modifying by other group member to implement more mechanisms.
More mechanisms may need to be synced in our project and I need to figure out how to do it through Alteruna.
As the narrative designer of MM&NN, one of my core goals has been to explore how characters might communicate in a world where language—at least in its conventional, verbal form—does not exist. In this game, MM and NN do not speak in words, but in sounds. And in those sounds, in their rhythms and reactions, lies a new kind of storytelling.
This week, I focused on prototyping their non-verbal communication system, a mechanic that lies at the intersection of narrative design, world-building, and tutorial functionality.
⚠️ Note: The placeholder vocalizations shown here are temporary. All final sound design will be developed and implemented by our audio team.
The Design Goal: Language Through Interaction
Rather than relying on subtitles or exposition, we wanted players to understand MM and NN’s intentions, emotions, and decisions through behavior, context, and sound. This creates a sense of intuitive immersion—players are not told what’s happening, they feel it, they interpret it.
In MM&NN, sound is language. And because each character has a different perception—MM navigates through audio, NN through visuals—their shared “language” must emerge from collaboration.
First Encounter: A Conversation in the Dark
At the start of the game, MM and NN awaken in a pitch-black section of the maze. In front of them: three diverging paths. One holds the key to the next area. But which?
The scene plays out with simple vocalizations and gestures:
Character
Line
Meaning
Behavior
NN
“Pu?”
Should we go forward?
Points ahead
MM
“Mu.”
No. That’s not right.
Shakes head
NN
“Ka?”
What about left?
Draws arrow on ground
MM
“Ni!”
Yes. That’s the safe way.
Nods and leads the way
Later, they encounter a hidden trap:
🟡 NN: (Points forward) “Pu?” (Should we go forward?)
🔵 MM: (Listens carefully, then shakes their head) “Mu.” (No, that’s not the right way.)
🟡 NN: (Thinks for a moment, then draws an arrow on the ground pointing left) “Ka?” (Then left?)
🔵 MM: (Closes their eyes, listens, then nods) “Ni!” (Yes! Left is safe.)
🟡 NN: (Takes a step forward, MM follows.)
Tutorial Prompt
✔ “Pu?” – Asking if they should move forward.
✔ “Mu.” – No, that’s not right.
✔ “Ka?” – Asking if they should go left.
✔ “Ni!” – Confirming the correct choice.
🔵 MM: (Suddenly stops and makes a sharp sound) “Sha!” (Danger!)
🟡 NN: (Stops immediately, looks back, confused) “Luu?” (Where is the danger?)
🔵 MM: (Points at the ground ahead, then steps back) “Ba! Ba!” (Move back!)
🟡 NN: (Carefully steps back. A second later, the ground ahead collapses, revealing a deep pit.)
🔵 MM: (Points to a different, safer path) “Ni!” (This is the right way.)
🟡 NN: (Follows MM, avoiding the trap.)
Tutorial Prompt
✔ “Sha!” – Warning! Danger!
✔ “Luu?” – Asking where the danger is.
✔ “Ba! Ba!” – Telling the other to move back.
They continue forward and finally find a glowing key in a small room! NN picks it up, the entire room lights up, and a door to the next area opens.
🔵 MM: (Taps NN’s arm) “Ni!” (We did it!)
🟡 NN: (Nods slightly, holding the key tightly, and moves forward.)
🎮 [Next Level Begins…]
Language as Mechanic: Teaching Through Play
This system is not just for flavor—it serves as the foundation for our immersive tutorial experience. Instead of showing UI prompts or explicit directions, players learn the meaning of each sound through repetition and interaction.
Current design goals include:
A non-intrusive tutorial where sounds and gestures naturally introduce language through context.
An evolving player vocabulary: the more the player observes, the more fluent they become in MM and NN’s communication.
The vocal system is also deeply embedded in MM&NN’s world and story themes. Since the entire game is built around dual perception—visual vs. auditory, illusion vs. reality—the absence of traditional language allows us to emphasize embodied communication.
These sounds become a metaphor for how connection forms in uncertain environments: not through clarity, but through shared rhythm, risk, and response.
Next Steps (with the Audio Team)
While I’ve mapped out the core vocabulary and use-cases from a narrative perspective, all final audio design and vocalization development will be handled by our sound design team.
Their next tasks include:
Defining the tonal quality and emotion of each vocalization (e.g., pitch, intensity, texture)
Creating differentiated sound palettes for MM and NN
Adding subtle audio-reactive environmental cues (like how the maze “responds” to certain sounds)
Exploring communication breakdowns (e.g., ambiguity, mimicry, silence) as narrative devices
Inspirations: Learning from Games That Speak Without Speaking
The idea of crafting a unique language for MM and NN didn’t come out of nowhere—it was deeply inspired by several games that have beautifully embraced non-verbal or pseudo-linguistic character expression.
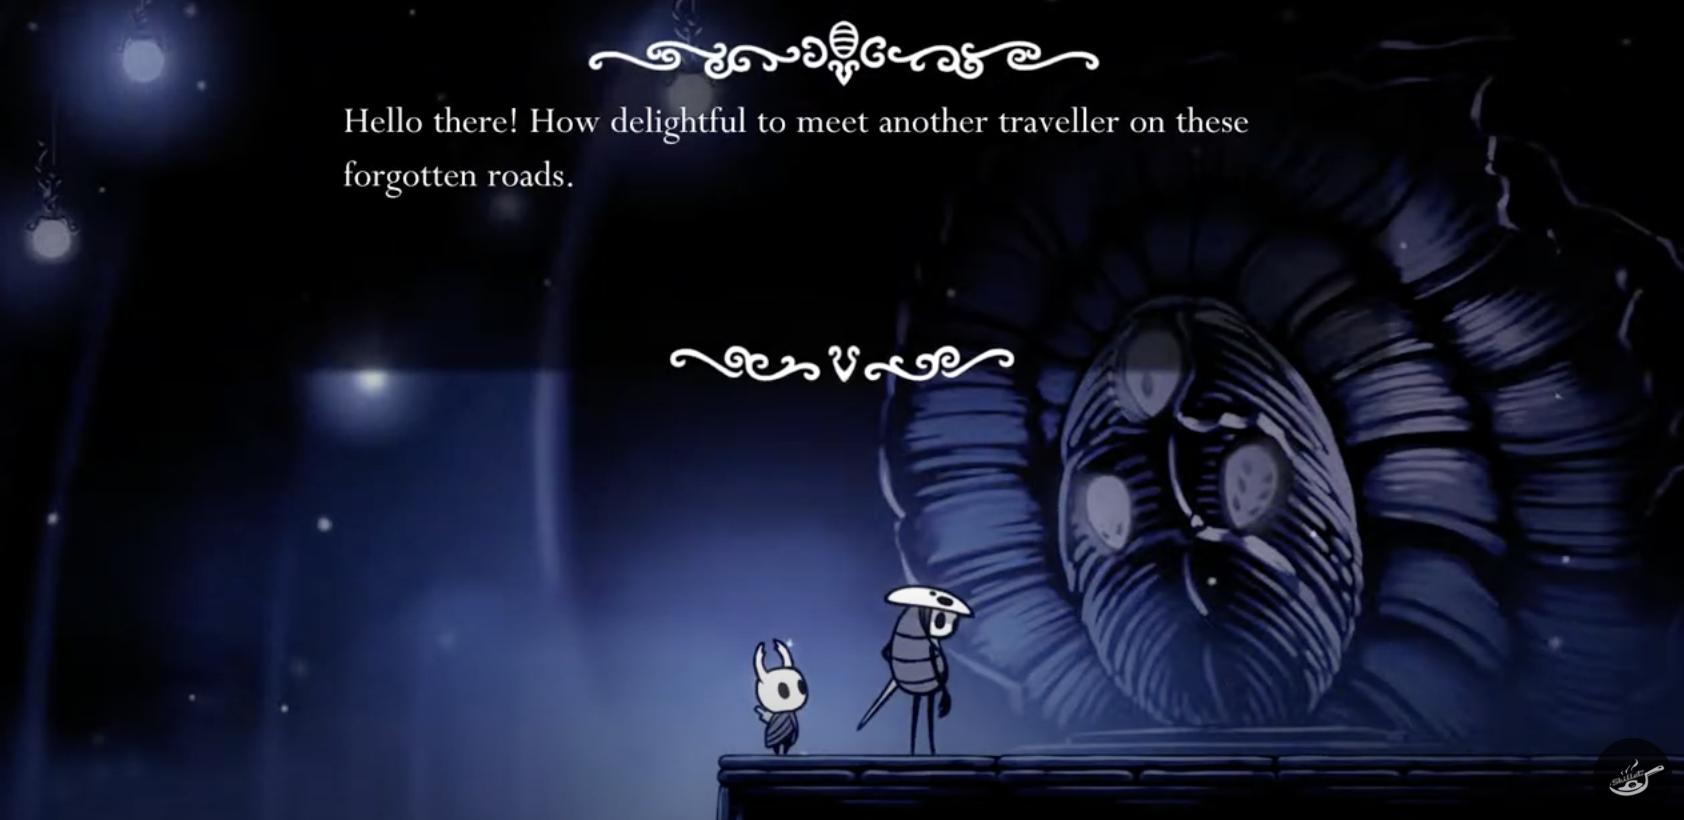
Games like Hollow Knight, Cult of the Lamb, Minions (from broader media), and Ori and the Blind Forest all demonstrate how character-specific sound design can become a language in itself—conveying tone, emotion, and intent without relying on traditional dialogue systems.
In Hollow Knight, brief utterances—grunts, chirps, and sighs—build a melancholic, wordless world of underground wonder.
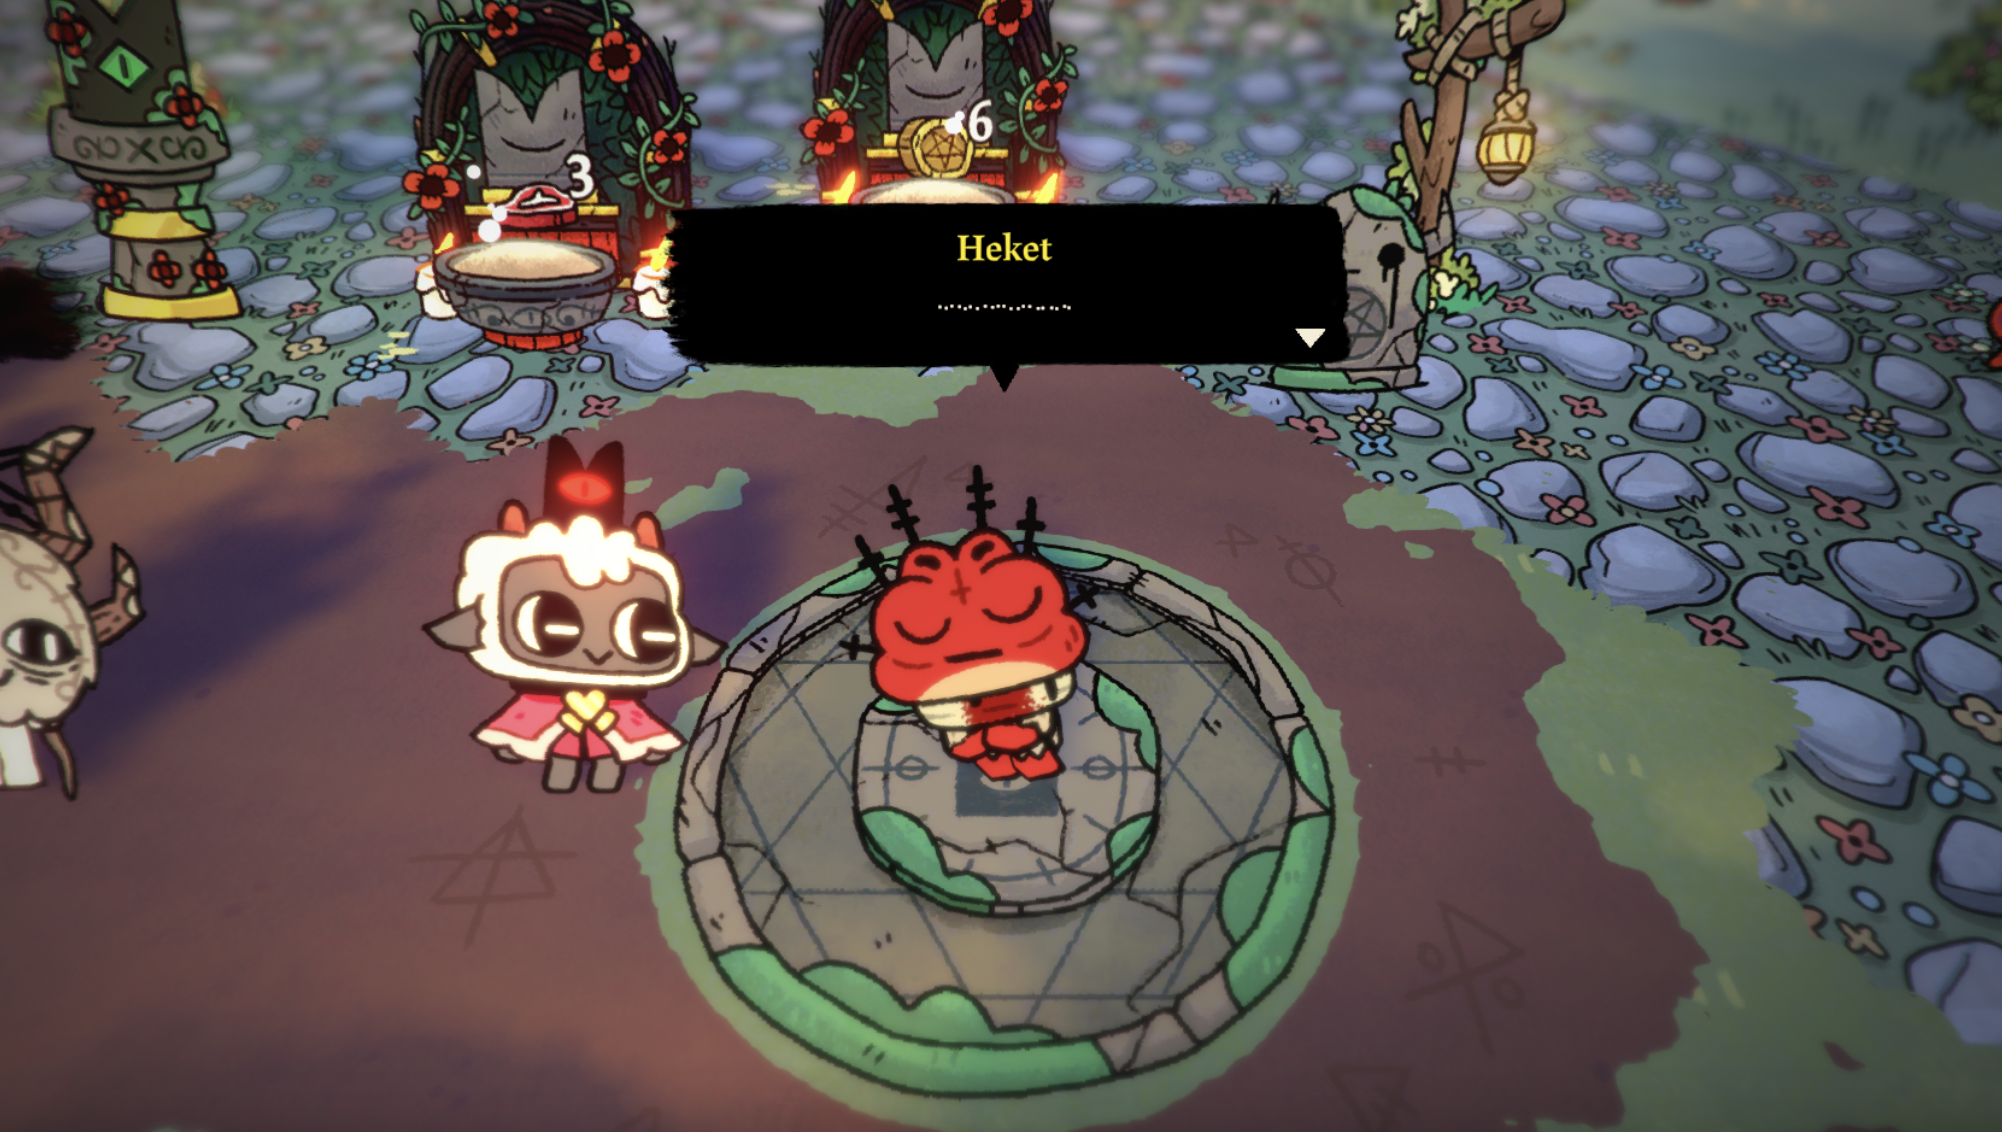
Cult of the Lamb uses playful, randomized vocalizations to give each character a quirky personality without breaking flow.
The Minions franchise created a near-universal comedic language out of gibberish—highly expressive and emotionally direct.
These examples showed me how sonic identity can become a fundamental part of storytelling. In MM&NN, I hope to continue that tradition—where every “Ni!” or “Sha!” isn’t just a mechanic, but a narrative moment in its own right.
Final Thoughts
In MM&NN, communication is not about language. It’s about attention, response, and intuition. This developing system of vocal exchanges is just the beginning of a deeper emotional and mechanical dialogue between player, character, and world.
Through this system, I hope to guide players into a state of play where meaning is not told, but felt—and where even the simplest sound can become a bridge between two lost voices in the maze.
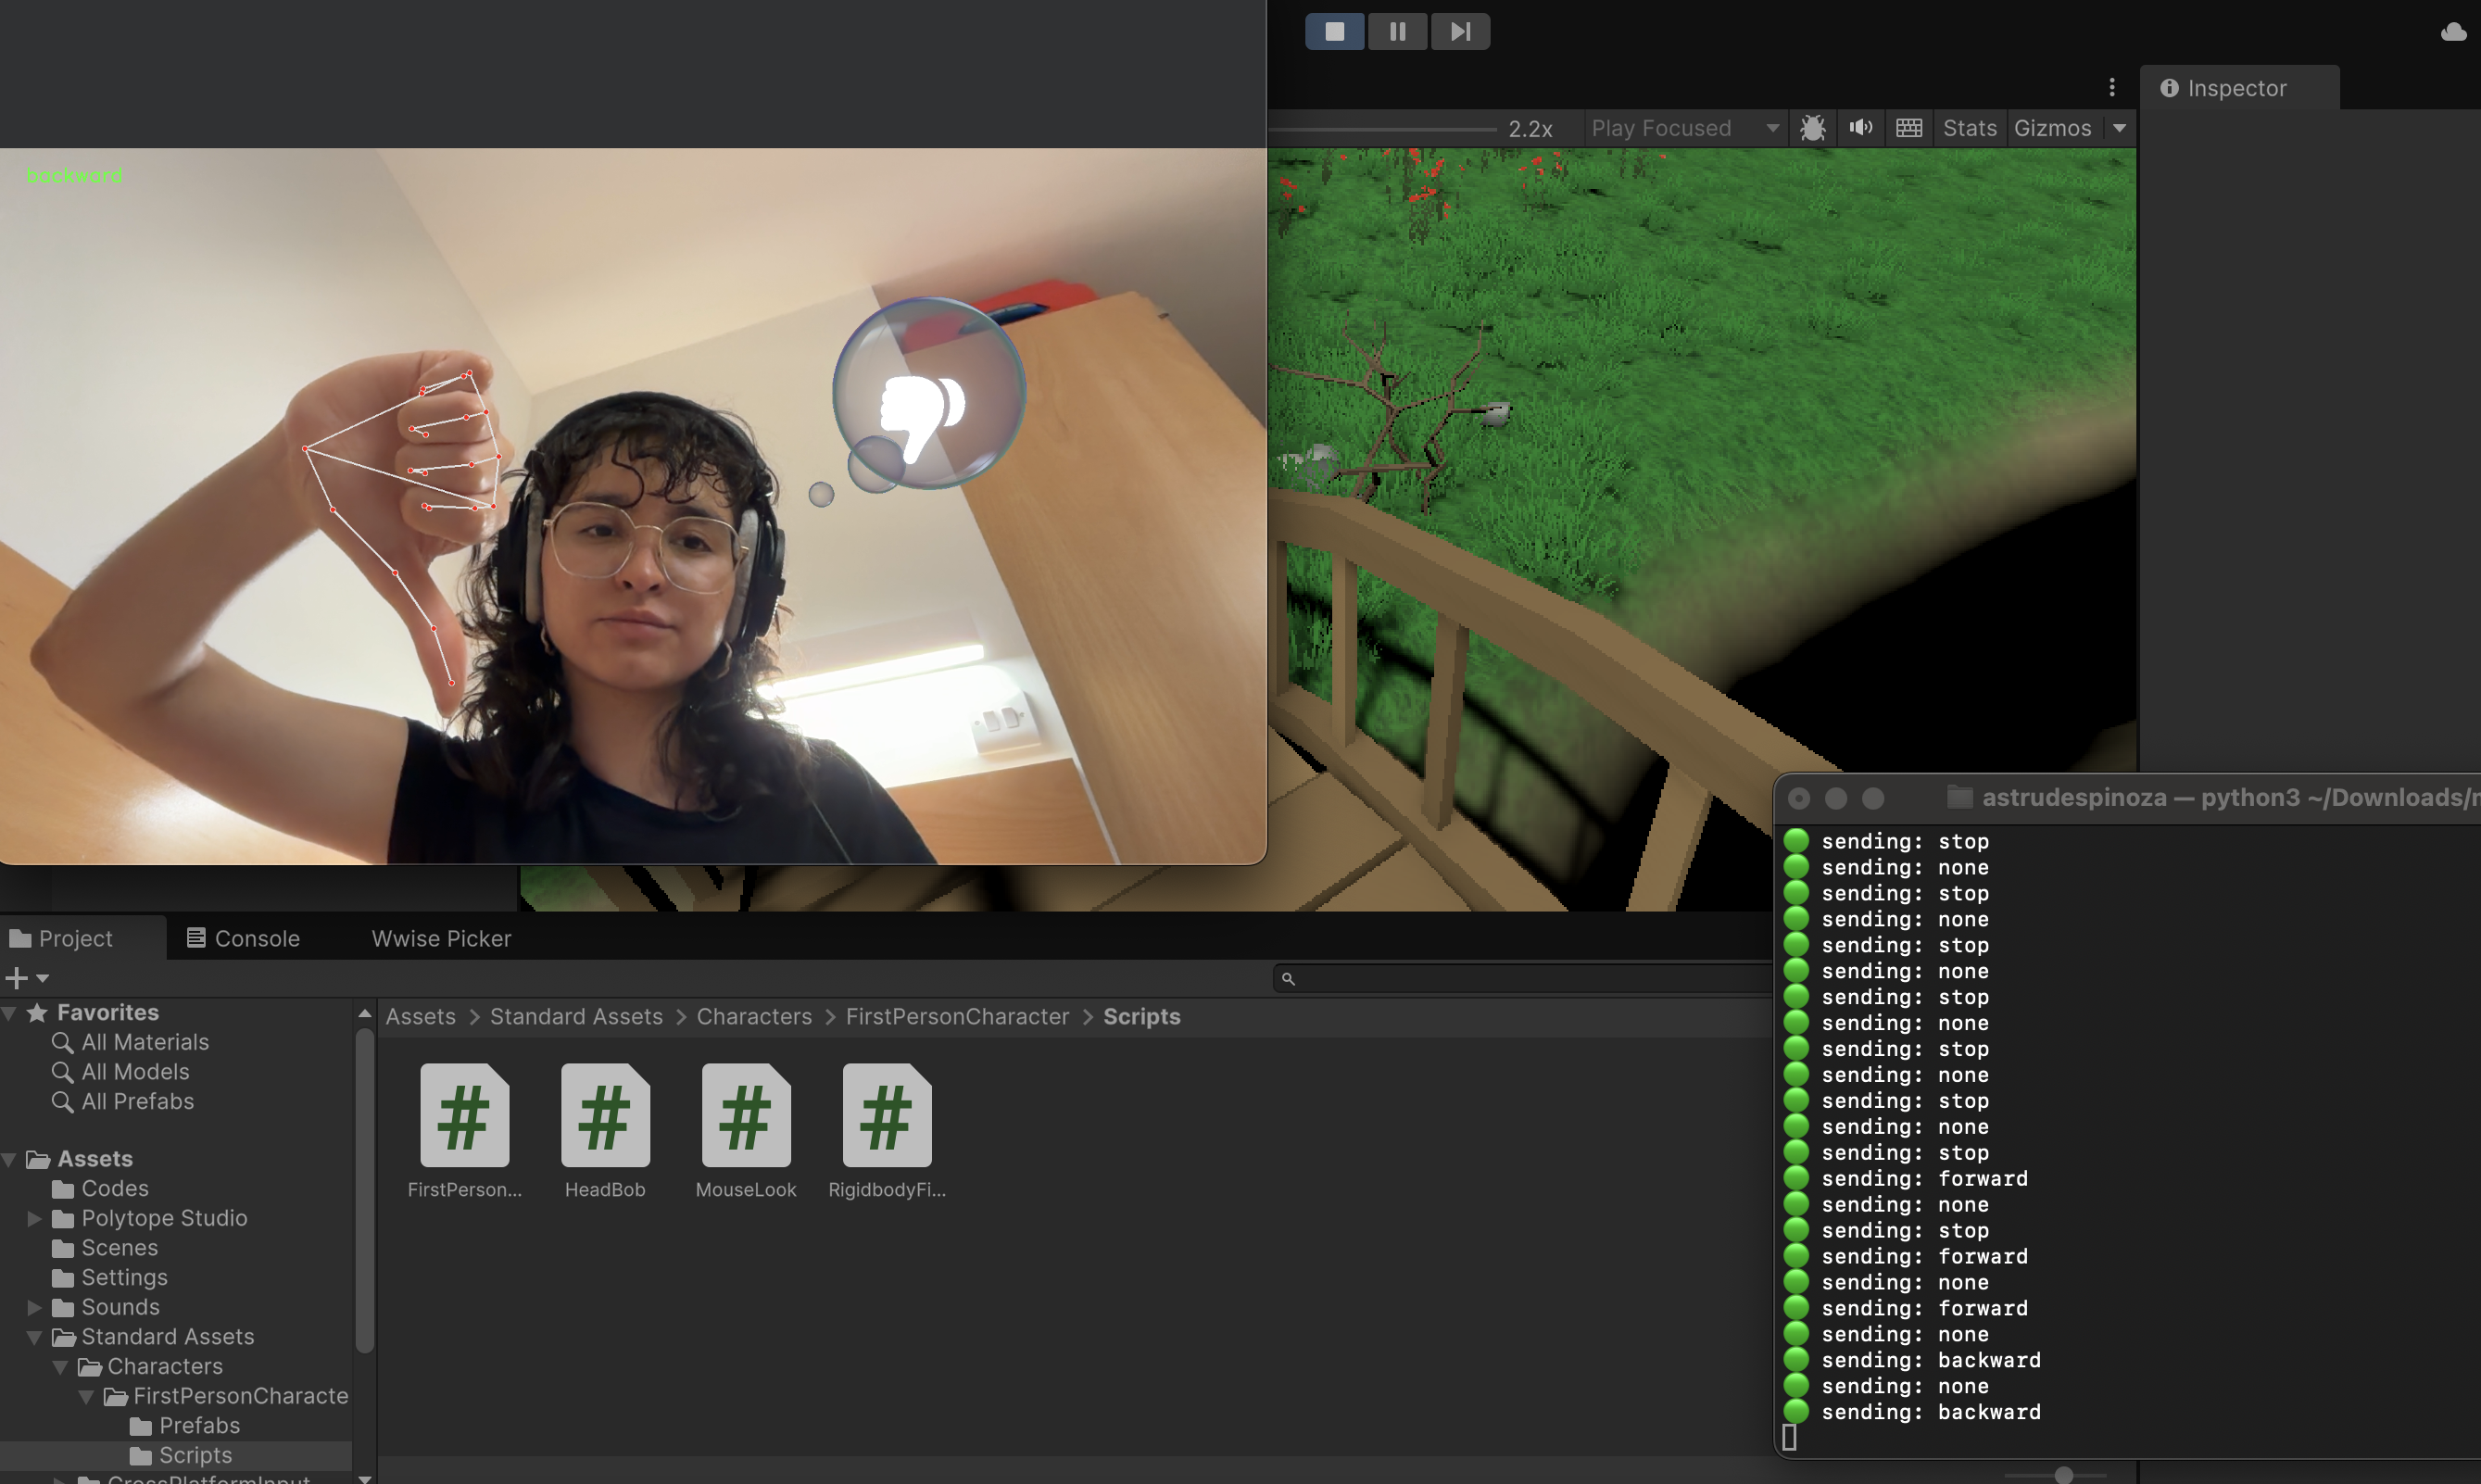
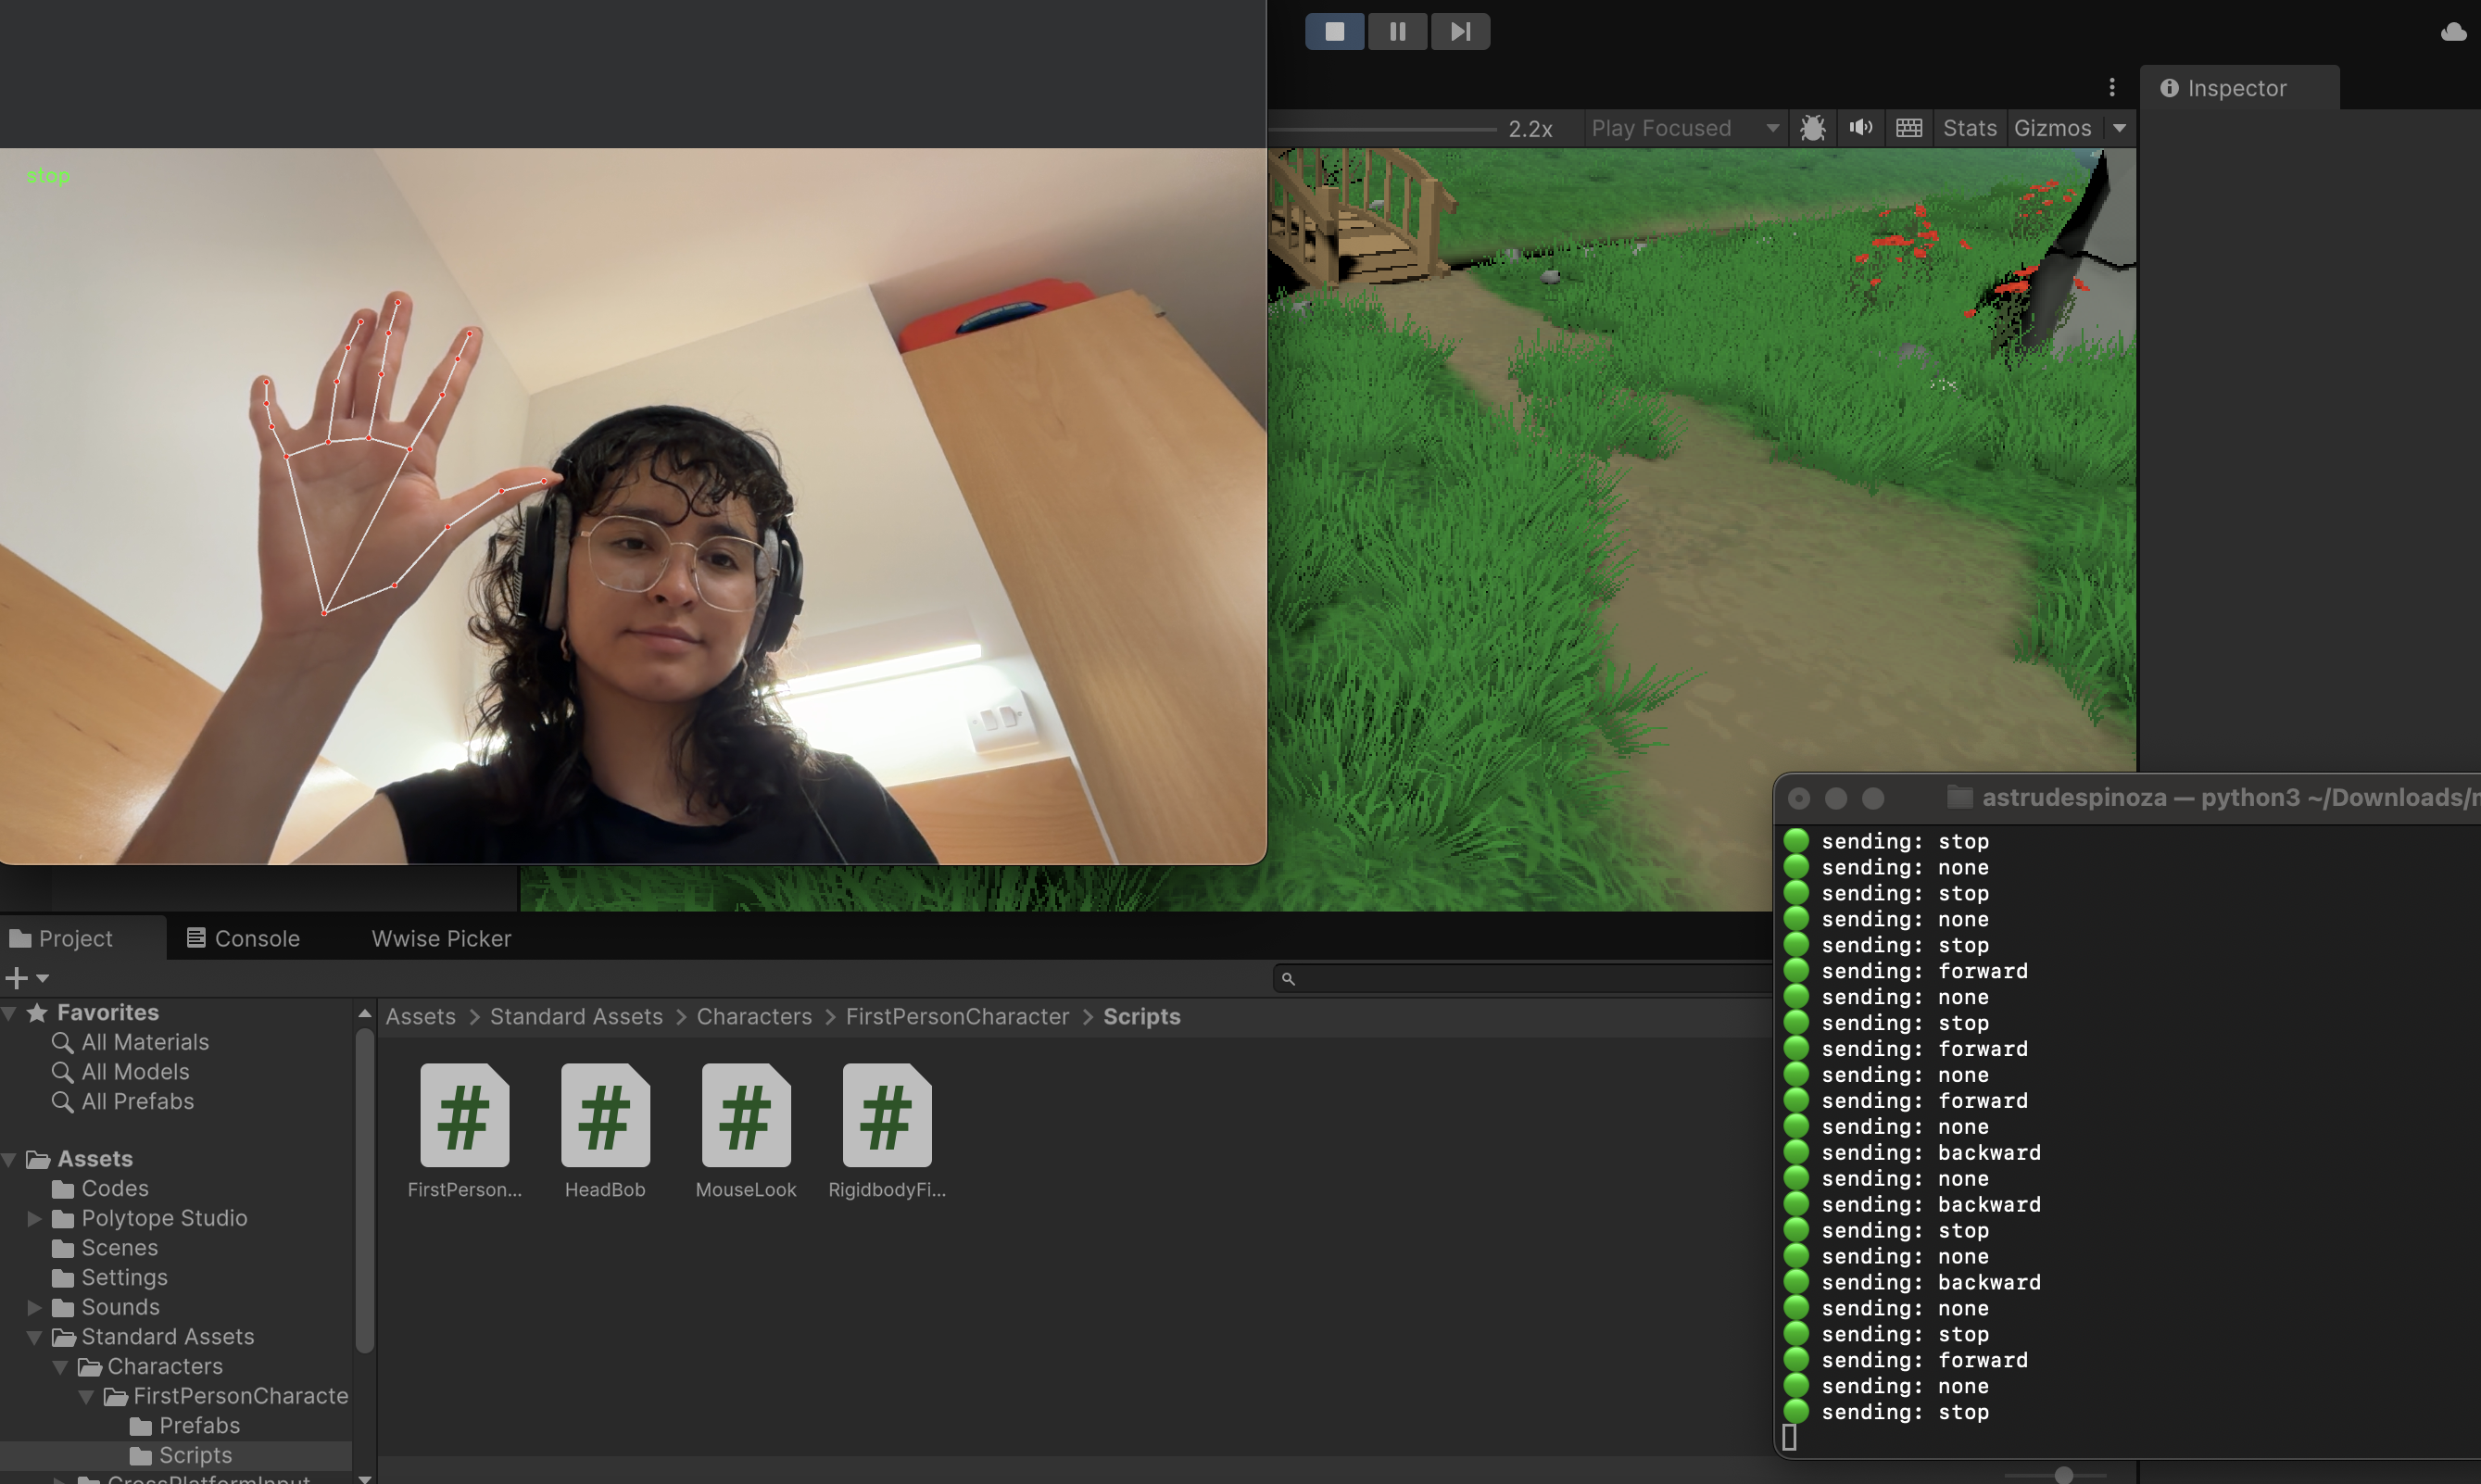
In order to create an in-game language to allow MM (player 1) who can hear, but sees blurry to communicate with NN (player 2) who can see, but hears muffled, I thought using a hand tracking system implemented in Unity could work.
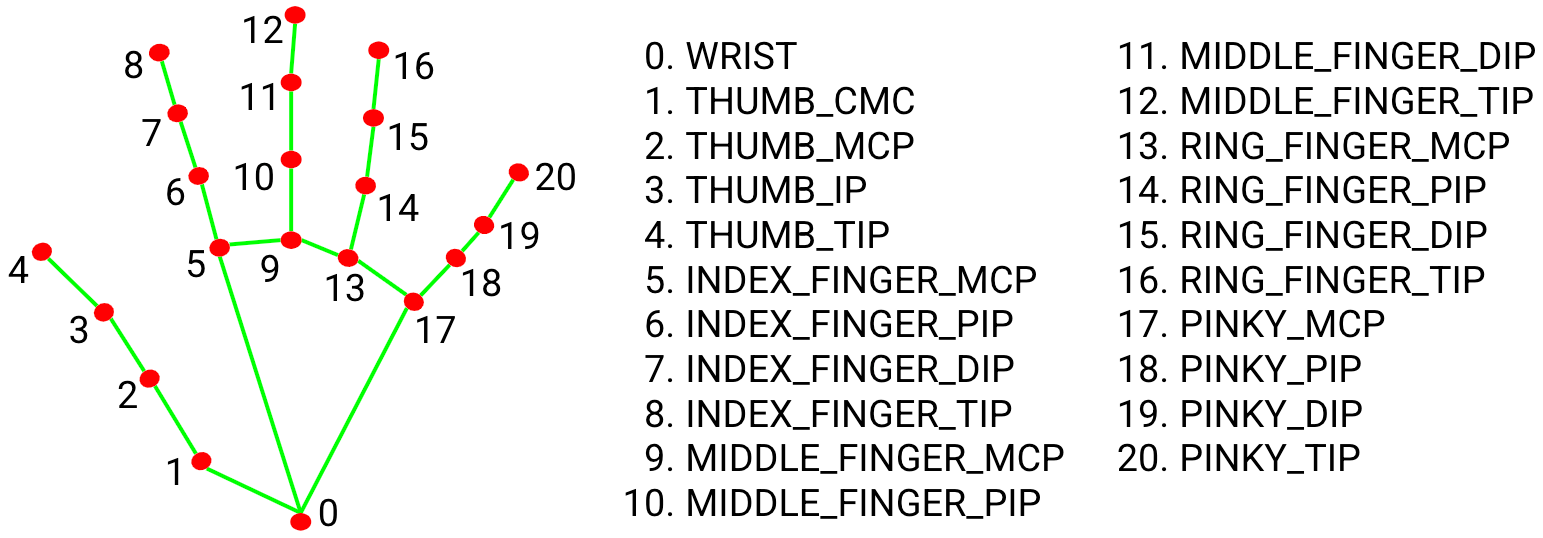
MediaPipe Hands
Is a high-fidelity hand and finger tracking solution. It employs machine learning (ML) to infer 21 3D landmarks of a hand from just a single frame.
Hand landmarks
MediaPipe Hands utilizes an ML pipeline consisting of multiple models working together: A palm detection model that operates on the full image and returns an oriented hand bounding box. A hand landmark model that operates on the cropped image region defined by the palm detector and returns high-fidelity 3D hand keypoints.
Installing
The recommended way to do it is by installing Python and pip: https://www.python.org/downloads/ . In some cases it might require the package manager Conda to be installed. In the terminal, OpenCV and Mediapipe need to be installed; this process may vary depending on the computers processor. For a Mac with M4, the next process carried on:
OpenCV-Mediapipe installationMediaPipe in Conda environmentEnvironment activationMediaPipe installation in Conda
Configuration
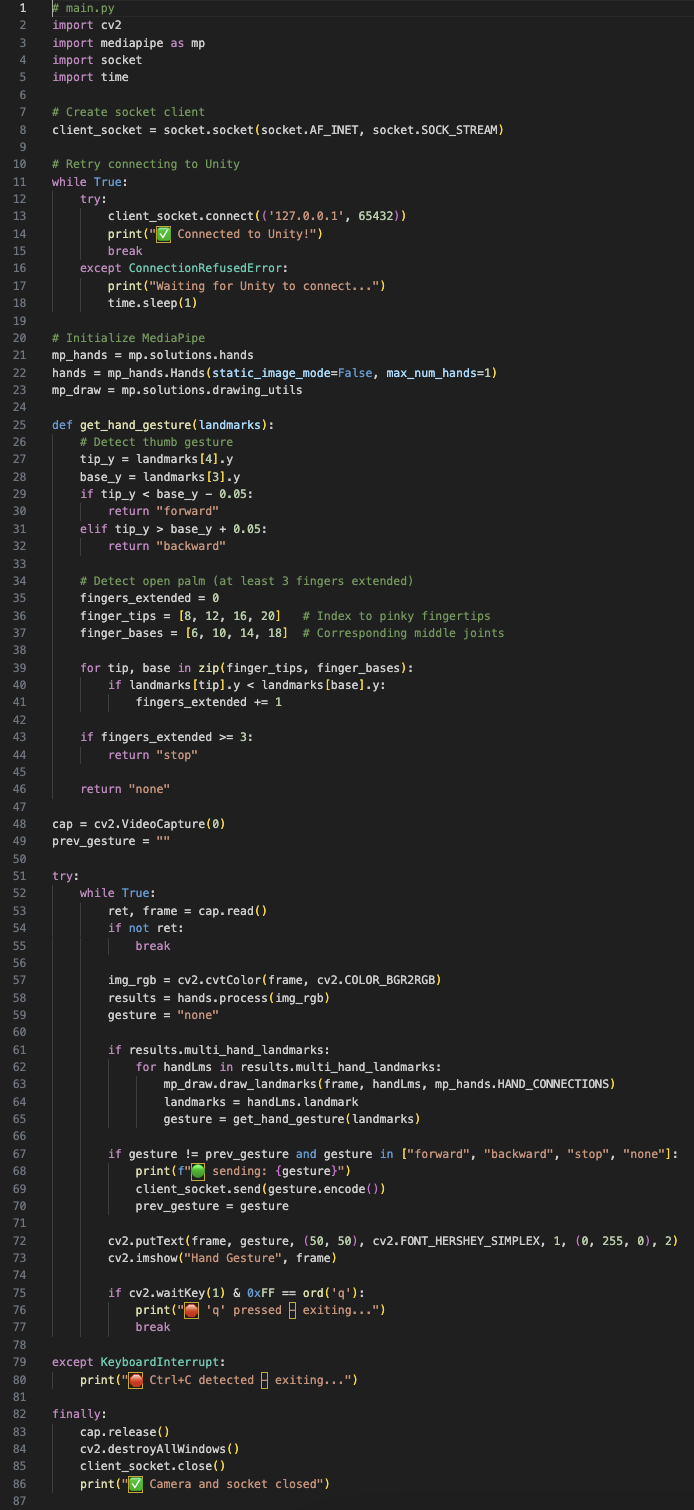
The first step is to create a Python code for Hand gesture recognition and network communication using the MediaPipe library. This may vary depending on what is expected to do, but the one used in the first trial was this:
Hand tracking recognition and network communication Python code
Where the hand landmarks (3, 4) represent the thumb finger and will move the player forward when the thumb is up and backward when it’s down. This code will also capture the video from the default camera, processes the hand landmarks and sends the data via socket, in this case, to Unity.
Unity connection
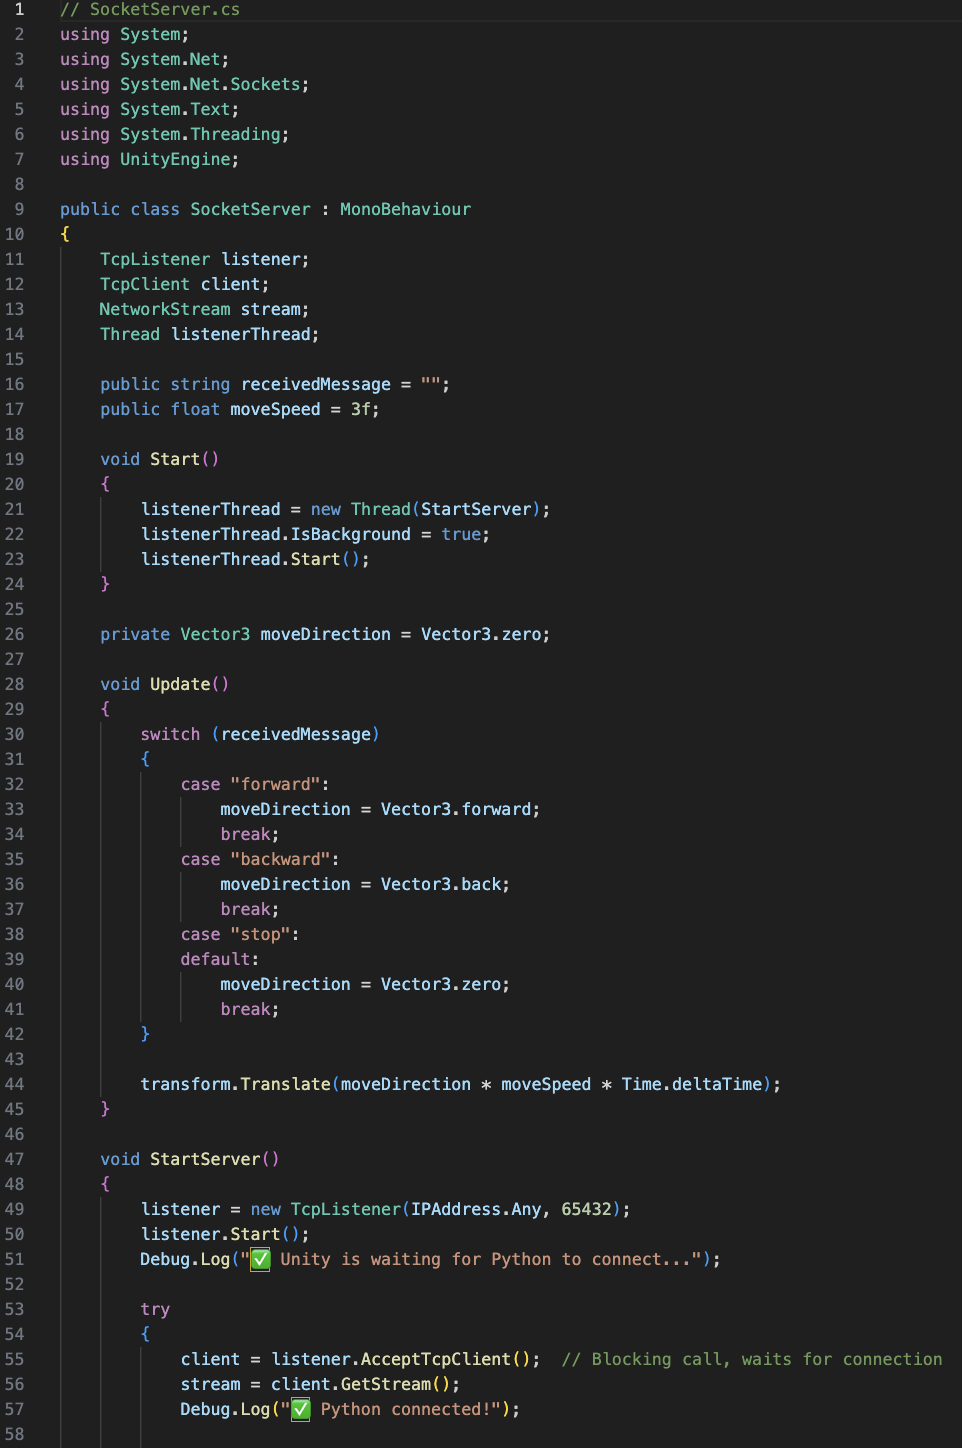
For the Unity implementation, we need to create C# sharp code that starts the socket server.
Socket server to Unity C# code
This script will be inserted into the First Person Controller inside the Unity environment. The script will need to be modified in case it doesn’t match or use the same variables as the First Person Controller script.
FPS Socket Server script
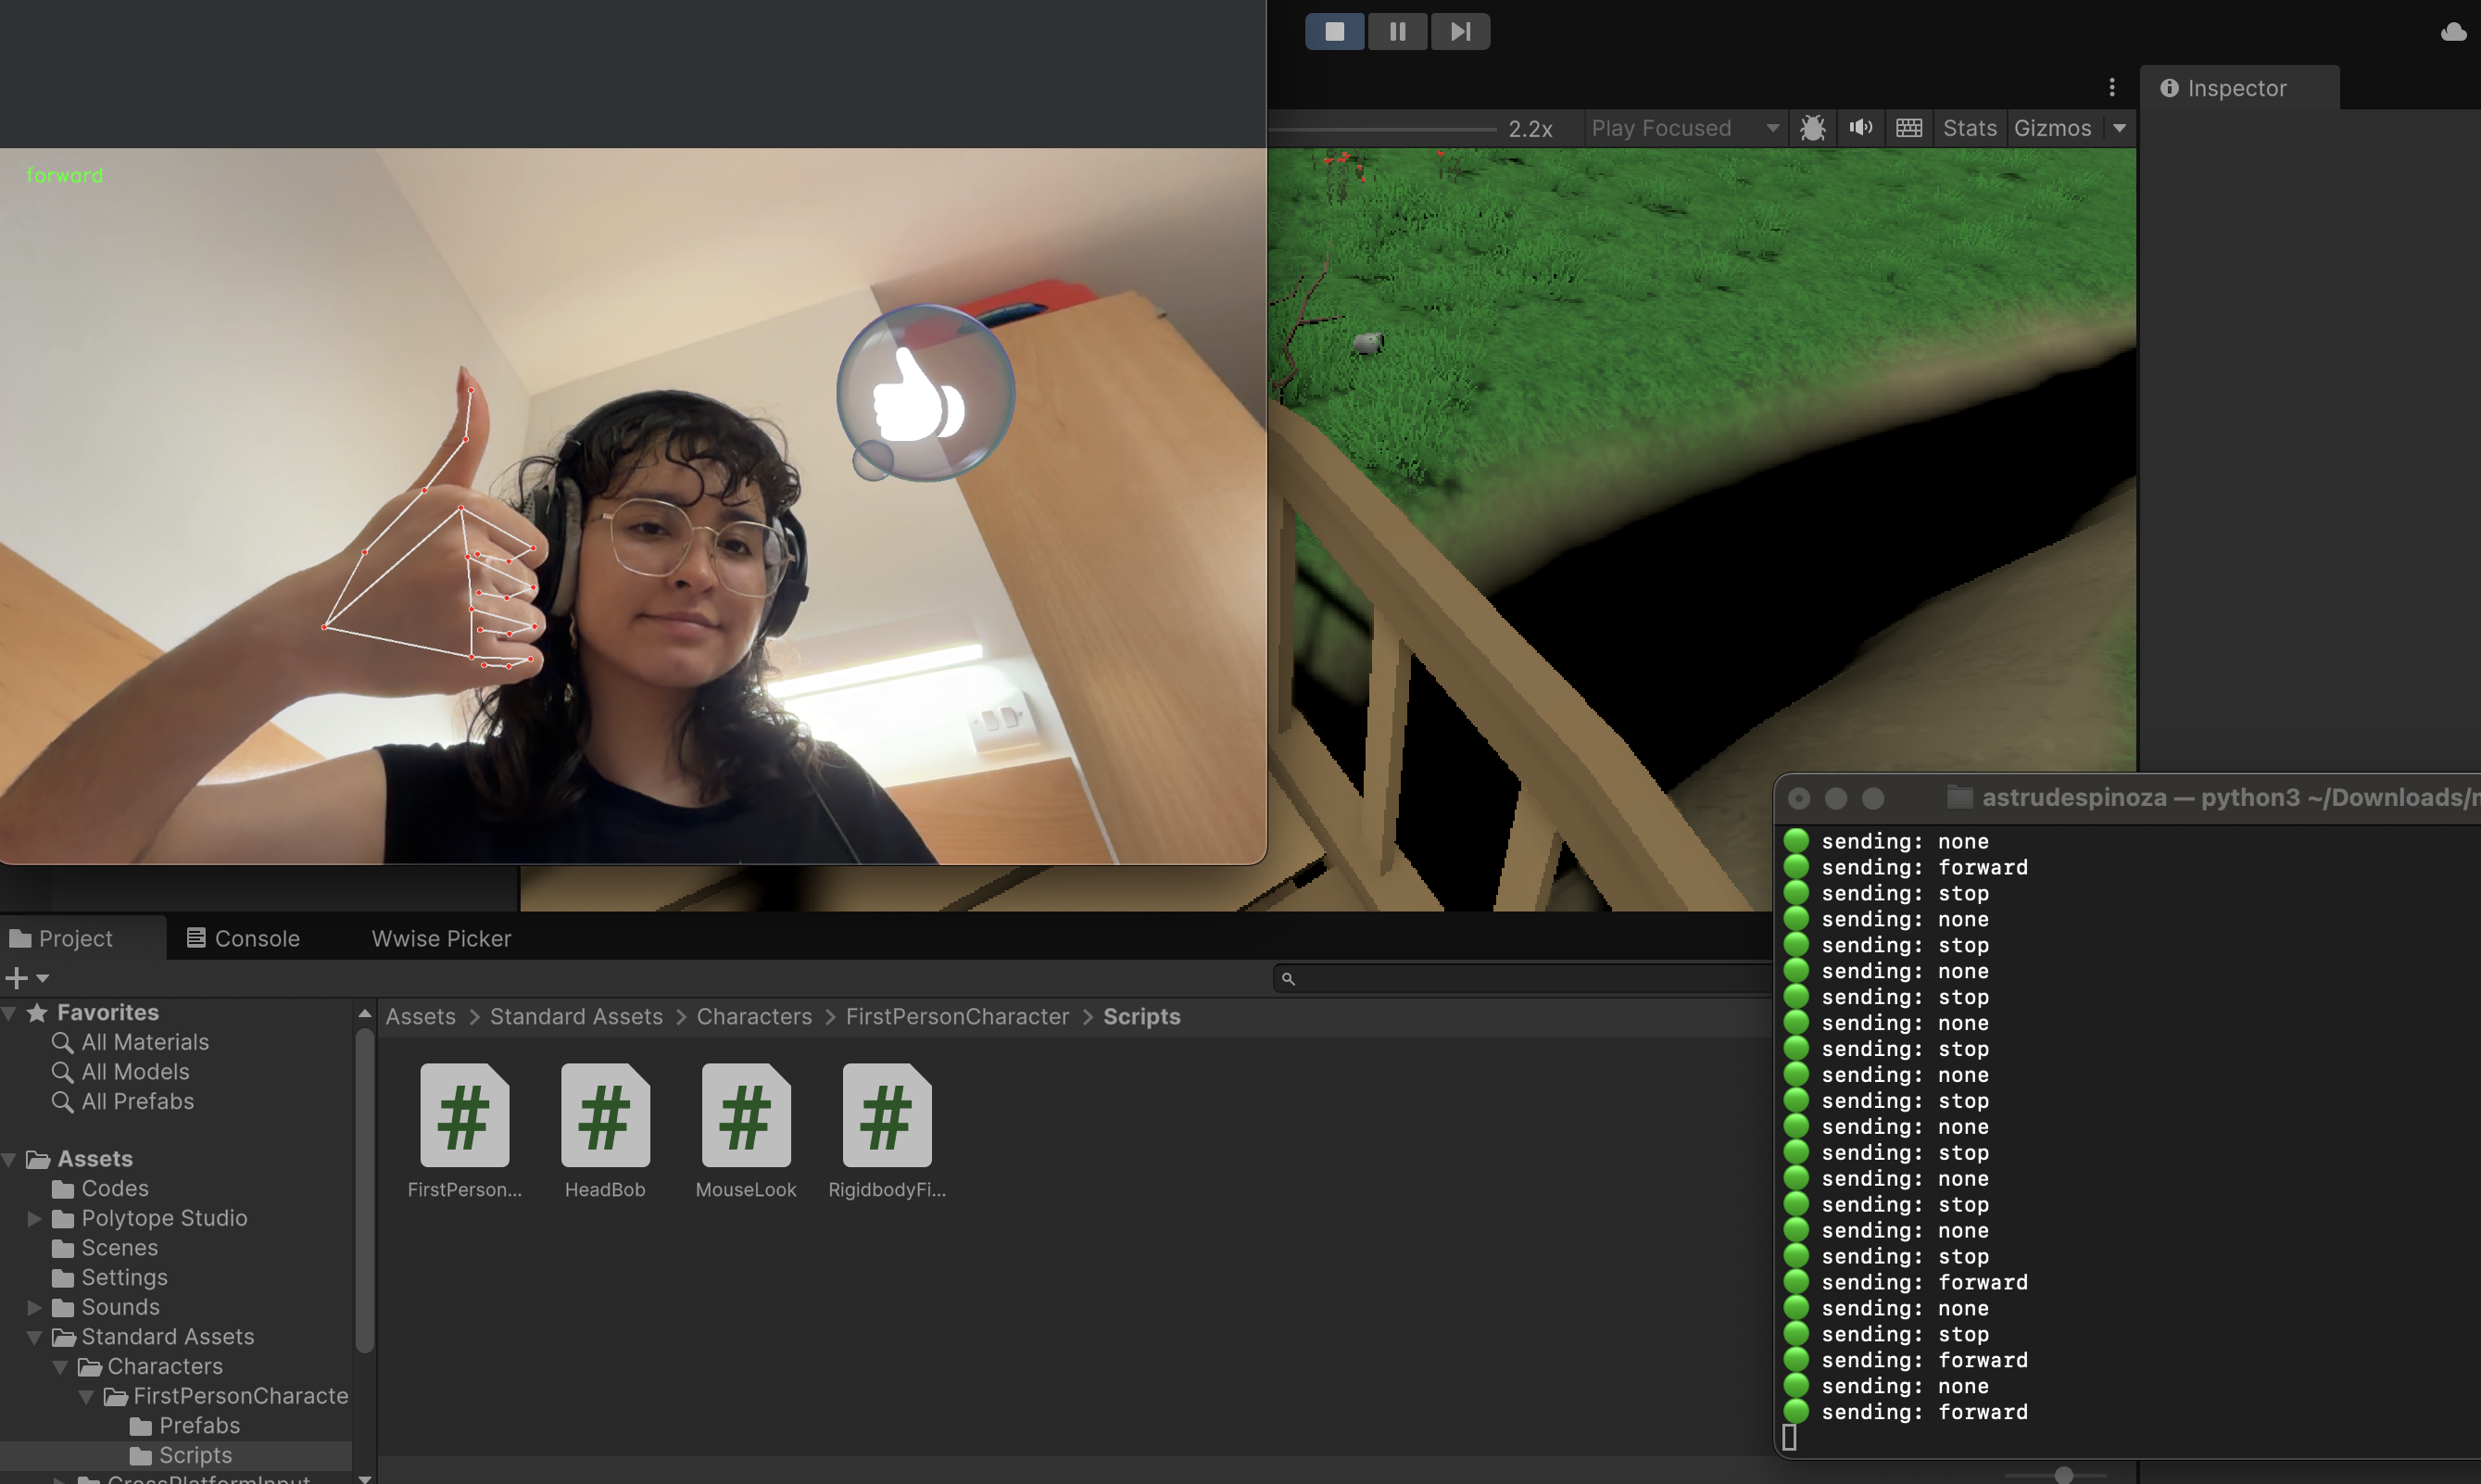
Running the Python file
The Unity game must be running previously to running the py file. Once this is done, in the terminal type the corresponding path of the Python file.
As the creator of this narrative world, I constantly seek ways to minimize the reliance on textual exposition, allowing players to intuitively grasp the core objective—escaping the maze—through interactive design alone. In MM & NN, narrative and gameplay are not separate components; they are deeply interwoven. Every gameplay mechanic is crafted to serve the story, and every narrative decision is reflected back through the player’s actions. My ongoing development focus is to refine this synergy, ensuring that the maze functions not only as a space for exploration, but also as a narrative medium—one that unfolds through interaction, perception, and choice.
Narrative Foundations: Dual Perception and Divergent Realities
The game follows two protagonists—NN and MM—each representing a different mode of perception. NN sees the world through visual manipulation; MM perceives the world entirely through sound. Their abilities form the core of the game’s thematic and mechanical duality: vision vs. hearing, illusion vs. reality.
Players gradually uncover a layered narrative through four distinct endings, each of which arises organically from player behaviour and mechanical interaction rather than cutscenes or text. These endings include:
The Illusion: Accepting a stable, false reality.
Truth Seeker A: Discovering the real exit and achieving freedom.
Truth Seeker B: Falling into deeper illusions.
The Divide: Experiencing a complete separation between NN and MM
Maze Design as Narrative Mechanism
The maze is not a backdrop—it is the narrative structure itself. Each player’s interaction with the space, from movement to puzzle-solving, creates story.
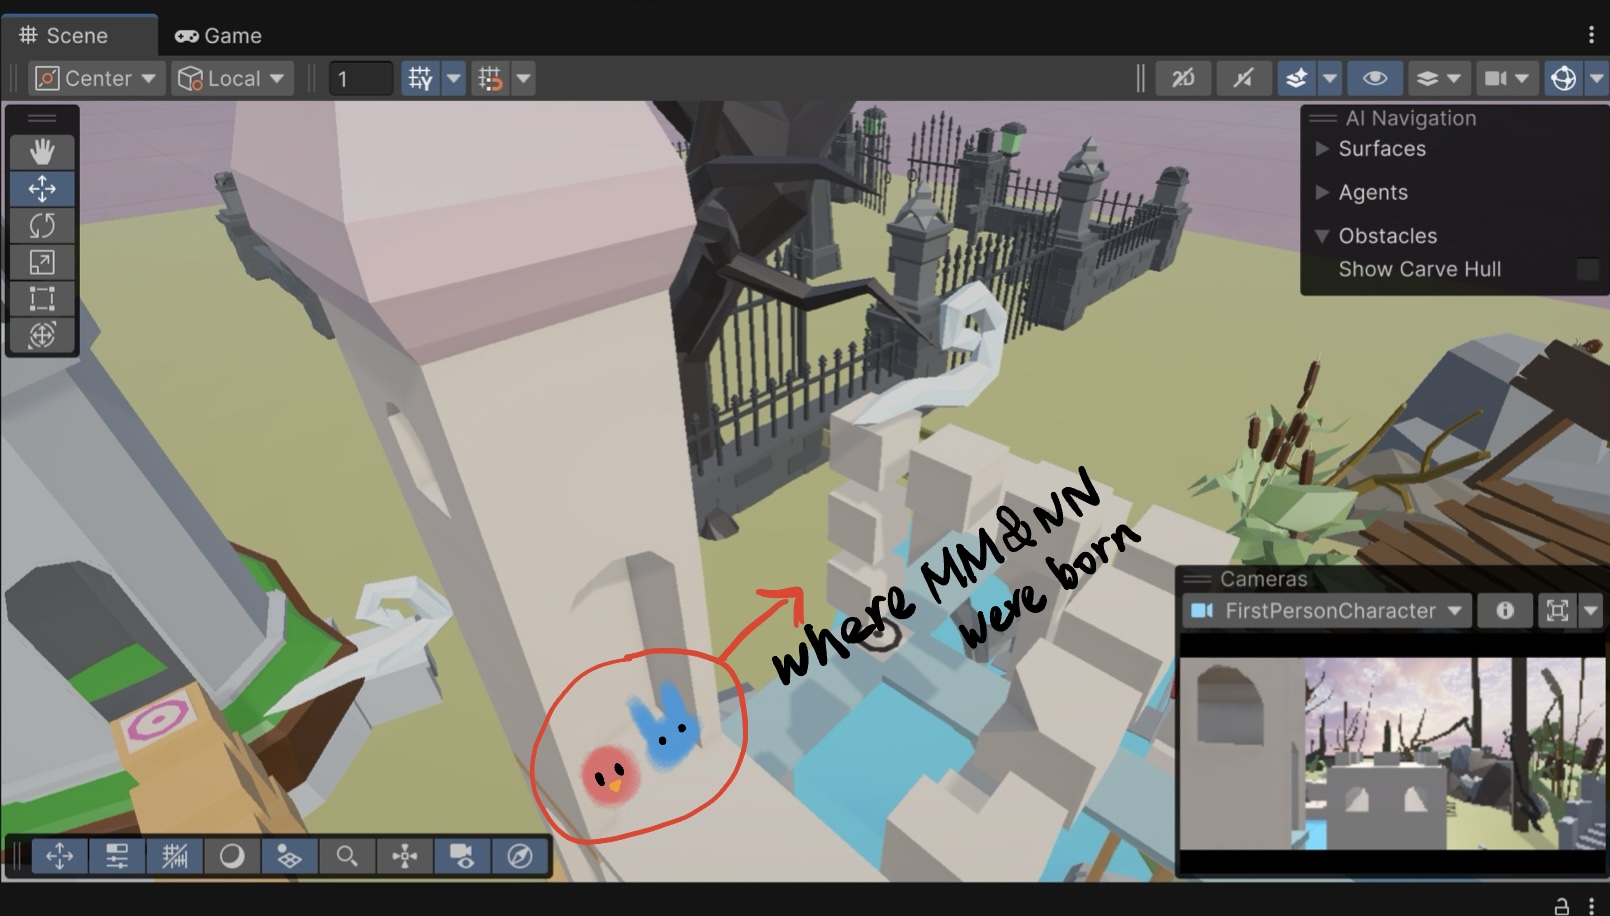
Spawn mechanics place players atop a tower, reinforcing the feeling of isolation and mystery.
Movement paths are governed by anti-gravity navigation, challenging spatial expectations.
Key puzzles involve auditory and harmonic cues (e.g., major vs. minor arpeggios), transforming musical elements into narrative-significant mechanics:
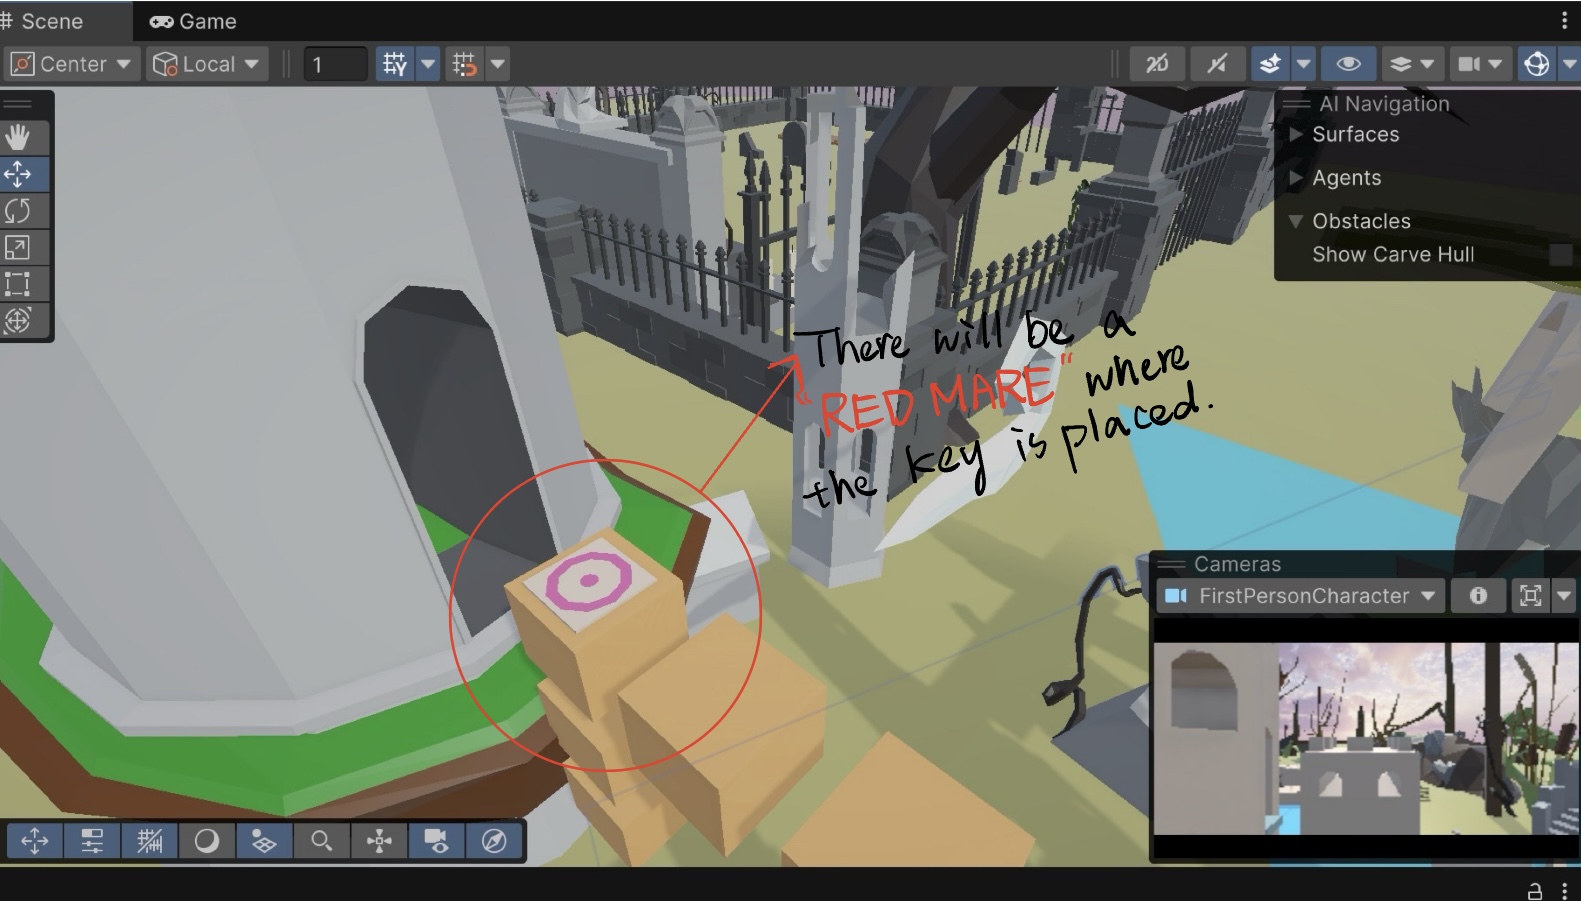
True Key: Discovered under the blue tower; associated with clarity and progress.
Fake Key: Leads players toward false exits or looping realities.
These systems are not merely gameplay obstacles, but metaphors for the characters’ internal states and their growing uncertainty about what is real.
ScreenshotScreenshotScreenshot
Mechanic-Triggered Story Outcomes
Each ending is mechanically triggered by how players interact with the game systems:
Ending
Core Mechanic
Narrative Consequence
The Illusionist
Aligning NN’s visuals with MM’s sounds until anomalies disappear
The maze becomes static and peaceful; a false reality where change ceases
Truth Seeker A
Actively finding contradictions in light, sound, and memory
The player uncovers the real exit; a world of freedom awaits
Truth Seeker B
Escaping too quickly or following misleading cues
The maze deepens; the illusion continues under a new guise
The Divide
Choosing divergent paths for NN and MM
NN and MM are trapped in the maze world;
The gameplay does not merely represent the narrative; it manifests it. For instance, when NN loses in “The Divide” path, it’s not just a mechanical limitation—it’s a diegetic expression of losing agency. Likewise, when MM navigates in darkness through sound only, players must rely on stereo cues, echoes, and frequency shifts—mirroring MM’s psychological journey through uncertainty.
Layered Mechanics: Sound, Vision, and Player Control
Newly implemented mechanics this week include:
NN’s Visual Obstruction: A gray ink overlay distorts the visible world, representing loss of visual clarity.
MM’s Hearing Obstruction: A dynamic RTPC filter simulates hearing loss, reinforcing MM’s sensory limitations in specific story states.
Death & Mist System: If NN and MM separate too far (>100 units), players trigger a narrative sequence (“Lost”) and the screen fades into mist.
Floating Lotus Platforms: These serve both as spatial puzzles and symbolic elements—ephemeral, beautiful, and fleeting, reflecting the dreamlike logic of the maze.
Design Philosophy: Narrative Emergence Through Play
Our core design philosophy is simple yet challenging: Don’t tell the story—let the player discover and perform it.
Rather than presenting exposition, we embed narrative meaning in:
Spatial contradictions
Perceptual puzzles
Mechanic-driven consequences
The player constructs their own interpretation by engaging with the world. The result is an emergent narrative where player action is the author of meaning.
Conclusion: From Labyrinth to Language
In MM&NN, narrative and mechanics are two sides of the same mirror. The gameplay is not an obstacle between the player and the story—it is the story. Every sound MM hears, every wall NN sees, every shortcut taken or illusion believed… all shape how the tale ends.
As development continues, we aim to deepen this fusion even further—designing puzzles that respond to emotion, and narrative arcs that only emerge through the full embodiment of play.
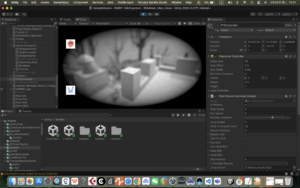
This week I focused on developing a visual effect that simulates a ‘blind person’s perspective’ to enhance the immersion and challenge of the game. By investigating Unity’s Post Processing technology, I implemented a Bokeh effect that allows the player to only see close objects clearly, while the distant terrain is blurred, making the exploration process more difficult and tense. At the same time, I made adjustments to the overall image, including the addition of vignettes and black and white tones, to more realistically reproduce the perceptual experience of the visually impaired.
In addition, I also implemented an automatic resurrection function when the player falls into the water, the character will automatically reset to the starting position to ensure the continuity and playability of the game flow.