Any views expressed within media held on this service are those of the contributors, should not be taken as approved or endorsed by the University, and do not necessarily reflect the views of the University in respect of any particular issue.

MM&NN:From the initial game concept to the final implementation of gameplay mechanics

1.Game Concept

Game Title: Darkness
Genre: Adventure, Puzzle
Perspective: First-Person
Gameplay: Puzzle-solving, Survival
Number of Players: 1

Game Story:

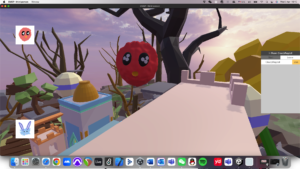
In Darkness, the player takes on the role of a cat named Buster. At the start of the game, Buster finds itself trapped in a dark, misty maze, having lost its sight (or retained only minimal vision, able to see the fog and some nearby objects, but primarily relying on sound to complete tasks) and memory. The goal is to escape the dark mist. As the game progresses, the player follows sounds from different directions and gradually uncovers fragments of memory, eventually finding a way out of the mist.

Game Background:

Buster is a cat with special abilities. It has completed many tasks with a girl named Betty, guiding her to grow independent and courageous. In order to help Betty gain more courage, Buster sets up a series of dark, mist-filled challenges to test her. Buster temporarily erases Betty’s memory and swaps identities with her, allowing the player to complete the tasks from the cat’s perspective. Gradually, Betty regains her sense of identity and with Buster’s guidance, completes the challenges.

Gameplay Mechanics:

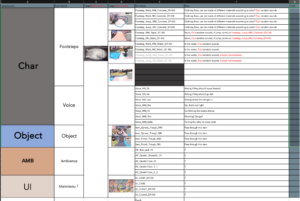
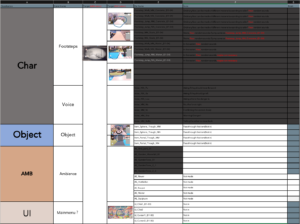
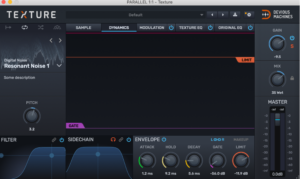
  • Auditory-driven: Due to the lack of vision, the game design emphasizes sound as the primary means of interaction. There is a small, limited visual interface in the game, but most of the world is shrouded in mist. Most of the interactions and information gathering rely on sound. The player will hear footsteps, environmental sounds, object collisions, and voices from other characters.
  • Stereo and Directional Sound: To enhance immersion, the game uses stereo and directional sound, allowing the player to accurately judge the position of their surroundings and objects. For example, the player can use the sound of footsteps in the distance to determine when enemies are approaching and hide, or follow sound cues to find hidden paths and items.
  • Fragment Collection Example: During exploration, when collecting fragments, there will be special auditory cues that appear intermittently.

Main Objective:

Collect the fragments, uncover your memories, and escape the mist.

Side Objectives:

Avoid footsteps and dangerous objects.

Reference game:

2.Worked with team members to formulate preliminary concepts for game mechanics and collect relevant reference links

Leap Motion is an advanced gesture control technology that allows users to interact with computers through hand movements. It captures hand and finger movements with extreme precision and responsiveness through a small sensor device.Leap Motion can be used in a wide range of applications such as virtual reality (VR), augmented reality (AR), gaming, design, healthcare, and more.

Leap Motion uses infrared sensors to capture hand movements. These sensors can accurately detect the position, speed, and trajectory of the fingers, and can even sense small changes in movement. Leap Motion analyzes this data to convert hand movements into computer-recognizable signals in real time, enabling gesture control.


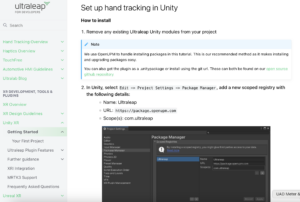
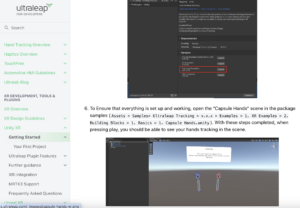
This is the official Leap motion tutorial for connecting to unity.

https://docs.ultraleap.com/xr-and-tabletop/xr/unity/getting-started/index.html


This is the official YouTube tutorial for Leap motion

https://www.youtube.com/user/LeapMotion


We also found the official Leap motion forums for technical queries

https://forums.leapmotion.com/latest


Specific examples of related games


An example of a similar implementation goal, such as using one gesture to control movement forward and a specific gesture to control the player’s jump.


Tools preparation : Unity, Leap Motion

Everything is ready for testing!


3.Conception and Implementation of Unity Mechanisms and UI

Over the past few weeks, the Unity team has discussed and planned the game’s narrative, gameplay, mechanisms, as well as the start and end game UI.

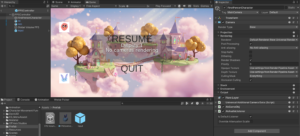
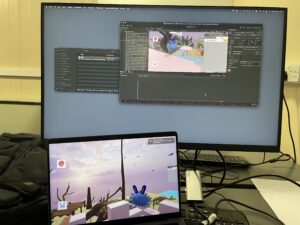
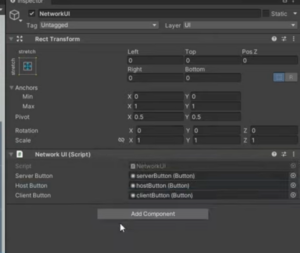
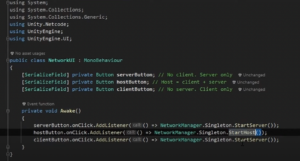
In the game, I have implemented mechanisms such as triggering elevator movement when the player interacts and requiring a key with the same sound as the door to unlock it. Additionally, I have created a simple version of the exit game UI. Below are my related videos and screenshots.

3.1 Elevator video

3.2 How the Elevator Mechanism is Implemented

I used a combination of object animation and scripting to make the elevator move when the player jumps onto it. The elevator follows the parameters set in the animation, moving to the designated position within the specified time.

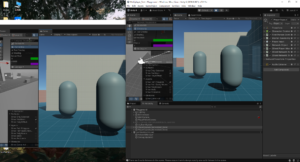
3.2.1 Animation Part

First, I created an Animator on the object that needs to move, allowing it to follow my designed movement. Then, I set up an Animator Controller to manage how the animations transition between each other.
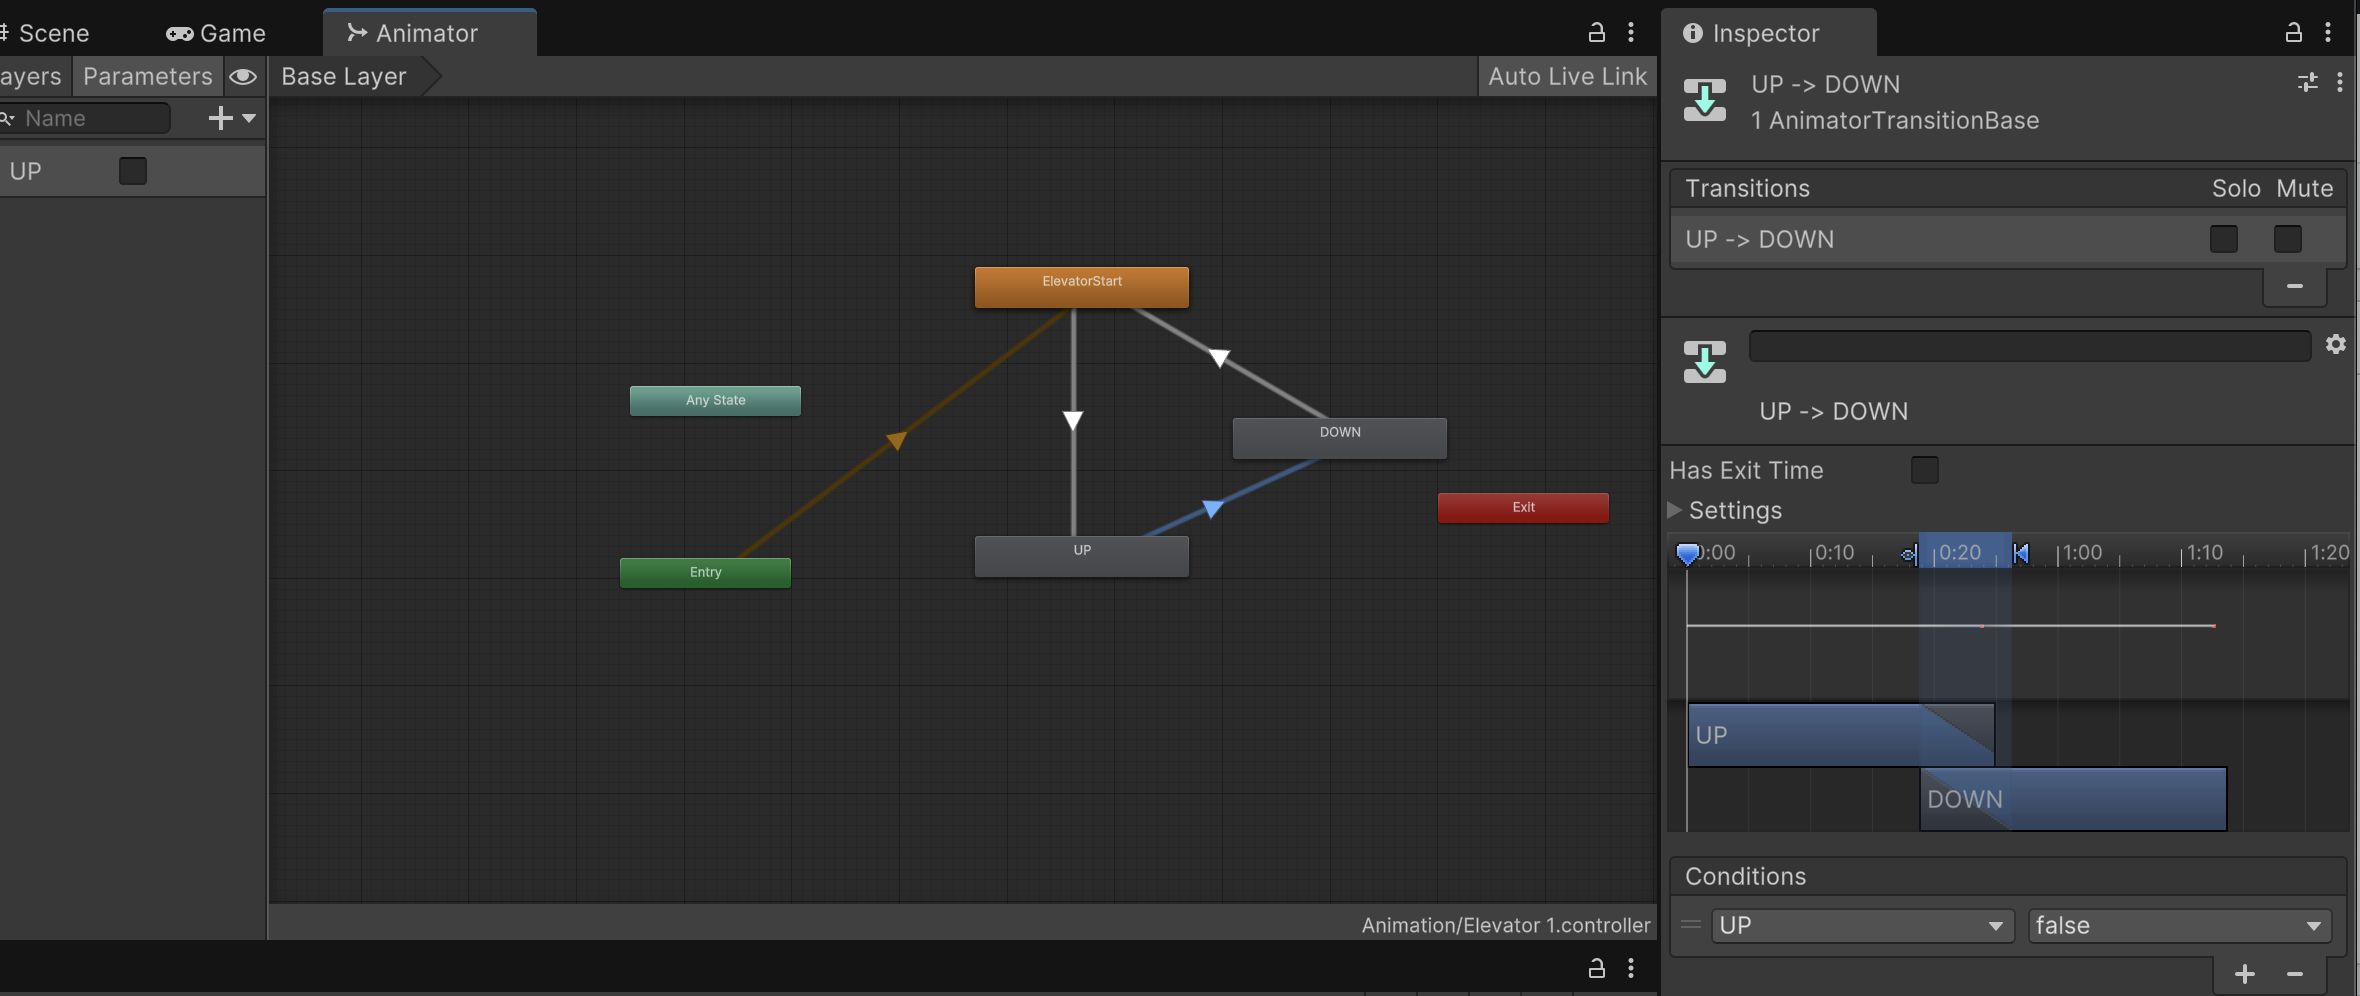
Figure 1

Figure 1 shows a screenshot of the State Machine and Animator parameters in the Controller. However, not all specific parameters are fully displayed in this screenshot.
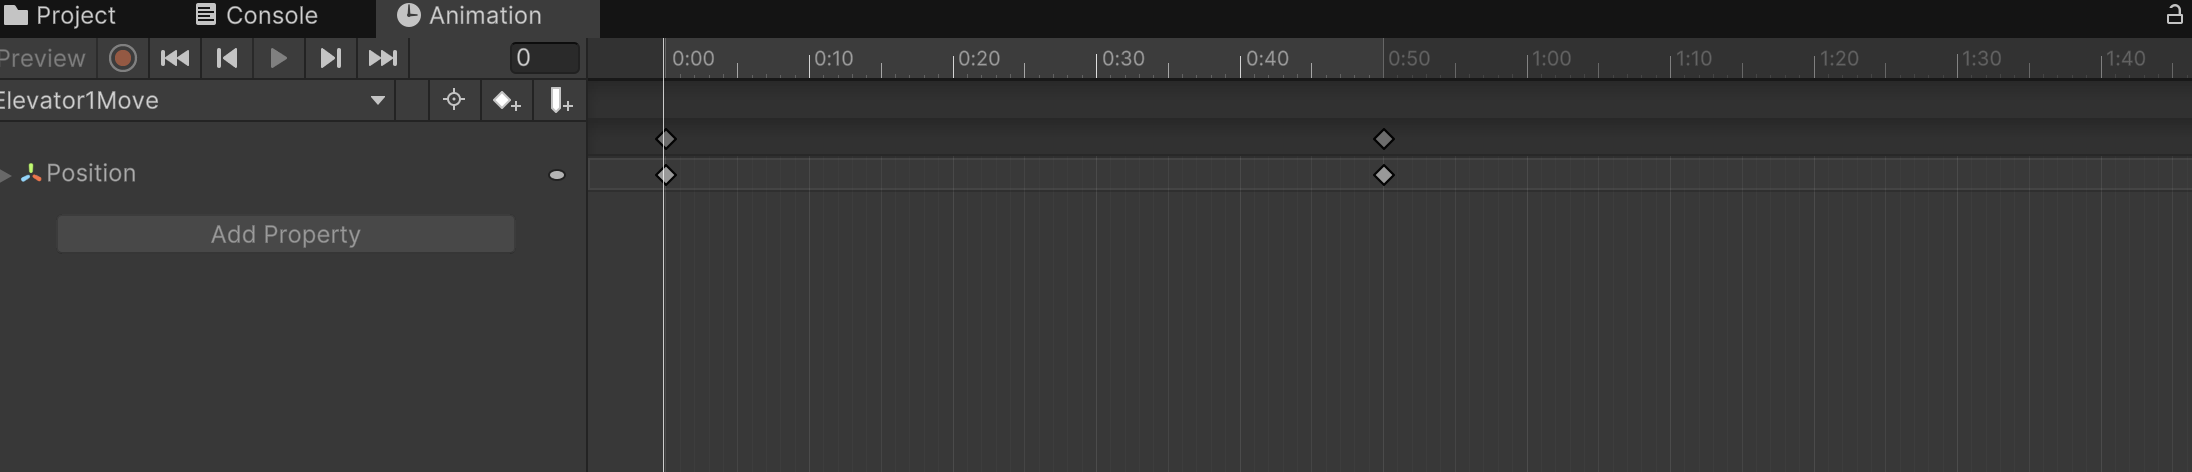
Figure 2

Image 2 shows the Animator I set up for the elevator, moving it from its original position to the designated position within 0.5 seconds.

3.2.2 scripts


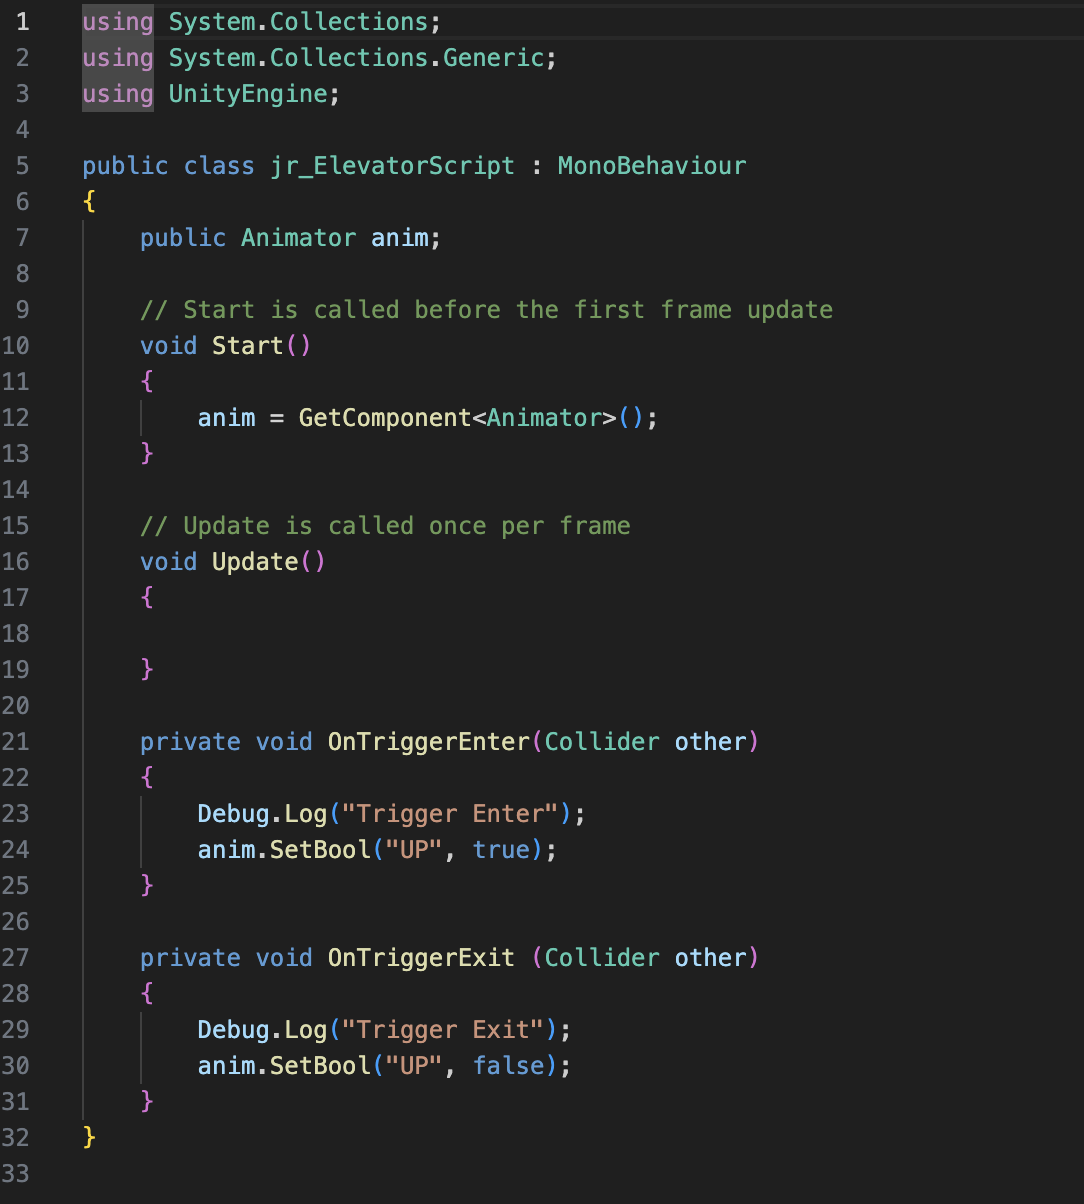
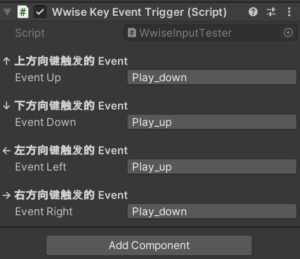
Figure 3 Completed by referencing Jules’ game script


3.3 Correct Key unlock door Video

3.3.1 How the Key Unlock door Mechanism is Implemented

In the design of the mechanism for unlocking the door with the correct key, the approach is similar to that of the elevator. The key difference is that each object requires a sound, which I implemented through scripting, allowing the necessary sound to be directly imported. The second difference is that I needed to add a Pickup Key script to the player controller, enabling the player to trigger the door to open after obtaining the correct key.

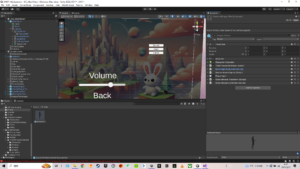
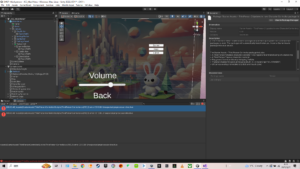
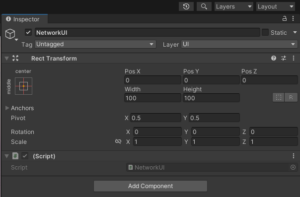
3.4 Exit Game UI Video

3.4.1 How Exit UI is Implemented

I initially designed a simple and clear exit game UI, allowing players to press the ESC key at any time to bring up options to either return to the game or exit. The Unity team discussed implementing different end-game screens based on the player’s ending. I will continue to follow up on this part of the UI design.


Sound Design Approach 

The core logic of our sound design is based on contrast. First, characters MM and NN hear different sounds. For example, the same sound may be much more blurred or unclear when heard by NN. Second, in the game, we designed true and false keys and doors. The real ones sound more harmonious, while the fake ones make players feel uneasy. However, we didn’t want the contrast between them to be too obvious or binary. Instead, we aimed for a kind of subtle consistency, where the differences are noticeable but not sharply divided. 


The core logic of our sound design is based on contrast. First, characters MM and NN hear different sounds. For example, the same sound may be much more muffled or unclear when heard by NN. Second, in the game, we designed true and false keys and doors. The real ones sound more harmonious, while the fake ones make players feel uneasy. However, we didn’t want the contrast between them to be too obvious or binary. Instead, we aimed for a kind of subtle consistency, where the differences are noticeable but not sharply divided. 


Before we began sound production, we made a detailed list of the sounds we needed, categorized according to character, object, ambient sounds (AMB), and UI. Based on this, we coordinated with the team member in charge of the Unity project to confirm what sounds needed to be added, removed, or modified. This ensured that our work was aligned and we could distribute the tasks clearly. 


For the character’s movements, we paid attention to the footsteps. Since the character model looks cute and playful, we recorded the sound of a toy duck as a base. Then we layered it with the sound of stones to represent the contact with the concrete-like and give a sense of weight. Because the game’s art style and story have a certain absurd or surreal quality — like how buildings from different cultures appear in one scene — we wanted the sounds to reflect this with some exaggeration. Therefore, using a synthesizer became an obvious choice. 


We used Massive X to process MIDI keyboard notes and create short pad tones. The real keys and doors sound calm and solid, while the fake ones are sharper and more uncomfortable. For NN’s version, we made the sounds more distorted and noisier. This was achieved by adding texture through noise and adjusting the details with the Pitch Monster plugin. These techniques allowed us to shape each character’s sonic perspective and match the game’s surreal tone. 


Technical Details of Multiplayer System

Since I am responsible for the multiplayer system part of the project MM&NN, this blog is about sharing some basic information and common techniques and logic about multiplayer system implementation.

Implementation

This section is detail about multiplayer system implementation in MM&NN. The scripts and functionalities related to the multiplayer system can be divided into two main parts:

  1. Core Multiplayer Features

These include synchronization between players (ensuring both game instances remain in sync across two computers), avoiding duplicated input across clients, creating and joining rooms. These core systems and scripts are provided by the Alteruna package. I directly implemented these by dragging the appropriate components into the scene or applying them to the relevant prefabs.

Multiplayer Manager: A network manager from Alteruna’s prefab script. Responsible for network connection between devices.

Multiplayer Manager

RoomMenu: A lobby-like menu from Alterunas’ prefab script for players to create, join and leave game rooms. This object is in the scene and can be customized depend on project’s needs.

RoomMenu

Avatar: A script for Alteruna multiplayer system to locate the player prefab and spawn.

Avatar

Transform Synchronizable: A script to enable information synchronization between devices.

Transform Synchronisation
  1. Player-Specific Settings

This part is my customization to meet project’s needs mainly in First Person Controller prefab. The differentiation between host and client, as well as between “is me” and “not me,” plays a crucial role in separating character logic and visuals (camera) for MM and NN. I added identification logic within the First Person Controller script (see screenshots below).

First Person Controller Prefab

First Person Controller Prefab Overview

All character models and post-processing settings are stored under the single prefab of first person controller. The multiplayer system “enable” or “disable” different elements depending on whether the current player is the host or client, and whether the character being controlled is “me” or “not me,” before spawning it in the game scene.

Below is an enabling/disabling logic using “if” within the script.

Big if Logic

This part is basically two small “if” of self-identification under one big “if” host and client identification. Because character MM and NN ‘s settings are activated based on player’s identity to the server, which is host and client. MM’s settings are bind with host while NN’s settings are bind with client. After clarifying player’s identity, program can allocate different character settings to different devices. However, that’s not enough. Two small “if” is responsible for identifying whether the player “is me” in order to enable the correct model to the right player. Without this layer, the player will have wrong model for the other partner player.

In terms of the game audio, since we are using Wwise implemented into Unity and there are two Ak Audio Listeners present in the same scene (one per player), I disabled the listener on the not “is me” player’s object to avoid audio conflicts. Besides, there are two different play events of ambient sound in the Wwise project for two characters, I have the GetChild() to enable/disable two events in the big “if” script.

Audio Enable/Disable

With this setup, the basic individual character settings are successfully implemented.

Multiplayer in Two Perspectives

MM (Host) View
NN (Client) View

Basic Structure

During the research and hands on experience, I found a basic structure and rules for online multiplayer system implementation which works for both packages I have experienced:

  1. A manager which in charge of the network connection

Online multiplayer system needs scripts to let the device gets access to the sever / host in order to connect with other devices.

  1. A player prefab (avatar) in Asset for the system to spawn players

Player prefab has all the information of the player controller. When a new device comes in, it will spawn a new player to the scene.

  1. Synchronization scripts (transformation, animation …)

To get other players’ movement, location and other information precisely and lively, system need scripts to transform other player’s information to the device through network.

  1. Input collision avoiding script

A script to ensure the input commands from a device are only controlling the local player instead of all the players.

  1. Multiple listeners avoiding script

If the game is implemented with Wwise, it has to make sure the local device only has one listener.

Although there are a lot of methods for online multiplayer system, they all follow this basic structure in some way.

Multiplayer vs Single player

When implementing multiplayer into the project, it’s better to previously consider what content in the project may change when there is more than one player in the game scene.

Players:

Firstly, multiplayer system always needs a player prefab to spawn players. Besides, if the game has different settings to players, an extra player identification and functionalities switches have to be aligned with the player prefab. (Examples in implementation of MM&NN)

Audio:

As we introduce multiplayer system to the project, every player has a listener. However, a running game cannot hold more than one listener except special circumstances. We have to disable all other listener except the local one.

Game Objects:

Some game objects may include interactions with players which means they have to be synchronized in multiplayer system too.

Final Post Processing Summary

Post Processing

Introduction

The purpose of post-processing in the MM&NN project is to create a unique visual experience for the character MM, who sees the world through a blurred and color-shifted perspective, distinct from the normal view of NN. Because post-processing in Unity can provide an aesthetic style to the game by adding filters to the camera, its functionality aligns with our objectives on character MM’s visual. This effect is enabled when the player is the MM, and disabled for the NN, as technical detailed in the Multiplayer System section.

Implementation

I made a mistake when implementing this functionality for the first time, which is directly adding Post-processing Layer and Post-processing Volume under the camera object. Since the project is built using Unity’s Universal Render Pipeline (URP), post-processing cannot be applied directly to the camera using the traditional Post-processing Layer and Volume components. Instead, it must follow the URP approach, which involves two key components:

  • Volume Profile: A data asset that defines post-processing effects and their parameters.
  • Global Volume: A component that applies the selected Volume Profile across the scene globally.
First Person Controller Prefab setting

These two components are integrated into the First Person Controller prefab. To simplify enabling and disabling the effect through scripting, the Global Volume is placed as a child under the FPS Controller object, allowing easy access via GetChild() in the First Person Controller script.

The Volume Profile used here is called “FPS Volume Profile”, which contains:

  • Vignette: Adds a soft blur around the edges of the camera view. Intensity controls how much the effect applies to the camera. Smoothness blurred the effect’s edge. These two effects create a blurred and limited visual for the player.
  • Color Curves: Applies a blue color tone to match MM’s unique visual perception. In the Color Curves settings, I used the Hue vs Saturation curve to increase the saturation of the blue and purple areas, while lowering the saturation of the green area. This made the blue in the scene more intense and harsher, creating an unsettling atmosphere.
Profile settings and final outcome

The “Global Volume FPS” object uses the “FPS Volume Profile” and applies it globally when MM is the active player. Finally, MM character’s player will have a different aesthetic style from NN character’s player, building players’ difference to increase gameplay.

About the design and trigger of game language system in unity__Chengcheng Jiang

Considering that this project is set up as a two-player co-operative puzzle game, where one of the players is visually impaired but has normal hearing, we believe that voice prompts will become one of the most crucial ways of information transfer between the two players.

In order to meet this design requirement, I developed a voice triggering system script in Unity, so that the able-bodied players can press the up, down, left, right and right arrow keys of the keyboard to play the voice commands with different meanings (e.g., ‘forward, backward, right, left, right,’ ‘danger’, ‘need’, ‘need’, ‘need’, ‘need’, ‘need’, ‘need’, ‘need’). ’, ‘need help’, ‘find the exit’, etc.), and at the same time these voices have different emotional colours (e.g. nervousness, encouragement, confirmation, etc.), so that the messages are not only clear instructions, but also have a certain degree of emotional This makes the messages not only clear instructions, but also has a certain emotional impact, enhancing the sense of immersion and character immersion. Finally, after exporting the soundbank integration of wwise to unity, the game language system can be triggered in unity.

In the end, the system successfully realises the closed-loop interaction from key input → playing voice events → providing command prompts, and the visually impaired players can judge the environmental information through hearing, which further improves the depth of collaboration between players and the playability of the game.

Update on Multiplayer System_KYP

Alteruna

With the suggestion from Mr. Jules Rawlinson, I go through another Multiplayer package called Alteruna. It’s easy to implement into our group’s project and I ran it successfully.

Two projects running in my computer in one game room

Just like Netcode for Game Objects, it spawns a player object from prefab when a new player enter the game. But I run Alteruna successfully so I moved my focus to it as frame for multiplayer system. The problem for me still is how to vary setting from two players.

Discussions

Plan

Later I had a meeting with Mr. Joe Hathway who gave me valuable advice on integration and game mechanism realisation. As we have successfully created settings of blurred camera in single player project and ran it, next step is figuring out how  to enable/disable these settings in multiplayer Prefab. Our plan is to find out a way to identify certain player by IDs(network ID). There are a complete document about Alteruna namespaces: https://alteruna.github.io/au-multiplayer-api-docs/html/G_Alteruna.htm

Fortunately, we found the one called UserID and GetID which may be used in our realisation of ID identify.

Structure and Progress Steps Draft by Joe

Realisation

Next day I had a meeting with Mr. Jules and we successfully implement both multiplayer and different camera settings through Alteruna in a test scene. Because there are only two players in our project, we use “IsHost” to identify whether the player is Host or not in order to identify certain player and enable / disable post processing volume added to the First Person Controller’s script in Prefab. https://alteruna.github.io/au-multiplayer-api-docs/html/P_Alteruna_User_IsHost.htm

GetUser + IsHost to identify host & client players

Thanks for Mr. Jules, this meeting helps me to decide using Alteruna as Multiplayer package instead of Netcode.

Implemetation

Finally, I implemented Alteruna multiplayer into our game project and it works well.

Testing project in one computer

But there are some problems happening.

  1. When playing through two computers, two players can only see each other’s flashing shape when they are moving. It works well when playing in one computer, may because of some network refresh settings.
  2. The players now have one module on their FPS controller. How to allocate different modules is the next step. My idea is enable / disable module added in FPS controller depends on the host and client identity.
  3. I haven’t add the post processing camera because our final project is modifying by other group  member to implement more mechanisms.
  4. More mechanisms may need to be synced in our project and I need to figure out how to do it through Alteruna.

Update in Multiplayer in Unity Project_KYP

Since our group members developed a game scene for our project. It’s time to implement multiplayer system into it. After last blog, I watched other two more tutorials but the first one needs a huge amount of scripting which I don’t have the fundamental knowledge for that. So I go with this one https://www.youtube.com/watch?v=2YQMJJINWpo&t=84s

I followed the video and implemented everything into our Unity Project and added more buttons in Menu canvas for multiplayer options.

Prefab of multiplayer character
UI Buttions for Multiplayer

In this testing, there are two problems that lead to failed running of the game project

Starter Assets package missing dependencies: this problem directly leads to failed running. I tried to search for solution online https://discussions.unity.com/t/first-person-starters-input-system-doesnt-work-on-webgl/885155. But same solution didn’t work in my project.

Another is NetworkUI scripting problem. I cannot connect my buttons to the script for some unknown reason. My script has a writing format unmatched with the tutorial (different colour and typing method in “call:”). I’ll ask for help in that too.

The tutorial’s NetworkUI
Tutorial’s NetworkUI script
My NetworkUI


My NetworkUI script

Beside, I asked a YouTuber about different features on players in multiplayer system to see which level is it to have different cameras and here is the answer.

From what I’ve learned recently, RPC setting for multiplayer is more advanced in scripting and system. I am concerning whether we have time to do that. After go into the project making process, my part changed from integration in Wwise and Unity into Multiplayer Implementation. Currently I am searching for help to some tutors who might be able to help in ECA and I am also learning more knowledge in multiplayer myself.

Testing Multiplayer in Unity_KYP

I’ve been doing some research on multiplayer in Unity and integrating multi-listener in it. There are mainly two separate ways to achieve multiplayer project in Unity – local multiplayer and online multiplayer. Based on the research I have been doing, local multiplayer project can only support split-screen in one device and online multiplayer can replicate parent model to multi individual clients through networking. Since our game will be displayed in two individual screens back to back and two audio output, online multiplayer can better fulfill our basic needs.

So I started my testing project with Unity official tutorial, only replacing the third-player controller with first-player controller.

The basic idea of online multiplayer through networking concepts of Unity is replicating player’s feature based on parent player setting by scripts in netcode. I made the FPS multiplayer test scene running well.

In case of further design and realization in multiplayer project, it may involves extra script in network transforming for every interactive component or animation.

Two players’ windows running in Multiplayer Tools

There are three problems I am working on:

  1. Because I completely followed the tutorial, there’s no script about FPS camera replication. The FPS camera contains two components-cinemachine brain and player follow camera. How to replicate them to different players is my next step.
  2. For now, I don’t know how to give players’ characters different features (blurred camera, footsteps SFX, etc.) through netcode or other networking methods.
  3. An error occurred when I integrate Wwise into this test project. I am trying to solve this problem in order to test multiplayer listener.
css.php

Report this page

To report inappropriate content on this page, please use the form below. Upon receiving your report, we will be in touch as per the Take Down Policy of the service.

Please note that personal data collected through this form is used and stored for the purposes of processing this report and communication with you.

If you are unable to report a concern about content via this form please contact the Service Owner.

Please enter an email address you wish to be contacted on. Please describe the unacceptable content in sufficient detail to allow us to locate it, and why you consider it to be unacceptable.
By submitting this report, you accept that it is accurate and that fraudulent or nuisance complaints may result in action by the University.

  Cancel