Any views expressed within media held on this service are those of the contributors, should not be taken as approved or endorsed by the University, and do not necessarily reflect the views of the University in respect of any particular issue.

Personal Reflection – Zhu Yuanguang

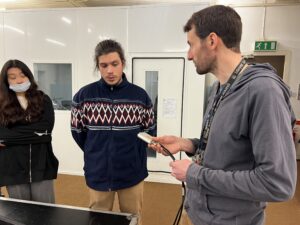
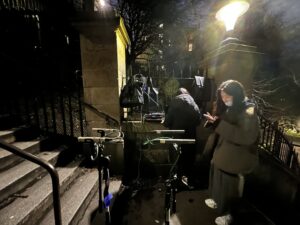
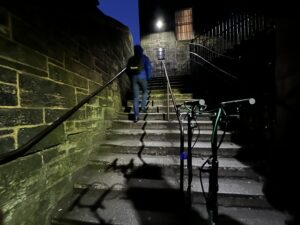
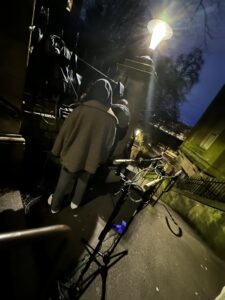
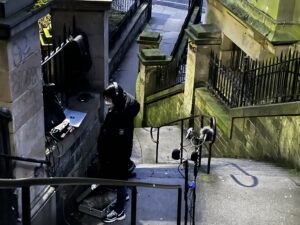
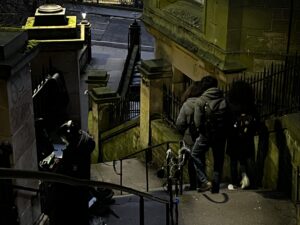
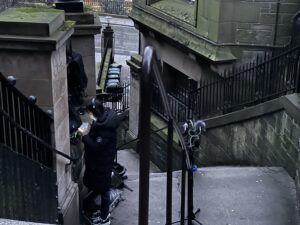
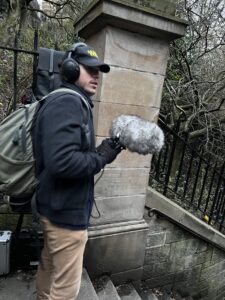
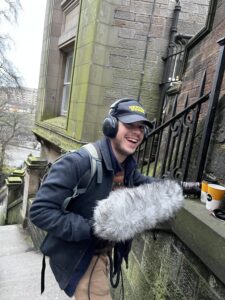
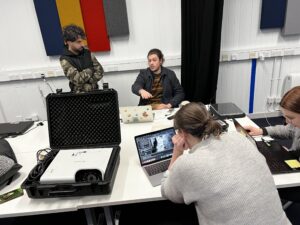
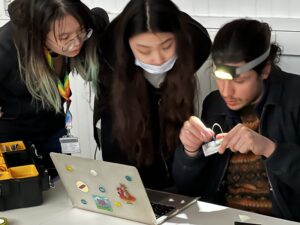
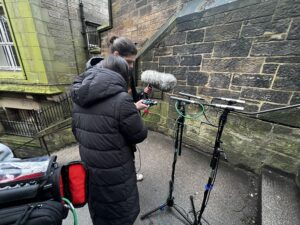
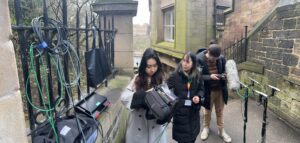
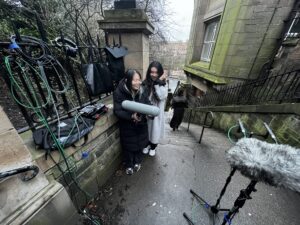
My experience in this Place group at DMSP was very rewarding and as I do not have a course in Max myself, I may not have been able to do much more practical work in Max-based sound design. Seeing the hard work of the group members, I did all the prep work I could (including equipment handling, field recording, audio and video recording of the workshop, etc.) and took an active role in the pre-planning and design of the sound installation on a live site.

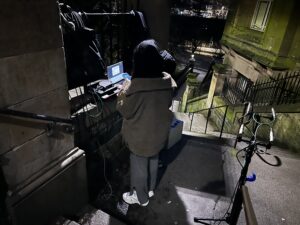
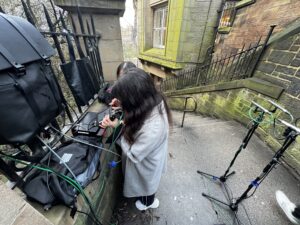
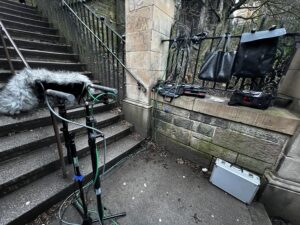
In practice, we encountered a number of problems during the booking process, such as equipment being borrowed at short notice, and similar situations where equipments were not in the Music Store despite being booked in advance. I would like to thank the sound crew for their patience, encouragement and help, and because of them, all the audio equipments have been solved in a better way. Also, due to the large amount of equipments, the sound team members helped me a lot both during the testing phase and the official performance phase to make sure that the live sound installation was done efficiently.

I believe that with better support, the live sound installations for our project would be more logical and efficient, and would provide a better sound environment for the audience to experience.

Finally, I would like to thank all the members of the Place team and the tutors and students who supported us. The results and achievements of this project were not only the efforts of each individual, but also the result of the collaboration of all the people who contributed to the project. Thanks again.

Exhibition Day – Zhu Yuanguang

On the day of the exhibition, setting up the audio equipments on live was relatively complicated, first of all, we needed to get a bunch of audio equipments we had booked in the Music Store. How to arrange the audio cables and power cables more efficiently and how to arrange the audio cables and power cables without hindering the audience’s visit and feeling became the main focus of my attention. In order to prevent the speakers from falling off accidentally, we also reinforced each speaker with tape. The cables were not allowed to pass through the audience experience area in order to reduce the risk to the safety of the audience and the safety of the installations.

After experiencing the visual and auditory impact of our group’s project in person during the testing phase of the project on the day of the exhibition, I was very excited because I was confident in our project from the testing phase.

After the exhibition had started, I continued to observe the expressions and reactions of the audience to our project, and I also talked to some of them to get their feedback on our project. I have to say that many of the audiences were very interested in our project and gave us good feedback on our project.

Although the whole exhibition would be a lot of work for every member of the group, I think it was all worth it. If there is another opportunity to do another exhibition like this, there are better solutions I think in terms of live audio installation settings to support the immersion and surround sounds of the project.

In the future, I think this project could be used to show details of historical buildings, future architectural visions and real-life immersions and studies, which could be more visually intuitive and aurally enjoyable for the audience. In this project exhibition, as I personally did not have the relevant courses for the other members of the group, it was refreshing to learn what they learned in the course, and to learn a lot about what Max could do in practice and what we could do with the software and sensors, which really made me curious about Max. I hope to learn how to use Max afterwards to create something like this project, which has not only cultural but also commercial value, which is great.

Sound Installation Setup in Exhibition

The surround sound installation in this exhibition provided a great immersive sound experience for many audiences. From talking to the audience, I found that there was a high level of interest in the sound installation and how it should be set up, so I would like to explain the idea of the sound installation and how it was set up in the exhibition.

For the sound installation in the exhibition, I initially set two plans, and I think the best sound installation plan would be the one I mentioned in my previous blog, Plan A. Firstly, the digital mixer DiGiCo SD11 and DiGiCo UB MADI Audio Interface would reduce unnecessary cables for the connection between our audio equipment and the audio channels. Secondly, the digital mixer would provide us with the greatest convenience in solving the gain level of the live sound without worrying about overloading live sounds and other unnecessary problems; finally, the digital mixer could provide some internal digital effects for live sound adjustment or live presentation to provide more options for the sounds of our project. Therefore, we learned about the SD11 in the early planning stages. Of course, the use of digital mixer in a live setting without the addition of a spare digital mixer confirms that there may be a certain risk to live presentation. Unfortunately, I was unable to use the digital mixer on the day of our presentation for a variety of reasons, which I felt slightly upset.

In sound installation setup Plan B, we replaced the digital mixer with an analogue console, the MIDAS Venice F, and changed the sound interface from a MADI sound card to an RME FireFace UCX. To some extent, this would reduce the efficiency of the live sound installation setup. However, this plan may be more reliable than Plan A, and may be slightly less rich in internal features than Plan A. This would mean that other members of the sound team may need to do more post-production work when designing the sound to ensure that the live sound could be perfect for the audience. Ultimately, Plan B could not be realised for a variety of reasons.

Our final solution in the live setting is to have the computer demonstrating the sound directly connected to a sound interface with ten output signals for live sound reinforcement. In the live test phase, we mainly did the following settings in terms of speakers connected to the sound interface, the front left speaker connected to the first channel of the sound interface output, the front right speaker connected to the second channel of the sound interface output, the front centre speaker connected to the third channel of the sound interface output, the left speaker connected to the fourth channel of the sound interface output, the right speaker connected to the fifth channel of the sound interface output, the rear left speaker connected to the sound interface output sixth channel, the rear right channel speakers connected to the sound interface output seventh channel, the front subwoofer connected to the sound interface output eighth channel. The live sound control was primarily controlled by the computer demonstrating the sound. During the live test phase, we also set a standard setting on the level of all the speakers and tested all the channels to see if the sound went smoothly. This plan would require relatively more audio cables as far as Plan A was concerned.

For this exhibition, all the audio equipments we needed for the live presentation was booked a week in advance in the Music Store, but due to the large number of DMSP Groups that needed to exhibit at the same period, there were many problems in booking the equipment, such as not having enough 8030 speakers to replace the 1030A speakers or not having enough speaker stands etc. Fortunately, all the problems were eventually solved.

I worked more on setting up and assembling the sound installation, so at other times I recorded the work of the other team members, taking photos and videos, and produced two clips as a trailer and a summary of the project, which I have shared with the group for their use and reference.

DMSP Place Group Trailer

DMSP Place Group Exhibition


If you’re reading this in order, please proceed to the next post: ‘Usability in the Exhibition’.

What we should book for the surround sound system

Plan A 

Mixer

DiGiCo SD11 (1)

Send email to Roderick to book it.

Interface

DiGiCo UB MADI Interface (1)

Send email to Roderick to book it.

(Don’t forget to download the driver.)

Speakers

Genelec 7060 – Active Subwoofer (1)

https://bookit.eca.ed.ac.uk/av/wizard/resourcedetail.aspx?id=6927

Genelec 8030A or Genelec 8040 (7)

https://bookit.eca.ed.ac.uk/av/wizard/resourcedetail.aspx?id=1727

or

https://bookit.eca.ed.ac.uk/av/wizard/resourcedetail.aspx?id=6918

Speaker Stands

Genelec Poles for Speaker Stand (7)

https://bookit.eca.ed.ac.uk/av/wizard/resourcedetail.aspx?id=6116

Audio Cables

XLR Male to XLR Female (16)

https://bookit.eca.ed.ac.uk/av/wizard/resourcedetail.aspx?id=929

Extension Cables

Extension Cable – 7m, 4 Socket (Ext 16) (9)

https://bookit.eca.ed.ac.uk/av/wizard/resourcedetail.aspx?id=6875

15m Cable Reel (3)

https://bookit.eca.ed.ac.uk/av/wizard/resourcedetail.aspx?id=5887


Plan B

Mixer

MIDAS – Venice F (1)

https://bookit.eca.ed.ac.uk/av/wizard/resourcedetail.aspx?id=1180

Interface

RME – FireFace UCX (1) and RME – FireFace UC (1)

https://bookit.eca.ed.ac.uk/av/wizard/resourcedetail.aspx?id=2635

and

https://bookit.eca.ed.ac.uk/av/wizard/resourcedetail.aspx?id=1147

(Don’t forget to download the driver. If we use an analogue mixer, we would face the problem of needing two audio interface to achieve eight channels of input signal. I have checked all the audio interface available for loan at the music store and there is no audio interface that has eight output signals. This also leads to the idea that if we want to achieve 7.1 surround sound we may need two computers to support it.)

Speakers

Genelec 7060 – Active Subwoofer (1)

https://bookit.eca.ed.ac.uk/av/wizard/resourcedetail.aspx?id=6927

Genelec 8030A or Genelec 8040 (7)

https://bookit.eca.ed.ac.uk/av/wizard/resourcedetail.aspx?id=1727

or

https://bookit.eca.ed.ac.uk/av/wizard/resourcedetail.aspx?id=6918

Speaker Stands

Genelec Poles for Speaker Stand (7)

https://bookit.eca.ed.ac.uk/av/wizard/resourcedetail.aspx?id=6116

Audio Cables

8 way TRS Jack to XLR Male – Loom (3)

https://bookit.eca.ed.ac.uk/av/wizard/resourcedetail.aspx?id=4532

XLR Male to XLR Female (16)

https://bookit.eca.ed.ac.uk/av/wizard/resourcedetail.aspx?id=929

Extension Cables

Extension Cable – 7m, 4 Socket (Ext 16) (9)

https://bookit.eca.ed.ac.uk/av/wizard/resourcedetail.aspx?id=6875

15m Cable Reel (3)

https://bookit.eca.ed.ac.uk/av/wizard/resourcedetail.aspx?id=5887


Surround Sound System Plan

The audio team met with Roderick on 3 March to discuss how to achieve 7.1 surround sound. With Roderick’s help, the audio team was introduced to the use and setup of the SD11 Mixer.

I have designed two surround sound plans for this purpose and the audio team will finalise the plans after sound testing.

The Day of Sound Material Recording

On 3 March, the audio team recorded the sound material. The audio crew woke up at 5 a.m. and arrived at The New Steps by 6 a.m. Once the recording system was fully set up, the audio team recorded audio at various times. While recording two pairs of stereo microphones, the audio team also recorded some scene-specific sounds using strong directional shotgun microphones to achieve the specific scenes required for the project.

All members of the audio team did our best to achieve a satisfactory sound for this recording, which lasted for about a morning. In the afternoon the Place group had a tutorial session and also discussed the sensors in the interactive audio section.

All the recorded sounds are now in the editing stage.

The Day of Recording Tests

In order to achieve the Place team’s expectation for the project, the DMSP audio team booked audio recording equipment and had a test recording session at The New Steps on the afternoon of 2 March.

During the test recordings, the audio team evaluated the quality of the recordings and made some settings to get the best quality recordings as possible. The audio team identified two main issues during the tests. One was that the recording location was narrow and windy, so there was some wind noise recorded with two pairs of stereo microphones, so the audio team discussed a solution to reduce the wind noise and address the effects of wind noise as much as possible. The other problem was that the MixPre recorder was running out of battery power so quickly that the four sets of batteries that the audio team had prepared for the recording were almost dead within half an hour, so the audio team decided to use a computer to power the recorder on the day of the recording in order to extend the recording time and ensure that the recording went smoothly.

Molly Munro

YG – Preparation for Surround Sound Production

In order to better realize our team’s ideas, surround sound preparation is essential. To do this, I searched the school’s equipment library for equipment that we could use. The list is as follows.

Pre-production


  1. Microphone

Sennheiser AMBEO VR mic

https://bookit.eca.ed.ac.uk/av/wizard/resourcedetail.aspx?id=4149


  1. Field Recorder


Zaxcin Nomad Lite

https://bookit.eca.ed.ac.uk/av/wizard/resourcedetail.aspx?id=1695


Zoom F8

https://bookit.eca.ed.ac.uk/av/wizard/resourcedetail.aspx?id=4175


Post-production and live sound reinforcement


  1. Interface


RME FireFace UC

https://bookit.eca.ed.ac.uk/av/wizard/resourcedetail.aspx?id=1147


RME FireFace UCX

https://bookit.eca.ed.ac.uk/av/wizard/resourcedetail.aspx?id=2635


  1. Speaker


Genelec 8030A

https://bookit.eca.ed.ac.uk/av/wizard/resourcedetail.aspx?id=1727


Genelec 7060 Active Subwoofer

https://bookit.eca.ed.ac.uk/av/wizard/resourcedetail.aspx?id=6927


In addition to this, our sound design could produce some of the sound effects to enrich the scenes’ storytelling content. I think the focus of this audio work is on how to bring the sounds that we have created to the scene in surround sound as much as possible, so I think we need to have more discussion about the implementation of surround sound.

We could consider the speaker position setup like this.

css.php

Report this page

To report inappropriate content on this page, please use the form below. Upon receiving your report, we will be in touch as per the Take Down Policy of the service.

Please note that personal data collected through this form is used and stored for the purposes of processing this report and communication with you.

If you are unable to report a concern about content via this form please contact the Service Owner.

Please enter an email address you wish to be contacted on. Please describe the unacceptable content in sufficient detail to allow us to locate it, and why you consider it to be unacceptable.
By submitting this report, you accept that it is accurate and that fraudulent or nuisance complaints may result in action by the University.

  Cancel