Any views expressed within media held on this service are those of the contributors, should not be taken as approved or endorsed by the University, and do not necessarily reflect the views of the University in respect of any particular issue.

Ambience Sound Recording

Zixuan:

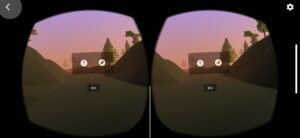
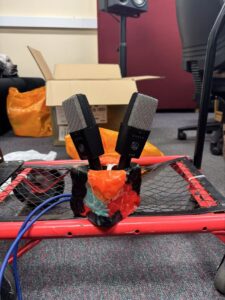
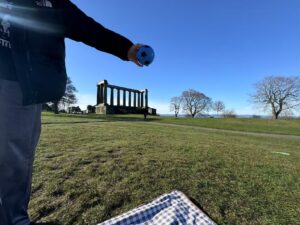
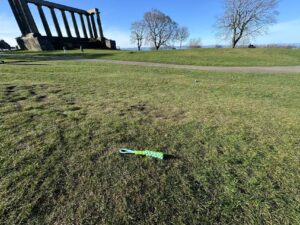
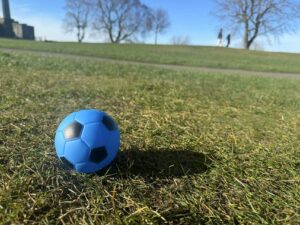
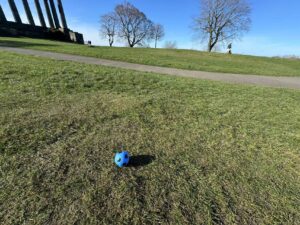
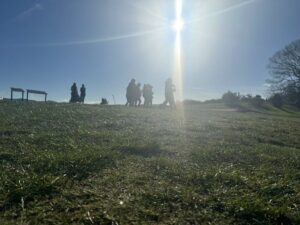
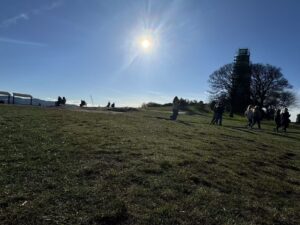
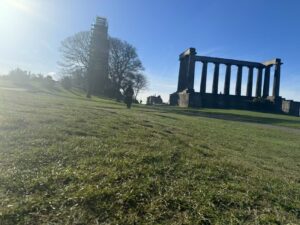
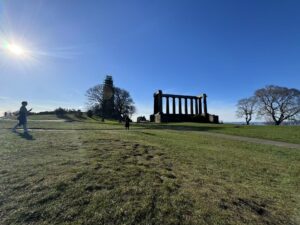
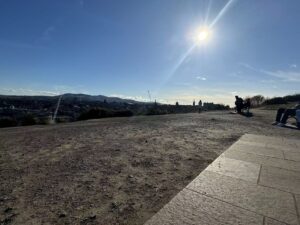
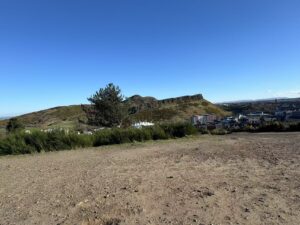
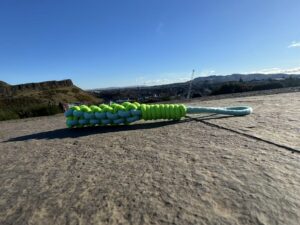
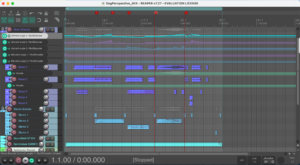
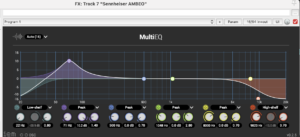
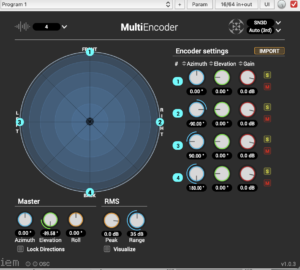
Today, we recorded environmental sound using the Sennheiser AMBEO VR microphone. We captured three separate recordings at the same location, with the only difference being the recording height, to simulate how dogs of different sizes perceive their surroundings.

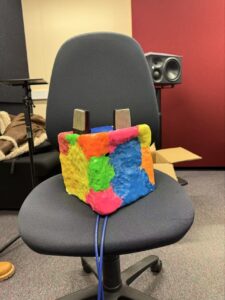
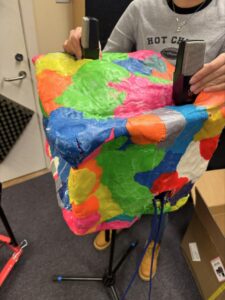
Since the Chihuahua is very small, we couldn’t find a mic stand low enough to match its ear level. So we rested the microphone directly on the mic stand at a low angle to approximate its actual height.
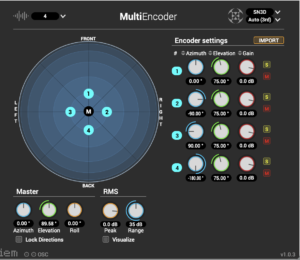
For the Labrador and the Irish Wolfhound, we recorded at approximately 60 cm and 120 cm from the ground, respectively, to match their standing ear positions.

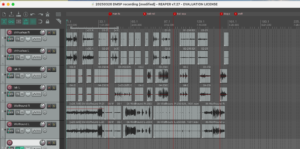
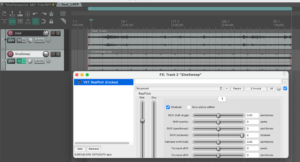
After recording, I processed the environmental sound recordings for the large dog and small dog perspectives, making adjustments based on their body size and likely auditory characteristics.

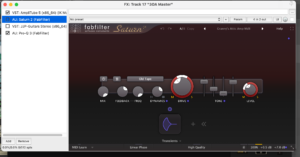
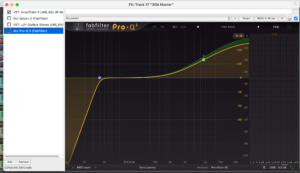
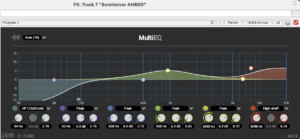
Larger dogs (such as the Irish Wolfhound) have larger body sizes and ear membrane areas, which make them generally more sensitive to low frequencies and less responsive to high frequencies. So, in post-processing, I boosted the low frequencies and slightly reduced the highs while also widening the stereo image to create a broader, fuller auditory space.

Smaller dogs (like the Chihuahua) are typically more sensitive to high frequencies but less responsive to lows. Therefore, I enhanced the high frequencies, reduced some of the lows, and narrowed the overall sound field to create a more focused, sharper listening perspective.

With these adjustments, we aim to authentically simulate how dogs of different sizes hear the world, enhancing the immersive quality of the experience and reinforcing the concept of “listening from a dog’s perspective.”

Ruiqi:

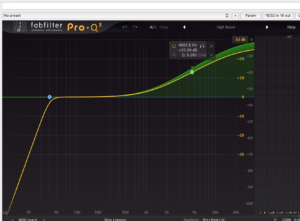
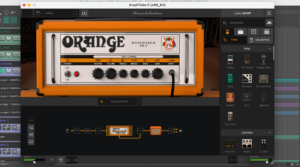
That was what I did on atmos for Labrador. Dogs typically hear frequencies from 40 Hz to 45,000 Hz, way far exceeding human hearing (20 Hz–20,000 Hz). They are most sensitive to higher frequencies (2k–45 kHz), which are critical for detecting sounds like prey movements, high-pitched whistles and orders. And I think amplifying 4k Hz can make sounds like human footsteps and verbal commands more perceptible.

Carly:

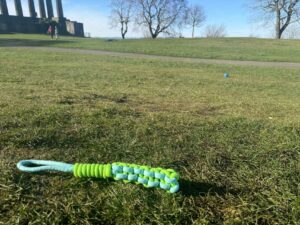
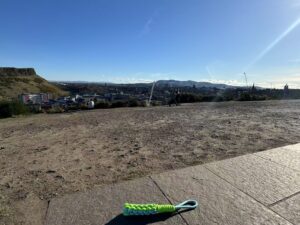
When recording the the ambience I made sure of having a measuring tape so we could get the correct size, the thing is that while recording the ambience it was still the plan to use the photos taken with the camera rather than the phone, which is the reason we had the measuring tape too so we could have the correct height.

Optimising images for VR

Zixuan:

Today we tested how our images and video content perform in a VR environment. Ruiqi and I went to the library and picked up a set of free VR headsets, then began a full round of testing. It was our first time viewing the project content inside VR, and while we ran into a few issues, we also gained some very helpful insights.

We started by testing the video Carly had created. Right away, we noticed a major issue: there was a thick black border surrounding the video in VR, which seriously disrupted the sense of immersion. It felt like we were watching the content through a “window” instead of being inside the scene.

To solve this, we tried enlarging the image to remove the black edges. While this did fill the screen, it introduced a new problem: the content became blurry and hard to focus on, and there was noticeable ghosting and double vision. It made the experience uncomfortable to watch.

So, I decided to open the VR headset’s built-in testing app to study what properly formatted images for VR should look like. As expected, there were clear standards for image proportions and layout. I sent one of the reference images to Carly, and together we adjusted our content based on that template. It worked—the focus issue was completely resolved, and the visuals looked much more natural and immersive.

We also tried adding some explanatory text about our project during the black screen sections, but in VR it was impossible to view the full text properly, so we eventually decided to abandon that idea.

In the final stage, I added a small emotional touch to the video: every time a dog hears a positive word from its owner, I subtly increased the brightness of the screen to represent the dog’s happiness and excitement. This gentle lighting shift adds emotional depth without distracting from the experience.

After final testing, everything ran smoothly, and the VR playback now works perfectly. It feels like a huge step forward, and we’re excited to let others try it—to finally experience what the world might look and sound like from a dog’s point of view!

Binaural Recording…But in dogs’ perspective?

Ruiqi:

Aha! We used the Play-Doh to make three dog heads in different sizes.

Just look at how much Play-Doh’s been consumed (And that’s just a start)

We’ve recorded what dogs may notice or do in a binaural format, including human footsteps, dog’s footsteps, toy ball rolling (in various perspectives), squeezing the toy ball, dog sniffing (actually Ruiqi…) and collar shaking and so on.

Zixuan:

Today, Ruiqi and I went to the studio to record sounds using our dog head microphone setup. Since it’s just before our presentation, it was really difficult to book a recording space—but luckily, we managed to find an available slot and got in!

Our main recording equipment was a pair of AKG C414 XLS microphones, chosen for their excellent sensitivity and clarity, perfect for capturing the subtle environmental sounds we need for this simulation project. To make the recordings feel as close as possible to a dog’s hearing experience, we tried to replicate the physical characteristics of a dog’s head and ear position as accurately as possible.

One challenge we faced was with the Chihuahua model. It’s such a small dog with a very low shoulder height, and we couldn’t find a regular mic stand that worked at that level. In the end, we placed the Chihuahua model on a flat trolley, which turned out to be the perfect height, around 15 cm, very close to a real Chihuahua’s ear position.

Another issue was that the dog heads couldn’t be mounted directly onto a mic stand. So, we borrowed a speaker stand tray from the music store and used it to support the dog head models. This worked really well, keeping everything stable and secure during the recording.

We recorded at different heights according to the breeds:
– Chihuahua: about 15 cm
– Labrador: about 60 cm
– Irish Wolfhound: about 120 cm

These heights correspond roughly to each dog’s natural ear position when standing, helping us better simulate spatial hearing differences between breeds.

One problem with the studio environment was the flooring. Our video scenes are set on grass, but the studio had a carpeted floor. To recreate the sound of footsteps on grass, we improvised: we layered a sheet of hard plastic underneath a sheet of soft plastic, then placed both under the carpet. The result was surprisingly convincing—when stepped on, the layered surface produced a sound quite similar to walking on grass.

As for sound content, we followed the details from our storyboard and recorded specific elements, including:
– Human footsteps (to simulate off-screen presence)
– Dog footsteps (running, turning, stepping on grass)
– Dog tag jingling sounds
– Toy ball rolling sounds
– Toy ball being squeezed or bitten

Originally, we had also hoped to record background crowd noise and bird sounds to enrich the ambient layers. However, since the dog head models are fragile and not very portable, we decided to skip outdoor recording for now.

All in all, the recording session was really productive. Despite some limitations in space and materials, we managed to recreate the environment and capture the sounds we needed. Once the recordings are sorted, we’ll move on to editing and mixing. I can’t wait to hear how the world sounds from inside a dog’s head!

Video and photo capturing

Zixuan:

Today, as planned, we went to Calton Hill to capture photos and video materials for our project. In order to make the final piece feel more rhythmic and narrative-driven, we did some initial planning before heading out, designing two simple scene-based storylines to make the “dog’s perspective” feel more natural and immersive.

We chose to shoot in the afternoon because the lighting at that time is softer and more vibrant. The scenery at Calton Hill during this time also fits well with the atmosphere we wanted to convey.

🎬 Scene One: “Distraction by Choice”
In the first scene, we set up a playful moment where a dog is chasing a ball but suddenly gets distracted by another toy. To enhance the audience’s sense of immersion, we decided to film the ball-throwing and the dog’s gaze following the ball as video, while the rest of the sequence would be presented through photographs. We believe that photos give more space for the sound design to come forward, allowing audio to take the lead in crafting an immersive experience。

IMG_2415

IMG_2418

🐶 Scene Two: “A Quiet Moment”
In the second scene, the dog looks around before quietly lying down in front of its favourite toy. The movement is subtle but emotionally more contained. Here, too, we chose to film the moment of the dog lying down to strengthen the feeling of presence while using photographs to complement the setting and visual composition.

IMG_2442

📷 Shooting Method & Lens Choices
We started with the “big dog vs. small dog” group. To ensure visual consistency in composition, we kept the camera position fixed and adjusted the height of each dog model so that both appeared to be at the same eye level. This allowed for a clearer comparison of their sizes and perspectives.

We also made specific choices regarding lens focal lengths to simulate the field of view from each dog’s perspective:
The Chihuahua was shot with a 24 mm lens, which offers a narrower field of view to match its small size.
The Irish Wolfhound was captured using a 14 mm wide-angle lens, highlighting the broader perspective granted by its larger body.
– The Labrador Retriever, as the mid-sized reference, was shot with a 19mm lens, striking a balance between the two and representing a “medium perspective.”

With this setup, we hope the audience can not only observe the dog’s behaviour but also visually experience how dogs of different sizes perceive the world differently.

Overall, today’s shoot was quite compact but very productive. The whole team worked smoothly together. From choosing the right lighting and adjusting lenses to positioning the dog head models, every detail brought us one step closer to realising the final vision. Next, we’ll move into organising the materials and starting the sound design phase—we’re excited to see what comes next!

Carly:

I really enjoyed today’s shooting, it also felt a little bit “new” in a sense as we changed the medium from a camera to an iPhone, we changed from only photos to photos and videos and we also added two different dog toys (which is an excellent thing specially with my dogs back in Spain as they are gonna get a new toy).

I am delighted with the results from the images taken, not only because they look good and are going to make wonders when edited, but also because it was really amazing seeing that, with the previous organisation and communication, we took the pictures and videos we needed really fast – not rushed, but efficient.  Can’t wait to edit them!

Making the dog heads

Zixuan:

🐶 Dog Head Microphone – Making Process Log

Today we completed the first round of making our dog head microphone. In terms of materials and structural design, we did a bit of experimentation in order to simulate the physical shape and auditory perspective of a real dog’s head using simple materials. This will help us more accurately capture sound from a “dog’s point of hearing” for our project.

📐 Dog Head Sizes and Breed Categories

Based on the three types of dogs featured in our project, we created head models of different sizes:

– Chihuahua (small breed): The actual head diameter is about 6–8 cm. We chose 8 cm as our reference.
– Labrador Retriever (medium breed): Scaled up to a 20 cm head diameter.
– Irish Wolfhound (large breed): For the greatest contrast, we made the head about 35 cm in diameter.

By creating models with these size differences, we aim to simulate how dogs of different breeds and sizes might experience sound spatially. This gives us a physical foundation for our sound design.

🔧 Materials and Construction Approach

We used three main materials to build the dog heads:

– Cardboard: Served as the skeletal framework—lightweight, easy to cut and shape, yet strong enough for structure.
– Plasticine: Simulated the “muscle layer” and soft tissue of a dog’s head, giving weight and flexibility to the shape.
– White glue (PVA): Brushed on the outside as a sealing layer to strengthen the structure, prevent deformation, and add texture.

An unexpected bonus of this combination is the tactile and acoustic feedback—when you tap the completed dog head, it produces a sound somewhere between soft flesh and solid form, very similar to striking actual animal tissue. This quality gave us ideas for using these models not only for microphone placement but potentially as physical sound sources for future sampling.

🛠 Challenges and Solutions During Construction

During the process, we ran into a shortage of cardboard. To make the most of what we had, we carefully selected the best pieces and **patched them together using transparent tape** to form the frame.

Initially, we were concerned about whether the taped structure would hold, but once the clay was added over it, the overall form became much more solid and stable, more than we expected.

In terms of practical functionality, we also designed the heads with recording in mind. We left microphone slots on both sides of the head, aligning roughly with where a dog’s ears would be, and created openings at the bottom and side for cable routing. This setup allows us to mount mics easily and connect them to recording devices, achieving a binaural recording experience that closely mimics a dog’s hearing position.

Despite the simplicity of the materials, this handmade process gave us valuable insights into structural design, texture, and acoustic response. It also laid a solid foundation for the next phase of our work—testing how the different-sized dog heads affect recorded sound in the same environment, and further exploring the relationship between body structure and auditory space.

Ruiqi:

I hate to say this, but… I’ll never forget how embarrassing it was, running into every single shop on South Clerk Street asking for cardboard.

Carly:

It was a shock to discover that the plasticine here is different from the one in Spain. I think one of the biggest problems we encountered was how long the heads took compared to how long we actually planned them to take. We started at 10 am, thinking we would finish around 2 pm or 3 pm. We didn’t even finish that day…

Group meeting 9

Zixuan:

Today’s team meeting finalised the core direction of our project. After the discussion, we decided to focus on “a dog’s perspective” by combining video and photography to show how dogs experience the world. We chose Calton Hill as our presentation location because it offers both open natural scenery and the opportunity for the audience to gain a human perspective and find out the difference between humans and dogs.

For content design, we will explore two key comparisons:

1.How size affects perception:
We’ll compare Chihuahuas and Irish Wolfhounds, studying differences in their behaviour and hearing to understand how body size shapes their experience of the world.

2.Special sensory experiences:
We’ll focus on blind and deaf Labrador Retrievers to show how disabled dogs perceive their surroundings. We’ll observe how blind dogs rely on hearing and smell to navigate space, and how deaf dogs use vision and touch to understand their environment. This will highlight the unique ways dogs adapt when missing key senses.

To capture authentic sounds, we’ll build a “dog-head microphone” that mimics a dog’s ear structure for realistic audio recording. For special-needs dogs, we’ll also use vibration sensors to track their responses to different environments.

Additionally, we’ll film in multiple settings to compare how blind and deaf dogs behave in the same situations. This will help showcase their unique ways of adapting, making the project more engaging and impactful.

Group meeting 8

Zixuan:

This week, we held an online group meeting to discuss our new project. After thorough discussion, we unanimously agreed to focus on the concept of viewing the world from a dog’s perspective.

Additionally, we considered Andrew’s suggestions. His first idea was to create a project similar to Night Walk Edinburgh, where we would start at the foot of Calton Hill and gradually move to the top, capturing the journey from a dog’s point of view. His second suggestion was to focus solely on Calton Hill, using it as our only setting while showcasing different perspectives overlooking the city.

After discussing both options, we decided to base our project on Calton Hill and explore its various perspectives from the top. We also talked about when to gather materials for the project and agreed to go to Calton Hill on Monday for recording.

This meeting helped us establish a clear direction for our project, and we are excited to begin working on it.

Irish wolfhound is MUCH bigger than you can imagine

While having a binaural wolfhound-sized head is certainly worthwhile for capturing and crafting richer sonic possibilities, I must say— it demands a LOT of plasticine!

Mixing on Labrador

As we have recorded the background sounds according to different kinds of dogs’ sizes and hearing traits, coupled with sound effects that they would hear or make, we presented them in the mixing as much as possible.

For the blind Labrador part, I went with binaural audio — so the sound feels like it’s happening all around your head, helping listeners feel a bit more “dog” in the process.

Reaper Project of Deaf/ Blind Dog

For dogs who have issues with watching, an orange speaker was added to its soundtrack to boost the sensation of acuity and sensitivity.

Adding up the high frequency and granularity

And other details about processing are listed below for reference.

Amping up the distorted vibe
Complying with the dog’s hearing range, 40- 60 kHz

The deaf dog version is processed based on the blind dog’s configuration (but not binaural anymore, because it can only hear things on one side as discussed). However, I’ve panned the previous soundtrack to the left channel, while adding a pure sine sweep—two octaves above—into the right, amplifying the sensation of distraction and disorientation. (I suspect those dogs can’t perceive orientation at all.)

Initially, I applied a Doppler effect to the sine sweep in the presentation version. However, after discussions with the group and following Jule’s advice, I decided to retain the pure sine sweep.

At last, I want to explain why I was so determined to add various distortion plug-ins to these soundtracks. I was deeply moved and inspired by the film Sound of Metal (2019, Darius Marder), which powerfully portrays how individuals with hearing loss might perceive sound — metallic, distorted, even robotic — yet rendered in an unexpectedly simple and affecting way.

Group 1_Week 11

Week 11 is the presentation week and our project has reached its final stage. We have completed 80% of the video and sound.

On Monday, we went to Calton Hill to test the video ourselves. During the test, we found that the video speed was faster than the actual speed, which made it impossible for viewers to keep up with the video speed. That evening, we adjusted the video and sound to the normal viewing speed, and the video and sound were finalized. After finalizing, we uploaded the video to the vimeo website, and also uploaded the video to Jules’ account for backup.

On Tuesday, we conducted a max test to test whether the microphone and camera could work properly. Before that, we also conceived a map and promotional cards for viewers. On Tuesday afternoon, the cards and maps were completed and printed.

On Wednesday, the day of the presentation, we prepared three computers, three microphones, three cameras, a sound card and a midi controller. At one o’clock in the afternoon, we took all the equipment to Calton Hill for advance arrangements, and pointed three microphones and cameras in three different directions of Calton Hill to capture different sounds and images. Viewers will first receive a project introduction card to learn about the project overview, and then take the project map to watch the video and take a walk on Calton Hill, which takes about 10 minutes. After the tour, return to the starting point of the project for a real-time max audio and video experience. After each viewer completes the experience, we record their feedback so that we can present better projects in the future.


Role:

0331

Chao Li, Yiting Liu and Ruotong Wu

– Test video

– Adjust video and audio

0401

Ruotong Wu and Chao Li

– Test Max


css.php

Report this page

To report inappropriate content on this page, please use the form below. Upon receiving your report, we will be in touch as per the Take Down Policy of the service.

Please note that personal data collected through this form is used and stored for the purposes of processing this report and communication with you.

If you are unable to report a concern about content via this form please contact the Service Owner.

Please enter an email address you wish to be contacted on. Please describe the unacceptable content in sufficient detail to allow us to locate it, and why you consider it to be unacceptable.
By submitting this report, you accept that it is accurate and that fraudulent or nuisance complaints may result in action by the University.

  Cancel