Please see the below PDF for Owen’s reflections on this project as a whole.
Month: April 2023
Creating videos of garbage
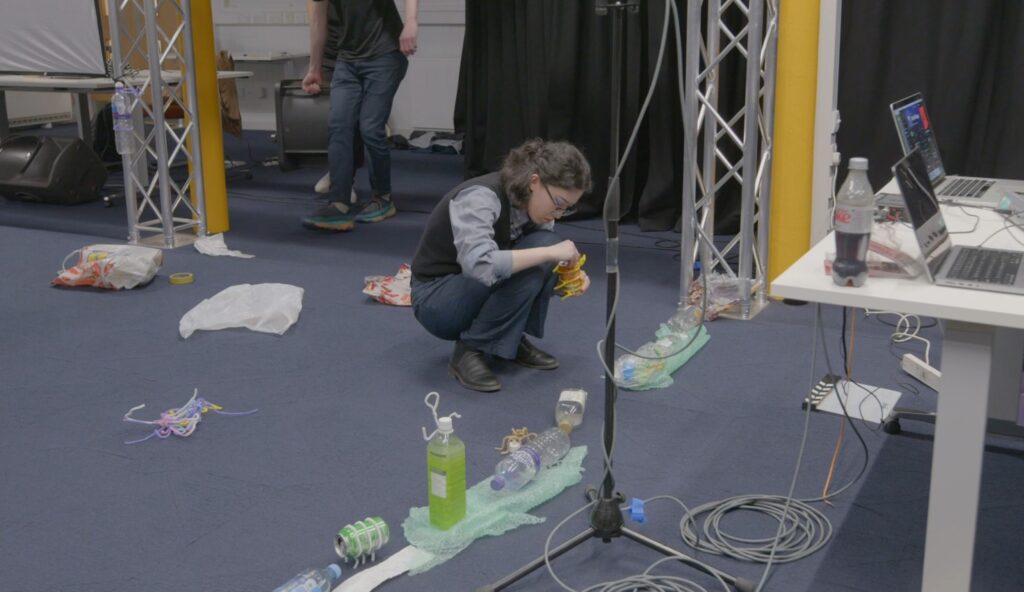
Owen and I (Vibha) created some videos of garbage on our own using items we found in the free store. This included some furry wires, stop watches, some sheets of wrap. I also bought some plastic bags. We used a DSLR camera with set lighting and a black screen to film most of our videos.
We weren’t too sure about the precise content of the videos and decided to brainstorm and experiment, and ended up filming a few interesting takes.
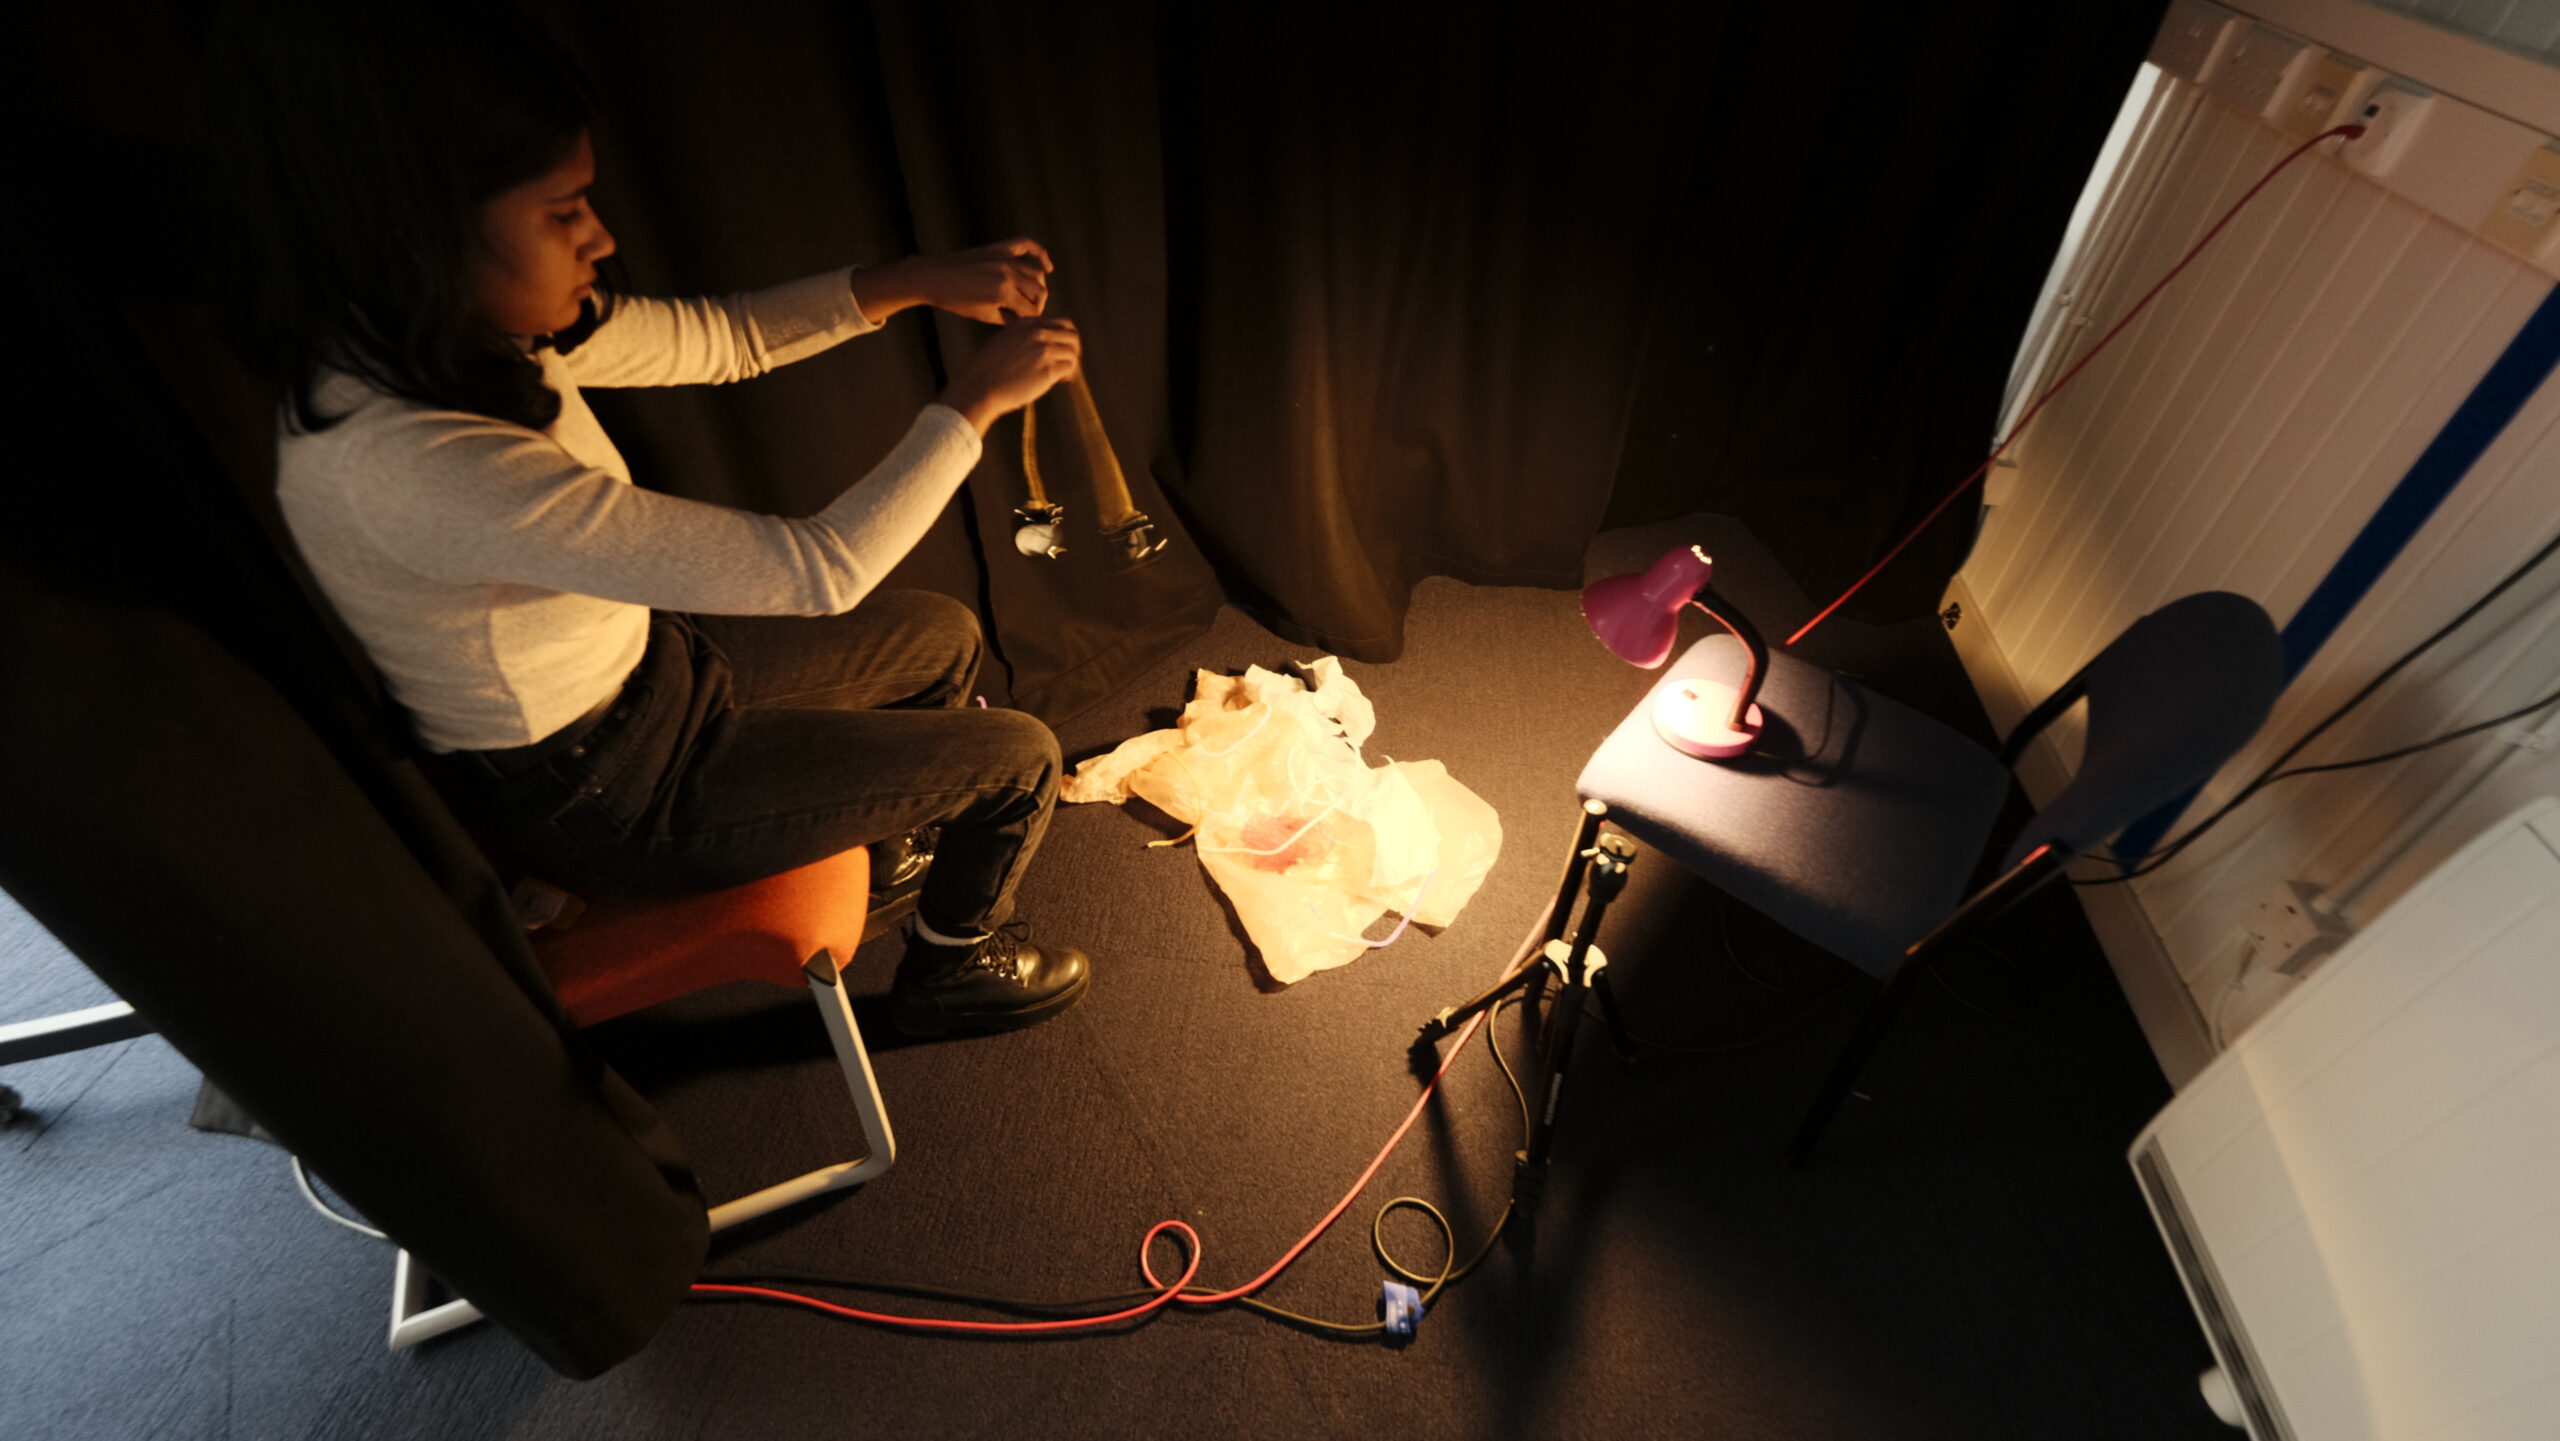 Our ‘film set’.
I dropped some garbage bags from a height to get the illusion of jelly fish floating in the sky.
We also created a little set with garbage being dumped into a pile add to the buildup of the garbage monster.
We made miniature garbage monsters using the furry wires and dangled the stop clocks with the wire to shoot a video of a pendulum like motion to indicate time running out.
Here are the extra videos we shot:
Test runs prior to performance
We had multiple test runs to ensure that we had sufficient practice for the performance. We had a discussion regarding what sort of projector we will be using and decided on a short throw projector because we had access to back projecting screens which prevented audience’s shadow onto screen. It also worked great for space constraints. We also booked a documentation web cam, midi controllers and speakers.
The first trial run was on Friday 31st march in studio 3, Alison house:
We used the short throw projector to superimpose Xu Yi’s garbage monster onto part 2 of the performance to check for issues. we found that a black background for the garbage monster worked best, we also segregated and divided Xu Yi’s videos so that we could use them across the performance to show the garbage monster forming. We also checked how the sounds were doing with the videos, and decided we needed more practice.
The second trial run was on Monday, 3rd March at Alison house:
We checked if the screens were working well, and set up our projectors to see how we need to place the tech during the performance. We ran into a couple of problems:
1. The pico and short throw projectors didn’t work well together, the intensity of projections varied too much to fix. We decided on two short throw projectors instead.
2. The layout of the walkthrough had had multiple changes because of availability of space. So we spoke to Jules, who suggested a number of interesting ways to use the space. Our issue now was how we’d direct the viewers from panel 1 to panel 2. We decided we would use an arrow at the end of Shruti’s performance to point to the direction the audience need to walk to reach panel 2. Also while playing Xu Yi’s garbage monster videos with the Pico projector, we realised we could create a pathway projection onto the ground to lead the viewers into our space.
3. We performed our visuals with sounds twice, and we still weren’t perfect and decided to practice again.
4. Exiting from one patch to another patch for part 2 of the performance seemed a little problematic, so I(Vibha) combined two patches to make a single patch. Unfortunately when I combined the third patch, Vizzie crashed, so I stuck to having 2 instead of 3 patches. I also found simple ways of transitioning within patches for the performance.
Last trial run was on Wednesday, 5th April.
We tested the sounds and visuals by connecting our systems to monitors. The transition between patches followed a different route here, which seemed like a minor issue, but apart from that we felt confident for our performance.
Our Stage
Initially, we had thought of using West Court at ECA to showcase our performance, but we soon changed it to the Atrium in Alison House. The main reason is the already existing truss support that can be used to hang screens and partitions.
Below shows the plan of the atrium, please note it is NOT to scale. 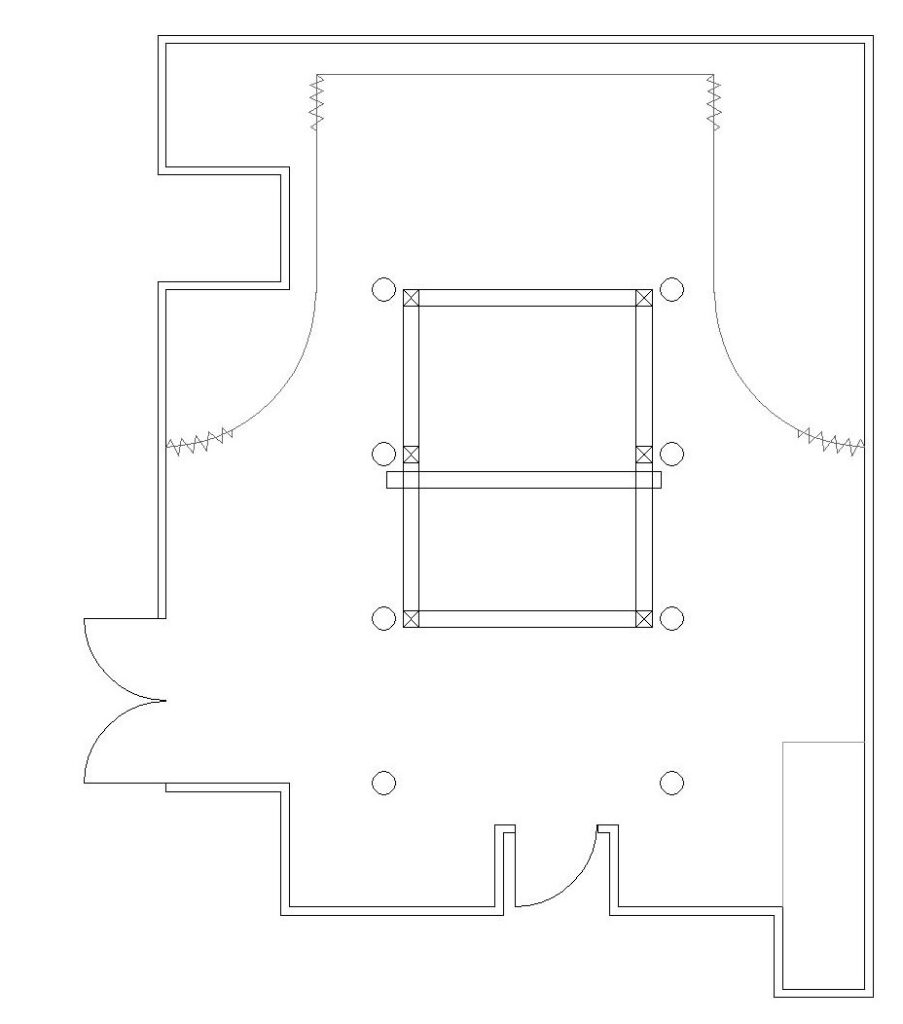
We decided to use the central space and with the help of the truss tie the screens. We weren’t able to establish a clear walk around within the room as planned before, but the audience does move from screen 1 to 2 as they move from my (Shruti) part to Vibha and Yi Xu’s part.
Below shows the stage we designed and the various places we positioned ourselves during the performance.
As seen, the audience enters the atrium and would first notice a black screen in front followed by the screen to the left. This is where part 1 is performed. The audience then moves through the gap and faces screen 2 to the right where the second half is performed. We were able to create an S-shaped movement pattern but a circle or a loop would’ve been more interesting as it would relate to our narrative and the audience would have an entrance/exit.
The digital designers sat behind their respective screens and the sound designers were in the corner of the S-shape. This way they could see both the screens and the audience.
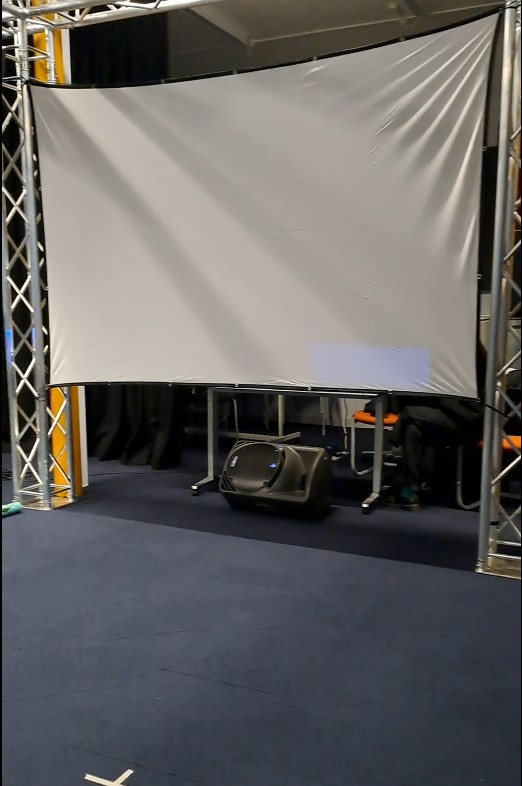
Regarding the speaker setup, we decided to place 1 Mackie SRM450 on the ground tilted up 45 degrees behind each of the 2 screens. This seemed like an obvious choice, since the audience would be staring at each of the screens during the performance. This placement allowed us to have sound emitting only out of the speaker behind screen #1 during the first half of the performance, and then, when it was time for the audience to move to the second viewing area, we panned all of the sound to the speaker behind screen #2. This ushered in the audience effectively and was a creative use of a simple stereo setup.
We also placed a Genelec 7060 subwoofer at about the middle-left of the performance space. Since the low frequencies emitted by subwoofers are omnidirectional, we knew it didn’t matter precisely where the subwoofer was located or which direction it faced – we just put it roughly in the center of the room in order to emit an added ‘thump’, and it worked brilliantly!
Mengru and Vibha did some set designing by creating a boundary with plastic waste and even added some small lights which enhanced the stage. 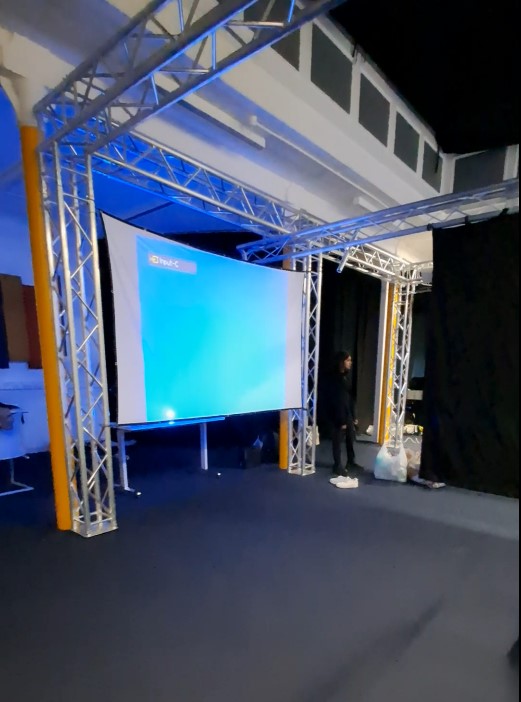


Final Documentation – Video
Below is a video put together by Owen that documents the performance day. It incorporates footage from 5 different cameras, a live audio feed from both my and Mengru’s laptops, and a stereo recording of the sound of the room during the performance! Edited in Davinci Resolve.
25.03.23 rehearsal
Prep for Rehearsal
-I (Owen) am thinking about ways in which an Ableton Session View can be ‘performed’ live.
-Using MIDI controllers that have rotary dials and faders, it is possible to adjust ANY parameter inside Ableton. But which ones??? That is the important question.
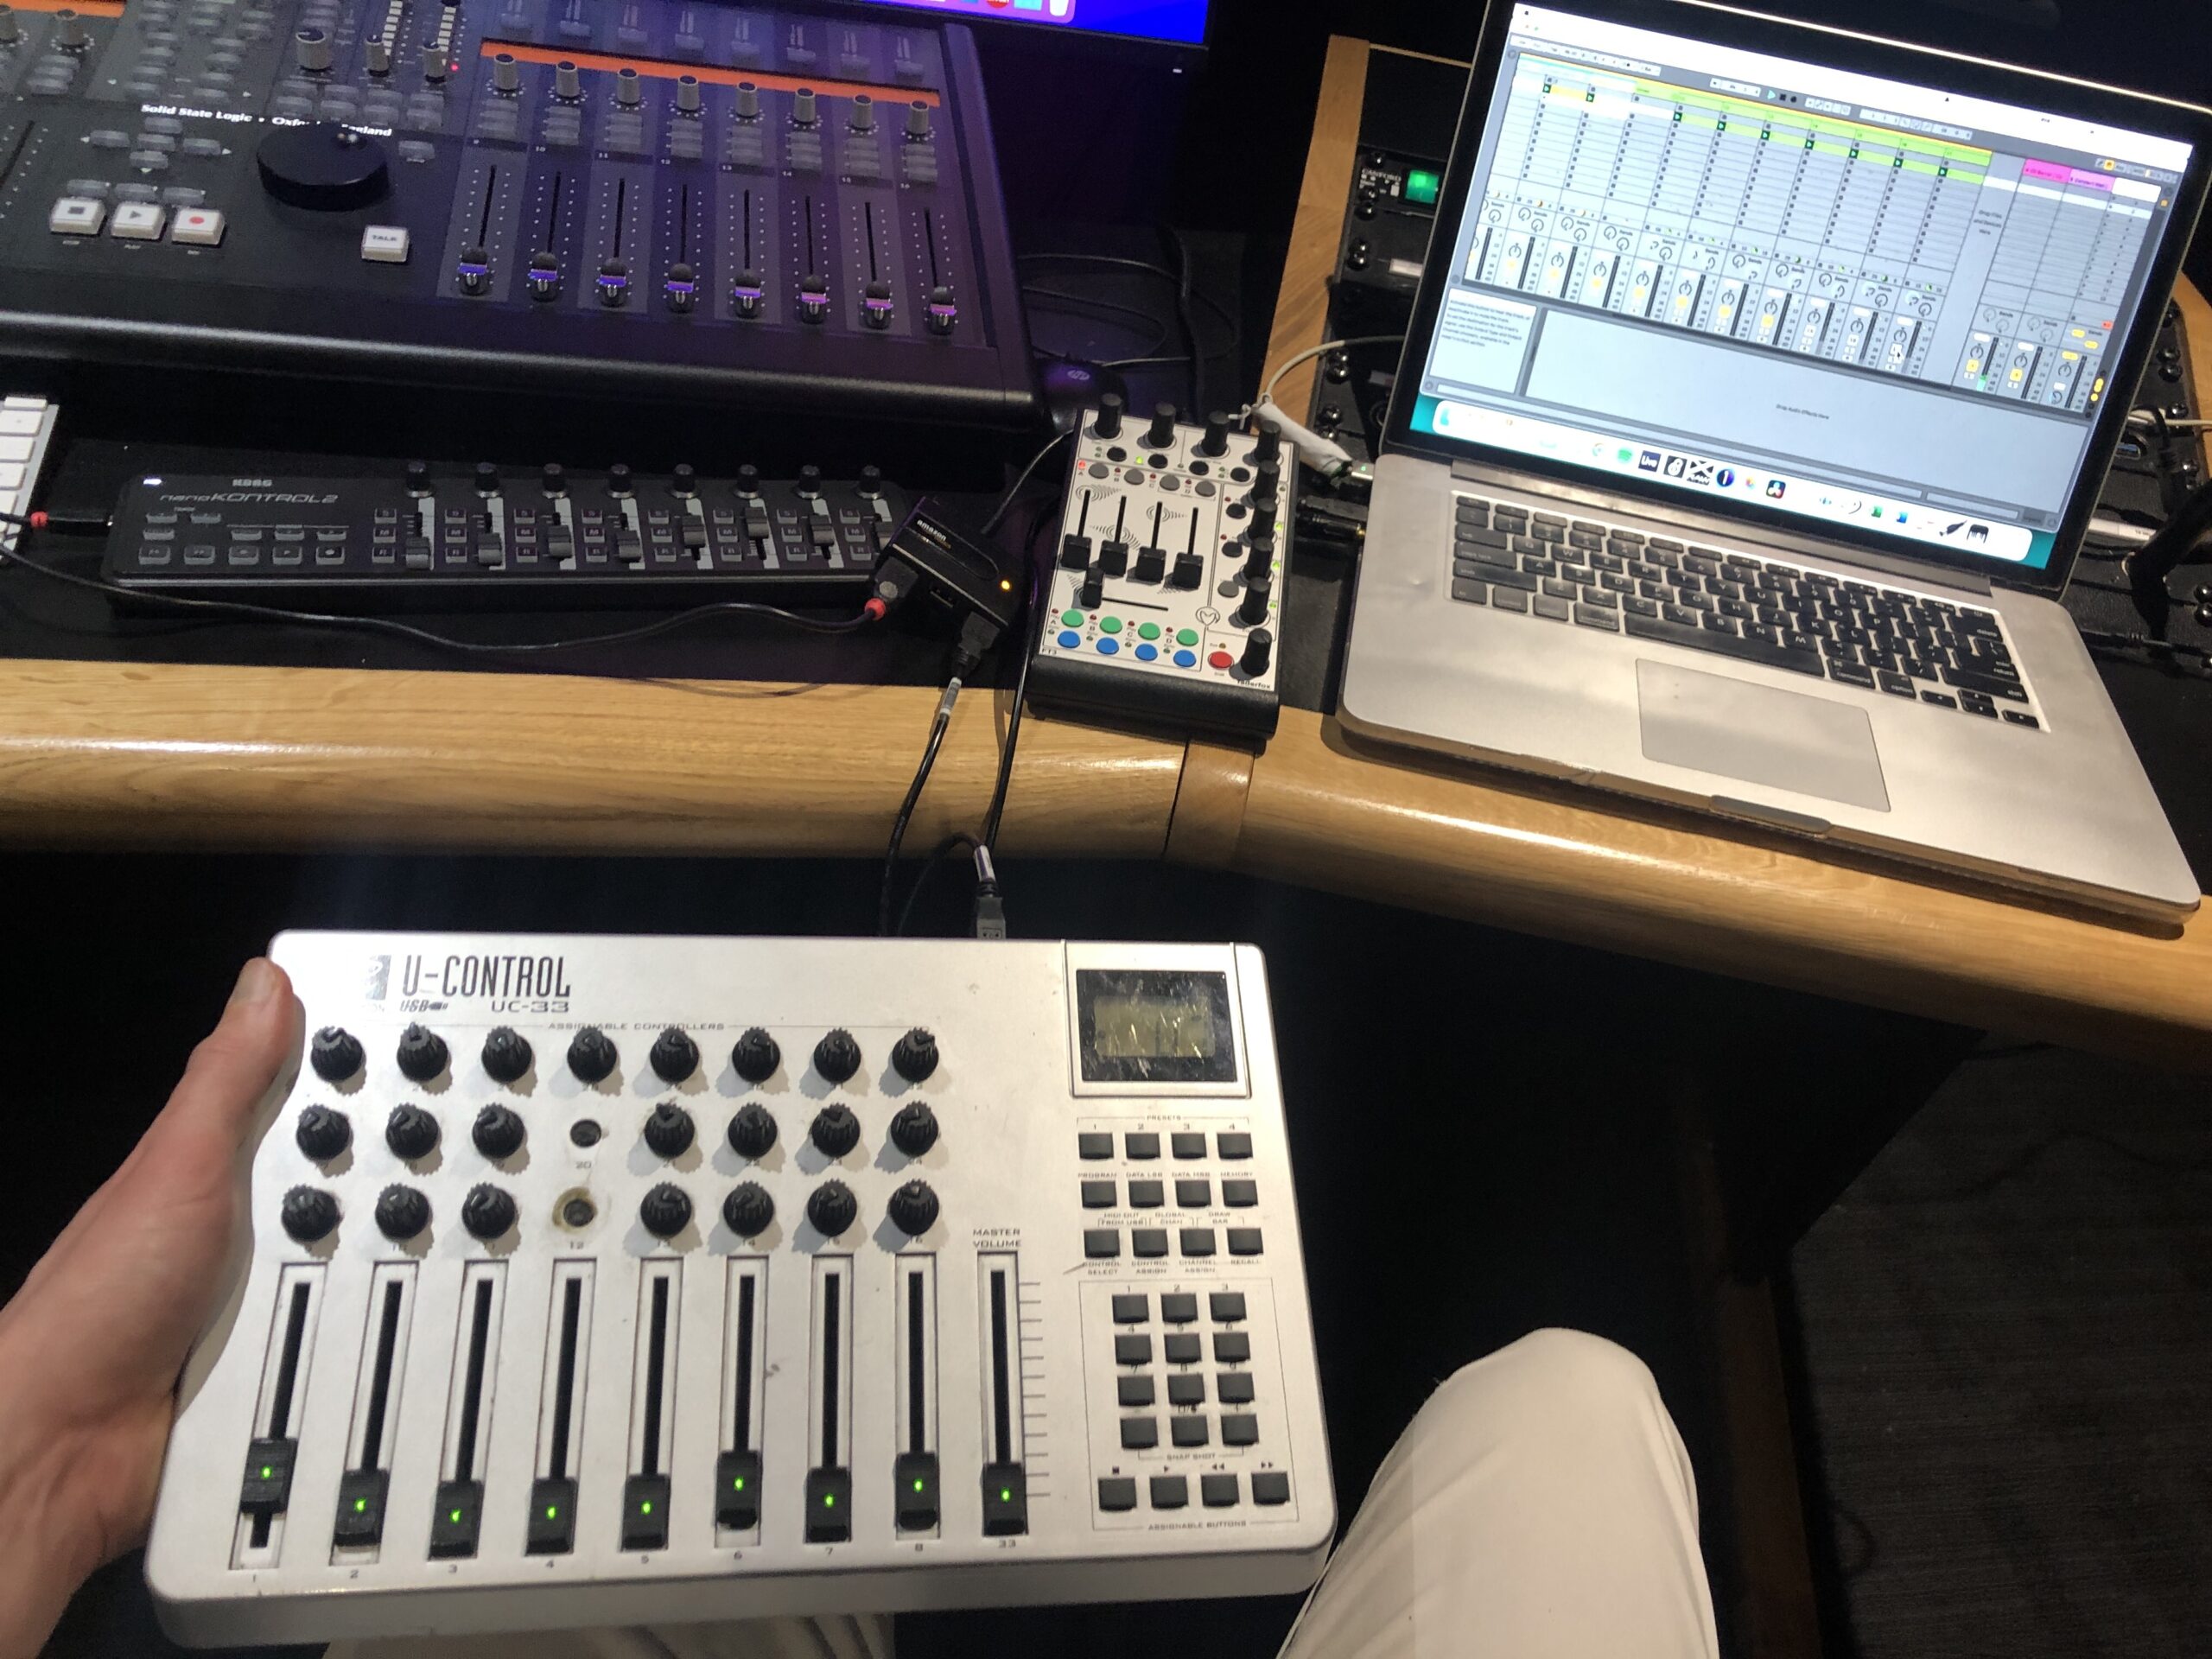
-What I am going to try tomorrow during our rehearsal is using the Evolution U-Control. I will basically have 8 faders, each of which controls the level of a track in Ableton – so I can mix different ‘instruments’ together in order to progress the soundtrack. I can also select different ‘scenes’ in Session View (i.e. rows of MIDI clips) using the << and >> buttons. Then, I have plenty of dials (24 in total) left to manipulate various effects (effects TBD, but probably some kind of distortion for starters).
-Pictured below: Evolution U-Control (silver one in my lap); Faderfox FT3 and Korg nanoKontrol2 (black and silver ones on desk); Ableton Live Session View (on my laptop)
–
Rehearsal
We got together in the Atrium to begin practicing the actual performance. Vibha, Shruti and Yi worked on the visuals, while Maggie and Owen worked on the sound. The main takeaway is that we need to continue practicing, because you don’t really find out what doesn’t work until you fully rehearse. See pics from the rehearsal below.
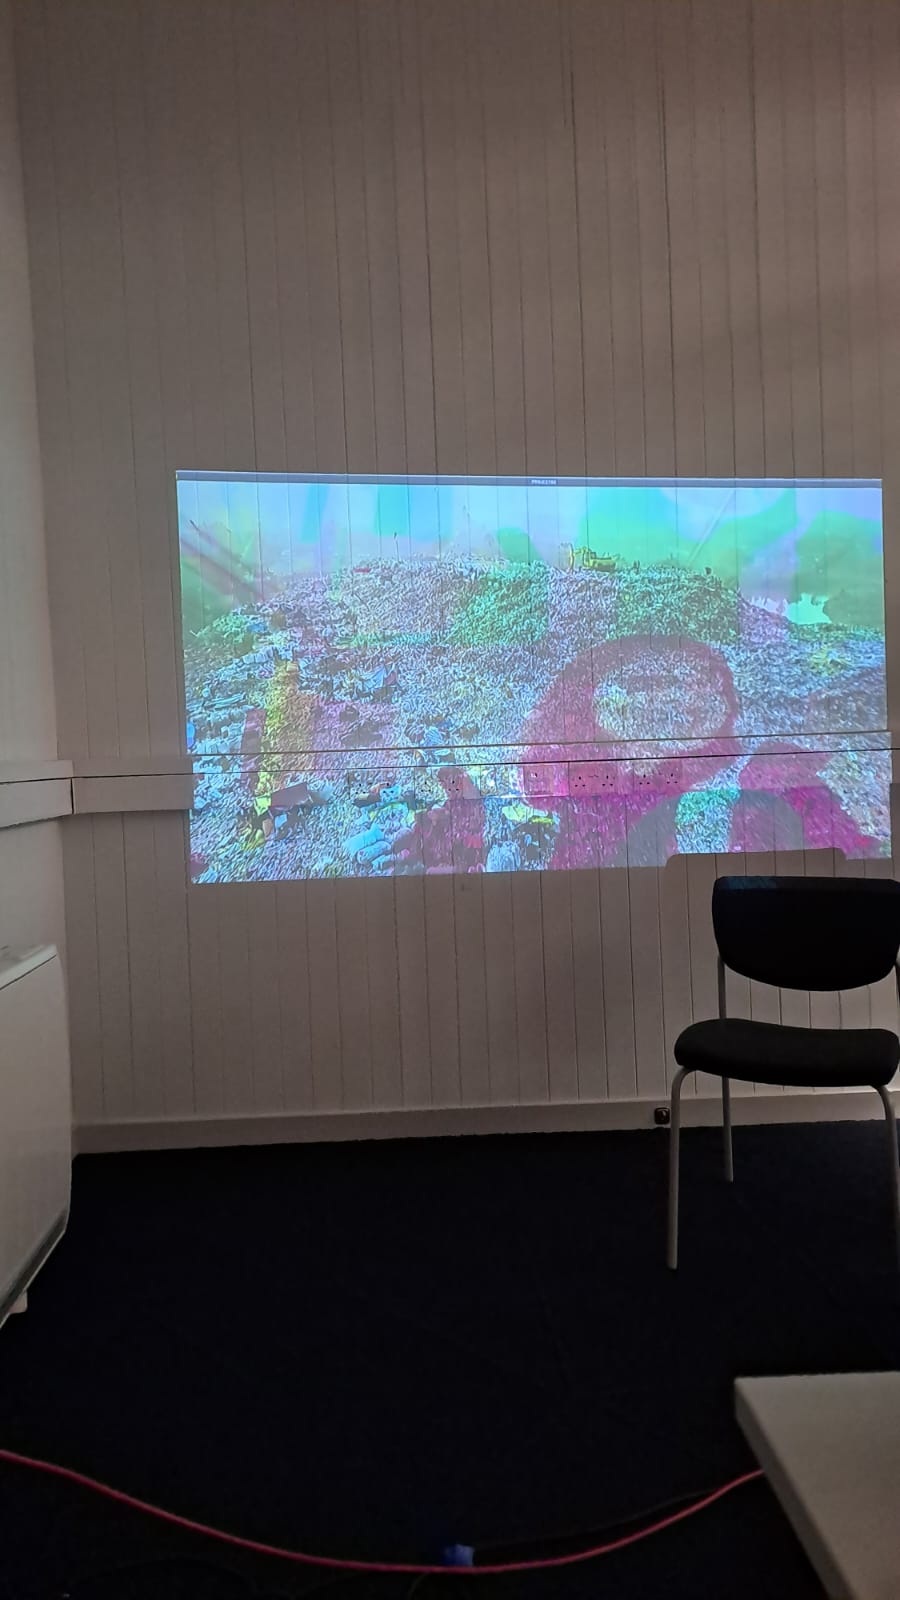
Practicing projections on wall
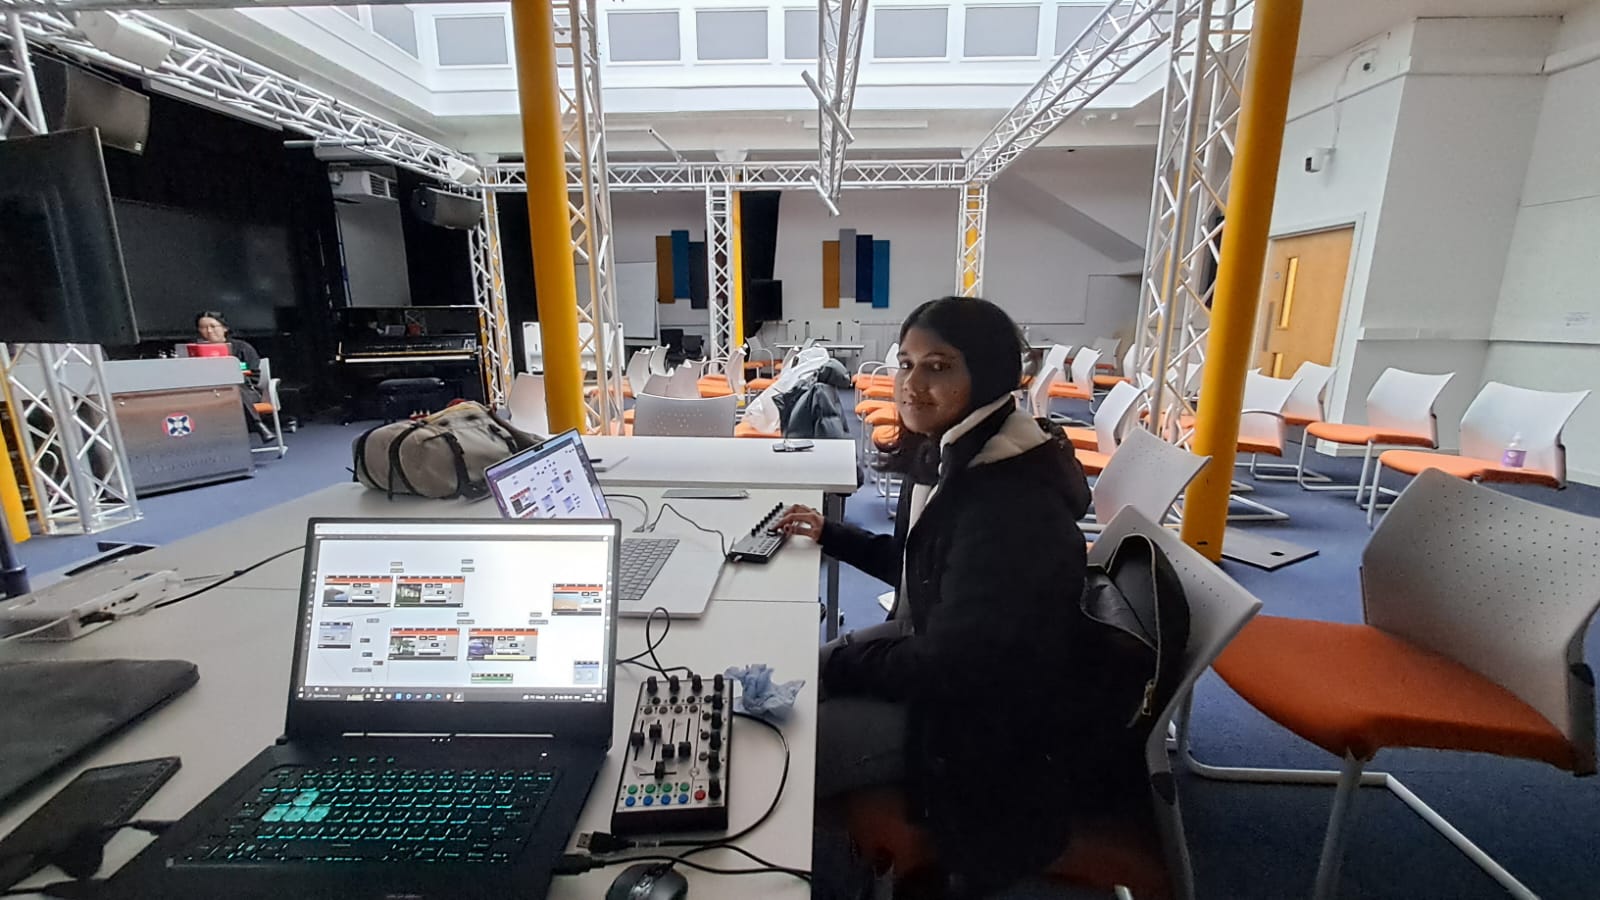
Vibha working on her Vizzie patch
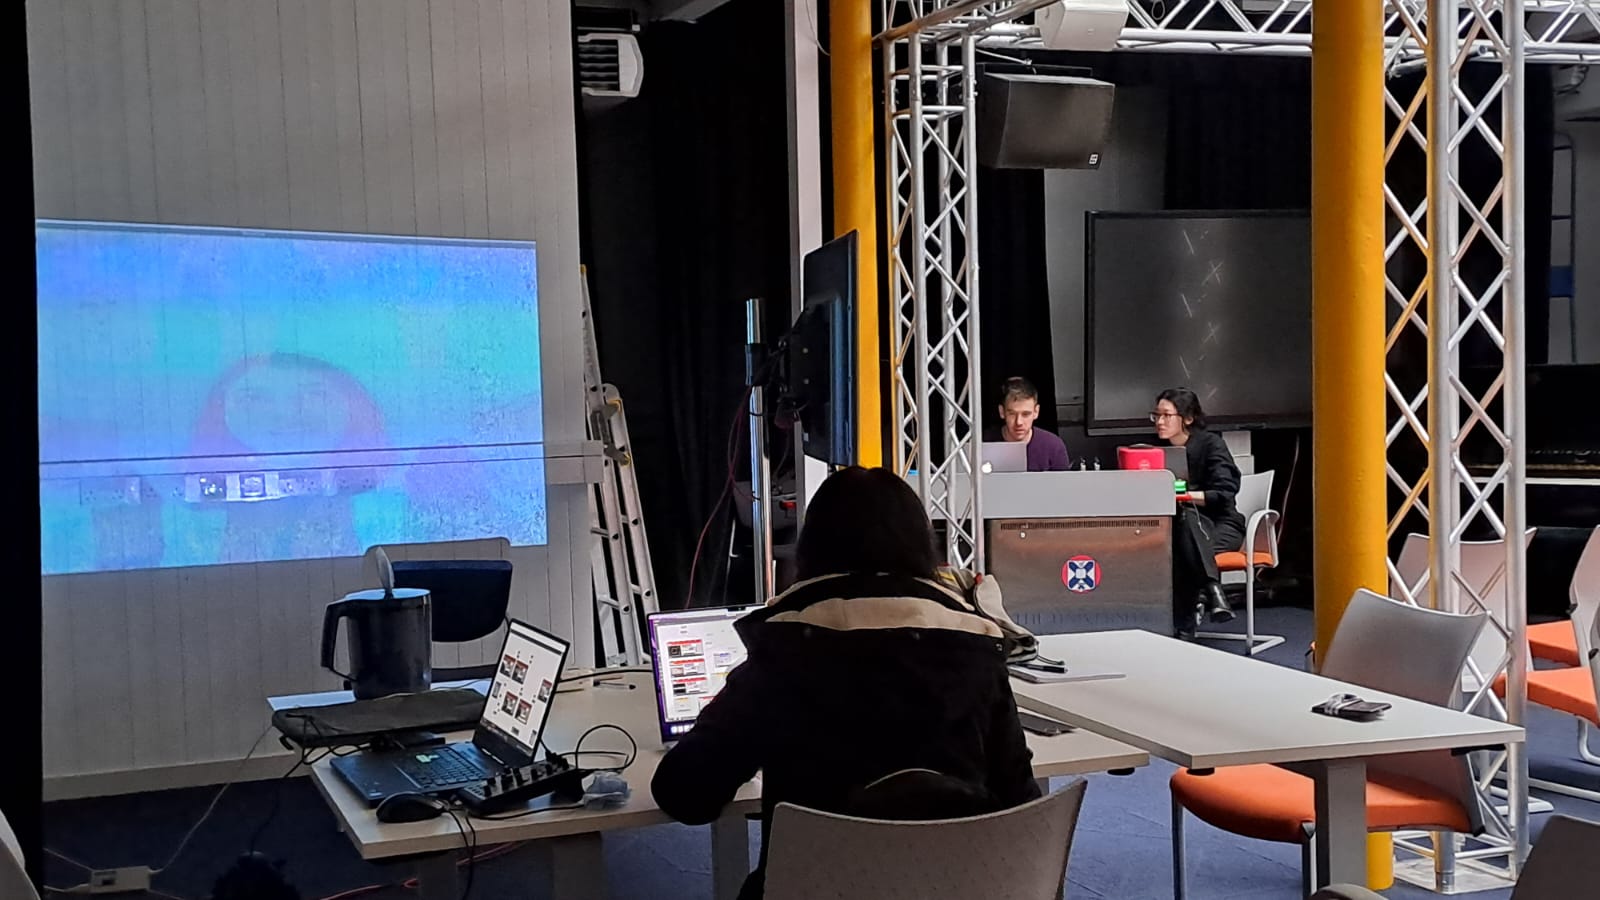
Vibha, Owen and Mengru practicing
22.03.23 Putting together music
Mengru and I (Owen) are writing the music for the performance. It is going to be a combination of sound design and music.
Today (22.03.23), I continued my work on the soundtrack. Using ONLY samples that Mengru and I recorded (hitting/squeezing plastic and metal bottles/cans etc.) and some light processing (resonator, reverb, boosting sub frequencies), I came up with the few bars of music below. I was pleasantly surprised with the result – the sounds from an empty plastic water bottle in particular were very useful in terms of adding texture and movement to the percussion layer.
Perhaps it would be beneficial for each of us to be assigned specific bars of music out of the entire timeline; or perhaps we should write the music for all bars together with each of us taking a specific component of the music (e.g. percussive vs melodic instruments). We will decide soon!
Developing My Max Patches – Shruti
The content
The videos I gathered were of nature and pollution. I start with a generic sunrise that changes into a bird’s eye view of a forest to the mountains with a beach. I wanted the audience to feel calm and see sites they are familiar with. From here I transitioned to a cityscape. I should’ve added visuals that had more vehicles and people but showed one that was rather a calm city road with a few cars. I then began adding pollution videos and these would crossfade with the nature visuals. In short, I move from nature to cityscape, pollution in the cityscape to pollution in nature. Finally, end with us (the group) looking down a hole and it begins to spiral. This is where my part ends.
These videos used were stock videos taken from online sources, I would’ve liked to film a few visuals in the city but unfortunately, never had the time. I did ask around for any aesthetic nature videos among my friends and peers but failed to receive any suitable ones. It was also interesting to learn that we use portrait mode to capture moments over landscape these days and that’s mainly due to social media. The links to the videos used are mentioned below.
Choreographing the performance
I start our performance with visuals of nature and pollution, blending them with effects to create an interesting video output. We were introduced to Vizzie (Max) during the course, where this was all possible and it seemed rather straightforward.
Little did I know that running the software would make my laptop sound like it was about to take off.
I started the first patch by adding video players, multiple effects, and loadbang commands for all of them. I did notice a considerable decrease in the speed of my laptop as I was working. The file crashed multiple times and I was starting to question my laptop’s GPU ( which could run Unity, Blender, and Photoshop at the same time!)

It was during our rehearsal on the 27th of March, that Jules pointed out that having too many players with loadbang for all of them is causing the laptop to slow down and crash the software. He told me to simplify it and have a maximum of four players.
So, I restarted, opened a new patch, and began the process again. This time I kept it as simple as possible and had just enough effects. I added movie folders, three exactly, one for nature, one for pollution, and another for glitches and effects. I added three effects so that I can follow consistency through the performance.
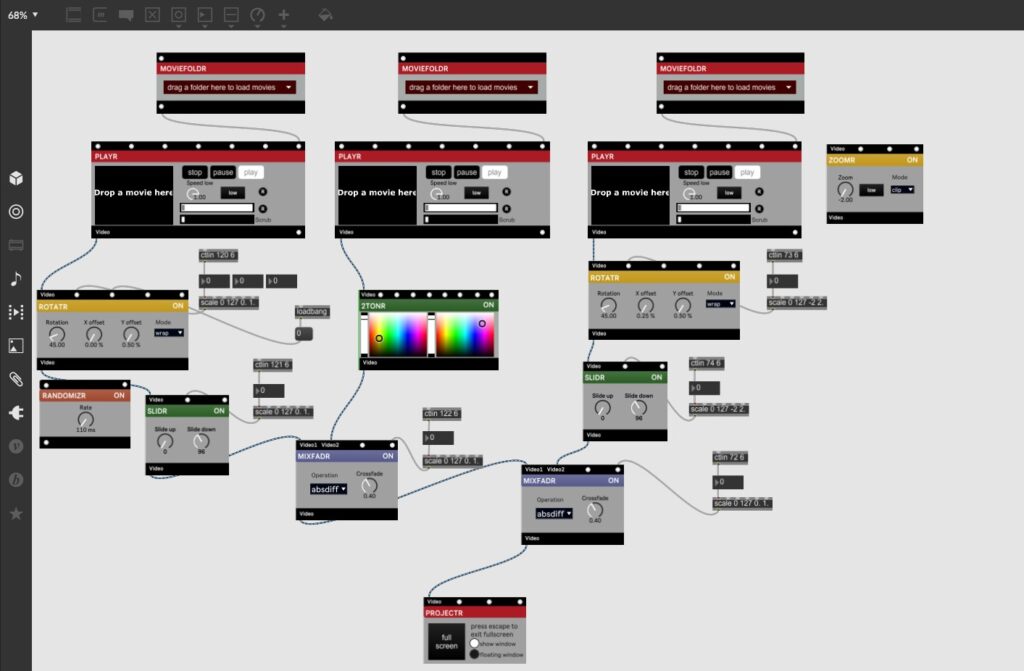 Adding a MiDi controller to control the changes/effects has been very useful and with practice, I feel a lot more confident.
What I learned from this experience – start simple, see what the software is capable of, and have fun!
100+ Free Pollution & Environment Videos, HD & 4K Clips – Pixabay (no date). Available at: https://pixabay.com/videos/search/pollution/ (Accessed: 23 April 2023).
Pollution Videos, Download The BEST Free 4k Stock Video Footage & Pollution HD Video Clips (no date). Available at: https://www.pexels.com/search/videos/pollution/ (Accessed: 23 April 2023).
Nature Videos, Download The BEST Free 4k Stock Video Footage & Nature HD Video Clips (no date). Available at: https://www.pexels.com/search/videos/nature/ (Accessed: 23 April 2023).
Trash pile on the street on a sunny day – Free Stock Video (no date). Available at: https://mixkit.co/free-stock-video/trash-pile-on-the-street-on-a-sunny-day-25552/ (Accessed: 23 April 2023).
Download plastic trash littering the ocean shore. Concept of Ocean Rubbish And Pollution Environmental problem for free (no date) Vecteezy. Available at: https://www.vecteezy.com/video/21199882-plastic-trash-littering-the-ocean-shore-concept-of-ocean-rubbish-and-pollution-environmental-problem (Accessed: 23 April 2023).
AIW——4.3Testing
1.进行现场设备调试,匹配可能出现的音视频。
2.测试环境光、投影仪和窗帘对视频质量的影响。
3.控制现场视频和音频的节奏
4. 反复解读视频叙事故事以达到最佳效果
5、我们考虑到现场观众的参与度,以及观众路线的规划和引导。
AIW——animation process
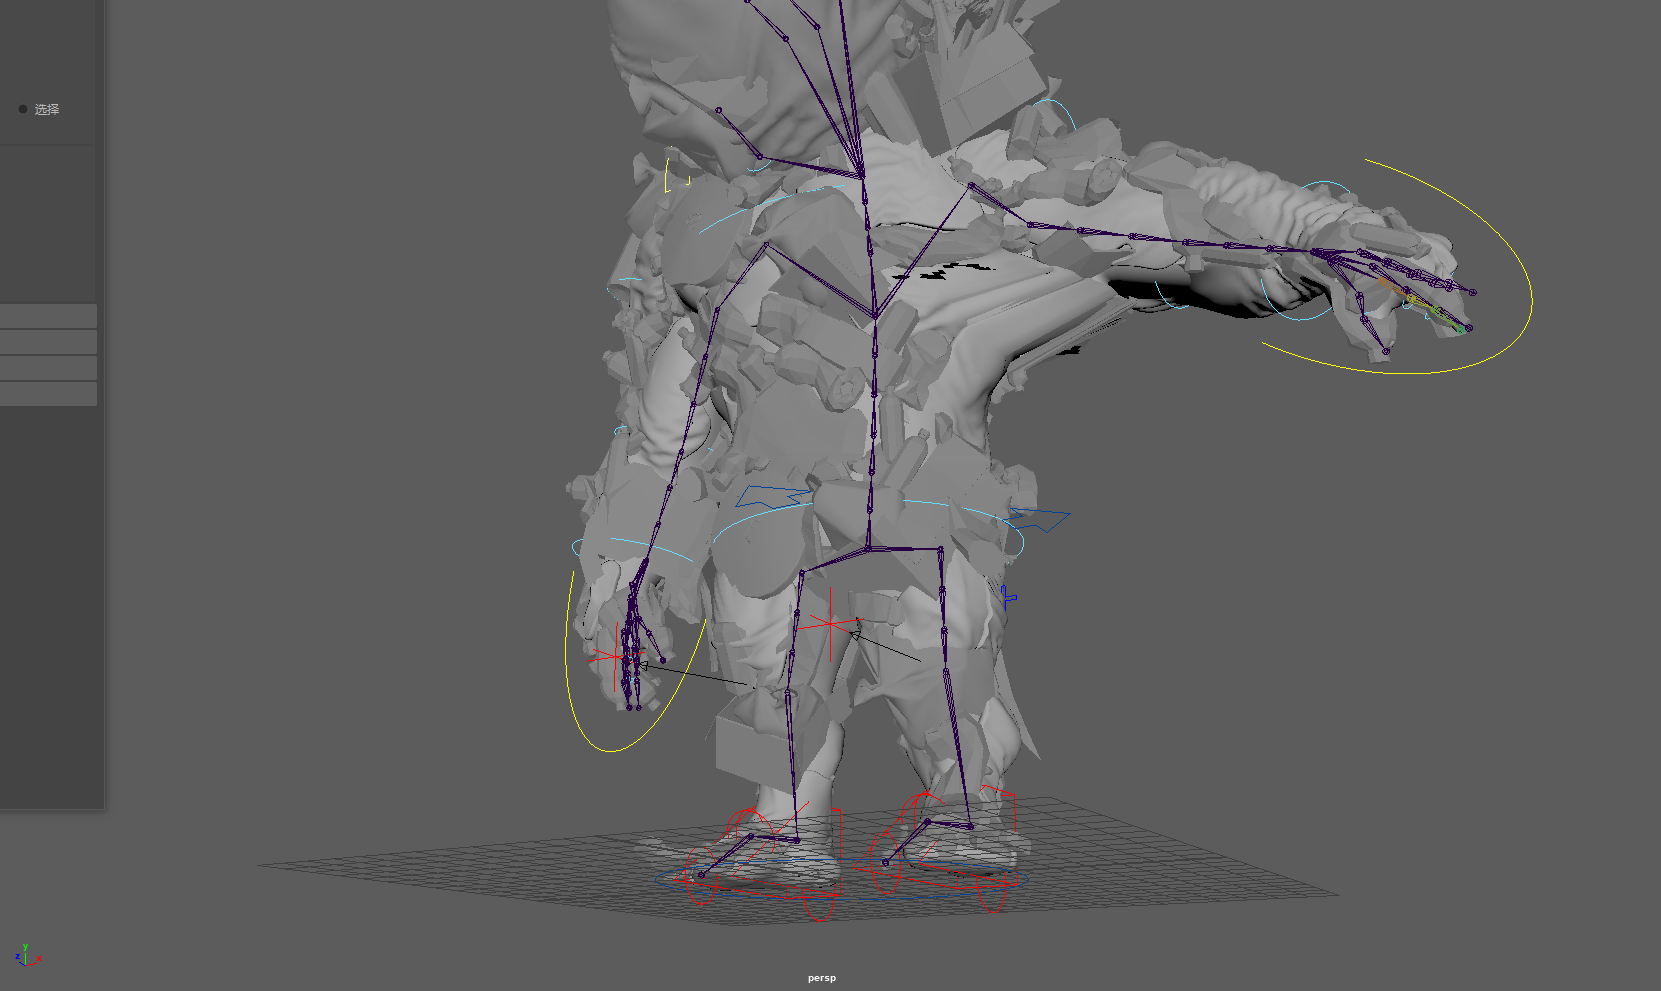
Start by adding an overall character skeleton to the Human IK panel, then constantly adjust and add joints and positions that fit the monster based on its shape. Also, when creating a hand skeleton, consider whether the hand skeleton is divided into four fingers, and the space between the fingers determines the Angle at which the skeleton needs to rotate. Thus, you can create and bind bones without modifying their rotation, but you can accept position information. In the process of creating fingers, there is always a certain curvature in the joints of the monster’s bones, and you should try to avoid breaking the first rule when adjusting him. When crafting skins, automatic brushing of skin details is often poor and requires additional adjustment of monster weights.
While learning how to control monster bones, I also learned reverse dynamics and forward dynamics in 3D animation. Forward dynamics is necessary to create detailed circular motion, as it requires directly setting the rotation of each joint of the garbage monster. Reverse dynamics is necessary to create direct target motion because it only requires setting the position and direction of motion of the end joint in the joint chain. To position the joint chain, rotate each joint one by one. For example, in order for a joint chain to reach a specific location in space, each joint in a keychain must be rotated one by one. To do this, you will first rotate the parent joint of the joint chain, then rotate the next joint, and proceed along the chain in turn. In this case, I often make mistakes in the parent-child joint, but this can be tested repeatedly to know whether the joint position is in the parent-child position or the parent-child position, so the statement in this part may not be very clear. When using forward dynamic animation of bones, Maya adds joint rotation starting at the root joint, followed by subjoints of the root joint, following the skeleton hierarchy.
Due to the complexity of the monster model, multiple joints need to be created close to each other (using short bones) to ensure smooth movement of the joints when animating curves. Especially when it comes to creating monster foot bones, it’s a very complicated system for me. You need to look at the position of the human foothold and then control the foot. For example, when walking forward or backward with the bone of the foot raised, move the feet back and forth alternately, with the pelvis always centered on the foot in the forward and backward direction. This is often prone to control errors. When creating the control joint for my left foot, I first selected the RightFoot joint for ease of use and then hid it by pressing Ctrl+h on my keyboard. Go to the side view and select Animation> from the main menu
When the controller is able to control the movement of the skeleton, the skeleton needs to be bound to the monster model. I’ve been trying this part for almost two nights. Since the monster models were made up of a lot of junk and were not created with the need for subsequent animation in mind, the models were not as standardized as in the video teaching. So, the whole night, 2 repeated mistakes, very painful, let me almost want to give up, animation always has bones, the controller can control the bones, but the monster’s body does not move. At first, I thought it was a problem with the controller Settings, but in fact, the model is difficult to attach skin, and the model often has stretching problems.
Learning reference:
Lee, H.J. and Chen, Z., 1985. Determination of 3D human body postures from a single view. Computer Vision, Graphics, and Image Processing, 30(2), pp.148-168. Available at: https://www.sciencedirect.com/science/article/pii/0734189X85900945 /. (Accessed:March 5, 2023)
Roberts, S. (2012). Character animation fundamentals: developing skills for 2D and 3D character animation. CRC Press. Available at: https://books.google.co.uk/books?hl=zh-CN&lr=&id=k4bOAwAAQBAJ&oi=fnd&pg=PP1&dq=3D+character+animation+maya&ots=6aXb1qNuoz&sig=zlVFzXgNJqu946S38vOXpXyeBt8#v=onepage&q=3D%20character%20animation%20maya&f=false /. (Accessed: March 5,2023)
Maraffi, C. (2003). Maya character creation: modeling and animation controls. New Riders. Available at:https://books.google.co.uk/books?hl=zh-CN&lr=&id=1GE6YbntJrQC&oi=fnd&pg=PR13&dq=3D+character+animation+maya&ots=Jd71ToLU6W&sig=l3I_9hhPlmE7K8VLRLGQsMkCfHc#v=onepage&q=3D%20character%20animation%20maya&f=false/. (Accessed: March 5,2023)