Any views expressed within media held on this service are those of the contributors, should not be taken as approved or endorsed by the University, and do not necessarily reflect the views of the University in respect of any particular issue.
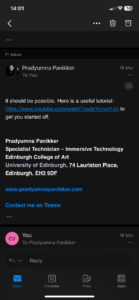
At some point while following the tutorial, it started not working anymore. I kept going back, retracing my steps, and even started again, but it kept breaking. So I reached out to Pradyumna for any help he could offer, as the tutorial I was following still wasn’t exactly what we needed. I explained our project to him and what we needed Touchdesigner for, and he suggested following the same tutorial I was already following. So it confirmed my suspicion that it would quite hard and specific to achieve what we wanted.
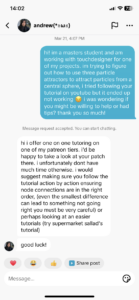
This then made me reach out to the creator of the tutorial. I had seen a few of his videos on TikTok before I had even started this whole project, so once I connected those dots, I figured he would probably be quite responsive on TikTok. I explained the issue and if he had any trouble shooting tips he might be able to share. Sadly, there wasn’t much he could do. I had previously taken this part over as Yanis was quite busy, but as I couldn’t figure it out, he has now taken it over and will try to follow the same tutorial and hopefully get better results.
We slowly started to buy everything we needed for our physical model building. We needed quite a bit of material, and tried our best to use things we already had like paint, superglue, paper, etc.
We did need to buy some weird things too like fake grass for the earth planet and a foam board to create our tracks.
For a short while our plan was to buy a plastic mat to stick our foam board track sides to so we could transport it easily and make sure we couldn’t lose any tracks. We went to multiple hardware store to find a mat, but either didn’t find one big enough or cheap enough. We had to be quite strategic with how much we could buy.
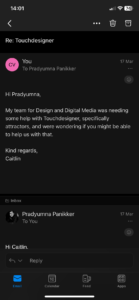
We had already thought that Touchdesigner would probably provide us with the best way to make what we needed. We also knew that you can input data from MAX into Touchdesigner which would work to make it a reactive visual. I started the process by looking for tutorials for what we needed specifically because neither of us have much experience using Touchdesigner (especially me). So it was going to be a real learning experience.
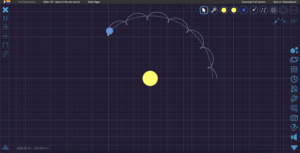
I looked extensively for the right tutorials, starting with just beginner Touchdesigner ones (which soon we realised we did not have enough time to start at the basics) and then trying to find specific ones. It became clear quite quickly that what we were attempting to make was not something commonly done, so I found just one tutorial that could maybe work. It used multiple attractors that attracted particles around a spherical base object.
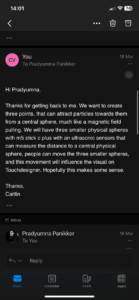
I started following the tutorial and it was definitely a long, hard process. It created some really interesting visuals in the process that looked quite like the one we were thinking of. The problem was trying to figure out where we would be able to input our own data as the locational information for the attractors. The tutorial has randomly generated coordinates for the attractors, which are constantly changing as well.
Yanis had used Touchdesigner a little before, so he started by trying to make something himself first, and then proceeded to use some tutorials that showed how to make wavey/sea like visuals.
We had a small meeting with our team leader Lulu to tie up some loose ends. Which for the most part were the small visual holes we had, but one big thing was the actual layout of our exhibit. We knew we were going to use tracks, on a smaller scale and handmade after concluding that our original idea was indeed too expensive and complicated. We hadn’t decided the scale of this. Originally the plan was to have the spheres be quite large, but that would be not only hard to move, but also hard to make in such a short time. Dave had already suggested scaling everything down, even to a type of switchboard so the focus could be on the digital visual. However we were determined to still make it a big enough model to really feel like an interactive exhibit that people could move around.
We had talked to Jules briefly about the layout of the Atrium and how it could be set up for our work. We wanted to project a lot of things, and Jules said we could drape sheets down the sides of the Atrium scaffolding. He also suggested projecting visuals from the back of the sheets, so it wouldn’t be in the way for the audience.
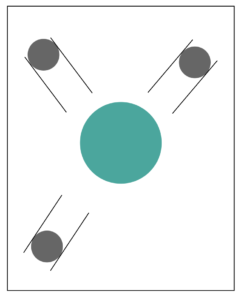
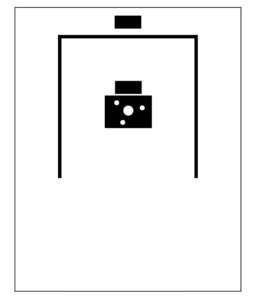
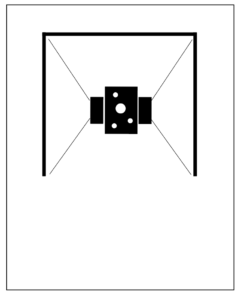
I made some basic layout sketches on Illustrator to demonstrate all these conclusions. First, it was much more scaled down. Then we decided to add three screens to surround the central planet set-up, with ambient visuals projecting on the left and right screens, and the central front one showing our reactive visual overlayed with the overhead projection of the water basin.
This is a very basic representation of the layout, and will probably change a bit after some tests and experiments. It definitely excited us to see how we would be setting it up because it made it all feel very real and imminent.
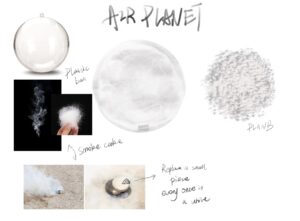
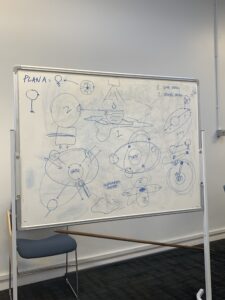
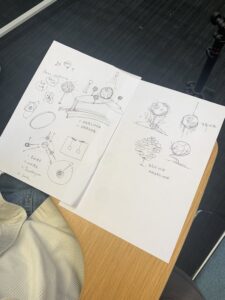
Yanis fleshed out his sketches a little more, clearly defining the overarching attribute of each planet, but now moon.
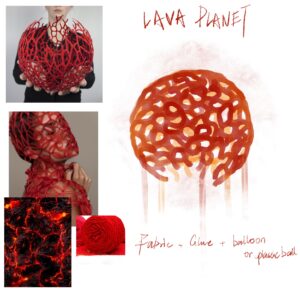
We had researched into different types of hypothetical planets, and based these off of them. There are many types of already defined planet types like e.g. gas giants. However there are also many types that are only a theory, such as entirely metal planets and lava planets.
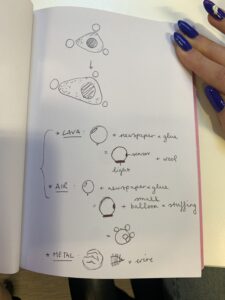
He noted what type of materials we would need for each, and what look we were going for. After our online meeting where we concluded we would have to redefine them as moons, we discussed what materials we would definitely need for each, as our next order of business was buying them to then finally start making them. We also thought about how to incorporate the sensor into the design. We opted for a small window that the sensor could sit in, that would point at the central “earth”.
We are very excited to get started with this our other courses haven’t offered this much opportunity to physically make things, so this is a nice change of scenery. It’s has also been a true collaborative approach to reach these conclusions which has been really nice. We want the same for this project, and know there our own and each other’s strengths lie which has been really helpful to inform our decisions.
We had some online meetings with Dave to discuss the development of the project. Most of them consisted of Dave telling us that we were probably quite behind and needed to shoot into action. Which we did know, but again because we did a 180 on our concept, it was hard to know where to start I guess.
I brought up what I had discussed with my astronomy student friend, and presented the options for our planets or moons. We quickly concluded that having the central sphere be a star wouldn’t make sense because our main focus was the tides and that would mean changing our concept once again. It was good to get that out of the way, but it did mean that Yanis and I had to slightly change our perception (no pun intended) of the spheres. Yanis had in the mean time sketched out ideas for each of the three orbiting spheres. We had already discussed wanting to have them all be the same, but thought this might not be the most visually striking. His sketched built off of this and produced three different attributed/concepts for each, which also meant we could be quite creative. With the change to them being classified to moons, we just kept in mind to keep the size of the physical models small enough to justify their “moon status” as it were.
We talked a bit more about the other aspects of the process, like the sound development and interactive aspect of the exhibit; like how people would be encouraged to touch and interact, how we could express these interactions through the sound too, etc.
I have a friend who studies astrobiology and planetary science as her master degree, so I thought it would be a good idea to talk with her about the actual science related to our topic. Even though our concept is fictional, it is rooted in reality with all the different gravity and tidal equations that were used.
We mainly spoke about how to make certain elements more accurate. The biggest thing being what would orbit our central planet. In all solar or planetary systems, planets will orbit a star as it has a bigger mass. A big mass doesn’t always equate to a bigger sized planet. Yanis and I had mainly been discussing making planets orbiting another, but that’s not really a thing that happens. The solution she suggested was to either change the planets to moons, as they do orbit planets and influence the tides, or make the “earth” a star to make it gravitationally correct and gives us the opporunity to make planets, but then we lose the tide aspect (which is integral). She did also tell me that there are different types of moons, which would work with our idea of having orbs with different characteristics.
Lastly, she showed me a website that can map planets and gravitational pull, so you can see how exactly they would orbit based off of mass, sizer, etc. This might be useful, but we don’t have any defined values right now for any planet, so we will see how that can factor into it.
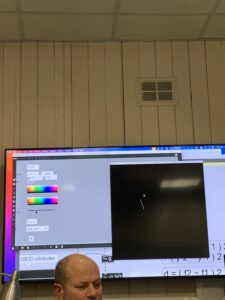
For the sound design, and as an alternative option for our visual, we got a short tutorial on MAX/MSP and Jitter. For the digital visual, we were really wanting to have a reactive particle system, that would have the particles gravitate towards the orbs if they moved. We had discussed using Touchdesigner for this but Dave wanted us to think of an alternative solution just in case. Also just in case the physical models proved too difficult, we had something to fall back on.
I personally was quite ill during this workshop and was really trying my best to understand what was going on, but it wasn’t really working. Luckily, Lulu, Fraser and Jackson understood what was going on.
It was really interesting to see how MAX could potentially help us with the visuals. Jules also showed us some other resources to create interesting visuals that would fit our theme of the tidal force. Yanis and I are still quite set on having a reactive visual, which didn’t immediately seem like a possibility with MAX, but will be explored further if Touchdesigner doesn’t agree with us.
Fraser was able to link our sound Max patch to a visual of three spheres orbiting a central sphere. This gave us a solid base that visualised all the sound work the rest of the group did.
We had a meeting to further flesh out what we spoke about in our meeting with Dave. We mainly tried to answer the questions we had noted down during the last meeting.
We had to decide how we would set up our exhibit, originally we had discussed hanging our planets from the ceiling and being able to move them around like that. In the meeting with Dave, he said that it would be nice for the audience to be able to move them wherever they wanted.
We also discussed that we could make a completely fictional planetary system, as that would give us more freedom to create something interesting in terms of sound, visuals and concept. We settled on having a central “earth” planet with a few moons or planets “orbiting” it. This way we could also manipulate the tide more so the effect would be greater.
Yanis and I tasked ourselves with solving how we could set this up. The orbs would have to be able to move, but in one line. But also couldn’t be moved out of that line because the sensor would always have to face the central orb. We thought we could use tracks on the ground to put the spheres on. This seems quite hard though, so we will think more about this system as it’s quite expensive and complicated.
We booked the sensors we are planning to use for the final thing, so we tried to see the best use for them. We concluded that they would need to be moving in a determined trajectory, so pointing towards a central “earth” planet. The data would be more stable, as these sensors are ultra sonic sensors, so would detect an object rather than an inherent location. We did discuss using a GPS sensor, and also booked and tested this out. This was going off of Dave’s suggestion to give the audience more agency to move the planets wherever they would want. The problem that came up with these was the accuracy. It would only measure to a an accuracy of 2 meters, and we were probably going to be working with a much smaller distance.
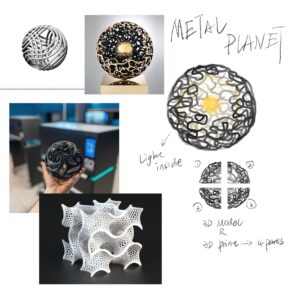
Yanis and I discussed how we would make our “planet” models while the others were testing out all these sensors and their capabilities. We wanted to use this course as an opportunity to be creative and use different materials. So we concluded that having three “planets” orbiting the central one would give us enough opportunity to do this. We looked into different aesthetics for the “planets”. Because our planetary system is fictional, that meant we could also create our own interpretation of a planet. We really liked the idea of having a hollow sphere with a light inside it. We thought this would look visually striking but also not enough like an actual planet and thus would help clarify how fictional this all is.
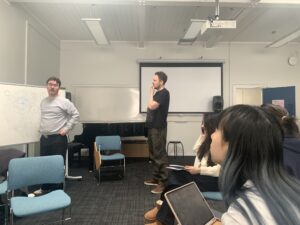
We had our first meeting with Dave after our submission. We went over our submission and discussed our feedback. Most of it was about the lack of experimentation. We hadn’t done too much experimentation, also due to changing our concept very close to the deadline. Because of this we had a lot to discuss about the small details surrounding it.
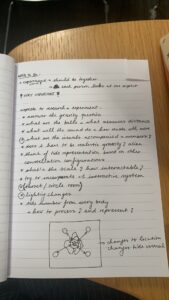
I made notes with all the questions that would need answering or researching in the next few weeks.
One big thing that was emphasised a lot by Dave was to experiment as much as possible. We know we need to do this however because we changed our topic so spontaneously, it’s hard to anticipate what we would need to experiment with right now.
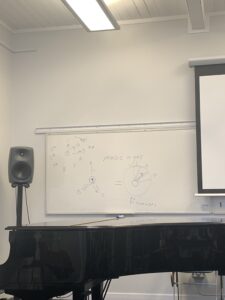
Once Dave had left, Yanis and I discussed our visuals and how we should attack those, while the rest discussed the maths that we would need to calculate all the different forces and relative distances to represent the gravity and tide in the right way. To be honest, we didn’t understand any of it but they seemed really happy when they finally cracked it.