1

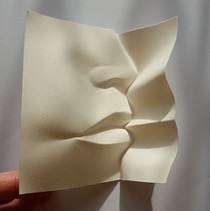
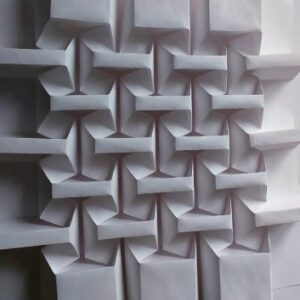
Scoring and Folding Vessels

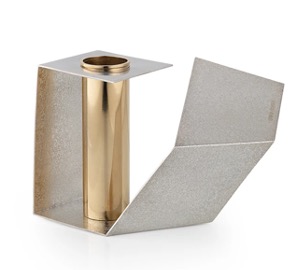
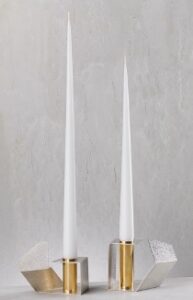
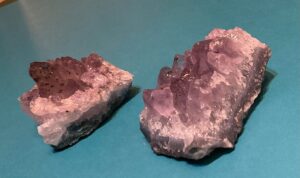
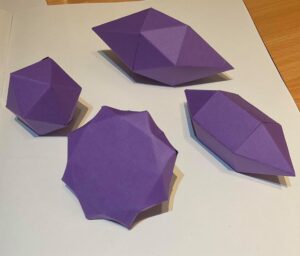
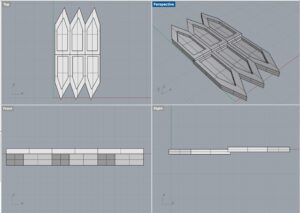
I researched silversmiths that have used scoring and folding in their work for the second part of my forms and facet research. I was creating two vessels which will be a vase and candle holder. I was using the rail revolve command to design the vase and surface commands to design the candleholder. I enjoyed designing these then using the unroll command to see what it would look like to trace onto metal for scoring and folding.


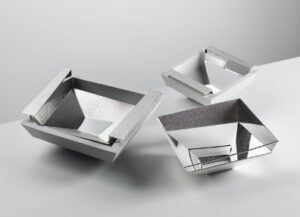
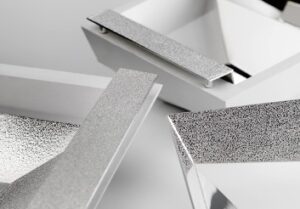
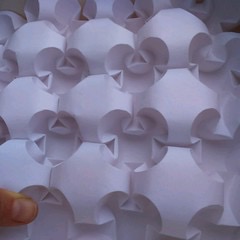
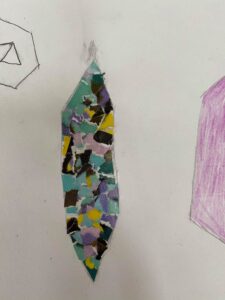
This is my first design that I made out of paper with my unroll that I had done earlier. I went up the town to get the sheets into A3 as I didn’t have access  to at home. I used the scalpel and ruler to cut out the shapes then i folded along the lines using a ruler which i then cut out holes for where the candles would go. It is held together with glue and tabs that i desighed using the surface command in CAD. This is a diamond shape from my research.


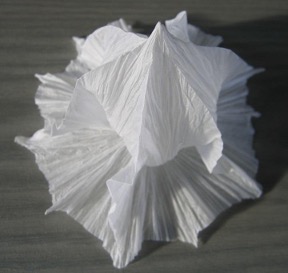
This is my second design that I made using the unroll command to make this vase out of paper which is more complex than the candle holder. I used the rail command to design the 3D vase. If i had access to tools and the money to buy sheets of metal which I could have made the vase out of. I really enjoyed this project


My 3 Form and Facet Vessels Rendered


This is the final product of my 3 vessels that will be made out of metal. I really enjoy rendering my designs as you can basically apply any materials that you like so that you can see what my vessel will look like as silverware. I designed the flowers myself using different commands e.g. bend, surface, rotate and extrude surfaces. I made the stem using the revolve command then made the green leaves using the symmetrical bend command.My Vessels are different shape vases for the flowers. I used Boolean difference to make the circle holes in the vases where the flowers can be positioned. I love how colourful the render has become. I could have made the table a different material so that the silver vases would stand out more and used less lighting. I had to change the colours of the flowers because when I used the flower material in the library as the petals on the flowers looked blurry and not like the red tulips that it was supposed to be and it was taking ages to render even when I change the resolution as shown in the image below.

This is the technical drawing for my final vases that I have rendered above. I used the Make 2D command first then used the aligned dimensions to see what the size of the vessels would be in silver.


Ellys May Wood

She graduated from the Glasgow School of art in 2018 where she then went to Bishopsland Educational Trust. It was there that she developed her ideas which she could explore on how to work with gold and silver.  Her Assortments of silverware and jewellery is motivated by the three Forth Bridges that are soaring over the Firth of Forth in Scotland. They have been interpreted into pieces that will be dazzling the alteration of the forms as you travel across them which will then create asymmetrical shapes. She captures these forms in photographs which will then be developed into three-dimensional card models. She produces them to life by scoring and folding the metal to create hard angles. To reproduce the concrete which is used in the structure by using the technique called etching.


Allie Anderson

She is a silversmith and jeweler who proceeded from the Glasgow School of art Silversmithing and Jewellery BA with a distinction in 2017. She is inspired by the atmosphere around Glasgow such as the current architecture and manufacturing structures of the city. She plans to explore the connection between the physical scale of these buildings by reinterpreting them into silverware. She uses a mixture of textured and accurately scored silver forms which are together with hand cast jesmonite to produce a divergence between material, surface and weight. She was presented a gilded award for Small-workers 3D design which was for her three textured Sterling silver and Jesmonite bowls. She was granted a Goldsmiths’ Precious Metal Funding to produce the bowls.


Polly Verity

She is the daughter of artists, so she grew up in the setting where there was plenty of art resources to hand and was encouraged to experiment with them. She uses scoring and folding to create mostly frequent patterns that are abstract geometric. The paper fold is relieved into a shape by hand using a small piece of paper which is then undone carefully before it is then accurately recorded into a computer line drawing. Once it has been refined and tested, the line data is sent to a desktop cutter that cuts very marginally into the paper to score it then is folded by hand. She chooses folds that are beautifully photogenic and striking which is due to the intense effects that are generated when the light hits one of the pieces.


My Forms and Facets Vessel Designs


These. are some of my vases that I have developed before I settled on the vases that are similar to each other which I will be finishing with rendering to a highest standard. I then developed the three vases by making more holes so that the flowers could be sitting in different angles.

This is the final product of my 3 vessels that will be made out of metal. I really enjoy rendering my designs as you can basically apply any materials that you like so that you can see what my vessel will look like as silverware. I designed the flowers myself using different commands e.g. bend, surface, rotate and extrude surfaces. I made the stem using the revolve command then made the green leaves using the symmetrical bend command.My Vessels are different shape vases for the flowers. I used Boolean difference to make the circle holes in the vases where the flowers can be positioned. I love how colourful the render has become. I could have made the table a different material so that the silver vases would stand out more and used less lighting. I had to change the colours of the flowers because when I used the flower material in the library as the petals on the flowers looked blurry and not like the red tulips that it was supposed to be and it was taking ages to render even when I change the resolution as shown in the images below. My technical sheet somehow came up as a link instead of my technical sheet.

I started by first doing a render of the vases with no other objects as I wanted to 3 vases to be the centre of attention.


This is my 3 final vases rendered on top of a wooden table with a couple of flowers to be able to show the use of the vases

Untitled


My Rendered Vessels


I found that after rendering my vessels into different materials and background look like finished pieces that looking at them as solid objects. I love that you could see how the vessels would look like in different materials to make the come to life. I could then develop these vessels more with dfferent shapes. I might then develop these by incorporating more of my crystal research I have been doing.


Vessels and cutlery set


These are my vessel that I made using the revolve and rail revolve commands which I used the curve tool and the star tool. I then used the offset command to close the line drawing so that the vessels could have volume. I really enjoyed creating these shapes as the vessels could be used for a number of things for example, a vase, bowl for fruit or to hold things in.


These are my cutlery set that I was designing to practice with. I  found the spool easy to design using the commands that I have learned so far in the class. The knife and fork was what I struggled with as when I tried to join the handle and edges there would be a place where they weren’t joined. I used the naked edges command to check and there was naked edges in between the handle and top part of the cutlery.


Forms and Facet Research

I first started off my research on forms and facets about crystal forms which I took images from the internet. I used the images as a starting point to put together shapes that I could use to create different vessels. I have done some sketches of shapes that I took from the image using different medium e.g. water colour pens, watercolour paints, pencils, coloured pencils. I took the shape of the third image with the broken crystals that I then recreated with plasticine before overlapping some of them. The 3D drawings could have been drawn more 3-dimensional. I could have used CAD to draw in 3D then use tracing paper to trace which would make it more realistic and use the media to make the drawing 3D.

This is my observational drawings from my photographs of crystals. I feel that I could have added more detail into my drawings.

I then went online to have a look at some crystals which I Bought. It gave me a good idea on how to incorporate the shapes of the crystals so that I can use the shapes to create realistic looking vessels in CAD that look like my research. I took some pictures of the crystals in different layouts which I would then trace the images in Rhino for the vessels. I made some 3D models of crystal like forms and Geometric shapes.


I redrew two of my 3D objects using thicker card and used double sided tape to stick the sides together instead of glue which seemed to work well until it started to stop sticking.


Surface Commands explored


I enjoyed my first CAD class that I haven’t used in long time before the class. I find it very useful and interesting to see a drawing become 2D to then being drawn in 3D using the surface commands with the solids. I liked using the etching and cutting techniques that I thought you could only do that on illustrator and photoshop which i’m not very good at. I prefer to use the surface and solid tools to create my drawing into a 3D object. I like that my solid object could be developed into a vessel e.g. a bowl or a tray for objects. it could also be made into a piece of jewellery.