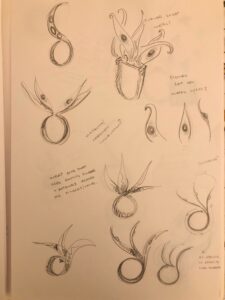
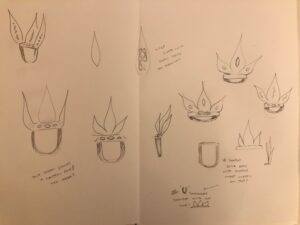
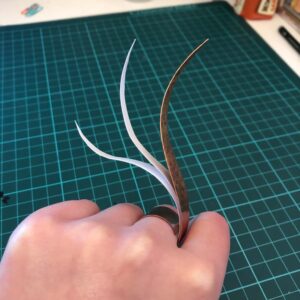
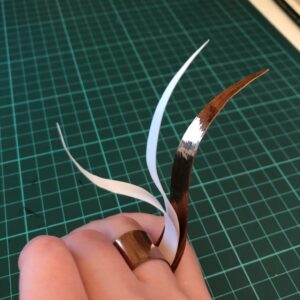
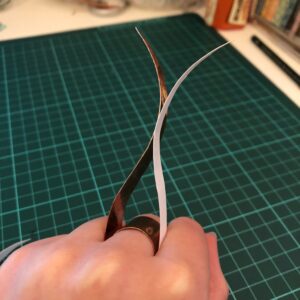
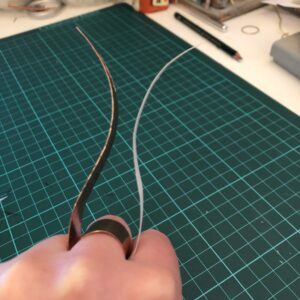
1

Final Ring Design


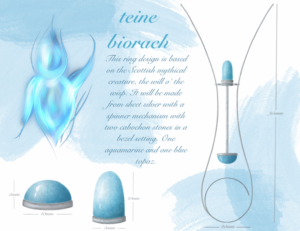
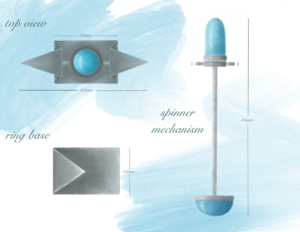
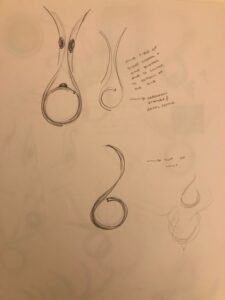
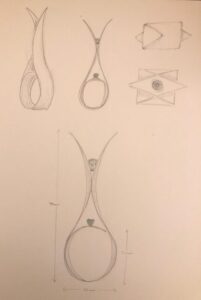
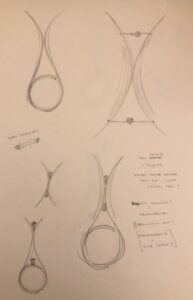
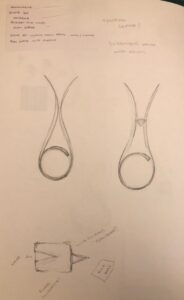
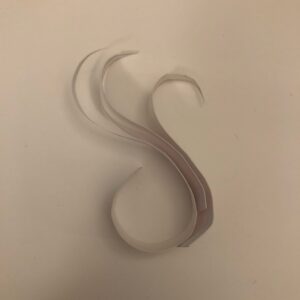
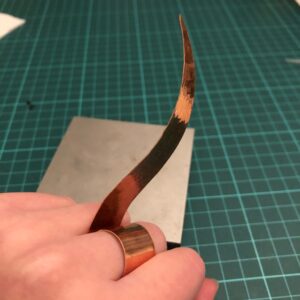
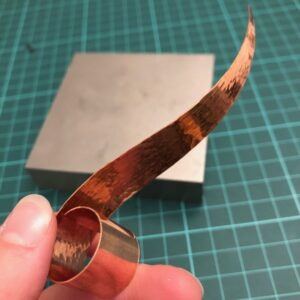
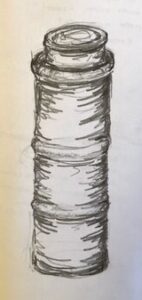
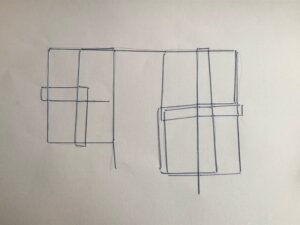
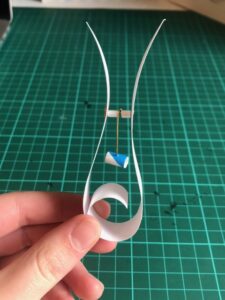
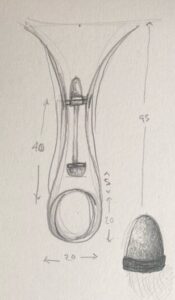
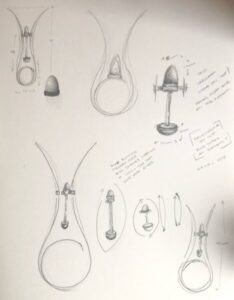
I have designed a kinetic ring comprised of two pieces of tapered sheet metal that resemble will o’ the wisps. One piece will be a wrap ring that will extend upwards to mimic a wisp, while the other will taper at both ends and be soldered to the base of the ring shank and continue up to mirror the opposite piece of sheet. Between the two pieces of sheet will be two bezel set cabochon stones, one a tall aquamarine, and the other a short blue topaz. They will be set at either end of one piece of wire that will hang vertically between the two pieces of sheet. They will be attached to a short piece of tube through which will run a wire which will act as two rivets on the outside of both pieces of sheet. I decided to design a moveable, interactive piece after seeing the work of  Dana C. Fear and Danielle Miller who both design stone set kinetic jewellery.


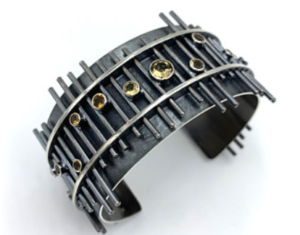
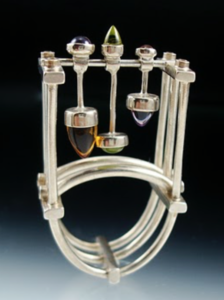
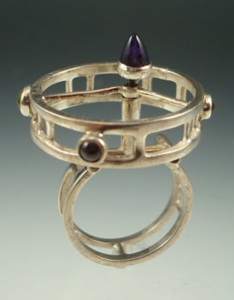
Dana C. Fear (left) & Dannielle Miller (middle & right)


Scottish Ring Designs

I began working with basic simplified shapes that I thought best resembled the will o’ the wisps and then refined the shape to a single continuous line which I thought best captured the shape and essence of the wisps. I wanted to make the ring feel more like a piece of sculptural jewellery than a simple accessory so I decided to create a more symmetrical design with two wisp shapes mirroring each other. I knew I wanted to have a central stone to resemble the ‘soul’ of the wisp so I began sketching ideas as to how I could potentially suspend the stone and how to incorporate another stone or two into the design without taking away from the minimalistic lines.


I thought about using a tension setting but decided against this due to the thickness of the sheet metal not being strong enough to hold a stone in place. I was also unsure as to where I would place a second stone in this design.


Scottish Ring Sketches

      Sketching Myths

I began doing some rough sketches of my inspiration for the project, the will o’ the wisps. They are described as small green or blue dancing flames so drawing their indefinable shape gave me the idea for a very organic, flowing ring design. I did a chart of some colours I associate with the Scottish landscape and I would like to incorporate the blues and greens as they go hand in hand with the classic colour of the wisps while mimicking Scotland’s scenery. The stones I’d like to use in my design are green tourmalines and aquamarines.


Mythical Scottish Ring Research

I’ve chosen to design a ring based on the Scottish folklore, in particular, ‘Will O’ the Wisps’. Their  mysterious flame like appearance interests me and I’d love to try and convey their shape as a ring. I was told Scottish folktales growing up by my granny and the story of the ‘Wisps’ always stuck in my head. The will o’ the wisps are said to be blue or green smokey shapes of light that float above marshland and are said to lead travellers off the beaten track.


I’ve been looking at green and blue precious stones like topazes, blue sapphires, moss agates or green tourmaline to capture the colour of the wisps and the colour palette of the Scottish landscape. I’d also like to incorporate some traditional celtic knot work into my design to coincide with the classic folktales I’m basing my piece on.


Enamel Brooch Sketches

I love the form of chimney pots and began sketching some of the ones I can see from my flat. Moving forward from these preliminary sketches, I did some line drawings and and added different coloured card to show possible areas of highlight and shade. I liked this concept coupled with the yellow and black colour contrast in classic cityscapes. I wanted to involve both in my final model. I began making models out of cardboard tubes and trying to make corrugated cardboard shapes.


Enamel Brooch

Enamel Brooch Design 

My designs inspired by Edinburgh’s beautiful chimney pots. Although they are unassuming forms, I think they add to the well known architecture of Edinburgh and give character to the many historic tenement flats around the city.

The piece is comprised of five silver sheet cylinders with two holes drilled through either end to allow two straight brooch pins to be threaded through the entire piece.

I’ve chosen the ‘Champlevé’ enamelling technique for this piece and I would like to sand down the left hand side of each cylinder to allow for a rectangular section of yellow enamel on each ‘chimney pot’. I decided on yellow as I think it has a bold and clean contrast with silver and while in the research stage of this project, I loved the contrast of dark city skylines and yellow lights from the rooms inside. I wanted to convey this contrast while still focusing on the chimney pot form. I think the placement of the yellow works well with the overall shape of the piece as it can be seen as a bold highlight as well as its intended meaning.

The piece is 70mm tall, 85mm long and 20mm deep with each individual cylinder’s diameter being 15mm.


      image3.jpeg


Skyline

Sawing and Soldering Sheet Metal

Glue cut out design to sheet metal and saw it, making sure to leave a small border around the stencil.

Anneal the cut out skyline and clean in the acid bath, scrub with pumice afterwards.

Hammer the annealed skyline on a cylindrical stake with a mallet so create a rounded edge so it will stand up on the leftover metal.

Clean both bits of metal with emory paper to remove any substances.

Place a flat layer of iron binding wire on the soldering block and place the piece of sheet metal to act as the base of the piece. Position the shaped skyline on the base and cover generously with flux.

Heat with the blowtorch until the flux bubbles up, then take a large chunk of hard solder and place at one side of the piece. Gently wave the flame over the piece and heat until the solder begins to flow. Draw the solder all the way along the piece with the torch.

Quench and leave the piece in the pickle and then scrub with pumice.


image0.jpeg     image1.jpeg     image2.jpeg


Urban Landscapes

    I began sketching views from my window and buildings I’d seen on walks and started to construct collages based these drawings. I found it difficult to convey my drawings through collage and it’s something I’d like to try more of so I can try and get the hang of it. I tried to include thread in all my collages as I think it adds a different dynamic to the page and allows for a contrast between thick and thin line. I’m most pleased with the collage of the archway as I feel it represents the drawing better than my other pieces. I decided to pursue this drawing and collage for my final model.


Flatlays

 I enjoyed creating the flatlays as I think they’re a great way to work through colour scheme ideas. I also think its interesting to combine different forms in one object collage to see how different shapes can look together.