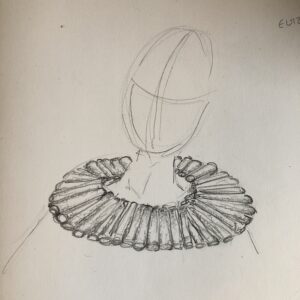
1

Wire Brooch


After deciding on the initial sketch (left) and wire drawing (right) I started to construct my final brooch. I decided to use the same structure and rough measurements for my brooch but I used my pliers more deliberately to make the bends in the wire more defined. I began making the brooch out of copper wire but once I had put the frame of the piece together, I decided against using copper as I liked the colour contrast between the dark wire and the blue thread in my wire drawing. I dipped the copper brooch in liver of sulphur solution to achieve the dark patina of my test piece and much preferred the result. I then added the blue thread to add to the structure of the piece and added a classic brooch clasp with a single bit of iron binding wire running along the back of the piece to clip into the catch at the opposite end.


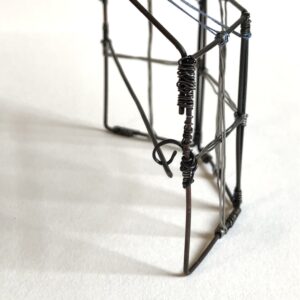
I’m really pleased with the way my final piece has turned out. I’d like to see how I could take this brooch further, perhaps by making it much smaller or soldering it to create a smoother finish as, although I like the wire wrapping, it looks a little clumsy in some places.
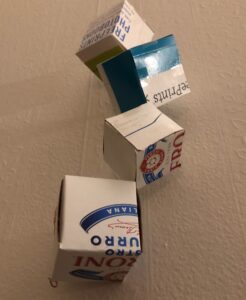
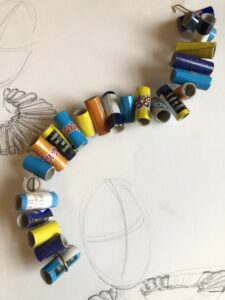
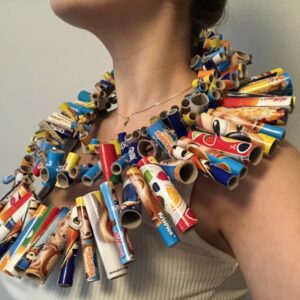
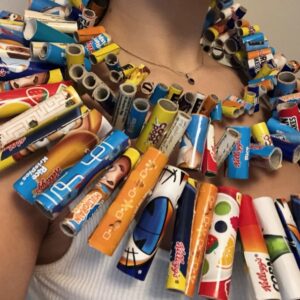
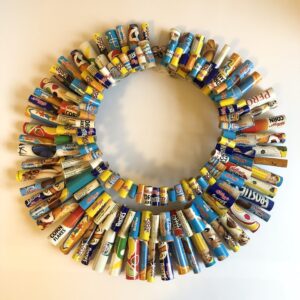
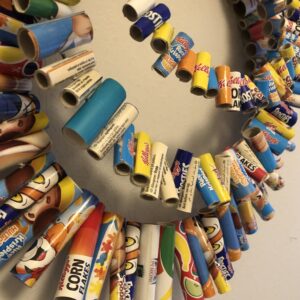
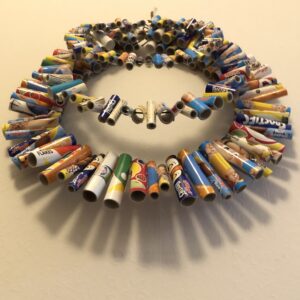
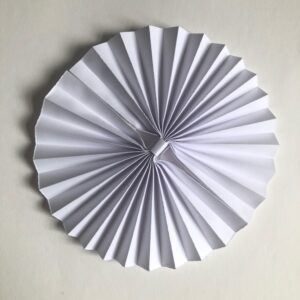
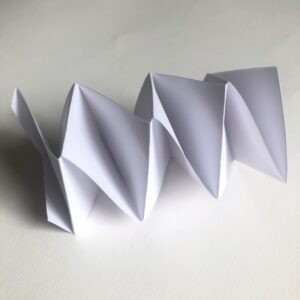
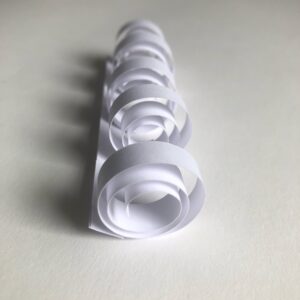
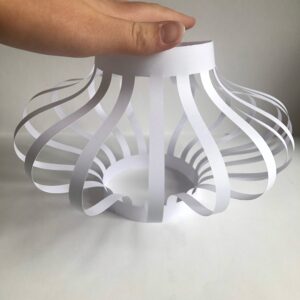
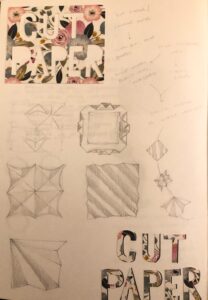
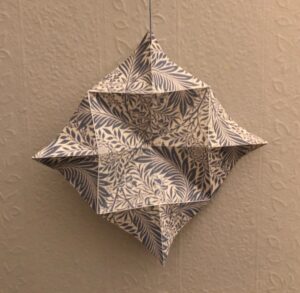
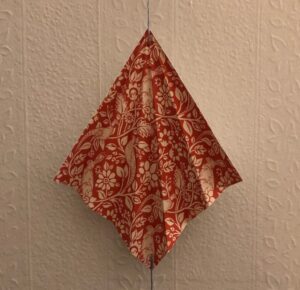
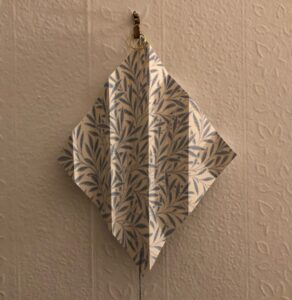
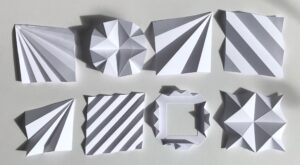


Wire Drawings

After completing the continuous line drawings, I translated these into small sculptural wire drawings.


For some of my wire drawings, I only sculpted part of my original sketches because they worked better when they were split up into parts. The top left piece is part of my window drawing where I preferred the bricks on their own with the continuous line leading from one block to the next. Although this is not the wire drawing I continued with, I would like to use it in future as I love its flowing form contrasting with its rigid quality.


   This is the wire drawing I chose to develop further into a brooch.


Wire Masterclass

Working with different thicknesses of copper and brass wire. Experimented with wire twisting and annealing to make the metal more malleable.

Annealing

Cut lengths of wire and wrap them in coils using iron binding wire. Light the torch and add the right amount of oxygen until you get a blue flame with orange tips. Heat the metal until it becomes a cherry red colour. Quench and remove binding wire. Put the coil in the pickle, make sure no binding wire goes in the bath. Once removed from the pickle, rinse under water and scrub with pumice, soap and water. Dry thoroughly.

Twisting and Straightening Wire

Cut a length of annealed wire and clamp one end in the vice.  Hold the other end of the wire with a set of tongs and pull the wire until it starts to stretch. To twist a length of wire, fold the straightened piece in half and clamp the two ends in the vice. Take a hand drill with a loop on the end and hook it onto the folded wire. Slowly, while pulling on the wire, begin turning the drill. Keep twisting until there is an even twist in the wire.

Soldering Twisted Wire

Generously cover the section of twisted wire with flux and gently heat with the torch (the torch flame should be fiercer than the one used to anneal). Take a large chunk of hard solder and place it on one side of the wire. Heat again with the torch and once the solder has flowed, slowly draw it along the wire with the torch. If the solder stops moving, place another piece at the other end of the wire and follow the same steps. Quench the wire and put it in the pickle bath. Remove the piece from the pickle, clean up with the pumice and dry thoroughly.


Continuous Line

Experimenting with different materials to depict an urban landscape in the form of continuous line drawings. I think my left handed drawings (right) were more successful than the ones done with my dominant hand (left) as the lines are far less harsh and geometric and I think that style works better with the free flowing look of continuos line drawings.


Alexander Calder

Alexander Calder was an American sculptor who is best known for his mobile like sculptures. Calder was fascinated by the idea of ‘drawing’ with wire and experimented with this throughout his career. He would create 3D portraits of people and used line to his advantage when designing these works (right). These wire portraits are fascinating and carry a beautiful sense of movement due to Calder’s shaping of the wire, particularly to show hair.  In the 1930s, Calder began constructing his first abstract mobile sculptures (left). These sculptures were usually made from wood and sheet metal and coloured with paint. They move peacefully, relying on the careful balance of each element to support the whole piece.


Wilhelmina Barns-Graham

Barns-Graham’s developed her signature style once she moved to St Ives in 1940. Her art was always caught between the realms of abstract and representational, though her drawings always captured movement and had a sculptural quality to them. Her drawing ‘Seventeen Lines’ in 1982 (left) is very expressive and carries a lot of movement despite its simplicity. Barns-Graham uses line in much of her work and despite her varying styles, she always manages to incorporate a sense of motion in her art. For example, her later ‘Scorpio Series’ (right) is bursting with bold colours but the natural lines from her earlier work is still visible.


Recycled Necklace

Over the last two weeks, I’ve really enjoyed creating this piece. It gave me the chance to create something entirely new out of discarded materials, whilst knowing my final piece would have no lasting effect of the environment.

I was initially working with ideas from the icebreaker project where I became fascinated by the look of folded paper. I began making the same forms I’d made previously but from recycled cardboard. However, I didn’t like how the shapes looked in cardboard so I started looking at different repeat shapes. I started making cubes and cylinders from thin patterned cardboard and found that they worked better due to the simplicity of the shapes combined with the pattern and colours.


My main inspirations for this piece were Elizabethan ruffs and Ancient Egyptian collar necklaces. Being able to combine such historic designs with a very current world issue like recycling and ethical making was an interesting challenge.

After making a couple of test pieces, I decided to go with the cylinder shape and worked with wire to create three different sized ruffs that can be worn together or separately.


Recycling Sketches

  Using recycled materials to design and make a neck piece based on the theme of repetition. Using inspiration from the icebreaker paper project and translating this into recycled cardboard. Looking at simple repeated shapes like cubes and cylinders to create a neck piece.


Sketches of possible neck pieces using the cardboard cylinder idea.


I’m looking at Elizabethan ruffs and Egyptian collar necklaces for inspiration for the shape of the design and how it will sit on the wearer.


Icebreaker Project

         A4 Paper Project

Exploring the different ways to convey the words ‘expand’ and ‘contract’. The freedom of this project allowed me to create some really satisfying and interesting forms. I was captivated by the simple beauty of folded paper, so I continued to develop these shapes in my sketchbook and create some larger versions using thicker patterned card.