Exploring Sketchup –
TITLE BAR –
The title bar contains the standard window controls (close, minimise, maximise) and the name of the currently open file. When you start SketchUp, the name of the currently open file in Untitled, indicating that you have not yet saved your work.
MENU BAR –
The majority of SketchUp tools, commands, and settings are available within the menus on the menu bar.
Viewing your model in 3D space –
- The most commonly used camera tools are the Orbit tool, pan tool, Zoom tool, and Zoom extents tool.
- Sketchup implements the concept of a camera to represent your point of view of the model. Simply, you (the user) are treated as though you were a camera looking at your model as you work.
- You must have a model in a drawing area before we can practice viewing. By default, SketchUp contains a model of a person at the origin of the axes.
Place SketchUp’s Pre-Built models into the drawing area –
- From the components tray (left side user interface)
- Click on the Collections and Searches’ drop-down list identified by a downward arrow. Click on the Architecture item. Architectural collections are listed.
- Click on one of the collections, Warehouse appears.
- Click on one of the pre-built architectural models, Click on the Download Model button. The Load into Model? A dialogue box appears.
- Click ok button. The model appears in SketchUp attached to the select tol.
- Click anywhere in the drawing area to place the model.
- The model will be positioned in the drawing area.
Viewing your model in 3D space –
- The orbit tool, Using the Orbit Tool
- The Pan Tool
- The Zoom Tool
- Zoom tool+shift changes the field of view
- The Zoom extents tool
Creating your first model –
- You can draw either in perspective view of from top/left/front view
- For 2D drafting select Parallel projection from the camera menu with top, front and left views.
- Drawing shapes: rectangle, circle, arch and line
- Keyboard enter for accuracy
- The Push-Pull tool, offset
Saving, re-opening and autosave files –
- From the file menu, you can save your work in a specific location then reopen it.
- Sketch up always saves a backup file of your work every 5 minutes,normally saved in the same location where you saved your file. If you didn’t save your file your backup file will be saved in documents.
Preparing your file to Sketchup –
IN AUTOCAD –
APPLY –
- Overkill
- Purge
- Hide unnecessary layers such as text, dimensions and hatch layers
- Convert Lines to Polylines
- WB 9write a look) the plan and save it as ‘for SketchUp copy’
Getting started with sketchup – Part 1
- Selecting a template
- Camera – Standard views – Iso.
SketchUp video tutorials –
View > Tool palettes > Large Tool Set
1-
Orbit tool – revolve around model
Pan tool – little hand
Zoom in and out of the model with the zoom tool.
2 – Line Tool
- Two methods to draw a line – click and drag to create a line, or create one edge only. Press escape to finish.
- Type for length (m = meters, ‘= feet)
- Divide edge/line by using the divide tool on the right click of a line.
3 – Rectangle Tool
- Perfect square or golden section – line shows up in the middle.
- Can draw on all green, blue and red planes
- To specify exact measurements – draw then type 3m,5m for 3 metre by 5 metre dimensions.
4 – Push Pull tool
- Pulls any flat shape into 3D – Click shape, move mouse and click to finish. Type in a distance which will measure from the last distance – be sure to check where you last measured from. Only works on surfaces not edges. It will also remember the last distance you used – double clicking another surface will give the same distance – remembers the last so you can treat multiple surfaces the same way.
- Can cut away other geometry – push a surface back and will cut away surfaces – must be parallel and no edges in the way.
- To make something extend to the same length, click to finish scaling/push pull tool onto a different object which can then be extended.
- By default the push pull tool works on any surface you click onto.
5 – Selection tool
- Making good selections in Sketch
up is crucial in using other tools. - Can select individual entities, grouped objects, edges and surfaces. One click selects surface, double click selects edges and surfaces, triple click selects all geometry connected.
- Select multiple objects by dragging a selection rectangle. Towards the left – crossing window – quickly select by dragging a window across them. To the right – more control – must completely encompass the entities you wish to select.
- Modifier keys – hold shift key then plus of minus on cursor.
- Control option to add
Then shift and control for subtract.- X-ray mode – to make sure you have a clean selection.
From the tutorial videos I have practiced using Sketch-up to draw basic shapes, use the orbit tool, pan tool, push and pull tool, zoom tool, selection and inference locking.
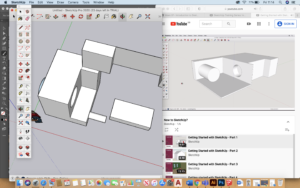
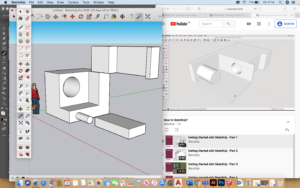
Above I am showing a range of different orbit tool views achieved.

Using the rectangle tool and the push and pull tool, you can quickly achieve a shape that resembles a house structure. By moving the centre line I could extend the top of the rectangle so that it looked like roof.
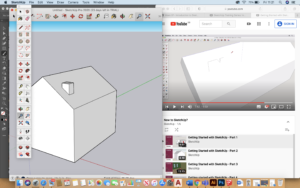
By adding lines that run along the dimensions of the side view of the house, I could create something similar to a chimney and then use the push and pull tools to make this wider and in proportion with the house.
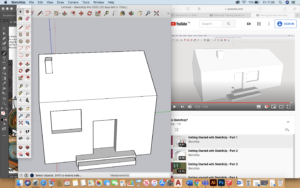
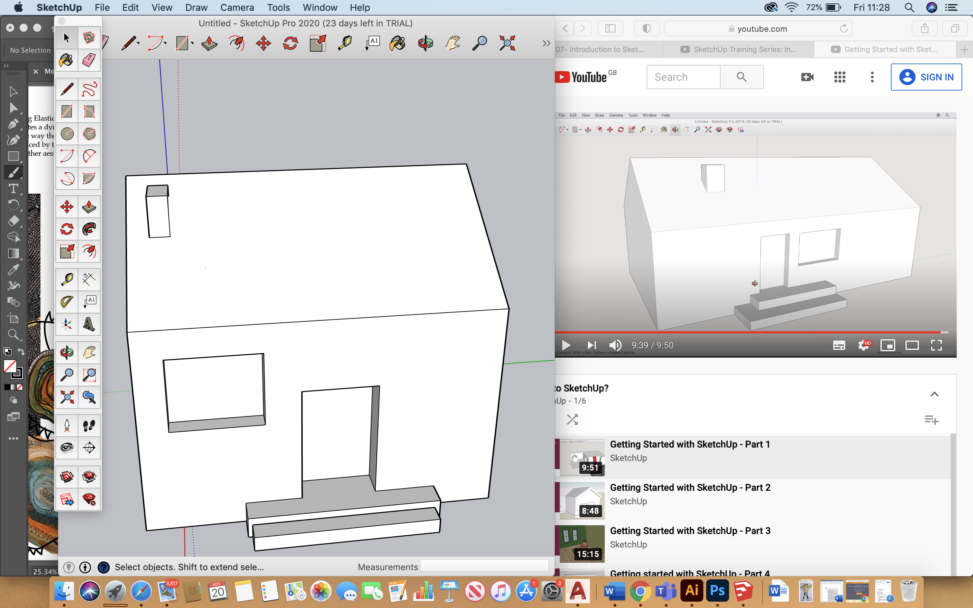
Finally I looked at how I could use rectangle tool and push and pull to further experiment with the house idea, creating a door, window, chimney and steps.


Leave a Reply