Copying a previous lecture recording (Media Hopper Replay)

Our most common enquiry is about how to use a recording made in a previous year in Media Hopper Replay.

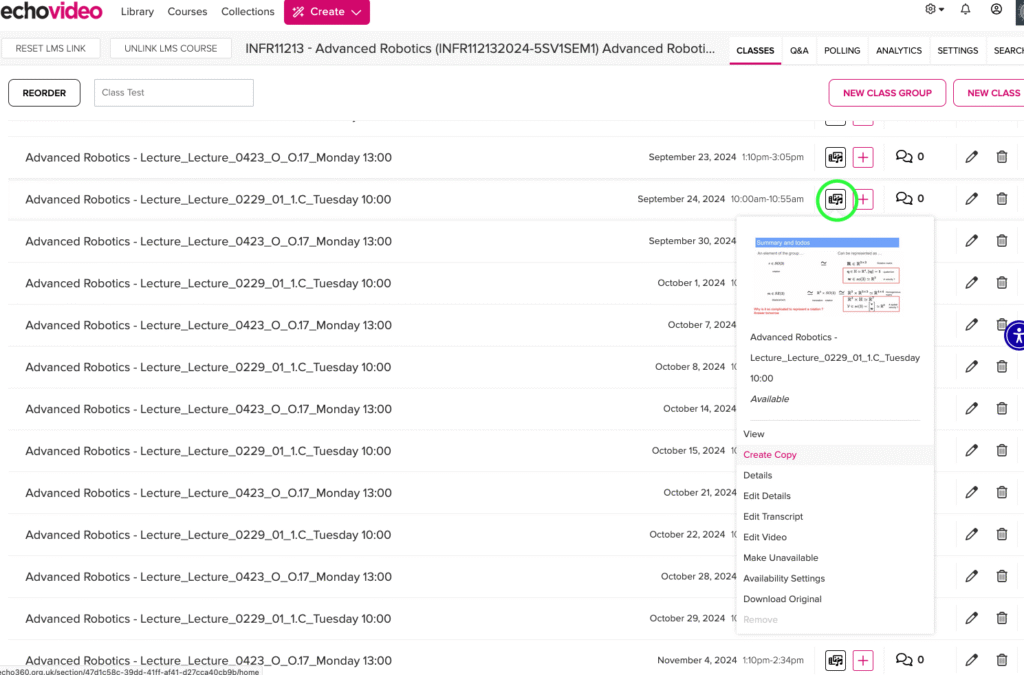
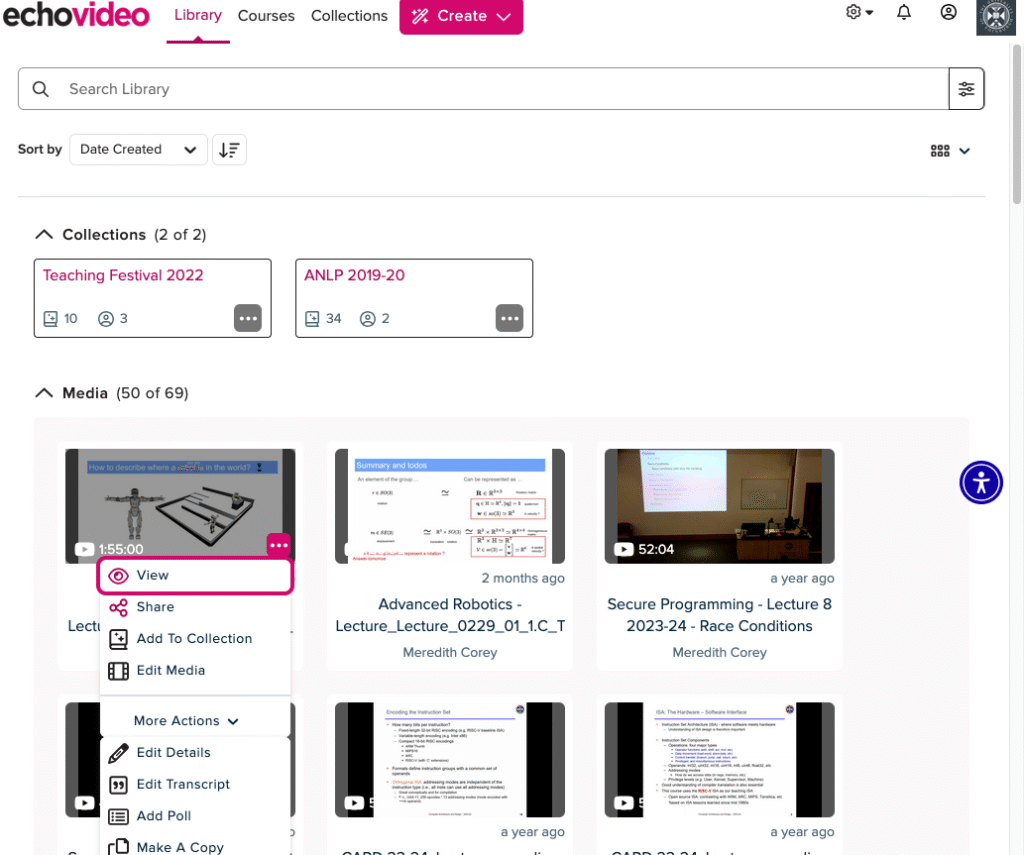
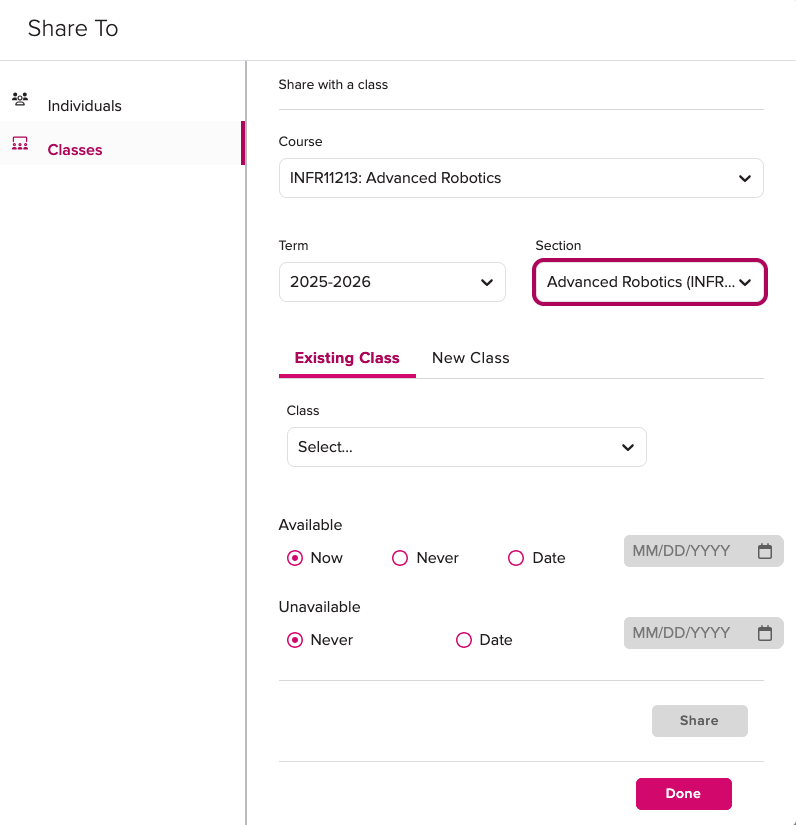
As an instructor, you can make a copy of a previous recording in Media Hopper Replay and then upload it to your personal library, thus allowing you to publish it to another linked course in Media Hopper Replay. This one page quick reference guide details the two step procedure to do this for each recording. View the PDF quick reference guide here.

This quick reference guide, along with many others, is available via the IS Media Hopper Replay quick reference guide website.

The IS Helpline supports Media Hopper Replay throughout the University. Contact details are listed here.


Adding an LTI link to Learn Ultra

Many of the learning technologies we use for teaching in the School of Informatics are integrated into Learn via LTI links, which ensure that user information (e.g. name, email address, and student number) are fed from Learn through to the other tool. Examples of these are Gradescope, Piazza, Zoom, Media Hopper Create and Replay, and CodeGrade. This also means that information can be fed back from these tools to Learn, e.g. marks in Gradescope added to Learn’s Gradebook. Many of these tools, including Library Resources, Media Hopper Replay (aka Lecture Recordings), and Piazza are included on all Informatics courses automatically through our School Learn template.

The process for adding these tools to a Learn page for students to access has changed in Ultra. Please follow the instructions below on how to add a link to these tools on a course Learn page for students and other staff enrolled on the Learn course to access. (Click on any of the screenshots below to open them full size.)

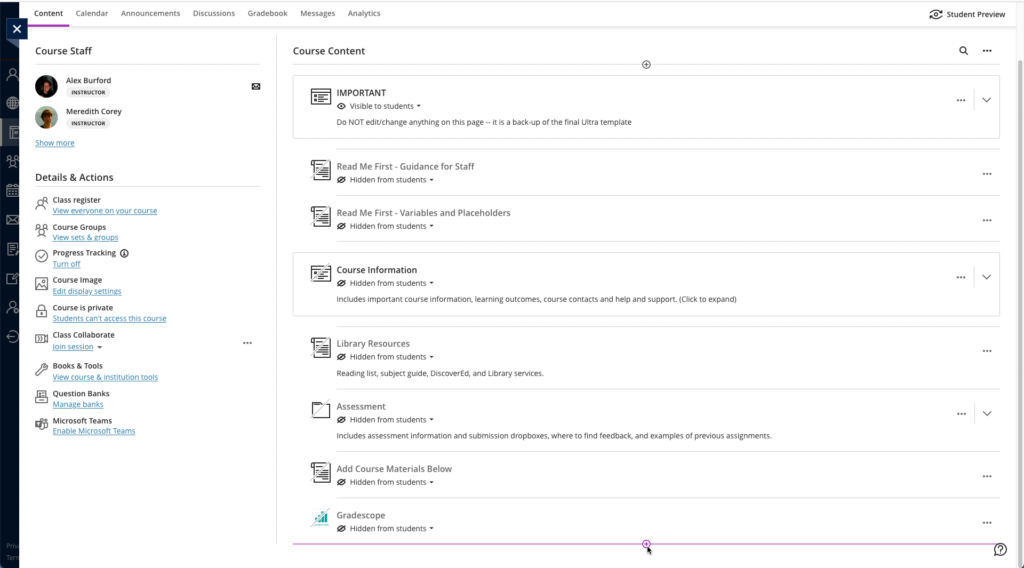
  1. Navigate to the place in Learn that you want to add the link (this might be within a folder, e.g. for an assessment submission) and click on the plus (+) sign where you would like to add it on the Course Content page. You can see that the Gradescope link has already been added below using these steps and, for this demo, we will be adding a link to Piazza below it.
    Screenshot showing how to add an item within a Learn Ultra page
  2. From the pop-up list of options that opens, select “Content Market”.
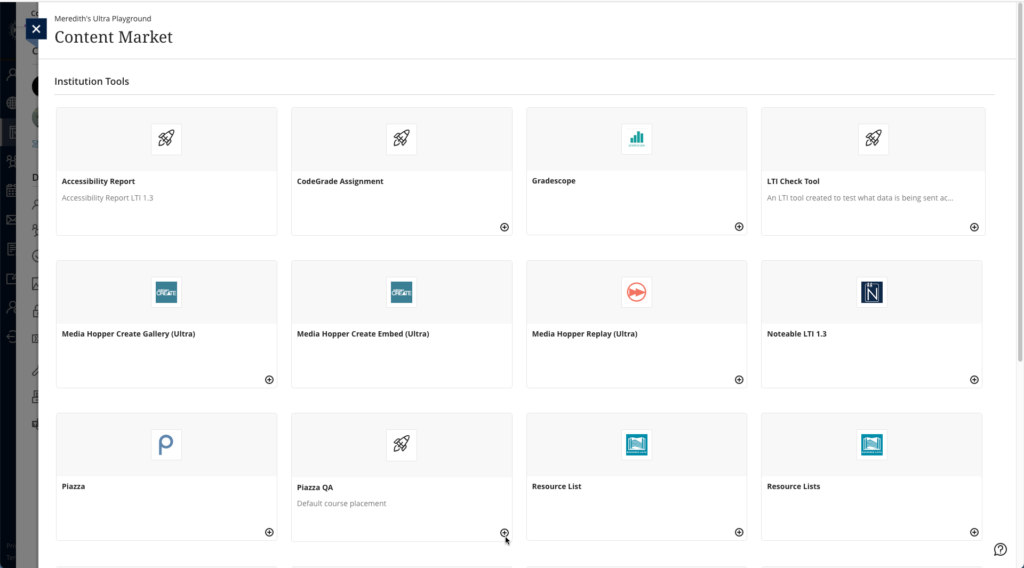
  3. When the Content Market screen opens, navigate to find the tool you need. Do not click on the name of the tool, rather select the little plus (+) sign icon in the bottom right-hand corner for that tool, as shown below for Piazza QA.
    Screenshot showing the Content Market in Learn Ultra
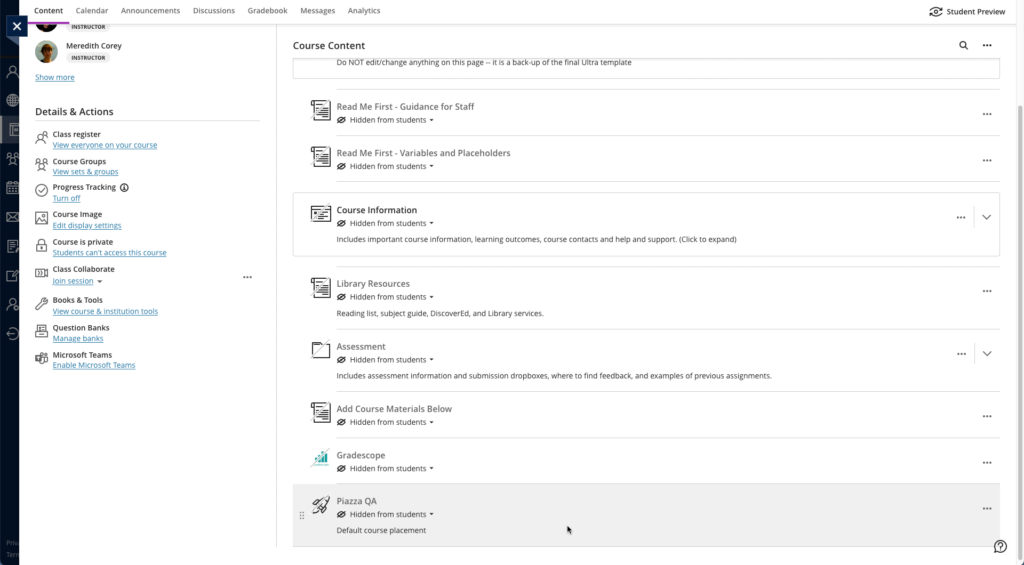
  4. You will then be taken back to the main course Learn page, where you can see that the Piazza QA tool has been added, as you can see below. You can use the three dot icon (…) to open the menu for the item and edit its name and/or description. Once you are ready for students to access it, make it visible to them.
    Screenshot showing Piazza link on a Learn Ultra page


Create an ad-hoc lecture recording

The scenario

You’re about to teach your class but there’s been a room change and you want to make sure the session will be recorded. What to do?

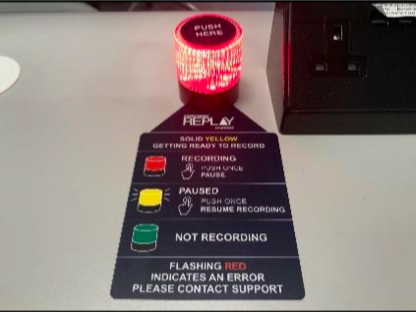
  • Firstly, check the light on the desk. It should change to RED at the time the class is scheduled to start (usually, 10 minutes past the hour).
Performing an ad-hoc recording
  • Log into your Learn course that you use for your course and open Replay using the Media Hopper Replay link (usually called “Lecture Recordings” in the list of course contents).
  • When Replay opens, click on the pink “Create” button at at the top of the screen and select “New Device Capture”.
  • From the Where? menu, select the room you are teaching in. You can type the name or location of the room into the search box to help narrow down the results.
  • Use the Hours and minutes options to define how long your recording will last.
  • From the Inputs menu, choose which of the available inputs you would like to record. The
    default selection is always as many inputs as possible for that particular room.
  • Leave the Quality setting as High Quality as this will produce a recording suitable for playback on most devices, and by users with slower internet connections.
  • If you wish to make your Ad Hoc recording a live session, then enable the Live Stream option. If you enable Live Streaming Your audience can view the live stream from within their course by logging into Media Hopper Replay and clicking on the class containing the stream, followed by the Show Live Stream button.
  • Use the Publish to… menu to select the location you want your recording to be saved to. The default will be the course you currently have open.
  • Click Start to begin your recording. Your ad hoc capture will either appear in your Library or as a new class within your course (depending on your choice) under the title ‘Ad Hoc Capture’. A green light will appear next to it to inform you that it is recording.
Myth Busting

The Delcom light in the rooms acts primarily as a visual clue as to whether a recording is in process.

RED=Recording

GREEN=Not Recording

Amber=Recording Paused.

You can press the light to pause / unpause an already scheduled recording. You can *not* start a recording by pressing the light in the room. Instead, follow the instructions above on how to perform an ad-hoc recording.

Related Links

User guide: Performing an ad hoc recording in Media Hopper Replay (PDF)

Video: View the short tutorial video on performing an ad hoc recording in Media Hopper Replay


Lecture recording scheduler

The Media Hopper Replay page for your course displays *when* recordings are scheduled, but not *where*. So, when you select the Lecture recordings link in Learn…

… you see something like this:

But what if you want to check *where* your classes are scheduled for recording?

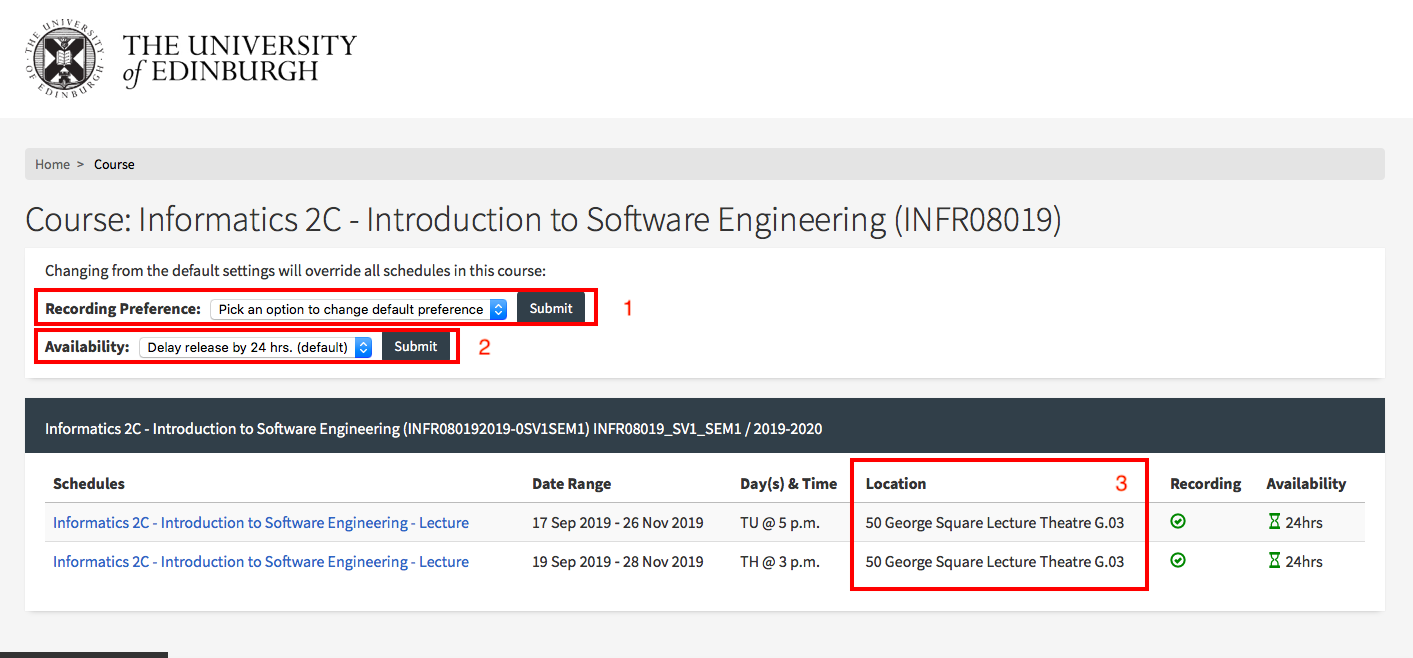
You can visit the Media Hopper Replay scheduler*. Enter the course name or course code (be sure to select the correct instance) and you will see something like this:

  1. you can change your recording preference – and give a reason why. Please remember – this changes recording preference for all lectures within your course. If you want to change at a more granular level, please select the specific scheduled lecture (eg TU @ 5pm)
  2. you can change the availability of your recordings from the default 24 hour delay to ‘immediately’ or ‘manual release’
  3. you can enable live streaming of classes
  4. you can check the location of the scheduled recordings.

Further information on the Media Hopper Replay scheduler can be found here: https://www.ed.ac.uk/information-services/learning-technology/media-hopper-replay/help-and-support/staff-help-and-support/replay-scheduler

*By default, only Course Organisers and Course Secretaries are added to a course in the Replay Scheduler, so people can only see information on the site for a specific course where they have one of these two roles. Additional users can be added by the CO or CS, who will then be able to manage opt-outs and release timings.