Adding an LTI link to Learn Ultra

Many of the learning technologies we use for teaching in the School of Informatics are integrated into Learn via LTI links, which ensure that user information (e.g. name, email address, and student number) are fed from Learn through to the other tool. Examples of these are Gradescope, Piazza, Zoom, Media Hopper Create and Replay, and CodeGrade. This also means that information can be fed back from these tools to Learn, e.g. marks in Gradescope added to Learn’s Gradebook. Many of these tools, including Library Resources, Media Hopper Replay (aka Lecture Recordings), and Piazza are included on all Informatics courses automatically through our School Learn template.

The process for adding these tools to a Learn page for students to access has changed in Ultra. Please follow the instructions below on how to add a link to these tools on a course Learn page for students and other staff enrolled on the Learn course to access. (Click on any of the screenshots below to open them full size.)

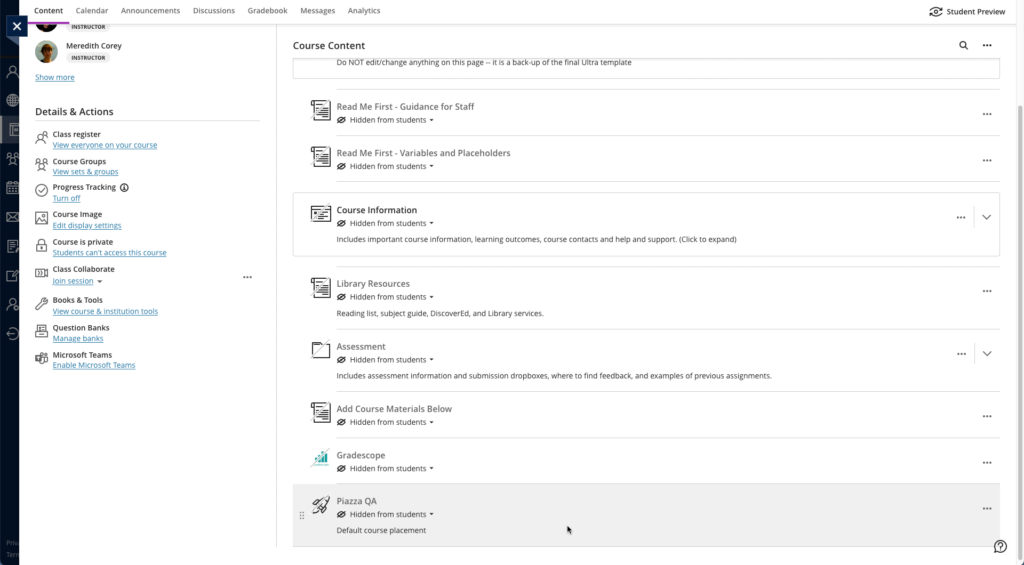
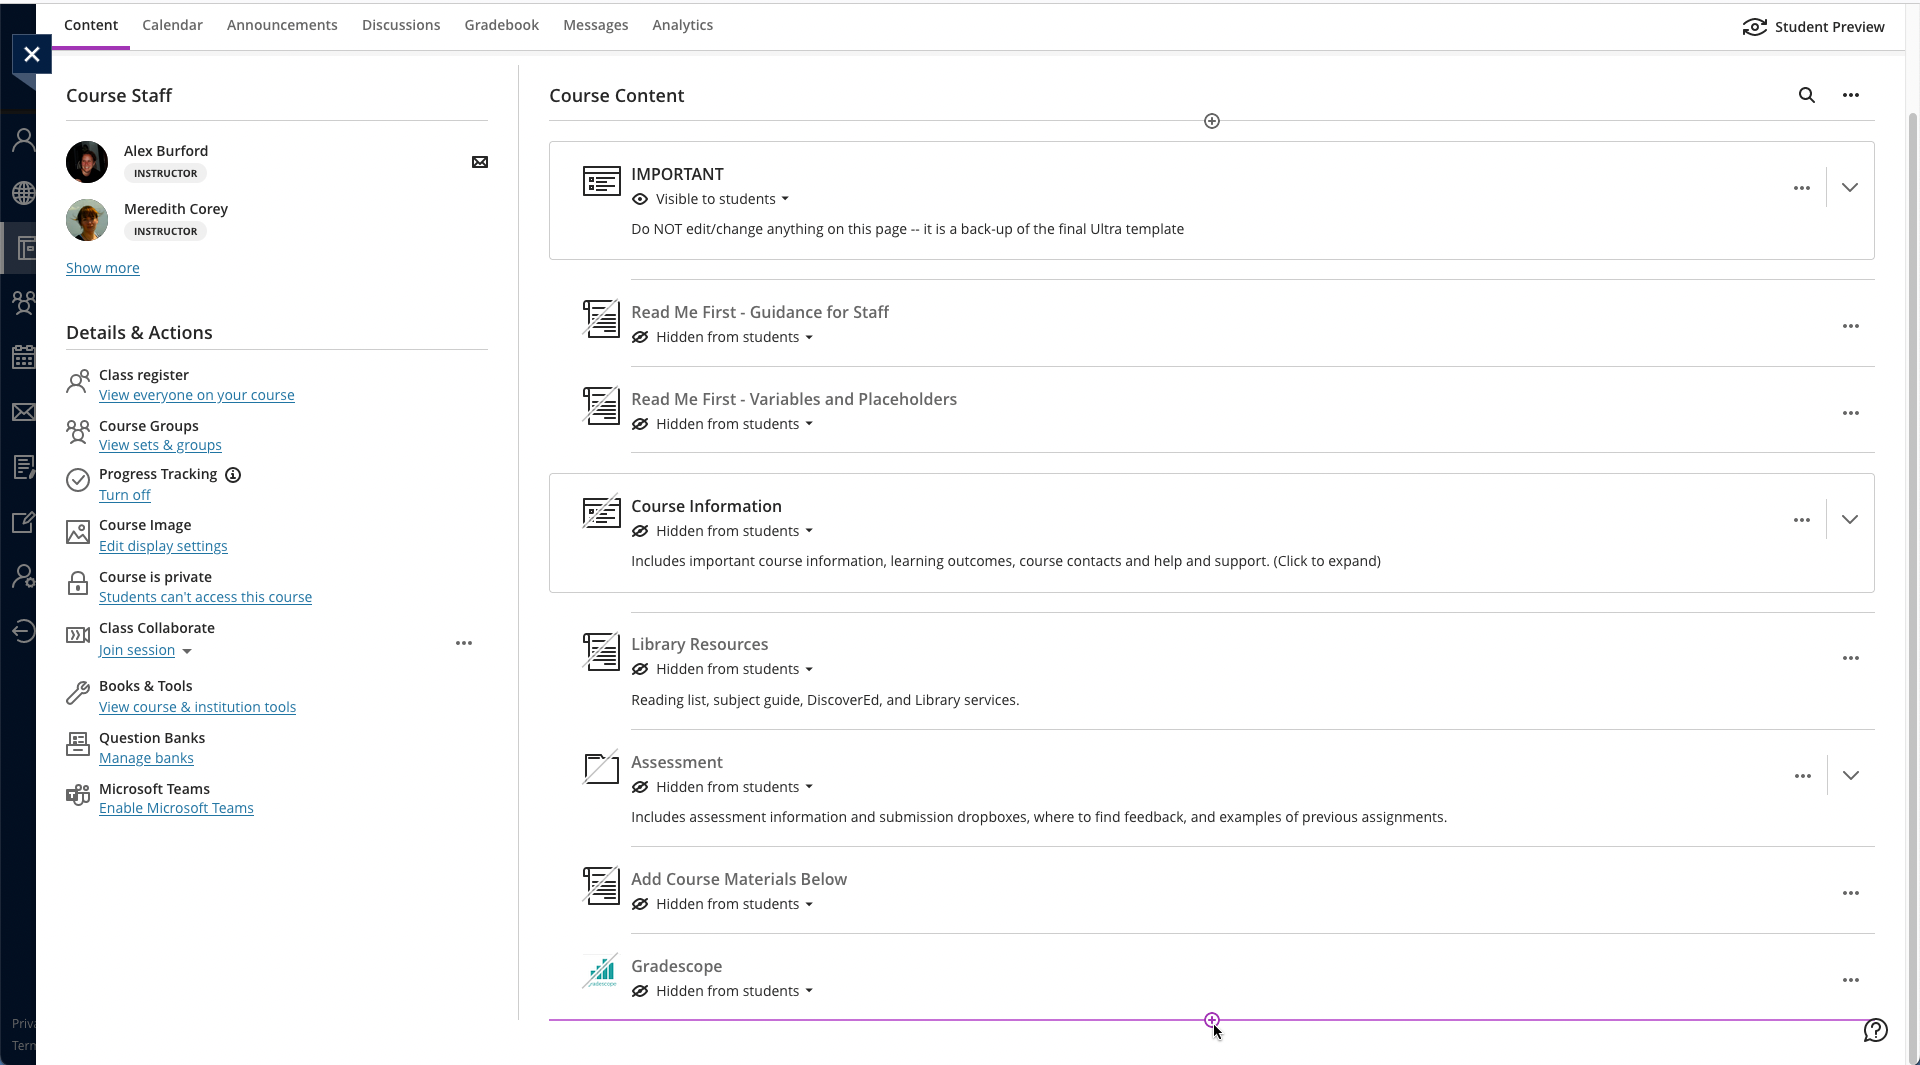
  1. Navigate to the place in Learn that you want to add the link (this might be within a folder, e.g. for an assessment submission) and click on the plus (+) sign where you would like to add it on the Course Content page. You can see that the Gradescope link has already been added below using these steps and, for this demo, we will be adding a link to Piazza below it.
    Screenshot showing how to add an item within a Learn Ultra page
  2. From the pop-up list of options that opens, select “Content Market”.
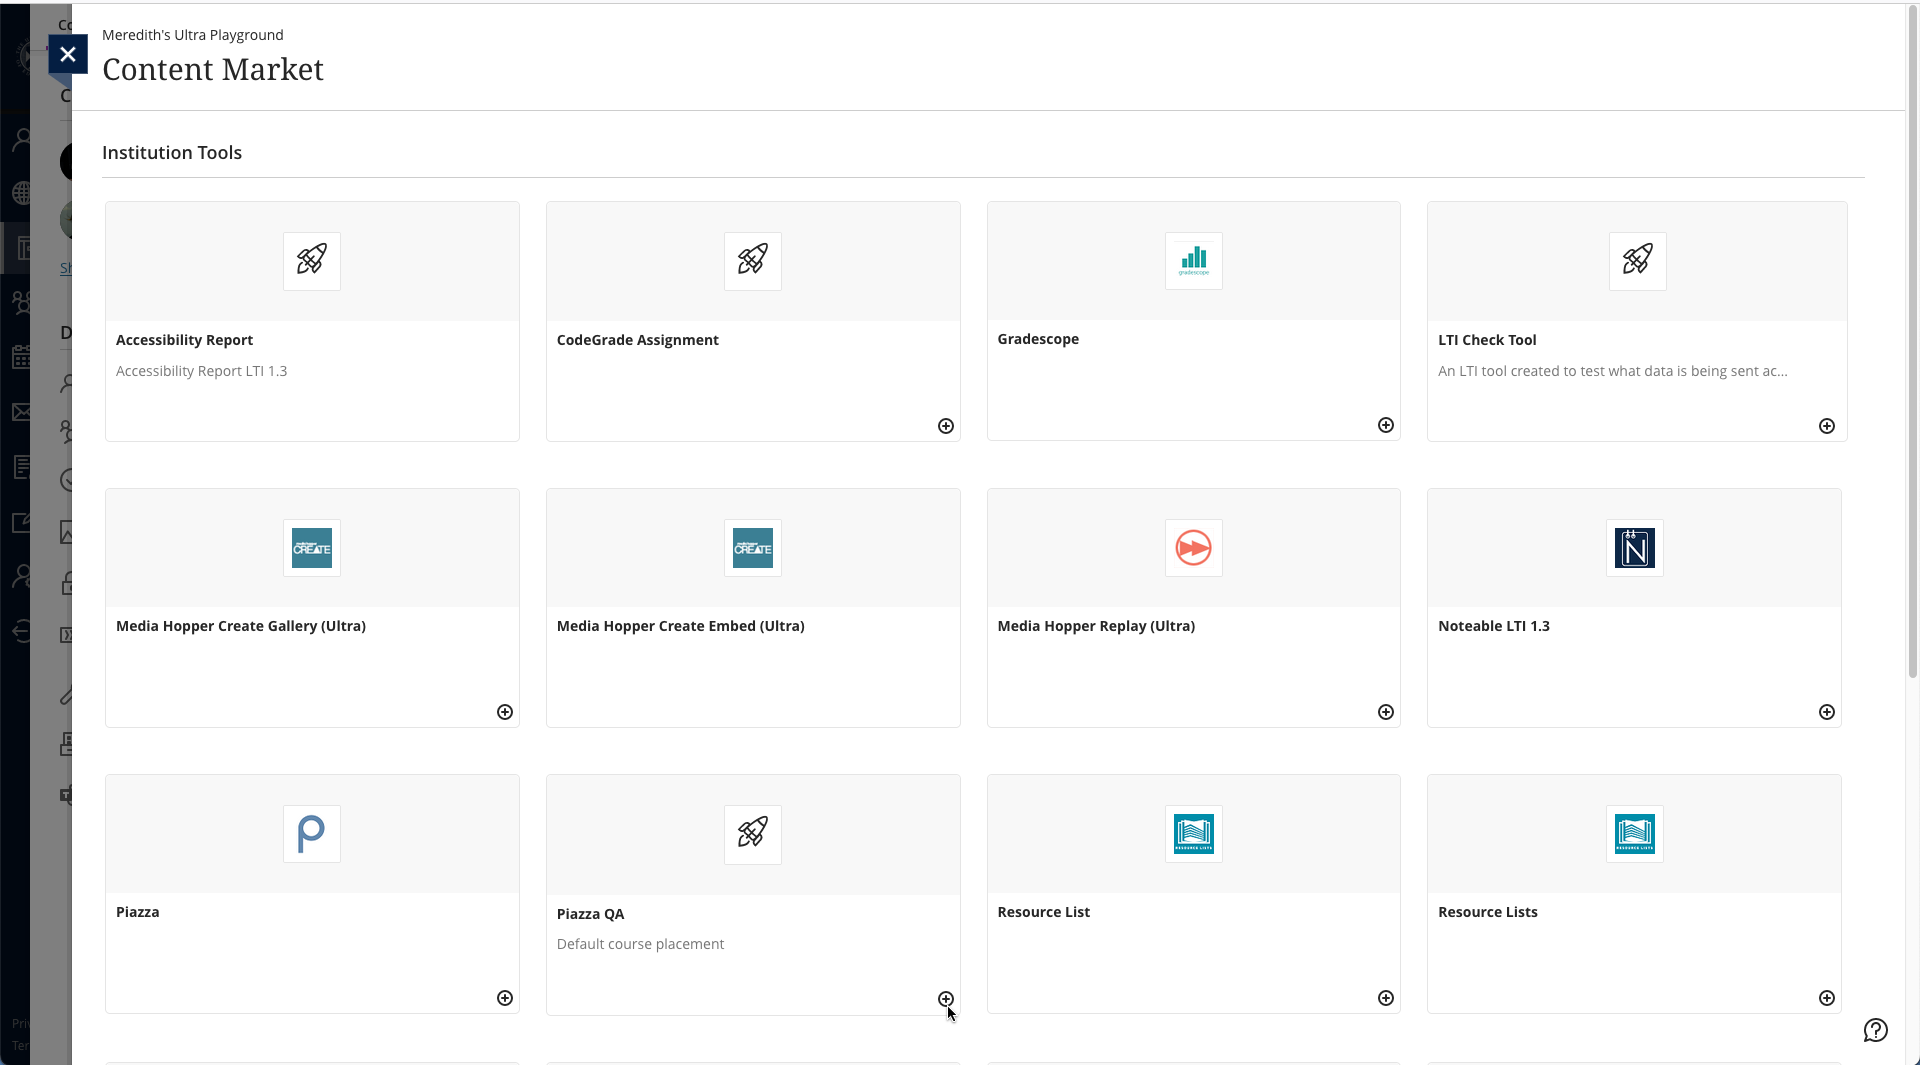
  3. When the Content Market screen opens, navigate to find the tool you need. Do not click on the name of the tool, rather select the little plus (+) sign icon in the bottom right-hand corner for that tool, as shown below for Piazza QA.
    Screenshot showing the Content Market in Learn Ultra
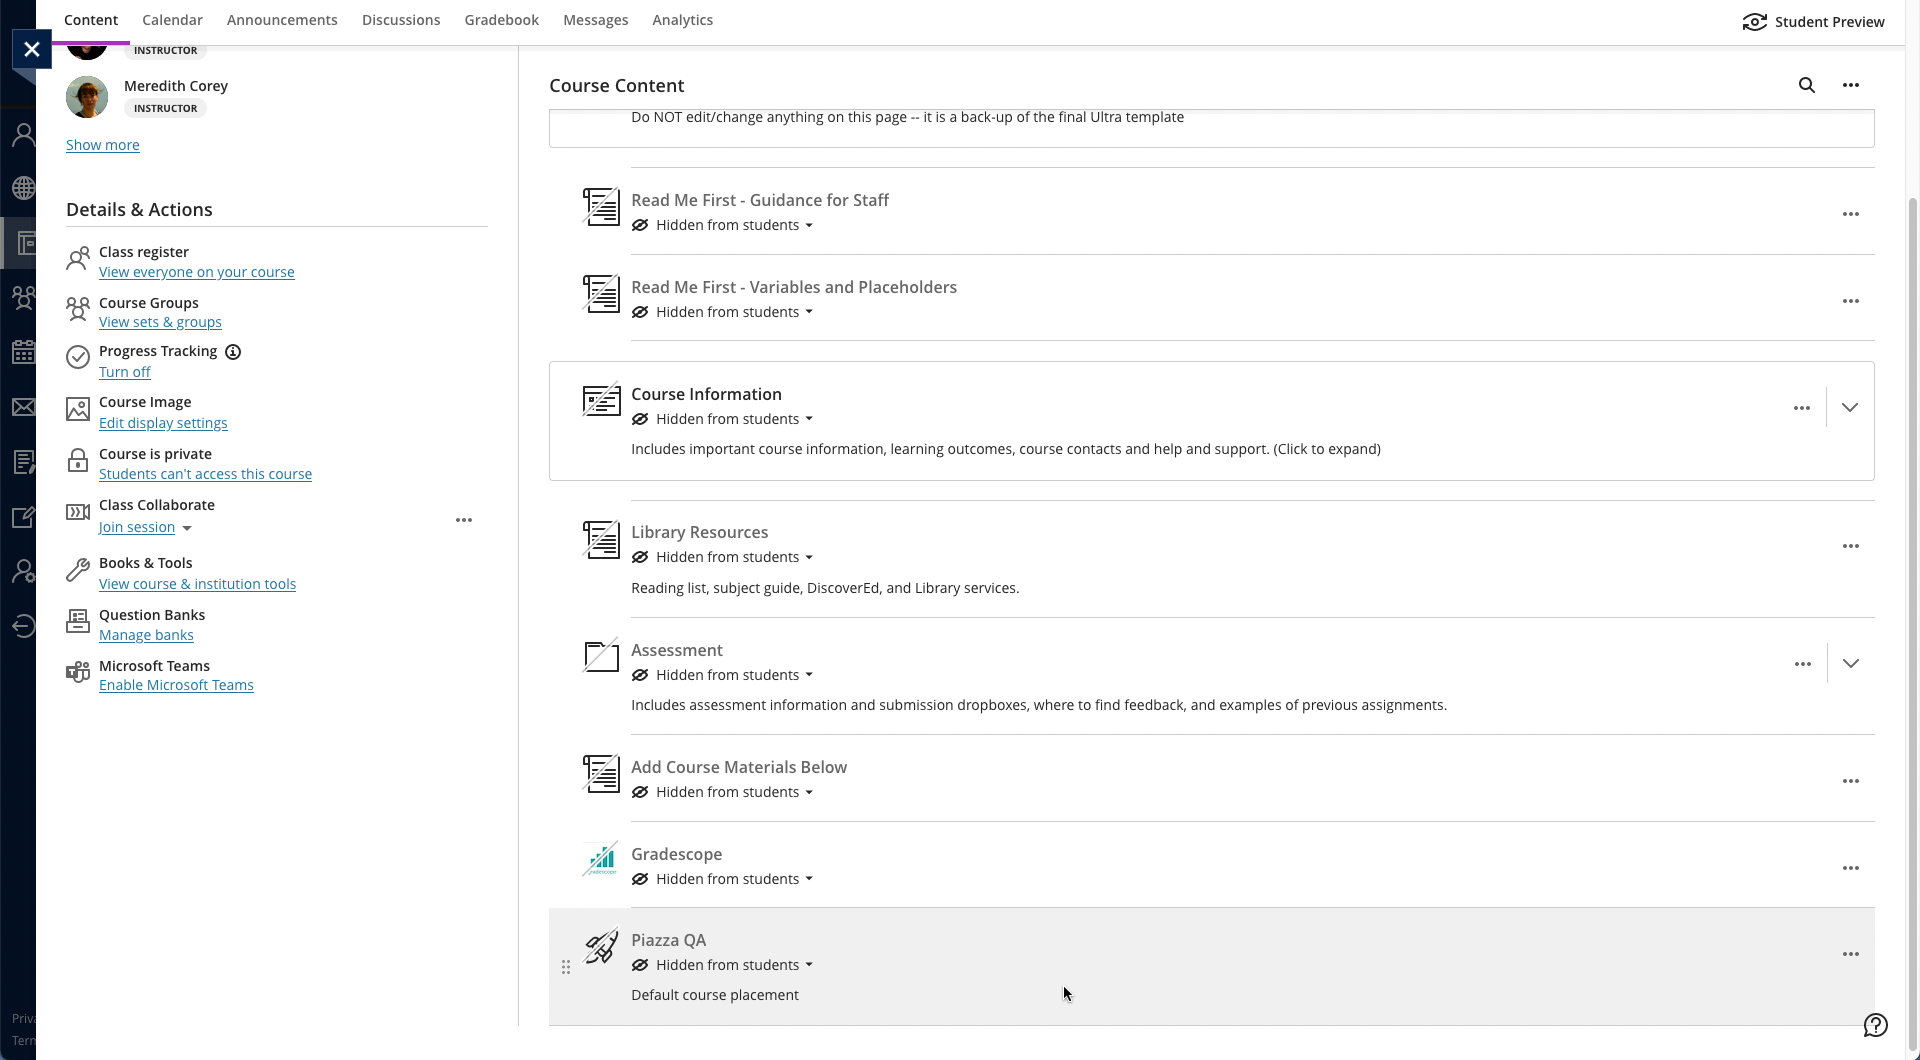
  4. You will then be taken back to the main course Learn page, where you can see that the Piazza QA tool has been added, as you can see below. You can use the three dot icon (…) to open the menu for the item and edit its name and/or description. Once you are ready for students to access it, make it visible to them.
    Screenshot showing Piazza link on a Learn Ultra page


Where does Kaltura store your video files locally?

The Kaltura desktop recorder is designed for easy upload to Media Hopper Create. However, there may come a time where you wish to have access to the native video files on your local machine. You can find these as follows:

Windows

  1. Right click on the Kaltura Capture icon on the desktop.
  2. Select Properties.
  3. Click on ‘Open File Location’ and go up one folder to the ‘Capture’ folder.
  4. Or simply go to: C:\Users\<username>\AppData\Local\Kaltura\Capture\

Mac

  1. Go to the Finder.
  2. From the Go menu, select Go to Folder.
  3. In the form, enter ~/Library/Preferences/Kaltura/Capture/
  4. Click Go.
  5. Or simply go to: /Users/<username>/Library/Preferences/Kaltura/Capture/


Publishing videos to a Media Hopper Create channel.

How to publish a video

To upload a video, e.g. from another university source such as Blackboard Collaborate, click Add New on media.ed.ac.uk, then click Media Upload to begin.


When uploading a piece of media to Media Hopper Create, certain fields must be filled in order for the video to be published to a course channel. The required fields to publish can be filled in while uploading the content, or after uploading the content by finding the video and clicking Actions>Edit>Details and filling in the fields below. In order to publish the media fill out:

Name (The title of the video that will be displayed)

Description (Will be displayed underneath the video)

Tags (at least one tag word is required for the video to be published and help people find it easier)

License Type (This is the copyright license to be applied to the content. I normally select All Rights Reserved The University of Edinburgh from the dropdown menu but this is at the content creator’s discretion.)

Course code, Publisher, Language and Date Created do not need to be filled in order to publish the video but can be useful to fill in to make the video easier to retrieve later on. A publishing schedule can also be set so the media can only be viewed for a certain period of time (useful for perhaps making a video only available during one semester).

– You now need to agree to request automatic subtitles before you can publish your content.

NOTE: Selecting this box does NOT enable auto-captioning, this is done in the next step.

screen shot showing where to agree to automatic subtitles

After the details are filled in, on the video uploading page (or on the video editing page under Publish instead of Details), set the Publishing Status to Published (if Published is not selectable, there are missing video details that still need to be filled in). A drop down menu will appear giving the option to Publish in Category or Publish in Channel. Select Publish in Channel and select a channel you manage to publish to the channel.


Create a playlist in Media Hopper Create

A playlist is a specifically selected collection of files which play one after the other for the user.

Any published media file can be added to a playlist. This can either be media created by you, or someone else.

Login to Media Hopper Create. Locate the media files you wish to add to your playlist and tick their corresponding checkboxes. They must be published. Click on the Actions button and choose Add to playlist.

screen shot showing Add To Playlist button

To create a new playlist, enter a name and click on the Create button. The newly created playlist will be selected automatically.

screen shot showing how to create a new playlist

Click save to add the selected files to this playlist.

To view the playlist, click on the My Playlists button.

Screen shot showing My Playlists button

A file can be removed from the playlist by clicking on the three dot menu icon next to the file and choosing Remove.

screen shot showing how to remove file from playlist

Select Save.

Further information

IS have created a video, demonstrating how to work with channels and playlists in Media Hopper Create. It can be found here: https://media.ed.ac.uk/media/Working+with+Channels+and+Playlists/1_k4oocp0k